Author

Mike

Browsing

Unlocking the Secrets to a Perfectly Moist Vanilla Pound Cake

Welcome to the delightful world of baking—a space where simple ingredients can transform into a comforting, mouthwatering treat. Today, I’m excited to share my expert take on crafting a perfectly moist vanilla pound cake, an absolute classic that every home baker should master. Whether you’re celebrating a special occasion or simply indulging your sweet tooth, this vanilla pound cake recipe is destined to impress. In this comprehensive guide, we’ll explore the nuances of flavor, texture, and presentation, ensuring that you create a cake that’s not just good but truly exceptional.

Throughout my culinary journey, I’ve learned that great baking combines technique, quality ingredients, and a sprinkle of love. With over two decades of experience in the kitchen, I’m here to walk you through each step with clarity and warmth. Let’s dive into the details that will make your cake the talk of the table!

Why You’ll Love This Recipe

  • Moisture Guaranteed: This recipe is designed to yield a cake that is tender and moist, ensuring each slice melts in your mouth.
  • Simple Ingredients: With just a handful of pantry staples, you can create a cake that tastes gourmet without the fuss.
  • Versatile Base: This vanilla pound cake serves as a delightful foundation for various flavor variations and toppings.
  • Beginner-Friendly: Even if you’re new to baking, the straightforward steps make it easy to achieve a perfect result.
  • Perfect for Any Occasion: Whether it’s a family gathering, birthday celebration, or afternoon tea, this cake fits right in.

Ingredient Breakdown

To create the perfect moist vanilla pound cake, you need to understand each ingredient’s role. Below, I’ve outlined the ingredients, their functions, and possible substitutions.

  • All-Purpose Flour (225 g / 1 3/4 cups): Provides the structure of the cake. For a gluten-free version, opt for a 1:1 gluten-free flour blend.
  • Baking Powder (2 teaspoons): Acts as a leavening agent to help the cake rise. Ensure it’s fresh for the best results.
  • Salt (1/4 teaspoon): Enhances the flavors. Don’t skip it, as it balances the sweetness.
  • Softened Butter (175 g / 3/4 cup): Adds richness and moisture. You can substitute with room temperature coconut oil for a dairy-free option.
  • Sugar (150 g / 3/4 cup): Sweetens the cake and contributes to its texture. Brown sugar can be used for a deeper flavor.
  • Milk (150 ml / 2/3 cup): Adds moisture. You can use almond or oat milk for a lactose-free alternative.
  • Eggs (2 large, lightly beaten): Binds the ingredients together and adds moisture. Flax eggs can be used for a vegan version.
  • Vanilla Extract (1.5 teaspoons): Infuses the cake with a rich flavor. Consider using pure vanilla extract for the best taste.

Step-by-Step Instructions for Moist Vanilla Pound Cake
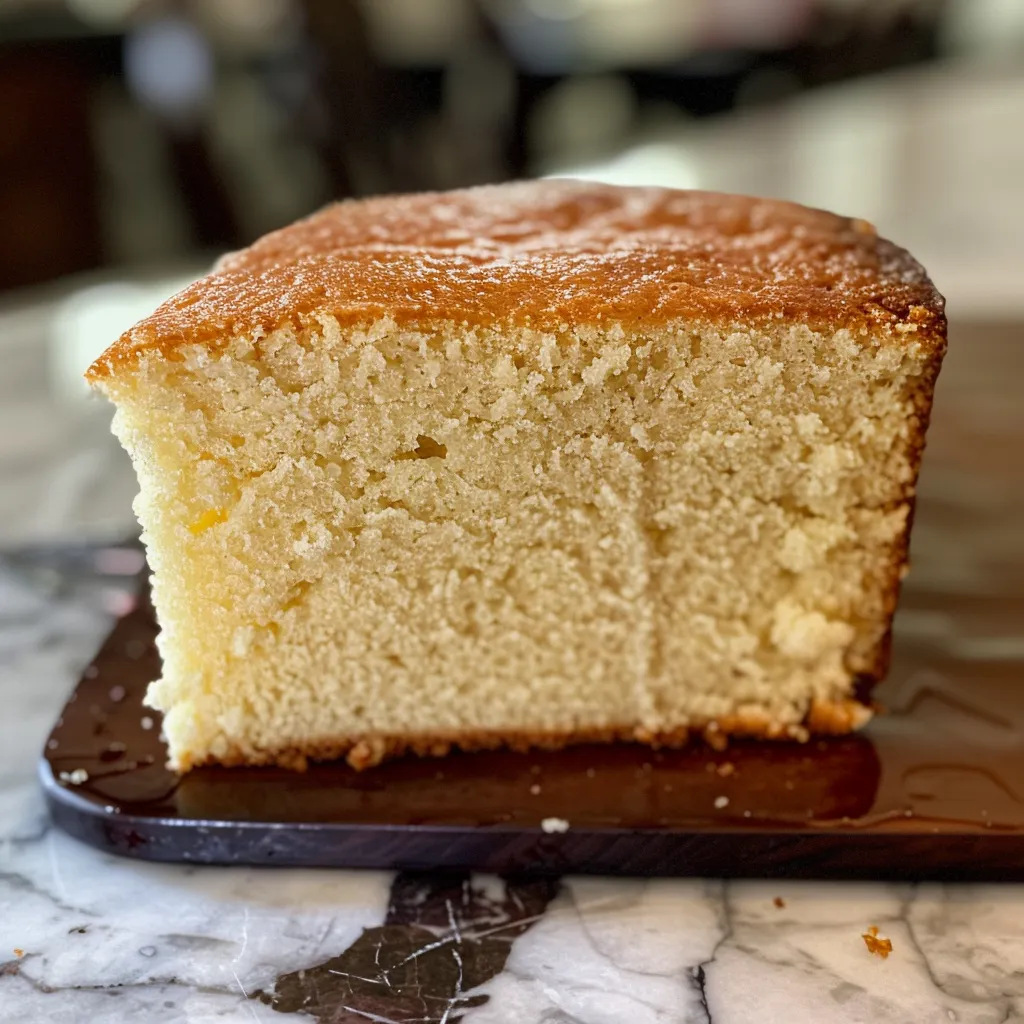
Soft and moist vanilla pound cake displayed on a wooden table.

Now that you have your ingredients ready, let’s get started with the baking process! Follow these step-by-step instructions for a flawless cake.

  • Step 1: Preheat the Oven: Preheat your oven to 170°C (325°F). Grease and line a loaf tin with parchment paper to prevent sticking.
  • Step 2: Prepare the Dry Ingredients: In a medium bowl, sift together the all-purpose flour, baking powder, and salt. This helps to aerate the flour and combine the leavening agent evenly.
  • Step 3: Cream the Butter and Sugar: In a large mixing bowl, cream the softened butter and sugar together until light and fluffy, about 3-5 minutes. This step is crucial for incorporating air into the batter, resulting in a lighter cake.
  • Step 4: Add the Eggs: Gradually add the beaten eggs on low speed. If the mixture starts to curdle, add a spoonful of flour to help it come together smoothly.
  • Step 5: Combine Wet and Dry Ingredients: Mix half of the milk and half of the sifted flour into the creamed mixture until just combined. Repeat with the remaining milk and flour. Be careful not to overmix, as this can lead to a dense texture.
  • Step 6: Pour and Bake: Pour the batter into the prepared loaf tin, smoothing the top with a spatula. Bake in the preheated oven for 60 to 65 minutes, or until a skewer inserted into the center comes out clean.
  • Step 7: Cooling: Let the cake cool in the tin for about 10 minutes, then transfer it to a cooling rack to cool completely. This helps avoid sogginess.

Pro Tips for the Perfect Pound Cake

Every baker has their secrets, and here are some of my tried-and-true tips to ensure your vanilla pound cake turns out perfectly every time:

  • Room Temperature Ingredients: Make sure your butter, eggs, and milk are at room temperature. This helps them combine more easily and results in a smoother batter.
  • Don’t Overmix: Overmixing can lead to a tough cake. Mix until just combined to keep it tender.
  • Use Quality Vanilla: The quality of your vanilla extract can significantly impact flavor. Opt for pure vanilla extract whenever possible.
  • Check for Doneness: Ovens vary, so start checking your cake a few minutes before the recommended baking time. If it’s browning too quickly, tent it with foil.
  • Cool Completely: Allow your cake to cool completely before frosting or slicing to avoid a crumbly mess.
  • Experiment with Add-Ins: Consider adding chocolate chips, nuts, or dried fruit for extra flavor and texture.
  • Don’t Rush the Process: Baking is a science and an art; take your time to enjoy each step!
  • Use a Toothpick Test: Insert a toothpick into the center of the cake. If it comes out clean or with a few crumbs, your cake is ready.
  • Frosting Options: A simple glaze or whipped cream can elevate the cake, making it even more delightful.
  • Consider Flavor Variations: Feel free to experiment with different extracts or citrus zest for a unique twist.

Common Mistakes and Troubleshooting

Even experienced bakers can run into issues. Here are some common mistakes and how to avoid them:

  • Dense Texture: This often results from overmixing the batter or using cold ingredients. Ensure everything is at room temperature and mix only until just combined.
  • Cracked Top: A cracked top can occur if the oven temperature is too high. Try reducing the temperature slightly and baking longer.
  • Dry Cake: This can happen if you overbake. Keep an eye on the baking time and perform the toothpick test to catch it at the right moment.
  • Sticking to the Pan: Ensure you grease and line the pan properly. Using parchment paper can help prevent sticking.

Variations to Try

This vanilla pound cake serves as a versatile base for numerous delightful variations:

  • Citrus Zest: Add the zest of one lemon or orange to the batter for a refreshing twist.
  • Chocolate Chip Pound Cake: Fold in 1 cup of semi-sweet chocolate chips for a rich, sweet contrast.
  • Almond Extract: Substitute half of the vanilla extract with almond extract for a nutty flavor profile.
  • Fruit-Studded Pound Cake: Incorporate dried cranberries or blueberries for a fruity flair.

How to Store Pound Cake

Storing your cake properly ensures it stays fresh and delicious:

  • Room Temperature: Store the cake in an airtight container at room temperature for up to 3 days.
  • Refrigeration: For longer storage, wrap the cake tightly in plastic wrap and refrigerate for up to a week.
  • Freezing: To freeze, wrap the cooled cake in plastic wrap and then foil. It can be frozen for up to 3 months. Thaw in the refrigerator before serving.

Serving Suggestions

This moist vanilla pound cake is delicious on its own, but here are a few serving ideas to elevate your experience:

  • With Fresh Berries: Serve slices with a medley of fresh berries for a burst of color and flavor.
  • Whipped Cream: A dollop of whipped cream adds a light and airy touch.
  • Citrus Glaze: Drizzle a simple glaze made from powdered sugar and citrus juice over the top for added sweetness.
  • Ice Cream: Pair a warm slice with a scoop of vanilla or chocolate ice cream for a decadent dessert.

Frequently Asked Questions

Here are some common questions about baking and enjoying your vanilla pound cake:

  • Can I use margarine instead of butter? Yes, but the flavor and texture may vary slightly. Butter is recommended for the best results.
  • How can I tell when the cake is done? A toothpick inserted into the center should come out clean or with a few moist crumbs.
  • Can I double this recipe? Absolutely! Just ensure you use a larger mixing bowl and adjust baking time as necessary.
  • What if my cake sinks in the middle? This could be due to underbaking or overmixing. Make sure to follow the baking instructions closely.
  • How do I enhance the flavor of my pound cake? Experiment with different extracts, citrus zest, or flavored syrups.
  • Can I add nuts to the batter? Yes! Chopped nuts add a delightful crunch and flavor.
  • What’s the best way to serve leftovers? Enjoy them plain, or toast slices lightly for an added crunch.
  • Can I make this cake in advance? Yes, this cake stores well and can be made a few days ahead of time.

Nutrition Tips and Dietary Adaptations

If you’re looking to modify this recipe for dietary preferences, here are some tips:

  • Gluten-Free: Use a 1:1 gluten-free flour blend.
  • Dairy-Free: Substitute butter with coconut oil and use almond or oat milk.
  • Reduced Sugar: You can reduce the sugar by up to 25% without significantly affecting the texture.
  • Vegan: Use flax eggs and a dairy-free milk alternative.

Equipment Recommendations

Having the right tools can make your baking experience smoother:

  • Loaf Pan: A good-quality non-stick loaf pan is essential for easy release.
  • Mixing Bowls: Use mixing bowls in various sizes for different stages of the recipe.
  • Electric Mixer: A hand mixer or stand mixer saves time and effort during the creaming process.
  • Measuring Cups and Spoons: Accurate measurements ensure consistency in your baking.

With this guide, you’re now equipped with everything you need to bake a moist vanilla pound cake that not only tastes divine but also brings joy to your kitchen and table. Remember, baking is as much about the journey as it is about the destination. So, gather your ingredients, roll up your sleeves, and let’s create something wonderful together! Happy baking!

Moist Vanilla Pound

Prep Time 15 minutes
Cook Time 1 hour 5 minutes
Total Time 1 hour 20 minutes
Servings 8 slices
Calories 420
A rich and moist vanilla pound cake that's perfect for any occasion.

Ingredients

Dry ingredients

  • 225 g all-purpose flour
  • 2 teaspoons baking powder
  • 0.25 teaspoon salt

Wet ingredients

  • 175 g softened butter
  • 150 g sugar
  • 150 ml milk
  • 2 large eggs lightly beaten eggs
  • 1.5 teaspoons vanilla extract

Instructions 

  • Preheat oven to 170°C (325°F). Grease and line a loaf tin.
  • Sift flour, baking powder, and salt. Cream butter and sugar until fluffy.
  • Add eggs gradually; if curdling, add a spoonful of flour. Mix in milk and flour alternately.
  • Pour batter into the tin and bake for 60-65 minutes until a skewer comes out clean.
  • Cool in the tin briefly, then transfer to a rack.
Notes

Ensure not to overmix the batter for a tender crumb.
Calories: 420kcal
Cost: $12
Course: Dessert
Cuisine: American
Keyword: pound cake, vanilla

Welcome to the World of Heart-Shaped Sugar Cookies

There’s something truly magical about heart-shaped sugar cookies. Whether it’s for a special occasion or just a sweet treat to enjoy at home, these delightful cookies bring joy and warmth to any gathering. In this comprehensive guide, we’ll delve deep into the art of baking heart-shaped sugar cookies, ensuring that every bite is filled with love. With my years of culinary experience and passion for sharing knowledge, I’m here to guide you through the process of creating these perfect cookies that will melt in your mouth.

Why You’ll Love This Recipe

Let’s explore the top reasons why this heart-shaped sugar cookie recipe will become a favorite in your kitchen:

  • Ease of Preparation: This recipe requires simple ingredients and straightforward steps, making it accessible for bakers of all skill levels.
  • Perfect Texture: These cookies strike the ideal balance between crispy edges and a soft, chewy center, ensuring a delightful bite every time.
  • Customizable Decor: With the option to decorate with icing or sprinkles, you can personalize each cookie to match any occasion.
  • Great for All Occasions: Whether it’s Valentine’s Day, anniversaries, or just because, these cookies are perfect for expressing love.
  • Make-Ahead Friendly: The dough can be prepared in advance and stored, allowing you to bake fresh cookies whenever you desire.

Ingredients for Heart-Shaped Sugar Cookies

Here’s what you’ll need to bring these delicious cookies to life:

  • 2 ¾ cups all-purpose flour: The foundation of your cookie dough.
  • 1 cup unsalted butter, softened: Ensure it’s at room temperature for easy mixing.
  • 1 cup granulated sugar: This adds sweetness and helps achieve that perfect texture.
  • 1 large egg: The egg binds the ingredients together.
  • 2 teaspoons vanilla extract: For that classic cookie flavor.
  • ½ teaspoon almond extract (optional): A hint of almond enhances the flavor profile.
  • 1 teaspoon baking powder: This helps the cookies rise slightly.
  • ¼ teaspoon salt: Balances the sweetness.
  • Powdered sugar for dusting (optional): Adds a sweet touch to your finished cookies.
  • Decorative icing or sprinkles (optional): For a fun and festive look!

Step-by-Step Instructions

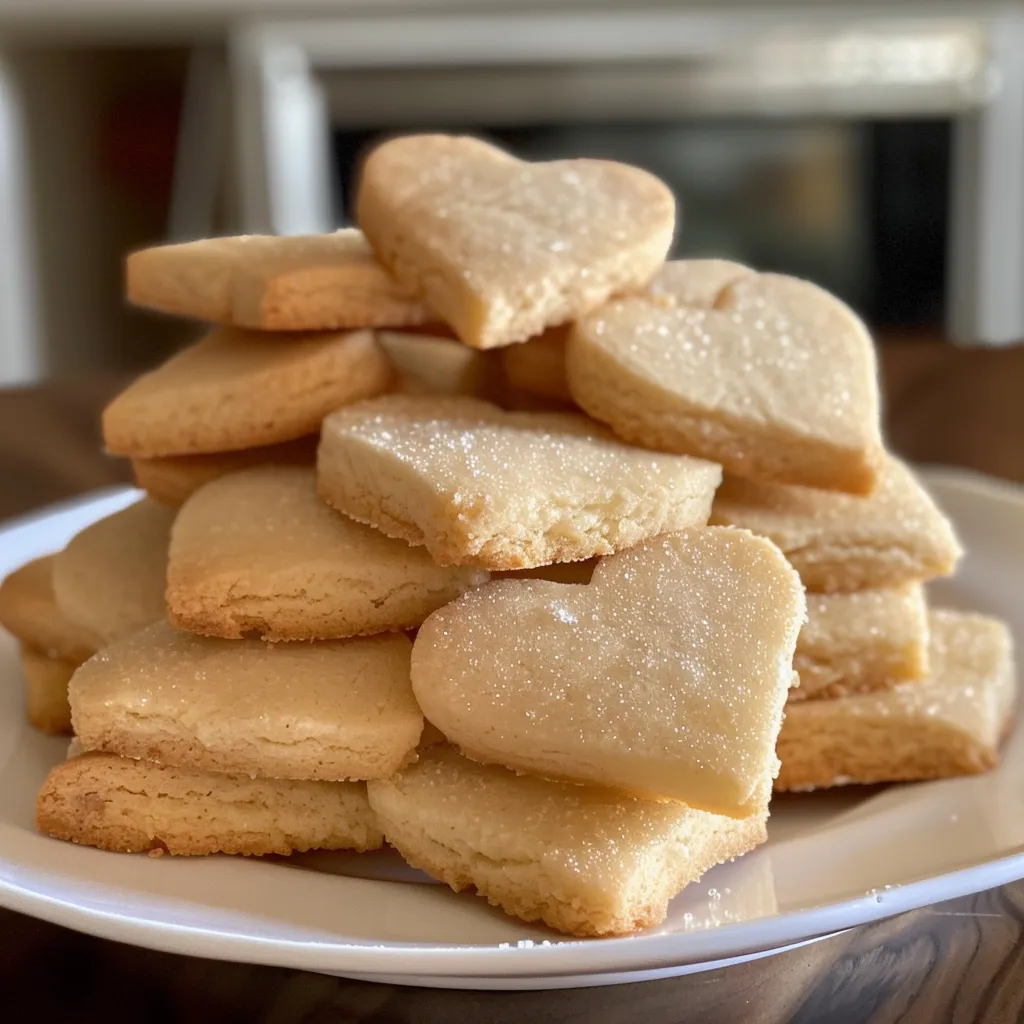
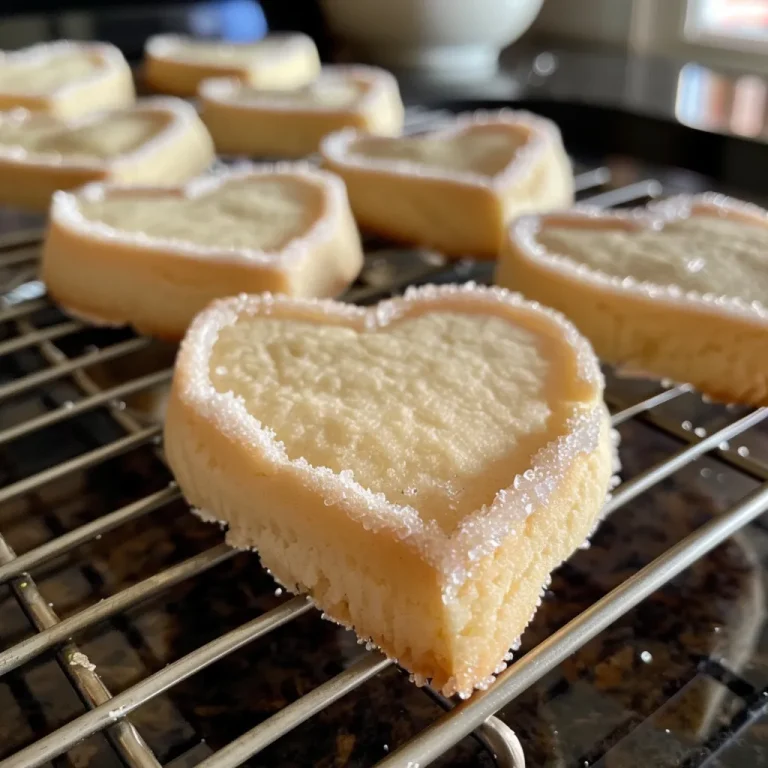
Juicy, delicious heart-shaped sugar cookies displayed on a plate, with powdered sugar dusting.

Follow these detailed steps to create your heart-shaped sugar cookies:

  • Step 1: Prepare Your Ingredients – Gather all your ingredients and ensure your butter is softened.
  • Step 2: Make the Dough – In a large bowl, cream together the softened butter and granulated sugar until light and fluffy. Add in the egg, vanilla extract, and almond extract (if using), mixing well.
  • Step 3: Combine Dry Ingredients – In another bowl, whisk together the flour, baking powder, and salt. Gradually add the dry mixture to the wet ingredients, mixing until just combined.
  • Step 4: Chill the Dough – Wrap the dough in plastic wrap and refrigerate for at least 1 hour. Chilling helps the cookies maintain their shape.
  • Step 5: Roll and Cut – Preheat your oven to 350°F (175°C). On a floured surface, roll out the chilled dough to about ¼-inch thickness. Use a heart-shaped cookie cutter to cut out shapes and place them on a baking sheet lined with parchment paper.
  • Step 6: Bake – Bake in the preheated oven for 10-12 minutes or until the edges are lightly golden. Let them cool on the baking sheet for a few minutes before transferring to a wire rack.
  • Step 7: Decorate – Once cooled, dust with powdered sugar or decorate with icing and sprinkles as desired.

Expert Tips for Perfect Cookies

Here are some professional insights to elevate your heart-shaped sugar cookies:

  • Room Temperature Ingredients: Always use room temperature butter and eggs; this ensures a smooth batter.
  • Don’t Overmix: Mix the dough just until combined to keep your cookies tender.
  • Chill the Dough: Chilling helps prevent spreading during baking, ensuring your shapes stay defined.
  • Use Quality Extracts: High-quality vanilla and almond extracts will enhance the flavor of your cookies significantly.
  • Watch the Baking Time: Keep an eye on the cookies as they bake; overbaking can lead to dryness.
  • Experiment with Flavors: Try adding citrus zest or spices to the dough for a unique twist.
  • Have Fun with Decorations: Don’t hesitate to get creative with your icing and sprinkles to match the occasion.
  • Store Properly: Keep cookies in an airtight container to maintain freshness.

Common Mistakes and Troubleshooting

Even the best bakers make mistakes! Here are some common issues and how to fix them:

  • Cookies Spread Too Much: This is often due to warm dough. Always chill the dough before rolling it out.
  • Cookies Are Too Hard: Overbaking can lead to dryness. Bake until just golden on the edges.
  • Flavor Is Lacking: Ensure you’re using fresh extracts and the proper amounts of sugar and salt.
  • Dough Is Crumbly: If you find your dough is too crumbly, add a bit of milk or water to help bind it.

Variations to Try

Get creative with these fun variations of the classic heart-shaped sugar cookies:

  • Chocolate-Dipped: Dip cooled cookies in melted chocolate for a rich twist.
  • Sandwich Cookies: Fill two cookies with buttercream or jam for a delightful treat.
  • Spiced Version: Add cinnamon and nutmeg to the dough for a warm, spiced flavor.
  • Gluten-Free: Substitute all-purpose flour with a gluten-free blend for a gluten-friendly version.

Storage and Make-Ahead Instructions

To keep your cookies fresh:

  • Storage: Keep baked cookies in an airtight container at room temperature for up to one week.
  • Freezing: Unbaked cookie dough can be frozen for up to 3 months. Just thaw in the fridge before rolling out.
  • Make-Ahead Dough: Prepare the dough ahead of time and refrigerate for convenient baking later.

Frequently Asked Questions

Here are some common questions about heart-shaped sugar cookies:

  • Can I substitute margarine for butter? Yes, but the flavor and texture may vary slightly.
  • How do I make my cookies softer? Ensure you don’t overbake them, and consider adding an extra egg yolk.
  • What can I use instead of almond extract? You can use more vanilla extract or omit it entirely.
  • How do I achieve perfect icing? Use powdered sugar and a little milk or water to get a smooth consistency.
  • Can I use whole wheat flour? Yes, but it may change the texture. Consider a blend with all-purpose flour.
  • What’s the best way to decorate cookies? Use a piping bag for detailed designs, or simply spread icing for a quick finish.
  • How long do these cookies last? Baked cookies can last about a week in an airtight container.
  • Can I add food coloring to the dough? Absolutely! Divide the dough and add different colors for festive variations.

Nutritional Tips and Dietary Adaptations

If you’re mindful of dietary needs, here are some suggestions:

  • Lower Sugar Option: Reduce the sugar by 25% for a less sweet cookie.
  • Dairy-Free Version: Use coconut oil or dairy-free butter as a substitute.
  • Vegan Adaptation: Substitute the egg with a flax egg (1 tablespoon ground flaxseed mixed with 2.5 tablespoons water).

Essential Equipment for Baking

Having the right tools will make your baking experience much smoother:

  • Baking Sheets: Use heavy-duty, non-stick baking sheets for even baking.
  • Cookie Cutters: Invest in a good set of heart-shaped cookie cutters in various sizes.
  • Mixing Bowls: A set of mixing bowls in various sizes will help with all your mixing needs.
  • Cooling Rack: Essential for letting your cookies cool evenly without becoming soggy.

Serving Suggestions

When it’s time to share your heart-shaped sugar cookies, consider these serving ideas:

  • Cookie Platters: Arrange cookies on a decorative platter for parties and gatherings.
  • Gift Packaging: Wrap cookies in cellophane bags with ribbons to give as thoughtful gifts.
  • Pair with Beverages: Serve with milk, tea, or coffee for a delightful pairing.

Conclusion

There you have it! A comprehensive guide to baking heart-shaped sugar cookies that are sure to impress. Whether you’re celebrating love, friendship, or simply the joy of baking, these cookies will make every occasion a little sweeter. Remember, cooking is not just about the food; it’s about the memories you create around the table. So gather your loved ones, bake some cookies, and enjoy the delightful experience together. Happy baking!

Heart-Shaped Sugar Cookies: An Amazing Ultimate Recipe

Prep Time 20 minutes
Cook Time 10 minutes
Total Time 30 minutes
Servings 24 cookies
Calories 150
Create delightful heart-shaped sugar cookies perfect for any occasion with this easy and fun recipe.

Ingredients

Dough

  • 2 ¾ cups all-purpose flour
  • 1 cup unsalted butter, softened
  • 1 cup granulated sugar
  • 1 large egg
  • 2 teaspoons vanilla extract
  • ½ teaspoon almond extract (optional)
  • 1 teaspoon baking powder
  • ¼ teaspoon salt

Optional toppings

  • Powdered sugar for dusting (for dusting (optional))
  • Decorative icing or sprinkles (for decoration (optional))

Instructions 

  • Mix flour, baking powder, and salt in a bowl.
  • Cream butter and sugar until light and fluffy, then add egg and vanilla extract.
  • Gradually add dry ingredients to the wet mixture and combine to form dough.
  • Roll out dough, cut into heart shapes, and chill for 15 minutes.
  • Bake at 350°F (175°C) for 8-10 minutes until edges are golden. Cool and decorate as desired.

Notes

Chill the dough for easier handling and better cookie shape.
Calories: 150kcal
Cost: $10
Course: Dessert
Cuisine: American
Keyword: sugar cookies

Discover the Joy of Baking a Hot Cocoa Cake

There’s something incredibly comforting about the warmth of hot cocoa during the winter months. Now, imagine transforming that beloved beverage into a delightful cake that captures all its rich flavors! This Hot Cocoa Cake is not just a dessert; it’s an experience. Perfectly moist, rich in chocolate flavor, and topped with fluffy marshmallow frosting, this cake is sure to become a family favorite. Whether you’re baking for a special occasion or simply craving something sweet, this recipe will warm your heart and delight your taste buds.

Why You’ll Love This Recipe

  • Decadent Chocolate Flavor: Each bite is infused with rich cocoa, creating a luscious chocolate experience that satisfies even the most intense cravings.
  • Moist and Fluffy Texture: The combination of buttermilk and hot water ensures that the cake remains incredibly moist and fluffy, making it a joy to eat.
  • Delightfully Whipped Marshmallow Frosting: Topped with a light and airy marshmallow frosting that brings back memories of cozy evenings by the fireplace.
  • Customizable Toppings: You can personalize your cake with toppings like mini marshmallows, chocolate curls, or even crushed peppermint for an extra festive flair.
  • Perfect for Any Occasion: Whether it’s a birthday, holiday gathering, or a simple family dessert night, this cake shines at any event.

Ingredients You’ll Need

To create this exquisite cocoa cake, gather the following ingredients. Don’t worry if you need substitutions; I’ll provide options!

  • 1¾ cups all-purpose flour – For a sturdy cake base.
  • ¾ cup unsweetened cocoa powder – The star ingredient that gives the cake its deep chocolate flavor.
  • 2 cups granulated sugar – Sweetness to balance the bitterness of the cocoa.
  • 1½ tsp baking powder and 1½ tsp baking soda – For leavening, ensuring your cake rises beautifully.
  • ½ tsp salt – Enhances the overall flavors.
  • ½ cup vegetable oil – Keeps the cake moist.
  • 2 large eggs (room temperature) – Binds the ingredients together.
  • 1 cup buttermilk (room temperature) – Adds moisture and tenderness.
  • 2 tsp pure vanilla extract – A hint of vanilla enhances the chocolate.
  • 1 cup hot water or hot brewed coffee – Helps the cocoa bloom and intensifies the chocolate flavor.

For the marshmallow frosting:

  • 4 large egg whites – The base for your fluffy frosting.
  • 1 cup granulated sugar – Sweetens the frosting.
  • ¼ tsp cream of tartar – Stabilizes the egg whites.
  • 1 tsp vanilla extract – Flavors the frosting.

For the chocolate ganache:

  • ½ cup heavy cream – Creamy base for the ganache.
  • 4 oz semisweet chocolate, finely chopped – Rich chocolate flavor.
  • 1 tbsp unsalted butter – Adds shine and richness to the ganache.

Optional toppings:

  • Mini marshmallows
  • Shaved chocolate or cocoa powder
  • Crushed peppermint

Step-by-Step Instructions

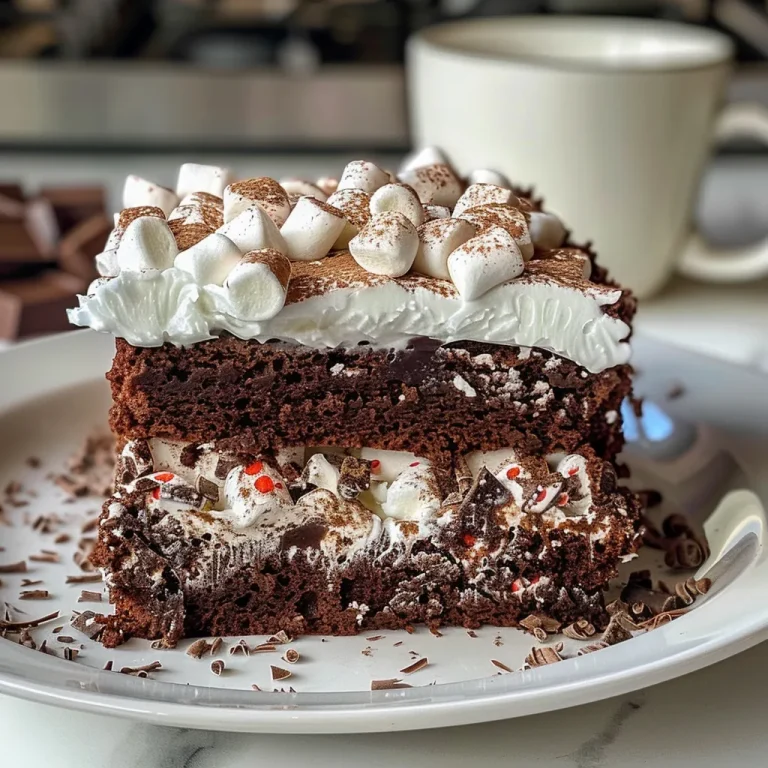
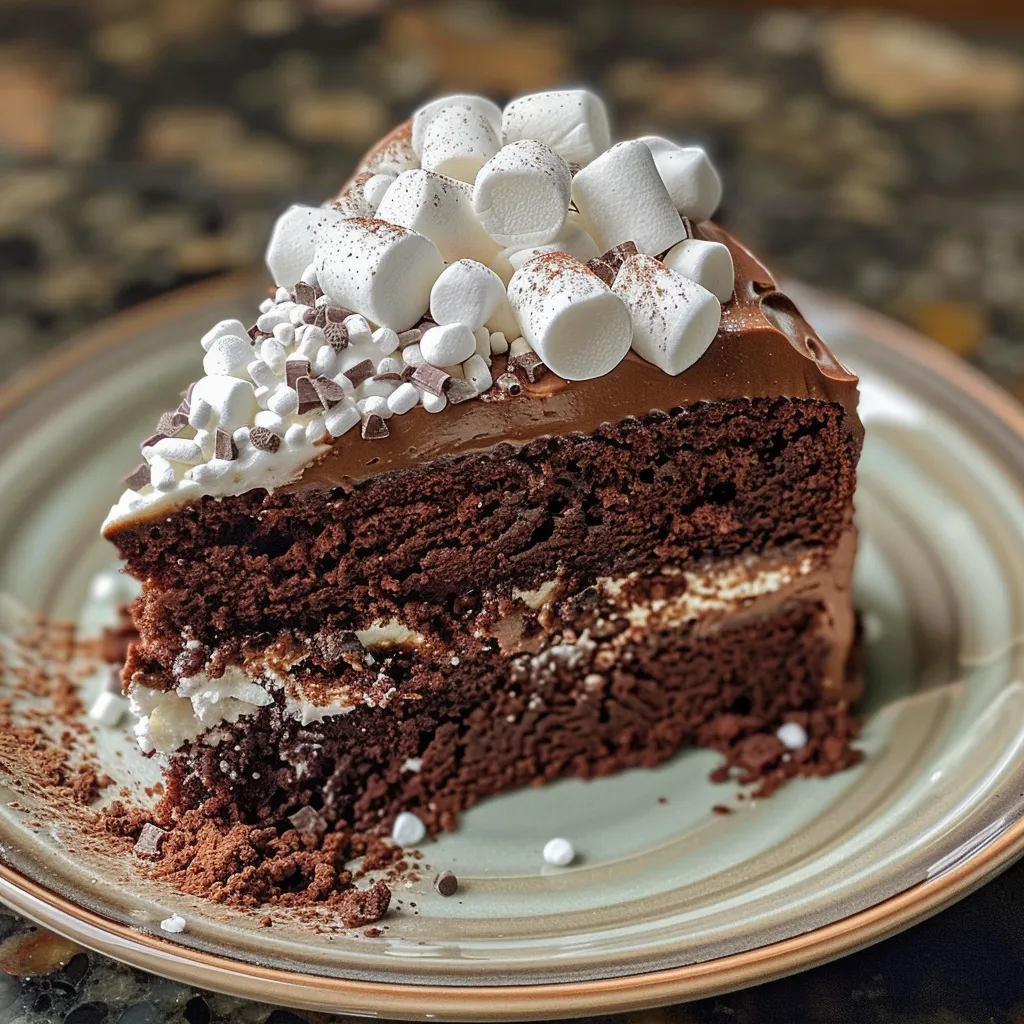
Beautifully presented Hot Cocoa Cake showcasing layers of chocolate and topped with fluffy marshmallows.

Let’s get baking! Follow these detailed steps to create your delicious Hot Cocoa Cake.

  • Preheat the oven: Set your oven to 350°F (175°C). Grease and flour two 8-inch round cake pans, then line the bottoms with parchment paper to prevent sticking.
  • Prepare the dry ingredients: In a large bowl, whisk together flour, cocoa powder, baking powder, baking soda, and salt until evenly combined.
  • Mix the wet ingredients: In another bowl, beat together sugar, oil, eggs, and vanilla until smooth. Stir in the buttermilk until well combined.
  • Combine mixtures: Gradually add the dry ingredients to the wet ingredients, mixing just until incorporated. Slowly pour in the hot water or coffee and stir until the batter is silky and pourable.
  • Fill the pans: Divide the batter evenly between the prepared pans. Bake for 30–35 minutes or until a toothpick inserted into the center comes out clean.
  • Cool the cakes: Let the cakes cool in the pans for 10 minutes, then transfer them to a wire rack to cool completely before frosting.
  • Make the marshmallow frosting: Place egg whites, sugar, and cream of tartar in a heatproof bowl over a pot of simmering water. Whisk constantly until the sugar dissolves and the mixture feels warm to the touch. Remove from heat and beat with an electric mixer for 6–8 minutes, until stiff, glossy peaks form. Beat in vanilla extract.
  • Prepare the chocolate ganache: Heat heavy cream in a small saucepan until just simmering. Pour over chopped chocolate and let sit for 1 minute. Stir until smooth and glossy, then whisk in the butter.
  • Assemble the cake: Place one cake layer on a serving plate. Spread a thick layer of marshmallow frosting over it. Add the second layer, then cover the entire cake with the remaining frosting.
  • Drizzle the ganache: Pour the chocolate ganache over the top, allowing it to drip down the sides naturally. Decorate with mini marshmallows, chocolate curls, or peppermint bits as desired.
  • Chill before serving: Refrigerate for 15–20 minutes to let everything set before slicing.

Pro Tips for Baking Success

  • Room temperature ingredients: Ensure that your eggs and buttermilk are at room temperature for a smoother batter.
  • Don’t overmix: Mix just until combined to keep your cake light and airy.
  • Check oven temperature: Use an oven thermometer to ensure accuracy; even a few degrees off can affect baking times.
  • Use quality cocoa powder: Opt for high-quality cocoa for the best flavor. Dutch-processed cocoa can provide a nice depth.
  • Cool completely: Make sure your cakes are completely cool before frosting to prevent melting.
  • Stabilize frosting: If it’s warm in your kitchen, consider adding a pinch of cornstarch to stabilize your frosting.
  • Experiment with flavors: Consider adding espresso powder to the batter for an extra kick or flavored extracts to the frosting.
  • Layer it up: For a more dramatic presentation, consider making a three-layer cake using the same batter!

Common Mistakes and Troubleshooting

Even seasoned bakers can face challenges. Here are common pitfalls and how to avoid them:

  • Dense cake: This often results from overmixing or using cold ingredients. Always mix just until combined and use room temperature ingredients.
  • Frosting too runny: If your frosting is too runny, it may need more beating to incorporate air or more sugar to thicken.
  • Uneven baking: Ensure your oven rack is centered, and rotate your pans halfway through baking for even heat distribution.
  • Chocolate ganache not setting: If the ganache is too warm, it may not set properly. Allow it to cool slightly before drizzling.

Variations on Hot Cocoa Cake

Feel free to get creative with this recipe! Here are some delightful variations:

  • Mint Chocolate Hot Cocoa Cake: Add peppermint extract to the batter and top with crushed peppermint candies.
  • Spicy Hot Cocoa Cake: Incorporate a teaspoon of cinnamon and a pinch of cayenne for a warm kick.
  • Nutty Hot Cocoa Cake: Fold in chopped nuts like walnuts or pecans for added texture.
  • Layered Hot Cocoa Trifle: Cut the cake into cubes and layer with frosting and ganache in a trifle dish for a beautiful presentation.

Storage and Make-Ahead Instructions

This cake is a great make-ahead option! Here’s how to store it:

  • Room Temperature: Store the unfrosted cake layers in an airtight container at room temperature for up to 3 days.
  • Refrigerator: Once frosted, refrigerate the cake for up to 5 days, but be sure to cover it to maintain moisture.
  • Freezer: The unfrosted cake can be frozen for up to 3 months. Wrap it tightly in plastic wrap and aluminum foil for best results.

FAQs about Hot Cocoa Cake

  • Can I use cake mix instead of scratch? Yes, you can use a chocolate cake mix as a base, but the flavor and texture will differ.
  • What can I substitute for buttermilk? You can use regular milk with a tablespoon of vinegar or lemon juice added to create a similar acidity.
  • Can I make this gluten-free? Yes, substitute the all-purpose flour with a 1:1 gluten-free baking blend.
  • How do I know when the cake is done? Insert a toothpick into the center; if it comes out clean or with a few moist crumbs, it’s ready.
  • What if my frosting is too sweet? You can add a pinch of salt to balance out the sweetness.
  • Can I make this in advance? Yes, the cake can be made a day ahead; just frost it right before serving.
  • How do I prevent the cake from sticking to the pans? Greasing and flouring the pans properly helps, as well as using parchment paper.
  • Can I use other types of chocolate? Absolutely! Dark chocolate can be substituted for a richer flavor.

Nutrition Tips and Dietary Adaptations

For those mindful of dietary needs, consider these adaptations:

  • Lower Sugar Options: Use a sugar substitute like Stevia or monk fruit for a lower-calorie version.
  • Dairy-Free: Substitute buttermilk with almond or oat milk and use plant-based butter.
  • Egg-Free: Replace eggs with flax eggs (1 tbsp flaxseed meal + 2.5 tbsp water per egg).
  • Healthy Fats: Swap vegetable oil with applesauce or avocado for a healthier fat option.

Essential Equipment for Success

Before you start baking, gather the following equipment:

  • Mixing bowls: A set of various sizes for mixing ingredients.
  • Electric mixer: Essential for whipping the frosting to perfection.
  • Measuring cups and spoons: Accurate measurements are key to a successful bake.
  • 8-inch round cake pans: Ensure even baking and beautiful presentation.
  • Cooling rack: Allows cakes to cool evenly without getting soggy.

Serving Suggestions

This cake is delightful on its own but can be paired with:

  • A scoop of vanilla ice cream: The creaminess complements the chocolate beautifully.
  • A dollop of whipped cream: For an extra layer of indulgence.
  • Fresh berries: Adds a refreshing contrast to the rich cake.
  • Hot cocoa on the side: Embrace the theme by serving a mug of hot cocoa alongside!

Conclusion

Creating a Hot Cocoa Cake is not just about baking; it’s about creating memories filled with joy and warmth. Whether shared with family during a festive gathering or enjoyed solo on a cozy evening, this cake is sure to be a hit. With its rich chocolate flavor and fluffy marshmallow frosting, it embodies everything we love about winter treats. So gather your ingredients, roll up your sleeves, and embark on this delightful baking adventure. Happy baking!

Hot Cocoa Cake

Prep Time 30 minutes
Cook Time 35 minutes
Total Time 1 hour 5 minutes
Servings 8 slices
Calories 550
A rich and moist chocolate cake layered with marshmallow frosting and topped with chocolate ganache, perfect for chocolate lovers.

Ingredients

Dry ingredients

  • cups all-purpose flour
  • ¾ cup unsweetened cocoa powder
  • 2 cups granulated sugar
  • tsp baking powder
  • tsp baking soda
  • ½ tsp salt

Wet ingredients

  • ½ cup vegetable oil
  • 2 large eggs (room temperature)
  • 1 cup buttermilk (room temperature)
  • 2 tsp pure vanilla extract
  • 1 cup hot water or hot brewed coffee

Frosting and topping

  • 4 large egg whites
  • 1 cup granulated sugar
  • ¼ tsp cream of tartar
  • 1 tsp vanilla extract
  • ½ cup heavy cream
  • 4 oz semisweet chocolate, finely chopped
  • 1 tbsp unsalted butter

Optional decorations

  • to taste Mini marshmallows (optional)
  • to taste Shaved chocolate or cocoa powder (optional)
  • to taste Crushed peppermint (optional)

Instructions 

  • Preheat oven to 350°F (175°C). Grease, flour, and line two 8-inch pans.
  • Mix dry ingredients; in another bowl, beat sugar, oil, eggs, vanilla, then add buttermilk.
  • Combine wet and dry, add hot water/coffee, mix until smooth. Divide batter and bake for 30–35 minutes.
  • Cool cakes, then frost with marshmallow frosting. Top with ganache and optional decorations.
  • Refrigerate for 15–20 minutes before serving.

Notes

Ensure eggs and buttermilk are at room temperature for best results.
Calories: 550kcal
Cost: $15
Course: Dessert
Keyword: chocolate

Unleash Your Inner Baker: A Guide to Perfect Red Velvet Cupcakes

Welcome to your ultimate baking adventure! If you’ve ever craved the rich, decadent flavor of red velvet cupcakes with their heavenly cream cheese frosting, you’re in the right place. In this comprehensive guide, we’ll walk you through every step of the process, ensuring that your cupcakes turn out perfectly moist, vibrantly colored, and irresistibly delicious. Let’s dive in!

Why You’ll Love This Recipe

These red velvet cupcakes are more than just a treat; they are a celebration of flavor and texture. Here are five reasons this recipe will become your go-to:

  • Moist and Flavorful: Each bite is a delightful mix of cocoa and vanilla, with a texture that melts in your mouth.
  • Stunning Presentation: The bright red color, especially when topped with white cream cheese frosting, makes for a visually stunning dessert that’s perfect for any occasion.
  • Simple Ingredients: You likely have most of the ingredients already in your pantry, making this recipe easy and convenient.
  • Versatile for Any Occasion: Whether it’s a birthday, holiday, or just a sweet treat, these cupcakes fit right in.
  • Fun to Make: Baking is a joyful experience, and these cupcakes are simple enough for bakers of all levels to enjoy.

Ingredients Breakdown

Before we begin, let’s gather our ingredients. Here’s what you’ll need for these delightful red velvet cupcakes:

  • 1 1/4 cups all-purpose flour: Essential for structure and texture.
  • 3/4 cup granulated sugar: For sweetness and moisture.
  • 1 tbsp unsweetened cocoa powder: Adds depth of flavor without overpowering the red color.
  • 1/2 tsp baking soda: Helps the cupcakes rise and become fluffy.
  • 1/4 tsp salt: Enhances the flavor profile.
  • 1/2 cup vegetable oil: Keeps the cupcakes moist and tender.
  • 1/2 cup buttermilk: Adds richness and helps activate the baking soda.
  • 1 large egg: Binds the ingredients together.
  • 1/2 tbsp white vinegar: Reacts with baking soda for a light texture.
  • 1 tsp vanilla extract: Infuses a warm flavor.
  • 1 tbsp red food coloring: Gives the cupcakes their signature hue.

Ingredient Substitutions

If you’re missing an ingredient or have dietary restrictions, here are some substitutions:

  • All-purpose flour: Swap with gluten-free flour for a gluten-free version.
  • Granulated sugar: Use coconut sugar or a sugar substitute for a lower-calorie option.
  • Buttermilk: Combine milk with a splash of vinegar or lemon juice for a quick homemade version.
  • Cocoa powder: Use carob powder for a caffeine-free alternative.
  • Vegetable oil: Substitute with melted coconut oil for a different flavor profile.

Step-by-Step Directions

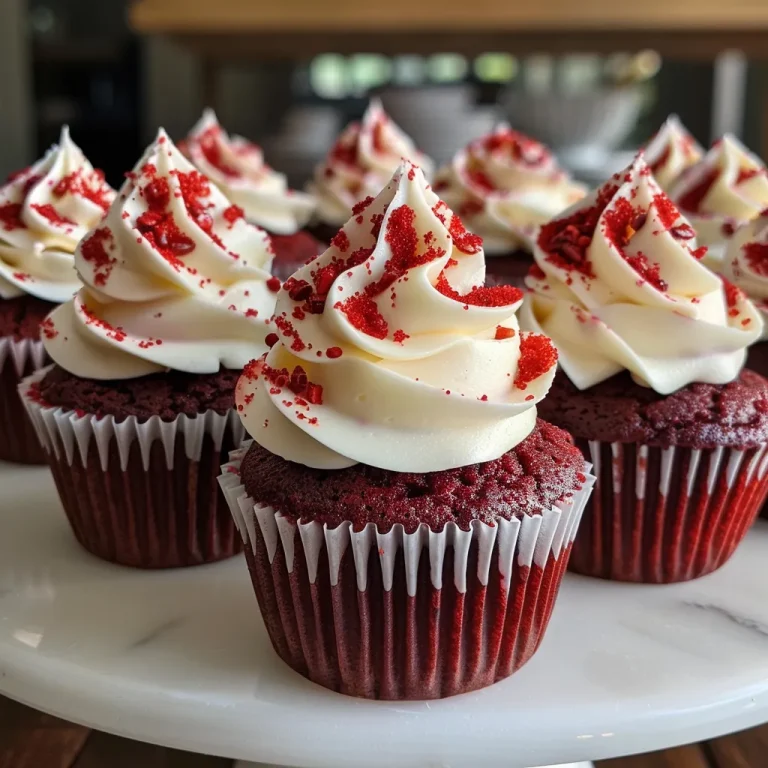
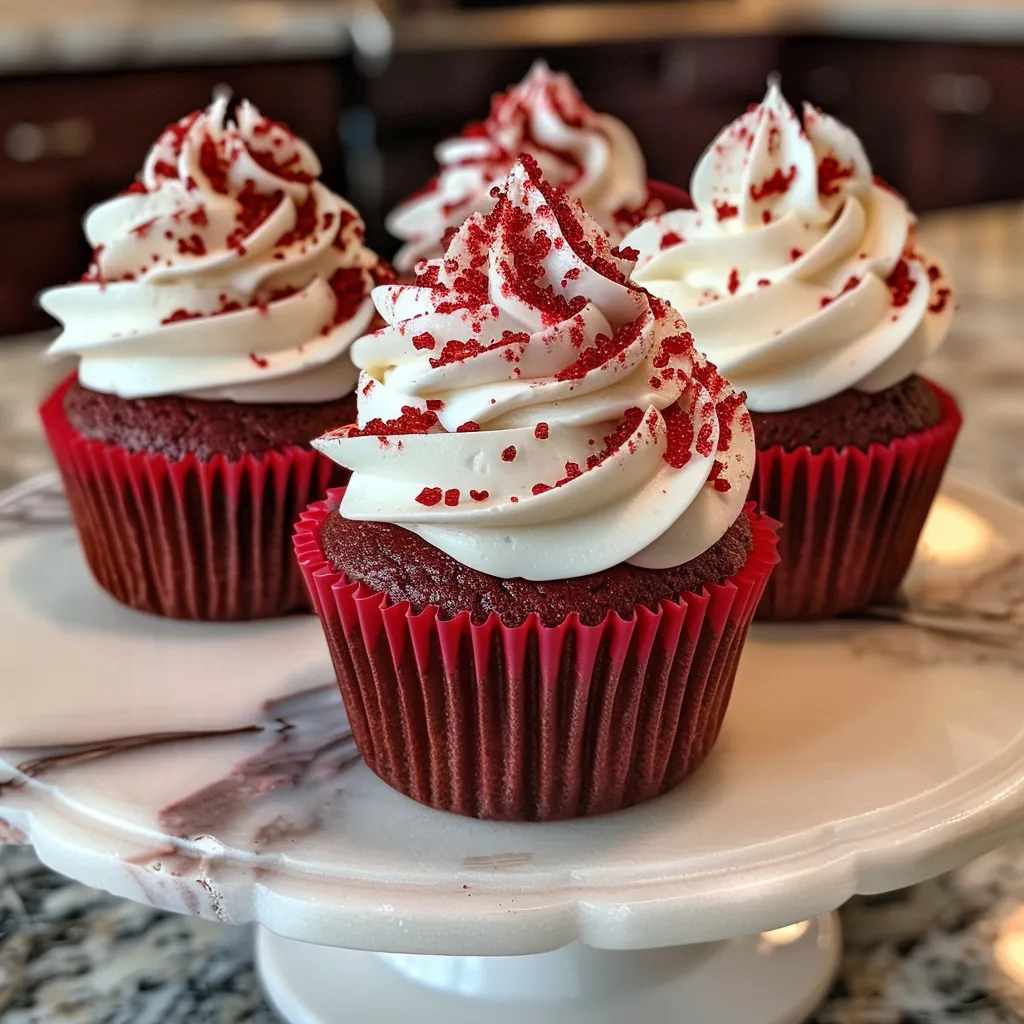
Side view of moist red velvet cupcakes with frosting, showcasing their texture.

Now that you have your ingredients ready, let’s get baking! Follow these steps for perfect red velvet cupcakes:

  1. Preheat your oven to 350°F (175°C). Line a muffin tin with cupcake liners.
  2. In a medium bowl, whisk together the flour, sugar, cocoa powder, baking soda, and salt.
  3. In a separate bowl, beat the egg. Then add the oil, buttermilk, vinegar, vanilla, and red food coloring. Mix well until fully combined.
  4. Slowly combine the wet and dry ingredients, mixing until the batter is smooth.
  5. Divide the batter evenly among the cupcake liners, filling each about 2/3 full.
  6. Bake for 18–20 minutes or until a toothpick inserted into the center comes out clean.
  7. Let the cupcakes cool in the pan for a few minutes before transferring them to a wire rack to cool completely.

Pro Tips for Perfect Cupcakes

Here are some expert insights to elevate your baking game:

  • Do not overmix: When combining wet and dry ingredients, mix just until smooth to prevent tough cupcakes.
  • Check your oven temperature: Use an oven thermometer to ensure accurate baking temperatures.
  • Let them cool: Ensure cupcakes are completely cool before frosting to prevent melting.
  • Use gel food coloring: For a richer red hue, opt for gel over liquid food coloring.
  • Garnish creatively: Top with red velvet crumbs or festive sprinkles for added flair.

Common Mistakes and Troubleshooting

Even seasoned bakers can run into challenges. Here’s how to avoid common pitfalls:

  • Dry cupcakes: Ensure not to overbake; keep an eye on them during the last few minutes.
  • Flat tops: Make sure your baking powder or soda is fresh for proper leavening.
  • Too sweet: If the sweetness is overwhelming, balance it with a tangy cream cheese frosting.
  • Uneven baking: Rotate the cupcake pan halfway through for even heat distribution.

Frosting and Variations

Now, let’s make that delicious cream cheese frosting!

Ingredients for Cream Cheese Frosting

  • 8 oz cream cheese, softened: The star ingredient for a rich frosting.
  • 1/4 cup unsalted butter, softened: Adds creaminess and flavor.
  • 2 cups powdered sugar: Sweetness and structure.
  • 1 tsp vanilla extract: Enhances flavor.

Frosting Directions

Combine the softened cream cheese and butter in a bowl, beating until smooth. Gradually add powdered sugar and vanilla, beating until fluffy. Frost cooled cupcakes generously and garnish if desired.

Delicious Variations

Feel free to experiment with these variations:

  • Red Velvet Cheesecake Cupcakes: Add a dollop of cheesecake batter in the center before baking.
  • Chocolate Chip Red Velvet Cupcakes: Fold in mini chocolate chips for an extra treat.
  • Nutty Red Velvet: Add chopped walnuts or pecans to the batter for a delightful crunch.
  • Vegan Red Velvet Cupcakes: Replace egg with flaxseed meal and use plant-based butter and milk.

Storage and Make-Ahead Instructions

Not planning to eat all your cupcakes at once? Here’s how to store them:

  • Room Temperature: Cupcakes can be stored in an airtight container for up to 3 days.
  • Refrigerator: For longer storage, place them in the fridge for up to a week. Allow to come to room temperature before serving.
  • Freezing: Cupcakes can be frozen for up to 3 months. Wrap each cupcake tightly in plastic wrap and place in a freezer-safe container.

Frequently Asked Questions

Here are answers to some common questions about red velvet cupcakes:

  • How do I know when the cupcakes are done baking? Insert a toothpick; if it comes out clean, they are ready!
  • Can I use liquid food coloring instead of gel? Yes, but gel yields a more vibrant color.
  • What can I use instead of buttermilk? Mix milk with vinegar or lemon juice for a homemade substitute.
  • Why is vinegar used in red velvet cupcakes? It reacts with the baking soda to create a light, fluffy texture.
  • Can I make the cupcakes ahead of time? Absolutely! They store well and can be frozen for later enjoyment.
  • What are some serving suggestions? Pair with a glass of milk or a cup of coffee for a delightful treat.
  • Can I decorate with fondant? Yes! Fondant can be used for a more elaborate decoration.
  • Are red velvet cupcakes gluten-free? You can make them gluten-free by using a gluten-free flour blend.

Nutritional Tips and Dietary Adaptations

For those mindful of nutrition, here are some tips:

  • Portion Control: Enjoy a smaller cupcake or share to balance indulgence with moderation.
  • Lower Sugar Options: Consider using a sugar substitute to reduce calories.
  • Healthier Fats: Substitute vegetable oil with applesauce for a lighter version.
  • Incorporate Fiber: Add whole wheat flour for more fiber and nutrients.

Essential Equipment

Before you start baking, make sure you have the following tools:

  • Muffin Tin: For baking the cupcakes.
  • Mixing Bowls: Use medium and large bowls for mixing ingredients.
  • Whisk: Essential for combining dry ingredients.
  • Electric Mixer: For beating the batter and frosting smoothly.
  • Cooling Rack: Allows cupcakes to cool evenly.

Serving Suggestions

Once your red velvet cupcakes are frosted and beautifully decorated, here are some serving ideas:

  • Pair with Coffee: A rich coffee enhances the sweet flavors of the cupcakes.
  • Offer with Ice Cream: Vanilla ice cream is a classic pairing that adds creaminess.
  • Host a Cupcake Party: Set up a cupcake decorating station for a fun gathering.

Conclusion

With this definitive guide, you’re now equipped to master the art of baking red velvet cupcakes from the comfort of your home. Remember, baking is all about enjoying the process and sharing delicious moments with loved ones. So roll up your sleeves, gather your ingredients, and let the sweet aroma fill your kitchen. Happy baking!

Red Velvet Cupcakes

Prep Time 20 minutes
Cook Time 20 minutes
Total Time 40 minutes
Servings 12 cupcakes
Calories 250
Delight in these moist and vibrant red velvet cupcakes topped with creamy frosting, perfect for celebrations.

Ingredients

Dry ingredients

  • 1 1/4 cups all-purpose flour
  • 3/4 cup granulated sugar
  • 1 tbsp unsweetened cocoa powder
  • 1/2 tsp baking soda
  • 1/4 tsp salt

Wet ingredients

  • 1/2 cup vegetable oil
  • 1/2 cup buttermilk
  • 1 large egg
  • 1/2 tbsp white vinegar
  • 1 tsp vanilla extract
  • 1 tbsp red food coloring

Frosting

  • 8 oz cream cheese, softened
  • 1/4 cup unsalted butter, softened
  • 2 cups powdered sugar
  • 1 tsp vanilla extract

Instructions 

  • Preheat oven to 350°F (175°C) and line a muffin tin with liners.
  • Mix dry ingredients in a bowl; beat egg and add wet ingredients. Combine wet and dry until smooth.
  • Fill cupcake liners 2/3 full and bake for 18–20 minutes. Cool on wire rack.
  • Beat cream cheese and butter, add powdered sugar and vanilla to make frosting.
  • Frost cooled cupcakes and garnish as desired.

Notes

Ensure cupcakes are fully cooled before frosting to prevent melting.
Calories: 250kcal
Cost: $15
Course: Dessert
Cuisine: American
Keyword: red velvet

Unlocking the Secrets to the Ultimate Moist Chocolate Cake

Welcome to the ultimate guide to creating a chocolate cake that will not only meet your expectations but exceed them! This rich and velvety dessert is perfect for any celebration, from birthdays to anniversaries, and even just a cozy night in. In this comprehensive article, we will delve into the intricacies of making the **ultimate moist chocolate cake**, ensuring you have all the tips and tricks needed to impress your guests.

With over two decades of culinary experience, I’m excited to share my secrets and techniques to help you achieve a cake that’s not only delicious but also visually stunning. Let’s get started!

Why You’ll Love This Recipe

  • Ridiculously Moist: This cake stays moist for days, thanks to a combination of ingredients that retain moisture, making it perfect for leftovers.
  • Rich Chocolate Flavor: The use of high-quality cocoa powder and the addition of boiling water enhances the chocolate flavor, ensuring every bite is decadent.
  • Simple to Make: No fancy equipment is required! You can whip this cake up in one bowl, making cleanup a breeze.
  • Perfect for Any Occasion: Whether it’s a birthday, wedding, or just a Tuesday, this cake suits every celebration.
  • Customizable: Make it your own! From toppings to fillings, there are endless variations to explore.

Ingredient Breakdown

Understanding each ingredient and its purpose is key to mastering this recipe. Here’s what you’ll need:

  • All-Purpose Flour: Provides structure. You can substitute with cake flour for a lighter texture.
  • Granulated Sugar: Sweetness and moisture retention. Brown sugar can be used for a richer flavor.
  • Unsweetened Cocoa Powder: The star ingredient! Dutch-process cocoa will give a deeper flavor.
  • Baking Powder & Baking Soda: These leavening agents ensure your cake rises perfectly.
  • Salt: Enhances flavor. Don’t skip it!
  • Large Eggs: Bind ingredients and add moisture. Room temperature eggs mix better.
  • Whole Milk: Adds richness. You can substitute with buttermilk for additional tang.
  • Vegetable Oil: Keeps the cake moist. Can be replaced with melted butter for a richer taste.
  • Vanilla Extract: Adds depth of flavor. Use pure vanilla for the best results.
  • Boiling Water: Activates the cocoa powder, deepening the chocolate flavor.
  • Heavy Cream & Semi-Sweet Chocolate: Ingredients for the ganache that add a luxurious finish.

Step-by-Step Instructions

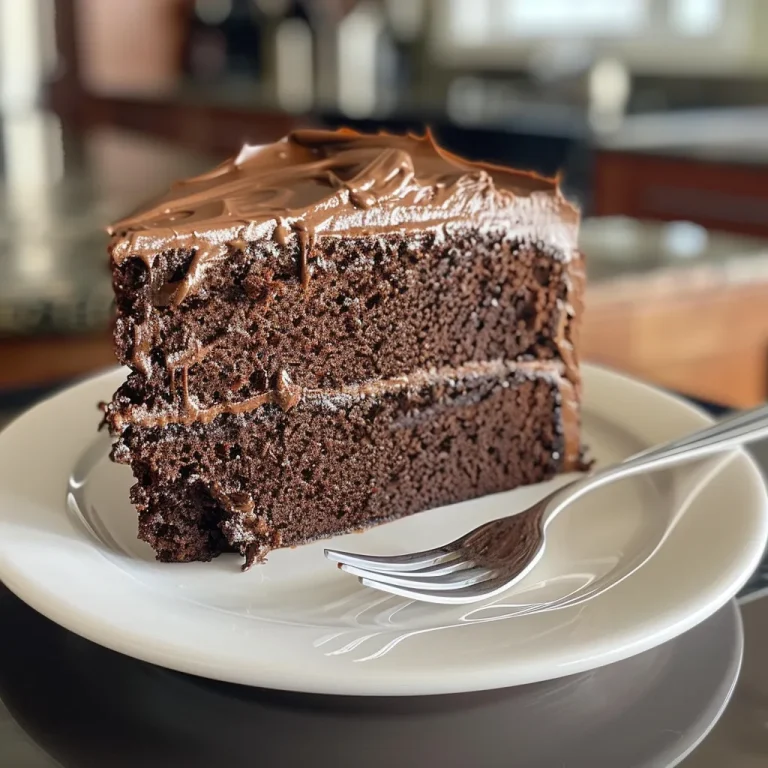
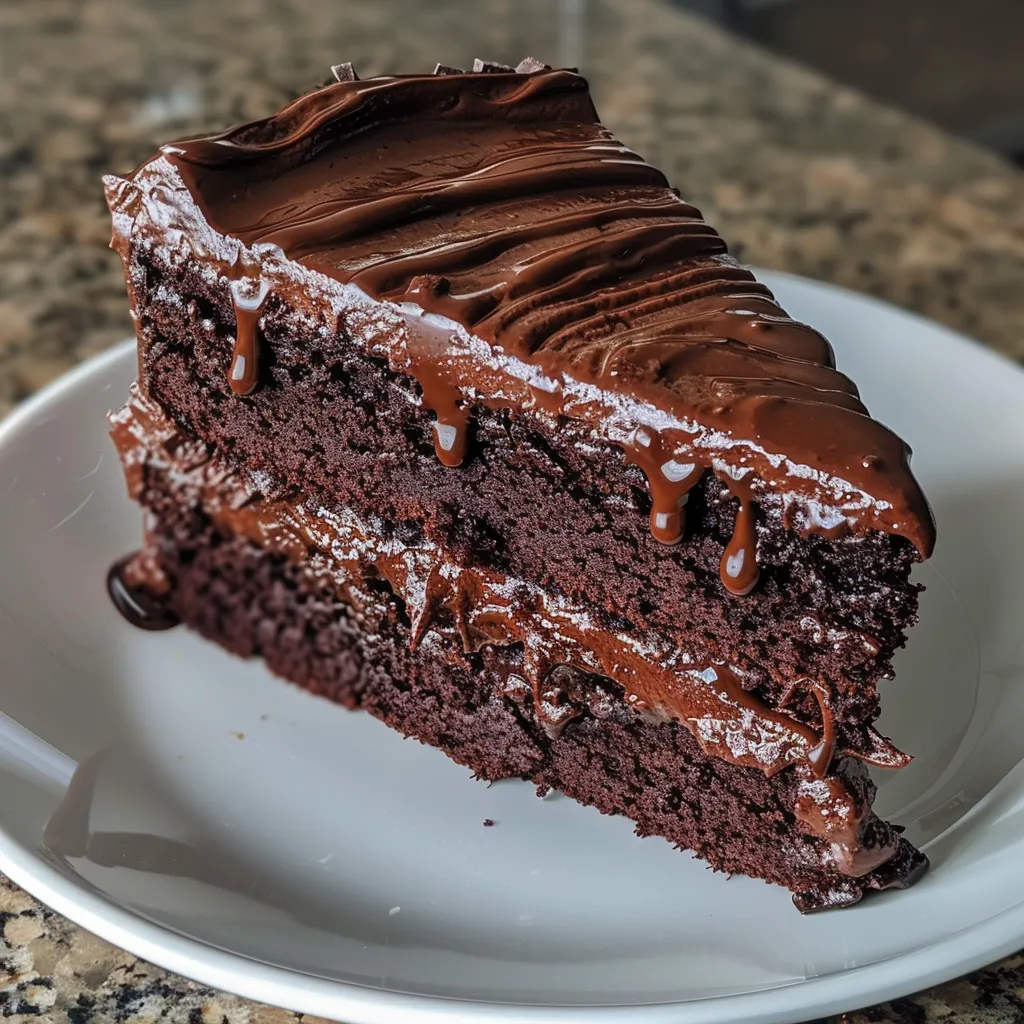
Side view of an ultimate chocolate cake, displaying the soft crumb and luxurious chocolate glaze.

Ready to bake? Follow these steps for the ultimate moist chocolate cake:

  1. Preheat your oven to 350°F (175°C). Grease and flour two 9-inch round cake pans.
  2. In a large mixing bowl, whisk together flour, sugar, cocoa powder, baking powder, baking soda, and salt until well combined.
  3. Add eggs, milk, oil, and vanilla extract to the dry ingredients. Beat with an electric mixer on medium speed for 2 minutes. Stir in boiling water (the batter will be thin).
  4. Pour the batter evenly into the prepared pans. Bake for 30-35 minutes or until a toothpick inserted into the center comes out clean. Allow cakes to cool in the pans for 10 minutes, then transfer to wire racks to cool completely.
  5. For the ganache, heat the heavy cream in a saucepan over medium heat until it begins to simmer. Pour the hot cream over the chopped chocolate and let it sit for 5 minutes. Stir until smooth and glossy.
  6. Once the cakes are completely cool, place one layer on a serving plate. Spread a layer of ganache on top, then place the second layer on top. Pour the remaining ganache over the top and let it drizzle down the sides.
  7. Slice and serve the cake, optionally garnished with fresh berries or chocolate shavings.

Pro Tips for Success

  • Room Temperature Ingredients: Always use room temperature eggs and milk for better mixing and a smoother batter.
  • Don’t Overmix: Mix just until combined to avoid a dense cake.
  • Check for Doneness: Use a toothpick to ensure the cake is baked through—if it comes out with moist crumbs, it’s perfect!
  • Cool Completely: Allow the cakes to cool completely before frosting to prevent melting your ganache.
  • Use Quality Chocolate: The better the chocolate, the better the ganache and overall flavor.
  • Experiment with Flavors: Try adding espresso powder or flavored extracts to the batter for a unique twist.
  • Layering: For an extra decadent cake, add layers of fruit or cream between the cake layers.
  • Storage: Store covered at room temperature for up to 3 days or in the refrigerator for up to a week.

Common Mistakes & Troubleshooting

Even the best bakers can run into issues. Here are some common mistakes and how to avoid them:

  • Dry Cake: Ensure you measure your flour correctly. Spoon it into the measuring cup instead of scooping.
  • Dense Texture: Overmixing can lead to a tough cake. Mix just until combined.
  • Sunken Center: This can occur if the oven door is opened prematurely. Wait until at least the halfway point to check.
  • Ganache Not Setting: If your ganache is too runny, let it cool longer before spreading.

Variations to Try

Feeling adventurous? Here are some variations to customize your ultimate moist chocolate cake:

  • Chocolate Mint Cake: Add mint extract to the batter for a refreshing twist.
  • Chocolate Peanut Butter Cake: Swirl creamy peanut butter into the batter before baking.
  • Mocha Chocolate Cake: Substitute coffee for the boiling water for a rich mocha flavor.
  • Spiced Chocolate Cake: Add cinnamon and nutmeg for a warm, spiced cake.

Storage and Make-Ahead Instructions

This cake can be made ahead of time, making it perfect for parties or gatherings:

  • Make Ahead: Bake the cake layers ahead of time, wrap them tightly in plastic wrap, and freeze. Thaw before frosting.
  • Storing: Store the cake covered at room temperature for up to 3 days or in the fridge for up to a week.
  • Freezing: Slice the cake and freeze individual pieces for a quick treat later on.

Frequently Asked Questions

  • Can I use a different type of flour? Yes, you can use cake flour for a lighter texture or alternative flours for dietary needs.
  • How do I know when the cake is done? A toothpick inserted in the center should come out clean or with a few moist crumbs.
  • Can I make this cake gluten-free? Absolutely! Use a 1:1 gluten-free flour blend.
  • What can I substitute for eggs? Use flaxseed meal or applesauce for vegan alternatives.
  • Is it possible to make this cake ahead of time? Yes! The cakes can be baked and frozen, then frosted later.
  • How can I make the cake more chocolatey? Consider adding chocolate chips to the batter or using a chocolate buttercream frosting.
  • Can I add fillings between the layers? Yes! Fresh fruits or flavored creams work wonderfully.
  • What’s the best way to frost the cake? Use an offset spatula for smooth edges and a beautiful finish.

Nutritional Tips and Dietary Adaptations

For those watching their nutritional intake or with dietary restrictions, here are some tips:

  • Lower Sugar: Reduce sugar by 1/4 and use unsweetened applesauce to maintain moisture.
  • Gluten-Free: Substitute with a gluten-free flour blend and ensure all other ingredients are gluten-free.
  • Lower Fat: Replace some of the oil with unsweetened applesauce to cut down on fat while keeping moisture.

Equipment Recommendations

To achieve the best results, here’s what I recommend:

  • Mixing Bowls: Use large, sturdy bowls that can handle vigorous mixing.
  • Electric Mixer: A stand mixer or hand mixer will make the mixing process easier.
  • Measuring Cups and Spoons: Accurate measurements are crucial for baking success.
  • Cake Pans: Use high-quality, non-stick pans for even baking and easy release.
  • Cooling Rack: Allows for proper cooling and prevents sogginess.

Serving Suggestions

This cake pairs beautifully with a variety of accompaniments:

  • Fresh Berries: Adding strawberries, raspberries, or blueberries adds a refreshing contrast.
  • Whipped Cream: A dollop of lightly sweetened whipped cream balances the richness.
  • Ice Cream: Vanilla or coffee ice cream makes for a delicious pairing.

In conclusion, the **ultimate moist chocolate cake** is not just a dessert; it’s an experience filled with rich flavors and delightful textures. With the tips, variations, and troubleshooting advice provided here, you’re well-equipped to create a cake that will be the star of any gathering. Happy baking, and remember, every slice is a moment worth savoring!

Ultimate Moist Chocolate Cake

Prep Time 20 minutes
Cook Time 35 minutes
Total Time 55 minutes
Servings 12 pieces
Calories 450
Indulge in this rich, moist chocolate cake with luscious ganache, perfect for special occasions or a decadent treat.

Ingredients

Dry ingredients

  • 2 cups all-purpose flour
  • 2 cups granulated sugar
  • ¾ cup unsweetened cocoa powder
  • 1 ½ teaspoons baking powder
  • 1 ½ teaspoons baking soda
  • 1 teaspoon salt

Wet ingredients

  • 2 large eggs
  • 1 cup whole milk
  • ½ cup vegetable oil
  • 2 teaspoons vanilla extract
  • 1 cup boiling water

Ganache

  • 1 cup heavy cream
  • 8 ounces semi-sweet chocolate, chopped

Instructions 

  • Preheat oven to 350°F (175°C). Grease and flour two 9-inch pans.
  • Mix dry ingredients. Add eggs, milk, oil, vanilla; beat 2 min. Stir in boiling water.
  • Pour batter into pans. Bake 30-35 min. Cool completely.
  • Heat cream, pour over chocolate; stir until smooth. Spread ganache between layers and over top.
  • Assemble cake, drizzle with remaining ganache. Slice and serve.

Notes

Ensure cakes are completely cooled before applying ganache for best results.
Calories: 450kcal
Cost: $15
Course: Dessert
Cuisine: American
Keyword: chocolate

Nothing warms the heart quite like the aroma of baking apples spiced with cinnamon wafting through your home. This delightful dessert is not only a celebration of flavor but also a simple way to embrace the comforts of the season. In just three easy steps, you can create tender, sweet Cinnamon Baked Apples that will become a cherished favorite in your household.

In this guide, you’ll find everything you need to know to make the perfect baked apples, from ingredients and substitutions to expert tips and serving suggestions. Let’s dive into the cozy world of Cinnamon Baked Apples!

Why You’ll Love This Recipe

  • Quick and Easy: This recipe takes just 30 minutes from start to finish, making it perfect for a last-minute dessert.
  • Healthy Comfort Food: Using fresh apples and minimal added sugar, this dish offers a guilt-free indulgence.
  • Customizable: You can easily adapt this recipe with different spices, sweeteners, or toppings to suit your taste.
  • Perfect for Any Occasion: Whether it’s a weeknight dinner or a holiday feast, these baked apples are sure to impress.
  • Kid-Friendly: A fun and interactive dessert for kids to help prepare, making it a great family activity.

Ingredients and Substitutions

To create your delicious Cinnamon Baked Apples, you will need the following ingredients:

  • 4 medium apples: Honeycrisp or Granny Smith are recommended for their balance of sweetness and tartness. You can substitute with any apples you have on hand.
  • 2 tablespoons (30g) unsalted butter: Melted, this adds richness to the recipe. You can use coconut oil for a dairy-free option.
  • 2 tablespoons (25g) granulated sugar: For sweetness. Brown sugar can be used for a deeper flavor.
  • 1 tablespoon (6g) ground cinnamon: Essential for that warm spice. You can add nutmeg or allspice for extra warmth.
  • 1 teaspoon (5ml) vanilla extract: A touch of vanilla enhances the flavors beautifully.
  • Pinch of salt: Balances the sweetness and enhances flavors.
  • Optional: 1 tablespoon (10g) brown sugar for extra caramelization.

How to Make Cinnamon Baked Apples

Follow these simple steps to create your own Cinnamon Baked Apples:

  1. Preheat your oven to 375°F (190°C). Lightly grease a 9×13 inch baking dish.
  2. Wash, core, and slice the apples into thin wedges (about 1/4 inch thick). Arrange the apple slices in the prepared baking dish, slightly overlapping.
  3. In a small bowl, whisk together the melted butter, granulated sugar, ground cinnamon, vanilla extract, and salt until well combined.
  4. Drizzle the cinnamon-sugar mixture evenly over the apple slices in the baking dish.
  5. Bake for 20-25 minutes, or until the apples are fork-tender and beginning to caramelize at the edges. Stir gently halfway through baking.
  6. Let the Cinnamon Baked Apple Slices cool for about 5 minutes before serving.

Pro Tips for the Best Cinnamon Baked Apples

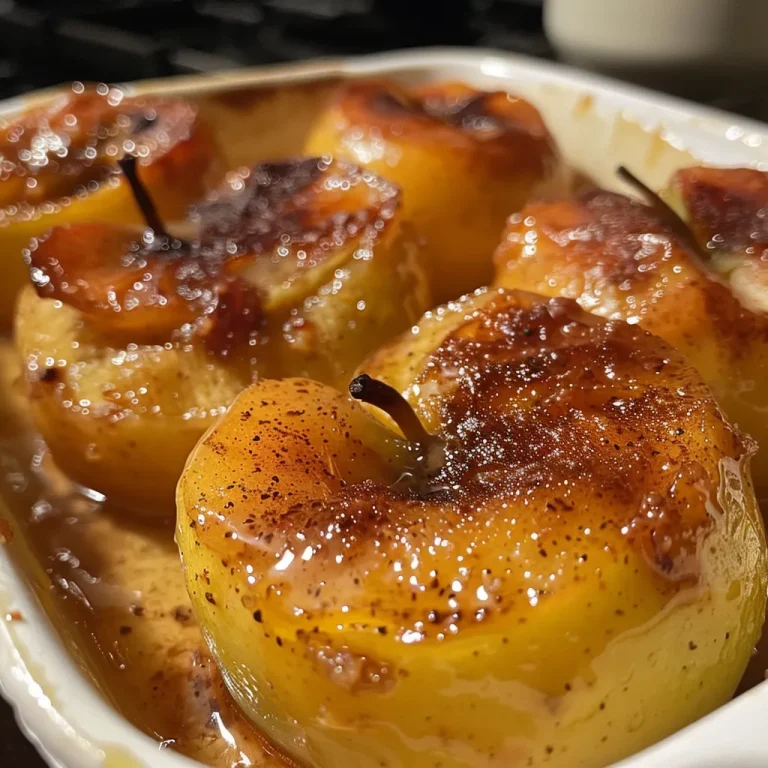
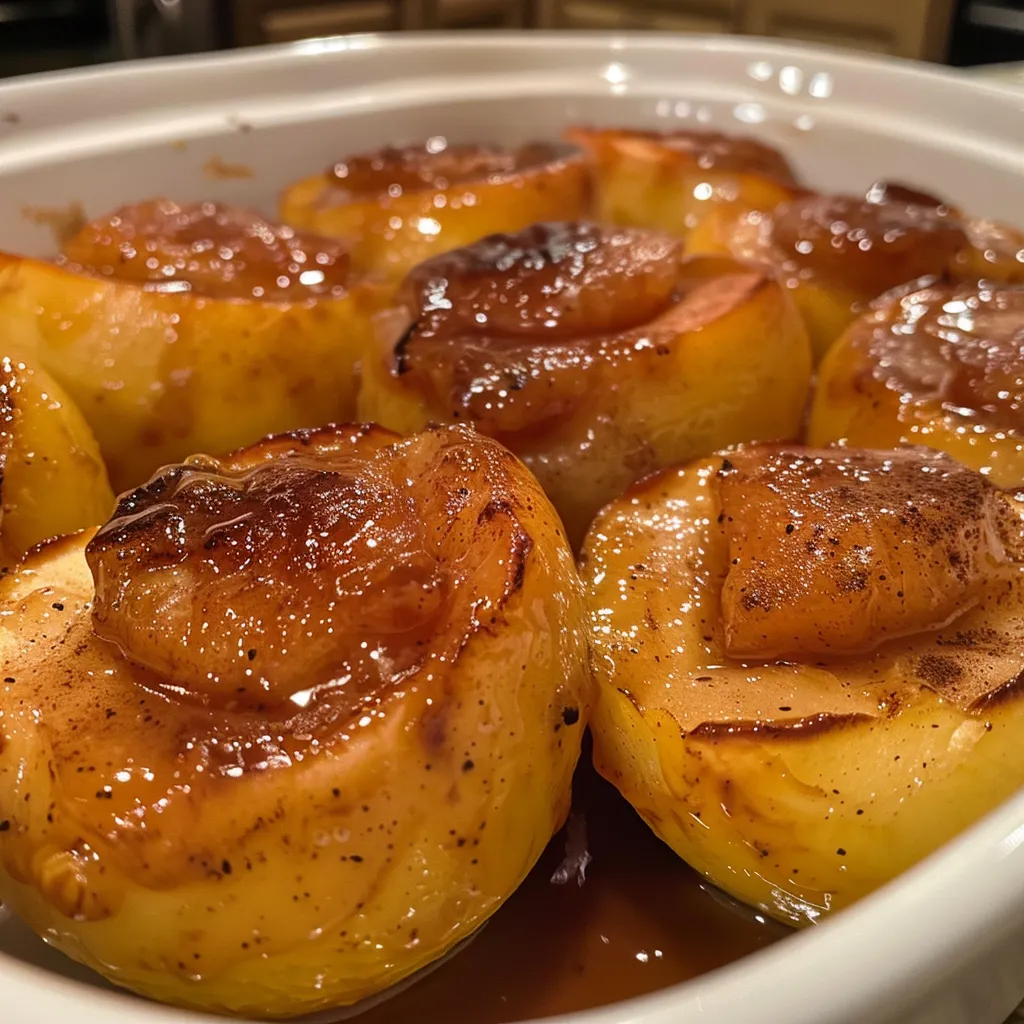
Appetizing side view of cinnamon-baked apples, highlighting their tender texture.
  • Choose the Right Apples: Use a mix of sweet and tart apples for balanced flavor.
  • Don’t Overbake: Keep an eye on them as they bake to prevent mushiness, aiming for tender but still slightly firm apples.
  • Try Different Spices: Experiment with nutmeg, ginger, or cardamom for a unique twist.
  • Layering: For even flavor distribution, layer your apple slices instead of just piling them in.
  • Serve Warm: Enjoy them immediately for the best taste and texture.
  • Ice Cream Pairing: Serve with vanilla ice cream or whipped cream for a delightful contrast.
  • Garnish Wisely: A sprinkle of chopped nuts or a drizzle of caramel sauce can elevate this dish further.
  • Make Ahead: Prepare the apples and cinnamon mixture, then bake just before serving for the freshest taste.

Common Mistakes and Troubleshooting

Even the best chefs can make mistakes. Here are some common pitfalls and how to avoid them:

  • Using Overripe Apples: Always choose firm apples. Overripe apples can turn mushy and lose their structure during baking.
  • Skipping the Salt: A pinch of salt enhances the overall flavor—don’t skip it!
  • Not Preheating the Oven: Always preheat your oven to ensure even baking.
  • Overcrowding the Pan: If your apples are too tightly packed, they may steam instead of bake. Arrange them with some space.

Variations of Cinnamon Baked Apples

Feel free to get creative with your Cinnamon Baked Apples! Here are some variations you can try:

  • Nutty Crunch: Add chopped walnuts or pecans into the cinnamon-sugar mixture for added texture.
  • Berry Delight: Mix in a handful of fresh or frozen berries for a fruity twist.
  • Caramel Drizzle: Drizzle with homemade or store-bought caramel sauce before serving for a sweet finish.
  • Spiced Rum: Add a splash of spiced rum to the cinnamon mixture for an adult-only version!

Storage and Make-Ahead Instructions

If you want to make these delicious baked apples in advance, here’s how to store them:

  • Refrigeration: Store leftover baked apples in an airtight container in the fridge for up to 3 days.
  • Freezing: You can freeze baked apples in an airtight container for up to 2 months. Thaw and reheat in the oven before serving.
  • Make Ahead: Prepare the apples and the cinnamon mixture a day in advance. Just bake them just before serving for a fresh taste.

Frequently Asked Questions

  • Can I use different types of apples? Yes, feel free to mix different varieties to achieve a unique flavor profile!
  • How do I know when the apples are done? They should be fork-tender and slightly caramelized at the edges.
  • Can I make these apples without sugar? Absolutely! You can omit sugar or use a sugar substitute to make them healthier.
  • What should I serve with baked apples? They pair beautifully with vanilla ice cream, yogurt, or a dollop of whipped cream.
  • Can I add raisins or other dried fruits? Yes! Adding dried fruits can enhance the flavor and texture.
  • What if I don’t have ground cinnamon? You can substitute with pumpkin pie spice or apple pie spice for a different flavor.
  • How long do baked apples last? They can be stored in the fridge for up to 3 days or frozen for up to 2 months.
  • Can I double this recipe? Yes, simply adjust the baking dish size and keep an eye on baking time.

Nutrition Tips and Dietary Adaptations

This recipe is naturally low in fat and can be adapted to suit various dietary needs:

  • Vegan Option: Substitute butter with coconut oil and omit the sugar or use a plant-based sweetener.
  • Gluten-Free: This recipe is already gluten-free, making it a safe choice for those with gluten sensitivities.
  • Low-Calorie: Reduce the sugar or use a sugar substitute to lower the calorie count.

Equipment Recommendations

To make your Cinnamon Baked Apples, you’ll need:

  • 9×13 inch baking dish: For even baking of the apple slices.
  • Mixing bowl: To whisk together your cinnamon-sugar mixture.
  • Sharp knife: For coring and slicing apples efficiently.
  • Whisk: For mixing ingredients smoothly.

Serving Suggestions

Once your Cinnamon Baked Apples are ready, consider these serving ideas:

  • À La Mode: Serve warm with a scoop of vanilla ice cream on top for a delightful contrast.
  • With Yogurt: Pair with Greek yogurt for a healthy breakfast or snack.
  • Garnished: Top with chopped nuts or a sprinkle of granola for added crunch.
  • As a Topping: Use as a topping for pancakes, waffles, or oatmeal for a cozy breakfast option.

Conclusion

In conclusion, Cinnamon Baked Apples are a flavor-packed dessert that brings warmth and comfort to any table. They are incredibly easy to prepare, customizable, and sure to impress family and friends alike. So, roll up your sleeves and embrace the cozy flavors of this delightful dish. Thank you for joining me on this culinary journey—now, go ahead and make this recipe to create warm memories around your dining table!

Cinnamon Baked Apples: Tender, Sweet Comfort in 3 Easy Steps

Prep Time 10 minutes
Cook Time 25 minutes
Total Time 35 minutes
Servings 4 servings
Calories 150
Enjoy warm, cinnamon-spiced baked apples with minimal effort. Perfect for a cozy dessert or snack.

Ingredients

Fruits

  • 4 medium apples (Honeycrisp or Granny Smith)
  • 2 tablespoons unsalted butter, melted
  • 2 tablespoons granulated sugar
  • 1 tablespoon ground cinnamon
  • 1 teaspoon vanilla extract
  • Pinch salt
  • 1 tablespoon brown sugar (optional)

Instructions 

  • Preheat oven to 375°F (190°C). Grease a 9×13 inch baking dish.
  • Wash, core, and slice apples into thin wedges. Arrange in dish.
  • Mix melted butter, sugar, cinnamon, vanilla, and salt. Drizzle over apples.
  • Bake for 20-25 minutes until tender and caramelized. Stir halfway.
  • Let cool for 5 minutes before serving.

Notes

For extra flavor, sprinkle with a little more cinnamon or serve with ice cream.
Calories: 150kcal
Cost: $10
Course: Dessert
Cuisine: American
Keyword: Apples

Welcome to your ultimate guide on making homemade pita bread! If you’ve ever savored a warm, fluffy pita fresh from the oven, you know the joy it brings. This recipe is not just about creating a delicious bread; it’s an invitation to explore the comforting art of baking. In this comprehensive guide, I’ll walk you through everything you need to know to make perfect pita bread. From the right ingredients to expert tips, you’ll be equipped to create this staple in your kitchen.

Let’s dive in and discover why making pita bread at home is a delightful endeavor that anyone can master!

Why You’ll Love This Recipe

  • Quick and Easy Preparation: This recipe is designed for simplicity, allowing you to whip up delicious pita bread in under two hours, including resting time.
  • Fluffy and Soft Texture: Achieve that perfect pocket with a fluffy interior that’s excellent for stuffing with your favorite fillings.
  • Versatile Uses: Whether you’re making wraps, dips, or serving alongside a hearty stew, pita bread can elevate any meal.
  • Cost-Effective: Making your own pita is not only fun but also budget-friendly compared to store-bought options.
  • Customizable Flavors: With this basic recipe, you can experiment with herbs, spices, and even whole grain flours to create unique variations.

Ingredients & Substitutions for Pita Bread

Before we jump into the baking process, let’s break down the key ingredients and possible substitutions:

  • All-Purpose Flour: 3⅓ cups. You can substitute with whole wheat flour for a healthier option, but the texture may be denser.
  • Lukewarm Water: 1¼ cups. This is essential for activating the yeast. If you don’t have lukewarm water, you can heat water and let it cool to the right temperature.
  • Active Dry Yeast: 2 teaspoons. Instant yeast can be used in the same quantity without the need for activation.
  • Sugar: 2 teaspoons. This helps with browning and fermentation. You can use honey or agave syrup as a natural alternative.
  • Salt: 2 teaspoons. Essential for flavor; don’t skip this ingredient!
  • Olive Oil: 2 tablespoons. This adds moisture and flavor. You can substitute with melted butter or a neutral oil.

How to Make Pita Bread

Making pita bread is a straightforward process. Follow these steps to create your delicious bread:

1. Prepare the Dough

Start by combining the lukewarm water, sugar, and yeast in a bowl. Allow it to sit for about 5-10 minutes until it becomes frothy, indicating the yeast is active.

2. Mix the Ingredients

In a large mixing bowl, combine the flour and salt. Make a well in the center and pour in the yeast mixture along with the olive oil. Stir until it forms a shaggy dough.

3. Knead the Dough

Transfer the dough to a floured surface and knead for about 8-10 minutes, until it becomes smooth and elastic. If the dough is too sticky, sprinkle a little more flour as needed.

4. Let the Dough Rise

Place the dough in a lightly oiled bowl, cover it with a damp cloth, and let it rise in a warm place until it doubles in size, about 1 hour.

5. Shape the Pitas

Once risen, punch down the dough to release air. Divide it into 8 equal pieces and shape each piece into a ball. Roll each ball into a flat circle about ¼ inch thick.

6. Preheat the Oven

Preheat your oven to 475°F (245°C) and place a baking sheet or pizza stone inside to heat up. If you have a pizza oven like Ooni, this is the perfect time to use it!

7. Bake the Pitas

Carefully place the rolled-out pita onto the hot baking sheet or stone. Bake for about 5-7 minutes, or until they puff up and turn lightly golden. Keep an eye on them, as they can bake quickly!

8. Cool and Enjoy

Remove the pitas from the oven and cover them with a clean towel to keep them soft as they cool. Enjoy them warm or store them for later!

Pro Tips for Perfect Pita Bread

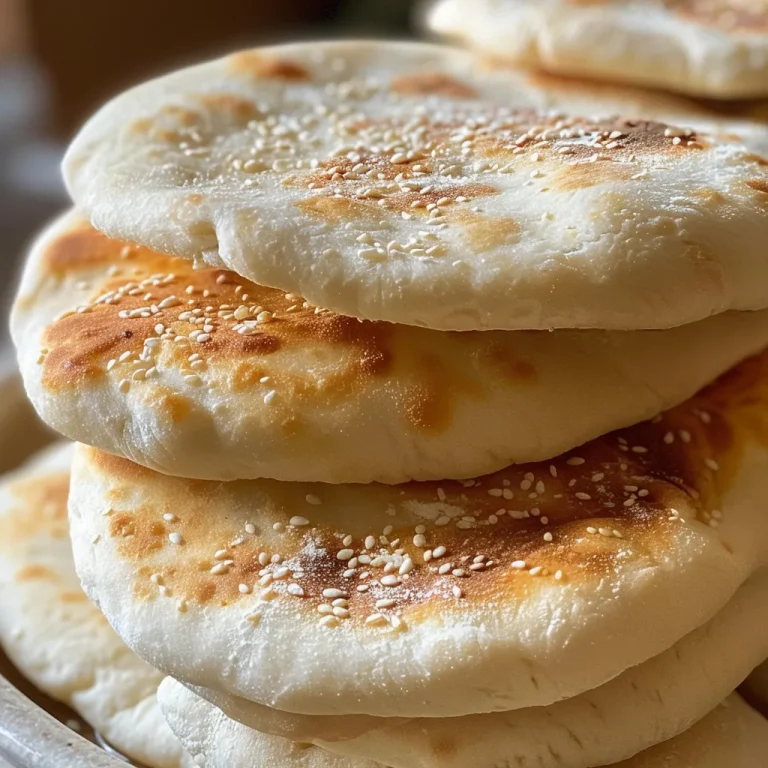
Image of pita bread with a crisp outer layer and airy interior, taken from a side angle.
  • Use Fresh Yeast: Always check the expiration date on your yeast for the best results. Fresh yeast will ensure proper rising.
  • Monitor Oven Temperature: A hot oven is crucial for puffing the pita. Use an oven thermometer if needed.
  • Don’t Overwork the Dough: Knead until smooth, but avoid overworking, which can make the bread tough.
  • Shape Consistently: Ensure all pita rounds are the same thickness for even baking.
  • Experiment with Flavors: Add herbs or spices to the dough for a unique twist. Garlic powder or za’atar can add an exciting flavor.
  • Store Properly: Place cooled pitas in an airtight container to keep them fresh longer.
  • Try Different Baking Methods: If you don’t have an oven, you can cook pitas on a skillet over medium-high heat for about 2-3 minutes on each side.
  • Perfect Pocket Test: To test if your pita has formed a pocket, gently press the side with your fingers.

Common Mistakes and Troubleshooting

Even seasoned bakers can run into issues. Here are some common mistakes and how to troubleshoot them:

  • Pitas Don’t Puff Up: This could be due to insufficient oven temperature or old yeast. Ensure your oven is preheated and your yeast is fresh.
  • Dough is Too Sticky: If your dough is too sticky, gradually add more flour during kneading. It should be soft but not tacky.
  • Dry or Tough Pitas: This can happen if the dough is overworked or the oven temperature is too high. Keep kneading to a minimum and monitor your bake time.

Variations of Pita Bread

Feel free to get creative with your pita bread! Here are some delicious variations:

  • Whole Wheat Pita: Substitute half of the all-purpose flour for whole wheat flour for a nutty flavor and added nutrition.
  • Herbed Pita: Add a tablespoon of dried herbs like oregano, rosemary, or thyme to the dough for an aromatic twist.
  • Spiced Pita: Mix in spices like cumin or paprika for a flavor kick that complements savory fillings.
  • Stuffed Pita: Before baking, fill the rounds with your favorite ingredients (like cheese or sautéed vegetables) for a delicious pocket treat.

Storage and Make-Ahead Instructions

To keep your homemade pita bread fresh:

  • Room Temperature: Store cooled pitas in an airtight container at room temperature for up to 3 days.
  • Refrigeration: For longer storage, place them in the fridge for up to a week. Just be aware they may dry out slightly.
  • Freezing: Wrap individual pitas in plastic wrap and store them in a freezer-safe bag for up to 3 months. Thaw at room temperature or warm them in the oven before serving.

Frequently Asked Questions

Here are some common questions about making pita bread:

  • Can I use whole grain flour? Yes, you can substitute whole grain flour, but the texture will be denser.
  • What can I serve with pita bread? Serve with dips like hummus, baba ganoush, or stuffed with grilled meats and veggies.
  • How do I know when the dough has risen enough? The dough should double in size during the rising process.
  • Can I make pita bread without yeast? Yes, you can use baking powder as a leavening agent, but the texture will differ.
  • What happens if my pita bread is too thick? It may not puff up properly. Roll them thinner for better results.
  • Is it possible to make gluten-free pita bread? Yes, there are gluten-free flour blends available that can be used, though the texture will vary.
  • How can I reheat leftover pita bread? Place them in the oven or on a skillet for a few minutes to warm them up.
  • Can I use flavored olive oil? Absolutely! Using flavored oils like garlic or herb-infused can add depth to your pita.

Nutrition Tips and Dietary Adaptations

For those conscious about their diet, here are some nutrition tips:

  • Whole Grain Options: Use whole wheat flour for added fiber and nutrients.
  • Low-Sugar Alternatives: If you’re watching your sugar intake, consider reducing the sugar amount or using a sugar substitute.
  • Healthy Fats: Use olive oil or avocado oil for healthier fat options.
  • Add Seeds: Incorporate sesame or chia seeds into the dough for a nutritious boost.

Equipment Recommendations

To make the process smoother, here are some recommended tools:

  • Mixing Bowls: A large bowl for mixing and a smaller one for proofing yeast.
  • Rolling Pin: Essential for rolling out your pita dough evenly.
  • Oven Thermometer: To ensure your oven is at the right temperature for baking.
  • Baking Sheet or Pizza Stone: A hot surface is crucial for puffing the pita.

Serving Suggestions

Now that you’ve made your pita bread, here are some delicious serving suggestions:

  • Wraps: Fill with grilled chicken, lettuce, tomatoes, and tzatziki sauce for a satisfying meal.
  • Dips: Serve alongside hummus, tzatziki, or baba ganoush for a great appetizer.
  • Breakfast Pita: Stuff with scrambled eggs, avocado, and salsa for a delicious breakfast option.
  • Snack: Enjoy warm pita with olive oil and za’atar as a simple snack.

Making homemade pita bread is not only rewarding but also enhances your culinary skills and brings a touch of homemade warmth to your meals. Thank you for joining me on this flavorful journey! I hope you find joy in baking and sharing your pita creations with family and friends. Happy cooking!

Pita Bread

Prep Time 15 minutes
Cook Time 10 minutes
Total Time 25 minutes
Servings 8 pieces
Calories 150
Soft and fluffy pita bread is perfect for sandwiches, wraps, or enjoying on its own. This easy recipe yields warm, homemade pita with a delightful pocket.

Ingredients

Dough

  • 3⅓ cups all-purpose flour
  • cups lukewarm water
  • 2 teaspoons active dry yeast ((or instant dry yeast))
  • 2 teaspoons sugar
  • 2 teaspoons salt
  • 2 tablespoons olive oil

Instructions 

  • Mix the flour, yeast, sugar, and salt in a bowl.
  • Add warm water and olive oil; knead until smooth.
  • Let the dough rise for about 1 hour until doubled in size.
  • Divide the dough into 8 balls and roll into circles.
  • Bake in a preheated oven at 475°F (245°C) for 8-10 minutes until puffed and golden.

Notes

For best results, roll the dough evenly and bake on a hot baking stone or sheet.
Calories: 150kcal
Cost: $4
Course: bread
Cuisine: Mediterranean
Keyword: Pita

Elevate Your Breakfast with Irresistible Cheese and Herb Muffins

Welcome to the wonderful world of baking, where a simple combination of ingredients can transform your breakfast experience. Today, we’re diving into a delightful recipe for Cheese and Herb Muffins that not only tantalize your taste buds but also bring a touch of gourmet flair to your morning routine. With the richness of cheese and the freshness of herbs, these muffins are sure to become a staple in your kitchen—perfect for sharing with family or enjoying solo. Let’s get started!

Why You’ll Love This Recipe

These muffins are more than just a breakfast option; they offer a variety of benefits that cater to different tastes and lifestyles:

  • Versatile Flavor Profile: The combination of savory cheese and fresh herbs allows you to create muffins that can suit any palate, whether you prefer something mild or bold.
  • Quick and Simple Preparation: With straightforward steps, you can whip these muffins together in no time—perfect for busy mornings!
  • Nutritious and Wholesome: Made with fresh ingredients, these muffins are a great source of energy to kickstart your day.
  • Perfectly Portable: These muffins are great for on-the-go breakfasts, making them ideal for hectic mornings or snacks throughout the day.
  • Customizable Options: Feel free to experiment with different cheeses and herbs, ensuring that each batch is uniquely yours!

Ingredients Breakdown

Before we dive into the baking process, let’s take a closer look at the ingredients you’ll need:

  • 2 cups all-purpose flour: This is the base of your muffins. For a gluten-free option, substitute with a gluten-free flour blend.
  • 1 tbsp baking powder: This leavening agent helps your muffins rise and become fluffy.
  • 1/2 tsp salt: Essential for enhancing the flavors of the other ingredients.
  • 1/4 tsp black pepper: Adds a hint of spice to the muffins, complementing the cheese.
  • 1/2 cup Cheddar Cheese (grated): Offers a rich, sharp flavor. You can also use mozzarella or gouda if you prefer.
  • 1/4 cup Parmesan cheese (grated): This adds a savory depth to the muffins.
  • 1 tbsp fresh herbs (thyme or chives): Feel free to mix in parsley or basil for different flavor notes.
  • 1 cup milk: Provides moisture. Almond milk or oat milk can be used as dairy-free alternatives.
  • 1/4 cup butter (melted): Adds richness. You can replace it with olive oil or coconut oil for a healthier twist.
  • 1 large egg: Binds the ingredients and adds moisture.

Let’s Make It Together

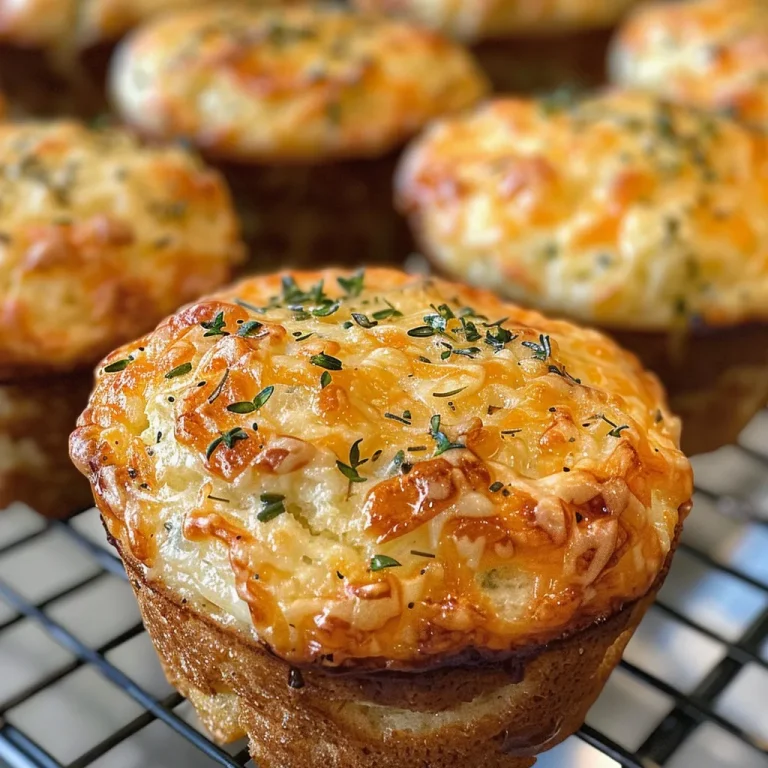
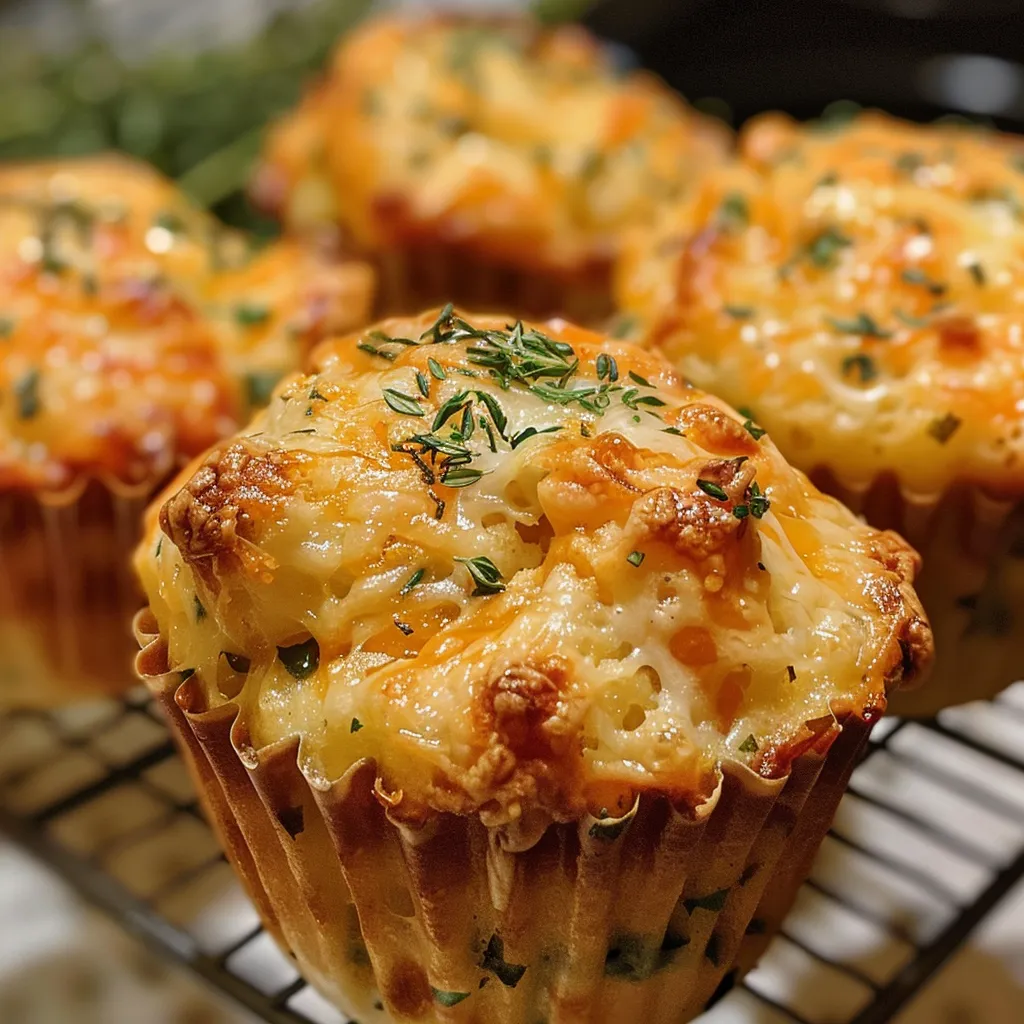
Appetizing close-up of muffins highlighting herbs and cheese textures.

Now, let’s get to the fun part—baking these delicious muffins!

  • Step 1: Preheat your oven to 375°F (190°C) and prepare a muffin tin by greasing it or lining it with paper liners.
  • Step 2: In a large bowl, whisk together the flour, baking powder, salt, and black pepper until fully combined.
  • Step 3: Stir in the grated Cheddar cheese, Parmesan cheese, and chopped fresh herbs to distribute them evenly throughout the dry ingredients.
  • Step 4: In another bowl, whisk together the milk, melted butter, and egg until blended.
  • Step 5: Pour the wet ingredients into the dry mixture and stir gently until just combined—be careful not to overmix!
  • Step 6: Spoon the batter into the prepared muffin tin, filling each cup about 3/4 full.
  • Step 7: Bake for 18-20 minutes, or until the muffins are golden brown and a toothpick inserted into the center comes out clean.
  • Step 8: Remove the muffins from the oven and allow them to cool in the tin for a few minutes before transferring to a wire rack to cool completely.

Pro Tips for Perfect Muffins

To ensure your Cheese and Herb Muffins turn out beautifully every time, consider these expert insights:

  • Use Fresh Ingredients: Always use fresh herbs and quality cheese to enhance the flavors of your muffins.
  • Don’t Overmix: Mix until just combined to keep your muffins light and fluffy. Overmixing can lead to dense muffins.
  • Check Oven Temperature: Make sure your oven is preheated correctly; an incorrect temperature can affect baking time and muffin texture.
  • Experiment with Cheese: Different types of cheese can yield unique flavors. Try feta for a Mediterranean twist or blue cheese for a bolder taste.
  • Let Them Cool Properly: Allowing the muffins to cool in the tin for a few minutes prevents them from becoming soggy.
  • Store Correctly: To keep muffins fresh, store them in an airtight container at room temperature for up to 3 days.
  • Freeze for Later: These muffins freeze well! Wrap them individually and store them in a freezer bag for up to three months.
  • Enhance with Toppings: Consider adding a sprinkle of cheese on top before baking for an extra cheesy crust.

Common Mistakes and Troubleshooting

Even seasoned bakers can make mistakes! Here are some common pitfalls and how to avoid them:

  • Dense Muffins: This can happen if the batter is overmixed or if too much baking powder is used. Stick to the measurements for best results.
  • Burnt Tops: If your muffins are browning too quickly, try covering them loosely with aluminum foil during the last few minutes of baking.
  • Undercooked Centers: If the outside is golden but the inside is still wet, reduce the oven temperature slightly and extend the baking time.
  • Flavorless Muffins: Ensure you’re using enough seasoning and fresh herbs to bring out the flavors!

Variations on Cheese and Herb Muffins

Feeling adventurous? Here are four delicious variations to try:

  • Sun-Dried Tomato and Feta: Add chopped sun-dried tomatoes and crumbled feta cheese for a Mediterranean flavor.
  • Spinach and Ricotta: Incorporate fresh spinach and ricotta cheese for a hearty, nutritious twist.
  • Garlic and Herb: Mix in roasted garlic and a blend of your favorite herbs for a fragrant, savory muffin.
  • Spicy Jalapeño and Cheese: Add diced jalapeños and pepper jack cheese for a spicy kick!

Storing and Make-Ahead Instructions

Want to prepare these muffins ahead of time? Here’s how:

  • Make-Ahead: Prepare the batter in advance and store it in the refrigerator for up to 24 hours. Bake when you’re ready!
  • Freezing: Place cooled muffins in a freezer bag and store in the freezer. Defrost overnight in the refrigerator when ready to enjoy.
  • Reheating: Warm muffins in the microwave for about 15-20 seconds or in the oven at 350°F (175°C) for 5-10 minutes.

Frequently Asked Questions

Here are some common questions about Cheese and Herb Muffins:

  • Can I use whole wheat flour? Yes, you can substitute half or all of the all-purpose flour with whole wheat flour for a healthier option.
  • What if I don’t have fresh herbs? Dried herbs can be used, but you’ll need less as they are more concentrated. About 1 tsp of dried herbs should suffice.
  • Can I make these muffins vegan? Absolutely! Use plant-based milk, a flax egg (1 tbsp flaxseed meal + 2.5 tbsp water), and coconut oil instead of butter.
  • How can I make these muffins spicier? Add crushed red pepper flakes or diced jalapeños to the batter for an extra kick.
  • What types of cheese work best? Cheddar and Parmesan are fantastic, but feel free to experiment with your favorites like gouda or feta!
  • Can I add vegetables? Yes! Grated zucchini or shredded carrots can add moisture and nutrition.
  • How do I know when my muffins are done? Insert a toothpick into the center; if it comes out clean, they are done!
  • Can I double the recipe? Yes, simply double all the ingredients and make sure to use a larger muffin tin or bake in batches.

Nutrition Tips and Dietary Adaptations

Making your muffins healthier is easy! Consider these tips:

  • Lower Fat Option: Substitute half of the butter with unsweetened applesauce or Greek yogurt.
  • Increase Fiber: Add a tablespoon of chia seeds or flaxseeds for added nutrition.
  • Control Sodium: Use low-sodium baking powder and cheese to reduce salt intake.

Essential Equipment Recommendations

To achieve muffin perfection, here’s what you’ll need:

  • Muffin Tin: A standard 12-cup muffin tin is ideal for this recipe.
  • Mixing Bowls: Use both a large bowl for dry ingredients and a medium bowl for wet ingredients.
  • Whisk: A good whisk is essential for mixing your ingredients thoroughly.
  • Measuring Cups and Spoons: Accurate measurements ensure the best results.
  • Spatula: Use a rubber spatula for folding the batter without overmixing.

Serving Suggestions

Serve your Cheese and Herb Muffins with:

  • Butter and Jam: Spread with butter and your favorite jam for a sweet contrast.
  • Soup or Salad: Pair with a hearty soup or fresh salad for a complete meal.
  • Cheese Platter: Serve alongside a cheese platter for a delicious brunch option.

In conclusion, these Cheese and Herb Muffins are not only a joy to make but also a delight to eat. With their perfect balance of flavors and textures, they are bound to become a favorite in your household. Remember, the kitchen is a place for creativity and experimentation, so feel free to adapt this recipe to suit your tastes. Happy baking!

Cheese and Herb Muffins

Prep Time 10 minutes
Cook Time 20 minutes
Total Time 30 minutes
Servings 12 muffins
Calories 180
Delight in these savory muffins packed with cheese and fresh herbs, perfect for breakfast or snacks.

Ingredients

Dry ingredients

  • 2 cups all-purpose flour
  • 1 tbsp baking powder
  • 1/2 tsp salt
  • 1/4 tsp black pepper

Cheese and herbs

  • 1/2 cup Cheddar Cheese (grated)
  • 1/4 cup parmesan cheese (grated)
  • 1 tbsp fresh herbs (thyme, or chives), such as parsley

Wet ingredients

  • 1 cup milk
  • 1/4 cup butter (melted)
  • 1 large egg

Instructions 

  • Preheat oven to 375°F (190°C).
  • Mix dry ingredients and cheeses with herbs.
  • Whisk wet ingredients together.
  • Combine wet and dry, stir until just mixed.
  • Spoon batter into greased muffin tin, bake 18-20 mins.
  • Cool briefly before serving.

Notes

Use fresh herbs for best flavor.
Calories: 180kcal
Cost: $8
Course: Breakfast
Cuisine: American
Keyword: Cheese, herbs

Indulge in the vibrant flavors of our Green Goddess Whipped Feta Dip, a perfect blend of fresh herbs and creamy feta. This easy-to-make dip will impress your guests and elevate any gathering! With its lush texture and bright, herbaceous notes, this dip is a culinary delight that you can serve with everything from fresh vegetables to crusty bread. Whether you’re hosting a dinner party or just enjoying a cozy night in, this recipe is sure to become a favorite in your home.

Why You’ll Love This Recipe

  • Easy to Make: With just a few simple steps, you can whip up this delicious dip in no time, making it a perfect choice for busy hosts.
  • Versatile Serving Options: This dip pairs beautifully with a variety of dippers, including veggies, pita chips, and crackers, making it a crowd-pleaser.
  • Fresh and Flavorful: Packed with fresh herbs, this dip brings a burst of flavor that is both refreshing and satisfying.
  • Healthier Alternative: Made with wholesome ingredients, this whipped feta dip is a healthier option compared to traditional creamy dips.
  • Make-Ahead Friendly: You can prepare this dip in advance, allowing the flavors to meld together, making it even tastier!

Ingredient Breakdown

Let’s dive into the ingredients that make this Green Goddess Whipped Feta Dip a standout:

  • Feta Cheese (8 ounces): The star of the show! Use good quality block feta packed in brine for the best flavor and creamy texture. Drain the brine before using.
  • Olive Oil (1/4 cup): Extra virgin olive oil is recommended for its rich flavor. It contributes to the creamy texture and adds a fruity note to the dip.
  • Fresh Parsley (1 cup, packed): Flat-leaf parsley is preferred for its robust flavor, but curly parsley can be used in a pinch. Parsley provides a fresh, herbaceous base for the “Green Goddess” element.
  • Fresh Basil (1/2 cup, packed): Basil adds a sweet, slightly peppery, and aromatic dimension to the dip, beautifully complementing the other herbs.
  • Fresh Mint (1/4 cup, packed): Mint introduces a refreshing coolness and balances the saltiness of the feta, enhancing the overall flavor profile.
  • Green Onions (2-3, white and light green parts): Offering a mild onion flavor, green onions contribute to the dip’s freshness without being overpowering.
  • Garlic Cloves (2 cloves): Garlic provides essential aromatic depth. Adjust the amount to your preference for a stronger or milder flavor.
  • Lemon Juice (2 tablespoons, fresh): Fresh lemon juice is vital for its bright acidity, cutting through the richness of the feta and enhancing the flavors of the herbs.
  • Lemon Zest (1 teaspoon): Adds an aromatic citrus note that elevates the dip’s flavor profile. Use a microplane to avoid the bitter pith.
  • Salt & Black Pepper (to taste): Start with a small amount of salt, adjusting to taste, as feta is already salty. Freshly ground black pepper adds warmth and spice.

Pro Tips for Perfecting Your Dip

  • Use Room Temperature Ingredients: Allow your feta and other ingredients to come to room temperature for easier blending and a smoother dip.
  • Adjust the Consistency: If the dip is too thick, add a drizzle of olive oil or a splash of water to achieve your desired texture.
  • Chill Before Serving: For optimal flavor, chill the dip for at least 30 minutes before serving, allowing the flavors to meld beautifully.
  • Experiment with Herbs: Feel free to swap in your favorite herbs or whatever you have on hand; dill or cilantro can add interesting twists!
  • Make it Dairy-Free: Swap feta with a dairy-free cheese alternative and use vegan yogurt for a dairy-free version.
  • Boost the Flavor: Add a pinch of red pepper flakes for a hint of heat or a dash of smoked paprika for a smoky depth.
  • Presentation Matters: Drizzle extra olive oil on top before serving and garnish with freshly chopped herbs for a beautiful presentation.
  • Perfect for Meal Prep: This dip keeps well in the fridge, making it a great option for meal prep or last-minute gatherings.

Common Mistakes and Troubleshooting

Detail of whipped feta dip showcasing its creamy consistency, surrounded by fresh ingredients.

Here are some common pitfalls to avoid when making your Green Goddess Whipped Feta Dip:

  • Too Watery: If your dip turns out watery, ensure you drain the feta well and possibly add less olive oil.
  • Over-Processing: Blend just until creamy; over-blending can make the dip too thin or lose the fresh herb texture.
  • Unbalanced Flavors: Taste as you go! Adjust the seasoning with salt, lemon juice, or herbs to keep the flavors balanced.
  • Using Dried Herbs: Fresh herbs offer the best flavor; if you only have dried, use about 1/3 of the amount.

Variations to Try

Here are some delightful variations to customize your Green Goddess Whipped Feta Dip:

  • Spicy Green Goddess: Add chopped jalapeños or a dash of hot sauce for a spicy kick.
  • Sun-Dried Tomato Twist: Incorporate chopped sun-dried tomatoes for a sweet and tangy flavor contrast.
  • Roasted Garlic Version: Roast garlic cloves before blending for a sweeter, mellower garlic flavor.
  • Avocado Addition: Blend in half a ripe avocado for an extra creamy texture and a slightly different flavor profile.

Storage and Make-Ahead Instructions

This dip is perfect for preparing in advance:

  • Refrigeration: Store in an airtight container in the refrigerator for up to 5 days. The flavors will continue to develop!
  • Freezing: While fresh dips are best, you can freeze this dip for up to 2 months. Thaw in the refrigerator before serving.
  • Make-Ahead: Prepare the dip up to 2 days in advance for the best flavor; just give it a good stir before serving.

Comprehensive FAQ

  • Can I use pre-crumbled feta?: Yes, pre-crumbled feta is convenient, but ensure it’s high quality for the best flavor.
  • How can I make this dip vegan?: Substitute feta with a plant-based cheese and use vegan yogurt instead of sour cream.
  • What herbs can I swap in this recipe?: You can substitute with dill or cilantro for a different flavor profile.
  • Can I make this in advance?: Absolutely! Chilling for a few hours enhances the flavors.
  • Is this dip gluten-free?: Yes, all ingredients are gluten-free; just ensure your dippers are as well.
  • How do I serve this dip?: It’s delicious with fresh veggies, pita, chips, or as a spread for sandwiches.
  • Can I adjust the garlic flavor?: Yes, simply add more or less garlic according to your preference.
  • What’s the best way to store leftovers?: Keep the dip in an airtight container in the fridge for up to 5 days.

Nutrition Tips and Dietary Adaptations

This Green Goddess Whipped Feta Dip is not only delicious but can also fit into various dietary lifestyles:

  • Low-Carb Option: Pair it with fresh veggies like celery, cucumbers, or bell peppers for a satisfying low-carb snack.
  • Protein Boost: Add a scoop of Greek yogurt or cottage cheese to increase the protein content for a healthier snack.
  • Low-Fat Version: Substitute some of the feta with Greek yogurt to reduce fat without sacrificing flavor.
  • High-Fiber Boost: Serve with whole grain crackers or a variety of colorful veggies to add fiber to your snack.

Equipment Recommendations

For this recipe, the right tools can make all the difference:

  • Food Processor: Essential for achieving that creamy texture; a high-powered model will yield the best results.
  • Microplane Zester: Great for zesting lemons without the pith, enhancing the dip’s flavor.
  • Measuring Cups and Spoons: Accurate measurements ensure the perfect balance of flavors.
  • Serving Bowl: A beautiful bowl can elevate your presentation, making the dip more inviting.

Serving Suggestions

Now that your dip is ready, here’s how to serve it:

  • With Fresh Vegetables: Carrot sticks, cucumber slices, and bell pepper strips are fantastic dippers.
  • On a Cheese Board: Add it to a charcuterie board alongside cheeses, olives, and nuts for a stunning appetizer.
  • As a Sandwich Spread: Use this dip in place of mayonnaise for a flavorful twist on your sandwiches or wraps.
  • With Grilled Meats: This whipped feta dip pairs beautifully with grilled chicken or fish for a refreshing complement.

In conclusion, this Green Goddess Whipped Feta Dip is not just a recipe; it’s a celebration of flavor and freshness that can elevate any gathering. Whether it’s a festive party or a cozy evening, serving this dip will surely impress your guests and bring smiles around the table. Enjoy making it, and may it become a staple in your culinary repertoire!

Green Goddess Whipped Feta Dip

Prep Time 10 minutes
Total Time 10 minutes
Servings 4 servings
Calories 180
A vibrant, herbaceous dip combining creamy feta with fresh herbs and citrus for a bright, flavorful appetizer or spread.

Ingredients

Dairy

  • 8 ounces Feta Cheese (Use good quality feta packed in brine, drained and crumbled)
  • 0.25 cup Olive Oil (Extra virgin recommended)

Herbs and Aromatics

  • 1 cup Fresh Parsley (Packed)
  • 0.5 cup Fresh Basil (Packed)
  • 0.25 cup Fresh Mint (Packed)
  • 2-3 pieces Green Onions (White and light green parts)
  • 2 cloves Garlic Cloves (Adjust to taste)
  • 2 tablespoons Lemon Juice (Freshly squeezed)
  • 1 teaspoon Lemon Zest (Use a microplane or fine grater)

Seasoning

  • to taste Salt (Start small, adjust after blending)
  • to taste Black Pepper (Freshly ground)

Instructions 

  • Drain and crumble the feta cheese.
  • In a food processor, blend feta and olive oil until smooth and creamy.
  • Add herbs, green onions, and garlic; pulse briefly to combine.
  • Mix in lemon juice and zest, then season with salt and pepper to taste. Blend until well combined.
  • Transfer to a bowl, chill for at least 30 minutes, then serve with dippers.

Notes

For a thinner dip, add a drizzle of olive oil or water before serving.
Calories: 180kcal
Cost: $15
Course: Appetizer
Cuisine: American
Keyword: Dip, Feta, herbs

Welcome to Your New Favorite Pancake Recipe!

There’s something truly delightful about starting your day with a stack of fluffy pancakes, and when they’re healthy, vegan, and gluten-free, it feels even better! In this article, we’re diving into the world of vegan banana pancakes that are not just easy to make, but also incredibly delicious. This comprehensive guide will provide you with all the information you need to create the perfect pancake breakfast that everyone will love, plus tips, variations, and more!

Why You’ll Love This Recipe

  • Quick and Easy: With just a few simple ingredients and a blender, you can whip up these pancakes in no time—perfect for busy mornings!
  • Healthy Ingredients: Made without flour, these pancakes are packed with nutrients, making them a guilt-free treat.
  • Customizable: This recipe is versatile; you can easily swap in your favorite add-ins or toppings to suit your taste preferences.
  • Vegan and Gluten-Free: Ideal for those with dietary restrictions, these pancakes can be enjoyed by everyone!
  • Deliciously Satisfying: They are fluffy, flavorful, and will keep you full, thanks to the wholesome ingredients.

Ingredient Breakdown

Understanding the ingredients is key to perfect pancakes. Here’s what you’ll need for our Easy No-Flour Vegan Banana Pancakes:

  • 1/2 cup unsweetened almond milk: This dairy-free milk provides creaminess without added sugars.
  • 2 eggs: Eggs help bind the ingredients together; for a vegan substitute, you can use flax eggs (1 tbsp ground flaxseed mixed with 3 tbsp water).
  • 1 1/2 cups gluten-free oatmeal: The star ingredient, oatmeal, is a great source of fiber and gives the pancakes their structure.
  • 1 1/2 large ripe bananas: Very ripe bananas add natural sweetness and moisture to the batter.
  • 1 tsp vanilla extract: This enhances the flavor, making the pancakes taste delightful!
  • 1 tsp vanilla creme stevia extract: To keep these pancakes sugar-free while adding a hint of sweetness.
  • 2 tsp baking powder: This is essential for fluffiness; it helps the pancakes rise.
  • 1/2 tsp salt: A pinch of salt enhances the overall flavor of the pancakes.

How to Make Vegan Banana Pancakes

Freshly made banana pancakes showing their moist surface in a close-up.

Now that you have all your ingredients ready, let’s get cooking! Follow these simple steps to create your delicious pancakes:

  1. Add all the ingredients to a blender and blend on high power until smooth, which should take about 45 seconds to 1 minute.
  2. Grease a skillet generously and warm it over medium heat. Once hot, add about 1/3 cup of batter for each pancake.
  3. Cook for about 2 minutes or until you see little bubbles forming and the pancake appears slightly firmer. Flip and cook for an additional 1-2 minutes on the other side.
  4. Serve hot with your favorite toppings, such as fresh blueberries and sugar-free chocolate chunks.

Pro Tips for Perfect Pancakes

  • Use very ripe bananas: The riper the banana, the sweeter and more flavorful your pancakes will be.
  • Don’t overblend: Blending too long can make the batter too thin. Aim for a smooth but thick consistency.
  • Monitor the heat: If the skillet is too hot, the pancakes may burn before cooking through. Medium heat is ideal.
  • Test the first pancake: The first pancake is often a test for heat and batter consistency; adjust accordingly for the next ones.
  • Keep them warm: If making a large batch, keep pancakes warm in a low oven until ready to serve.
  • Add spices: For extra flavor, consider adding cinnamon or nutmeg to the batter.
  • Experiment with flours: If you’re not strictly gluten-free, you can experiment with whole wheat or spelt flour for added nutrients.
  • Use a non-stick pan: Ensuring your skillet is well-greased or using a non-stick surface will prevent pancakes from sticking.

Common Mistakes and Troubleshooting

Even the best chefs encounter hurdles. Here are some common mistakes and how to avoid them:

  • Too thick batter: If your batter is too thick, add a bit more almond milk until you reach the desired consistency.
  • Pancakes are too dense: Ensure you’re using enough baking powder; it’s crucial for creating fluffy pancakes.
  • Flipping too soon: Wait for bubbles to form on the surface before flipping; this indicates they’re ready to turn.
  • Pancakes sticking to the pan: Use enough oil and ensure the skillet is adequately preheated.

Variations to Try

Feeling adventurous? Here are some fun variations you can try with this recipe:

  • Chocolate Chip Banana Pancakes: Fold in some dairy-free chocolate chips for a sweet twist.
  • Nutty Banana Pancakes: Add chopped walnuts or pecans to the batter for a satisfying crunch.
  • Berry Bliss Pancakes: Mix in fresh berries like blueberries or raspberries for a burst of freshness.
  • Spiced Banana Pancakes: Incorporate pumpkin spice or cinnamon for a seasonal flavor enhancement.

Storage and Make-Ahead Instructions

These pancakes can be made ahead of time and stored for later use:

  • Refrigerator: Store leftovers in an airtight container for up to 3 days.
  • Freezer: For longer storage, place pancakes in a single layer on a baking sheet to freeze, then transfer to a freezer-safe bag for up to 2 months.
  • Reheating: Reheat pancakes in the microwave or on a skillet until heated through.

Frequently Asked Questions

  • Can I make these pancakes without eggs? Yes! Use flax eggs as a substitute.
  • What can I use instead of almond milk? Any plant-based milk works well, such as oat or soy milk.
  • Can I make these pancakes ahead of time? Absolutely! They store well in the refrigerator or freezer.
  • How can I make these pancakes sweeter? Add more ripe bananas or a bit of maple syrup to the batter.
  • Can I use regular oatmeal instead of gluten-free? Yes, if gluten is not a concern for you.
  • What toppings do you recommend? Fresh fruit, nut butter, or sugar-free chocolate chunks are excellent choices!
  • How thick should the batter be? The batter should be thick but pourable; adjust with almond milk as needed.
  • What’s the best way to keep pancakes warm? Place them in a low oven (around 200°F) while you finish cooking the rest.

Nutrition Tips and Dietary Adaptations

This recipe not only tastes great but can also be tailored to meet various dietary needs:

  • Protein Boost: For added protein, consider adding a scoop of vegan protein powder to the batter.
  • Low-Carb Option: Substitute the oatmeal with almond flour for a low-carb version.
  • Fiber-Rich: Add chia seeds or ground flaxseed to boost fiber content.
  • Nut-Free: Use sunflower seed butter as a topping instead of nut butters for a nut-free option.

Equipment Recommendations

Having the right tools can make cooking easier and more enjoyable. For this pancake recipe, consider the following:

  • High-Powered Blender: A good blender ensures a smooth batter and can handle the oatmeal effectively.
  • Non-Stick Skillet: A quality non-stick pan is key to avoiding pancake stickage.
  • Spatula: A wide spatula helps flip the pancakes without breaking them.
  • Measuring Cups and Spoons: Accurate measurements are crucial for the perfect pancake texture.

Serving Suggestions

Enhance your pancake experience with these serving ideas:

  • Fresh Fruits: Serve with sliced bananas, strawberries, or a berry compote.
  • Nut Butters: Spread almond or peanut butter for added creaminess and flavor.
  • Maple Syrup: If you’re not strictly sugar-free, drizzle some pure maple syrup on top.
  • Coconut Whipped Cream: For a decadent touch, top with coconut whipped cream for a creamy finish.

Wrapping Up

There you have it—a comprehensive guide to making the best vegan banana pancakes that are not only easy and delicious but also healthy! Whether you’re whipping them up for a family brunch or a quick weekday breakfast, these pancakes are sure to impress. Remember, cooking is all about experimenting and finding what works for you, so don’t hesitate to make this recipe your own. Enjoy your cooking journey, and happy flipping!

Easy No-Flour Vegan Banana Pancakes (Sugar-Free, Gluten-Free)

Prep Time 5 minutes
Cook Time 10 minutes
Total Time 15 minutes
Servings 4 pancakes
Calories 250
Delicious, healthy pancakes made with oats and bananas, perfect for a quick vegan breakfast without flour or added sugar.

Ingredients

Wet ingredients

  • 0.5 cup unsweetened almond milk
  • 2 eggs eggs

Dry ingredients

  • 1.5 cups gluten-free oatmeal
  • 1.5 large bananas very ripe bananas (mashed)
  • 1 tsp vanilla extract
  • 1 tsp vanilla creme stevia extract
  • 2 tsp baking powder
  • 0.5 tsp salt

Instructions 

  • Add all ingredients to a blender and blend until smooth.
  • Heat a well-greased skillet over medium heat.
  • Pour about 1/3 cup batter onto the skillet and cook for 2 minutes or until bubbles form. Flip and cook for another 1-2 minutes.
  • Repeat with remaining batter.
  • Serve hot with toppings like blueberries or sugar-free chocolate chunks, if desired.

Notes

For extra flavor, add a dash of cinnamon or nutmeg to the batter.
Calories: 250kcal
Cost: $10
Course: Breakfast
Cuisine: vegan
Keyword: Banana, gluten free, vegan