Author

Mike

Browsing

Indulge in the Ultimate No Bake Chocolate Cheesecake

Welcome to the world of decadent desserts! Today, we’re diving into a recipe that will not only satisfy your sweet tooth but also impress your guests: the Decadent No Bake Chocolate Cheesecake. This luscious dessert combines rich dark chocolate with the creamy goodness of cream cheese, all nestled in a delightful Oreo crust. Perfect for any occasion, this no bake chocolate cheesecake is easy to follow, guaranteed to impress, and perfect for those who want the joy of a homemade dessert without the oven. Let’s get started!

Why You’ll Love This Recipe

  • Effortlessly Simple: This no bake recipe means no complicated baking techniques—just mix, chill, and serve!
  • Rich & Creamy Texture: Each slice delivers a perfect balance of smooth creaminess and rich chocolate flavor that melts in your mouth.
  • Customizable Ingredients: You can easily swap ingredients to cater to dietary preferences or to include your favorite flavors.
  • Make Ahead Convenience: Prepare this cheesecake the day before your event and free up your time for other tasks.
  • Impressive Presentation: With its glossy ganache and fluffy whipped cream topping, this dessert looks as good as it tastes!

Ingredients Breakdown

Before diving into the steps, let’s take a closer look at the ingredients needed for this no bake chocolate cheesecake. Understanding the role each component plays will help you master the art of this recipe.

  • 25 Oreos or chocolate creme cookies (~285g): These create the perfect crumbly base for your cheesecake. Feel free to use any chocolate cookie you prefer!
  • 5 tbsp unsalted butter, melted (~70g): This helps bind the cookie crumbs together and adds richness.
  • 250g dark chocolate: Use high-quality chocolate for the best flavor. You can substitute with semi-sweet or milk chocolate based on your taste.
  • 1 1/2 cup heavy cream, chilled (divided into 3/4 cup and 3/4 cup): This is crucial for achieving a fluffy texture in your cheesecake filling.
  • 24 oz cream cheese, room temperature (3 8oz packs or 680g): Provides the creamy base for your cheesecake.
  • 1 cup granulated sugar (200g): Sweetens the cheesecake without overpowering the chocolate flavor.
  • 1/2 tsp salt: Enhances the flavors and balances sweetness.
  • Optional: 1 tsp instant coffee: This can deepen the chocolate flavor.
  • ½ cup heavy cream (120g): For the optional ganache topping.
  • 100g chocolate (for ganache): Use the same type of chocolate as before for consistency.
  • 1/4 cup granulated sugar (50g): Used in the whipped cream topping.
  • 3 tbsp cocoa powder, sifted (25g): Adds an extra chocolatey kick to your whipped cream.

Step-by-Step Instructions

Juicy no-bake chocolate cheesecake with an Oreo crust, presented on a plate with a fork beside it.

Ready to create your masterpiece? Follow these simple steps to whip up your no bake chocolate cheesecake.

  1. Prepare a 9″ springform pan by lightly brushing butter on the bottom and edges. You can also place parchment paper on the bottom for easier removal.
  2. Grind the Oreos (or chocolate cookies) with melted butter in a food processor until they form a fine crumb. Transfer to the pan and press down tightly using the back of a spoon or measuring cup to form the crust. Place in the fridge while you work on the cheesecake filling.
  3. For the cheesecake filling, add the 250g dark chocolate and 3/4 cup heavy cream in a heat-safe glass bowl. If using instant coffee, add that in too. Place a small saucepan with 1″ water on the stove over low heat and bring to a boil. Place the glass bowl on top of the saucepan (it should not touch the water) and stir for a few minutes until the chocolate has just melted. Remove from heat immediately and mix gently to form a shiny ganache. Set it aside to cool down for 5 minutes.
  4. In a separate bowl, whisk the room temperature cream cheese, sugar, and salt for 2-3 minutes on medium speed until creamy. Scrape the bowl once in the middle to ensure everything is well combined.
  5. Pour the ganache into the cream cheese mixture and whisk again on medium-low speed until just combined (~1 minute). Scrape the bowl again.
  6. In another bowl, whisk the remaining 3/4 cup heavy cream (chilled) until it forms stiff peaks. Be careful not to overmix.
  7. Gently fold the whipped cream into the cheesecake filling using a rubber spatula until combined. You should have a smooth and fluffy cheesecake filling.
  8. Transfer the filling to the springform pan on top of the crust and spread it out evenly.
  9. Refrigerate overnight or at least 6 hours to set.
  10. Once the cheesecake is set, carefully remove it from the pan and transfer it to your serving board.
  11. Prepare the optional toppings. For the ganache, melt together the cream and chocolate over a double boiler. For the chocolate whipped cream, whisk together the heavy cream, sugar, and cocoa powder until stiff peaks form.
  12. Let the ganache cool slightly (it should be warm and runny but not hot) and pour it over the cold cheesecake, spreading it out gently. Refrigerate for 10 minutes and top off with the chocolate whipped cream.
  13. Serve and enjoy your incredible no bake chocolate cheesecake!

Pro Tips for Perfection

  • Room Temperature Ingredients: Make sure your cream cheese is at room temperature to avoid lumps in your filling.
  • Chill the Cream: Always use chilled heavy cream for whipping; this helps achieve stiff peaks more easily.
  • Quality Chocolate Matters: Use high-quality chocolate for both the filling and ganache for a richer flavor.
  • Don’t Rush the Chilling: For the best texture, allow the cheesecake to set overnight in the fridge.
  • Experiment with Flavors: Feel free to add flavors like orange zest or almond extract to the filling for a twist.
  • Check for Doneness: The cheesecake should be firm but slightly jiggly in the center when you take it out of the fridge.
  • Use the Right Pan: A springform pan is ideal for this recipe as it allows for easy removal.
  • Top It Off: Don’t skip the ganache or whipped cream topping; they elevate the dessert significantly.

Common Mistakes and Troubleshooting

  • Too Soft Filling: If your filling is too soft, it may not have chilled long enough. Ensure you let it set for the recommended time.
  • Grainy Texture: This can happen if the cream cheese isn’t softened properly. Make sure it’s at room temperature before mixing.
  • Crumbling Crust: A dry crust can lead to crumbling. Ensure you mix the cookie crumbs with enough melted butter to bind.
  • Over Whipped Cream: Whipping the cream too long can turn it into butter. Stop once you reach stiff peaks.
  • Not Enough Chocolate Flavor: If the chocolate flavor is too subtle, consider adding a bit more chocolate or using a darker chocolate.

Delicious Variations

  • Nutty Crunch: Add crushed nuts to the crust for an added texture and flavor.
  • Fruit Fusion: Top the cheesecake with fresh berries or a berry compote for a refreshing contrast.
  • Mint Chocolate: Add a few drops of peppermint extract to the filling for a minty twist.
  • Caramel Drizzle: Drizzle caramel sauce over the ganache for an extra layer of sweetness.

Storage and Make-Ahead Instructions

This no bake chocolate cheesecake is perfect for making ahead of time. You can store it in the refrigerator for up to 5 days. Just be sure to cover it well to prevent it from absorbing other flavors in the fridge. If you want to make it even further in advance, you can freeze it for up to 2 months. Just remember to thaw it in the fridge overnight before serving.

FAQs About No Bake Chocolate Cheesecake

  • Can I use a different type of cookie for the crust? Yes! Feel free to experiment with different cookie types like graham crackers or digestive biscuits.
  • How can I prevent the cheesecake from cracking? Ensuring even chilling and not overmixing the filling can help prevent cracks.
  • Can I use low-fat cream cheese? While it can be used, the texture may not be as rich and creamy as full-fat options.
  • What if I don’t have a springform pan? You can use a regular pie dish, but removing slices may be more challenging.
  • Is it necessary to use heavy cream? Yes, heavy cream is crucial for achieving the right texture in the filling.
  • Can I add other flavors to the cheesecake? Absolutely! You can add spices like cinnamon or flavor extracts for variety.
  • How long does it take for the cheesecake to set? Ideally, it should set for at least 6 hours, but overnight is best.
  • Can I make this cheesecake gluten-free? Yes! Just use gluten-free cookies for the crust.

Nutrition Tips and Dietary Adaptations

If you’re looking to make this cheesecake a bit healthier, consider using reduced-fat cream cheese or substituting some of the sugar with a natural sweetener. Additionally, you can add protein powder to the filling for an extra boost.

Essential Equipment Recommendations

  • 9-inch Springform Pan: Ideal for creating a smooth and even cheesecake.
  • Food Processor: Perfect for grinding cookies into fine crumbs.
  • Mixing Bowls: Use large bowls for mixing ingredients without spills.
  • Hand Mixer or Stand Mixer: Essential for achieving the right texture in your cream cheese and whipped cream.
  • Rubber Spatula: For gently folding in ingredients without deflating the whipped cream.

Serving Suggestions

Serve your no bake chocolate cheesecake chilled, garnished with additional whipped cream, chocolate shavings, or fresh berries for a pop of color. It pairs wonderfully with a cup of coffee or a glass of dessert wine. Enjoy every delightful bite!

Conclusion

There you have it! A comprehensive guide to creating the best no bake chocolate cheesecake that’s not only easy to make but also a feast for the eyes and taste buds. Remember, cooking is all about enjoyment and sharing moments with loved ones. So gather your ingredients, unleash your inner chef, and enjoy the sweet symphony of flavors that this cheesecake brings to your table. Happy baking!

BEST NO BAKE CHOCOLATE CHEESECAKE RECIPE

Prep Time 30 minutes
Total Time 30 minutes
Servings 12 pieces
Calories 550
A rich and creamy no-bake chocolate cheesecake that combines a chocolate cookie crust with a luscious chocolate filling, topped with ganache and whipped cream.

Ingredients

Crust

  • 285 g Oreos or chocolate creme cookies (crushed for crust)
  • 70 g unsalted butter (melted)

Filling

  • 250 g dark chocolate
  • 360 g heavy cream (divided into 3/4 cup portions)
  • 680 g cream cheese (room temperature)
  • 200 g granulated sugar
  • 0.5 tsp salt
  • 1 tsp instant coffee (optional)
  • 120 g heavy cream (for ganache)
  • 100 g chocolate (dark, semi-sweet, or milk)
  • 240 g heavy cream (chilled for whipping)
  • 50 g granulated sugar (for whipped cream)
  • 25 g cocoa powder (sifted)

Instructions 

  • Prepare a 9" springform pan by greasing the bottom and sides or lining with parchment.
  • Mix crushed cookies with melted butter, press into the pan to form the crust, and chill.
  • Heat chocolate with 3/4 cup heavy cream (and optional coffee) over a double boiler until melted and shiny. Cool for 5 minutes.
  • Beat cream cheese, sugar, and salt until smooth. Fold in cooled ganache. Whip remaining heavy cream until stiff peaks, then fold into the mixture.
  • Pour filling over crust, smooth the top, and refrigerate overnight or at least 6 hours.
  • Optional: Make ganache with cream and chocolate, cool slightly, then pour over chilled cheesecake. Top with whipped cream and refrigerate for 10 minutes before serving.
Notes

Ensure the cheesecake is fully chilled before adding ganache for best results.
Calories: 550kcal
Cost: $15
Course: Dessert
Cuisine: American
Keyword: cheesecake, chocolate, no bake

Indulge in Sweet Moments: Your Guide to Chocolate Covered Strawberry Heart Pops

Chocolate Covered Strawberry Heart Pops are a delightful treat that perfectly blend sweetness and elegance. Whether you’re celebrating a special occasion or simply looking to impress loved ones, these pops are sure to bring a smile to anyone’s face. In this comprehensive guide, we will take you through every step of the process, ensuring your pops are not only beautiful but also delicious. By the end, you’ll have the confidence to create these simple yet stunning desserts that will leave everyone wanting more.

Why You’ll Love This Recipe

These Chocolate Covered Strawberry Heart Pops are more than just a sweet treat; they come with a myriad of benefits that make them a favorite among dessert enthusiasts:

  • Easy to Make: With minimal ingredients and straightforward steps, these pops are perfect for both novice and experienced bakers.
  • Perfect for Any Occasion: Whether it’s Valentine’s Day, birthdays, or a simple family gathering, these pops fit right in.
  • Customizable: You can easily adapt the chocolate coating and toppings to suit your taste or dietary needs.
  • Visually Stunning: The heart shape and vibrant red strawberries create a beautiful presentation that is sure to impress.
  • Healthier Option: Made with fresh strawberries, you get the benefits of fruit along with your dessert!

Ingredients You’ll Need

Before you start, make sure you have all the ingredients on hand. Here’s what you’ll need:

  • Fresh strawberries: 24 pieces, hulled. Opt for firm, ripe strawberries for the best flavor.
  • Semisweet chocolate chips: 8 oz. For a richer taste, consider using dark chocolate.
  • Lollipop sticks: 12 pieces. These will hold your strawberries while you dip them.
  • Coconut oil: 1 tbsp. This adds smoothness to the melted chocolate and helps it adhere better to the strawberries.

How to Make Chocolate Covered Strawberry Heart Pops

Follow these simple steps to create your own Chocolate Covered Strawberry Heart Pops:

  1. Wash and hull the strawberries, then pat them dry completely to ensure the chocolate adheres well.
  2. Insert lollipop sticks into the stems of the strawberries, ensuring they are sturdy.
  3. In a microwave-safe bowl, melt the chocolate chips with coconut oil in 30-second intervals, stirring until smooth.
  4. Dip each strawberry into the melted chocolate, ensuring it is fully coated.
  5. Place the dipped strawberries on parchment paper and refrigerate until the chocolate sets, about 30 minutes.
  6. Serve chilled or store in the fridge until you’re ready to enjoy!

Pro Tips for Perfect Pops

To ensure your Chocolate Covered Strawberry Heart Pops turn out perfectly every time, consider these expert tips:

  • Dry Thoroughly: Make sure your strawberries are completely dry before dipping. This is crucial for the chocolate to stick properly.
  • Quality Chocolate: Use high-quality chocolate for a better flavor. Brands like Ghirardelli or Callebaut are excellent choices.
  • Chill Before Dipping: Refrigerate your strawberries for about 30 minutes before dipping to help the chocolate set faster.
  • Make It Fun: Get creative with toppings! Consider sprinkles, crushed nuts, or shredded coconut for added texture.
  • Temperature Control: If your chocolate is too thick, add a little more coconut oil to thin it out.
  • Keep an Eye on Time: Don’t leave the pops in the fridge for too long—up to 2 hours is ideal; otherwise, the strawberries may lose their freshness.
  • Use a Double Boiler: If you prefer, melt the chocolate using a double boiler for more control over the temperature.
  • Practice Makes Perfect: Don’t worry if your first few pops aren’t perfect. With practice, you’ll master the technique!

Common Mistakes and Troubleshooting

Even the best chefs can run into hiccups during the cooking process. Here are some common mistakes and how to remedy them:

  • Chocolate Not Sticking: Ensure strawberries are dry, and consider using a thicker chocolate coating.
  • Chocolate Is Grainy: This can happen if chocolate is overheated. If you notice this, try adding a teaspoon of coconut oil and stirring until smooth.
  • Strawberries Falling Off Sticks: Make sure the stick is inserted deep enough into the strawberry and that the chocolate sets properly.
  • Chocolate Cracking: If the chocolate is too thick, it can crack as it sets. Adjust the consistency with coconut oil.

Delicious Variations

Feel free to get creative with your Chocolate Covered Strawberry Heart Pops! Here are some fun variations to try:

  • White Chocolate Pops: Swap semisweet chocolate for white chocolate for a sweeter treat.
  • Nutty Coating: After dipping in chocolate, roll the pops in chopped nuts like almonds or pistachios.
  • Drizzled Chocolate: Use a contrasting chocolate (like dark chocolate on white) to drizzle over the tops for a fancy touch.
  • Flavor Infusions: Add a few drops of peppermint or vanilla extract to your melted chocolate for an extra burst of flavor.

Make-Ahead and Storage Instructions

If you want to prepare these ahead of time, here’s how to store them:

  • Make-Ahead: You can make these pops up to 2 days in advance. Just make sure they’re stored properly.
  • Storage: Keep the pops in an airtight container in the fridge. They will stay fresh for up to 5 days, but they are best enjoyed within 2-3 days for optimal flavor and texture.

Nutrition Information

When making treats like these, it’s essential to consider the nutritional aspects. Here’s a quick overview:

  • Calories: Each pop contains approximately 80-100 calories, depending on the size of the strawberries and the amount of chocolate used.
  • Fats: The fat content mainly comes from the chocolate and coconut oil, which can be adjusted based on your preferences.
  • Vitamins: Strawberries are rich in Vitamin C and antioxidants, making them a healthier dessert option.

Frequently Asked Questions

Here are some common questions about making Chocolate Covered Strawberry Heart Pops:

  • Can I use frozen strawberries? Frozen strawberries can be used, but they may become mushy once thawed, so fresh is best.
  • How do I know when the chocolate has melted? Stir the chocolate after each interval; it should be smooth and glossy.
  • Can I use other fruits? Yes! Bananas, pretzels, or marshmallows also work well with chocolate.
  • How do I remove excess chocolate? Gently shake the strawberry after dipping to remove excess chocolate before placing it on parchment paper.
  • Can I use milk chocolate instead? Absolutely! Just keep in mind that it will alter the flavor profile.
  • What if my chocolate hardens before I finish dipping? You can gently reheat the chocolate in the microwave for a few seconds to soften it again.
  • Do I need to temper the chocolate? No, for this recipe, you don’t need to temper the chocolate. Just melt and dip!
  • Can I ship these as gifts? Yes! Just ensure they are packed securely in an insulated container.

Equipment Recommendations

Here’s a quick list of essential tools you’ll need:

  • Microwave-safe bowl: For melting chocolate.
  • Parchment paper: To place the dipped strawberries on while they set.
  • Lollipop sticks: For holding your pops.
  • Measuring spoons: For precise measurements of ingredients.

Serving Suggestions

These pops can be enjoyed on their own, but they also pair wonderfully with:

  • Whipped cream: A dollop of whipped cream adds a delightful creaminess.
  • Fruit platters: Serve alongside other fruits for a colorful dessert spread.
  • Chocolate sauce: Drizzle some extra chocolate sauce for those who want more chocolatey goodness!

In conclusion, Chocolate Covered Strawberry Heart Pops are not just a treat; they’re an experience. With this comprehensive guide, you’re now equipped to create these delightful desserts that are sure to be the highlight of any gathering. Remember, cooking is all about enjoying the process and sharing the joy with those around you. Happy cooking, and enjoy those pops!

Chocolate Covered Strawberry Heart Pops Recipe

Prep Time 15 minutes
Cook Time 10 minutes
Total Time 25 minutes
Servings 12 pieces
Calories 150
Delight in these adorable chocolate-covered strawberry pops, perfect for Valentine's Day or any special occasion.

Ingredients

Fruits

  • 24 pieces fresh strawberries, hulled
  • 8 oz semisweet chocolate chips
  • 12 pieces lollipop sticks
  • 1 tbsp coconut oil

Instructions 

  • Wash, hull, and dry strawberries.
  • Insert sticks into strawberries.
  • Melt chocolate with coconut oil until smooth.
  • Dip strawberries into chocolate and place on parchment.
  • Refrigerate until chocolate sets, then serve.

Notes

Ensure strawberries are completely dry before dipping to prevent chocolate from seizing.
Calories: 150kcal
Cost: $15
Course: Dessert
Cuisine: American
Keyword: Strawberries

Indulge in the Richness of Dark Chocolate Cake

Welcome to the ultimate guide to creating a moist and flavorful dark chocolate cake that will impress anyone at your table! With rich ingredients like melted dark chocolate and brewed coffee, this cake is a true chocolate lover’s dream. Whether you’re celebrating a birthday, hosting a dinner party, or just indulging your sweet tooth, this recipe will elevate your dessert game. In this article, we’ll explore every aspect of making the perfect cake, providing you with the tips and tricks you need to succeed.

Why You’ll Love This Recipe

  • Irresistible Flavor: The combination of dark chocolate and brewed coffee enhances the cake’s rich chocolate flavor, creating a deep, satisfying taste.
  • Moist Texture: With ingredients like buttermilk and sour cream, this cake remains incredibly moist, ensuring every bite melts in your mouth.
  • Easy to Follow: This recipe breaks down the process into simple steps, making it accessible for both beginner and experienced bakers.
  • Versatile Options: Customize the cake with various frostings or fillings to suit your taste, making it perfect for any occasion.
  • Make Ahead: This dark chocolate cake can be made in advance, allowing flavors to deepen and making it ideal for busy schedules.

Ingredient Breakdown

Before we dive into the baking process, let’s take a closer look at the key ingredients used in this dark chocolate cake recipe and explore possible substitutions.

  • Dark Chocolate (60–70% cocoa): Provides the cake with a rich chocolate flavor. You can substitute with semi-sweet chocolate if desired.
  • Dutch-Process Cocoa Powder: This gives the cake a smoother flavor. If unavailable, use regular cocoa powder, but note the difference in acidity.
  • Fresh Brewed Coffee: Enhances the chocolate flavor. You can replace it with hot water or milk if you prefer.
  • Brown Sugar: Adds depth and moisture. White sugar can be used, but the cake may be less moist.
  • All-Purpose Flour: Essential for structure. Gluten-free flour can be a substitute, but results may vary.
  • Buttermilk: Contributes to moisture and tenderness. If you don’t have buttermilk, mix milk with a tablespoon of vinegar or lemon juice.
  • Sour Cream: Adds richness; Greek yogurt can be a healthy alternative.
  • Eggs: Provide structure; aquafaba can be used for a vegan version.

How to Make Dark Chocolate Cake

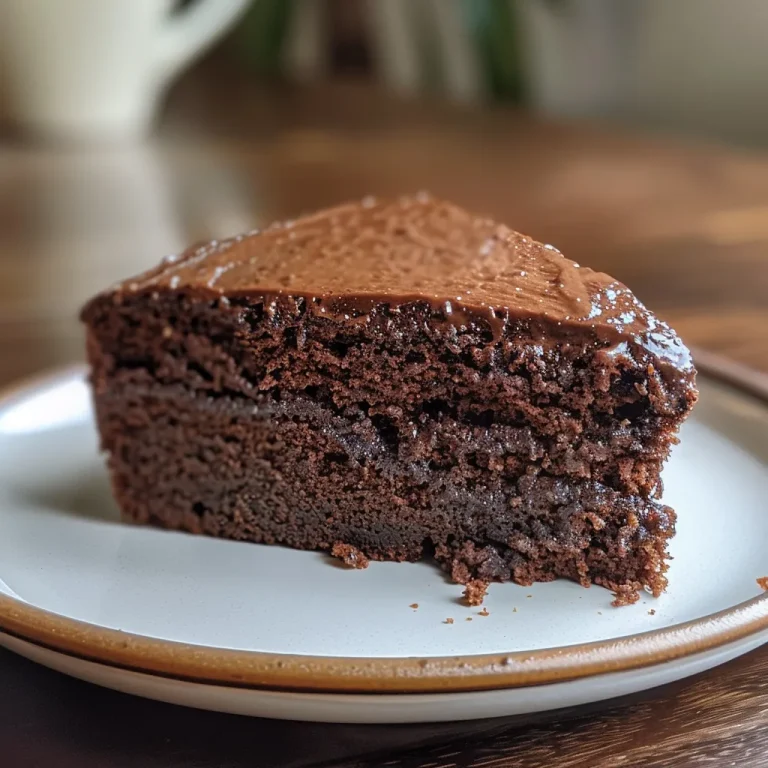
Appetizing dark chocolate cake with a shiny finish on a wooden table.

Now that we have our ingredients ready, let’s walk through the baking process step by step.

Step 1: Preheat and Prepare

Preheat your oven to 350°F (175°C). Grease and line two 9-inch round cake pans with parchment paper for easy removal.

Step 2: Melt Chocolate and Bloom Cocoa

Melt the dark chocolate gently in a heatproof bowl. In another bowl, stir the cocoa powder into hot brewed coffee and allow it to bloom. Let both mixtures cool slightly.

Step 3: Cream Butter and Sugar

In a large mixing bowl, cream the softened unsalted butter with half of the brown sugar until the mixture is light and fluffy, about 3 minutes.

Step 4: Combine Egg Mixture

In a separate bowl, whisk the eggs with the remaining brown sugar until thickened and pale. Add this egg mixture to the creamed butter, followed by the melted dark chocolate and vanilla extract.

Step 5: Mix Dry Ingredients and Wet Ingredients

In another bowl, whisk together the flour, baking soda, baking powder, and fine sea salt. Gradually alternate adding the dry mixture with buttermilk to the chocolate mixture, mixing just until combined.

Step 6: Fold in Additional Ingredients

Gently fold in sour cream and vegetable oil until the batter is smooth and well combined.

Step 7: Bake

Divide the batter evenly between the prepared pans, tapping them lightly to release any air bubbles. Bake for 30–35 minutes or until a toothpick inserted into the center comes out with moist crumbs.

Step 8: Cool and Rest

Allow the cakes to cool in the pans for 10 minutes before transferring them to a wire rack. For enhanced flavor, wrap the cakes and let them rest in the refrigerator overnight.

Pro Tips for Success

  • Room Temperature Ingredients: Ensure that eggs, buttermilk, and sour cream are at room temperature for better mixing and texture.
  • Do Not Overmix: Overmixing can lead to a dense cake; mix just until combined for a lighter texture.
  • Use Quality Chocolate: The better the chocolate you use, the richer the flavor of the cake.
  • Bake Evenly: Rotate your cake pans halfway through baking for even cooking.
  • Check Doneness: Use the toothpick test to check for doneness, but remember a few moist crumbs are ideal for a moist cake.
  • Chill Before Frosting: If frosting, ensure the cake layers are completely cooled to prevent melting your frosting.
  • Experiment with Frosting: Try a cream cheese frosting or ganache for a decadent touch!
  • Store Properly: Wrap leftover cake tightly in plastic wrap to maintain moisture and flavor.

Common Mistakes and Troubleshooting

Even the best bakers can run into issues. Here are common mistakes and how to avoid them:

  • Dry Cake: Ensure you’re measuring flour correctly. Too much flour makes a dry cake.
  • Flat Cake: Ensure baking powder and baking soda are fresh and active; expired leavening agents can lead to flat cakes.
  • Falling Cake: Avoid opening the oven door too soon; this can cause the cake to collapse.
  • Crumbly Texture: Adding too much flour or not enough fat can lead to a crumbly texture. Stick to the recipe’s measurements.

Variations to Try

Feel free to get creative with your dark chocolate cake! Here are some fun variations:

  • Chocolate Espresso Cake: Add 1 tablespoon of instant espresso powder to enhance the chocolate flavor.
  • Nutty Chocolate Cake: Fold in chopped walnuts or pecans for added texture and flavor.
  • Chocolate Mint Cake: Replace vanilla extract with peppermint extract for a refreshing twist.
  • Layered Chocolate Cake: Use the same recipe to create a multi-layered cake with chocolate ganache layers in between.

Storage and Make-Ahead Instructions

This dark chocolate cake can be made ahead of time:

  • Refrigerate: Wrap the cooled cake layers in plastic wrap and store in the refrigerator for up to a week.
  • Freeze: For longer storage, freeze the cake layers wrapped tightly in plastic wrap for up to 3 months. Thaw completely before frosting.

Frequently Asked Questions

Here are some common questions about making dark chocolate cake:

  • Can I use a different type of chocolate? Yes, you can use semi-sweet chocolate, but the flavor will be less intense.
  • Is it necessary to use coffee? Coffee enhances the chocolate flavor, but you can substitute it with hot water or milk.
  • Can I make this cake gluten-free? Yes, use a gluten-free all-purpose flour blend.
  • How can I make this cake vegan? Substitute eggs with aquafaba and use plant-based butter and milk alternatives.
  • What’s the best way to frost the cake? Ensure the cake is completely cool before frosting to prevent melting.
  • How do I store leftovers? Wrap the cake in plastic wrap and store it in an airtight container in the refrigerator.
  • Can I bake this as a sheet cake? Yes, you can bake it in a 9×13-inch pan; adjust baking time accordingly.
  • What frosting pairs well with dark chocolate cake? Cream cheese frosting, chocolate ganache, or vanilla buttercream all make excellent choices.

Nutrition Tips and Dietary Adaptations

While indulging in a slice of cake, consider these nutrition tips:

  • Portion Control: Enjoy in moderation; a small slice can satisfy your sweet tooth without overindulging.
  • Healthier Fats: Use avocado oil instead of vegetable oil for a healthier fat source.
  • Reduce Sugar: Substitute some of the brown sugar with unsweetened applesauce for a lower-sugar option.

Equipment Recommendations

To make the best dark chocolate cake, here are some essential tools:

  • Stand Mixer or Hand Mixer: For efficient mixing and creaming of ingredients.
  • 9-inch Round Cake Pans: Ensure even baking and easy layer separation.
  • Parchment Paper: Prevents sticking and helps with easy cake removal.
  • Offset Spatula: Perfect for spreading frosting smoothly.
  • Cooling Rack: Allows for proper cooling, preventing sogginess.

Serving Suggestions

When it’s time to serve your magnificent cake, consider these delightful pairings:

  • Whipped Cream: A dollop of lightly sweetened whipped cream balances the richness of the cake.
  • Fresh Berries: Serve with strawberries or raspberries for a fresh contrast.
  • Chocolate Ganache: Drizzle warm ganache over each slice for an extra chocolate hit.
  • Ice Cream: Pair with vanilla ice cream for a classic dessert experience.

With this comprehensive guide, you’re well-equipped to bake an astonishing dark chocolate cake that will wow your friends and family. Remember, great cooking is about experimentation and enjoyment—so don’t hesitate to make this recipe your own. Happy baking!

dark chocolate cake

Prep Time 20 minutes
Cook Time 35 minutes
Total Time 55 minutes
Servings 8 slices
Calories 420
A rich and moist dark chocolate cake with deep cocoa flavor, perfect for special occasions or indulgent treats.

Ingredients

Dried ingredients

  • 170 g Dark chocolate (- 60–70% cocoa ,melted)
  • 60 g Dutch-process cocoa powder (- Bloomed in coffee)
  • 240 ml Fresh brewed coffee (- Hot)
  • 2 tsp Vanilla extract (- Pure)
  • 200 g Brown sugar (- Packed)
  • 200 g All-purpose flour (- Spoon & leveled)
  • 1 tsp Baking soda
  • 1 tsp Baking powder
  • ½ tsp Fine sea salt
  • 2 large Eggs (- Room temperature)
  • 240 ml Buttermilk (- Room temperature)
  • 115 g Unsalted butter (- Softened)
  • 60 ml Vegetable oil (- Neutral-flavored)
  • 120 g Sour cream (- Full-fat ,room temperature)
  • 1 tbsp Instant espresso powder (- Intensifies chocolate)

Instructions 

  • Preheat oven to 350°F (175°C). Grease and line two 9-inch pans.
  • Melt chocolate and stir cocoa into hot coffee; cool.
  • Cream butter and half sugar until fluffy; whisk eggs and remaining sugar until pale.
  • Combine wet and dry ingredients alternately with buttermilk; fold in sour cream and oil.
  • Divide batter into pans, tap to release air, and bake 30–35 min. Cool and serve.

Notes

For best results, wrap and rest overnight before serving.
Calories: 420kcal
Cost: $15
Course: Dessert
Cuisine: American
Keyword: chocolate

Start Your Day Right with Wholesome Egg Muffins

Are you looking for a nutritious breakfast option that’s quick, tasty, and easy to make? Look no further than these delightful egg muffins! Packed with protein and fresh vegetables, this recipe is perfect for busy mornings or meal prep. In this guide, we’ll dive deep into everything you need to know about egg muffins, from ingredients to variations, and tips to ensure perfect results every time.

Why You’ll Love This Recipe

  • Quick and Easy: With just 15 minutes of prep time, you can whip up a batch of egg muffins that will fuel your day.
  • Versatile Ingredients: Customize your egg muffins with your favorite veggies, proteins, and cheeses to suit your taste.
  • Healthy Meal Prep: Make a large batch on the weekend and enjoy healthy breakfasts throughout the week.
  • Kid-Friendly: Sneak in nutritious ingredients that even picky eaters will love!
  • Perfect for Any Diet: These muffins can be made gluten-free, dairy-free, or low-carb, making them suitable for everyone.

Detailed Ingredient Breakdown

Here’s what you’ll need to make these delicious egg muffins, along with some substitution ideas:

  • 12 large eggs: The foundation of your muffins. You can substitute with 12 egg whites for a lower-calorie option.
  • 1/4 cup whole milk: Adds creaminess. For a dairy-free alternative, use almond milk or coconut milk.
  • 1/2 tsp salt: Enhances flavor. Adjust according to your taste preference.
  • 1/4 tsp black pepper: Freshly ground is best for maximum flavor.
  • 1/2 cup shredded cheddar cheese: Cheese adds richness. Feel free to use mozzarella, feta, or omit for a dairy-free version.
  • 1/4 cup red bell pepper: Adds sweetness and color. Substitute with any bell pepper or chopped tomatoes.
  • 1/4 cup fresh spinach: Provides nutrients. Kale or arugula can be used as alternatives.
  • Cooking spray: Helps prevent sticking. You can also use olive oil or butter for greasing.

Step-by-Step Instructions for Perfect Egg Muffins

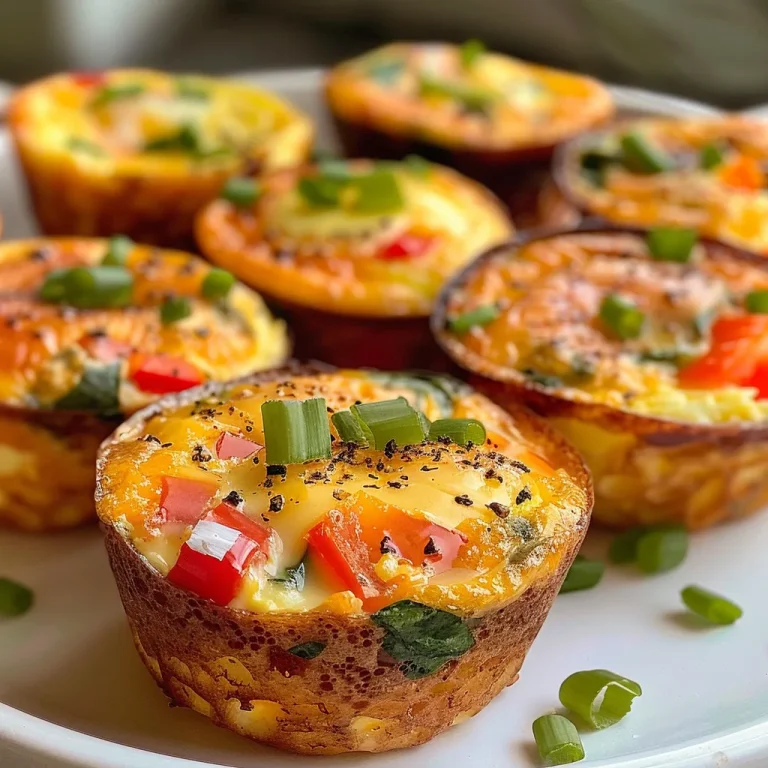
Deliciously baked egg muffins with a crispy exterior and colorful vegetable filling.

Follow these steps for delicious, fluffy egg muffins:

  1. Preheat your oven to 375°F (190°C). Generously coat a standard 12-cup muffin tin with cooking spray.
  2. Prepare the egg mixture: In a large bowl, crack the eggs, add milk, salt, and pepper. Whisk until frothy.
  3. Add fillings: Gently fold in cheese, bell pepper, and spinach until evenly mixed.
  4. Fill the muffin cups: Pour the mixture into the muffin cups, filling each about two-thirds full to allow for rising.
  5. Bake: Place in the oven and bake for 15-20 minutes until set and lightly golden. A toothpick inserted should come out clean.
  6. Cool and serve: Let cool for 5 minutes in the tin before transferring to a wire rack. Serve warm or let cool completely for storage.

Pro Tips for Perfect Egg Muffins

  • Don’t overfill: Leave room for the muffins to puff up while baking.
  • Pre-cook vegetables: Sauté veggies like mushrooms or spinach before adding to avoid sogginess.
  • Use a variety of add-ins: Experiment with different meats like turkey sausage or bacon for flavor.
  • Mix up flavors: Try different herbs and spices like basil, oregano, or garlic powder for an extra kick.
  • Check doneness: Use a toothpick to ensure they’re fully cooked in the center.
  • Store properly: Let them cool completely before freezing or refrigerating to maintain texture.
  • Consider portion size: Make mini muffins for easy snacking or for kids.
  • Reheat wisely: Microwave for 30 seconds or warm in the oven for best results.

Common Mistakes and Troubleshooting

Here are some common pitfalls to avoid when making egg muffins:

  • Watery muffins: Ensure to sauté vegetables beforehand to remove excess moisture.
  • Sticking to the tin: Make sure to generously grease the muffin tin to avoid sticking.
  • Overcooked muffins: Keep a close eye during baking. Start checking at 15 minutes.
  • Uneven cooking: Rotate the muffin tin halfway through baking for even heat distribution.

Delicious Variations to Try

Feel free to change things up with these variations:

  • Southwestern Style: Add black beans, corn, and jalapeños for a spicy kick.
  • Italian Twist: Incorporate sun-dried tomatoes, Italian herbs, and mozzarella cheese.
  • Greek-Inspired: Use feta cheese, olives, and diced cucumbers for a Mediterranean flair.
  • Breakfast Meat Lovers: Include cooked bacon, sausage, or ham for a hearty option.

Storage and Make-Ahead Instructions

These egg muffins are perfect for meal prep! Here’s how to store them:

  • Refrigerate: Store in an airtight container in the fridge for up to five days.
  • Freeze: Place in a freezer-safe bag or container for up to three months. Thaw in the fridge overnight before reheating.
  • Reheat: Microwave for 30 seconds or bake at 350°F (175°C) for about 10 minutes until warm.

Comprehensive FAQ

  • Can I use egg substitutes? Yes, liquid egg substitutes work well, but avoid using only egg whites for texture.
  • How long do egg muffins last? They can be stored in the fridge for up to five days or frozen for three months.
  • Can I make these dairy-free? Absolutely! Use a dairy-free milk alternative and omit cheese or use a dairy-free cheese.
  • Can I add meat to my muffins? Yes, pre-cooked sausage, bacon, or ham can be delicious additions.
  • What vegetables can I use? Almost any vegetable works, but be sure to sauté those that contain a lot of moisture.
  • Are egg muffins gluten-free? Yes, as long as all ingredients used are gluten-free.
  • How do I know when they are done? They should be puffed up and lightly golden, with a toothpick coming out clean.
  • Can I make mini egg muffins? Yes! Just adjust the baking time and check for doneness sooner.

Nutritional Tips and Dietary Adaptations

These egg muffins can fit various dietary needs:

  • Low Carb: Use fewer starchy vegetables and focus on meats and cheese.
  • Vegetarian: Load up on vegetables and omit meat for a satisfying option.
  • Keto-Friendly: Stick to high-fat ingredients like cheese and cream, and limit carbs.
  • High Protein: Add more eggs or incorporate protein-rich veggies like broccoli.

Essential Equipment Recommendations

To make your egg muffins, you’ll need:

  • Muffin tin: A standard 12-cup muffin tin is ideal for this recipe.
  • Mixing bowl: A large bowl for whisking the egg mixture.
  • Whisk: A good whisk helps create a frothy mixture.
  • Cooking spray or oil: To grease the muffin tin.
  • Wire rack: For cooling the muffins after baking.

Serving Suggestions

Egg muffins can be enjoyed in various ways:

  • On Their Own: Perfect as a snack or a light meal.
  • With Salsa: Top with salsa or avocado for added flavor.
  • With Toast: Serve alongside whole-grain toast for a complete breakfast.
  • In a Wrap: Place in a tortilla for an on-the-go breakfast burrito.

With the steps provided and the flexibility of this recipe, you’ll discover why egg muffins have become a staple in kitchens everywhere. Enjoy making your own, and watch them become a beloved part of your breakfast routine!

Egg Muffins

Prep Time 10 minutes
Cook Time 15 minutes
Total Time 25 minutes
Servings 12 muffins
Calories 150
These delicious egg muffins are a quick, healthy, and customizable breakfast option perfect for busy mornings.

Ingredients

Eggs and Dairy

  • 12 large eggs
  • 0.25 cup whole milk
  • 0.5 tsp salt
  • 0.25 tsp black pepper (freshly ground)
  • 0.5 cup shredded cheddar cheese
  • 0.25 cup red bell pepper (finely chopped)
  • 0.25 cup fresh spinach (finely chopped)

Cooking Spray

Instructions 

  • Preheat oven to 375°F and spray a 12-cup muffin tin with cooking spray.
  • Whisk eggs, milk, salt, and pepper until frothy and well combined.
  • Fold in cheese, red bell pepper, and spinach until evenly mixed.
  • Pour mixture into muffin cups, filling about two-thirds full, then bake for 15-20 minutes until set and golden.
  • Cool for 5 minutes, then remove and serve warm or cooled.

Notes

Store leftovers in an airtight container in the fridge for up to 3 days.
Calories: 150kcal
Cost: $10
Course: Breakfast
Cuisine: American
Keyword: Eggs

Baking is an art that brings people together, and what better way to express love than with these delightful heart shaped jam cookies? This recipe is not just about creating a sweet treat but about sharing moments of joy and connection. Whether you’re celebrating Valentine’s Day, a special occasion, or simply want a cozy afternoon baking session with your kids, these cookies are the perfect choice. In this comprehensive guide, I’ll take you through everything you need to know to make these cookies a resounding success. Let’s dive in!

Why You’ll Love This Recipe

Here are just a few reasons why this heart-shaped jam cookie recipe will become a staple in your baking repertoire:

  • Simple Ingredients: You can whip these cookies up with pantry staples, making them easy to prepare whenever a craving strikes.
  • Customizable Flavors: Use any jam you love—raspberry, strawberry, apricot, or even lemon curd—to create a unique flavor profile that suits your taste.
  • Adorable Presentation: The heart shape and jam-filled centers make these cookies not just delicious but also visually appealing, perfect for gifting or sharing.
  • Perfect for All Occasions: Whether it’s a holiday, a birthday, or just a Tuesday, these cookies are versatile and loved by all.
  • Great for Baking with Kids: This recipe is straightforward enough for kids to help with, making it a fun family activity.

Ingredients You’ll Need

Here’s what you need to make these delightful cookies:

  • 1 cup unsalted butter: Softened to room temperature for easy mixing.
  • 2/3 cup granulated sugar: Adds sweetness and helps with the cookie’s structure.
  • 1 large egg: Acts as a binder to hold the ingredients together.
  • 1 1/2 teaspoons vanilla extract: Infuses the cookies with a rich flavor.
  • 2 1/4 cups all-purpose flour: The base for the cookie dough.
  • 1/4 teaspoon salt: Enhances the flavors of the other ingredients.
  • 1/2 cup jam: Your choice of flavor—this is the star filling!

**Substitution Ideas**: If you need alternatives, consider using coconut oil in place of butter for a dairy-free option, or whole wheat flour for a nuttier flavor.

How to Make Heart Shaped Jam Cookies

Ready to bake? Follow these simple steps to create your delicious heart-shaped jam cookies.

  1. Preheat your oven to 350°F (175°C). Line a baking sheet with parchment paper to prevent sticking.
  2. In a large bowl, cream together the softened butter and granulated sugar until light and fluffy. This usually takes about 2-3 minutes.
  3. Beat in the egg and vanilla extract until well combined.
  4. In a separate bowl, whisk together the flour and salt.
  5. Gradually add the dry ingredients to the wet mixture, mixing until a dough forms. Don’t overmix!
  6. On a floured surface, roll out the dough to about 1/4-inch thickness.
  7. Cut out heart shapes using a cookie cutter. For half of the cookies, use a smaller heart cutter to create a window in the center.
  8. Place the solid heart cookies on the baking sheet. Spread a small amount of jam on each solid heart, then top with a cut-out heart.
  9. Bake for 12-15 minutes or until the edges are lightly golden. Keep an eye on them!
  10. Remove from the oven and let cool on the baking sheet for a few minutes before transferring to a wire rack to cool completely.

Pro Tips for Perfect Heart Shaped Jam Cookies

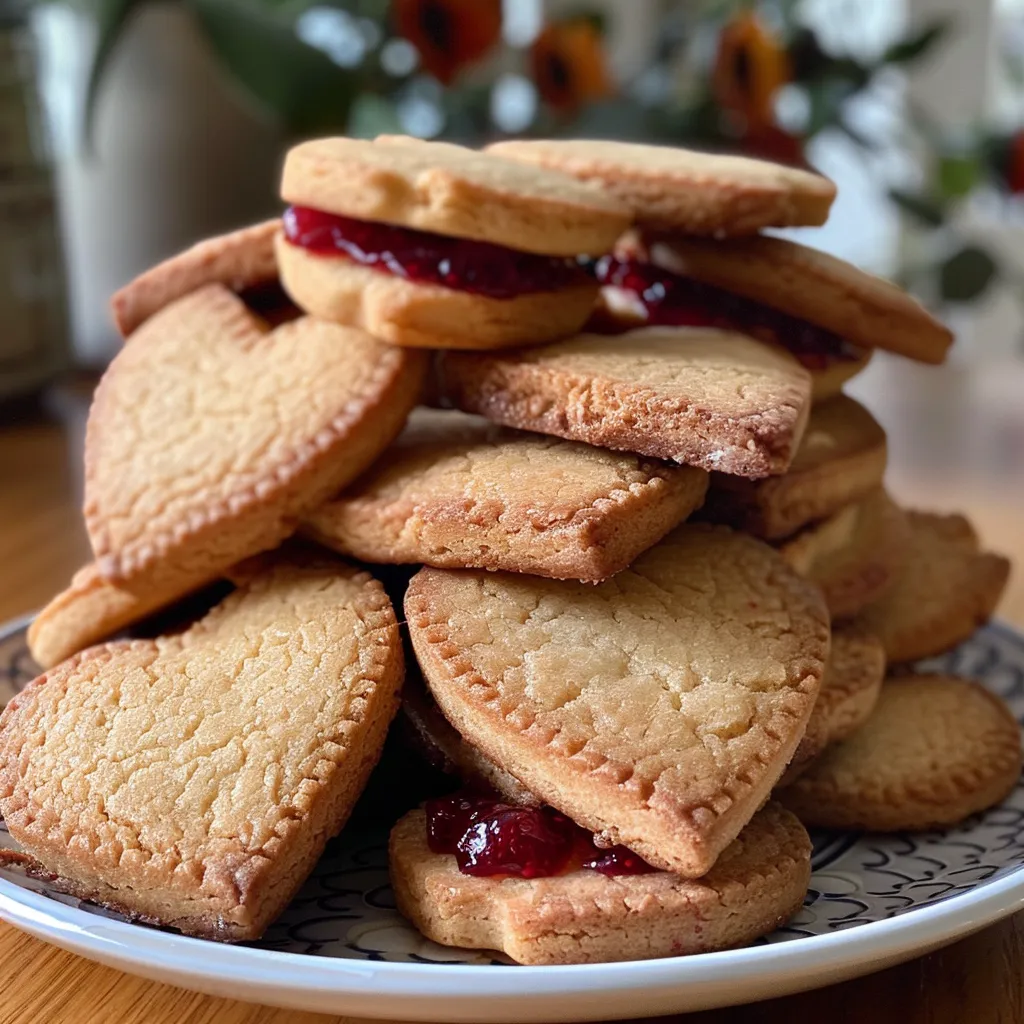
A side view of freshly baked heart-shaped jam cookies, highlighting their design.

To ensure your cookies turn out perfectly every time, consider these expert insights:

  • Chill the Dough: If the dough is too soft to work with, chill it in the refrigerator for about 30 minutes.
  • Use Quality Jam: The flavor of your jam will directly impact the taste of your cookies, so choose a high-quality brand.
  • Avoid Overbaking: Keep a close eye while baking. They should be light golden on the edges but not browned.
  • Experiment with Shapes: These cookies don’t have to be hearts! Use different cutters for various occasions.
  • Store Properly: Keep cookies in an airtight container at room temperature for up to a week, or freeze them for longer storage.
  • Make-Ahead Dough: You can prepare the dough ahead of time and store it in the fridge or freezer until you’re ready to bake.
  • Test Jam Amount: Use just enough jam to avoid overflow during baking, which could cause a sticky mess.
  • Dust with Powdered Sugar: For a gourmet touch, dust cooled cookies with powdered sugar for an elegant presentation.

Common Mistakes and Troubleshooting

Even the best bakers make mistakes! Here are some common issues and how to avoid them:

  • Cookies Spread Too Much: This can happen if the dough is too warm or if you didn’t chill it. Always ensure your dough is cold before rolling it out.
  • Jam Leaks Out: If you added too much jam, it might overflow during baking. Use a spoon to spread a thin layer.
  • Dry Cookies: Overbaking can lead to dry cookies. Always check for doneness a minute or two early.
  • Too Soft to Handle: If the dough is sticky, sprinkle a little flour on your surface and rolling pin.

Variations to Try

Want to mix things up? Here are some fun variations you can try:

  • Lemon Curd Filling: Swap out the jam for lemon curd for a refreshing twist.
  • Chocolate Hazelnut Spread: Use Nutella or any chocolate spread as the filling for a decadent treat.
  • Nutty Additions: Fold in chopped nuts or chocolate chips into the dough for an extra crunch.
  • Spiced Cookies: Add a teaspoon of cinnamon or nutmeg to the dough for a warm, spiced flavor.

Storage and Make-Ahead Instructions

Proper storage is key to keeping your cookies fresh. Here are some tips:

  • Room Temperature: Store cookies in an airtight container at room temperature for up to a week.
  • Freezing: Freeze baked cookies in a single layer, then transfer to a zip-top bag for up to three months.
  • Make-Ahead Dough: Prepare the dough ahead of time and keep it in the refrigerator for up to 3 days or freeze for up to a month.

Frequently Asked Questions (FAQs)

Here are some common questions about heart-shaped jam cookies:

  • Can I use any type of jam for the filling? Yes, feel free to use your favorite jam or even a fruit preserve.
  • Can I make these cookies gluten-free? Absolutely! Substitute all-purpose flour with a gluten-free blend.
  • How do I prevent cookies from spreading too much? Chill the dough and ensure your butter is at room temperature, not melted.
  • What if I don’t have a heart cookie cutter? Use any shape you have on hand; creativity is encouraged!
  • Can I freeze the dough? Yes, you can freeze the dough for up to a month. Thaw in the fridge before rolling out.
  • What’s the best way to decorate these cookies? You can drizzle with melted chocolate or sprinkle with colored sugar before baking.
  • How long do these cookies last? When stored properly, they can last up to a week at room temperature or up to three months in the freezer.
  • Can I make these cookies vegan? Yes! Substitute butter with vegan butter and use flax eggs instead of chicken eggs.

Nutritional Tips and Dietary Adaptations

For health-conscious bakers, consider these adaptations:

  • Reduced Sugar: Cut down on sugar by using a sugar substitute or reducing the amount in the recipe.
  • Whole Grain: Use whole wheat flour for added fiber and nutrients.
  • Healthier Fat Options: Substitute butter with coconut oil or avocado oil for a healthier fat profile.

Equipment Recommendations

Having the right tools can make your baking experience smoother:

  • Mixing Bowls: Use a large bowl for mixing the dough, making it easier to incorporate ingredients.
  • Rolling Pin: A good quality rolling pin helps achieve even dough thickness.
  • Cookie Cutters: Invest in a set of various shapes to diversify your cookie baking.
  • Baking Sheets: Use heavy-duty baking sheets for even heat distribution.
  • Parchment Paper: Essential for easy cookie removal and cleanup.

Serving Suggestions

These cookies are not only delightful on their own but can also be paired with:

  • Tea or Coffee: Perfect for an afternoon treat.
  • Ice Cream: Serve with a scoop of vanilla or raspberry sorbet for a dessert duo.
  • Gift Packaging: Consider packaging these cookies in a decorative tin or box for a thoughtful gift.

Baking these heart-shaped jam cookies is a wonderful way to create lasting memories and share love with those around you. With their sweet flavor, adorable shape, and ability to be customized, they’re sure to become a beloved recipe in your kitchen. So grab your ingredients, gather your loved ones, and start baking these delicious treats today!

Heart Shaped Jam Cookies Recipe

Prep Time 20 minutes
Cook Time 15 minutes
Total Time 35 minutes
Servings 24 cookies
Calories 150
Delight in these charming heart-shaped cookies filled with jam, perfect for special occasions or sweet treats.

Ingredients

Dough

  • 1 cup unsalted butter, softened
  • 2/3 cup granulated sugar
  • 1 large egg
  • 1 1/2 teaspoons vanilla extract
  • 2 1/4 cups all-purpose flour
  • 1/4 teaspoon salt
  • 1/2 cup jam (any flavor)

Instructions 

  • Preheat oven to 350°F (175°C) and line a baking sheet with parchment.
  • Cream butter and sugar until fluffy, then mix in egg and vanilla.
  • Whisk flour and salt, then combine with wet ingredients to form dough.
  • Roll out dough, cut heart shapes, and cut smaller hearts in half.
  • Assemble cookies with jam, bake for 12-15 minutes, then cool.

Notes

Chill the dough before rolling for easier handling.
Calories: 150kcal
Cost: $15
Course: Dessert
Keyword: cookies

Welcome to your new favorite baking adventure! Today, we’re diving into the world of desserts with an easy yet decadent Blender Chocolate Cake recipe that is sure to impress both friends and family. This cake is not just simple to prepare; it’s a delicious chocolate treat that will make your taste buds sing! If you’ve ever thought baking a cake was too time-consuming or complicated, you’re in for a delightful surprise. Get ready to whip up a moist and rich chocolate cake in just a matter of minutes, perfect for any occasion!

Why You’ll Love This Recipe

  • Quick Preparation: This blender chocolate cake comes together in a flash. With minimal prep time, you can enjoy a freshly baked cake without the fuss.
  • Rich Flavor: The combination of chocolate powder, sugar, and a few simple ingredients creates a cake that is both rich and satisfying.
  • Versatile Serving Options: Whether you prefer it plain, topped with frosting, or served alongside a scoop of ice cream, this cake is adaptable to your taste.
  • Perfect for Any Occasion: Whether you’re celebrating a birthday, hosting a gathering, or just treating yourself, this cake is ideal for any event.
  • Beginner-Friendly: Even if you’re a novice baker, this recipe is straightforward enough to ensure your success!

Ingredient Breakdown

Let’s take a closer look at what you’ll need to make this delicious blender chocolate cake. Each ingredient plays a crucial role in achieving the perfect texture and flavor.

  • 2 cups of wheat flour: Provides the structure of the cake. You can substitute with all-purpose flour or gluten-free flour for a lighter touch.
  • 3 eggs: Essential for binding the ingredients together and adding moisture. For a vegan alternative, use flax eggs (1 tablespoon of ground flaxseed mixed with 2.5 tablespoons of water per egg).
  • 1 cup of chocolate powder: Gives the cake its rich chocolate flavor. Opt for unsweetened cocoa powder for a less sweet cake.
  • 1 cup of sugar: Sweetens the cake; you can use brown sugar for a deeper flavor or a sugar substitute for a low-calorie option.
  • 1 cup of milk: Adds moisture. You can replace it with almond milk or oat milk for a dairy-free version.
  • 1/2 cup of oil: Contributes to the cake’s moistness. Can be substituted with melted butter or applesauce for a healthier option.
  • 1 tablespoon of baking powder: Acts as a leavening agent to help the cake rise. Ensure it’s fresh for the best results.

How to Make Blender Chocolate Cake

Ready to dive into the baking process? Follow these simple steps to create your own blender chocolate cake:

  • Step 1: Preheat your oven to 180°C (350°F) and grease a pan with butter and flour to prevent sticking.
  • Step 2: In the blender, add the eggs, sugar, and oil. Beat until smooth and creamy—this forms the base of your cake batter.
  • Step 3: Add the milk and chocolate powder to the blender and continue beating until well incorporated.
  • Step 4: In a large bowl, sift together the wheat flour and baking powder. This step ensures there are no lumps.
  • Step 5: Pour the mixture from the blender over the dry ingredients and gently mix with a spatula until just combined.
  • Step 6: Transfer the batter to the greased pan and bake for 40 to 45 minutes, or until a toothpick inserted in the center comes out clean.
  • Step 7: Allow the cake to cool for a few minutes before unmolding. Serve and enjoy your creation!

Tips for Perfecting Your Cake

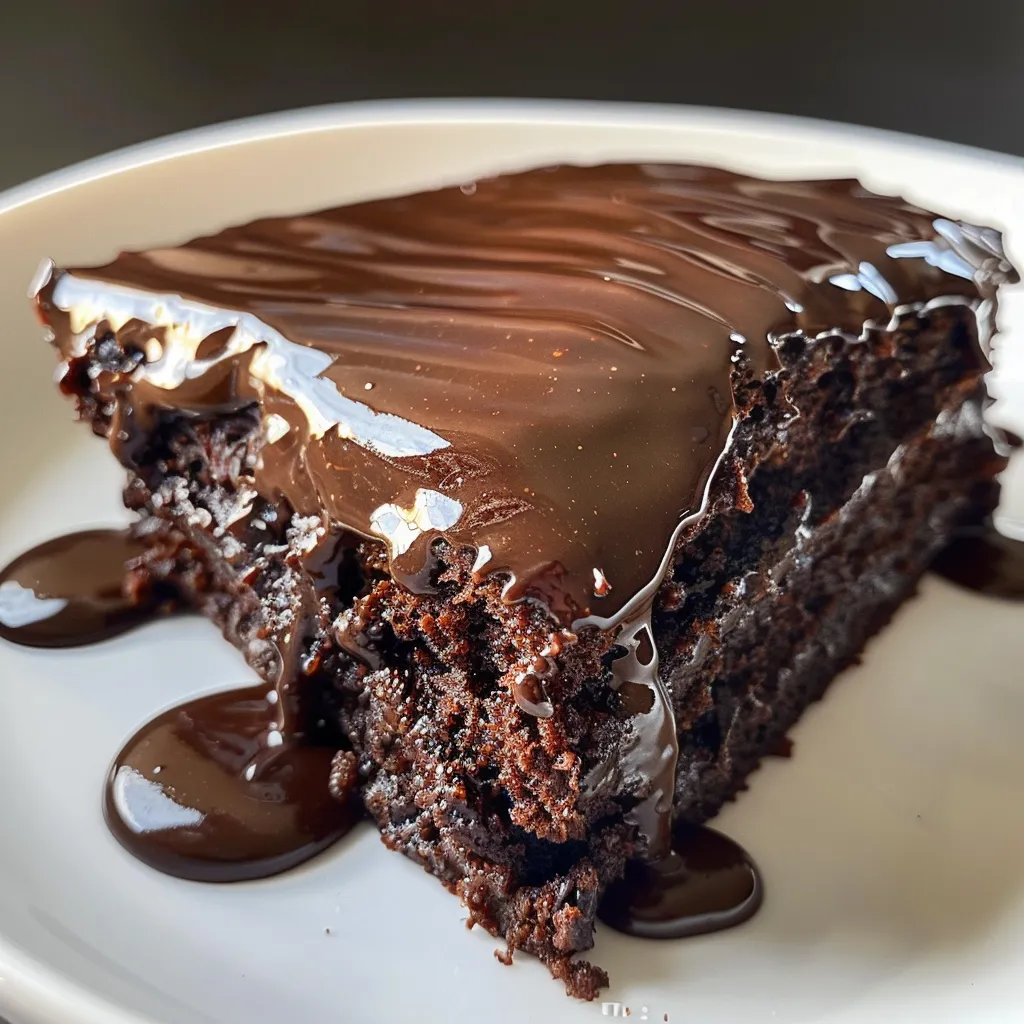
Close-up of a chocolate cake slice revealing its fluffy interior and creamy topping.

To ensure your blender chocolate cake comes out perfectly, consider these pro tips:

  • Don’t Overmix: Once you combine the wet and dry ingredients, mix just until everything is combined. Overmixing can lead to a tough cake.
  • Check for Freshness: Ensure your baking powder is fresh for optimal rise. A quick test: add a teaspoon to hot water; it should fizz.
  • Room Temperature Ingredients: Use room temperature eggs and milk for a smoother batter that blends more easily.
  • Customize Your Flavor: Feel free to add vanilla extract or a pinch of salt to enhance the chocolate flavor.
  • Use Quality Chocolate: Opt for high-quality chocolate powder for a richer taste. It makes a difference!
  • Cooling Time: Let the cake cool completely before frosting or cutting to maintain its structure.
  • Experiment with Toppings: Try adding chocolate chips to the batter or topping with whipped cream, fruit, or nuts for a twist.
  • Store Properly: Store leftovers in an airtight container at room temperature for up to 3 days or refrigerate for longer freshness.

Common Mistakes and Troubleshooting

Even the best bakers can encounter challenges. Here are some common mistakes and how to avoid them:

  • Dense Texture: This can happen if you overmix the batter or use too much flour. Measure your ingredients carefully.
  • Dry Cake: Ensure you are following the measurements accurately, and check baking time; overbaking can lead to dryness.
  • Cake Sticking to the Pan: Always grease your pan generously and consider using parchment paper for easy removal.
  • Uneven Baking: Make sure your oven is preheated and that your cake is centered in the oven for even cooking.

Variations to Try

Once you’ve mastered the basic recipe, why not experiment? Here are some delicious variations:

  • Chocolate Chip Blender Cake: Add 1 cup of chocolate chips to the batter for extra chocolatey goodness.
  • Nutty Delight: Stir in 1 cup of chopped nuts for added texture and flavor.
  • Berry Bliss: Top the cake with fresh berries or serve it with a berry compote for a fruity twist.
  • Frosted Fantasy: Frost with a rich chocolate ganache or cream cheese frosting for an indulgent treat.

How to Serve Your Blender Chocolate Cake

This cake is deliciously versatile. Here are some serving suggestions:

  • Serve Warm: Enjoy the cake fresh out of the oven for a warm, melty chocolate experience.
  • Pair with Ice Cream: A scoop of vanilla or mint chocolate chip ice cream complements the rich chocolate flavor perfectly.
  • Dust with Powdered Sugar: For a simple yet elegant touch, dust the top with powdered sugar before serving.
  • Garnish with Whipped Cream: Add a dollop of whipped cream on top for a creamy finish.

How to Store Your Cake

Proper storage is key to maintaining freshness:

  • Room Temperature: If you plan to eat the cake within a few days, store it in an airtight container at room temperature.
  • Refrigeration: For longer storage, keep it in the fridge. Just be sure to wrap it well to prevent it from drying out.
  • Freezing: You can freeze the cake for up to 3 months. Wrap it tightly in plastic wrap and foil before freezing.

Frequently Asked Questions

Here are some common questions about the blender chocolate cake:

  • Can I use a different type of flour? Yes! You can substitute all-purpose flour or gluten-free flour.
  • How do I know when the cake is done? Insert a toothpick into the center—if it comes out clean, your cake is ready!
  • Can I add other flavors? Absolutely! Consider adding vanilla extract or a pinch of espresso powder for depth of flavor.
  • What should I do if my cake sinks in the middle? This can happen due to underbaking or opening the oven door too soon. Ensure your oven is preheated and avoid peeking.
  • Is this cake suitable for special diets? Yes! With substitutions, it can be made vegan or gluten-free.
  • Can I double the recipe? Yes! Just make sure to adjust the baking time accordingly.
  • How should I serve leftovers? They can be enjoyed plain, or you can reheat slices in the microwave for a warm treat.
  • How long does it last? The cake can last up to 3 days at room temperature and about a week in the fridge.

Nutritional Tips and Dietary Adaptations

To make this blender chocolate cake even healthier:

  • Reduce Sugar: Consider cutting the sugar by 25% for a less sweet cake.
  • Use Whole Wheat Flour: For added fiber and nutrients, substitute half the flour with whole wheat.
  • Incorporate Healthy Fats: Opt for avocado oil instead of regular oil for a healthier fat source.
  • Boost Nutritional Value: Add in some ground flaxseed or chia seeds to the batter for extra omega-3s.

Equipment Recommendations

To make your baking experience smooth and enjoyable, here are some essentials:

  • Blender: A high-speed blender works best for mixing the batter quickly and evenly.
  • Baking Pan: Use a 9-inch round cake pan for even baking and easy serving.
  • Spatula: A silicone spatula is perfect for folding the batter gently without overmixing.
  • Oven Thermometer: Ensure your oven is at the correct temperature for perfect baking.

With these tips and this simple recipe, you’re well on your way to creating a delicious chocolate cake that everyone will love. Remember, baking is all about joy and creativity, so don’t hesitate to make it your own. Enjoy the process, and happy baking!

Blender Chocolate Cake

Prep Time 15 minutes
Cook Time 45 minutes
Total Time 1 hour
Servings 8 pieces
Calories 350
A rich and moist chocolate cake made effortlessly in the blender, perfect for any occasion.

Ingredients

Dry ingredients

  • 2 cups wheat flour
  • 1 cup chocolate powder
  • 1 cup sugar
  • 1 tablespoon baking powder

Wet ingredients

  • 3 eggs eggs
  • 1 cup milk
  • 1/2 cup oil

Instructions 

  • Preheat oven to 180°C and grease a pan.
  • In a blender, blend eggs, sugar, and oil until smooth.
  • Add milk and chocolate powder; blend until combined.
  • Mix dry ingredients in a bowl; pour blended mixture over and fold gently.
  • Pour batter into pan and bake for 40-45 minutes.
  • Cool briefly, then serve and enjoy!

Notes

Use high-quality cocoa for best flavor.
Calories: 350kcal
Cost: $12
Course: Dessert
Cuisine: International
Keyword: chocolate

Elevate Your Baking with Classic Red Velvet Cupcakes

Welcome to the wonderful world of baking! Today, we’re diving deep into the art of making classic red velvet cupcakes. These stunning treats are not just a feast for the eyes; they are a delightful combination of rich flavors and textures that will make any occasion special. From their vibrant color to the smooth, creamy cream cheese frosting, red velvet cupcakes are a timeless favorite. Whether you’re an experienced baker or just starting, I’m here to guide you through every step of this delicious journey. Grab your apron, and let’s get started!

Why You’ll Love This Recipe

This classic red velvet cupcake recipe is more than just a dessert; it’s an experience. Here are five reasons you’ll adore these cupcakes:

  • Moist and Tender: Thanks to the buttermilk and careful mixing, these cupcakes are incredibly moist and tender, ensuring every bite melts in your mouth.
  • Rich Flavor: The hint of cocoa powder adds depth to the flavor profile, making these cupcakes deliciously unique.
  • Stunning Presentation: Their vibrant red color and creamy white frosting create an eye-catching contrast that’s perfect for any celebration.
  • Versatile Treat: These cupcakes can be enjoyed at birthday parties, weddings, or simply as a sweet treat to brighten your day.
  • Easy to Customize: With various frosting options and mix-ins, you can easily adapt this recipe to suit your taste preferences!

Ingredients for the Best Classic Red Velvet Cupcakes

For the perfect red velvet cupcakes, you’ll need the following ingredients. I’ve included some substitutions for those who might need them:

  • 2 ½ cups all-purpose flour: You can substitute with gluten-free flour for a gluten-free version.
  • 1 teaspoon baking soda: This is essential for achieving the right rise and texture.
  • 1 teaspoon unsweetened cocoa powder: Don’t skip this! It provides that subtle chocolate flavor.
  • ½ teaspoon salt: Enhances the overall flavor of the cupcakes.
  • 1 cup buttermilk, room temperature: If you don’t have buttermilk, mix 1 cup of milk with 1 tablespoon of vinegar or lemon juice and let it sit for 5-10 minutes.
  • 1 tablespoon white vinegar: This reacts with the baking soda to create lift.
  • 1 teaspoon vanilla extract: A must for flavor!
  • 1 cup (2 sticks) unsalted butter, softened: Make sure it’s at room temperature for easy mixing.
  • 2 cups granulated sugar: This adds sweetness and moisture.
  • 2 large eggs, room temperature: Eggs should be at room temperature for better emulsification.
  • 2 tablespoons red food coloring (liquid or gel): The star of the show! This gives the cupcakes their iconic color.
  • 1 (8-ounce) package cream cheese, softened: Essential for that luscious frosting.
  • ½ cup (1 stick) unsalted butter, softened: For a creamy frosting.
  • 4 cups powdered sugar, sifted: This creates a smooth texture for your frosting.
  • 1 teaspoon vanilla extract: Just like in the cupcake batter, it enhances flavor.
  • 1-2 tablespoons milk (optional, for consistency): Adjust as needed for frosting texture.

How to Make Classic Red Velvet Cupcakes: Step-by-Step

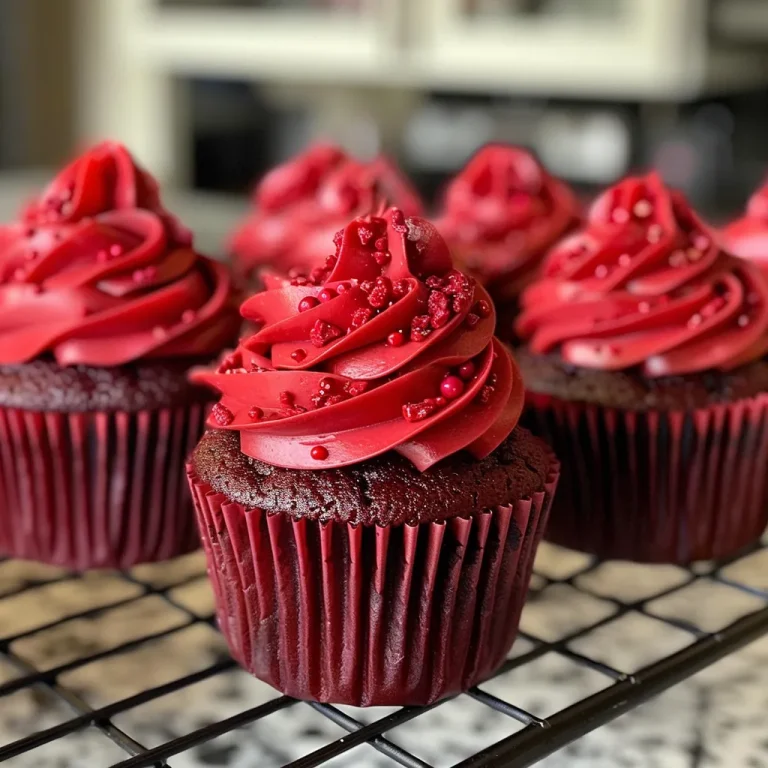
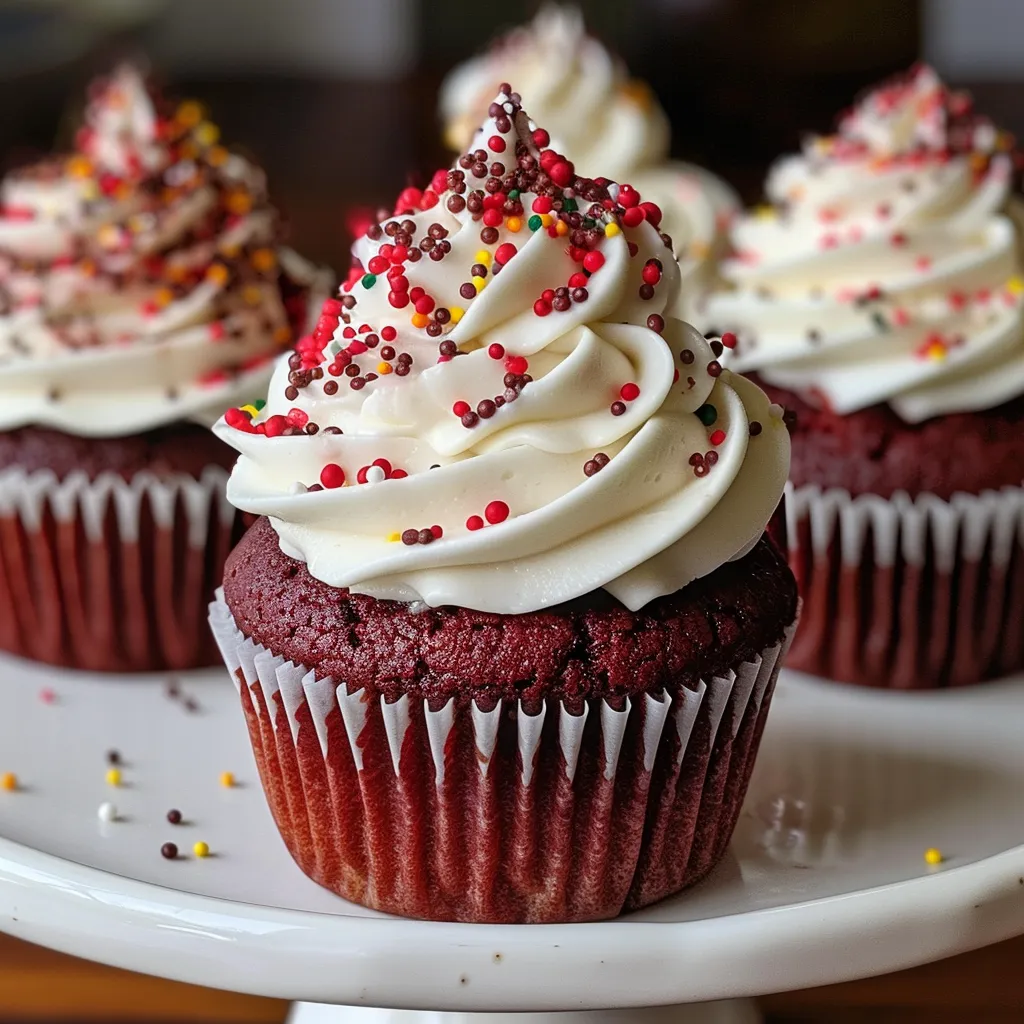
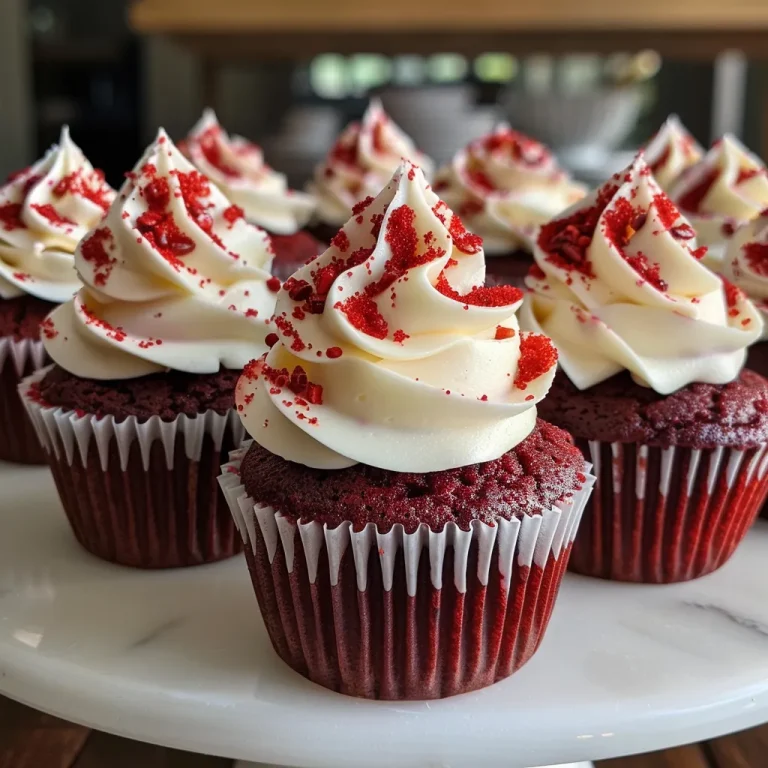
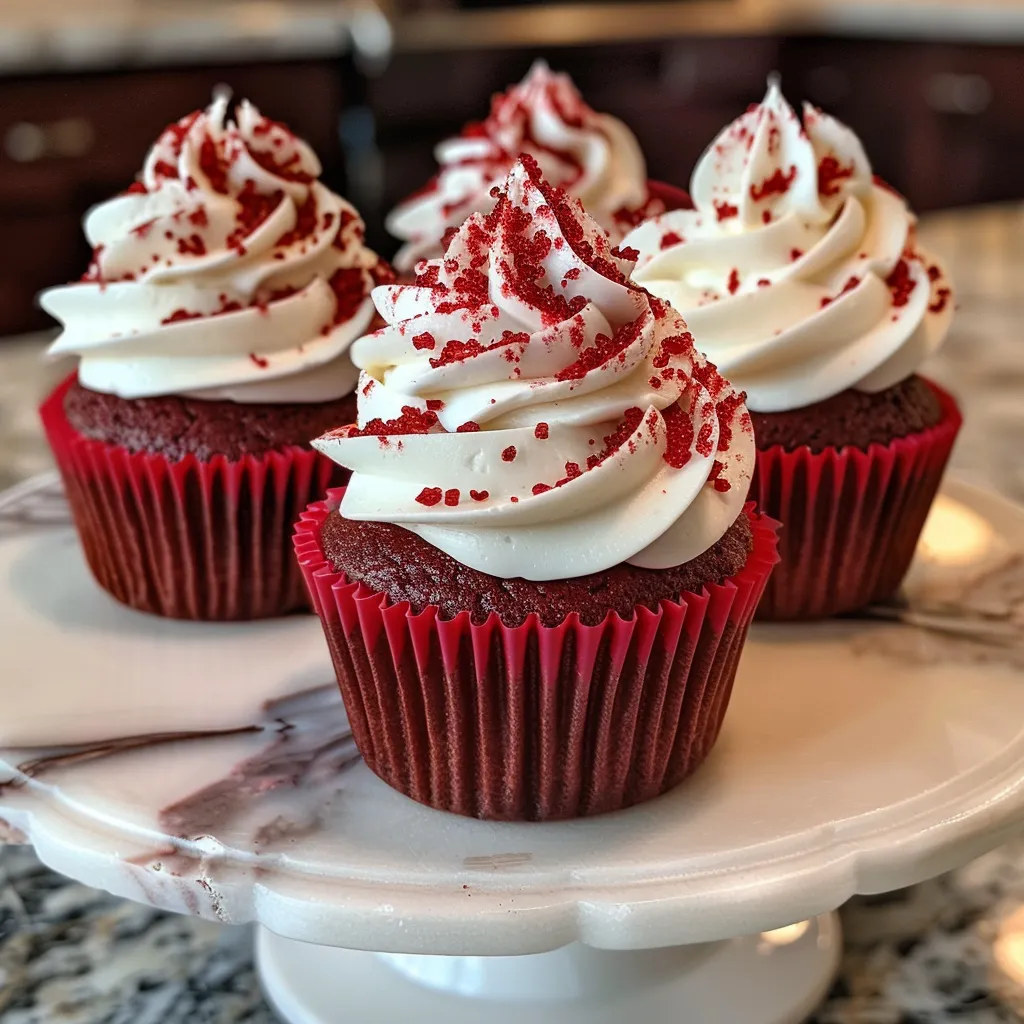
Tempting side view of a red velvet cupcake, highlighting its fluffy texture and vibrant red color.

Follow these simple steps to create your classic red velvet cupcakes:

  1. Preheat your oven to 350°F (175°C) and line a 12-cup muffin pan with paper liners.
  2. In a medium bowl, whisk together the flour, baking soda, cocoa powder, and salt. Set aside.
  3. In a liquid measuring cup, combine the buttermilk, vinegar, and vanilla extract. Set aside.
  4. In a large bowl, cream together the softened butter and granulated sugar with an electric mixer until light and fluffy.
  5. Beat in the eggs one at a time, mixing well after each addition.
  6. Stir in the red food coloring until fully incorporated and the batter is a vibrant red.
  7. Gradually add the dry ingredients to the wet ingredients, alternating with the buttermilk mixture, beginning and ending with the dry ingredients. Mix until just combined, being careful not to overmix.
  8. Divide the batter evenly among the prepared muffin cups, filling each about two-thirds full.
  9. Bake for 18-22 minutes, or until a wooden skewer inserted into the center of a cupcake comes out clean.
  10. Let the cupcakes cool in the pan for a few minutes before transferring them to a wire rack to cool completely.

Creating the Cream Cheese Frosting

While your cupcakes are cooling, let’s prepare the cream cheese frosting:

  1. In a large bowl, beat the softened cream cheese and butter together with an electric mixer until smooth and creamy.
  2. Gradually add the sifted powdered sugar, one cup at a time, mixing until fully incorporated and smooth.
  3. Beat in the vanilla extract. If the frosting is too thick, add milk one tablespoon at a time until desired consistency is reached.

Pro Tips for Baking Perfect Red Velvet Cupcakes

To help you achieve cupcake perfection, here are some expert insights:

  • Room Temperature Ingredients: Ensure all ingredients are at room temperature for better mixing and texture.
  • Don’t Overmix: Overmixing can lead to tough cupcakes. Mix just until combined.
  • Use Quality Food Coloring: Gel food coloring provides a more vibrant color than liquid.
  • Check for Doneness: Use the toothpick test—if it comes out clean, they’re done!
  • Cool Completely: Ensure cupcakes are completely cool before frosting to prevent melting.
  • Customize the Frosting: Feel free to add flavors like lemon zest or chocolate for a twist!
  • Use a Piping Bag: For a professional look, use a piping bag to frost your cupcakes.
  • Serve Fresh: For the best taste, serve the cupcakes within a few days of baking.

Common Mistakes and Troubleshooting

Even the best bakers make mistakes! Here are some common pitfalls and how to avoid them:

  • Dry Cupcakes: This may occur from overbaking or using too much flour. Always measure flour correctly—spoon it into the measuring cup and level it off.
  • Flat Cupcakes: Ensure your baking soda is fresh, and double-check your oven temperature for accuracy.
  • Frosting Too Runny: If your frosting is too runny, add more powdered sugar until you reach the desired consistency.
  • Uneven Bakes: Rotate your cupcake pan halfway through baking for even heat distribution.

Delicious Variations on Your Classic Red Velvet Cupcakes

Once you’ve mastered the classic version, try these fun variations:

  • Red Velvet Cake: Use the same batter to create a layered red velvet cake. Adjust the baking time accordingly.
  • Red Velvet Brownies: Transform the batter into fudgy brownies for a rich, chocolatey treat.
  • Red Velvet Cookies: Adapt the recipe for cookies and add chocolate chips for a delightful twist.
  • Red Velvet Whoopie Pies: Sandwich the frosting between two red velvet cookies for a fun dessert.

Storing Your Delicious Classic Red Velvet Cupcakes

To maintain the freshness of your cupcakes:

  • At Room Temperature: Store in an airtight container for up to 2 days.
  • In the Refrigerator: Keep them in the fridge for up to a week, but allow them to come to room temperature before serving.
  • Freezing: You can freeze unfrosted cupcakes for up to 3 months. Thaw them at room temperature before frosting.

Frequently Asked Questions (FAQs)

Here are some of the most common questions about red velvet cupcakes:

  • Why are red velvet cupcakes red? The red color comes from the reaction between cocoa powder and acidic ingredients like vinegar and buttermilk.
  • Can I use a different type of frosting? Absolutely! Cream cheese frosting is traditional, but you can also try buttercream, whipped cream, or even ganache.
  • How do I make the cupcakes more moist? Ensure you’re using enough liquid ingredients and not overbaking them.
  • Can I make the batter ahead of time? Yes, you can prepare the batter a day in advance and refrigerate it, but let it come to room temperature before baking.
  • What can I do with leftover frosting? Leftover cream cheese frosting can be stored in the refrigerator for up to a week. Use it on other desserts or enjoy it with fruit!
  • Are red velvet cupcakes healthy? While not a health food, you can make healthier substitutions like using whole wheat flour or reducing sugar for a lighter version.
  • How can I make my cupcakes rise higher? Ensure your leavening agents (baking soda and vinegar) are fresh and that you’re not overmixing the batter.
  • Can I use gel food coloring instead of liquid? Yes! Gel food coloring is preferred for a more vibrant and concentrated color.

Nutritional Tips and Dietary Adaptations

If you’re looking to make your red velvet cupcakes a bit healthier, consider these tips:

  • Whole Wheat Flour: Substitute half of the all-purpose flour with whole wheat flour for added fiber.
  • Reduce Sugar: Cut down the sugar by about 25% without sacrificing taste.
  • Non-Dairy Options: Use non-dairy butter and cream cheese to make this recipe vegan-friendly.
  • Natural Food Colorings: Explore natural options like beet juice for coloring if you prefer a more natural approach.

Essential Equipment for Baking

To achieve the best results, here’s a quick list of equipment you’ll need:

  • Muffin Pan: A standard 12-cup muffin pan is perfect for this recipe.
  • Electric Mixer: A stand or handheld mixer will make creaming butter and sugar a breeze.
  • Whisk: For mixing dry ingredients and combining wet ingredients.
  • Measuring Cups and Spoons: Accurate measurements are crucial for baking success!
  • Cooling Rack: To cool your cupcakes evenly and prevent sogginess.

Serving Suggestions

Once your cupcakes are baked and frosted, here are some delightful ways to serve them:

  • Garnish: Top with red velvet crumbs, chocolate shavings, or festive sprinkles for an attractive finish.
  • Pair with Coffee: Serve alongside a rich cup of coffee to balance the sweetness.
  • Make a Dessert Platter: Arrange them with other desserts like brownies and cookies for a fabulous dessert spread.
  • Gift Them: Package them beautifully in a box to share with friends or loved ones.

Conclusion

There you have it—your comprehensive guide to baking classic red velvet cupcakes! With their stunning color, delicious flavor, and creamy frosting, these cupcakes are bound to be a hit wherever you serve them. Remember, baking is all about experimenting and having fun. Trust me, with a little practice, you’ll master this recipe in no time. So, roll up your sleeves, gather your ingredients, and enjoy the delightful process of baking. Happy baking!

Classic Red Velvet Cupcakes

Prep Time 20 minutes
Cook Time 20 minutes
Total Time 40 minutes
Servings 12 cupcakes
Calories 250
Delight in these moist, vibrant red velvet cupcakes topped with creamy cheese frosting, perfect for any celebration.

Ingredients

Dry Ingredients

  • 2.5 cups all-purpose flour
  • 1 teaspoon baking soda
  • 1 teaspoon unsweetened cocoa powder
  • 0.5 teaspoon salt

Wet Ingredients

  • 1 cup buttermilk (room temperature)
  • 1 tablespoon white vinegar
  • 1 teaspoon vanilla extract
  • 1 cup unsalted butter (softened)
  • 2 cups granulated sugar
  • 2 large eggs (room temperature)
  • 2 tablespoons red food coloring (liquid or gel)

Frosting

  • 8 ounces cream cheese (softened)
  • 0.5 cup unsalted butter (softened)
  • 4 cups powdered sugar (sifted)
  • 1 teaspoon vanilla extract
  • 1-2 tablespoons milk (optional, for consistency)

Instructions 

  • Preheat oven to 350°F (175°C) and line a muffin pan with liners.
  • Mix dry ingredients; combine wet ingredients separately.
  • Cream butter and sugar, add eggs and food coloring, then alternate dry and wet ingredients.
  • Fill cupcake liners two-thirds full and bake for 18-22 minutes.
  • Cool cupcakes, then beat cream cheese and butter, add powdered sugar and vanilla to make frosting. Frost cooled cupcakes.

Notes

Ensure cupcakes are completely cooled before frosting for best results.
Calories: 250kcal
Cost: $15
Course: Dessert
Cuisine: American
Keyword: red velvet

Experience the Magic of Baking with Red Velvet Cupcakes

Welcome to a delightful baking adventure where we will explore the enchanting world of red velvet cupcakes. This recipe promises not only a visually striking dessert but also an irresistible taste that captures the hearts of many. With its rich, velvety texture and the lusciousness of cream cheese frosting, these cupcakes are destined to be a showstopper at any gathering. Let’s dive into the sweet journey of creating these magical treats!

Why You’ll Love This Recipe

This red velvet cupcake recipe is more than just a dessert; it’s a heartfelt experience. Here are five reasons why you’ll adore making and sharing these cupcakes:

  • Moist and Tender Cake: The combination of buttermilk and oil ensures every bite is soft and moist, making them incredibly satisfying.
  • Breathtaking Appearance: The vibrant red hue of these cupcakes makes them a stunning addition to any dessert table.
  • Rich Flavor Profile: A subtle hint of cocoa complements the sweetness, creating a flavor that’s both unique and delectable.
  • Versatile Frosting Options: While we recommend classic cream cheese frosting, feel free to experiment with variations like chocolate ganache or whipped cream.
  • Perfect for Any Occasion: Whether it’s a birthday, holiday, or just a Tuesday, these cupcakes are perfect for celebrating life’s moments.

Ingredient Breakdown

Let’s take a closer look at the ingredients that make these red velvet cupcakes so special. Each component plays a vital role in achieving the perfect flavor and texture.

  • Cake Flour: Using cake flour creates a lighter, more tender cupcake. You can substitute with all-purpose flour if needed, but the texture may be slightly denser.
  • Baking Soda and Cocoa Powder: These leavening agents work together to provide rise and a subtle chocolate flavor.
  • Unsalted Butter: Softened butter is crucial for achieving a fluffy batter. If you prefer a dairy-free version, consider using plant-based butter.
  • Granulated Sugar: Adds sweetness and helps with the cupcake’s moist texture. Brown sugar can be used for a richer flavor.
  • Eggs: Room temperature eggs help emulsify the batter, leading to a smooth and consistent mixture.
  • Canola Oil: This adds moisture without affecting the flavor. You can use vegetable oil or melted coconut oil as alternatives.
  • Red Food Coloring: Essential for that iconic red hue. Feel free to use natural food coloring if you prefer.
  • Buttermilk: Its acidity tenderizes the cake and adds moisture. You can make a substitute by mixing milk with a tablespoon of vinegar or lemon juice.
  • Distilled White Vinegar: Enhances the leavening process and adds a slight tanginess.
  • Cream Cheese and Butter for Frosting: The key ingredients that create a rich and creamy topping. Ensure they are at room temperature for easy mixing.

How to Make Red Velvet Cupcakes

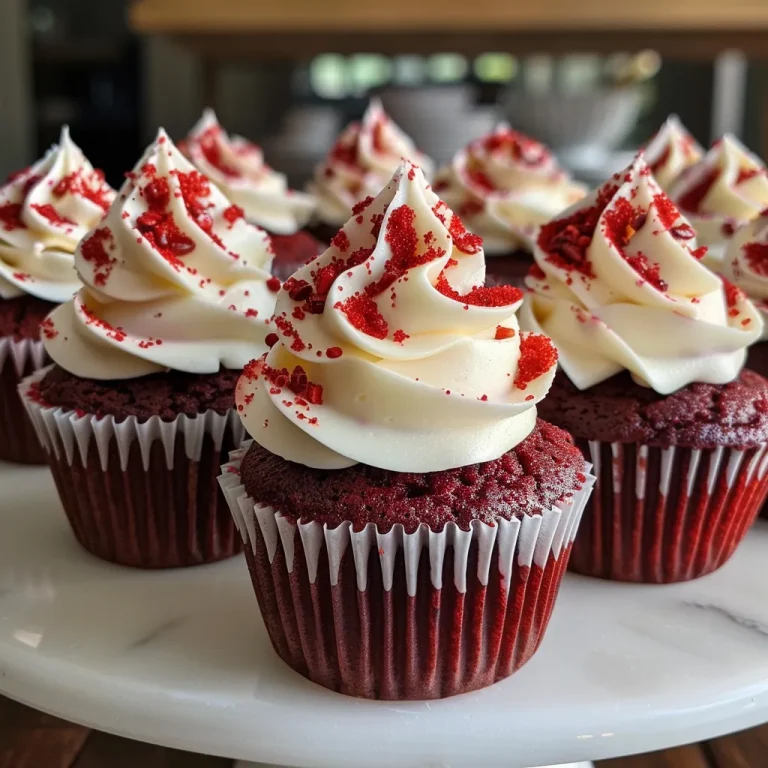
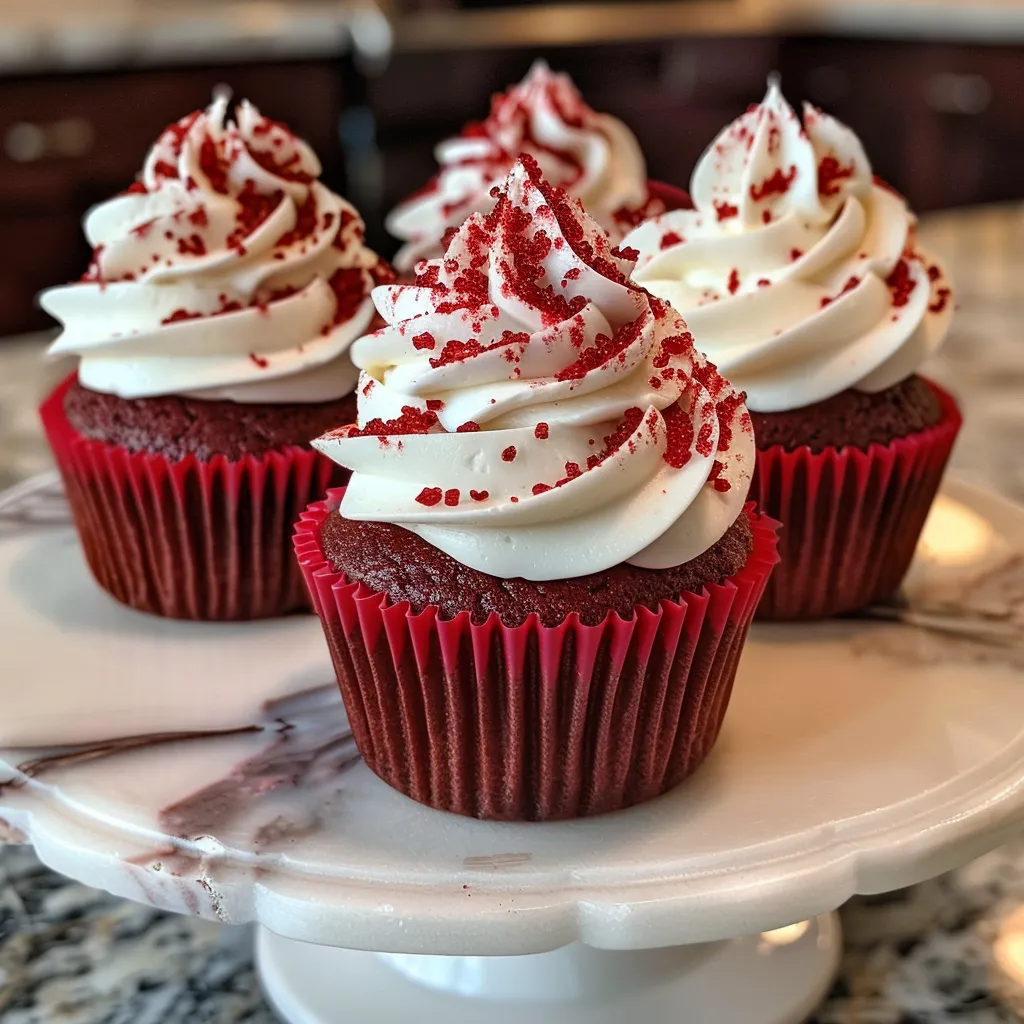
Delicious Red Velvet Cupcakes in a close-up shot highlighting the frosting and cake texture.

Let’s roll up our sleeves and get started! Follow these step-by-step instructions to whip up a batch of delightful red velvet cupcakes.

  • Prep pans and preheat: Preheat your oven to 350°F (180°C). Line cupcake pans with paper liners.
  • Combine dry ingredients: In a mixing bowl, whisk together the cake flour, baking soda, cocoa powder, and salt. Set aside.
  • Cream butter and sugar: In a separate bowl, cream together the softened butter and granulated sugar until light and fluffy. This should take about 2-3 minutes. Add in the eggs, vanilla extract, canola oil, and red food coloring, mixing until well combined.
  • Alternate the flour and buttermilk: Stir the vinegar into the buttermilk. Gradually alternate adding the dry flour mixture and the buttermilk to the butter mixture, starting and ending with the flour. Mix until just combined to avoid overmixing.
  • Bake: Divide the batter evenly among the prepared cupcake liners, filling each about 2/3 full. Bake for approximately 18 minutes, or until a toothpick inserted into the center comes out clean. Allow the cupcakes to cool in the pan for 5 minutes before transferring them to a wire rack to cool completely.
  • Make the frosting: In a mixing bowl, combine the cream cheese and butter. Beat on medium-high speed until smooth and well combined, about 2-3 minutes. Gradually add the confectioners’ sugar and a pinch of salt, mixing until smooth. Frost cooled cupcakes as desired.

Pro Tips for Perfect Red Velvet Cupcakes

To elevate your baking game, consider these expert tips:

  • Room Temperature Ingredients: Ensure all your ingredients, especially eggs and butter, are at room temperature. This helps create a smooth batter and better texture.
  • Don’t Overmix: Mix just until combined to maintain the lightness of the cupcakes. Overmixing can lead to dense cupcakes.
  • Use a Toothpick: Always check for doneness with a toothpick inserted into the center. If it comes out clean, they’re ready!
  • Cool Completely: Allow cupcakes to cool completely before frosting, as warm cupcakes can cause the frosting to melt.
  • Experiment with Frosting: Try different frosting styles like piping or spreading for a unique look. Use a star tip for a beautiful finish.
  • Chill Your Frosting: If your frosting is too soft, chill it for a bit before frosting the cupcakes to ensure it holds its shape.
  • Store Properly: Keep frosted cupcakes in an airtight container to maintain freshness. You can also freeze unfrosted cupcakes for later enjoyment.
  • Test for Doneness Early: Start checking your cupcakes a few minutes before the recommended baking time to prevent overbaking.

Common Mistakes and Troubleshooting

Even the best bakers can run into hiccups. Here are some common pitfalls and how to overcome them:

  • Dry Cupcakes: If your cupcakes turn out dry, it may be due to overbaking or not enough moisture in the batter. Always check for doneness early and ensure you’re using fresh ingredients.
  • Flat Cupcakes: This can happen if your leavening agents are expired or if the batter is overmixed. Double-check your baking soda and ensure you mix gently.
  • Frosting Melting: If your frosting is too soft, it might be due to the butter being too warm. Chill the frosting for a while to firm it up.
  • Color Issues: If your cupcakes don’t have that vibrant red color, make sure you’re using enough food coloring and that it’s of good quality.

Variations to Try

Feeling adventurous? Here are some fun variations to put a twist on your red velvet cupcakes:

  • Chocolate Chip Red Velvet Cupcakes: Fold in some chocolate chips to the batter for added sweetness and texture.
  • Red Velvet with Cream Cheese Swirl: Swirl cream cheese into the cupcake batter before baking for a delicious marbled effect.
  • Red Velvet Cheesecake Cupcakes: Add a small dollop of cheesecake batter to the center of each cupcake before baking for a creamy surprise.
  • Spicy Red Velvet Cupcakes: Add a pinch of cinnamon or cayenne pepper to the batter for a unique, spicy flavor profile.

Storage and Make-Ahead Instructions

These cupcakes can be made ahead of time and stored with ease:

  • Room Temperature: Store frosted cupcakes at room temperature for up to 2 days in an airtight container.
  • Refrigerator: If you need to keep them longer, refrigerate them for up to a week. Allow them to come to room temperature before serving.
  • Freezing: Unfrosted cupcakes can be frozen for up to 3 months. Just make sure to wrap them tightly in plastic wrap and place them in an airtight container.

Frequently Asked Questions

Here are some commonly asked questions about red velvet cupcakes:

  • Can I use all-purpose flour instead of cake flour? Yes, you can, but the texture may be slightly denser.
  • What can I substitute for buttermilk? Mix 1 cup of milk with 1 tablespoon of vinegar or lemon juice for a quick substitute.
  • How do I know when my cupcakes are done baking? A toothpick inserted into the center should come out clean or with a few moist crumbs.
  • Can I make the cupcakes ahead of time? Absolutely! They can be made a day in advance and stored properly.
  • Is it necessary to use vinegar? Yes, it helps with the leavening process and enhances the cupcake’s texture.
  • Why is my frosting too soft? It may be due to warm butter. Chill the frosting for a bit to firm it up.
  • Can I add nuts to the batter? Yes, finely chopped nuts can add a lovely crunch to your cupcakes.
  • What’s the best way to frost my cupcakes? Use a piping bag for a professional finish, or simply spread it on with a knife for a rustic look.

Nutrition Tips and Dietary Adaptations

If you’re looking to adapt this recipe for different dietary needs, consider the following:

  • Gluten-Free: Use a gluten-free cake flour mix to make these cupcakes gluten-free.
  • Lower Sugar: Substitute granulated sugar with a sugar alternative, adjusting for sweetness.
  • Vegan: Replace eggs with flax eggs (1 tablespoon flaxseed meal + 2.5 tablespoons water per egg) and use plant-based butter and milk.

Equipment Recommendations

Here’s what you’ll need to get started:

  • Mixing Bowls: A set of mixing bowls in various sizes will make combining ingredients easier.
  • Hand Mixer or Stand Mixer: Essential for achieving that fluffy texture in your batter and frosting.
  • Measuring Cups and Spoons: Accurate measurements are key in baking.
  • Silicone Spatula: Perfect for folding ingredients and scraping down the sides of the bowl.
  • Cupcake Pans: Non-stick pans make for easy cupcake removal after baking.

Serving Suggestions

To make your red velvet cupcakes shine, consider these serving ideas:

  • Pair with Coffee or Milk: The rich flavors of red velvet cupcakes pair beautifully with a hot cup of coffee or a glass of milk.
  • Plate with Fresh Berries: Adding a side of fresh berries can enhance the presentation and add a refreshing touch.
  • Top with Edible Flowers: Decorate with edible flowers for an elegant touch, especially for special occasions.
  • Serve with Ice Cream: For an indulgent treat, serve your cupcakes with a scoop of vanilla ice cream.

Conclusion

There you have it! A comprehensive guide to creating stunning and delicious red velvet cupcakes. With a little patience and the right techniques, you’ll be able to impress your friends and family with these delightful treats. Don’t forget, baking is all about joy and connection—so gather your loved ones and enjoy the experience together. Happy baking!

Red Velvet Cupcakes

Prep Time 20 minutes
Cook Time 18 minutes
Total Time 38 minutes
Servings 12 cupcakes
Calories 250
Delight in these moist and vibrant red velvet cupcakes topped with creamy frosting, perfect for any celebration.

Ingredients

Dry Ingredients

  • 2.5 cups cake flour (spooned and leveled)
  • 1 teaspoon baking soda
  • 2 tablespoons unsweetened cocoa powder
  • 1 teaspoon salt

Wet Ingredients

  • 0.5 cup unsalted butter (softened to room temperature)
  • 1.5 cups granulated white sugar
  • 2 large eggs (room temperature)
  • 0.5 cup canola oil
  • 2 tablespoons liquid red food coloring
  • 1 teaspoon vanilla extract

Buttermilk Mixture

  • 1 cup buttermilk
  • 1 teaspoon white vinegar

Frosting

  • 8 oz cream cheese (room temperature)
  • 8 tbsp unsalted butter (at room temperature)
  • 2 tsp vanilla extract
  • pinch salt
  • 4 cups confectioners’ sugar

Instructions 

  • Preheat oven to 350°F (180°C) and line cupcake pans with liners.
  • Whisk dry ingredients (flour, baking soda, cocoa, salt) and set aside.
  • Cream butter and sugar until light, then add eggs, vanilla, oil, and food coloring.
  • Alternate adding flour and buttermilk (with vinegar), starting and ending with flour. Mix just until combined.
  • Divide batter into liners, bake for 18 minutes, cool, then frost.

Notes

Ensure not to overmix the batter for tender cupcakes.
Calories: 250kcal
Cost: $15
Course: Dessert
Cuisine: American
Keyword: red velvet

The Irresistible Allure of Red Velvet Cupcakes

When it comes to baking, few desserts capture the heart quite like red velvet cupcakes topped with rich cream cheese frosting. These delightful treats are not just a feast for the eyes with their vibrant color; they also offer a unique flavor profile that combines a hint of cocoa with a moist, tender crumb. In this comprehensive guide, I will take you through the art of crafting these velvet cupcakes, ensuring you understand every step, ingredient, and technique involved. Whether you’re a baking novice or a seasoned pro, you’ll find valuable insights and tips to elevate your cupcake game!

Why You’ll Adore This Recipe

  • Perfect for Any Occasion: These cupcakes are versatile enough for birthdays, weddings, or just a cozy night in.
  • Decadent Flavor: The blend of cocoa and buttermilk creates a flavor that is both rich and tangy, making each bite unforgettable.
  • Visual Appeal: With their striking red hue, these cupcakes are a showstopper that impresses guests and family alike.
  • Customizable: You can easily adapt this recipe to create variations that suit your taste or dietary needs.
  • Simple Steps: The clear, step-by-step instructions make it easy for anyone to follow, ensuring success every time.

Ingredients & Why They Work

Before diving into the baking process, let’s break down the ingredients that make these red velvet cupcakes so special:

  • Cake Flour: The foundation of a light and tender cupcake, cake flour has a lower protein content than all-purpose flour.
  • Cocoa Powder: Adds a subtle chocolate flavor while contributing to the unique red color when combined with acidic ingredients.
  • Baking Soda & Vinegar: This duo creates a reaction that helps the cupcakes rise and develop their signature texture.
  • Buttermilk: It not only enhances moisture but also adds a slight tang that complements the sweetness.
  • Cream Cheese: The star of the frosting, cream cheese provides a rich, tangy flavor that balances the sweetness of the cupcakes.

Step-by-Step: How to Make Red Velvet Cupcakes with Cream Cheese Frosting

A delicious red velvet cupcake with white cream cheese frosting, emphasizing its appealing side profile.

Follow these detailed steps to create your batch of delicious red velvet cupcakes.

Step 1: Preheat and Prepare

Preheat your oven to 350°F (180°C) and line two standard 12-count muffin pans with 16 cupcake liners. This ensures even baking and easy removal.

Step 2: Mix Dry Ingredients

In a large mixing bowl, sift together cake flour, cocoa powder, baking soda, and salt. This aerates the flour and ensures even distribution of the leavening agents.

Step 3: Cream Butter and Sugar

Using a stand mixer or handheld mixer, cream unsalted butter and granulated sugar on medium speed for about 4-5 minutes until the mixture is light and fluffy.

Step 4: Incorporate Wet Ingredients

Add one large egg, mixing until fully integrated. Then, mix in canola oil, liquid red food coloring, vanilla extract, and vinegar, scraping down the bowl as needed.

Step 5: Combine Dry and Wet Ingredients

Add the dry ingredients in three additions, alternating with buttermilk. Start and end with the dry mixture, mixing until just combined to avoid overmixing.

Step 6: Bake the Cupcakes

Distribute the batter evenly among the cupcake liners, filling each about halfway. Bake for 18 minutes or until a toothpick inserted into the center comes out clean.

Step 7: Cool and Prepare Frosting

Once baked, allow the cupcakes to cool in the pan for a few minutes before transferring them to a wire rack to cool completely. In the meantime, prepare the cream cheese frosting.

Step 8: Make the Cream Cheese Frosting

In a mixer, beat cream cheese until smooth, then add softened butter and mix until well combined. Gradually add powdered sugar and vanilla extract, mixing until smooth.

Step 9: Frost the Cupcakes

Once cooled, pipe or spread the cream cheese frosting generously on top of each cupcake.

Pro Tips for Perfect Red Velvet Cupcakes

  • Room Temperature Ingredients: Ensure all ingredients are at room temperature for better mixing and texture.
  • Avoid Overmixing: Mix just until blended to keep the cupcakes tender and light.
  • Use Quality Cocoa Powder: A high-quality cocoa powder will enhance the chocolate flavor in the cupcakes.
  • Test for Doneness: Use a toothpick to check if the cupcakes are done; they should spring back when lightly touched.
  • Let Cool Completely: Allow cupcakes to cool completely before frosting to prevent melting.
  • Frosting Variations: Experiment by adding flavors like lemon zest or almond extract to the frosting for a unique twist.
  • Decorate with Style: Top with sprinkles, edible glitter, or fresh berries for an attractive finish.
  • Keep an Eye on Baking Time: Ovens can vary, so start checking a few minutes before the suggested time.

Common Mistakes and Troubleshooting

Even the best bakers make mistakes! Here are some common issues and how to troubleshoot them:

  • Cupcakes Too Dense: This can happen if you overmix the batter. Mix just until combined.
  • Too Dry: Ensure you’re measuring flour correctly. Use a kitchen scale for accuracy.
  • Frosting Too Runny: If your frosting is too thin, add more powdered sugar until it reaches your desired consistency.
  • Uneven Baking: Make sure your oven is properly preheated and avoid opening the door multiple times while baking.

Variations to Try

Want to switch it up? Here are some fun variations of the classic red velvet cupcake:

  • Red Velvet Cheesecake Cupcakes: Add a cheesecake filling for a rich surprise.
  • Chocolate Cream Cheese Frosting: Use cocoa powder in your frosting for an extra chocolate kick.
  • Mini Red Velvet Cupcakes: Use a mini cupcake pan for bite-sized treats perfect for parties.
  • Red Velvet Whoopie Pies: Use the same batter to make whoopie pies for a playful take on the classic.

Storage and Make-Ahead Instructions

To keep your red velvet cupcakes fresh:

  • Room Temperature: Store frosted cupcakes at room temperature for up to 2 days.
  • Refrigeration: If you need to store them longer, keep them in an airtight container in the fridge for up to a week.
  • Freezing: Cupcakes freeze well! Just wrap each one in plastic wrap and place them in a freezer-safe bag for up to 3 months. Thaw in the fridge before serving.

Frequently Asked Questions

Here are some common questions about red velvet cupcakes:

  • Can I use all-purpose flour instead of cake flour? Yes, but the texture may be denser.
  • What can I substitute for buttermilk? Mix 1 cup of milk with 1 tablespoon of vinegar or lemon juice and let it sit for 5 minutes.
  • How can I make the cupcakes less sweet? Reduce the amount of sugar in the batter and frosting to taste.
  • Can I use gel food coloring? Yes, gel food coloring will give you a more vibrant red color.
  • Is it necessary to use vinegar? Yes, vinegar reacts with baking soda to help the cupcakes rise.
  • How can I make the frosting fluffier? Beat the frosting longer to incorporate air, making it light and fluffy.
  • Can I add chocolate chips? Absolutely! Fold in mini chocolate chips for an added treat.
  • What’s the best way to frost these cupcakes? A piping bag with a star tip creates a beautiful swirl, but a simple spatula works too!

Nutrition Tips and Dietary Adaptations

Here are some tips for making your red velvet cupcakes more nutritious:

  • Lower Sugar Options: Substitute part of the sugar with applesauce or a sugar alternative for a healthier version.
  • Gluten-Free Options: Use a gluten-free cake flour blend for a gluten-free treat.
  • Dairy-Free Version: Substitute buttermilk with a plant-based milk and a squeeze of lemon juice, and use dairy-free butter for frosting.

Equipment Recommendations

To achieve the best results, consider using the following equipment:

  • Stand Mixer: Ideal for mixing and creaming ingredients smoothly.
  • Silicone Spatula: Perfect for folding ingredients and scraping the bowl without wasting any batter.
  • Oven Thermometer: Ensures your oven is at the correct temperature for even baking.
  • Piping Bags and Tips: For beautifully decorated cupcakes, invest in a good piping bag and various tips.

Serving Suggestions

Serve your red velvet cupcakes with the following ideas:

  • Pair with a Beverage: A glass of milk or a cup of coffee complements the sweetness perfectly.
  • Accompany with Fresh Berries: Fresh strawberries or raspberries add a nice tartness that balances the sweetness of the cupcakes.
  • Create a Dessert Platter: Serve alongside other baked goods for a delightful dessert table.

Conclusion

There you have it! A comprehensive guide to crafting the most delectable red velvet cupcakes with cream cheese frosting. With the right ingredients, techniques, and a little love, you can achieve bakery-quality results right from your kitchen. Remember, baking is about enjoying the process and sharing delicious moments with loved ones. So, go ahead and whip up a batch of these beauties, and watch them disappear before your eyes!

Red Velvet Cupcakes with Cream Cheese Frosting Recipe

Prep Time 20 minutes
Cook Time 18 minutes
Total Time 38 minutes
Servings 16 cupcakes
Calories 250
Delight in these moist red velvet cupcakes topped with rich cream cheese frosting, perfect for any celebration.

Ingredients

Dry Ingredients

  • 1 ⅓ cups cake flour ((145 grams))
  • 2 tablespoons unsweetened cocoa powder ((10 grams))
  • ½ teaspoon baking soda
  • ¼ teaspoon salt

Wet Ingredients

  • ¼ cup unsalted butter, softened ((60 grams))
  • 1 cup granulated sugar ((200 grams))
  • 1 large egg (room temperature)
  • ¼ cup oil ((60 ml))
  • 1 tablespoon liquid red food coloring ((15 ml))
  • 1 teaspoon vanilla extract
  • ½ teaspoon white vinegar
  • cup buttermilk ((160 ml))

Frosting

  • ½ cup unsalted butter, softened ((115 grams))
  • 1 (8-ounce) package brick-style cream cheese, softened ((226 grams))
  • 2 cups powdered sugar ((240 grams))
  • 1 teaspoon vanilla extract

Instructions 

  • Preheat oven to 350°F (180°C) and line pans with cupcake liners.
  • Mix dry ingredients, then cream butter and sugar. Add egg, oil, food coloring, vanilla, and vinegar; combine.
  • Alternate adding dry ingredients and buttermilk, mixing until just combined. Fill liners halfway.
  • Bake for 18 minutes, then cool completely.
  • Beat cream cheese and butter, then add powdered sugar and vanilla to make frosting. Frost cooled cupcakes.

Notes

Ensure not to overmix the batter to keep cupcakes light and fluffy.
Calories: 250kcal
Cost: $15
Course: Dessert
Cuisine: American
Keyword: cream cheese, cupcakes, red velvet

Elevate Your Breakfast: The Ultimate Hot Chocolate Pancakes Experience

Welcome to a delightful culinary adventure where breakfast meets dessert! If you’ve ever craved the rich, comforting flavor of hot chocolate in pancake form, you’re in for a treat. This recipe for hot chocolate pancakes is not just about satisfying your sweet tooth; it’s about creating a moment of joy in your kitchen. With every bite, these pancakes promise to deliver a chocolate lover’s dream experience, topped generously with fluffy whipped cream and chocolate chips. Let’s dive into the delicious details!

Why You’ll Love This Recipe

Here are just a few reasons to get excited about making hot chocolate pancakes:

  • Decadent Flavor: Infused with unsweetened cocoa powder and topped with mini chocolate chips, these pancakes are a chocolate lover’s dream come true.
  • Quick and Easy: With simple ingredients and straightforward steps, you can whip up this delightful breakfast in under 30 minutes.
  • Versatile Serving Options: Pair these pancakes with a variety of toppings—think whipped cream, maple syrup, or even your favorite berries!
  • Family-Friendly: Great for kids and adults alike, this recipe is sure to become a breakfast favorite for the whole family.
  • Perfect for Any Occasion: Whether it’s a cozy family brunch or a special holiday breakfast, these pancakes fit the bill perfectly.

Gathering Your Ingredients

Here’s what you’ll need to create these delightful hot chocolate pancakes:

  • 1 cup all-purpose flour: The base for your pancake batter.
  • 1/3 cup unsweetened cocoa powder: Adds that rich chocolate flavor.
  • 2 tbsp granulated sugar: For a touch of sweetness.
  • 1 tsp baking powder: Ensures your pancakes rise perfectly.
  • 1/2 tsp baking soda: Works with the baking powder for a light texture.
  • 1/4 tsp salt: Enhances all the flavors.
  • 3/4 cup whole milk: For a creamy batter.
  • 1/4 cup sour cream: Adds moisture and a hint of tang.
  • 1 large egg: Binds everything together.
  • 2 tbsp unsalted butter, melted: Adds richness.
  • 1 tsp vanilla extract: For that aromatic flavor.
  • 1/3 cup mini chocolate chips: Extra chocolatey goodness, plus more for topping.
  • Whipped cream: The perfect finishing touch!
  • Butter or oil: For greasing the pan.

Pro Tips for Perfect Hot Chocolate Pancakes

Deliciously plated hot chocolate pancakes with whipped cream and chocolate chip topping in a close-up shot.

Before you start cooking, consider these expert tips to make your pancakes even better:

  • Don’t overmix the batter: Gently combine ingredients until just mixed to ensure light and fluffy pancakes.
  • Let the batter rest: Allowing it to sit for a few minutes helps the gluten relax, resulting in softer pancakes.
  • Use a nonstick skillet: This helps prevent sticking and makes flipping easier.
  • Cook on medium heat: This allows the pancakes to cook evenly without burning.
  • Keep them warm: Place cooked pancakes on a plate in a warm oven while you finish cooking the rest.
  • Experiment with toppings: Try adding fresh fruit, nut butter, or even a drizzle of caramel for a unique twist.
  • Make them gluten-free: Substitute with your favorite gluten-free flour blend.
  • Freeze leftovers: Store in an airtight container for up to a month for quick breakfasts on busy days.

Common Mistakes and Troubleshooting

Even seasoned cooks can run into issues. Here’s how to avoid common pitfalls:

  • Flat pancakes: If your pancakes are too flat, check that your baking powder and soda are fresh—they’re essential for lift.
  • Burnt pancakes: If they’re burning on the outside but raw inside, lower the heat and give them a bit more time to cook.
  • Too dense: If the pancakes come out heavy, try not to overmix and ensure your liquid measurements are accurate.
  • Sticking to the pan: Make sure your skillet is well-greased and preheated before adding the batter.

Delicious Variations

Looking to mix things up? Here are some fantastic variations of the classic hot chocolate pancake:

  • Mint Chocolate Chip: Add a few drops of peppermint extract and use mint chocolate chips for a refreshing twist.
  • Peanut Butter Swirl: Swirl peanut butter into the batter before cooking for a nutty flavor.
  • Banana Chocolate Chip: Fold in mashed bananas for added sweetness and moisture.
  • Spicy Mexican Hot Chocolate: Add a pinch of cayenne pepper or cinnamon for a warm kick.

Storage and Make-Ahead Instructions

Want to prepare ahead of time? Here’s how to store and reheat your hot chocolate pancakes:

  • Make-ahead batter: You can prepare the batter the night before and refrigerate it. Just give it a quick stir before cooking.
  • Storing cooked pancakes: Place cooled pancakes in an airtight container and refrigerate for up to 3 days.
  • Freezing pancakes: For longer storage, freeze pancakes separated by parchment paper in an airtight container for up to a month.
  • Reheating: Warm pancakes in the microwave for 30 seconds or on a skillet over low heat until heated through.

Frequently Asked Questions

Here are some common questions about hot chocolate pancakes:

  • Can I make these pancakes dairy-free? Yes! Substitute the milk with almond or oat milk and use a dairy-free yogurt instead of sour cream.
  • Can I use regular chocolate chips? Absolutely! Use regular chocolate chips if you prefer a more intense chocolate flavor.
  • How do I make these pancakes gluten-free? Use a gluten-free flour blend as a 1:1 substitute for all-purpose flour.
  • Can I make these pancakes without eggs? Yes! Substitute the egg with a flaxseed or chia seed egg (1 tbsp of seeds mixed with 2.5 tbsp of water).
  • What toppings go well with these pancakes? Consider whipped cream, maple syrup, fresh berries, or even a drizzle of fudge sauce!
  • How can I adjust the sweetness? Feel free to reduce the sugar amount if you prefer a less sweet pancake or add more chocolate chips.
  • What’s the best way to serve hot chocolate pancakes? Serve them stacked high with your choice of toppings and a dusting of cocoa powder for a beautiful presentation.
  • Why are my pancakes tough? This usually happens from overmixing the batter. Mix until just combined for the best texture.

Nutritional Information and Dietary Adaptations

Here’s a quick look at the nutritional aspects of hot chocolate pancakes. Each serving (based on 4 servings) contains approximately:

  • Calories: 320
  • Protein: 8g
  • Fat: 14g
  • Carbohydrates: 45g
  • Fiber: 3g
  • Sugar: 10g

For dietary adaptations, consider these options:

  • Gluten-Free: Use a gluten-free flour blend.
  • Dairy-Free: Substitute dairy ingredients with non-dairy alternatives.
  • Lower Sugar: Reduce the sugar or use a sugar substitute like stevia.

Essential Equipment for Making Pancakes

To ensure a smooth cooking experience, here are some essential tools:

  • Mixing Bowls: A large bowl for mixing ingredients and a smaller one for wet ingredients.
  • Whisk: For combining dry and wet ingredients effortlessly.
  • Nonstick Skillet or Griddle: Ideal for cooking pancakes evenly.
  • Spatula: A wide spatula for flipping pancakes without breaking them.
  • Measuring Cups and Spoons: Accurate measurements are crucial for perfect results.

Serving Suggestions

When it comes to serving hot chocolate pancakes, presentation can elevate the meal:

  • Stack them high: Create a tall stack of pancakes for an impressive display.
  • Top generously: Use whipped cream, chocolate chips, and a light dusting of cocoa powder.
  • Add a drizzle: Serve with a side of syrup or a chocolate drizzle for extra indulgence.

Now that you have all the insights and tips, it’s time to make these hot chocolate pancakes your own! Dive into the process, have fun, and remember that the best ingredient you can add is love. Happy cooking!

Hot Chocolate Pancakes with Whipped Cream

Prep Time 10 minutes
Cook Time 10 minutes
Total Time 20 minutes
Servings 4 servings
Calories 350
Indulge in fluffy chocolate pancakes topped with whipped cream for a delightful treat perfect for breakfast or dessert.

Ingredients

Dry ingredients

  • 1 cup all-purpose flour
  • 1/3 cup unsweetened cocoa powder
  • 2 tbsp granulated sugar
  • 1 tsp baking powder
  • 1/2 tsp baking soda
  • 1/4 tsp salt

Wet ingredients

  • 3/4 cup whole milk
  • 1/4 cup sour cream
  • 1 large egg
  • 2 tbsp unsalted butter, melted
  • 1 tsp vanilla extract
  • 1/3 cup mini chocolate chips (plus extra for topping)

For serving

  • Whipped cream (for topping)
  • Butter or oil (for greasing the pan)

Instructions 

  • Mix dry ingredients in a bowl.
  • Add wet ingredients and whisk until just combined.
  • Gently fold in mini chocolate chips.
  • Cook pancakes on a greased skillet until bubbles form, then flip and cook until golden.
  • Stack pancakes, top with whipped cream and extra chocolate chips.

Notes

Use high-quality cocoa powder for richer flavor.
Calories: 350kcal
Cost: $12
Course: Breakfast
Cuisine: American
Keyword: chocolate