Author

Mike

Browsing

Welcome to the delightful world of Classic French Toast! This dish is more than just a breakfast item; it’s a beloved tradition that evokes warmth and comfort. Whether you’re looking to impress guests at brunch or simply enjoy a cozy morning at home, this easy recipe will guide you through creating the perfect plate of French toast. With its crispy edges, soft center, and the rich flavors of vanilla and cinnamon, it’s a dish you won’t forget. Let’s dive into the art of making this classic breakfast!

Why You’ll Love This Recipe

This Classic French Toast recipe isn’t just about flavor; it’s about creating moments. Here are five compelling reasons to try it:

  • Quick and Easy: With just a few simple ingredients, you can whip up this dish in under 20 minutes, making it a perfect weekday breakfast or last-minute brunch option.
  • Customizable: This recipe allows for endless variations—experiment with different breads, spices, and toppings to find your favorite combination.
  • Family-Friendly: Kids and adults alike love French toast! It’s a hit at the breakfast table that brings everyone together.
  • Perfect for Meal Prep: Make a big batch ahead of time, and simply reheat for a quick breakfast during busy mornings.
  • Delicious and Satisfying: The rich, creamy texture and sweet flavors will leave you feeling full and happy, ensuring your day starts on a high note.

Ingredients Breakdown

Let’s take a closer look at the ingredients that make this classic French toast a beloved breakfast staple:

  • 4 slices thick bread (brioche or challah works best): Choose thick, hearty bread for the best texture and flavor.
  • 2 large eggs: Use large eggs for a richer flavor and creamier texture.
  • 1/2 cup milk: Any milk, including whole, almond, or oat, can be used to suit your dietary preferences.
  • 1 teaspoon vanilla extract: This adds a delightful hint of sweetness and aroma.
  • 1 teaspoon cinnamon (optional): Enhances the warmth of the dish, making it even more comforting.
  • A pinch of salt: Balances the sweetness and brings out the flavors.
  • Butter or oil for cooking: Use for greasing the cooking surface, ensuring your French toast doesn’t stick.

Pro Tips for Perfect French Toast

To elevate your French toast game, consider the following expert insights:

  • Use stale bread: Day-old bread absorbs the egg mixture better without becoming soggy, giving you a perfect texture.
  • Whisk well: Ensure your egg mixture is well combined for an even coating on the bread.
  • Heat your pan adequately: A hot pan ensures a perfect golden-brown crust. Test the heat by dropping a small piece of bread in; it should sizzle.
  • Don’t overcrowd: Cook in batches to avoid steaming the bread, which can lead to sogginess.
  • Let it rest: Allow the coated bread to sit for a few minutes before cooking; this helps it soak in the mixture.
  • Finish in the oven: For perfectly cooked French toast, especially if you’re making a large batch, pop it in a 200°F (93°C) oven to keep warm.
  • Experiment with toppings: Fresh fruit, syrup, whipped cream, or even a dusting of powdered sugar can take your French toast to the next level.
  • Try different spices: Nutmeg, cardamom, or even a splash of orange zest can add a unique twist to your classic recipe.

Common Mistakes to Avoid

Even simple recipes can have pitfalls. Here are some common mistakes and how to troubleshoot them:

  • Using fresh bread: Fresh bread can turn mushy. Opt for stale or toasted bread for best results.
  • Not enough egg mixture: Ensure you have enough mixture to coat the bread adequately. A thicker bread will require more egg mixture.
  • Cooking at too high a temperature: High heat can burn the outside while leaving the inside uncooked. Keep the temperature moderate.
  • Skipping the salt: A pinch of salt enhances flavors significantly; don’t skip it!
  • Forgetting to flip: Make sure to flip the bread halfway through cooking for even browning.

Delicious Variations to Try

Make this classic French toast your own with these delightful variations:

  • Stuffed French Toast: Add a layer of cream cheese, Nutella, or jam between two slices of bread for a decadent twist.
  • Banana Bread French Toast: Use banana bread instead of regular bread for a fruity flavor.
  • Cinnamon Roll French Toast: Use store-bought cinnamon rolls; bake them and then slice and soak in the egg mixture.
  • Savory French Toast: Swap the sweet toppings for cheese, avocado, and herbs for a delicious brunch option.

Storage and Make-Ahead Instructions

You can easily make this dish ahead of time:

  • Refrigerate: Store cooked French toast in the fridge for up to 3 days. Reheat in a toaster or microwave.
  • Freeze: Freeze slices between layers of parchment paper in an airtight container for up to a month. Reheat directly from frozen.
  • Make-ahead mix: Prepare the egg mixture a day in advance and store it in the fridge. Soak the bread just before cooking.

Frequently Asked Questions

Here are some common queries about making French toast:

  • Can I use gluten-free bread? Absolutely! Gluten-free bread works well, just ensure it’s thick enough to hold up.
  • What can I use instead of eggs? You can use a flax egg or a commercial egg substitute for a vegan option.
  • How can I make it dairy-free? Substitute regular milk with almond, soy, or coconut milk.
  • What are the best toppings for French toast? Popular choices include maple syrup, fresh berries, whipped cream, or even yogurt.
  • Can I bake French toast? Yes! Assemble the soaked bread in a baking dish and bake at 350°F (175°C) for about 30 minutes.
  • Can I make French toast without a frying pan? Yes, use a griddle or an electric skillet for larger batches!
  • How do I know when it’s done? Look for golden-brown edges and a firm texture. A gentle press should bounce back.
  • Can I add flavor to the egg mixture? Definitely! Adding spices like nutmeg or flavored extracts can enhance the taste.

Nutrition Tips and Dietary Adaptations

For those mindful of dietary needs, here are some adaptations:

  • Low-Calorie Option: Use low-calorie bread and a milk alternative, and reduce the amount of sugar in toppings.
  • High-Protein Version: Add protein powder to the egg mixture or serve with Greek yogurt.
  • Low-Carb Alternative: Use cloud bread or almond flour bread for a low-carb version.

Essential Equipment Recommendations

To make the best French toast, here are some kitchen essentials:

  • Non-stick skillet or griddle: Ensures your French toast cooks evenly without sticking.
  • Whisk: For mixing your egg mixture thoroughly.
  • Spatula: A flexible spatula helps you flip the toast easily.
  • Measuring cups and spoons: Accuracy is key in cooking, especially in baking.

Serving Suggestions

For a complete breakfast experience, consider these serving suggestions:

  • Fresh Fruit: Top with bananas, strawberries, or blueberries for a refreshing contrast.
  • Whipped Cream: A dollop adds a decadent touch that’s hard to resist.
  • Nuts and Seeds: Add a sprinkle of almonds or chia seeds for extra crunch and nutrition.
  • Maple Syrup: A classic pairing that enhances the sweetness and flavor profile.

In conclusion, mastering the art of Classic French Toast opens up a world of delicious possibilities. With the right ingredients, techniques, and a sprinkle of creativity, you can turn a simple breakfast into a memorable experience. So, gather your loved ones around the table, whip up a batch of this comforting dish, and enjoy the joy of sharing a meal together. Happy cooking!

Classic French Toast

Prep Time 5 minutes
Cook Time 10 minutes
Total Time 15 minutes
Servings 4 slices
Calories 250
Enjoy a delicious and hearty breakfast with this classic French toast recipe, perfect for a cozy morning.

Ingredients

Bread

  • 4 slices thick bread (brioche or challah) (Choose thick, hearty bread for best results.)

Eggs

  • 2 large eggs (Use large eggs for a richer flavor.)

Milk

  • 0.5 cup milk (or your choice of milk alternative) (Any milk alternative can be used.)

Vanilla Extract

  • 1 teaspoon vanilla extract (Adds flavor to the egg mixture.)

Cinnamon

  • 1 teaspoon cinnamon (optional) (Enhances the warmth of the dish.)

Salt

  • a pinch salt (Balances sweetness.)

Butter or Oil for cooking

  • as needed butter or oil for cooking (Use for greasing the cooking surface.)

Instructions 

  • Whisk eggs, milk, vanilla, cinnamon, and salt in a shallow dish.
  • Dip bread slices into the mixture, coating both sides.
  • Heat butter or oil in a skillet over medium heat.
  • Cook bread slices until golden brown on both sides, about 2-3 minutes per side.
  • Serve warm with toppings of your choice.

Notes

For extra flavor, top with fresh berries or syrup.
Calories: 250kcal
Cost: $8
Course: Breakfast
Cuisine: French
Keyword: French Toast

Indulge in a Luxurious Treat: Gourmet Black Chocolate Covered Strawberries

Are you ready to elevate your dessert game with a delightful treat that combines the sweetness of fresh strawberries and the richness of dark chocolate? This Gourmet Black Chocolate Covered Strawberries recipe is not only a feast for the eyes but also a joy for the palate. Perfect for special occasions, romantic evenings, or simply to satisfy your sweet tooth, this recipe is simple enough for any home chef to master.

In this comprehensive guide, we’ll explore everything you need to know about making these exquisite chocolate-covered strawberries, from the ingredient breakdown to expert tips, common mistakes to avoid, and creative variations. Let’s dive into the world of decadent desserts!

Why You’ll Love This Recipe

This gourmet chocolate-covered strawberries recipe is sure to impress. Here are five reasons why:

  • Impressive Presentation: The shiny, chocolate-coated strawberries adorned with gold luster dust create a stunning visual that will wow your guests.
  • Simple and Quick: With just a few ingredients and straightforward steps, this recipe is simple and can be completed in under 30 minutes.
  • Perfect for Any Occasion: Whether it’s a birthday, anniversary, or holiday gathering, these treats are a delightful addition to any celebration.
  • Customizable Flavors: You can easily personalize the flavors and decorations to suit your taste preferences or themed events.
  • Healthier Indulgence: Strawberries are naturally low in calories and high in vitamins, making them a guilt-free dessert option when dipped in dark chocolate.

Ingredients Breakdown

To create your gourmet black chocolate covered strawberries, you’ll need the following ingredients:

  • 12 fresh strawberries: Choose ripe strawberries that are firm and free from blemishes.
  • 8 ounces dark chocolate: Use chocolate with at least 70% cocoa for a rich flavor. You can substitute with milk or white chocolate if desired.
  • 1 tablespoon coconut oil: This helps to create a smooth, glossy finish. Alternatively, you can use vegetable shortening.
  • Edible gold luster dust: For decoration, this adds a touch of luxury. If unavailable, you can use gold glitter or sprinkles.

Step-by-Step Instructions

Side view of chocolate-covered strawberries adorned with edible gold luster dust.

Follow these easy steps to make your gourmet black chocolate covered strawberries:

  1. Ensure the strawberries are completely dry after washing, as water can cause the chocolate to seize.
  2. In a microwave-safe bowl, combine the chopped dark chocolate and coconut oil. Heat in the microwave in 30-second intervals, stirring in between, until smooth and fully melted.
  3. Hold each strawberry by the stem and dip it into the melted chocolate, swirling to coat evenly. Allow excess chocolate to drip off.
  4. Using a small brush or a piping bag, apply the edible gold luster dust or glitter in swirls over the chocolate-covered strawberries while the chocolate is still wet.
  5. Place the dipped strawberries on a parchment-lined baking sheet and let them cool at room temperature until the chocolate hardens.
  6. Once set, arrange the strawberries on a serving platter or insert them onto sticks for easy handling. Enjoy immediately or refrigerate until ready to serve.

Pro Tips for Perfect Chocolate Covered Strawberries

To ensure your chocolate-covered strawberries turn out perfectly every time, consider the following expert insights:

  • Choose Quality Ingredients: High-quality dark chocolate will enhance the flavor of your strawberries.
  • Dry Strawberries Thoroughly: Make sure no water remains on the strawberries as it can cause the chocolate to seize.
  • Control Chocolate Temperature: Avoid overheating the chocolate to maintain a smooth consistency.
  • Use Parchment Paper: Line your baking sheet with parchment paper to prevent the strawberries from sticking.
  • Work Quickly: Dip the strawberries promptly before the chocolate begins to set.
  • Experiment with Toppings: Try adding crushed nuts, sprinkles, or sea salt for added flavor and texture.
  • Chill Before Dipping: Refrigerating strawberries for 15-20 minutes before dipping can help the chocolate set faster.
  • Store Properly: If you have leftovers, store them in an airtight container in the refrigerator for up to 2 days.

Common Mistakes and Troubleshooting

Even seasoned bakers encounter challenges. Here are some common mistakes and how to avoid them:

  • Chocolate Seizing: This happens when water comes into contact with chocolate. Ensure strawberries are completely dry.
  • Chocolate Not Setting: If the chocolate is too thick, it may not set properly. Ensure you add enough coconut oil and melt it smoothly.
  • Uneven Coating: Swirl the strawberries thoroughly in the chocolate to achieve an even coat.
  • Gold Dust Clumping: Apply the gold luster dust while the chocolate is still wet for better adherence.

Delicious Variations

Get creative with these variations to personalize your chocolate-covered strawberries:

  • Milk Chocolate Covered Strawberries: For a sweeter treat, use milk chocolate instead of dark chocolate.
  • White Chocolate Drizzled Strawberries: Dip strawberries in dark chocolate, then drizzle with melted white chocolate for a beautiful contrast.
  • Nutty Delight: After dipping in chocolate, roll the strawberries in chopped nuts for added crunch.
  • Spiced Chocolate: Mix a pinch of cayenne or cinnamon into the melted chocolate for a spicy kick.

Storage and Make-Ahead Instructions

If you want to prepare your gourmet black chocolate covered strawberries in advance, here’s how to store them:

  • Refrigerate: Store in an airtight container in the refrigerator for up to 2 days to maintain freshness.
  • Freeze for Longer Storage: If you want to store them longer, freeze the chocolate-covered strawberries. Place them on a baking sheet to freeze individually before transferring to an airtight container. They can be frozen for up to 3 months.

Frequently Asked Questions (FAQ)

Here are answers to some common questions about making chocolate-covered strawberries:

  • Can I use frozen strawberries? It’s best to use fresh strawberries for optimal texture and flavor.
  • How do I make the chocolate shiny? Adding coconut oil or shortening to the chocolate can help achieve a glossy finish.
  • What type of chocolate is best? Dark chocolate with 70% cocoa or higher is recommended for a rich taste.
  • Can I make these ahead of time? Yes, you can prepare them a day or two in advance and store them properly.
  • What can I use instead of luster dust? Edible glitter or sprinkles can be used as an alternative for decoration.
  • Why did my chocolate not harden? Ensure the chocolate was melted correctly and the strawberries were dry before dipping.
  • Can I use toppings other than gold dust? Absolutely! Try crushed nuts, sprinkles, or coconut for a unique twist.
  • How do I prevent chocolate from cracking? Use a good quality chocolate and temper it properly to avoid cracking when it cools.

Nutrition Tips and Dietary Adaptations

For those concerned about nutrition, here are some tips:

  • Dark Chocolate Benefits: Dark chocolate is rich in antioxidants and may improve heart health.
  • Low-Sugar Option: Choose sugar-free chocolate for a lower sugar content.
  • Vegan Adaptation: Use dark chocolate that is dairy-free and coconut oil for a vegan-friendly treat.
  • Gluten-Free: This recipe is naturally gluten-free, making it suitable for those with gluten sensitivities.

Essential Equipment Recommendations

To make the process smoother, consider having the following equipment:

  • Microwave-Safe Bowl: For melting chocolate safely and efficiently.
  • Parchment Paper: To prevent sticking and make cleanup easier.
  • Small Brush or Piping Bag: For applying luster dust or other toppings.
  • Sharp Knife: For chopping chocolate evenly.

Serving Suggestions

When it comes to serving your gourmet black chocolate covered strawberries, consider these ideas:

  • Elegant Platter: Arrange the strawberries on a decorative platter for an eye-catching presentation.
  • Chocolate Fountain: Serve with a chocolate fountain for a fun, interactive dessert experience.
  • Gift Giving: Package them in a beautiful box as a thoughtful gift for loved ones.
  • Pairing with Wine: These strawberries pair beautifully with red wine or champagne for a romantic touch.

Conclusion

In conclusion, making gourmet black chocolate covered strawberries is a rewarding experience that brings joy to both the creator and the consumer. With this comprehensive guide, you’re equipped with all the knowledge and tips needed to create these stunning treats. So gather your ingredients, unleash your inner chef, and enjoy the delightful process of crafting these chocolate-covered strawberries that are not just a dessert, but a moment of indulgence and connection. Happy cooking!

Gourmet Black Chocolate Covered Strawberries

Prep Time 15 minutes
Cook Time 5 minutes
Total Time 20 minutes
Servings 12 pieces
Calories 150
Indulge in elegant, decadent strawberries dipped in rich dark chocolate and adorned with edible gold for a luxurious treat.

Ingredients

Fruits

  • 12 pieces fresh strawberries, washed and dried
  • 8 ounces dark chocolate (70% cocoa or higher), chopped
  • 1 tablespoon coconut oil or vegetable shortening
  • 1 tablespoon edible gold luster dust or gold glitter for decoration

Instructions 

  • Ensure strawberries are completely dry.
  • Melt chocolate and coconut oil in 30-second microwave intervals, stirring until smooth.
  • Dip strawberries into melted chocolate, letting excess drip off.
  • Apply gold dust or glitter on wet chocolate using a brush or piping bag.
  • Place strawberries on parchment and let cool until chocolate hardens.
  • Serve immediately or refrigerate until ready.

Notes

For best results, keep strawberries dry and work quickly to prevent chocolate from seizing.
Calories: 150kcal
Cost: $15
Course: Dessert
Cuisine: International
Keyword: chocolate, Gold, Strawberries

Start Your Morning Right with Fluffy Oatmeal Pancakes

Breakfast is often considered the most important meal of the day, and what better way to kickstart your morning than with a plate of fluffy oatmeal pancakes? These delightful pancakes are not only easy to make but also packed with wholesome ingredients that will fuel your day. In this comprehensive guide, I’ll walk you through everything you need to know to create the perfect batch of fluffy oatmeal pancakes without using bananas. With over two decades of culinary experience, I assure you that great cooking is possible for everyone, and this recipe is no exception!

Why You’ll Love This Recipe

Here are five compelling reasons to give this pancake recipe a try:

  • Quick and Easy: This pancake recipe takes less than 30 minutes from start to finish, making it a perfect choice for busy mornings.
  • Healthy Ingredients: Made with oats, eggs, and yogurt, these pancakes are a nutritious option that will keep you satisfied.
  • Customizable: Feel free to add your favorite toppings or mix-ins, such as berries, nuts, or chocolate chips, to personalize your pancakes.
  • Gluten-Free Option: Simply use certified gluten-free oats to make these pancakes suitable for those with gluten sensitivities.
  • Kid-Friendly: With a fluffy texture and delicious taste, these pancakes are a hit with kids and adults alike!

Ingredient Breakdown

Let’s dive into the key ingredients you’ll need and some possible substitutions:

  • 1 cup oats: Use rolled oats for the best texture. You can also use quick oats, but be aware that the texture may differ slightly.
  • 1/3 cup plain yogurt: Greek yogurt works well for extra protein, but feel free to use any plain yogurt you have on hand.
  • 2 large eggs: Eggs are essential for binding the ingredients together and providing structure.
  • 2 tablespoons maple syrup (or honey): This natural sweetener adds a touch of sweetness to the pancakes. You can adjust the amount based on your preference.
  • 2 teaspoons vanilla extract: This adds a lovely flavor to the batter. You can also experiment with almond extract for a different taste.
  • 2 teaspoons baking powder: This will help your pancakes rise and become fluffy. Make sure it’s fresh for the best results.

Step-by-Step Instructions

Delicious oatmeal pancakes on a plate, showcasing their fluffy texture.

Now that we have everything ready, let’s make these fluffy oatmeal pancakes:

  1. To a blender, add the oats, yogurt, eggs, maple syrup, vanilla extract, and baking powder. Blend for 20-25 seconds until the batter is smooth. If the batter is too thick, you can add a little bit of milk or water to thin it out.
  2. Preheat a greased skillet over medium heat. Pour ⅓ cup of batter into the skillet and cook for 2 minutes until the edges look dry and bubbles start forming on top. Flip and cook for another 1-2 minutes until golden brown.
  3. Serve immediately with your favorite pancake toppings!

Expert Tips for Perfect Pancakes

Here are some pro tips to ensure your pancakes turn out perfectly every time:

  • Don’t Overmix: Blend just until smooth. Overmixing can lead to dense pancakes.
  • Let the Batter Rest: Allowing the batter to sit for a few minutes before cooking helps the oats absorb liquid and results in fluffier pancakes.
  • Adjust Heat Carefully: If your pancakes are browning too quickly, lower the heat a bit to ensure they cook through without burning.
  • Use a Non-Stick Pan: A non-stick skillet or griddle ensures easy flipping and prevents sticking.
  • Keep Warm: If making multiple batches, keep pancakes warm in a low oven (around 200°F) while you finish cooking.

Common Mistakes and Troubleshooting

Even the best chefs can face challenges in the kitchen. Here are a few common mistakes and how to avoid them:

  • Pancakes Are Too Dense: This often happens due to overmixing the batter. Remember, mix just until combined!
  • Pancakes Are Sticking: Ensure your skillet is well-greased and properly preheated to prevent sticking.
  • Pancakes Are Too Dry: If your pancakes are dry, consider adding a bit more yogurt or an extra egg to the batter.

Delicious Variations

If you want to mix things up, here are some delicious variations to try:

  • Chocolate Chip Oatmeal Pancakes: Add ½ cup of chocolate chips to the batter for a sweet surprise.
  • Berry Oatmeal Pancakes: Fold in fresh or frozen berries like blueberries or raspberries for a fruity twist.
  • Nutty Oatmeal Pancakes: Stir in chopped nuts such as walnuts or pecans for added crunch and flavor.
  • Spiced Oatmeal Pancakes: Add a teaspoon of cinnamon or pumpkin spice to the batter for a warm flavor profile.

Storage and Make-Ahead Instructions

Want to enjoy pancakes later? Here’s how to store them:

  • Storing Leftovers: Allow pancakes to cool completely, then place them in an airtight container in the refrigerator for up to 3 days.
  • Freezing Pancakes: For longer storage, freeze pancakes separated by parchment paper in a freezer-safe bag for up to 2 months.
  • Reheating: To reheat, simply pop them in the toaster, microwave, or oven until warmed through.

Comprehensive FAQs

Here are some frequently asked questions about oatmeal pancakes:

  • Can I make these pancakes vegan? Yes! Substitute the eggs with flax eggs and use a dairy-free yogurt alternative.
  • Can I use quick oats instead of rolled oats? Yes, though the texture may be slightly different.
  • Do I need to add sugar? The maple syrup adds enough sweetness, but you can adjust to your taste.
  • How can I make the pancakes fluffier? Ensure your baking powder is fresh and let the batter rest before cooking.
  • What toppings do you recommend? Try fresh fruit, yogurt, nuts, or a drizzle of honey or maple syrup.
  • Can I double the recipe? Absolutely! Just multiply the ingredients accordingly.
  • How do I know when the pancakes are done? Look for dry edges and bubbles on the surface before flipping.
  • Can I add protein powder to the batter? Yes, but adjust the liquid in the recipe to maintain the right consistency.

Nutritional Tips and Dietary Adaptations

These pancakes can be adapted to fit various dietary needs:

  • Protein Boost: Add a scoop of protein powder to the batter for an extra nutritional boost.
  • Dairy-Free Option: Replace yogurt with a dairy-free alternative and use almond or soy milk instead of regular milk.
  • Lower Carb Version: Use almond flour instead of oats for a low-carb pancake alternative.

Equipment Recommendations

For the best results, consider using the following equipment:

  • High-Speed Blender: A good blender is essential for creating a smooth pancake batter.
  • Non-Stick Skillet: Ideal for easy flipping and even cooking.
  • Spatula: A sturdy spatula will help you flip and serve your pancakes without breaking them.

Serving Suggestions

These pancakes can be enjoyed in numerous ways:

  • Classic Style: Serve with maple syrup and a sprinkle of powdered sugar.
  • Fruit Medley: Top with fresh fruit like strawberries, bananas, or blueberries for added flavor.
  • Nut Butter Delight: Spread almond or peanut butter on top for a protein boost.

In conclusion, making fluffy oatmeal pancakes without bananas is not only achievable but also incredibly rewarding. With the right ingredients and techniques, you can create a delicious breakfast that the whole family will love. So grab your blender, gather your ingredients, and let’s make some pancakes that will brighten your mornings!

Fluffy Oatmeal Pancakes Without Banana (Flourless)

Prep Time 5 minutes
Cook Time 10 minutes
Total Time 15 minutes
Servings 4 pancakes
Calories 180
Enjoy these light and fluffy oatmeal pancakes that are easy to make and perfect for a healthy breakfast.

Ingredients

Dry ingredients

  • 1 cup oats
  • 2 tablespoons baking powder

Wet ingredients

  • 1/3 cup plain yogurt
  • 2 large eggs
  • 2 tablespoons maple syrup (or honey)
  • 2 teaspoons vanilla extract

Instructions 

  • Add oats, yogurt, eggs, maple syrup, vanilla, and baking powder to a blender. Blend until smooth.
  • Preheat a greased skillet over medium heat. Pour ⅓ cup batter for each pancake.
  • Cook for 2 minutes until edges are dry and bubbles form. Flip and cook another 1-2 minutes until golden.
  • Serve immediately with toppings of choice.

Notes

For extra flavor, add fresh berries or nuts on top.
Calories: 180kcal
Cost: $10
Course: Breakfast
Cuisine: American
Keyword: healthy, Oatmeal, Pancakes

Discover the Allure of Red Velvet Cupcakes

Welcome to the delightful world of red velvet cupcakes! These vibrant treats are more than just a pretty dessert; they embody a rich history and a unique flavor profile that makes them a favorite for celebrations and casual gatherings alike. With their striking red color, velvety soft texture, and luscious cream cheese frosting, red velvet cupcakes are sure to impress. In this comprehensive guide, I’ll walk you through everything you need to know to create the perfect batch, ensuring you can enjoy these enchanting cupcakes in your own kitchen.

Why You’ll Love This Red Velvet Cupcake Recipe

There are countless reasons to fall in love with this red velvet cupcake recipe. Here are just a few that stand out:

  • Rich Flavor: The subtle cocoa flavor paired with the tangy cream cheese frosting creates a delicious balance that’s hard to resist.
  • Striking Appearance: The vibrant red color makes these cupcakes visually stunning, perfect for any special occasion.
  • Easy to Make: This recipe is straightforward, even for beginners, ensuring you can whip up a batch without stress.
  • Versatile Treat: Whether for birthdays, holidays, or just because, red velvet cupcakes fit any celebration beautifully.
  • Customizable: With a few simple tweaks, you can create different variations of red velvet cupcakes to suit your tastes.

Understanding Red Velvet Cupcakes

Red velvet cupcakes are essentially a variation of the classic velvet cake, characterized by their deep red hue and smooth, moist crumb. The addition of cocoa powder gives them a subtle chocolate flavor, while the buttermilk contributes to their tender texture. Traditionally, these cupcakes are topped with a rich cream cheese frosting that complements their unique flavor perfectly.

Ingredients Breakdown

Delicious red velvet cupcake showcasing its vibrant red color and creamy frosting.

Before diving into the baking process, let’s take a closer look at the ingredients you’ll need and some potential substitutions.

  • Cake Flour (2 1/2 cups or 285g): This will give your cupcakes a light and soft texture. If unavailable, you can use all-purpose flour with a bit of cornstarch.
  • Granulated Sugar (2 cups or 400g): Adds sweetness and moisture. Brown sugar can be used for a deeper flavor.
  • Cocoa Powder (1 tbsp): Use natural unsweetened cocoa for the best results; Dutch-processed can also work but may alter the final color.
  • Salt (1 tsp): Enhances flavor. Make sure to use fine salt for even distribution.
  • Baking Soda (1 tsp): This is crucial for leavening, helping the cupcakes rise.
  • Large Eggs (2, room temperature): Eggs help bind the ingredients and provide structure; room temperature eggs incorporate better.
  • Vegetable Oil (1 1/2 cups or 360ml): Oil keeps the cupcakes moist. You can substitute with melted coconut oil or melted butter.
  • Buttermilk (1 cup or 240ml, room temperature): Adds moisture and a slight tang. You can make a substitute by mixing milk with vinegar or lemon juice.
  • White Vinegar (1 tbsp): Reacts with baking soda for a fluffy texture.
  • Vanilla Extract (1 tsp): Adds depth of flavor; pure vanilla is best.
  • Red Food Coloring (1 tsp): This gives the cupcakes their signature color. Gel food coloring is preferred for vibrancy.
  • Cream Cheese (8 oz or 227g) and Unsalted Butter (1 stick or 114g): The base for your frosting—both should be at room temperature for easy mixing.
  • Powdered Sugar (4-6 cups or 480g – 720g): Sweetens and thickens the frosting; adjust for desired consistency.

Step-by-Step Guide to Making Red Velvet Cupcakes

Now that you have your ingredients ready, let’s get started on the baking process!

  1. Preheat the Oven: Set your oven to 350°F / 180°C (160° fan-assisted) and line a muffin pan with cupcake liners.
  2. Mix Dry Ingredients: In a large bowl, sift the sugar, flour, cocoa powder, baking soda, and salt together.
  3. Combine Wet Ingredients: In a separate bowl, crack the eggs and add the buttermilk, oil, vinegar, and vanilla. Whisk until well combined.
  4. Add Food Coloring: Mix the red food coloring into the wet ingredients. For best results, first mix it with a small amount of the wet mixture before combining it all together.
  5. Combine Mixtures: Pour the wet ingredients into the dry ingredients and stir with a wooden spoon or rubber spatula until just combined. Avoid overmixing.
  6. Fill the Cupcake Liners: Use an ice cream scoop to divide the batter evenly into the lined muffin pan.
  7. Bake: Place the cupcakes in the oven and bake for 20-22 minutes or until a skewer comes out clean.
  8. Cool Down: Remove from the oven and let sit for a few minutes then transfer to a wire rack to cool completely before frosting.

Mastering Cream Cheese Frosting

The cream cheese frosting is perhaps the most celebrated aspect of red velvet cupcakes. Here’s how to make it:

  1. Beat Cream Cheese and Butter: In a mixing bowl, beat the softened cream cheese and unsalted butter until smooth and creamy.
  2. Add Vanilla and Salt: Mix in the vanilla extract and salt to enhance the flavor.
  3. Gradually Add Powdered Sugar: Slowly add the powdered sugar, mixing until you achieve your desired consistency. For a thicker frosting, add more sugar.
  4. Frost the Cupcakes: Use a spatula or piping bag to frost each cooled cupcake generously.

Pro Tips for Perfect Red Velvet Cupcakes

To ensure your red velvet cupcakes are the best they can be, keep these expert tips in mind:

  • Room Temperature Ingredients: Always use room temperature eggs and buttermilk for better emulsification.
  • Don’t Overmix: Overmixing can lead to tough cupcakes. Mix until just combined.
  • Check Oven Temperature: An oven thermometer can help ensure your cupcakes bake evenly.
  • Cool Completely: Always allow cupcakes to cool completely before frosting to prevent melting.
  • Adjust Food Coloring: Feel free to adjust the amount of food coloring based on your desired shade of red.
  • Flavor Variations: Experiment with adding spices like cinnamon or nutmeg for a unique twist.
  • Frosting Consistency: If your frosting is too runny, add more powdered sugar; if too thick, add a splash of milk.
  • Storage Tips: Keep frosted cupcakes in an airtight container to maintain freshness.

Common Mistakes and Troubleshooting

Even the best bakers can encounter a few hiccups. Here are common mistakes and how to avoid them:

  • Dry Cupcakes: This can happen from overbaking. Keep an eye on the timer and perform a skewer test.
  • Dense Texture: Often due to overmixing or using cold ingredients. Stick to room temperature ingredients and mix gently.
  • Frosting Not Setting: If your frosting is too soft, chill it briefly before using to help it firm up.
  • Too Sweet Frosting: If your frosting is too sweet, add a pinch of salt to balance the flavors.

Delicious Variations of Red Velvet Cupcakes

Red velvet cupcakes are incredibly versatile. Here are some fun variations you can try:

  • Red Velvet Cake: Bake the same batter in a larger cake pan and adjust the baking time accordingly.
  • Red Velvet Brownies: Use the same batter but bake in a square pan for fudgy brownies.
  • Red Velvet Cookies: Transform the batter into cookies for a chewy twist.
  • Red Velvet Cupcake Pops: Crumble cooled cupcakes and mix with frosting, form into balls, and dip in chocolate.

Storage and Make-Ahead Instructions

Planning ahead? Here’s how to store your red velvet cupcakes:

  • Room Temperature: Cupcakes can be stored in an airtight container at room temperature for up to 3 days.
  • Refrigeration: For longer storage, keep frosted cupcakes in the fridge for up to a week. Allow to come to room temperature before serving.
  • Freezing: You can freeze unfrosted cupcakes for up to 3 months. Thaw at room temperature and frost before serving.

Comprehensive FAQ

Here are some frequently asked questions regarding red velvet cupcakes:

  • What gives red velvet its color? Red food coloring is what gives red velvet its signature hue.
  • Can I use cocoa powder instead of Dutch-processed? Yes, natural unsweetened cocoa powder works well for this recipe.
  • How do I know when my cupcakes are done? Insert a toothpick; if it comes out clean or with a few crumbs, they are done.
  • Can I use oil instead of butter in the frosting? Yes, but the flavor and texture will differ slightly.
  • Is there a gluten-free version? You can substitute the cake flour with a gluten-free blend for a gluten-free option.
  • What can I add to enhance the flavor? Consider adding a splash of almond extract or a hint of espresso for depth.
  • What’s the best way to frost cupcakes? A piping bag provides a professional touch, but a spatula works just fine for a rustic look.
  • How long does it take to bake? Bake for 20-22 minutes or until a skewer comes out clean.

Nutritional Tips and Dietary Adaptations

For those mindful of nutrition, here are some tips:

  • Lower Sugar: You can reduce the sugar by 25% without significantly affecting the texture.
  • Healthier Frosting: Consider using Greek yogurt instead of cream cheese for a lighter version.
  • Vegan Option: Substitute eggs with flax eggs, use plant-based milk, and dairy-free butter for the frosting.

Essential Equipment Recommendations

Here’s a quick list of equipment that can make your cupcake-making journey smoother:

  • Mixing Bowls: A set of mixing bowls in varying sizes is essential for combining ingredients.
  • Electric Mixer: A hand mixer or stand mixer will simplify the process of whipping ingredients.
  • Cupcake Liners: Choose high-quality liners to prevent sticking and enhance presentation.
  • Ice Cream Scoop: Ensures consistent portioning of batter for evenly sized cupcakes.
  • Wire Rack: A cooling rack allows air circulation, helping your cupcakes cool evenly.

Serving Suggestions

Finally, let’s talk about serving your delightful creations:

  • Garnish: Top with a sprinkle of cocoa powder or chocolate shavings for an elegant touch.
  • Pairings: Serve alongside a glass of milk or a cup of coffee for a delightful snack.
  • Presentation: Arrange on a beautiful platter for special occasions to impress your guests.

Conclusion

Red velvet cupcakes are a timeless treat that brings joy to any occasion. With this comprehensive guide, you now have all the tools necessary to create your own batch, from understanding the ingredients to mastering the frosting. Remember, baking is about sharing love and creating connections—so gather your loved ones, make some memories, and indulge in these delicious cupcakes. Happy baking!

Red Velvet Cupcakes Recipe

Prep Time 15 minutes
Cook Time 20 minutes
Total Time 35 minutes
Servings 12 cupcakes
Calories 250
Delight in these moist and vibrant red velvet cupcakes topped with creamy frosting, perfect for any celebration.

Ingredients

Dry Ingredients

  • 2 1/2 cups Cake Flour ((285g))
  • 2 cups Granulated Sugar ((400g))
  • 1 tbsp Cocoa Powder (natural unsweetened)
  • 1 tsp Salt
  • 1 tsp Baking Soda

Wet Ingredients

  • 2 large Eggs ((room temperature))
  • 1 1/2 cups Vegetable Oil ((360ml))
  • 1 cup Buttermilk ((240ml, room temperature))
  • 1 tbsp White Vinegar
  • 1 tsp Vanilla Extract
  • 1 tsp Gel Red Food Colouring

Frosting

  • 8 oz Cream Cheese ((227g))
  • 1 stick Unsalted Butter ((114g))
  • 4-6 cups Powdered Sugar ((480g - 720g))
  • 1 tsp Vanilla Extract
  • 1/4 tsp Salt

Instructions 

  • Preheat oven to 350°F / 180°C and line a muffin pan with cupcake liners.
  • Mix dry ingredients in a bowl. Whisk wet ingredients separately, add red food coloring, then combine with dry ingredients until just mixed.
  • Divide batter into liners and bake for 20-22 minutes. Cool completely before frosting.

Notes

Use an ice cream scoop for even cupcake sizes and avoid overmixing to keep cupcakes light.
Calories: 250kcal
Cost: $15
Course: Dessert
Cuisine: American
Keyword: red velvet

Welcome to the World of Classic Vanilla Pound Cake

There’s something truly special about a classic vanilla pound cake. This cake is not just a dessert; it’s a slice of tradition that carries with it the warmth of home and the joy of sharing. In this article, we’ll explore everything you need to know to craft the perfect vanilla pound cake, ensuring that every bite is a delightful experience. Get ready to impress your friends and family with this timeless treat!

Why You’ll Love This Recipe

Before we dive into the specifics of baking, let’s talk about why this vanilla pound cake is a must-try. Here are a few compelling reasons:

  • Rich and Buttery Flavor: This cake is a perfect balance of sweetness and richness, making it a delightful choice for any occasion.
  • Simple Ingredients: Made with pantry staples such as butter, sugar, eggs, and flour, this recipe is accessible for everyone.
  • Versatile Serving Options: Enjoy it plain, or dress it up with fruits, glazes, or whipped cream for a personalized touch.
  • Easy to Make: With straightforward steps, even beginner bakers can create a delightful dessert.
  • Great for Any Occasion: Whether it’s a family gathering, a holiday celebration, or a simple tea time, this vanilla pound cake is the perfect treat.

Ingredients Breakdown

To achieve the perfect vanilla pound cake, you’ll need the following ingredients:

  • 1 cup unsalted butter, softened: Provides richness and flavor. Ensure it’s at room temperature for easy creaming.
  • 2 cups granulated sugar: Sweetens the cake and contributes to its texture.
  • 4 large eggs, at room temperature: Helps bind the ingredients and creates a fluffy texture.
  • 3 cups all-purpose flour: The base of your cake, providing structure.
  • 1 teaspoon baking powder: Ensures the cake rises properly.
  • 1/2 teaspoon salt: Balances the sweetness and enhances the flavors.
  • 1 cup whole milk: Adds moisture, contributing to a tender crumb.
  • 2 teaspoons pure vanilla extract: Infuses a rich vanilla flavor, enhancing the overall taste.

**Substitutions**: If you’re looking to make adjustments, consider these alternatives:

  • Coconut Oil: Replace butter with coconut oil for a dairy-free option.
  • Almond Milk: Use almond milk instead of whole milk for a nutty flavor.
  • Egg Replacers: Use flax eggs or applesauce for a vegan version.

Step-by-Step Instructions for Vanilla Pound Cake

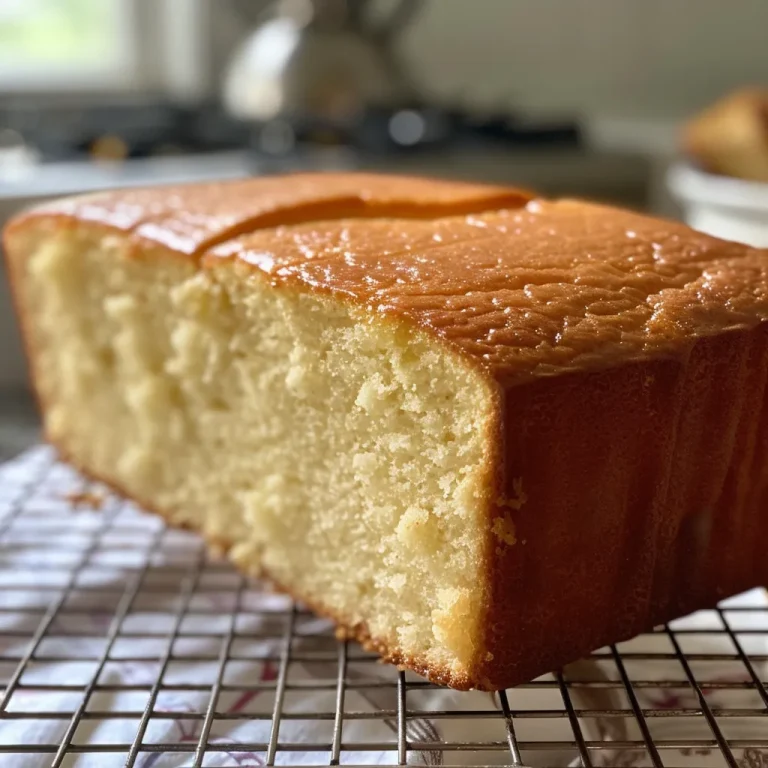
A slice of classic vanilla pound cake with a soft, inviting interior and golden edges.

Now that we have our ingredients ready, let’s get into the baking process!

  1. Preheat your oven to 350°F (175°C). Grease and flour a loaf pan to prevent sticking.
  2. In a large mixing bowl, cream the softened butter and sugar together until light and fluffy, about 5 minutes.
  3. Add the eggs, one at a time, mixing well after each addition. Stir in the vanilla extract.
  4. In another bowl, whisk together the flour, baking powder, and salt.
  5. Gradually add the dry ingredients to the butter mixture, alternating with the milk. Start and end with the flour mixture. Mix until just combined.
  6. Pour the batter into the prepared loaf pan and smooth the top. Bake for 60-70 minutes or until a toothpick inserted into the center comes out clean.
  7. Allow the cake to cool in the pan for 10 minutes before transferring it to a wire rack to cool completely.

Pro Tips for Perfecting Your Pound Cake

To ensure your vanilla pound cake turns out perfectly, consider these expert insights:

  • Room Temperature Ingredients: Make sure your eggs and butter are at room temperature for better emulsification.
  • Don’t Overmix: Mix until just combined to maintain a tender crumb; overmixing can lead to a dense cake.
  • Use a Kitchen Scale: Weighing your ingredients can improve accuracy and consistency.
  • Check for Doneness: Every oven is different; start checking for doneness a few minutes before the suggested baking time.
  • Cool Completely: Allow the cake to cool completely before slicing; this prevents it from crumbling.
  • Flavor Enhancements: Experiment with lemon zest or almond extract for a unique twist.
  • Grease Properly: Use butter or baking spray on your pan to ensure easy release.
  • Store Correctly: Wrap and store your cake properly to keep it moist and fresh.

Common Mistakes and Troubleshooting

Baking can sometimes lead to unexpected results. Here are some common mistakes and how to avoid them:

  • Dense Texture: This can occur from overmixing or using cold ingredients. Always mix until just combined and ensure ingredients are at room temperature.
  • Dry Cake: Overbaking is often the culprit. Use a toothpick to check for doneness and avoid leaving it in the oven too long.
  • Uneven Baking: Ensure your oven is properly calibrated and avoid opening the door frequently during baking.

Variations on Vanilla Pound Cake

Let’s get creative! Here are some delicious variations to try:

  • Citrus Zest Pound Cake: Add zest from oranges or lemons for a refreshing twist.
  • Chocolate Chip Vanilla Pound Cake: Fold in chocolate chips for a sweet surprise.
  • Almond Vanilla Pound Cake: Substitute a portion of vanilla extract with almond extract for a nutty flavor.
  • Sour Cream Pound Cake: Replace some of the milk with sour cream for added richness and moisture.

Storing and Make-Ahead Instructions

Want to enjoy your cake later? Here’s how to store it:

  • Room Temperature: Store in an airtight container for up to 3 days.
  • Refrigerator: Keep in the fridge for up to 1 week, wrapped in plastic wrap.
  • Freezer: Freeze slices or the whole cake in an airtight container for up to 3 months. Thaw overnight in the fridge before serving.

FAQs About Vanilla Pound Cake

Here are some frequently asked questions that can help you with your baking:

  • Can I use salted butter instead of unsalted? Yes, but reduce the added salt in the recipe.
  • What can I substitute for eggs? Use flax eggs or unsweetened applesauce for a vegan version.
  • How can I tell when my cake is done? Insert a toothpick into the center; it should come out clean.
  • Can I make this recipe gluten-free? Yes, substitute with gluten-free all-purpose flour.
  • Can I use a bundt pan instead? Absolutely! Just adjust the baking time as needed.
  • Why did my cake sink in the middle? This often happens from underbaking or not enough leavening agents.
  • How do I enhance the flavor of my cake? Adding extracts like almond or incorporating spices can elevate the taste.
  • What should I serve with my vanilla pound cake? Enjoy it with fresh fruits, whipped cream, or a drizzle of chocolate ganache.

Nutritional Tips and Dietary Adaptations

For those mindful of dietary choices, here are some adjustments you can make:

  • Lower Sugar Option: Use a sugar substitute that measures cup-for-cup to reduce sugar intake.
  • Whole Wheat Version: Substitute half of the all-purpose flour with whole wheat flour for added fiber.
  • Dairy-Free Option: Use plant-based butter and milk alternatives for those with dairy restrictions.

Recommended Equipment

To successfully bake this vanilla pound cake, you will need:

  • Loaf Pan: A standard 9×5 inch loaf pan works best.
  • Mixing Bowls: Use both large and medium-sized bowls for mixing ingredients.
  • Electric Mixer: A hand mixer or stand mixer will help you achieve the right texture.
  • Measuring Cups and Spoons: Accurate measurements are key to a perfect cake.

Serving Suggestions

Here are some delightful ideas for serving your classic vanilla pound cake:

  • With Fresh Berries: Top slices with strawberries, blueberries, or raspberries for a fruity contrast.
  • Glazed: Drizzle a simple vanilla glaze over the cooled cake for added sweetness.
  • With Ice Cream: Serve warm slices alongside a scoop of vanilla or chocolate ice cream.
  • As French Toast: Transform leftover slices into a decadent breakfast by dipping them in egg batter and frying until golden.

Final Thoughts

Baking a classic vanilla pound cake is a rewarding experience that brings joy to both the baker and those who get to enjoy the final product. With this comprehensive guide, you’re equipped to create a cake that’s not just delicious but also a testament to the love and care poured into it. So, gather your ingredients, preheat the oven, and embark on this delightful baking journey. Remember, every slice is a moment of connection, and I hope this cake becomes a cherished favorite in your home!

Classic Vanilla Pound Cake

Prep Time 15 minutes
Cook Time 1 hour 10 minutes
Total Time 1 hour 25 minutes
Servings 8 slices
Calories 480
A rich and buttery vanilla pound cake that's perfect for any occasion. Simple to make with classic ingredients, it offers a moist and flavorful treat.

Ingredients

Dough

  • 1 cup unsalted butter, softened
  • 2 cups granulated sugar
  • 4 large eggs, at room temperature
  • 3 cups all-purpose flour
  • 1 teaspoon baking powder
  • 1/2 teaspoon salt
  • 1 cup whole milk
  • 2 teaspoons pure vanilla extract

Instructions 

  • Preheat oven to 350°F (175°C). Grease and flour a loaf pan.
  • Cream butter and sugar until light and fluffy. Add eggs one at a time, then vanilla.
  • Whisk together flour, baking powder, and salt. Gradually add dry ingredients and milk to the butter mixture, starting and ending with flour.
  • Pour batter into prepared pan and smooth top. Bake for 60-70 minutes until a toothpick comes out clean.
  • Cool in pan for 10 minutes, then transfer to a wire rack to cool completely.

Notes

For extra flavor, add a splash of vanilla or serve with fresh berries.
Calories: 480kcal
Cost: $15
Course: Dessert
Cuisine: American
Keyword: vanilla

Discover the Joy of Homemade Vanilla Pound Cake

There’s something magical about the aroma of a freshly baked cake wafting through your home. This Vanilla Pound Cake recipe is not just any cake; it’s a timeless delight that brings comfort and joy to any occasion. Whether you’re celebrating a birthday, hosting a tea party, or simply indulging in a sweet treat after dinner, this cake is your go-to choice. In this comprehensive guide, we’ll explore every aspect of making the perfect Vanilla Pound Cake, from ingredients to variations, ensuring that you feel confident and excited to bake.

Why You’ll Love This Recipe

  • Unmatched Flavor: Infused with rich vanilla, this cake delivers a delightful taste that pairs well with various toppings, from fresh fruits to creamy frostings.
  • Easy to Make: With simple ingredients and straightforward steps, even novice bakers can achieve success. You don’t need to be a pro to impress your friends and family!
  • Moist and Tender: Thanks to the perfect balance of butter, sugar, and eggs, this recipe ensures a moist and tender crumb that melts in your mouth.
  • Versatile Base: This pound cake serves as an excellent foundation for various flavors, making it adaptable for any occasion.
  • Make-Ahead Friendly: The cake can be baked in advance and stored, allowing you to plan ahead for gatherings without the last-minute rush.

Ingredient Breakdown

To create the best Vanilla Pound Cake, let’s dive into the essential ingredients you’ll need:

  • All-Purpose Flour: 1 ¾ cups. This is the backbone of the cake, providing structure. For a gluten-free option, substitute with a gluten-free all-purpose blend.
  • Baking Powder: 1 tsp. This helps your cake rise, giving it a light texture.
  • Salt: ¼ tsp. A pinch of salt enhances the flavor, balancing the sweetness.
  • Unsalted Butter: ¾ cup, softened. Essential for richness and moisture. You can replace it with coconut oil for a dairy-free version.
  • Granulated Sugar: 1 cup. This adds sweetness and contributes to the cake’s structure.
  • Whole Milk: ⅔ cup. Adds moisture and richness. You can use almond or soy milk for dairy-free alternatives.
  • Large Eggs: 2. They act as a binding agent and help with the cake’s lift.
  • Vanilla Extract: 1 Tbsp. For that unmistakable vanilla flavor. You can use vanilla bean paste for an even richer taste.

Step-by-Step Instructions for Vanilla Pound Cake

Close-up of Vanilla Pound Cake displaying its rich color and moist crumb.

Now that you’ve gathered your ingredients, let’s walk through the steps to make this delightful cake:

  1. Preheat & Prep Pan: Preheat your oven to 350°F (175°C). Grease a loaf pan with nonstick cooking spray to ensure easy release.
  2. Mix Dry Ingredients: In a medium bowl, whisk together the flour, baking powder, and salt. Set aside.
  3. Cream Butter & Sugar: In a large bowl, beat the softened butter and sugar with a hand mixer for about 2–3 minutes until the mixture is smooth and creamy.
  4. Add Wet Ingredients: Beat in the eggs, milk, and vanilla extract until everything is fully combined.
  5. Combine: Gradually add the dry ingredients to the wet mixture, mixing until just combined. Be careful not to overmix to maintain a light texture.
  6. Bake: Pour the batter into the prepared loaf pan, smoothing the top. Bake for 60–70 minutes, covering with foil for the last 20 minutes if the top starts to brown too much. Test doneness by inserting a toothpick—it should come out clean.
  7. Cool & Serve: Let the cake cool in the pan for 15 minutes. Use a knife or spatula to loosen the edges before transferring it to a wire rack to cool completely before slicing.

Pro Tips for the Perfect Pound Cake

  • Room Temperature Ingredients: Ensure your butter, eggs, and milk are at room temperature for better emulsification.
  • Don’t Overmix: Mix until just combined to prevent a dense cake; overmixing incorporates too much air.
  • Use a Toothpick: Always test for doneness at the center of the cake, and check multiple spots to ensure it’s fully baked.
  • Let it Rest: Allow your cake to cool in the pan briefly to prevent it from breaking apart when transferred.
  • Experiment with Flavorings: Don’t hesitate to add citrus zest, almond extract, or spices for a unique twist.
  • Store Properly: Keep your cake in an airtight container to maintain its moisture and flavor.
  • Try a Glaze: A simple glaze can elevate the cake further—consider a vanilla or almond glaze for extra sweetness.
  • Chill Before Slicing: If time allows, chilling the cake before slicing can help achieve cleaner cuts.

Common Mistakes and Troubleshooting

Baking can sometimes be finicky. Here are common mistakes and how to avoid them:

  • Dense Texture: Caused by overmixing the batter. Mix until just combined.
  • Dry Cake: This can happen if you overbake. Keep an eye on the baking time and test early.
  • Uneven Baking: Ensure that your oven is properly calibrated. Use an oven thermometer to check the temperature.
  • Cracked Top: This can occur if the oven temperature is too high. Consider lowering it slightly.

Variations on Vanilla Pound Cake

Feel free to get creative with your Vanilla Pound Cake! Here are some delightful variations:

  • Citrus Infusion: Add the zest of one lemon or orange to the batter for a refreshing citrus flavor.
  • Chocolate Chip Delight: Fold in ½ cup of chocolate chips for a sweet surprise in every bite.
  • Almond Pound Cake: Substitute vanilla extract with almond extract for a nutty twist.
  • Fruit-Studded Cake: Incorporate fresh or dried fruits, such as blueberries or cranberries, into the batter.

Storage and Make-Ahead Instructions

Your Vanilla Pound Cake can be made ahead of time and stored properly to maintain its freshness:

  • Room Temperature: Store in an airtight container at room temperature for up to 3 days.
  • Refrigerator: For longer storage, wrap the cake in plastic wrap and refrigerate for up to a week.
  • Freezer: Wrap the cooled cake tightly in plastic wrap and aluminum foil. It can be frozen for up to 3 months. Thaw in the refrigerator before serving.

Frequently Asked Questions (FAQs)

  • Can I use different types of flour? Yes, you can use cake flour for a lighter texture or gluten-free flour for a gluten-free version.
  • What can I use instead of eggs? You can substitute each egg with ¼ cup of unsweetened applesauce or a flax egg (1 tbsp ground flaxseed mixed with 2.5 tbsp water).
  • How can I tell if my cake is done? Insert a toothpick into the center; it should come out clean or with a few moist crumbs.
  • Can I add frosting? Absolutely! Cream cheese frosting or a simple glaze pairs wonderfully with this cake.
  • Why is my cake sinking? This can happen if the batter was overmixed or if the oven temperature was too low.
  • How do I make the cake more flavorful? Consider adding extracts or flavoring agents like lemon zest or almond extract.
  • Can I make mini pound cakes? Yes, adjust the baking time to about 30-40 minutes for smaller loaves.
  • Is it better to slice the cake warm or cold? It’s best to let it cool completely before slicing for cleaner cuts.

Nutrition Tips and Dietary Adaptations

This Vanilla Pound Cake can be adapted to fit various dietary needs:

  • Low-Sugar Option: Substitute granulated sugar with a sugar substitute suitable for baking.
  • Dairy-Free: Use coconut oil and almond milk in place of butter and whole milk.
  • Whole Grain: Swap half of the all-purpose flour with whole wheat flour for added nutrition.

Equipment Recommendations

Here are some essential tools to make your baking experience enjoyable:

  • Loaf Pan: A good-quality nonstick loaf pan is crucial for easy release.
  • Mixing Bowls: Use a set of mixing bowls for easy ingredient preparation.
  • Hand Mixer: A hand mixer is great for creaming butter and sugar effectively.
  • Cooling Rack: Ensure even cooling to prevent sogginess.

Serving Suggestions

Serve your Vanilla Pound Cake in delightful ways:

  • With Fresh Berries: Top with strawberries or raspberries for a fresh burst of flavor.
  • With Whipped Cream: A dollop of freshly whipped cream enhances the cake’s richness.
  • As a Dessert Parfait: Layer with yogurt and fruit for a delicious parfait.

In conclusion, this Vanilla Pound Cake is not only a classic recipe but also a canvas for your creativity in the kitchen. With its moist texture and rich flavor, it’s sure to become a staple in your baking repertoire. Remember, the joy of baking lies in the process and the love you put into it. So gather your ingredients, preheat that oven, and let’s bake a cake that will create memories around your table!

Vanilla Pound Cake

Prep Time 15 minutes
Cook Time 1 hour 10 minutes
Total Time 1 hour 25 minutes
Servings 8 slices
Calories 350
A moist and buttery vanilla pound cake perfect for any occasion. Simple to make with classic ingredients.

Ingredients

Dry Ingredients

  • 1 ¾ cups all-purpose flour
  • 1 tsp baking powder
  • ¼ tsp salt

Wet Ingredients

  • ¾ cup unsalted butter, softened
  • 1 cup granulated sugar
  • cup whole milk
  • 2 large eggs
  • 1 Tbsp vanilla extract

Instructions 

  • Preheat oven to 350°F (175°C). Grease a loaf pan.
  • Whisk dry ingredients together. Cream butter and sugar until smooth.
  • Add eggs, milk, and vanilla; mix until combined. Fold in dry ingredients.
  • Pour batter into pan. Bake 60–70 minutes, covering if needed.
  • Cool 15 minutes, then transfer to wire rack to cool completely.

Notes

Ensure not to overmix the batter for a tender crumb.
Calories: 350kcal
Cost: $15
Course: Dessert
Cuisine: American
Keyword: pound cake

Elevate Your Breakfast with the Ultimate French Toast Experience

Welcome to the ultimate guide on crafting the best French toast! If you’ve ever wondered how to achieve that perfect balance of buttery crisp edges and a custardy center, you’re in the right place. This article will not only provide you with a foolproof recipe, but also delve into the nuances that make French toast a breakfast classic loved by many. Let’s explore the secrets to making this beloved dish that’s perfect for breakfast or brunch.

Why You’ll Love This Recipe

  • Rich Flavor: Infused with vanilla and a hint of cinnamon, this recipe elevates the taste of your classic French toast.
  • Perfect Texture: Achieve the perfect contrast between buttery crisp edges and a soft, custardy center that melts in your mouth.
  • Easy to Make: With just a few simple steps, you’ll have a restaurant-quality breakfast on your table in no time.
  • Versatile Toppings: The French toast serves as a perfect canvas for a variety of toppings, from fresh fruits to decadent syrups.
  • Make Ahead Option: You can prepare the custard mixture ahead of time, making breakfast even easier!

Ingredients Breakdown

Here’s what you’ll need to create this delicious French toast, along with some substitutions for flexibility:

  • 1 loaf Challah or Brioche Bread: These types of bread provide the best texture and flavor. You can substitute with any thick-sliced bread.
  • 2 cups Half-n-Half or Heavy Cream: For a richer custard, consider using heavy cream. For a lighter version, use whole milk.
  • 4 large Eggs: Essential for the custard base, they help bind the mixture.
  • 1/4 cup Sugar: This adds a touch of sweetness; use brown sugar for a deeper flavor.
  • 2 teaspoons Vanilla Extract: Pure vanilla extract offers the best flavor; avoid imitation if possible.
  • 1/2 teaspoon Cinnamon: A pinch of nutmeg can also be a delightful addition.
  • Salted Butter: For cooking; feel free to use unsalted if you prefer more control over the saltiness.

Steps to Create the Best French Toast

Deliciously golden French toast drizzled with maple syrup.

Now that we have our ingredients ready, let’s dive into the step-by-step process:

  1. Slice the challah or brioche bread into thick slices, approximately 1 inch. Using day-old bread enhances texture.
  2. In a shallow dish, whisk together the half-and-half, eggs, sugar, vanilla extract, and cinnamon until well combined. For a smoother custard, blend the mixture.
  3. Dip each slice of bread into the custard, soaking both sides for about 20 seconds. Allow excess custard to drain off.
  4. Heat a large skillet or griddle over medium-low heat and add a generous amount of butter.
  5. Cook each slice of French toast for approximately 3-5 minutes per side until golden brown and cooked through. Adjust heat as necessary to avoid burning.
  6. Serve immediately with powdered sugar, salted butter, and pure maple syrup. Enjoy!

Pro Tips for Success

  • Use Day-Old Bread: Day-old bread absorbs the custard better, resulting in a creamier texture.
  • Don’t Rush the Cooking: Cooking on medium-low heat ensures the toast cooks evenly without burning.
  • Experiment with Flavors: Add a dash of orange zest or almond extract for a unique twist.
  • Keep It Warm: If cooking in batches, keep finished slices warm in a low oven until all are ready.
  • Try Different Breads: While challah and brioche are fantastic, sourdough or even cinnamon raisin bread can add exciting flavors.
  • Double the Recipe: If you’re serving a crowd, doubling the custard recipe is simple and effective!
  • Pairing Suggestions: Consider serving with fresh berries, whipped cream, or a fruit compote.
  • Use a Non-Stick Pan: This makes cleanup easier and helps prevent sticking.

Common Mistakes and Troubleshooting

Even the best chefs can face challenges. Here’s how to avoid common pitfalls:

  • Too Soggy? If your French toast is soggy, it likely soaked too long in the custard. Limit soaking time to 20 seconds.
  • Burnt Edges? If you find the edges are burning before the center is cooked, lower your heat and take your time.
  • Not Enough Flavor? Always taste your custard before dipping the bread. Adjust sweetness or spice as needed.

Variations to Try

Mix things up with these delightful variations:

  • Stuffed French Toast: Add a layer of cream cheese or Nutella between two slices for a rich treat.
  • Savory French Toast: Replace sugar with herbs and cheese for a delicious savory option.
  • French Toast Casserole: Prepare the custard and bread in layers in a baking dish, then bake for a crowd-pleasing breakfast.
  • Chocolate Chip French Toast: Add chocolate chips to the custard for a sweet surprise.

Storage and Make-Ahead Instructions

If you have leftovers (though unlikely!), store them in an airtight container in the fridge for up to 3 days. To reheat, place them in a toaster or on a skillet over medium heat until warmed through.

For make-ahead options, prepare the custard mixture the night before and cover it in the refrigerator. Simply soak the bread slices in the morning and cook!

Comprehensive FAQ

  • Can I use any type of bread? Yes! While challah and brioche are best, any thick-sliced bread works.
  • How can I make French toast gluten-free? Substitute with gluten-free bread and ensure your custard ingredients are also gluten-free.
  • What’s the best way to freeze French toast? Flash freeze individual slices on a baking sheet, then transfer to a freezer bag for up to 3 months.
  • Can I use almond milk instead of dairy? Absolutely! Almond milk or any plant-based milk can be used for a dairy-free version.
  • How do I make it less sweet? Simply reduce the sugar in the custard mixture to your taste preference.
  • What toppings do you recommend? Fresh fruits, whipped cream, maple syrup, or a sprinkle of powdered sugar work beautifully!
  • Is French toast a breakfast or a dessert? While traditionally a breakfast dish, it can easily serve as a delightful dessert!
  • Can I add spices other than cinnamon? Yes! Nutmeg, cardamom, or even a bit of ginger can add wonderful flavors.

Nutritional Tips and Dietary Adaptations

This French toast recipe can be adapted for various dietary needs:

  • Low-Carb Option: Use low-carb bread and sugar substitutes to make it keto-friendly.
  • Vegan Version: Substitute eggs with flaxseed meal and use almond milk instead of cream.
  • Dairy-Free Adaptation: Use plant-based milk and dairy-free butter for a completely dairy-free meal.

Equipment Recommendations

For the best results, consider these kitchen tools:

  • Non-Stick Skillet: Essential for preventing sticking and ensuring even cooking.
  • Whisk: A good whisk helps create a smooth custard mixture.
  • Spatula: A flexible spatula makes flipping easy without tearing the bread.
  • Shallow Dish: Ideal for soaking the bread without excessive spillage.

Serving Suggestions

Pair your French toast with:

  • Fresh Berries: Strawberries, blueberries, or raspberries enhance both flavor and presentation.
  • Maple Syrup: For that classic sweet touch, opt for pure maple syrup.
  • Whipped Cream: A dollop of whipped cream makes for a luxurious finish.
  • Chocolate Sauce: For a dessert twist, drizzle with rich chocolate sauce.

Conclusion

Now that you have the ultimate guide to making the best French toast, it’s time to roll up your sleeves and get cooking! Remember, cooking is about joy, connection, and the delicious moments shared around the table. Whether you’re enjoying this French toast for breakfast or brunch, it’s sure to bring smiles to your loved ones. Happy cooking!

The Best French Toast Recipe: Achieving Golden Perfection! 🍞🍳

Prep Time 10 minutes
Cook Time 10 minutes
Total Time 20 minutes
Servings 4 servings
Calories 250
Enjoy perfectly golden French toast with a rich custard and crispy edges, ideal for a delightful breakfast.

Ingredients

Bread

  • 2 cups Half-n-Half or Heavy Cream
  • 4 large Eggs
  • 1/4 cup Sugar
  • 2 teaspoons Vanilla Extract
  • 1/2 teaspoon Cinnamon
  • Salted Butter Salted Butter

Instructions 

  • Slice bread into 1-inch thick slices; use day-old bread for best results.
  • Whisk together cream, eggs, sugar, vanilla, and cinnamon until smooth.
  • Dip bread slices into custard, soaking both sides for 20 seconds.
  • Heat skillet with butter over medium-low heat.
  • Cook slices 3-5 minutes per side until golden brown.
  • Serve with powdered sugar, butter, and maple syrup.

Notes

Use slightly stale bread for better absorption of the custard.
Calories: 250kcal
Cost: $15
Course: Breakfast
Cuisine: French
Keyword: French Toast

Fluffy Buttermilk Pancakes: A Breakfast Delight Worth Waking Up For

Imagine waking up to the aroma of freshly made buttermilk pancakes wafting through your kitchen, inviting you to the table. This classic breakfast dish is not just a meal; it’s an experience that brings families together and creates cherished moments. In this article, we’ll explore a comprehensive guide to making the fluffiest buttermilk pancakes, complete with tips, variations, and everything you need to elevate your breakfast game.

Why You’ll Love This Recipe

  • Quick and Easy: With simple ingredients and straightforward steps, you can whip up these pancakes in no time, making them perfect for busy mornings.
  • Fluffy Texture: The secret to achieving that light and airy texture lies in the batter and cooking technique—no more dense pancakes!
  • Customizable: You can easily modify the recipe to suit your taste by adding various flavors and toppings.
  • Family-Friendly: Kids love pancakes! This dish is a hit with children and adults alike, making it an ideal family breakfast.
  • Make-Ahead Option: These pancakes can be made in advance and frozen, so you can enjoy a quick breakfast any day of the week.

Ingredients for Fluffy Buttermilk Pancakes

To make the perfect buttermilk pancakes, gather the following ingredients:

  • 2 cups of all-purpose flour: The foundation of your pancake batter; it gives structure.
  • 2 cups of buttermilk: This ingredient adds moisture and tang, enhancing the pancake’s flavor.
  • 2 large eggs, beaten: Eggs provide richness and help bind the ingredients together.
  • 2 tablespoons of sugar: This adds sweetness and promotes browning for that lovely golden color.
  • 2 tablespoons of baking powder: Essential for fluffiness; it helps the pancakes rise.
  • 1 teaspoon of baking soda: Enhances the leavening effect, particularly when combined with buttermilk.
  • 1/2 teaspoon of salt: Balances the flavors and enhances sweetness.
  • 2 tablespoons of melted butter: Adds richness and flavor; use unsalted for better control over saltiness.

Directions to Make Fluffy Buttermilk Pancakes

Side angle of a plate featuring classic pancakes, showing the syrup pooling on top and the texture of the pancakes.
  1. In a large bowl, whisk together the dry ingredients: flour, sugar, baking powder, baking soda, and salt.
  2. In a separate bowl, mix the wet ingredients: buttermilk, eggs, and melted butter.
  3. Gently combine the wet and dry ingredients, taking care not to overmix. A few lumps are perfectly fine—this will help keep the pancakes fluffy.
  4. Let the batter rest for about 10 minutes. This allows the leavening agents to activate and the flour to hydrate.
  5. Preheat a greased griddle or cast iron skillet to 350°F (175°C).
  6. Pour about ¼ cup of batter onto the hot surface for each pancake.
  7. Wait until small bubbles form on the surface before flipping the pancakes. This usually takes about 2-3 minutes.
  8. Once flipped, cook for an additional 1-2 minutes until golden brown.
  9. Serve hot with butter and maple syrup, or top with fresh fruit for a delightful twist.

Pro Tips for Perfect Pancakes

  • Use fresh ingredients: Ensure your baking powder is fresh for maximum fluffiness.
  • Don’t overmix: Overmixing can lead to tough pancakes; a few lumps are okay!
  • Rest the batter: Allowing the batter to rest is crucial for achieving that perfect texture.
  • Temperature matters: Make sure your griddle is at the right temperature before pouring the batter.
  • Keep pancakes warm: If making a large batch, keep pancakes warm in an oven set at 200°F (93°C).
  • Experiment with add-ins: Try adding chocolate chips, blueberries, or nuts to the batter for varied flavors.
  • Flip wisely: Only flip once the edges look set and bubbles appear on the surface.
  • Layer flavors: Serve with flavored syrups or whipped cream for an indulgent breakfast.

Common Mistakes and Troubleshooting

Even the best chefs can make mistakes! Here are common pitfalls and how to avoid them:

  • Pancakes too dense: This can happen if you overmix the batter or use old baking powder. Always check your ingredients!
  • Pancakes burning: If your pancakes are browning too quickly, lower the heat on your griddle.
  • Uneven cooking: Ensure your griddle is evenly heated; use a thermometer for accuracy.
  • Pancakes sticking: Make sure your cooking surface is adequately greased.

Variations to Try

Add a twist to your buttermilk pancakes with these fun variations:

  • Blueberry Buttermilk Pancakes: Add fresh or frozen blueberries to the batter for a fruity explosion.
  • Chocolate Chip Pancakes: Stir in chocolate chips for a decadent treat that kids will love.
  • Banana Pancakes: Mash a ripe banana into the batter for natural sweetness and flavor.
  • Spiced Pancakes: Add a pinch of cinnamon or nutmeg for a warm, cozy flavor profile.

Storage and Make-Ahead Instructions

Want to save time on busy mornings? Here’s how to store and reheat your pancakes:

  • Refrigeration: Store leftover pancakes in an airtight container in the fridge for up to 3 days.
  • Freezing: Freeze pancakes in a single layer, then transfer to a zip-top bag. They can last up to 2 months.
  • Reheating: Reheat pancakes in the microwave for 30 seconds or in a toaster oven until warmed through.

Frequently Asked Questions

Here are some common questions about making buttermilk pancakes:

  • Can I substitute regular milk for buttermilk? Yes, but for the best results, add a tablespoon of vinegar or lemon juice to regular milk and let it sit for a few minutes to sour.
  • How do I know when to flip my pancakes? Look for bubbles forming on the surface of the pancake; this is a sign that it’s ready to flip.
  • Can I use whole wheat flour? Absolutely! Whole wheat flour can add a nutty flavor and extra fiber.
  • Why are my pancakes sticking? Ensure your cooking surface is well-greased and properly preheated.
  • Can I make the batter ahead of time? It’s best to use the batter fresh, but you can prepare dry ingredients in advance and mix them with wet ingredients just before cooking.
  • What can I serve with pancakes? Traditional toppings include butter and maple syrup, but you can also try yogurt, fruit, or whipped cream.
  • How do I store leftover pancakes? Refrigerate in an airtight container for up to 3 days or freeze for up to 2 months.
  • Why are my pancakes flat? This can be due to old baking powder or not allowing the batter to rest properly.

Nutrition Tips and Dietary Adaptations

Want to make your pancakes healthier? Here are some suggestions:

  • Whole Wheat Flour: Substitute half of the all-purpose flour with whole wheat flour for added nutrients.
  • Reduce Sugar: Cut down on sugar or use natural sweeteners like honey or agave syrup.
  • Dairy Alternatives: Use almond milk or coconut milk in place of buttermilk for a dairy-free version.
  • Add Flaxseed: Incorporate ground flaxseed for extra fiber and omega-3 fatty acids.

Essential Equipment for Making Pancakes

To achieve pancake perfection, you’ll need the right tools:

  • Mixing Bowls: A set of mixing bowls in different sizes will help keep your ingredients organized.
  • Whisk: A good whisk ensures that your ingredients are well combined.
  • Griddle or Cast Iron Skillet: A non-stick surface is crucial for perfectly cooked pancakes.
  • Spatula: A wide, flat spatula makes flipping pancakes a breeze.

Serving Suggestions

Elevate your pancake presentation with these serving ideas:

  • Layered Pancake Stacks: Create tall stacks and drizzle with syrup or fruit compote for a beautiful presentation.
  • Garnish: Add a dollop of whipped cream and sprinkle with powdered sugar for a touch of elegance.
  • Side Dishes: Serve with crispy bacon, fresh fruit, or yogurt for a complete breakfast.
  • Flavorful Syrups: Experiment with flavored syrups like blueberry, raspberry, or even chocolate for a decadent twist.

In conclusion, making fluffy buttermilk pancakes from scratch is not only easy but also a rewarding experience that can be customized to suit any palate. With this comprehensive guide, you now have all the tools and knowledge to create delicious pancakes that will delight friends and family alike. So, gather your ingredients, roll up your sleeves, and enjoy the delightful journey of pancake making!

Classic Buttermilk Pancakes With Maple Syrup

Prep Time 10 minutes
Cook Time 15 minutes
Total Time 25 minutes
Servings 4 servings
Calories 350
Fluffy and delicious pancakes made with buttermilk, perfect for a cozy breakfast topped with maple syrup.

Ingredients

Dry ingredients

  • 2 cups all-purpose flour

Wet ingredients

  • 2 cups buttermilk
  • 2 large eggs (beaten)

Instructions 

  • Mix dry ingredients in one bowl.
  • Whisk wet ingredients separately.
  • Combine wet and dry, gently mixing.
  • Let batter rest for 10 minutes.
  • Preheat skillet and pour ¼ cup batter for each pancake.
  • Cook until bubbles form, then flip and serve with syrup.

Notes

For extra fluffiness, do not overmix the batter.
Calories: 350kcal
Cost: $15
Course: Breakfast
Cuisine: American
Keyword: Pancakes

Elevate Your Breakfast with the Best French Toast Recipe

There’s nothing quite like starting your day with a plate of perfectly made French toast. This classic breakfast dish combines rich flavors and a fluffy texture that can transform any ordinary morning into a delightful experience. In this guide, I’ll walk you through the secrets of crafting the ideal French toast, ensuring it becomes a family favorite at your table. With just a few simple ingredients and some expert tips, you’ll be well on your way to French toast perfection.

Why You’ll Love This Recipe

This French toast recipe is not just easy; it’s packed with flavor and versatility. Here are five compelling reasons to love it:

  • Quick and Easy: Takes just 15 minutes from prep to plate, perfect for busy mornings.
  • Customizable: Use your favorite bread—whether brioche, sourdough, or even gluten-free options.
  • Deliciously Flavorful: The blend of cinnamon and vanilla creates a warm, inviting flavor profile.
  • Perfect for Meal Prep: Make a large batch and store it for quick breakfasts throughout the week.
  • Family-Friendly: Kids and adults alike will love this sweet and satisfying start to the day.

Ingredients Breakdown

Here’s what you’ll need to make this scrumptious French toast, along with some handy substitutions:

  • 1 cup milk: You can use whole, low-fat, or even almond milk for a dairy-free version.
  • 3 tablespoons all-purpose flour: This helps create a thicker batter; whole wheat flour is a great alternative.
  • 4 large eggs: Essential for binding and creating that fluffy texture.
  • 3 tablespoons light brown sugar: Adds a rich sweetness; feel free to substitute with maple syrup.
  • 1 1/2 teaspoons vanilla extract: Use pure vanilla for the best flavor.
  • 1 teaspoon ground cinnamon: Enhances the warmth of the dish; nutmeg can be used for a different twist.
  • 1/8 teaspoon salt: Balances the sweetness.
  • 1 tablespoon butter: For greasing the griddle; use coconut oil for a dairy-free option.
  • 12 slices thick bread: Brioche is my favorite, but challah or even bagels can work!

How to Make French Toast

Thick slices of French toast garnished with strawberries and a light drizzle of syrup.

Ready to get started? Follow these easy steps for perfectly cooked French toast:

  1. In a blender, combine the milk, flour, eggs, brown sugar, vanilla, cinnamon, and salt. Blend until smooth. If you prefer, you can whisk these ingredients together in a bowl instead.
  2. Preheat your griddle to 350°F or use a skillet on medium-high heat. Grease it with butter.
  3. Dip each slice of bread into the egg mixture, ensuring both sides are evenly coated. Place the bread on the griddle and cook for about 2 minutes per side, or until golden brown.
  4. Serve immediately with your favorite toppings!

Pro Tips for French Toast Perfection

Here are some expert insights to ensure your French toast turns out perfectly every time:

  • Use Thick Bread: Thicker slices absorb more of the egg mixture, leading to a fluffier texture.
  • Let the Bread Soak: For an even richer flavor, allow the bread to soak for a minute before cooking.
  • Keep Warm: If making in batches, keep cooked slices warm in the oven on low heat.
  • Flavor Variations: Experiment with flavored extracts like almond or orange for a unique twist.
  • Check Your Heat: If your French toast is browning too quickly, lower the heat to ensure it cooks through.
  • Don’t Crowd the Pan: Cook in batches for even cooking and browning.
  • Garnish Wisely: Use fresh fruits, nuts, or whipped cream to elevate your presentation.
  • Try a Casserole: For a crowd, consider baking French toast in a casserole dish to save time.

Common Mistakes and Troubleshooting

Even the best cooks can make mistakes. Here’s how to avoid common pitfalls:

  • Too Eggy: If your French toast tastes too eggy, reduce the number of eggs or increase the milk.
  • Burning: Make sure your griddle isn’t too hot. Start with medium heat and adjust as necessary.
  • Not Enough Flavor: Always taste your batter first; adjust sugar and spices to your preference.
  • Soggy Bread: Ensure the bread is thick and allow it to soak just long enough to absorb but not become mushy.

Variations to Try

Once you’ve mastered the basic recipe, consider these fun variations to mix things up:

  • Stuffed French Toast: Add a layer of cream cheese or Nutella between two slices for a decadent treat.
  • Cinnamon Roll French Toast: Use cinnamon rolls instead of plain bread for a sweet twist.
  • Chocolate-Dipped French Toast: Incorporate cocoa powder in the batter and top with powdered sugar and chocolate syrup.
  • Savory French Toast: Swap sugar for herbs, and serve with cheese and sautéed vegetables for a savory dish.

Storing and Make-Ahead Instructions

Want to prep ahead? Here’s how to store and reheat your French toast:

  • Refrigerator: Store leftovers in an airtight container for up to 3 days.
  • Freezer: Freeze cooked French toast slices for up to a month. Wrap in foil and place in a freezer bag.
  • Reheating: To reheat, place in a toaster or oven until heated through.
  • Make-Ahead: Prepare the batter and store in the fridge overnight. Dip bread just before cooking.

Comprehensive FAQ

Got questions? Here are answers to some of the most common inquiries about French toast:

  • Can I use any type of bread? Yes! While brioche is recommended for its richness, any thick bread will work.
  • Can I make French toast ahead of time? Absolutely! Prepare it and store it in the fridge or freezer for later.
  • What toppings work best? Popular toppings include maple syrup, fresh fruits, whipped cream, and nuts.
  • How do I prevent soggy French toast? Use thick bread and don’t let it soak for too long.
  • Can I use a non-dairy milk? Yes, alternatives like almond or soy milk work great.
  • Is French toast a breakfast or dessert? It can be both! Top with sweet ingredients for dessert or savory ones for breakfast.
  • What spices can I add? Besides cinnamon, try nutmeg, cardamom, or even a pinch of ginger for unique flavors.
  • How do I keep my French toast warm? Place cooked slices in a warm oven until ready to serve.

Nutrition Tips and Dietary Adaptations

If you’re looking to make this dish healthier, consider these adaptations:

  • Whole Grain Bread: Use whole grain or gluten-free bread to increase fiber content.
  • Reduced Sugar: Cut back on sugar or substitute with natural sweeteners like honey or maple syrup.
  • Low-Calorie Options: Use skim milk and egg whites to reduce calories.
  • Add Fruits: Incorporate fruits into the batter or as toppings for added nutrients.

Equipment Recommendations

Here’s what you’ll need to make this recipe a success:

  • Blender: For smooth batter preparation.
  • Griddle or Skillet: A non-stick surface is ideal for even cooking.
  • Spatula: A sturdy spatula is essential for flipping your French toast.

Serving Suggestions

Serve your French toast hot with a variety of toppings to delight everyone:

  • Fresh Berries: Strawberries, blueberries, or raspberries add a burst of freshness.
  • Maple Syrup: A classic choice that pairs perfectly with the sweetness of the dish.
  • Whipped Cream: Light and fluffy, it adds a touch of indulgence.
  • Nuts: Chopped pecans or walnuts provide a delightful crunch.

Conclusion

Now that you have the ultimate guide to French toast, it’s time to bring this delicious dish to your breakfast table. With its rich flavors and customizable options, you can create a meal that brings joy and comfort to your mornings. Remember, cooking is all about experimentation and finding what you love. Happy cooking!

French Toast Recipe

Prep Time 5 minutes
Cook Time 10 minutes
Total Time 15 minutes
Servings 4 slices
Calories 250
A delicious and easy French toast recipe perfect for breakfast or brunch. Crispy on the outside and soft inside, topped with your favorite toppings.

Ingredients

Dough/batter

  • 1 cup milk (, or half-and-half)
  • 3 Tablespoons all-purpose flour
  • 4 large eggs eggs
  • 3 Tablespoons light brown sugar
  • 1 1/2 teaspoons vanilla extract
  • 1 teaspoon ground cinnamon
  • 1/8 teaspoon salt
  • 1 Tablespoon butter (, for greasing the griddle)
  • 12 slices thick bread (, I prefer brioche)

Instructions 

  • Blend milk, flour, eggs, sugar, vanilla, cinnamon, and salt until smooth. Transfer to a shallow bowl.
  • Preheat griddle to 350°F (175°C). Grease with butter.
  • Dip bread slices into egg mixture, coat evenly, then cook 2 minutes per side until golden.
  • Serve immediately with toppings of choice.

Notes

For extra flavor, sprinkle with powdered sugar or add fresh fruit.
Calories: 250kcal
Cost: $10
Course: Breakfast
Cuisine: French
Keyword: French Toast

When it comes to the perfect breakfast, few dishes can rival the warm, comforting embrace of a well-made french toast. This best french toast recipe is not only easy to prepare but also indulgently delicious, making it an ideal choice for cozy weekend brunches or special occasions. With thick slices of Challah or Brioche soaked in a rich custard and cooked to golden perfection, you are just moments away from a memorable meal. Let’s dive into the delicious details and uncover why this recipe is a must-try!

Why You’ll Love This Recipe

This french toast recipe stands out for several reasons:

  • Flavorful Custard: The combination of half-n-half, eggs, and vanilla extract creates a custard that is creamy and rich in flavor.
  • Perfect Texture: Using day-old bread ensures that each slice absorbs the custard without becoming soggy.
  • Easy to Customize: This recipe serves as a great base for numerous variations, allowing you to experiment with different flavors and toppings.
  • Quick Preparation: With simple steps, you can whip up a gourmet breakfast in less than 30 minutes.
  • Make-Ahead Friendly: Prepare the custard in advance, making your morning routine stress-free.

Ingredients You’ll Need

Here’s what you’ll need to make the best french toast:

  • 1 loaf Challah or Brioche Bread: Cut into thick slices, preferably day-old for optimal absorption.
  • 2 cups Half-n-Half or Heavy Cream: Adds a rich, luxurious flavor to the custard.
  • 4 large Eggs: Essential for binding the ingredients together.
  • 1/4 cup Sugar: Sweetens the custard; adjust based on your preference.
  • 2 teaspoons Vanilla Extract: Enhances the overall flavor profile.
  • 1/2 teaspoon Cinnamon: Adds warmth and depth to the dish.
  • Salted Butter: For frying, giving the toast a golden crust.

Don’t have all the ingredients? Here are some substitutes:

  • Bread: Use any sturdy bread like sourdough or white bread if you can’t find Challah or Brioche.
  • Milk Alternatives: Feel free to use almond milk, oat milk, or any dairy-free option.
  • Sugar: Substitute with honey or maple syrup for a natural sweetener.
  • Cinnamon: For a different flavor, try nutmeg or pumpkin spice instead.

How to Make the Best French Toast Recipe

Follow these steps for a french toast that will impress:

Step 1: Prepare the Bread

Start by slicing the Challah or Brioche bread into thick slices, about 3/4 to 1 inch thick. Stale or day-old bread is preferred as it holds up better and soaks the custard mixture evenly without falling apart.

Step 2: Mix the Custard

In a large mixing bowl, whisk together the half-n-half or heavy cream, eggs, sugar, vanilla extract, and cinnamon until fully combined. For a smoother texture, consider using an immersion blender.

Step 3: Soak the Bread

Dip each slice of bread into the custard mixture ensuring both sides are fully submerged. Let the bread soak for about 20 seconds per side to absorb enough custard without becoming soggy. Allow excess custard to drip off.

Step 4: Cook Low and Slow

Place a skillet or frying pan over medium-low heat and add a generous amount of salted butter. Allow the butter to melt completely without burning. Place the soaked bread slices in the skillet and cook for 3 to 5 minutes on each side, adjusting the heat as needed. Cooking low and slow ensures the custard centers cook through without burning the crust.

Step 5: Serve and Enjoy

Remove the golden brown french toast from the skillet and serve immediately. Garnish with a sprinkle of powdered sugar, a pat of additional salted butter, and a generous drizzle of real maple syrup.

Pro Tips for Perfect French Toast

Image of French toast drizzled with syrup, displayed on a wooden table.

To enhance your french toast experience, consider these expert insights:

  • Use Day-Old Bread: Day-old or stale bread has the right texture for soaking.
  • Don’t Rush It: Cook on low heat to ensure that the inside is fully cooked without burning the outside.
  • Experiment with Flavors: Try adding orange zest or almond extract to the custard for a unique twist.
  • Keep Warm: Place cooked french toast in a low oven (200°F) to keep it warm while you finish cooking the rest.
  • Adjust Sweetness: Taste the custard before soaking the bread and adjust the sugar based on your preference.
  • Try Toppings: Fresh fruit, whipped cream, or chocolate chips can elevate your toast.
  • Don’t Over-Soak: Soak each slice just enough to absorb the custard without falling apart.
  • Serve Immediately: French toast is best enjoyed fresh off the skillet.

Common Mistakes and Troubleshooting

Avoid these common pitfalls to ensure your french toast turns out perfectly:

  • Soggy Bread: If your bread is too soggy, reduce the soaking time.
  • Burnt Exterior: Cooking on too high heat will burn the outside while leaving the inside raw; always cook on low to medium heat.
  • Flavorless Custard: Don’t skimp on vanilla or cinnamon; these add essential flavors.
  • Not Enough Butter: Use enough butter to coat the pan for a golden crust.

Variations to Try

Feel free to get creative! Here are some delicious variations on the classic french toast:

  • Stuffed French Toast: Fill your slices with cream cheese and fruit before soaking.
  • Banana Bread French Toast: Use banana bread for a sweet twist.
  • Savory French Toast: Skip the sugar and add herbs and cheese for a savory breakfast option.
  • French Toast Casserole: Layer slices in a baking dish, soak overnight, and bake for a crowd-pleasing dish.

Storage and Make-Ahead Instructions

This recipe can be made ahead of time for convenience:

  • Make-Ahead Custard: Prepare the custard mixture the night before and store it in the refrigerator.
  • Cooked French Toast: If you have leftovers, store them in an airtight container in the fridge for up to 3 days.
  • Freezing: Freeze individual slices with parchment paper in between for easy reheating. They can be stored for up to 3 months.

Frequently Asked Questions

Here are some common questions about making french toast:

  • Can I use any type of bread? Yes, but sturdy bread like Challah or Brioche yields the best results.
  • How do I know when it’s done? The outside should be golden brown, and the center should be set but moist.
  • Can I use egg substitutes? Yes, for a vegan version, use flax eggs or a commercial egg replacer.
  • What can I serve with french toast? Fresh fruits, whipped cream, or even a side of crispy bacon complement this dish beautifully.
  • How do I keep french toast warm while cooking? Place cooked slices in a warm oven (about 200°F) until ready to serve.
  • Can I make it dairy-free? Absolutely! Use a dairy-free milk alternative and coconut cream instead of half-n-half.
  • What if my custard is too thin? Whisk in an extra egg or some cornstarch to thicken it.
  • Is it possible to make french toast in advance? Yes, you can prepare the custard and soak the bread ahead of time.

Nutritional Tips and Dietary Adaptations

This best french toast recipe can be adapted to fit various dietary needs:

  • Gluten-Free: Use gluten-free bread to make this recipe suitable for those with gluten intolerance.
  • Lower Sugar: Reduce the sugar amount or use natural sweeteners like honey or maple syrup.
  • Plant-Based: Substitute eggs with flaxseed meal or commercial egg replacers for a vegan option.

Equipment Recommendations

Here are some essential tools to have on hand:

  • Skillet or Griddle: A non-stick skillet is ideal for cooking french toast evenly.
  • Mixing Bowls: Use a large mixing bowl to combine the custard ingredients.
  • Whisk: A sturdy whisk will help ensure your custard is well-blended.
  • Spatula: A spatula is crucial for flipping your toast without tearing.

Serving Suggestions

Serve your french toast with a variety of toppings to enhance the experience:

  • Maple Syrup: A classic pairing that complements the sweetness of the custard.
  • Fresh Berries: Strawberries, blueberries, or raspberries add a refreshing touch.
  • Whipped Cream: A dollop of whipped cream can elevate your dish to dessert status.
  • Chopped Nuts: Sprinkle with your favorite nuts for added crunch.

In conclusion, this best french toast recipe isn’t just about breakfast; it’s about creating cherished moments around the table. With its rich flavors and customizable options, you can make this dish your own. So gather your ingredients, invite your loved ones, and get ready to enjoy a delightful meal that brings everyone together. Happy cooking!

Best French Toast Recipe

Prep Time 10 minutes
Cook Time 15 minutes
Total Time 25 minutes
Servings 4 servings
Calories 350
This classic French toast recipe delivers perfectly golden, custardy slices with minimal effort. Ideal for a cozy breakfast or brunch treat.

Ingredients

Bread

  • 2 cups Half-n-Half or Heavy Cream
  • 4 large Eggs
  • 1/4 cup Sugar
  • 2 teaspoons Vanilla Extract
  • 1/2 teaspoon Cinnamon
  • enough for skillet Salted Butter (for cooking)

Bread

  • 1 loaf Challah or Brioche Bread (cut into thick slices, preferably day-old)

Instructions 

  • Slice the bread into 3/4 to 1 inch thick slices and soak in custard for 20 seconds per side.
  • Whisk together cream, eggs, sugar, vanilla, and cinnamon until smooth.
  • Dip bread slices into custard, then cook in a skillet with melted butter until golden on both sides.
  • Cook each side for 3-5 minutes over medium-low heat until golden brown.
  • Serve immediately with powdered sugar, butter, and maple syrup.

Notes

Using day-old bread helps it soak up more custard without falling apart.
Calories: 350kcal
Cost: $15
Course: Breakfast
Cuisine: French
Keyword: French Toast