Author

Mike

Browsing

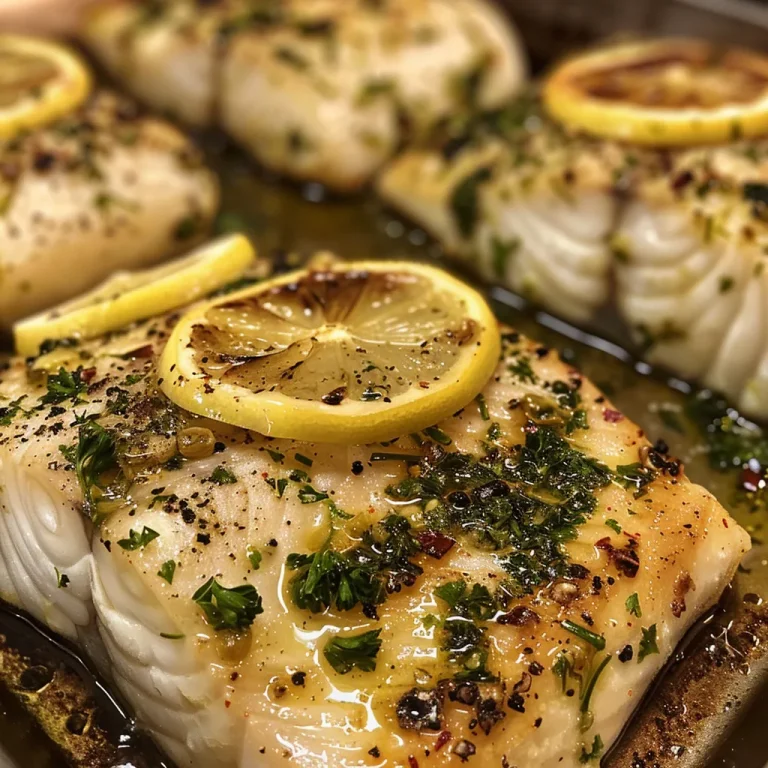
Welcome to a culinary adventure that will transform your dinner routine! If you’re seeking a quick, healthy, and absolutely delicious meal, you’ve landed in the right place. This lemon herb baked white fish recipe is not just easy to prepare; it’s a celebration of flavors that will leave your taste buds dancing. Bursting with the brightness of fresh herbs and the zest of lemon, this dish is perfect for weeknight dinners or special occasions. Let’s dive into the delicious details!

Why You’ll Love This Recipe

  • Quick and Easy: This recipe takes just 15 minutes of prep time, making it perfect for busy weeknights.
  • Healthy Choice: Packed with lean protein and omega-3 fatty acids, white fish is low in calories and high in nutrients.
  • Flavor Explosion: The combination of lemon, herbs, and butter or olive oil creates a rich, savory flavor that enhances the fish perfectly.
  • Moist and Tender: The key to this dish is the aromatic liquid that keeps the fish moist, preventing any drying out during baking.
  • Versatile Pairing: This fish dish pairs beautifully with a variety of sides, from roasted vegetables to fluffy rice, making it adaptable to any meal.

Ingredients Breakdown

To craft this delightful dish, gather the following ingredients:

  • 4 white fish fillets: Options like cod, tilapia, or halibut work beautifully. Aim for about 6 oz each.
  • 1/4 cup unsalted butter or olive oil: Choose butter for richness, or olive oil for a lighter twist.
  • 1 large lemon: Thinly sliced, plus extra for juicing. Fresh lemon is essential for that zesty flavor.
  • 2 tablespoons fresh parsley: Chopped, to add a touch of herbal brightness.
  • 1 tablespoon fresh thyme: Leaves only, for a fragrant herbal note.
  • 1 teaspoon black pepper: Freshly cracked for a mild spice.
  • 1/2 teaspoon red pepper flakes: Optional, for those who like a kick.
  • 1/2 teaspoon salt: Essential for elevating the overall flavor.

Substitutions

  • Fish: If you can’t find white fish, consider salmon or even shrimp for a different taste.
  • Butter vs Olive Oil: You can also use ghee or avocado oil for a dairy-free option.
  • Herbs: Feel free to substitute with dill, basil, or even cilantro if you prefer.
  • Spice Level: Adjust the heat by adding more or less red pepper flakes according to your taste.

Pro Tips for Perfect Lemon Herb Baked White Fish

Here are some expert insights to elevate your cooking experience:

  • Fresh is Best: Always opt for fresh fish for superior flavor. If using frozen, ensure it’s fully thawed before cooking.
  • Don’t Overcook: Fish cooks quickly. Start checking for doneness at 10 minutes to avoid dryness.
  • Zest for More Flavor: Zesting the lemon before slicing adds an extra burst of citrus aroma.
  • Even Coating: Ensure each fillet is thoroughly coated in the butter or oil mixture for consistent flavor.
  • Pan Selection: Use a shallow baking dish to promote even cooking and easier basting.
  • Rest Before Serving: Let the fish sit for a minute after baking to allow flavors to meld.
  • Garnish with Fresh Herbs: A sprinkle of additional parsley or thyme just before serving enhances presentation and flavor.
  • Experiment with Citrus: Try adding orange or lime slices alongside lemon for a unique twist.

Common Mistakes and Troubleshooting
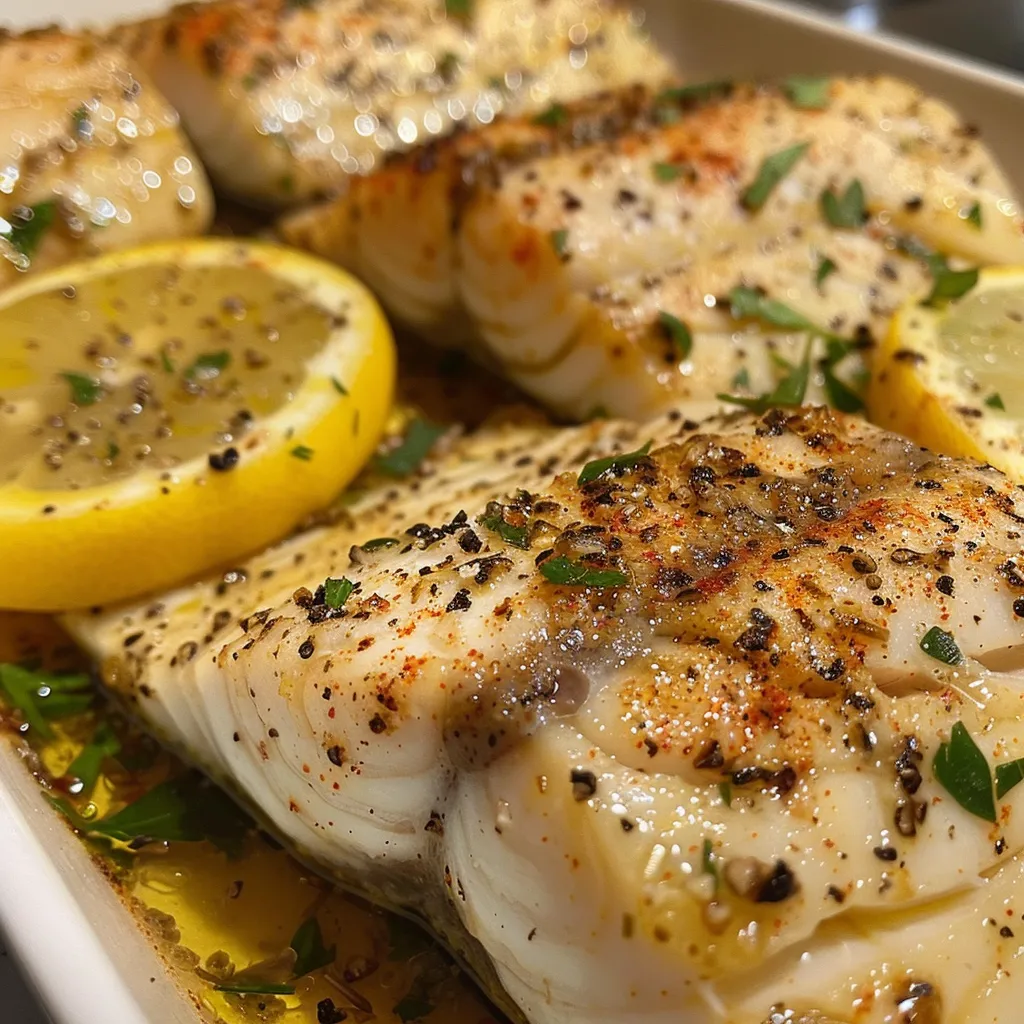
A delicious serving of lemon herb baked white fish on a plate.

Here are some pitfalls to avoid:

  • Overcrowding the Pan: Make sure the fillets aren’t touching; this allows for proper cooking and browning.
  • Ignoring Thickness: Thicker fillets may require a longer cooking time; adjust accordingly.
  • Not Checking for Doneness: Use a fork to test; the fish should flake easily when done.

Variations to Try

Want to switch things up? Here are some delicious variations:

  • Spicy Lemon Herb: Add jalapeño slices to the lemon for a spicier kick.
  • Garlic Lovers: Mix minced garlic into your butter or oil for a robust flavor.
  • Parmesan Crust: Sprinkle grated Parmesan over the fish before baking for a cheesy finish.
  • Citrus Medley: Combine lemon, lime, and orange slices for a flavorful and colorful presentation.

Storage and Make-Ahead Instructions

This dish is best enjoyed fresh, but here’s how to store leftovers:

  • Refrigeration: Store any leftovers in an airtight container in the fridge for up to 2 days.
  • Reheating: Gently reheat in the oven at 350°F (175°C) for 10 minutes, or until warmed through.
  • Freezing: It’s not recommended, as fish can lose texture and flavor when frozen.
  • Make-Ahead: You can prepare the lemon mixture and season the fish a few hours in advance to save time.

Comprehensive FAQs

  • Can I use frozen fish? Yes, but make sure it’s completely thawed and dried for the best texture.
  • What’s the best way to tell if the fish is done? The fish should be opaque and flake easily with a fork; check at the thickest part.
  • Can I make this recipe dairy-free? Absolutely! Substitute butter with olive oil or a dairy-free butter alternative.
  • What sides pair well with this dish? Roasted vegetables, quinoa, or a light salad are excellent options.
  • Is this recipe suitable for meal prep? Yes! Just store the cooked fish in airtight containers for easy meals throughout the week.
  • How can I enhance the flavor? Experiment with different herbs and spices, or add a splash of white wine to the pan before baking.
  • What if I don’t have fresh herbs? Dried herbs can be used, but use only about one-third of the amount called for fresh herbs.
  • Can I grill the fish instead? Yes! This recipe can also be adapted for grilling; just use a grill-safe pan.

Nutritional Tips and Dietary Adaptations

This recipe is naturally low in calories and high in protein, making it a fantastic choice for those following a healthy diet. Here are some tips:

  • Low-Carb Option: Serve with a side of steamed broccoli or cauliflower rice for a low-carb meal.
  • Gluten-Free: This recipe is gluten-free as it contains no grains; perfect for those with gluten sensitivities.
  • Heart-Healthy: Rich in omega-3s, this dish supports cardiovascular health.

Equipment Recommendations

To make this recipe, you will need:

  • Baking Dish: A shallow baking pan is ideal for even cooking.
  • Mixing Bowl: For combining your flavorful butter or oil mixture.
  • Measuring Cups/Spoons: Accurate measurements ensure the perfect balance of flavors.

Serving Suggestions

This lemon herb baked white fish can be served in various ways:

  • On a Bed of Greens: Serve over a simple arugula salad for a refreshing meal.
  • With Grain Sides: Pair with quinoa or couscous for a satisfying grain component.
  • Garnished with Fresh Herbs: Add a sprinkle of parsley or dill right before serving for a pop of color.

In conclusion, this lemon herb baked white fish is not just a recipe; it’s an experience waiting to happen in your kitchen. Its simplicity and flavor make it a go-to for any cook. Whether you’re a seasoned chef or just starting out, you can master this dish and impress your friends and family. Happy cooking!

Lemon Herb Baked White Fish

Prep Time 10 minutes
Cook Time 15 minutes
Total Time 25 minutes
Servings 4 servings
Calories 250
A simple, flavorful baked fish dish infused with lemon and fresh herbs, perfect for a healthy and delicious meal.

Ingredients

Protein

  • 4 fillets white fish fillets (like cod, tilapia, or halibut) (about 6 oz each)
  • 1/4 cup unsalted butter or olive oil (melted)
  • 1 large lemon (sliced into thin rounds, plus extra for juicing)
  • 2 tablespoons fresh parsley (chopped)
  • 1 tablespoon fresh thyme leaves
  • 1 teaspoon black pepper (freshly cracked)
  • 1/2 teaspoon red pepper flakes (optional, for a kick)
  • 1/2 teaspoon salt

Instructions 

  • Preheat oven to 400°F (200°C).
  • Mix melted butter, lemon juice, parsley, thyme, pepper, red pepper flakes, and salt.
  • Arrange fish in a baking dish and pour the mixture over, then top with lemon slices.
  • Bake for 12-15 minutes until fish flakes easily.
  • Serve immediately with pan juices spooned over.
Notes

Ensure not to overcook the fish for best moistness and flavor.
Calories: 250kcal
Cost: $15
Course: Main Course
Cuisine: American
Keyword: fish, herbs, lemon

Unveiling the Delight of Roasted Berry Poke Cake

Welcome to the world of baking where every ingredient tells a story, and every slice brings joy! Today, we’re diving into the delightful realm of Roasted Berry Poke Cake. This dessert is a celebration of flavors, combining the sweetness of fresh berries with a moist cake base, all topped off with a creamy frosting. In this comprehensive guide, you will discover how to create this irresistible cake that’s perfect for any gathering or family dinner. Let’s embark on this culinary adventure together!

Why You’ll Love This Recipe

Here are just a few reasons why this Roasted Berry Poke Cake will become a staple in your baking repertoire:

  • Flavor Explosion: The combination of roasted berries and vanilla cake creates a balance of sweet and tart flavors that will tantalize your taste buds.
  • Easy to Make: With straightforward steps and common ingredients, you can whip this cake up even if you’re a beginner in the kitchen.
  • Customizable: You can easily substitute fruits based on seasonal availability or your personal preferences, making it versatile.
  • Perfect for Any Occasion: Whether it’s a birthday, picnic, or family gathering, this cake is sure to impress your guests.
  • Make Ahead: The cake can be prepared in advance, allowing you to enjoy more time with your loved ones.

Ingredient Breakdown

Before we start baking, let’s take a closer look at the ingredients required for our Roasted Berry Poke Cake, along with some useful substitutions:

  • Fresh Strawberries (2 cups, sliced): These add sweetness and color. If you don’t have strawberries, you can use raspberries or blackberries.
  • Fresh Raspberries (1 cup): Their tartness balances the sweetness. Substitute with blueberries if needed.
  • Fresh Blackberries (1 cup): These provide a lovely depth of flavor.
  • Fresh Blueberries (1 cup): These are juicy and sweet—perfect for the cake.
  • Fresh Cherries (1 cup, pitted and halved): These add a delightful pop of flavor. You can replace them with diced peaches or plums.
  • Granulated Sugar (2 tablespoons + 1 1/2 cups): Used for roasting the berries and sweetening the cake. Brown sugar can be used for a deeper flavor.
  • Lemon Juice (2 tablespoons + 1 tablespoon): This enhances the flavor of the berries and the frosting. You can substitute with lime juice.
  • Vanilla Bean (1, optional): For a fragrant boost. Vanilla extract can be used instead.
  • Unsalted Butter (1 cup, melted + 1 cup, room temperature): Essential for moisture. Coconut oil can be a lactose-free alternative.
  • Vanilla Extract (1 tablespoon): A staple for flavor. Use pure extract for the best taste.
  • Large Eggs (3, room temperature): These provide structure. If vegan, consider using flaxseed meal mixed with water as a substitute.
  • Cake Flour (3 cups, substitute all-purpose flour): For a tender cake. If you have cake flour, use it for the best texture.
  • Baking Powder (2 1/2 teaspoons): This is vital for leavening. Ensure it’s fresh for the best rise.
  • Kosher Salt (1/2 teaspoon): Enhances flavor. Sea salt can be a good alternative.
  • Whole Milk (1 cup): Provides moisture. You can substitute with almond milk for a dairy-free option.
  • Powdered Sugar (3 1/2 cups): Essential for the creamy frosting. Ensure it’s sifted for a smooth texture.
  • Fresh Berries and Flowers (optional): For decoration and visual appeal.

How to Make Roasted Berries

This step is crucial for bringing out the full flavor of the berries in your cake. Here’s how to roast them:

  1. Preheat your oven to 375°F (190°C).
  2. In a bowl, combine the fresh berries with 2 tablespoons of granulated sugar and 2 tablespoons of lemon juice. Mix well to coat the berries evenly.
  3. Spread the mixture on a baking sheet lined with parchment paper.
  4. Roast in the oven for about 15-20 minutes, or until the berries are soft and their juices are bubbling. Let cool before adding to the cake.

How to Make Berry Poke Cake

Now, let’s assemble the cake:

  1. Prepare the cake batter by whisking together melted butter, 1 1/2 cups of granulated sugar, and vanilla extract in a large bowl.
  2. Add in the eggs, one at a time, mixing well after each addition. Ensure they are at room temperature for a smoother batter.
  3. In another bowl, whisk together cake flour, baking powder, and kosher salt.
  4. Gradually add the dry mixture to the wet ingredients, alternating with the whole milk. Mix until just combined.
  5. Pour the batter into a greased and floured baking dish (about 9×13 inches) and smooth the top.
  6. Bake for 30-35 minutes or until a toothpick inserted in the center comes out clean. Let cool completely before poking holes for the berries.

Frosting the Cake

Now that your cake is baked and cooled, let’s prepare the frosting:

  1. In a large bowl, beat the room temperature unsalted butter until creamy.
  2. Gradually add sifted powdered sugar, mixing until combined.
  3. Add lemon juice and 2-3 tablespoons of milk as needed to reach your desired consistency. Beat until fluffy.

Assembling the Cake

It’s time to bring everything together:

  1. Use a skewer or the handle of a wooden spoon to poke holes all over the cooled cake.
  2. Pour the roasted berries and their juices over the cake, allowing them to seep into the holes.
  3. Spread the frosting evenly over the top of the cake.
  4. Garnish with fresh berries and optional edible flowers for a stunning presentation.

Common Mistakes and Troubleshooting

Even experienced bakers can face a few hiccups. Here are some common mistakes and how to avoid them:

  • Using cold ingredients: Make sure eggs and milk are at room temperature for a smoother batter.
  • Overmixing the batter: Mix until just combined to avoid a dense cake.
  • Not letting the cake cool: Allow the cake to cool completely before poking holes; otherwise, it may crumble.
  • Skipping the roasting step: Roasting the berries enhances their flavors immensely, so don’t skip this step!
  • Not adjusting sugar: Depending on the sweetness of your berries, you might want to adjust the sugar used in the roasting step.

Variations to Try

Feel free to get creative with your Roasted Berry Poke Cake. Here are some delicious variations:

  • Peach and Blueberry: Substitute the berries with fresh peaches and blueberries for a summery twist.
  • Chocolate Berry Poke Cake: Add cocoa powder to the cake batter for a chocolatey version.
  • Nutty Crunch: Top the frosting with crushed nuts or granola for added texture.
  • Herb-Infused Frosting: Infuse the frosting with a hint of mint or basil for a refreshing flavor.

Storage and Make-Ahead Instructions

If you want to prepare ahead of time, here’s how to store your cake:

  • Make the cake in advance and store it covered at room temperature for up to 2 days.
  • Assemble the cake with the berries and frosting up to 1 day in advance. Store in the fridge to keep it fresh.
  • Leftover cake can be stored in an airtight container in the fridge for up to 4 days.

Comprehensive FAQ

Here are some common questions about making Roasted Berry Poke Cake:

  • Can I use frozen berries? Yes, you can use frozen berries; just ensure they are thawed and drained before roasting.
  • How do I know when the cake is done? The cake is done when a toothpick inserted into the center comes out clean or with a few moist crumbs.
  • Can I freeze the cake? Yes, you can freeze the cake before frosting for up to 3 months. Thaw in the fridge before serving.
  • How can I make this cake gluten-free? Substitute cake flour with a gluten-free flour blend.
  • What can I use instead of eggs? You can use flaxseed meal or applesauce as a replacement for eggs.
  • How do I make the frosting less sweet? Reduce the amount of powdered sugar and add more lemon juice for tanginess.
  • Can I add other fruits? Absolutely! Feel free to mix in other fruits like kiwi or mango for an exotic twist.
  • What is the best way to serve this cake? Serve it chilled, garnished with fresh berries and edible flowers for an elegant touch.

Nutrition Tips and Dietary Adaptations

To make this cake more nutritious or accommodate dietary needs, consider the following:

  • Reduce Sugar: Adjust the sugar content based on your preference or use alternatives like honey or maple syrup.
  • Use Whole Wheat Flour: Substitute part of the cake flour with whole wheat flour for added fiber.
  • Add Seeds: Incorporate chia or flax seeds into the batter for extra nutrients.
  • Vegan Option: Use plant-based butter and egg substitutes for a vegan version of this cake.

Equipment Recommendations

Here’s what you’ll need to create your masterpiece:

  • Mixing Bowls: A set of various sizes for combining ingredients.
  • Measuring Cups and Spoons: Essential for accuracy in your recipe.
  • Whisk and Spatula: For mixing and folding ingredients together.
  • Baking Dish: A 9×13 inch dish is perfect for this recipe.
  • Cooling Rack: To cool your cake properly after baking.

Serving Suggestions

When it comes to serving your Roasted Berry Poke Cake, consider these options:

  • With Whipped Cream: A dollop of whipped cream on top enhances the experience.
  • Pair with Ice Cream: Serve warm slices alongside vanilla ice cream for a comforting treat.
  • Drizzle with Chocolate Sauce: Add a drizzle of chocolate sauce for a touch of indulgence.
  • Fresh Mint Leaves: Garnish with mint leaves for a pop of color and freshness.

Conclusion

Creating a Roasted Berry Poke Cake is not just about baking; it’s about crafting an experience filled with love, flavor, and connection. Whether you’re celebrating a special occasion or enjoying a cozy night in, this cake is bound to bring smiles all around. So gather your ingredients, unleash your creativity, and enjoy the delightful process of baking! Remember, the kitchen is a place of joy, and every bite of this cake is a reminder of that. Happy baking!

Roasted Berry Poke Cake

Prep Time 30 minutes
Cook Time 25 minutes
Total Time 55 minutes
Servings 8 slices
Calories 450
A vibrant and delicious layered cake filled with fresh berries and topped with a sweet glaze, perfect for summer gatherings.

Ingredients

Fruits

  • 2 cups fresh strawberries (sliced)
  • 1 cup fresh raspberries
  • 1 cup fresh blackberries
  • 1 cup fresh blueberries
  • 1 cup fresh cherries (pitted and halved)

Sugar & Lemon

  • 2 tablespoons granulated sugar
  • 2 tablespoons lemon juice
  • 1 vanilla bean (optional) vanilla bean (optional)

Cake & Filling

  • 1 cup unsalted butter (melted)
  • 1 1/2 cups granulated sugar
  • 1 tablespoon vanilla extract
  • 3 large eggs (room temperature)
  • 3 cups cake flour (substitute all purpose flour)
  • 2 1/2 teaspoons baking powder
  • 1/2 teaspoon kosher salt
  • 1 cup whole milk

Frosting & Garnish

  • 3 1/2 cups powdered sugar
  • 1 tablespoon lemon juice
  • 2-3 tablespoons milk (as needed)

Additional

  • fresh berries fresh berries (for garnish)
  • flowers (optional) flowers (optional) (for decoration)

Instructions 

  • Bake the cake layers at 350°F (175°C) for 25 minutes, then let cool.
  • Mix the frosting ingredients until smooth and spread between layers and on top.
  • Arrange fresh berries on top and garnish with flowers if desired.

Notes

Use ripe berries for the best flavor and color.
Calories: 450kcal
Cost: $15
Course: Dessert
Cuisine: American
Keyword: Berries

Unlock the Refreshing World of Iced Matcha Lattes

Welcome to your ultimate guide on how to create the perfect iced matcha latte at home! This delightful drink offers a harmonious blend of earthy matcha, creamy milk, and just the right touch of sweetness. Whether you’re enjoying it on a sunny afternoon or as a cozy treat during a lazy evening, this latte recipe is sure to elevate your refreshment game!

In this comprehensive article, we’ll dive deep into the world of matcha, covering everything from the origins of this vibrant green tea to expert tips for crafting the perfect iced matcha latte. So grab your whisk, and let’s get started!

Why You’ll Love This Iced Matcha Latte Recipe

There are countless reasons to embrace this refreshing beverage. Here are just a few benefits that make this iced matcha latte a must-try:

  • Rich in Antioxidants: Matcha is packed with antioxidants, particularly catechins, which help fight free radicals in your body.
  • Energy Boost: The caffeine in matcha provides a gentle energy boost without the jitters, making it a perfect pick-me-up.
  • Customizable: You can easily adjust the sweetness or milk type to match your personal preferences, making it a versatile drink.
  • Quick and Easy: This recipe requires minimal ingredients and can be prepared in just a few minutes.
  • Deliciously Aesthetic: The beautiful green color and layered presentation of an iced matcha latte make it an Instagram-worthy drink!

Ingredients for Your Iced Matcha Latte

To create your iced matcha latte, you’ll need the following ingredients:

  • 1 ½ tsp matcha powder: Opt for ceremonial or vibrant culinary grade for the best flavor.
  • 2 Tbsp warm water: About 175°F is ideal for dissolving the matcha.
  • 1 – 2 tsp maple syrup: Adjust sweetness to taste.
  • 1 cup cold milk: Dairy or non-dairy options like oat or almond work well.
  • ¼ tsp vanilla extract: For a touch of added flavor.
  • 1 cup ice cubes: Essential for that refreshing chill.
  • Optional add-ins: 2 Tbsp strawberry purée for a fruity twist, ¼ cup vanilla cold foam for a creamy finish, or a splash of coconut milk for a tropical vibe.

Step-by-Step Instructions for Making an Iced Matcha Latte

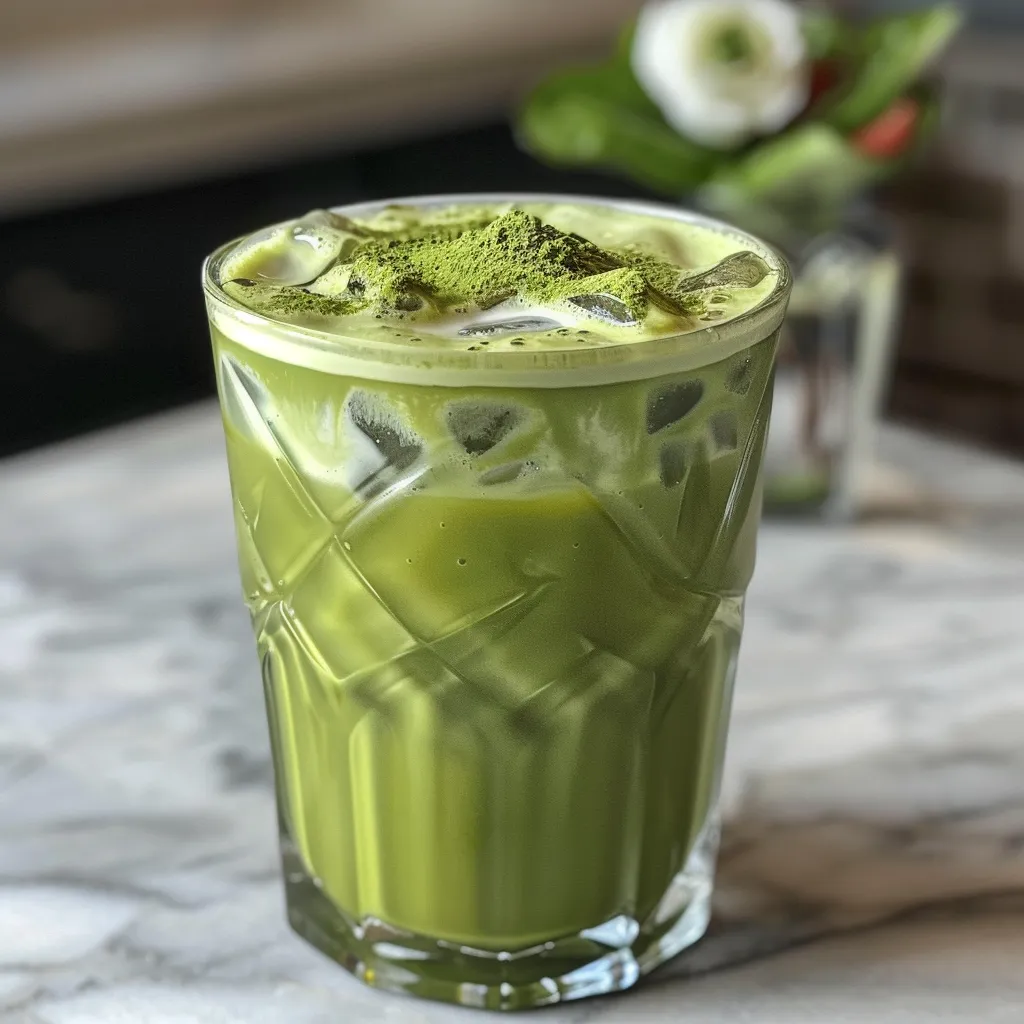
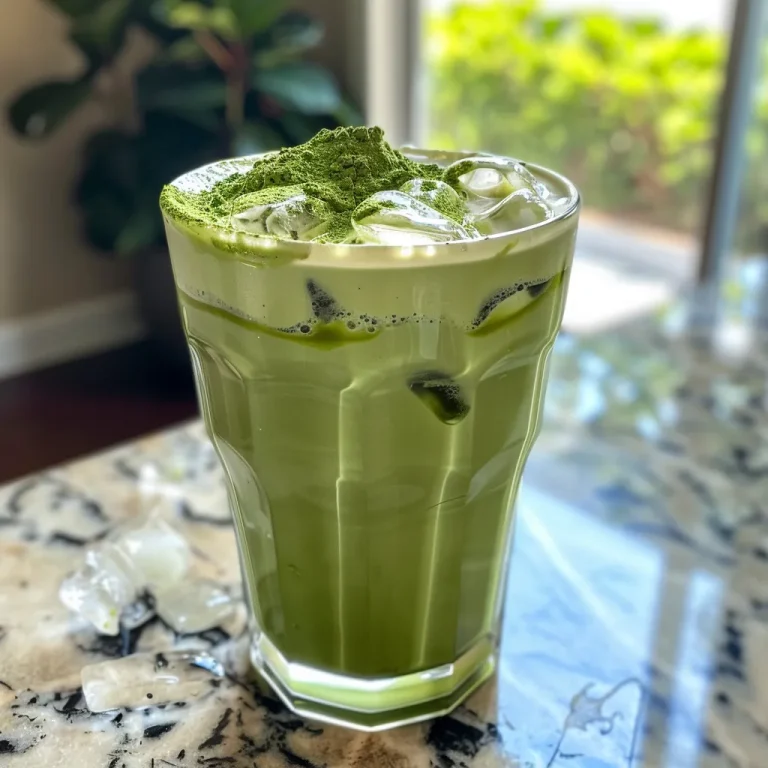
A delicious iced matcha latte served in a tall glass, showcasing rich matcha and strawberry layers.

Follow these easy steps to whip up your iced matcha latte:

  1. Sift the matcha into a bowl to break up any clumps.
  2. Add warm water and whisk in a zigzag motion until smooth and lightly foamy.
  3. Stir in maple syrup and mix well to dissolve.
  4. Fill a tall glass with ice.
  5. Pour in milk and vanilla extract over the ice, leaving room at the top.
  6. Layer the matcha gently over the back of a spoon onto the milk for that beautiful two-tone effect.
  7. Stir and enjoy! Or sip as-is to appreciate the stunning layers.

Expert Tips for the Perfect Iced Matcha Latte

To ensure your iced matcha latte turns out perfectly every time, consider these expert tips:

  • Choose Quality Matcha: Invest in good quality matcha powder for the best flavor and color. Ceremonial grade is ideal for drinks.
  • Use the Right Water Temperature: Ensure your water is not boiling; too hot can make the matcha taste bitter.
  • Whisk Properly: A bamboo whisk (chasen) works best, but a handheld frother or jar can also do the trick.
  • Experiment with Sweeteners: While maple syrup is a great choice, try agave, honey, or simple syrup for different flavor profiles.
  • Chill Your Glass: Pre-chilling your glass can help keep your drink colder for longer.
  • Add Toppings: For a fun touch, top with whipped cream, edible flowers, or a sprinkle of matcha powder.

Common Mistakes and Troubleshooting

Even seasoned cooks can make mistakes. Here are some common pitfalls and how to avoid them:

  • Clumpy Matcha: Always sift your matcha before mixing to prevent clumps.
  • Bitter Taste: Ensure your water isn’t boiling when adding to matcha, and adjust the sweetness to your liking.
  • Too Watery: Use less milk if you prefer a stronger matcha flavor.

Delicious Variations of the Iced Matcha Latte

Want to mix things up? Here are some delightful variations to try:

  • Iced Strawberry Matcha Latte: Add strawberry purée for a fruity twist.
  • Iced Vanilla Matcha Latte: Increase the vanilla extract for a sweeter, aromatic flavor.
  • Iced Coconut Matcha Latte: Use coconut milk instead of regular milk for a tropical vibe.
  • Iced Matcha Chai Latte: Blend matcha with chai spices for a spiced treat.

Storage and Make-Ahead Instructions

If you want to prepare your iced matcha latte in advance, keep these tips in mind:

  • Store Matcha Mixture: Mix matcha and water ahead of time, but do not add milk or ice until you’re ready to serve.
  • Refrigerate: Keep your matcha mixture in the fridge for up to 24 hours. Stir well before using.
  • Chill Milk Separately: Store your milk in the fridge to ensure it stays cold when you’re ready to make your drink.

Frequently Asked Questions

Here are some common questions about iced matcha lattes:

  • What is matcha? Matcha is finely ground powder made from specially grown green tea leaves. It offers a unique flavor and health benefits.
  • Can I use any milk for my iced matcha latte? Absolutely! Use your favorite milk—dairy, almond, oat, or coconut all work well.
  • Is matcha good for you? Yes! Matcha is rich in antioxidants and can boost your metabolism and energy levels.
  • Can I make this recipe vegan? Yes! Simply use non-dairy milk and a plant-based sweetener.
  • How can I sweeten my iced matcha latte? Maple syrup, agave, honey, or flavored syrups are great options.
  • What’s the best way to whisk matcha? Use a bamboo whisk for best results, but a frother or jar can also work.
  • Can I make matcha cold foam? Yes! Just whip milk until frothy and layer it on top of your latte.
  • How long can I store matcha powder? Keep it in a cool, dark place and use it within 3-6 months for optimal freshness.

Nutritional Insights and Dietary Adaptations

This iced matcha latte can easily fit into various dietary preferences:

  • Low-Calorie Option: Use unsweetened almond or coconut milk and reduce the amount of sweetener.
  • High-Protein Option: Use protein-fortified milk or add a scoop of protein powder.
  • Gluten-Free: This recipe is inherently gluten-free; just ensure any added ingredients are also gluten-free.

Essential Equipment for Your Iced Matcha Latte

Here’s what you’ll need:

  • Bamboo whisk (chasen): For traditional matcha mixing.
  • Matcha bowl: A shallow bowl makes whisking easier.
  • Measuring spoons: For precise ingredient measurements.
  • Glass or tumbler: To showcase your beautiful drink!

Serving Suggestions for Your Iced Matcha Latte

Enhance your iced matcha experience with these serving ideas:

  • Pair with Pastries: Enjoy your latte alongside a flaky croissant or a matcha muffin.
  • Garnish with Fresh Fruits: Top with slices of strawberries or a sprinkle of chia seeds for extra texture.
  • Host a Matcha Party: Prepare a variety of matcha drinks and invite friends to taste and compare!

In conclusion, making an iced matcha latte at home is not only easy but also enjoyable. With the right ingredients and a few expert tips, you’ll be able to craft a refreshing drink that rivals your favorite coffee shop creation. So, don’t hesitate—give this recipe a try, and elevate your refreshment game with your very own iced matcha latte!

Iced Matcha Latte Recipe

Prep Time 10 minutes
Cook Time 5 minutes
Total Time 15 minutes
Servings 1 cup
Calories 150
A refreshing and vibrant iced matcha latte with a layered look and tropical twist, perfect for a cool treat.

Ingredients

matcha powder

  • 1.5 tsp matcha powder (ceremonial or vibrant culinary grade)

warm water

  • 2 Tbsp warm water (about 175°F)

sweetener

  • 1-2 tsp maple syrup

milk

  • 1 cup cold milk (dairy or non-dairy like oat or almond)

vanilla extract

  • ¼ tsp vanilla extract

ice cubes

  • 1 cup ice cubes

strawberry purée

  • 2 Tbsp strawberry purée (for an iced strawberry matcha latte)

vanilla cold foam

  • ¼ cup vanilla cold foam

coconut milk

  • Splash coconut milk (for a tropical twist)

Instructions 

  • Sift matcha into a bowl to break up clumps.
  • Add warm water and whisk until smooth and foamy.
  • Stir in maple syrup to dissolve.
  • Fill a glass with ice, pour milk and vanilla over it.
  • Layer matcha over the milk for a layered look, then stir and serve.

Notes

Adjust sweetness and milk type to taste. For a tropical twist, add a splash of coconut milk.
Calories: 150kcal
Cost: $15
Course: Beverage
Cuisine: fusion
Keyword: matcha

Discover the Irresistible Flavors of Honey Lemon Chicken Skillet

Welcome to a culinary adventure where sweet meets savory in a delightful dance of flavors! The Honey Lemon Chicken Skillet is not just a meal; it’s a moment of joy, a comforting family dish that’s easy to prepare and bursting with fresh ingredients. In this comprehensive guide, we’ll explore everything you need to know about making this scrumptious dish, ensuring that you can whip it up with confidence at home or in your professional kitchen.

This recipe features tender chicken breasts coated in a luscious honey lemon sauce that balances sweetness with tanginess, making it a perfect choice for any weeknight dinner. Whether you’re a seasoned chef or a cooking novice, you’ll find that this dish is approachable and rewarding. Let’s dive in!

Why You’ll Love This Recipe

  • Quick to Prepare: With just a short prep and cook time, you can have this dish ready in under 30 minutes, perfect for busy weeknights.
  • Flavor Explosion: The combination of honey and lemon creates a vibrant sauce that elevates the chicken, making every bite a burst of flavor.
  • One-Pan Wonder: Easy cleanup is a breeze as everything cooks in one skillet, allowing you to focus on enjoying your meal.
  • Versatile Dish: This recipe is adaptable; you can switch up the protein or add vegetables to suit your family’s preferences.
  • Kid-Friendly: The sweetness from the honey is a hit with kids, making it a satisfying option for the whole family.

Essential Ingredients

Before you start cooking, let’s take a closer look at the ingredients you’ll need for this delicious Honey Lemon Chicken Skillet:

  • 4 boneless, skinless chicken breasts: About 6 ounces each, they provide the perfect base for this dish.
  • 1 teaspoon salt: Enhances the chicken’s natural flavor.
  • 1/2 teaspoon black pepper: Adds a mild kick to the seasoning.
  • 2 tablespoons olive oil: Used for sautéing the chicken, contributing to a rich flavor.
  • 3 cloves garlic, minced: Infuses the dish with a fragrant aroma and depth of flavor.
  • 1/4 cup fresh lemon juice: Provides the signature tangy taste of this dish.
  • 1/4 cup honey: Sweetens the sauce, balancing the acidity of the lemon.
  • 1/2 cup low sodium chicken broth: Adds moisture and richness to the sauce.
  • 1 teaspoon lemon zest: Intensifies the lemon flavor and fragrance.
  • 1 tablespoon unsalted butter: For finishing the sauce with a glossy texture.
  • 2 tablespoons chopped fresh parsley: For garnishing and adding a pop of color.

Feel free to make substitutions based on your preferences or dietary needs: use skin-on chicken for more flavor, swap honey for maple syrup for a different sweetness, or replace chicken with tofu for a vegetarian option.

Step-by-Step Instructions

Now that you have your ingredients ready, let’s walk through the process of making this delicious Honey Lemon Chicken Skillet:

  • Step 1: Pat the chicken breasts dry with paper towels. Season both sides with salt and black pepper.
  • Step 2: Heat olive oil in a large skillet over medium-high heat until shimmering.
  • Step 3: Add the chicken breasts to the skillet and cook for 5-6 minutes on each side until golden brown and cooked through (internal temperature 165°F). Remove chicken from skillet and set aside on a plate.
  • Step 4: Reduce heat to medium. Add the minced garlic to the skillet and sauté for 30 seconds until fragrant, stirring constantly to prevent burning.
  • Step 5: Pour in the fresh lemon juice, honey, and chicken broth. Stir to combine and bring the mixture to a simmer.
  • Step 6: Add the lemon zest and simmer the sauce for 3-4 minutes until it slightly thickens.
  • Step 7: Stir in the unsalted butter until melted and the sauce is glossy.
  • Step 8: Return the cooked chicken breasts to the skillet, spooning the sauce over the top. Cook for an additional 2 minutes to heat through and coat the chicken with sauce.
  • Step 9: Sprinkle chopped fresh parsley over the chicken before serving.

Pro Tips for Perfecting Your Honey Lemon Chicken Skillet

To ensure your dish turns out perfectly, here are some expert insights:

  • Use Fresh Ingredients: Opt for fresh garlic and lemons for the best flavor. Fresh ingredients always make a difference.
  • Marinate for Extra Flavor: For deeper flavor, marinate the chicken in honey and lemon juice for 30 minutes before cooking.
  • Adjust Sweetness: If you prefer a sweeter sauce, add a bit more honey. Taste as you go!
  • Monitor Cooking Temperature: Use a meat thermometer to ensure chicken is cooked to the safe internal temperature of 165°F.
  • Don’t Rush the Sauce: Allow the sauce to simmer so it can thicken and develop its flavors.
  • Experiment with Herbs: Fresh thyme or rosemary can be added for an aromatic twist.
  • Serve with Sides: Pair the chicken with rice, quinoa, or roasted vegetables for a complete meal.
  • Keep it Gluten-Free: This dish is naturally gluten-free; just ensure your chicken broth is gluten-free as well.

Common Mistakes and Troubleshooting

Even the best of us can encounter hurdles in the kitchen. Here are some common issues and how to fix them:

  • Chicken is Dry: Overcooking can lead to dry chicken. Always check the temperature and remove from heat promptly.
  • Sauce is Too Thin: If your sauce isn’t thickening, let it simmer longer. You can also mix a little cornstarch with water and add it to thicken.
  • Flavor is Off: Adjust seasoning gradually. If too tangy, add a pinch of sugar to balance.

Variations to Try

Get creative with your Honey Lemon Chicken Skillet by trying out these variations:

  • Vegetable Medley: Add bell peppers, broccoli, or snap peas to the skillet for extra nutrition and color.
  • Spicy Twist: Incorporate crushed red pepper flakes for a bit of heat in your sauce.
  • Honey Mustard Blend: Mix honey with Dijon mustard for a tangy twist.
  • Herb-Infused: Use fresh herbs like basil or cilantro to enhance the dish’s freshness.

Storage and Make-Ahead Instructions

This Honey Lemon Chicken Skillet can be made ahead of time and stored. Here’s how:

  • Refrigeration: Store leftovers in an airtight container in the refrigerator for up to 3 days.
  • Freezing: You can freeze cooked chicken in the sauce for up to 2 months. Thaw overnight in the fridge before reheating.
  • Reheating: Reheat in the microwave or on the stovetop over low heat, adding a splash of chicken broth to loosen the sauce if necessary.

Comprehensive FAQ

Here are some frequently asked questions to help you navigate this recipe:

  • Can I use different proteins in my Honey Lemon Chicken Skillet? Yes! Feel free to substitute chicken with shrimp, tofu, or pork.
  • What should I serve with my Honey Lemon Chicken Skillet? This dish pairs well with rice, quinoa, or a fresh green salad.
  • Can I use bottled lemon juice? While fresh lemon juice is best for flavor, bottled juice can be used in a pinch.
  • How do I know when the chicken is done? Use a meat thermometer; the internal temperature should reach 165°F.
  • Can I make this dish ahead of time? Yes! You can prepare the chicken and sauce ahead of time and reheat before serving.
  • Is this dish gluten-free? Yes, as long as your chicken broth is gluten-free, this dish is safe for gluten-sensitive diets.
  • Can I add vegetables to this dish? Absolutely! Bell peppers, broccoli, or snap peas are great additions.
  • What’s the best way to store leftovers? Store in an airtight container in the refrigerator for up to 3 days or freeze for up to 2 months.

Nutrition Tips and Dietary Adaptations

This dish can be adjusted to fit various dietary needs:

  • Low-Calorie Option: Use skinless chicken breasts and reduce the amount of honey.
  • Vegetarian Version: Substitute chicken with firm tofu and vegetable broth for a plant-based meal.
  • Low-Carb Alternative: Serve over cauliflower rice instead of traditional rice for a low-carb option.

Equipment Recommendations

To achieve the best results, here’s what you’ll need:

  • Large Skillet: A heavy-bottomed skillet is ideal for even cooking and browning.
  • Meat Thermometer: Essential for ensuring your chicken is cooked to the proper temperature.
  • Sharp Knife: For easy cutting and prepping of chicken and vegetables.

Serving Suggestions

When it comes to serving your Honey Lemon Chicken Skillet, consider these delightful options:

  • Rice or Quinoa: Serve over fluffy rice or quinoa to soak up the delicious sauce.
  • Fresh Salad: A light salad with greens, cucumbers, and a lemon vinaigrette complements the dish beautifully.
  • Crusty Bread: A side of crusty bread is perfect for dipping in the honey lemon sauce.

In conclusion, the Honey Lemon Chicken Skillet is a remarkable dish that brings joy to the dinner table with its vibrant flavors and ease of preparation. Whether you’re enjoying it with family or impressing guests, this recipe is sure to become a favorite. So gather your ingredients, follow the steps, and savor the sweet and tangy harmony that awaits you!

Honey Lemon Chicken Skillet

Prep Time 10 minutes
Cook Time 20 minutes
Total Time 30 minutes
Servings 4 servings
Calories 350
A quick and flavorful chicken dish with a tangy lemon-honey sauce, perfect for a weeknight dinner.

Ingredients

Chicken

  • 4 pieces boneless, skinless chicken breasts (about 6 ounces each)
  • 1 teaspoon salt
  • 1/2 teaspoon black pepper
  • 2 tablespoons olive oil
  • 3 cloves garlic, minced
  • 1/4 cup fresh lemon juice (about 2 lemons)
  • 1/4 cup honey
  • 1/2 cup low sodium chicken broth
  • 1 teaspoon lemon zest
  • 1 tablespoon unsalted butter
  • 2 tablespoons chopped fresh parsley

Instructions 

  • Pat chicken dry, season with salt and pepper.
  • Heat oil in skillet over medium-high heat. Cook chicken 5-6 mins per side until cooked through. Remove and set aside.
  • Sauté garlic in skillet 30 seconds. Add lemon juice, honey, and broth; simmer until slightly thickened, 3-4 mins.
  • Stir in lemon zest and butter until glossy. Return chicken to skillet, coat with sauce, cook 2 mins.
  • Garnish with parsley before serving.

Notes

Serve with rice or vegetables for a complete meal.
Calories: 350kcal
Cost: $15
Course: Main Course
Cuisine: American
Keyword: Chicken, Honey, lemon

Unleashing the Joy of Baking with a Whole Orange Cake

Welcome to the world of delightful desserts! Today, we’re diving into the art of making a whole orange cake that is not only flourless but also bursting with citrus flavor. This recipe is a celebration of simplicity, using fresh oranges, almond meal, and just a handful of ingredients to create a cake that is as beautiful as it is delicious. Whether you’re a seasoned baker or just starting out, this orange cake flourless recipe will inspire you to embrace your culinary creativity.

In under an hour, you can create a dessert that is perfect for any occasion—from family gatherings to quiet evenings at home. This cake is gluten-free, making it a great choice for those with dietary restrictions, yet it does not compromise on flavor or texture. Let’s embark on this baking adventure together!

Why You’ll Love This Recipe

  • Incredible Flavor: The use of whole oranges means every bite is infused with a vibrant citrus zing, making this cake a refreshing treat.
  • Gluten-Free Delight: This cake is naturally gluten-free, making it perfect for those who are avoiding gluten without sacrificing taste.
  • Simplicity at Its Best: With minimal ingredients and straightforward steps, this recipe is perfect for both novice and experienced bakers.
  • Moist and Tender Texture: The combination of almond meal and whole oranges creates a beautifully moist cake that melts in your mouth.
  • Versatile Serving Options: This cake pairs beautifully with a variety of toppings, from fresh fruits to whipped cream, allowing you to customize it for any occasion.

Ingredients You’ll Need

To create this delicious whole orange cake, gather the following ingredients:

  • 2 medium oranges: Fresh whole oranges with the rind on (600g/1.4 lb total weight, approximately 300g each, ~8cm/3″ diameter).
  • 1 1/4 tsp baking powder: Use gluten-free baking powder if required to keep the cake suitable for all guests.
  • 1 1/4 cups white sugar: This will sweeten the cake, enhancing the natural flavors of the oranges.
  • 2 3/4 cups almond meal: Ground almonds provide a rich texture and flavor, replacing traditional flour.
  • 6 large eggs: Ensure they are at room temperature for the best results in binding and moisture.

How to Make Whole Orange Cake – Flourless

Detailed view of a Whole Orange Cake, revealing its exquisite texture and the glossy finish of the orange rind.

Let’s get started with the steps to create this mouthwatering cake!

Step 1: Boil the Oranges

Place the whole oranges in a pot and cover them with cold water. Bring to a boil over medium-high heat. Boil for 10 minutes, then drain the water.

Step 2: Repeat Boiling

Return the oranges to the pot, cover with fresh cold water, and boil again for 10 minutes. Drain and repeat this process one more time for optimal flavor extraction. Alternatively, you can boil continuously for 40 minutes without draining, just be sure to monitor the water level to keep the oranges submerged.

Step 3: Cool and Prepare the Oranges

Rinse the boiled oranges and let them cool slightly for easier handling. Slice them into 1cm (1/4″) slices, then dice, removing any seeds. Allow the chopped oranges to cool completely.

Step 4: Preheat the Oven

Preheat your oven to 160°C (320°F) or 140°C (fan). Grease and line a 23cm (9″) cake pan with baking or parchment paper to prevent sticking.

Step 5: Puree the Oranges

Place the chopped oranges in a food processor. Pulse on high in four bursts of 10 seconds each, scraping the sides between pulses until the mixture reaches a marmalade-like consistency. Smoothness is not required, a few rind bits are perfectly fine!

Step 6: Make the Batter

Add the almond meal, eggs, baking powder, and sugar to the orange puree. Blitz for 5 to 10 seconds on high until just combined—be careful not to overmix.

Step 7: Bake the Cake

Pour the batter into the prepared pan and bake for 60 minutes or until the surface is golden and a toothpick inserted into the center comes out clean.

Step 8: Cool and Decorate

Once baked, allow the cake to cool completely in the pan. If your pan isn’t loose-bottomed, cover the surface with baking paper to help with turning the cake out without tearing. Decorate as desired, with fresh orange slices, rind strips, edible flowers, or a light dusting of powdered sugar.

How to Serve Whole Orange Cake

This cake is delightful on its own but can be elevated with various accompaniments:

  • Fresh Fruit: Serve with slices of fresh oranges or other seasonal fruits for added freshness.
  • Whipped Cream: A dollop of whipped cream enhances the cake’s richness.
  • Ice Cream: Vanilla or citrus-flavored ice cream pairs perfectly with this cake.
  • Yogurt: A dollop of Greek yogurt or crème fraîche can add a tangy contrast to the sweetness.

Pro Tips for Making Whole Orange Cake

  • Quality Ingredients: Use the best quality oranges you can find; organic oranges are a great choice.
  • Egg Temperature: Ensure your eggs are at room temperature to achieve a better rise in the cake.
  • Mixing: Don’t overmix the batter once you add the dry ingredients; this cake thrives on a gentle touch.
  • Baking Time: Keep an eye on the cake towards the end of baking; ovens can vary, and you want to avoid overbaking.
  • Cooling: Allow the cake to cool in the pan to help it set and reduce the risk of breaking when turning it out.
  • Flavor Variations: Experiment with adding spices like cinnamon or nutmeg for a unique twist.
  • Storage: The cake can be stored in an airtight container at room temperature for up to 5 days.
  • Make Ahead: This cake keeps well, making it an excellent choice for preparing in advance for parties or gatherings.

Common Mistakes and Troubleshooting

Here are some common pitfalls to avoid:

  • Overboiling the Oranges: Be careful not to overboil the oranges; this can make them too soft and affect the texture of the cake.
  • Incorrect Oven Temperature: Make sure your oven is accurately calibrated to ensure even baking.
  • Batter Consistency: If the batter is too thick, it may not rise properly; a little extra blending can help.
  • Not Cooling Properly: Cooling the cake in the pan is essential to maintain its shape.

Variations on the Whole Orange Cake

Feel free to customize this recipe with these variations:

  • Citrus Medley: Use a combination of oranges, lemons, and limes for a vibrant flavor profile.
  • Chocolate Drizzle: Drizzle melted dark chocolate over the cooled cake for a decadent touch.
  • Nuts and Seeds: Add chopped walnuts or sunflower seeds for a crunchy texture.
  • Herbs: Incorporate fresh herbs like rosemary or thyme for an unexpected twist.

Storage and Make-Ahead Instructions

This flourless orange cake is perfect for make-ahead serving:

  • Room Temperature: Store the cake in an airtight container at room temperature for up to 5 days.
  • Refrigeration: If you prefer a chilled cake, it can be stored in the fridge, but this may alter the texture slightly.
  • Freezing: This cake freezes well! Wrap it tightly in plastic wrap and then in foil for up to 3 months. Thaw in the refrigerator overnight before serving.

Frequently Asked Questions

  • Can I use other citrus fruits? Yes! Lemons and limes can be used for a different citrus flavor.
  • Is almond meal the same as almond flour? Almond meal is coarser than almond flour; both can be used, but the texture may vary.
  • Can I replace sugar with a sugar substitute? Yes, but ensure it is suitable for baking to achieve similar results.
  • Can I add frosting? While it’s delicious on its own, a light glaze or cream cheese frosting can enhance the cake.
  • How do I know when the cake is done? A toothpick inserted into the center should come out clean when the cake is fully baked.
  • What if my cake doesn’t rise? Ensure your baking powder is fresh and that you didn’t overmix the batter.
  • Can I make this cake vegan? Substitute eggs with flax eggs or applesauce and use a plant-based sugar.
  • What should I serve with this cake? It pairs wonderfully with yogurt, whipped cream, or fresh fruit.

Nutritional Tips and Dietary Adaptations

This cake is not only delicious but also offers some nutritional benefits:

  • Rich in Vitamin C: Whole oranges provide a significant amount of Vitamin C, boosting your immune system.
  • Healthy Fats: Almond meal contains healthy fats and protein, making it a heart-healthy option.
  • Low Glycemic Index: This cake can be a better alternative for those monitoring their sugar intake.

Equipment Recommendations

For this recipe, ensure you have the following tools:

  • Food Processor: Essential for achieving the right texture of the orange puree.
  • 23cm (9″) Cake Pan: A sturdy pan will help in even baking and easy removal.
  • Measuring Cups and Spoons: Accurate measurements are key to baking success.
  • Spatula: Use a silicone spatula for easy mixing and transferring the batter.

Serving Suggestions

To truly enjoy this whole orange cake, consider these serving ideas:

  • Garnish with Zest: Add freshly grated orange zest on top for an extra burst of flavor.
  • Create a Dessert Board: Serve slices of cake alongside cheese, nuts, and seasonal fruits.
  • Pair with Beverages: A glass of dessert wine or herbal tea complements the sweetness beautifully.

Conclusion

In conclusion, this flourless whole orange cake is a testament to the beauty of simple ingredients coming together to create something extraordinary. Whether enjoyed alone with a cup of tea or shared with loved ones at a gathering, it’s sure to bring joy to any table. So gather your ingredients, roll up your sleeves, and let’s make some memories in the kitchen!

Whole Orange Cake – flourless Recipe

Prep Time 20 minutes
Cook Time 1 hour
Total Time 1 hour 20 minutes
Servings 8 slices
Calories 350
A delicious flourless cake made with whole oranges, almond meal, and eggs, offering a moist and flavorful dessert.

Ingredients

Main

  • 2 medium oranges, fresh whole with rind on ((600g/1.4 lb total weight, ~300g / 10 oz each, ~8cm/3" diameter))
  • 1 1/4 tsp baking powder (gluten-free if required)
  • 1 1/4 cups white sugar
  • 2 3/4 cups almond meal / ground almonds
  • 6 large eggs, at room temperature

Instructions 

  • Boil oranges three times, draining after each boil, or for 40 minutes continuously. Cool and dice.
  • Puree oranges in a food processor until marmalade-like, with some rind bits.
  • Mix orange puree with almond meal, eggs, baking powder, and sugar until just combined.
  • Pour batter into a greased 23cm cake pan and bake at 160°C (320°F) for 60 minutes until golden and a toothpick comes out clean.
  • Cool completely, then decorate as desired and serve.

Notes

Use a loose-bottomed pan for easy removal and ensure oranges are thoroughly boiled for best flavor.
Calories: 350kcal
Cost: $15
Course: Dessert
Cuisine: fusion
Keyword: cake, flourless, orange

Welcome to the delightful world of baking with this flourless Whole Orange Cake! This recipe celebrates the bold and vibrant flavor of fresh oranges, combined with the rich texture of almond meal. You might be wondering why you should dive into making this cake. The answer is simple: it’s an incredibly satisfying dessert that is not only easy to prepare but also gluten-free and bursting with natural sweetness. Whether you’re an experienced baker or just starting out, this cake will surely impress your friends and family.

In this comprehensive guide, we’ll explore everything you need to know about making the perfect Whole Orange Cake. From ingredient breakdowns to troubleshooting tips, you’ll find all the tools necessary for baking success. Let’s get started!

Why You’ll Love This Recipe

This flourless orange cake is not just a dessert; it’s a celebration of flavor and simplicity. Here are some reasons why you will fall in love with this recipe:

  • Easy to Make: With just a handful of ingredients and simple steps, this cake is perfect for bakers of all skill levels.
  • Gluten-Free: Using almond meal instead of traditional flour means everyone can enjoy a slice, including those with gluten sensitivities.
  • Natural Sweetness: The use of whole oranges brings a bright, zesty flavor that reduces the need for excessive sugar.
  • Versatile Serving Options: This cake pairs beautifully with various toppings, from whipped cream to yogurt, making it an adaptable dessert for any occasion.
  • Make-Ahead Friendly: This cake keeps well, allowing you to bake it in advance for gatherings or special occasions.

What Goes in Orange Cake

Understanding the ingredients is crucial to mastering this recipe. Here’s a detailed breakdown:

  • Whole Oranges: You’ll need 2 medium-sized oranges, about 600g total. These should be fresh and unpeeled, as the zest adds flavor and moisture.
  • Almond Meal: This is the star of our cake, providing a rich, nutty flavor. If you don’t have almond meal, you can substitute with ground almonds or even try other nut flours.
  • Sugar: The recipe calls for 1 1/4 cups of white sugar. Feel free to adjust based on your sweetness preference or substitute with coconut sugar for a healthier option.
  • Baking Powder: You’ll need 1 1/4 teaspoons. Ensure it’s gluten-free if required.
  • Eggs: Six large eggs at room temperature will give the cake its structure and richness.

How to Make Orange Cake

Now that you have your ingredients ready, it’s time to dive into the baking process. Follow these steps for the perfect cake:

Step 1: Boil the Oranges

Place the whole oranges in a pot, covering them with cold water. Bring to a boil over medium-high heat.

  • Boil for 10 minutes, then drain the water.
  • Repeat the boiling process two more times, or alternatively, boil continuously for 40 minutes without draining.

Step 2: Prepare the Oranges

Once boiled, rinse the oranges and let them cool slightly. Slice into 1cm pieces, removing any seeds. Set aside to cool completely.

Step 3: Blend the Ingredients

In a food processor, pulse the chopped oranges until they reach a marmalade-like consistency. Add the almond meal, eggs, baking powder, and sugar. Blitz until just combined.

Step 4: Bake the Cake

Preheat your oven to 160°C (320°F) or 140°C (fan). Grease and line a 23cm (9”) cake pan with baking paper.

  • Pour the batter into the prepared pan.
  • Bake for 60 minutes or until the surface is golden and a toothpick comes out clean.

Step 5: Cool and Serve

Allow the cake to cool completely in the pan. Decorate as desired, with options like fresh orange slices or a dusting of powdered sugar. Serve with Greek yogurt or vanilla ice cream for a touch of indulgence.

Pro Tips for Baking Success

To ensure your cake turns out perfectly, consider these expert insights:

  • Room Temperature Eggs: Ensure your eggs are at room temperature for better mixing and a fluffier texture.
  • Quality Ingredients: Use fresh oranges and high-quality almond meal for the best flavor.
  • Don’t Overmix: When combining the batter, mix until just combined to avoid a dense cake.
  • Monitor Baking Time: Every oven is different; check for doneness a few minutes early to prevent overbaking.
  • Cool Properly: Let the cake cool in the pan for at least 15 minutes before transferring to a wire rack.
  • Store Correctly: Wrap leftovers tightly in plastic wrap and store in the refrigerator for up to 5 days.
  • Experiment with Flavors: Feel free to add spices like cinnamon or a splash of vanilla extract for a unique twist.
  • Presentation Matters: A simple dusting of powdered sugar can elevate the visual appeal of your cake.

Common Mistakes & Troubleshooting

Even seasoned bakers can run into issues. Here’s how to avoid common pitfalls:

  • Dense Cake: This could mean you overmixed the batter or your eggs were too cold.
  • Dry Cake: Ensure you’re measuring ingredients accurately and not baking for too long.
  • Flavorless Cake: Using old ingredients can dull the flavor; always opt for fresh!
  • Sticking to the Pan: Ensure you grease and line the pan well to avoid this problem.

Delicious Variations

Looking to change things up? Here are some delightful variations to try:

  • Chocolate Orange Cake: Add cocoa powder to the batter for a chocolatey twist.
  • Spiced Orange Cake: Introduce spices such as cinnamon, nutmeg, or cardamom for a warm flavor.
  • Citrus Medley Cake: Mix in other citrus fruits like lemons or limes for a zesty experience.
  • Nut-Free Version: Substitute almond meal with sunflower seed flour for a nut-free cake.

Storage & Make-Ahead Instructions

This cake is perfect for make-ahead preparation!

  • Room Temperature: Store in an airtight container for up to 2 days.
  • Refrigerator: Keep it wrapped in plastic for up to a week.
  • Freezing: You can also freeze slices for up to 3 months. Just thaw before serving.

Frequently Asked Questions

Let’s clarify some common queries about this recipe:

  • Can I use other nuts instead of almonds? Yes, you can experiment with cashew or hazelnut flour.
  • What if my oranges are too bitter? Choose sweeter varieties like navels for a pleasant flavor.
  • Can I make this cake vegan? You can substitute eggs with flaxseed or chia eggs, but texture may vary.
  • Does it need frosting? This cake is delicious on its own but can be enhanced with a simple glaze or cream.
  • How do I know when it’s done? A toothpick inserted should come out clean, and the top will be golden.
  • Can I add chocolate chips? Absolutely! Fold in chocolate chips before baking for an added treat.
  • What’s the best way to serve it? It pairs beautifully with a dollop of whipped cream or a scoop of ice cream.
  • How long does it take to prepare? Total prep and cook time is about 1 hour and 30 minutes.

Nutritional Tips and Dietary Adaptations

This cake is naturally gluten-free and can be adapted to suit various dietary needs:

  • Low Sugar: Reduce the sugar content or use a sugar substitute to lower calories.
  • Nut-Free: Use alternative flours like oat flour for those with nut allergies.
  • Dairy-Free: Serve with coconut yogurt or a dairy-free ice cream option.

Equipment Recommendations

To successfully bake this cake, here’s what you’ll need:

  • Food Processor: Essential for blending the oranges and mixing the batter.
  • 23cm (9”) Cake Pan: A good-quality cake pan ensures even baking.
  • Measuring Cups and Spoons: Accurate measurements are key to a successful bake.
  • Wire Rack: This helps with cooling the cake evenly once baked.

Serving Suggestions

Here are some ideas for serving your flourless whole orange cake:

  • Fresh Fruits: Garnish with slices of orange or berries for a fresh touch.
  • Whipped Cream: A dollop of whipped cream adds richness.
  • Ice Cream: Pair with vanilla or citrus-flavored ice cream for a delightful contrast.
  • Edible Flowers: Decorate with edible flowers for a beautiful presentation.

Now that you’re armed with knowledge and tips, it’s time to embrace the joy of baking! This flourless Whole Orange Cake is not just a recipe; it’s an experience that brings warmth and sweetness to your table. Enjoy every bite and the smiles that come with sharing it!

Whole Orange Cake – flourless Recipe

Prep Time 20 minutes
Cook Time 1 hour
Total Time 1 hour 20 minutes
Servings 8 slices
Calories 350
A delicious flourless cake made with whole oranges, almond meal, and eggs, offering a moist and flavorful dessert.

Ingredients

Main ingredients

  • 2 medium oranges, fresh whole with rind on (about 600g total weight)
  • 1 1/4 tsp baking powder (gluten-free if required)
  • 1 1/4 cups white sugar
  • 2 3/4 cups almond meal / ground almonds
  • 6 large eggs (at room temperature)

Instructions 

  • Boil oranges three times, draining after each boil, or for 40 minutes continuously. Cool and dice.
  • Puree oranges in a food processor until marmalade-like, then add almond meal, eggs, baking powder, and sugar. Blitz briefly.
  • Pour batter into a greased 23cm cake pan and bake at 160°C (320°F) for 60 minutes until golden and a toothpick comes out clean.
  • Cool completely in the pan, then invert onto a serving plate. Decorate as desired.

Notes

Use fresh oranges for the best flavor and ensure the cake is fully cooled before serving.
Calories: 350kcal
Cost: $15
Course: Dessert
Cuisine: fusion
Keyword: orange

Unleashing the Delight of Orange Almond Cake

If you’re looking to elevate your dessert game, the Irresistible Orange Almond Cake is your ticket to culinary bliss. This cake is not only a feast for the senses, bursting with citrus flavor and nutty goodness, but it’s also easy enough to whip up for any occasion—from cozy family gatherings to elegant dinner parties. Let’s dive into this recipe and discover why you’ll love it!

Why You’ll Love This Recipe

This Orange Almond Cake isn’t just about taste; it offers a variety of benefits that make it a must-try:

  • Flavor Explosion: The combination of fresh oranges and almonds creates a unique flavor profile that’s both refreshing and satisfying.
  • Gluten-Free Options: This cake can be made flourless, making it suitable for gluten-sensitive friends and family.
  • Easy to Make: With simple ingredients and straightforward instructions, even novice bakers can achieve stunning results.
  • Versatile Serving: Perfect for any occasion, whether as a dessert, a tea-time treat, or a festive celebration cake.
  • Make-Ahead Friendly: This cake keeps well, meaning you can prepare it a day in advance without compromising its flavor or texture.

Ingredient Breakdown

Let’s take a closer look at the ingredients that make this cake so delightful, along with some suggested substitutions:

  • 2 large oranges: Fresh, high-quality oranges are recommended for the best flavor. You can use navel or blood oranges for a twist.
  • 1 cup ground almonds: If you need a nut-free option, consider using sunflower seed flour or oat flour as a substitute.
  • 1 cup granulated sugar: You can replace this with coconut sugar for a lower glycemic index alternative.
  • 4 large eggs: For a vegan version, use flax eggs (1 tablespoon flaxseed meal + 2.5 tablespoons water per egg).
  • 1 teaspoon baking powder: This helps the cake rise; baking soda can also work in a pinch.
  • 1/2 teaspoon salt: Enhances the overall flavor of the cake.
  • 1/4 cup olive oil (or melted butter): Olive oil adds a unique flavor; use melted coconut oil for a different taste.
  • Powdered sugar (for dusting, optional): Adds a touch of sweetness and visual appeal.

Pro Tips for Baking Success

Follow these expert insights to ensure your Orange Almond Cake turns out perfectly every time:

  • Use Room Temperature Ingredients: This helps to create a uniform batter, ensuring even baking.
  • Don’t Overmix: Mix just until combined to keep the cake tender.
  • Check for Doneness: Insert a toothpick into the center; it should come out clean or with a few moist crumbs.
  • Let it Cool: Allow the cake to cool in the pan briefly before transferring it to a wire rack to cool completely.
  • Experiment with Zest: Adding lemon or lime zest can enhance the citrus notes.
  • Store Properly: Keep the cake in an airtight container to maintain freshness; it can last up to a week.
  • Serve with Whipped Cream: A dollop of whipped cream or crème fraîche elevates the experience.
  • Garnish Creatively: Consider topping with candied orange slices or slivered almonds for added flair.

Common Mistakes and Troubleshooting

Even the best bakers encounter hiccups. Here’s how to avoid common pitfalls:

  • Cake Sinking: This often happens from overmixing or underbaking. Ensure you mix just until combined and bake until fully set.
  • Dry Cake: Overbaking can lead to dryness; keep a close watch during the last few minutes of baking.
  • Uneven Texture: Use a scale for accurate measurements, especially for the ground almonds.
  • Not Enough Flavor: Use fresh ingredients; stale or old ingredients can diminish the cake’s flavor.

Variations to Try

Feel free to customize your Orange Almond Cake with these delicious variations:

  • Chocolate Orange Almond Cake: Fold in some cocoa powder or chocolate chips for a decadent twist.
  • Caramel Drizzle: Top with a homemade caramel sauce for an indulgent finish.
  • Berry Citrus Cake: Add fresh berries to the batter for a fruity surprise.
  • Spiced Orange Cake: Incorporate cinnamon or cardamom for a warm, aromatic flavor.

Storage and Make-Ahead Instructions

This Orange Almond Cake is great for making ahead of time:

  • Room Temperature: Store it in an airtight container for up to 3 days.
  • Refrigeration: Keeps in the fridge for up to a week; bring to room temperature before serving.
  • Freezing: Wrap the cooled cake tightly in plastic wrap and foil; it can be frozen for up to 3 months. Thaw overnight in the refrigerator.

Comprehensive FAQ

Here are some frequently asked questions to aid your baking journey:

  • Can I use almond flour instead of ground almonds? Yes, almond flour can be used—just ensure it’s finely ground.
  • Is this cake suitable for a birthday? Absolutely! It’s perfect for celebrations.
  • How can I make it dairy-free? Use olive oil instead of butter and ensure your powdered sugar is dairy-free.
  • What can I serve with this cake? It pairs beautifully with coffee, tea, or a fresh fruit salad.
  • Can I add nuts to the recipe? Yes, chopped walnuts or pecans can add an extra crunch.
  • How do I know when the cake is done? A toothpick inserted into the center should come out clean.
  • Can I double the recipe? Yes, just ensure you have a larger baking pan.
  • Is this cake good for freezing? Yes, it freezes well; just ensure it’s wrapped tightly.

Nutritional Tips and Dietary Adaptations

For those mindful of nutrition, here are some adaptations:

  • Lower Sugar Option: Use natural sweeteners like honey or maple syrup in moderation.
  • Increased Fiber: Add whole wheat flour or oat flour to boost fiber content.
  • Protein Boost: Incorporate protein powder into the batter for a healthier version.

Equipment Recommendations

Here’s what you’ll need to bake your Orange Almond Cake:

  • Mixing Bowls: A set of mixing bowls in various sizes will help in managing your ingredients.
  • Measuring Cups and Spoons: Precision is key in baking, so ensure you have reliable tools.
  • Whisk: A good whisk will help you combine your ingredients smoothly.
  • 9-inch Round Cake Pan: This size is ideal for baking the cake evenly.
  • Cooling Rack: Essential for allowing the cake to cool properly.

Serving Suggestions

To enhance your cake experience, consider these serving ideas:

  • With a Scoop of Ice Cream: Vanilla or citrus-flavored ice cream pairs wonderfully.
  • Garnished with Fresh Berries: A sprinkle of fresh berries adds color and flavor.
  • Accompanied by a Citrus Syrup: Drizzle a citrus syrup over the top for extra sweetness.

Conclusion

The Irresistible Orange Almond Cake is more than just a dessert; it’s a delightful experience that brings joy and connection to any table. Whether you’re baking it for a special occasion or simply to enjoy with loved ones, this cake is sure to impress. So roll up your sleeves and let’s get baking—your taste buds will thank you!

Irresistible Orange Almond Cake

Prep Time 15 minutes
Cook Time 45 minutes
Total Time 1 hour
Servings 8 slices
Calories 350
A moist and flavorful cake combining the bright citrus notes of oranges with the rich nuttiness of almonds, perfect for any occasion.

Ingredients

Fruits

  • 2 large oranges (Fresh, high-quality oranges recommended for best flavor.)
  • 1 cup ground almonds (Weigh for accuracy, as almond sizes can vary.)
  • 1 cup granulated sugar
  • 4 large eggs
  • 1 teaspoon baking powder
  • 1/2 teaspoon salt
  • 1/4 cup olive oil (or melted butter)
  • Powdered sugar for dusting Powdered sugar (optional)

Instructions 

  • Preheat the oven to 350°F (175°C). Grease a cake pan.
  • Boil the oranges for 30 minutes, then blend until smooth.
  • Mix orange puree, ground almonds, sugar, eggs, baking powder, salt, and olive oil until well combined.
  • Pour batter into the prepared pan and bake for 45 minutes or until a toothpick comes out clean.
  • Allow to cool, then dust with powdered sugar if desired.

Notes

This cake is best enjoyed fresh but can be stored in an airtight container for up to 2 days.
Calories: 350kcal
Cost: $15
Course: Dessert
Cuisine: fusion
Keyword: almond, cake, orange

Unlock the Secrets of Authentic Chinese Mango Pudding!

If you’re looking for a delightful dessert that captures the essence of summer, look no further than this authentic Chinese mango pudding. This creamy, luscious treat is not only simple to make but also a crowd-pleaser that will impress your family and friends. With ripe mangoes, creamy coconut milk, and a touch of sweetness, this recipe embodies the culinary spirit of Cantonese cuisine. Let’s dive into the world of mango pudding, where every spoonful is a journey through flavors!

Why You’ll Love This Recipe

  • Easy to Prepare: This mango pudding requires minimal effort, making it perfect for both novice and experienced cooks.
  • Refreshing Taste: The combination of fresh mangoes and creamy coconut milk creates a dessert that is light and refreshing, ideal for warm days.
  • Customizable: You can easily adapt the recipe to suit your dietary needs or preferences, whether you prefer dairy-free options or added toppings.
  • Perfect for Gatherings: This pudding is an excellent choice for family gatherings or parties, bringing a touch of elegance to your dessert table.
  • Make-Ahead Friendly: Prepare it a day in advance to save time and ensure a stress-free serving experience.

Ingredients Breakdown

To create this delicious mango pudding, you’ll need the following ingredients:

  • 2 large ripe mangoes: Peeled and cubed (about 2 cups of puree). Choose fully ripe mangoes for the best flavor.
  • 1/2 cup full-fat coconut milk or heavy cream: Adds richness and creaminess to the pudding.
  • 1/3 cup sweetened condensed milk: For a touch of sweetness and creamy texture.
  • 1/2 cup whole milk: Balances the richness of the coconut milk.
  • 2 tablespoons gelatin powder: This is what gives the pudding its smooth, set texture.
  • 1/2 cup hot water: Used to dissolve the gelatin.
  • 2 tablespoons sugar: Adjust based on the sweetness of your mangoes.
  • Fresh mango chunks: Optional, for topping.
  • Mint leaves: Optional, for garnish.

**Substitutions**: If you’re looking for alternatives, you can use evaporated milk instead of coconut milk for a different flavor profile. For a vegan version, replace sweetened condensed milk with a plant-based alternative.

Step-by-Step Instructions

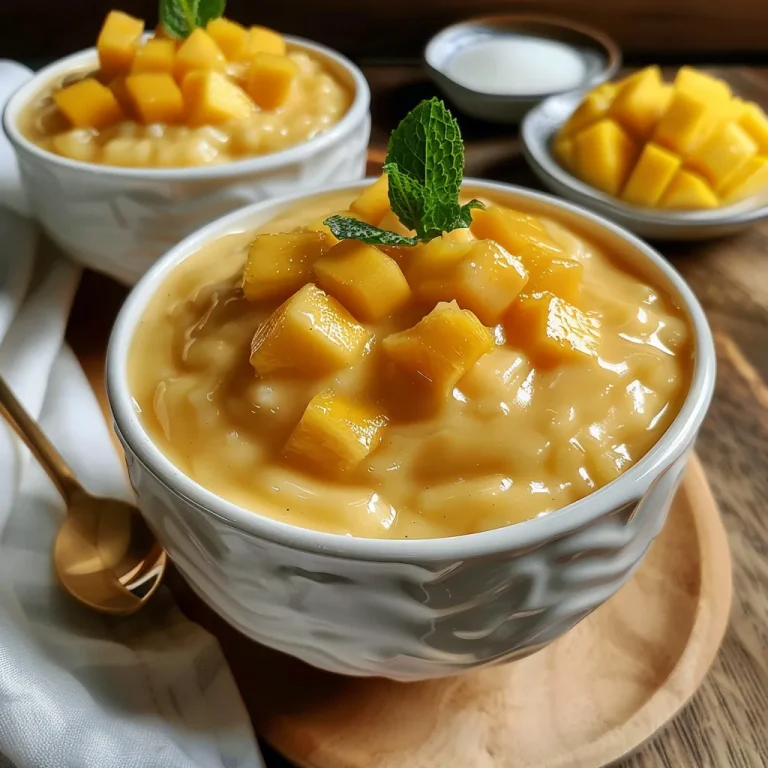
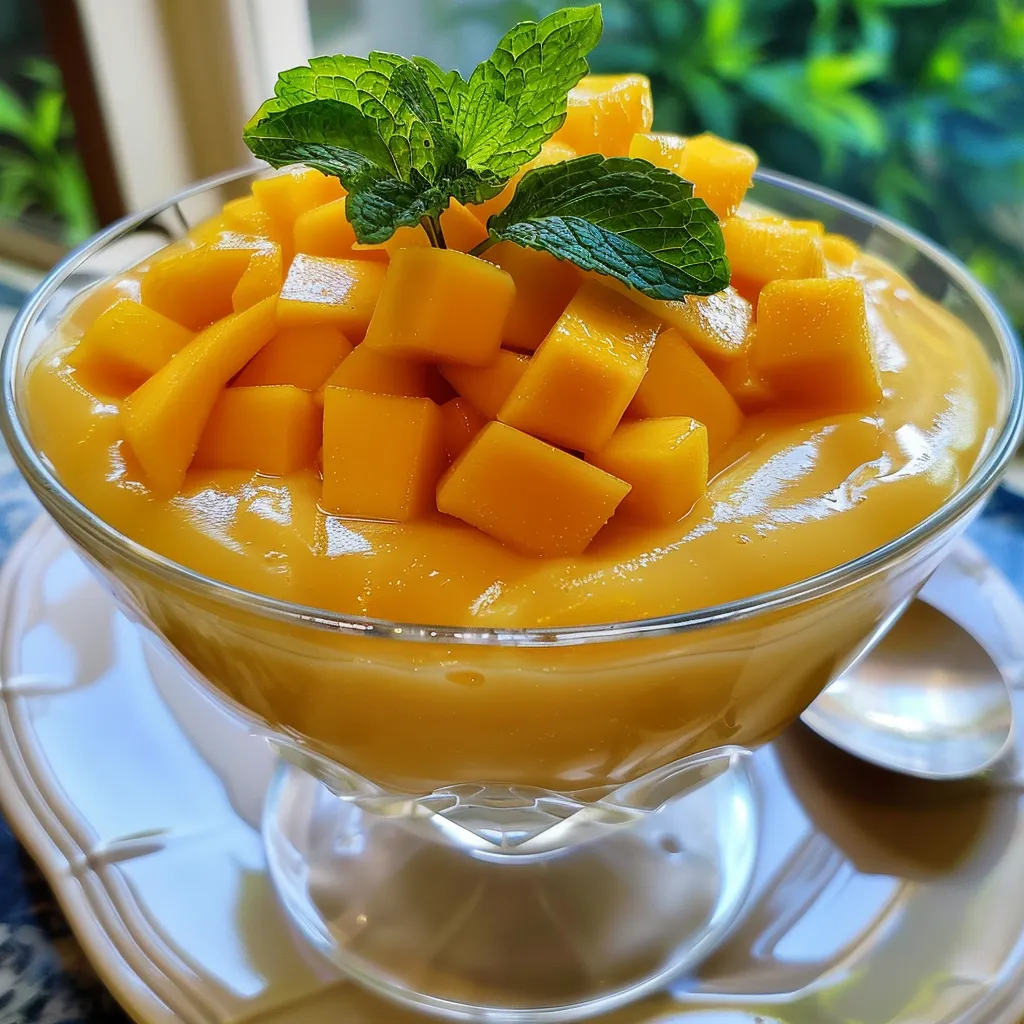
Appetizing mango pudding displayed with a smooth surface and tropical garnishes.

Follow these easy steps to create your mango pudding:

  • Step 1: Prepare the Mango Purée – Peel and cube the mangoes. Blend until smooth, yielding about 2 cups of purée. Strain if needed for extra smoothness.
  • Step 2: Dissolve the Gelatin – In a small bowl, mix the gelatin powder with hot water and stir until fully dissolved. Allow it to cool slightly.
  • Step 3: Combine the Creamy Base – In a large bowl, whisk together coconut milk, whole milk, sweetened condensed milk, and sugar until the sugar dissolves. Mix in the cooled gelatin.
  • Step 4: Add the Mango – Pour the mango purée into the mixture and stir until everything is well combined.
  • Step 5: Pour and Chill – Distribute the mixture into ramekins or silicone molds. Refrigerate for at least 4 hours or until set.
  • Step 6: Serve – Once chilled, serve the puddings as they are, or garnish with fresh mango chunks and mint leaves for an eye-catching touch.

Expert Tips for the Best Mango Pudding

  • Choose the right mangoes: Use sweet, fully ripe mangoes for the best flavor. Look for mangoes that give slightly when pressed.
  • Gelatin consistency: Make sure the gelatin is completely dissolved to avoid clumps in your pudding.
  • Chill properly: Allow ample time in the fridge to ensure the pudding sets correctly; overnight chilling is ideal.
  • Flavor variations: Consider adding a splash of vanilla extract or coconut extract to enhance the flavor profile.
  • Presentation matters: Use clear glassware to showcase the beautiful color of the pudding.
  • Adjust sweetness: Taste the mango purée before adding sugar to achieve your desired sweetness level.
  • Use fresh ingredients: Fresh mangoes and high-quality milk will significantly impact the flavor and texture of the pudding.
  • Experiment with toppings: Fresh fruits, shredded coconut, or a drizzle of honey can elevate your dessert.

Common Mistakes and Troubleshooting

  • Gelatin not setting: Ensure you’ve used the correct amount of gelatin, and it’s fully dissolved before mixing.
  • Overly sweet pudding: Adjust the sugar content based on the natural sweetness of your mangoes.
  • Grainy texture: Use a high-speed blender for a smoother purée, and strain if necessary.
  • Too firm pudding: If the pudding is set too hard, reduce the gelatin in your next attempt.

Flavor Variations

  • Coconut Mango Pudding: Use only coconut milk, omitting the whole milk for a richer coconut flavor.
  • Matcha Mango Pudding: Add a teaspoon of matcha powder to the mixture for a vibrant green color and earthy flavor.
  • Chocolate Mango Pudding: Mix in melted dark chocolate for a decadent twist on this classic.
  • Berry Mango Pudding: Swirl in a berry purée for a colorful and flavorful mashup.

Storage and Make-Ahead Instructions

This pudding is perfect for make-ahead preparations! Store it in the fridge for up to 4 days. Ensure it’s covered to prevent it from absorbing any odors. You can also freeze the pudding for up to a month, although the texture may change slightly upon thawing.

Frequently Asked Questions

  • Can I use frozen mangoes? Yes, just thaw and blend them for purée.
  • Is this pudding gluten-free? Absolutely! This recipe is naturally gluten-free.
  • How do I make it vegan? Substitute coconut cream for the cream and use agave syrup instead of condensed milk.
  • What can I serve with mango pudding? This pudding pairs well with fresh fruit, a dollop of whipped cream, or a scoop of vanilla ice cream.
  • How can I tell if the pudding is set? The pudding should be firm but jiggles slightly when moved.
  • Can I add alcohol to the recipe? A splash of rum or coconut liqueur can add a fun twist!
  • How do I make it less sweet? Reduce the amount of sweetened condensed milk or adjust the sugar to your taste.
  • Can I double the recipe? Yes, simply adjust your ingredients accordingly and ensure you have enough molds.

Nutritional Tips and Dietary Adaptations

This mango pudding is not only a treat but can also be a part of a balanced diet. Here are some tips:

  • Low-Calorie Version: Use low-fat milk and reduce the amount of sweetened condensed milk.
  • High-Protein Option: Replace whole milk with protein-fortified milk alternatives.
  • For Diabetics: Consider using a sugar substitute that measures like sugar.

Essential Equipment Recommendations

  • Blender or Food Processor: To make a smooth mango purée.
  • Mixing Bowls: For combining ingredients effectively.
  • Ramekins or Molds: For setting and serving the pudding.
  • Whisk: To ensure all ingredients are well mixed.

Serving Suggestions

Serve your mango pudding chilled, garnished with fresh mango chunks and mint leaves for a beautiful presentation. Pair it with a light tea or a refreshing tropical drink to enhance the experience. This pudding is always a hit, whether at family gatherings or as a sweet end to a casual dinner.

In conclusion, crafting this Chinese mango pudding is not just about following a recipe; it’s about creating a delightful experience. With its smooth texture and rich flavors, this pudding is sure to become a favorite in your household. Enjoy making and sharing this delightful dessert!

Chinese Mango Pudding Recipe: A Creamy Cantonese Classic

Prep Time 15 minutes
Total Time 15 minutes
Servings 4 servings
Calories 250
Enjoy this smooth and refreshing mango pudding, a beloved Cantonese dessert perfect for hot days or special occasions.

Ingredients

Main ingredients

  • 2 large ripe mangoes, peeled and cubed (about 2 cups of puree)
  • 1/2 cup full-fat coconut milk or heavy cream
  • 1/3 cup sweetened condensed milk
  • 1/2 cup whole milk
  • 2 tablespoons gelatin powder
  • 1/2 cup hot water
  • 2 tablespoons sugar (adjust to taste depending on mango sweetness)
  • optional Fresh mango chunks (for topping)
  • optional Mint leaves (for garnish)

Instructions 

  • Puree peeled mangoes until smooth, then set aside.
  • Dissolve gelatin in hot water, then cool slightly.
  • Mix coconut milk, condensed milk, milk, and sugar; add cooled gelatin.
  • Stir in mango purée until well combined.
  • Pour into molds and chill for at least 4 hours until set.
  • Serve topped with mango chunks and mint leaves if desired.

Notes

Ensure the pudding is fully chilled before serving for the best texture.
Calories: 250kcal
Cost: $10
Course: Dessert
Cuisine: Chinese
Keyword: Mango

Error: model did not return valid JSON.

BEST Brownie Recipe

Prep Time 10 minutes
Cook Time 25 minutes
Total Time 35 minutes
Servings 12 pieces
Calories 250
Indulge in rich, fudgy brownies with this easy-to-make recipe that yields perfect treats every time.

Ingredients

Dried ingredients

  • 1 ½ cup sugar
  • ¾ cup flour
  • cup unsweetened cocoa powder
  • ½ cup powdered sugar
  • ½ tsp salt
  • ½ cup semi-sweet chocolate chips
  • 2 large eggs
  • ½ cup vegetable oil
  • 2 Tablespoon water
  • 1 tsp vanilla

Instructions 

  • Preheat oven to 350°F (175°C). Grease a baking pan.
  • Mix sugar, flour, cocoa powder, powdered sugar, and salt in a bowl.
  • In a separate bowl, whisk eggs, oil, water, and vanilla. Combine with dry ingredients.
  • Fold in chocolate chips. Pour batter into prepared pan.
  • Bake for 25 minutes or until a toothpick inserted comes out clean. Cool before slicing.

Notes

For extra fudginess, slightly underbake and let cool.
Calories: 250kcal
Cost: $8
Course: Dessert
Cuisine: American
Keyword: brownie
Indulgent brownie displayed on a light background, emphasizing its gooey interior.

Indulge in Decadence with Choco Lava Cake

Welcome to the ultimate guide to mastering the art of Choco Lava Cake! This indulgent dessert is not just a treat; it’s a celebration of rich chocolate that oozes with molten goodness. Whether you’re looking to impress dinner guests or treat yourself on a cozy night in, this recipe will guide you to perfection. Let’s dive into the world of lava cakes and discover the secrets to creating the perfect molten center.

Why You’ll Love This Recipe

There are countless reasons why this Choco Lava Cake recipe will become a staple in your dessert repertoire:

  • Quick and Easy: Prepare the batter in under 30 minutes, making it a perfect last-minute dessert option.
  • Impressive Presentation: The moment you cut into the cake, the molten chocolate center flows out, impressing everyone at the table.
  • Versatile Options: Customize your cake with various add-ins and toppings to suit any occasion.
  • Rich Flavor: Made with high-quality dark chocolate, every bite offers an explosion of chocolatey goodness.
  • Perfect for Any Occasion: Whether it’s a romantic dinner, a birthday party, or just a treat for yourself, these lava cakes fit the bill!

Essential Ingredients for Choco Lava Cake

Let’s break down the ingredients you’ll need to achieve the perfect lava cake:

  • Dark chocolate (60–72% cocoa): Finely chopped for easier melting.
  • Unsalted butter: Essential for a rich, moist texture.
  • Large eggs: Provide structure and help create that luscious molten center.
  • Additional egg yolks: Adding extra yolks enhances richness.
  • Granulated sugar: Balances the bitterness of dark chocolate.
  • All-purpose flour: Just enough to bind the ingredients together.
  • Vanilla extract: Adds a comforting flavor note.
  • Kosher salt (a pinch): Enhances overall flavor.
  • Espresso powder: Deepens the chocolate flavor without making it taste like coffee.
  • Cocoa powder: For dusting ramekins, adds a nice touch to the presentation.

Step-by-Step Choco Lava Cake Recipe

A slice of Choco Lava cake, dripping with warm chocolate sauce on a plate.

Follow these simple steps to create your Choco Lava Cake:

  • Prepare your ramekins: Thoroughly butter the inside and dust with cocoa powder instead of flour for a chocolatey finish.
  • Melt the chocolate and butter: Combine chopped dark chocolate and unsalted butter using either a microwave (heat in 20–30 second bursts, stirring in between) or a double boiler over simmering water.
  • Cool the mixture: Stir until glossy and lump-free, then let it cool slightly to avoid cooking the eggs when mixed.
  • Whisk eggs and sugar: In a separate bowl, vigorously whisk together whole eggs, additional yolks, and granulated sugar until pale and slightly thickened.
  • Add flavorings: Incorporate a pinch of kosher salt and a splash of vanilla extract into the egg mixture.
  • Combine dry and wet ingredients: Gradually sift all-purpose flour into the egg mixture and fold gently to combine without toughening the batter.
  • Incorporate chocolate mixture: Slowly stream in the cooled chocolate-butter mixture while whisking constantly, then gently fold until smooth and glossy.
  • Fill ramekins: Pour the batter into your prepared ramekins, filling them about 2/3 full.
  • Heat the oven: Preheat your oven to 425°F (220°C).
  • Bake: For ramekins, bake for 12–14 minutes (for muffin tins, bake slightly shorter, around 9–11 minutes). Look for firm, set edges, a matte surface, and a jiggly but not runny center.
  • Rest and serve: Let cakes rest for 1 minute in their ramekins after baking. Invert onto plates and serve immediately for that irresistible molten effect.

Pro Tips for Perfecting Your Lava Cake

Here are some expert insights to help you nail this recipe:

  • Quality Ingredients: Use high-quality dark chocolate for the best flavor and texture.
  • Avoid Overbaking: Keep a close eye on baking time to ensure the center stays molten.
  • Rest Time is Key: Allow the cakes to rest before serving to achieve the perfect flow of molten chocolate.
  • Experiment with Add-ins: Try adding chopped nuts, chocolate chips, or caramel into the batter for extra flavor.
  • Make it Ahead of Time: You can prepare the batter earlier in the day and refrigerate it until you’re ready to bake.
  • Serving Suggestions: Pair with vanilla ice cream, fresh berries, or a dusting of cocoa powder for a gourmet touch.
  • Storage Tips: Store leftover cakes in an airtight container in the refrigerator for up to 2 days.
  • Garnish Creatively: Consider garnishing with edible gold leaf for a luxurious presentation.

Common Mistakes and Troubleshooting

Even seasoned cooks can run into issues. Here are some common mistakes and how to troubleshoot them:

  • Overbaked Cakes: If the cakes are too firm and lack a molten center, reduce the baking time next time.
  • Dry Texture: Ensure you measure ingredients accurately, especially flour, which can be easily overmeasured.
  • Chocolate Not Melting Smoothly: Make sure to stir continuously while melting to avoid seizing.
  • Uneven Baking: Rotate your baking tray halfway through for even heat distribution.

Delicious Variations

Want to mix it up? Here are some fun variations to try:

  • Nutty Lava Cake: Add chopped hazelnuts or almonds to the batter for a crunchy texture.
  • Spicy Lava Cake: Incorporate a pinch of cayenne pepper or chili powder for a surprising kick.
  • Fruit-Infused Lava Cake: Add pureed raspberries or strawberries to the batter for a fruity twist.
  • Coffee Lover’s Lava Cake: Enhance the chocolate flavor with a tablespoon of strong brewed coffee or espresso.

Storage and Make-Ahead Instructions

For those who want to prepare in advance:

  • Make-Ahead: Prepare the batter and fill the ramekins. Cover and refrigerate for up to 24 hours. Bake when ready.
  • Storage: Leftover cakes can be stored in an airtight container in the refrigerator for up to 2 days. Reheat in the microwave before serving.

Comprehensive FAQ

Here are some frequently asked questions about Choco Lava Cake:

  • Can I use milk chocolate instead of dark chocolate? Yes, but the flavor will be sweeter and less intense.
  • What if I don’t have ramekins? Muffin tins work great as an alternative!
  • Can I make this gluten-free? Substitute all-purpose flour with a gluten-free blend.
  • How can I tell when the cake is done? Look for firm edges and a soft center that jiggles slightly.
  • Can I freeze Choco Lava Cakes? Yes, but they are best enjoyed fresh.
  • What toppings pair well with lava cakes? Vanilla ice cream, whipped cream, or fresh berries are all delightful options.
  • Is there a vegan alternative? You can experiment with flax eggs and dairy-free chocolate for a vegan version.
  • How do I serve the cake? Invert onto a plate and enjoy immediately for the best molten effect!

Nutritional Tips and Dietary Adaptations

For those mindful of nutrition, here are some tips:

  • Portion Control: Consider serving smaller portions alongside fruit or yogurt to balance richness.
  • Healthier Sweeteners: Substitute granulated sugar with coconut sugar or a natural sweetener if desired.
  • Dairy-Free Option: Use coconut oil instead of butter and dairy-free chocolate.

Equipment Recommendations

To achieve the best results, use quality equipment:

  • Ramekins: Opt for oven-safe ramekins for the perfect baking environment.
  • Mixing Bowls: Use glass or stainless steel bowls for melting chocolate and mixing ingredients.
  • Whisk: A good whisk is essential for aerating your egg mixture effectively.
  • Silicone Spatula: Great for folding the batter without deflating it.

Serving Suggestions

For a delightful presentation:

  • Garnish with Fresh Berries: Raspberries or strawberries add a pop of color and flavor.
  • Top with Ice Cream: A scoop of vanilla or coffee ice cream complements the chocolate beautifully.
  • Add a Drizzle: A drizzle of caramel or chocolate sauce enhances the visual appeal and taste.

Conclusion: Your Journey to Chocolate Bliss Begins!

There you have it! With this comprehensive guide to Choco Lava Cake, you’re equipped to create a dessert that not only tastes incredible but also brings joy and warmth to every occasion. Remember, cooking is about connection and love—so don’t forget to share your creations with those you cherish. Happy baking!

Choco Lava cake

Prep Time 15 minutes
Cook Time 14 minutes
Total Time 29 minutes
Servings 4 pieces
Calories 420
A decadent dessert with a gooey chocolate center, perfect for chocolate lovers.

Ingredients

Chocolate and Butter

  • 200 grams Dark chocolate (60–72% cocoa), finely chopped
  • 113 grams Unsalted butter

Eggs and Sugar

  • 3 large Large eggs
  • 2 extra yolks Additional egg yolks
  • 150 grams Granulated sugar

Dry ingredients

  • 125 grams All-purpose flour, sifted
  • 10 grams Cocoa powder (for dusting ramekins)

Flavor Enhancers

  • 1 teaspoon Vanilla extract
  • 1 pinch Kosher salt
  • 1 teaspoon Espresso powder

Additional

  • Cocoa powder Cocoa powder (for dusting ramekins)

Instructions 

  • Butter the ramekins and dust with cocoa powder.
  • Melt chocolate and butter until smooth.
  • Whisk eggs, yolks, sugar, salt, vanilla, and espresso until pale.
  • Gradually fold in sifted flour and cocoa powder.
  • Combine cooled chocolate mixture with egg mixture, then pour into ramekins.
  • Bake at 220°C (425°F) for 12–14 minutes until edges are set but center is jiggly.

Notes

Serve immediately with vanilla ice cream and berries for best molten effect.
Calories: 420kcal
Cost: $15
Course: Dessert
Cuisine: International
Keyword: chocolate