Author

Mike

Browsing

Discover the Refreshing World of Mango Lassi

Mango Lassi is a delightful yogurt-based drink that hails from the Indian subcontinent, known for its creamy texture and refreshing taste. This mango lassi recipe combines ripe mangos, smooth Greek yogurt, and a touch of natural sweetness to create a beverage that’s perfect for any occasion. Whether you’re enjoying a spicy Indian meal or simply looking for a refreshing drink on a hot day, this lassi is the perfect choice. Not only is it delicious, but it’s also rich in nutrients, making it a guilt-free indulgence!

In this comprehensive guide, you’ll learn how to make the best mango lassi, explore variations, and discover tips to enhance the flavor and presentation. Let’s dive into the tropical goodness!

Why You’ll Love This Recipe

  • Quick and Easy: With just a few ingredients, you can whip up a mango lassi in minutes, making it the perfect drink for busy days.
  • Health Benefits: Packed with protein from Greek yogurt and vitamins from ripe mangoes, this drink supports a healthy lifestyle.
  • Versatile Ingredients: You can customize this recipe with different spices, sweeteners, and fruit variations to suit your taste.
  • Kid-Friendly: Kids love the sweet, fruity flavor, making it a great addition to lunchboxes or as an after-school snack.
  • Impressive Presentation: Serve it in fancy glasses with a garnish for a touch of elegance at your next gathering!

Ingredient Breakdown and Substitutions

Understanding the ingredients is key to mastering this mango lassi recipe. Here’s what you need:

  • 2 ripe mangos: Peel and dice them for the best flavor. If you can’t find fresh mangoes, you can substitute with frozen mango or canned mango pulp.
  • 1 cup Greek yogurt: This thick yogurt provides creaminess and a protein boost. You can use regular yogurt if you prefer a lighter texture.
  • 1/2 cup milk: Adjust the amount for desired thickness. Non-dairy alternatives like almond or coconut milk work well too.
  • 2-3 tablespoons honey: Sweeten to taste! You can also use maple syrup or agave for a vegan option.
  • Ice (optional): Add ice for a chilled version, especially refreshing during summer.
  • Cardamom powder (optional): A pinch adds aromatic flavor, enhancing the lassi’s authenticity.
  • Garnishes (optional): Consider mango slices, a sprinkle of ground cinnamon, or chopped pistachios for a delightful finish.

How to Make Mango Lassi: Step-by-Step Directions

Ready to create your own mango lassi? Follow these simple steps:

  1. Peel and dice the ripe mangos, ensuring you remove the pit.
  2. In a blender, combine the diced mango, Greek yogurt, milk, and honey.
  3. Blend until smooth and creamy. If the lassi is too thick, add more milk and blend again until desired thickness is reached.
  4. Taste and adjust honey or any other ingredient if needed, blending briefly after adjustments.
  5. Refrigerate the Mango Lassi for at least 30 minutes or serve immediately over ice for a refreshing chill.
  6. Garnish with a slice of mango or a sprinkle of ground cardamom for a spicy hit.

Pro Tips for the Perfect Mango Lassi

  • Choose Ripe Mangos: The sweeter the mango, the better your lassi will taste. Look for mangos that yield slightly to pressure.
  • Blend Thoroughly: Ensure all ingredients are well blended for a smooth consistency. No chunks should remain!
  • Chill Before Serving: Allowing the lassi to chill enhances its refreshing qualities, making it even more enjoyable.
  • Experiment with Spices: If you enjoy bold flavors, experiment with a splash of rose water or a hint of ground cinnamon.
  • Adjust Sweetness: Taste your lassi before serving; you can always add more honey or a splash of sugar if you prefer it sweeter.
  • Use a High-Powered Blender: A powerful blender can make the texture creamier and smoother.
  • Serve Immediately: For the best taste, serve your mango lassi fresh. However, it can be stored in the fridge for a couple of days.

Common Mistakes and Troubleshooting

Even experienced cooks can encounter issues. Here’s how to avoid common pitfalls:

  • Too Thick?: If your lassi is thicker than desired, blend in a bit more milk until you achieve the right consistency.
  • Too Sweet?: Balance out excessive sweetness with a splash of lemon juice or yogurt for a tangy touch.
  • Not Creamy Enough?: Ensure you’re using enough yogurt; for a creamier texture, opt for full-fat Greek yogurt.
  • Lack of Flavor?: If the flavor seems flat, add a pinch of salt or a sprinkle of spices to elevate the taste.

Variations to Try

Feel free to get creative! Here are some delicious variations to explore:

  • Berry Mango Lassi: Add a cup of mixed berries to the blender for a fruity twist.
  • Pineapple Mango Lassi: Substitute half the mango with fresh or frozen pineapple for a tropical flavor.
  • Spiced Mango Lassi: Mix in a pinch of cayenne or black pepper for a spicy kick.
  • Vegan Mango Lassi: Use coconut yogurt and a plant-based milk to create a vegan-friendly version.

Storage and Make-Ahead Instructions

Your mango lassi can be made ahead of time and stored in the refrigerator. Here are some tips:

  • Storage: Keep in an airtight container for up to 2 days. Stir well before serving again.
  • Make-Ahead: Prepare the ingredients and store them separately in the fridge. Blend when ready to serve.

Frequently Asked Questions (FAQs)

  • Can I use frozen mango?: Absolutely! Frozen mango works great and can be blended directly without thawing.
  • Is mango lassi good for you?: Yes! It’s rich in protein and vitamins, especially if made with fresh ingredients.
  • Can I make mango lassi without yogurt?: You can use coconut milk or almond milk as a substitute, though the texture will differ.
  • How can I make my lassi thicker?: Increase the amount of yogurt or reduce the amount of milk in your recipe.
  • What can I add for extra flavor?: A dash of vanilla extract or a sprinkle of nutmeg can enhance the flavor profile.
  • How do I serve mango lassi?: Serve chilled in glasses with optional garnishes like mint leaves or nuts for added texture.
  • Can I use flavored yogurt?: Yes, flavored yogurt can add an interesting twist, but make sure it complements the mango.
  • How long will it last?: Homemade mango lassi is best consumed within 2 days for optimal freshness.

Nutrition Tips and Dietary Adaptations

This mango lassi can fit into various dietary preferences:

  • Low-Calorie Option: Use low-fat yogurt and reduce the amount of honey for a lighter drink.
  • Dairy-Free: Choose coconut yogurt and almond milk to make it dairy-free.
  • Protein Boost: Add a scoop of your favorite protein powder for an extra boost post-workout.

Equipment Recommendations

  • High-Powered Blender: Essential for achieving a perfectly smooth consistency.
  • Measuring Cups: Helpful for accurately measuring ingredients, especially liquids.
  • Cutting Board and Knife: For prepping your mangoes efficiently.

Serving Suggestions

Enjoy your mango lassi in a variety of settings:

  • As a Refreshing Drink: Perfect on its own or as a complement to spicy dishes.
  • Breakfast Boost: Serve alongside granola or oatmeal for a nutritious start to your day.
  • Party Beverages: Serve in a punch bowl at gatherings for guests to help themselves.

With its vibrant taste and versatility, mango lassi truly shines as a delightful addition to your culinary repertoire. Whether you’re enjoying it solo or sharing with friends and family, this drink brings a smile to every occasion. So, gather your ingredients and start blending—joy is just a sip away!

Mango Lassi

Prep Time 10 minutes
Total Time 10 minutes
Servings 2 cups
Calories 250
A refreshing and creamy Indian-inspired mango yogurt drink perfect for hot days or as a delightful snack.

Ingredients

Fruits

  • 2 pieces ripe mangos, peeled and diced (Remove pit)
  • 1 cup Greek yogurt
  • 0.5 cup milk
  • 2-3 tablespoons honey (Adjust to taste)
  • optional Ice (Optional)
  • optional Cardamom powder (Optional)
  • optional Mango slices (Optional garnish)
  • optional Ground cinnamon (Optional garnish)
  • optional Chopped pistachios (Optional garnish)

Instructions 

  • Peel and dice the mangos, removing the pit.
  • Combine mango, Greek yogurt, milk, and honey in a blender.
  • Blend until smooth; add more milk if too thick.
  • Refrigerate for 30 minutes or serve over ice.
  • Garnish with mango slices or a sprinkle of ground cardamom if desired.
Notes

For a thicker lassi, add more yogurt; for a thinner one, add more milk.
Calories: 250kcal
Cost: $8
Course: Beverage
Cuisine: Indian
Keyword: Mango

Start Your Day Right with This Vibrant Pink Strawberry Banana Smoothie

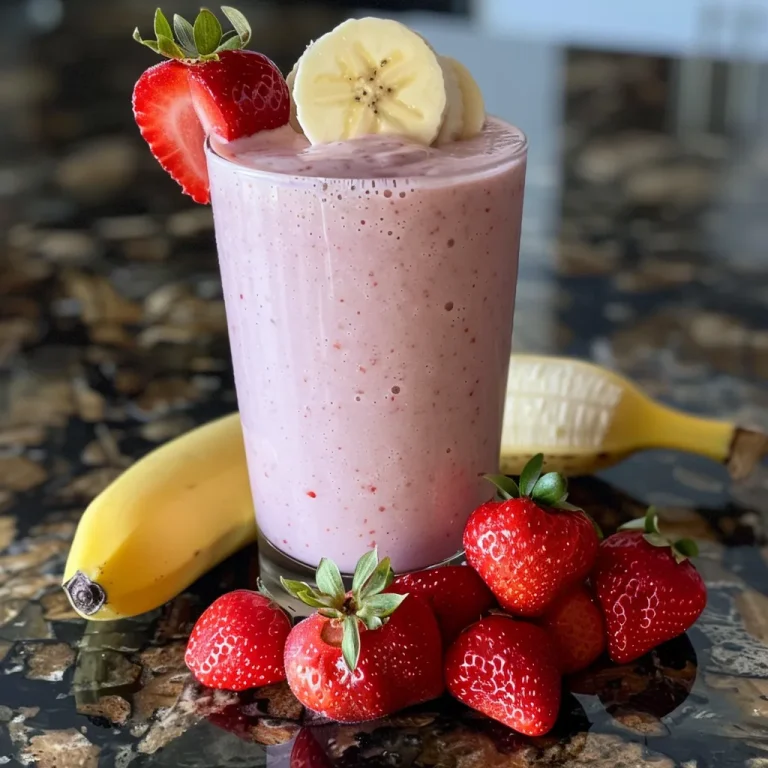
Are you looking for a delicious way to kickstart your mornings? Look no further than this Pink Strawberry Banana Smoothie! Packed with nutrients and bursting with flavor, this smoothie is the perfect addition to your breakfast or as a refreshing snack. In just a few minutes, you can enjoy a creamy and naturally sweet drink that satisfies your cravings and fuels your day. Let’s dive into the world of smoothies and discover why this recipe deserves a spot in your kitchen.

Why You’ll Love This Recipe

This Pink Strawberry Banana Smoothie offers numerous benefits that make it a must-try:

  • Quick and Easy: This smoothie recipe is ready in under 5 minutes, making it perfect for busy mornings.
  • Nutrient-Packed: With fruits and yogurt, this smoothie is rich in vitamins, antioxidants, and protein.
  • Customizable: Feel free to swap ingredients based on your dietary preferences or what’s in your kitchen.
  • Kid-Friendly: The vibrant color and sweet taste make it a hit with children, encouraging them to eat healthier.
  • Delicious and Satisfying: The combination of strawberries and bananas creates a naturally sweet and creamy flavor that’s hard to resist.

Ingredients Breakdown

To create this delightful smoothie, gather the following ingredients:

  • 1 cup frozen strawberries: These provide a bold fruity flavor and beautiful color, plus they keep the smoothie chilled and thick.
  • 1 ripe banana: Adds creamy texture and natural sweetness that complements the tartness of strawberries.
  • ½ cup Greek yogurt or dairy-free yogurt: Brings a silky smoothness and a tangy note while boosting protein content.
  • ¾ cup milk or plant-based milk: Adjust the consistency of your smoothie. Almond or oat milk are great dairy-free options.
  • 1 tablespoon honey or maple syrup (optional): Adds extra sweetness if needed, especially if your fruits aren’t fully ripe.
  • ½ teaspoon vanilla extract: Enhances the overall flavor profile.
  • 1 tablespoon chia seeds: Provides added fiber and omega-3 fatty acids.
  • ½ cup raspberries: For an extra burst of flavor and more nutrients.
  • Protein powder (quantity as desired): Boost your smoothie with additional protein for a satisfying meal.
  • Ice cubes (if using fresh fruit): Helps create a refreshing cold drink.

Step-by-Step Instructions

Follow these simple steps to create your Pink Strawberry Banana Smoothie:

  1. Add the frozen strawberries, ripe banana, Greek yogurt (or dairy-free alternative), milk (or plant-based milk), honey or maple syrup if using, and vanilla extract into a blender.
  2. Blend all the ingredients on high speed until the mixture is smooth and creamy without lumps.
  3. Taste the smoothie and add more sweetener if desired, blending again briefly to mix.
  4. Pour the smoothie into glasses immediately for the best texture and flavor.
  5. If desired, add optional add-ins like chia seeds, raspberries, protein powder, or ice cubes before blending for added nutrition or texture.

Pro Tips for the Perfect Smoothie

Here are some expert insights to ensure your smoothie turns out perfectly every time:

  • Choose Ripe Fruits: Using ripe bananas and strawberries maximizes sweetness and flavor.
  • Blend in Stages: If your blender struggles, blend harder ingredients first and then add softer ones.
  • Adjust Consistency: If your smoothie is too thick, add a splash more milk; if too thin, add more frozen fruit.
  • Chill Your Ingredients: Using frozen fruit keeps your smoothie cold and refreshing without needing ice.
  • Try Different Yogurts: Experiment with flavored yogurts for added taste or use coconut yogurt for a tropical twist.
  • Enhance Nutrition: Toss in a handful of spinach or kale for extra nutrients without altering the flavor significantly.
  • Use High-Quality Blender: A high-speed blender ensures a creamy texture without chunks.
  • Make It a Meal: Add oats or nut butter to turn your smoothie into a filling breakfast option.

Common Mistakes and Troubleshooting

Here are some common pitfalls to avoid while making your smoothie:

  • Over-blending: Blend just enough to achieve a smooth consistency; over-blending can lead to a watery texture.
  • Wrong Ingredient Ratios: Follow the recipe as closely as possible, adjusting only if necessary to maintain balance.
  • Skipping Sweeteners: If your fruits are not sweet enough, don’t hesitate to add a little honey or maple syrup.
  • Neglecting to Taste: Always taste your smoothie before serving to adjust sweetness or texture.

Delicious Variations to Try

Get creative with these variations of the Pink Strawberry Banana Smoothie:

  • Berry Blast: Add mixed berries (blueberries, blackberries) for a new flavor profile.
  • Tropical Twist: Incorporate pineapple or mango for a tropical flair.
  • Nutty Banana: Add a tablespoon of almond or peanut butter for a rich, nutty flavor.
  • Cacao Delight: Mix in a tablespoon of cocoa powder for a chocolatey version.

Storage and Make-Ahead Instructions

This smoothie is best enjoyed fresh, but you can prepare it in advance or store leftovers:

  • Make-Ahead: Prepare all ingredients in advance and store in the freezer in individual bags. Just blend in the morning!
  • Storage: If you have leftovers, store in an airtight container in the refrigerator for up to 24 hours. Shake well before drinking.

Frequently Asked Questions

Here are some common questions about the Pink Strawberry Banana Smoothie:

  • Can I use fresh strawberries instead of frozen? Yes, but you may need to add ice for a cool texture.
  • Is this smoothie vegan? Yes, just use dairy-free yogurt and plant-based milk.
  • How can I make this smoothie lower in sugar? Skip the sweetener and use fully ripe fruits for natural sweetness.
  • Can I add vegetables to my smoothie? Absolutely! Spinach or kale blends well and adds nutrients.
  • What can I use instead of Greek yogurt? Any dairy-free yogurt or silken tofu will work beautifully.
  • Is this smoothie gluten-free? Yes, all ingredients listed are gluten-free.
  • How many servings does this recipe make? This recipe typically serves two, but you can easily double it for a larger batch.
  • Can I add protein powder? Yes, adding protein powder is a great way to enhance the nutritional value.

Nutrition Tips and Dietary Adaptations

This smoothie not only tastes great but can also fit various dietary needs:

  • For a Protein Boost: Add a scoop of your favorite protein powder.
  • Dairy-Free Option: Substitute Greek yogurt with coconut yogurt or almond yogurt.
  • Low-Calorie Version: Use unsweetened almond milk and skip the sweeteners.
  • Fiber-Rich: Include chia seeds or oats to increase fiber content.

Equipment Recommendations

For best results, here’s what you’ll need:

  • High-Speed Blender: A powerful blender ensures a smooth consistency.
  • Measuring Cups and Spoons: For precise ingredient measurements.
  • Spatula: To scrape down the sides of the blender for thorough mixing.

Serving Suggestions

To elevate the presentation and enjoyment of your smoothie:

  • Garnish with Fresh Fruit: Top your smoothie with slices of banana or a few whole strawberries.
  • Serve in a Fun Glass: Use colorful glasses for a cheerful breakfast vibe.
  • Pair with a Snack: Enjoy alongside oatmeal, toast, or a handful of nuts for a complete meal.

In conclusion, this Pink Strawberry Banana Smoothie is not just a drink; it’s a delightful experience that brings joy to your mornings. With its vibrant color and delicious taste, it’s a recipe that everyone in your family will love. So gather your ingredients, blend away, and enjoy a refreshing moment that’s as nutritious as it is tasty!

Pink Strawberry Banana Smoothie Recipe

Prep Time 5 minutes
Total Time 5 minutes
Servings 2 cups
Calories 250
A delicious and nutritious smoothie combining strawberries, banana, and yogurt for a refreshing treat.

Ingredients

Fruits and Dairy

  • 1 cup frozen strawberries
  • 1 piece ripe banana
  • ½ cup Greek yogurt or dairy-free yogurt
  • ¾ cup milk or plant-based milk
  • 1 tablespoon honey or maple syrup (optional)
  • ½ teaspoon vanilla extract
  • 1 tablespoon chia seeds
  • ½ cup raspberries
  • to taste Protein powder (quantity as desired)
  • as needed Ice cubes (if using fresh fruit)

Instructions 

  • Add all ingredients into a blender and blend until smooth.
  • Taste and add more sweetener if desired, then blend briefly.
  • Pour into glasses and serve immediately.

Notes

Use frozen fruit for a creamier texture and best flavor.
Calories: 250kcal
Cost: $10
Course: Breakfast, Snack
Cuisine: American
Keyword: Fruit, Smoothie

The Ultimate Strawberry Banana Protein Smoothie Guide

Welcome to your new morning ritual! This Strawberry Banana Protein Smoothie is not just a refreshing drink; it’s a powerhouse of nutrition that energizes your day from the first sip. Packed with the natural sweetness of strawberries and bananas, combined with creamy Greek yogurt and protein powder, this smoothie is perfect for a quick breakfast, post-workout recovery, or a delicious snack. In this comprehensive guide, we’ll walk you through why you’ll love this recipe, how to make it, and so much more!

Why You’ll Love This Recipe

  • Quick and Easy: In just a few minutes, you can whip up this smoothie, making it ideal for those busy mornings or when you need a quick pick-me-up.
  • Nutrient-Rich: With fresh fruits and protein, this smoothie provides essential vitamins and minerals while keeping you full and satisfied.
  • Customizable: Adjust the sweetness and creaminess to your liking by tweaking the ingredients, ensuring it’s perfect for your taste buds.
  • Great for All Ages: Kids and adults alike will enjoy the delicious flavors, making it a hit for family breakfasts.
  • Versatile Ingredients: The ingredients can easily be swapped out based on dietary restrictions or personal preferences, so you can enjoy it guilt-free!

Ingredients for Your Strawberry Banana Protein Smoothie

Here’s what you’ll need:

  • 1 cup fresh strawberries (hulled)
  • 1 ripe banana (sliced)
  • 1 scoop vanilla protein powder (about 30g)
  • 1/2 cup Greek yogurt (plain or flavored)
  • 1 cup milk (or plant-based milk)
  • 1 tablespoon honey (optional)

Ingredient Breakdown

Understanding each ingredient not only helps in preparation but also allows for substitutions:

  • Strawberries: Fresh strawberries are best, but frozen ones work too—just keep in mind they may make your smoothie thicker.
  • Banana: A ripe banana adds natural sweetness. If you prefer, use a frozen banana for a creamier texture.
  • Protein Powder: Choose a protein powder that suits your dietary needs—whey, casein, or plant-based options are all great.
  • Greek Yogurt: This adds creaminess and additional protein. You can also use regular yogurt or a dairy-free alternative if desired.
  • Milk: Any milk works—dairy or plant-based like almond, oat, or coconut milk.
  • Honey: This is optional for added sweetness; feel free to skip if your fruits are sweet enough!

How to Make Your Strawberry Banana Protein Smoothie

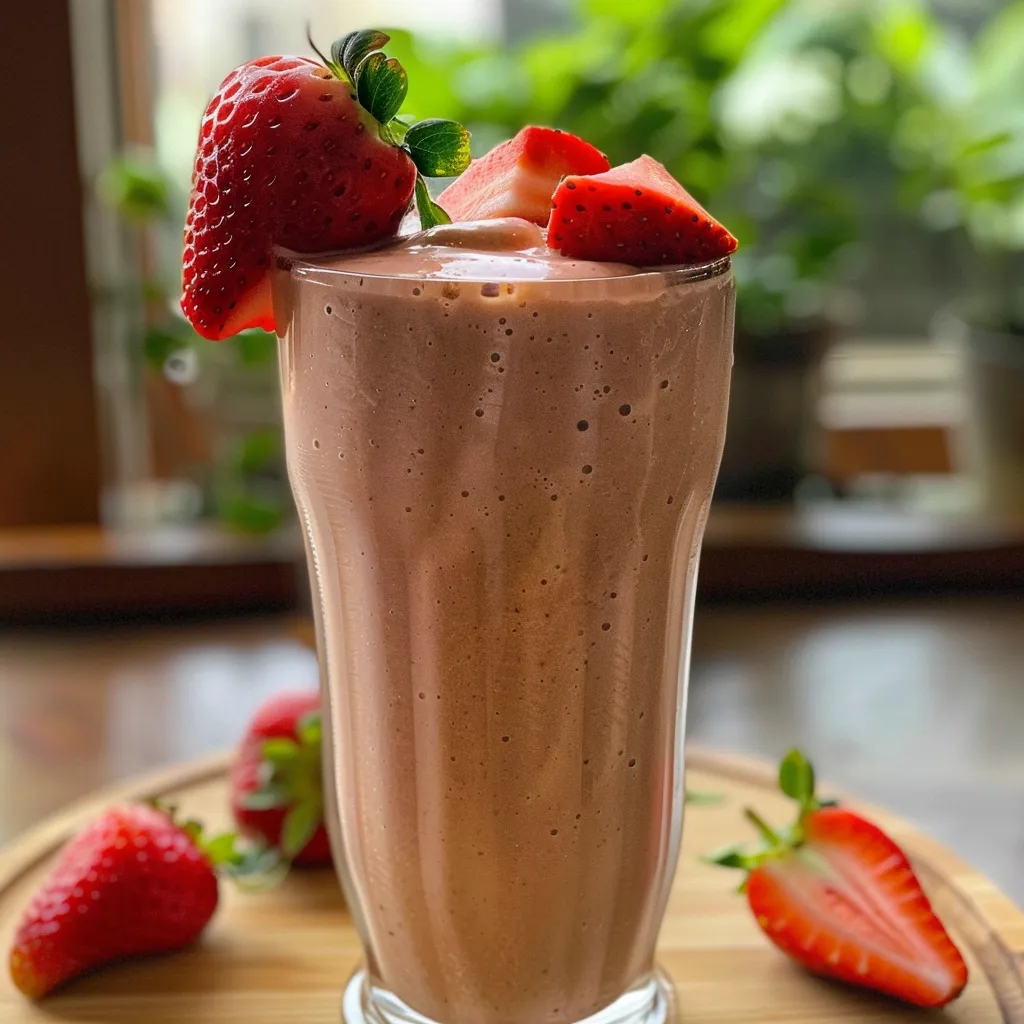
Creamy strawberry banana smoothie with a rich pink color, photographed from the side.

Follow these simple steps to create your smoothie:

  1. Gather all your ingredients.
  2. Wash the strawberries under cool water and hull them.
  3. Peel and slice the banana into chunks.
  4. In a blender, combine strawberries, banana slices, protein powder, Greek yogurt, and milk.
  5. Blend on high until smooth (about 30–40 seconds).
  6. Taste the smoothie; add honey if desired and blend briefly again.
  7. Pour into glasses and enjoy immediately.

Pro Tips for the Perfect Smoothie

Here are some expert insights to ensure your smoothie is top-notch:

  • Chill your ingredients: If possible, use chilled fruits and yogurt for a refreshing smoothie.
  • Blend in the right order: Start with liquids, then add softer ingredients, and top with frozen items for a smoother consistency.
  • Adjust consistency: If the smoothie is too thick, add a splash more milk; if too thin, add more yogurt or fruit.
  • Add greens: For extra nutrition, throw in a handful of spinach or kale—your taste buds won’t even notice!
  • Experiment with flavors: Try adding vanilla extract, cinnamon, or nutmeg to enhance the flavor profile.
  • Use a high-powered blender: This ensures everything is blended evenly for a silky-smooth texture.
  • Pre-portion your ingredients: For busy days, prep your ingredients in advance and freeze them in bags for quick blending.
  • Don’t skip the tasting: Always taste your smoothie before pouring it out—adjust sweetness and flavors as needed.

Common Mistakes and Troubleshooting

Here are some common pitfalls and how to avoid them:

  • Too thick: Add more liquid (milk or water) to achieve your desired consistency.
  • Too sweet: Balance with a splash of lemon juice or a handful of greens.
  • Not cold enough: Use frozen fruits to chill your smoothie, or add a few ice cubes before blending.

Delicious Variations to Try

Don’t hesitate to switch things up! Here are some tasty variations:

  • Berry Blast: Add blueberries or raspberries for an extra berry flavor.
  • Chocolate Delight: Add a tablespoon of cocoa powder for a delicious chocolate twist.
  • Nutty Banana: Include a tablespoon of almond or peanut butter for added creaminess and flavor.
  • Tropical Twist: Swap out strawberries for mango and add coconut milk for a tropical vibe.

Storage and Make-Ahead Instructions

If you want to prepare your smoothie in advance:

  • Storage: Store any leftovers in an airtight container in the fridge for up to 24 hours. Stir well before drinking.
  • Make-ahead: Pre-portion ingredients into freezer bags. When you’re ready, just blend with your choice of milk!

Frequently Asked Questions

Here are some common questions about the Strawberry Banana Protein Smoothie:

  • Can I use fresh fruits instead of frozen? Yes, but if you prefer a colder smoothie, consider adding ice or chilling the fruits beforehand.
  • Is this smoothie suitable for a post-workout? Absolutely! It’s packed with protein and carbohydrates to help with recovery.
  • Can I use other types of yogurt? Yes, feel free to use any yogurt you prefer, including dairy-free options.
  • How do I make this smoothie vegan? Use plant-based protein powder and substitute Greek yogurt with dairy-free yogurt.
  • What can I do with leftover smoothie? Pour it into ice cube trays and freeze for smoothie pops later!
  • Can I add supplements? Definitely! Consider adding flax seeds, chia seeds, or other protein supplements for extra nutrition.
  • Is this a good meal replacement? Yes, especially if you add oats or nut butter for extra calories and nutrients.
  • How can I make it gluten-free? Ensure your protein powder and any added ingredients are certified gluten-free.

Nutrition Tips and Dietary Adaptations

This smoothie can easily fit into various dietary needs:

  • Low Carb: Opt for unsweetened almond milk and omit honey for a low-carb option.
  • Dairy-Free: Use plant-based yogurt and milk alternatives.
  • High Protein: Increase the amount of protein powder or add Greek yogurt for a protein boost.

Equipment Recommendations

To make your smoothie experience seamless, here are a few essential tools:

  • High-Powered Blender: A powerful blender ensures smooth consistency and well-blended ingredients.
  • Measuring Cups: Accurate measurements can make a big difference in taste.
  • Spatula: Helpful for scraping down the sides of the blender to incorporate all ingredients.

Serving Suggestions

Here’s how to serve your smoothie:

  • Garnish: Top with a few slices of banana or strawberries for a beautiful presentation.
  • Pair with: Enjoy it alongside whole-grain toast or oatmeal for a well-rounded meal.
  • Glassware: Serve in clear glasses to showcase the vibrant colors of your smoothie.

Conclusion

Your journey to a healthier lifestyle starts with this delightful Strawberry Banana Protein Smoothie. With its simple ingredients, ease of preparation, and customizable options, you’ll find this recipe not only fuels your body but also satisfies your taste buds. So grab your blender, gather your ingredients, and start your day the delicious way. Happy blending!

Strawberry Banana Protein Smoothie

Prep Time 5 minutes
Total Time 5 minutes
Servings 2 cups
Calories 250
A delicious and nutritious smoothie perfect for a quick breakfast or post-workout refreshment.

Ingredients

Fruits

  • 1 cup fresh strawberries (hulled)
  • 1 piece ripe banana (sliced)

Dairy & Protein

  • 1 scoop vanilla protein powder (about 30g)
  • 1/2 cup Greek yogurt (plain or flavored)

Liquids & Sweeteners

  • 1 cup milk (or plant-based milk)
  • 1 tablespoon honey (optional)

Instructions 

  • Gather all ingredients and wash the strawberries.
  • Hull the strawberries and peel the banana.
  • Combine all ingredients in a blender and blend until smooth.
  • Taste and add honey if desired, then blend briefly again.
  • Pour into glasses and serve immediately.

Notes

For a creamier texture, use Greek yogurt with higher fat content.
Calories: 250kcal
Cost: $8
Course: Breakfast
Cuisine: American
Keyword: Smoothie

Welcome to the World of Italian Almond Orange Cake

Have you ever experienced the delightful combination of almond flour and fresh orange in a cake? This Italian Almond Orange Cake offers a vibrant explosion of flavor, moisture, and texture that brings a slice of sunshine to any occasion. Whether you’re a seasoned baker or just starting your culinary journey, this recipe is designed to guide you through the process with ease and confidence. With its moist and flavorful profile, it’s a cake that not only looks stunning but tastes divine.

Why You’ll Love This Recipe

This cake is more than just a dessert; it’s an experience. Here are five reasons why you’ll love making this Italian Almond Orange Cake:

  • Simple Ingredients: With just a handful of common ingredients, this recipe is accessible to everyone.
  • Allergy-Friendly: Using almond flour makes it a great gluten-free option without sacrificing flavor.
  • Moist and Tender: The combination of eggs and olive oil ensures that the cake remains moist and tender.
  • Perfect for Any Occasion: Whether it’s a birthday, a holiday, or just a cozy weekend, this cake fits right in.
  • Deliciously Versatile: The flavor of the orange complements the almond beautifully, allowing for various pairings and toppings.

Ingredients for Italian Almond Orange Cake

Let’s dive into the ingredients needed for this delightful cake. Each component plays a vital role in creating the perfect blend of flavors and textures.

  • 4 large eggs: Divided into yolks and whites for a light and airy texture.
  • 3/4 cup sugar (150 gr): Adds sweetness; feel free to adjust based on your preference.
  • 1 large orange: Zest and juice (¼ cup) bring a refreshing citrus flavor.
  • 1/2 cup vegetable or extra virgin olive oil (120 ml): Contributes to moisture and richness.
  • 1/8 teaspoon almond extract (optional): Enhances the almond flavor.
  • 3 cups almond flour (300 gr): The star ingredient that gives this cake its unique texture.
  • 1/2 tablespoon baking powder: Helps the cake rise.
  • ½ cup sliced almonds: Adds a crunchy topping and beautiful presentation.
  • Powdered sugar for serving: For that sweet finishing touch.

Feel free to make substitutions based on what you have at home. For instance, if you don’t have almond flour, you can use a nut flour of your choice, though it may alter the texture.

Step-by-Step Instructions

Now that you have your ingredients ready, let’s walk through the process of creating this fabulous cake.

  1. Preheat the oven: Set it to 350 ℉ (175 ℃) and line/grease an 8 or 9-inch springform cake pan.
  2. Prepare the batter: In a large bowl, combine the sugar and egg yolks. Beat until light and foamy. Add the orange zest, juice, olive oil, and almond extract (if using), whisking until well incorporated.
  3. Mix dry ingredients: Gradually add the almond flour and baking powder, mixing until the batter is smooth and lump-free.
  4. Beat egg whites: In a separate clean bowl, beat egg whites until firm peaks form. Carefully fold the egg whites into the batter, ensuring not to deflate them.
  5. Pour and sprinkle: Transfer the batter to the prepared pan, smoothing the top. Sprinkle sliced almonds over the surface.
  6. Bake: Place in the oven and bake for about 40 minutes. The cake is done when golden brown and a toothpick inserted in the center comes out with a few crumbs.
  7. Cool: Allow the cake to cool in the pan for 10 minutes before transferring it to a wire rack. If using a regular cake pan, invert it to release the cake.
  8. Serve: Dust with powdered sugar before serving for an elegant presentation.

Pro Tips for Success

To ensure your Italian Almond Orange Cake turns out perfectly, here are some expert tips:

  • Room temperature eggs: Use eggs at room temperature for better volume and texture.
  • Clean utensils: Make sure all mixing bowls and beaters are grease-free for the egg whites to whip properly.
  • Don’t overmix: When folding in the egg whites, be gentle to maintain the airy texture.
  • Test for doneness: Start checking the cake a few minutes early; every oven is different.
  • Cool completely: Let the cake cool completely for better slicing.
  • Flavor enhancement: Allow the cake to sit for a few hours before serving to enhance the flavor.

Common Mistakes to Avoid

Here are some common pitfalls to watch out for when making this cake:

  • Using cold eggs: Cold eggs can affect the batter’s texture.
  • Overbaking: This cake is best when it’s moist; overbaking can lead to dryness.
  • Skipping the folding step: This is crucial for a light cake; don’t rush!

Variations to Try

This recipe is wonderfully adaptable. Here are some variations to consider:

  • Citrus Twist: Substitute the orange with lemon or lime for a different citrus flavor.
  • Nutty Delight: Add chopped walnuts or pecans for additional texture and flavor.
  • Chocolate Drizzle: Drizzle melted dark chocolate over the top for a rich contrast.
  • Fruit Garnish: Serve with fresh berries or a citrus salad for a refreshing side.

Storage and Make-Ahead Instructions

If you want to prepare ahead of time or store leftovers, here’s how:

  • Room Temperature: The cake can be stored at room temperature for up to 3 days.
  • Refrigeration: For longer storage, refrigerate for up to a week; just bring it back to room temperature before serving.
  • Freezing: Wrap the cake tightly in plastic wrap and foil; it can be frozen for up to 3 months. Thaw overnight in the fridge before serving.

Frequently Asked Questions

Here are some common questions about this Italian Almond Orange Cake:

  • Can I use all-purpose flour instead of almond flour? No, this recipe relies on almond flour for its texture and flavor.
  • Is this cake gluten-free? Yes, as long as you use almond flour, it’s naturally gluten-free.
  • Can I make this cake ahead of time? Absolutely! It stores well for several days and can be frozen for longer.
  • What can I serve this cake with? Serve with whipped cream, ice cream, or a citrus glaze for added flavor.
  • Can I add more orange flavor? Yes, you can increase the amount of orange zest for a more pronounced flavor.
  • What is the best way to store leftovers? Keep in an airtight container at room temperature or refrigerate for freshness.
  • How do I know when the cake is done? A toothpick inserted should come out with a few moist crumbs, but not wet batter.
  • Can I use a different sweetener? You can try honey or coconut sugar, but it may alter the texture slightly.

Nutritional Tips and Dietary Adaptations

This cake can be adapted for various dietary needs:

  • Low Sugar: Reduce the sugar amount or use a sugar substitute.
  • Dairy-Free: Ensure the ingredients you choose are dairy-free, like using a dairy-free butter alternative.
  • Nut-Free: Substitute almond flour with sunflower seed flour.

Equipment Recommendations

To make this cake, you’ll need the following kitchen tools:

  • Mixing bowls: A large bowl for mixing the batter and a clean bowl for beating egg whites.
  • Handheld mixer or whisk: Essential for achieving fluffy egg whites.
  • Springform pan: Ideal for easy removal of the cake.
  • Rubber spatula: For folding in egg whites gently.

Serving Suggestions

When it comes to serving this delightful cake, consider these ideas:

  • With Fresh Berries: A side of mixed berries adds a refreshing touch.
  • Whipped Cream: Serve with a dollop of whipped cream for a creamy contrast.
  • Citrus Glaze: A light citrus glaze can enhance the orange flavor.

In Conclusion

Making Italian Almond Orange Cake is not just about baking; it’s about creating joyful moments. This cake, with its moist and flavorful characteristics, will surely impress your family and friends. So gather your ingredients, follow the steps, and enjoy the process of making this delicious treat. You’ll find that with each slice, you’re not just serving a cake, but a slice of sunshine and happiness. Happy baking!

Italian Almond Orange Cake

Prep Time 15 minutes
Cook Time 40 minutes
Total Time 55 minutes
Servings 8 slices
Calories 350
A moist and flavorful cake combining the bright citrus notes of orange with the rich nuttiness of almonds, perfect for any occasion.

Ingredients

Eggs

  • 4 large eggs (divided into yolks and whites)
  • 3/4 cup sugar (150 grams)
  • 1 large orange (zest and juice (¼ cup))
  • 1/2 cup vegetable or extra virgin olive oil (120 ml)
  • 1/8 teaspoon almond extract (optional)
  • 3 cups almond flour (300 grams)
  • 1/2 tablespoon baking powder
  • ½ cup sliced almonds
  • to taste for serving powdered sugar (for dusting)

Instructions 

  • Preheat oven to 350°F (175°C). Line and grease an 8 or 9-inch springform pan.
  • Beat sugar and egg yolks until light. Add orange zest, juice, oil, and almond extract; mix well.
  • Stir in almond flour and baking powder until smooth. In a separate bowl, beat egg whites until firm peaks form and fold into batter.
  • Pour batter into pan, sprinkle sliced almonds on top, and bake for 40 minutes until golden. Cool before removing from pan.
  • Dust with powdered sugar before serving.

Notes

Ensure egg whites are free of yolk and bowl is clean for best volume.
Calories: 350kcal
Cost: $15
Course: Dessert
Cuisine: Italian
Keyword: almond, cake, orange

Unlocking the Power of Green Detox Smoothies

Welcome to a world where vibrant health and deliciousness collide! If you’re searching for a refreshing way to nourish your body and rejuvenate your skin, you’ve landed in the right spot. Green detox smoothies are not just a trend; they’re a lifestyle choice that can transform how you feel and look. Packed with nutrient-rich ingredients, these smoothies offer a delightful way to kickstart your day or refresh your afternoon. In this comprehensive guide, we’ll explore how to create the ultimate green detox smoothie, delve into its benefits, and provide you with tips, variations, and answers to all your burning questions. Let’s dive in!

Why You’ll Love This Recipe

This green detox smoothie is not just another drink; it’s a powerhouse of health benefits. Here are just a few reasons why you’ll fall in love with this recipe:

  • Glowing Skin: Packed with antioxidants and vitamins, this smoothie helps promote a radiant complexion.
  • Boosts Energy: The combination of fresh greens and hydrating ingredients provides a natural energy boost without the crash.
  • Supports Digestion: With fiber-rich ingredients, this smoothie aids digestion and keeps your gut happy.
  • Detoxifies Your Body: Ingredients like cucumber and spinach help flush out toxins, giving your body a fresh start.
  • Customizable: You can tweak the ingredients based on your preferences, dietary needs, or what you have on hand.

Ingredient Breakdown

Let’s take a closer look at the ingredients that make up this revitalizing green detox smoothie:

  • 1 cup unsweetened coconut water or water: Provides hydration and a subtle sweetness.
  • 1 packed cup baby spinach or kale: These leafy greens are loaded with vitamins A, C, and K, along with iron and calcium.
  • 1/2 small cucumber, sliced: Adds refreshing hydration and a crisp texture.
  • 1/2 green apple or pear, chopped: Brings natural sweetness and additional fiber.
  • 1/2 frozen banana: Adds creaminess and natural sweetness without refined sugars.
  • 1 tablespoon fresh lemon juice: Adds brightness and aids digestion.
  • 1/2 inch fresh ginger, peeled: Provides a spicy kick and has anti-inflammatory properties.
  • 1 tablespoon chia seeds or ground flaxseed: Rich in omega-3 fatty acids and fiber, these seeds enhance the smoothie’s nutritional profile.
  • Optional: 1/4 avocado: For a creamy texture and healthy fats.
  • Optional: handful of mint: Adds a refreshing flavor.

Pro Tips for the Perfect Smoothie

An appetizing green detox smoothie with a straw, highlighting the fresh greens and fruit used in the recipe.

Creating a smoothie that’s both delicious and nutritious is an art. Here are some expert insights to help you master it:

  • Order of Ingredients Matters: Always add liquids first, followed by softer items, then harder ingredients. This helps achieve a smoother blend.
  • Adjust Consistency: If your smoothie is too thick, add a splash more water. If it’s too thin, throw in some ice or an extra banana for creaminess.
  • Taste as You Go: Don’t be afraid to taste your smoothie while blending. Adjust the flavors by adding more lemon for brightness or ginger for a spicy kick.
  • Fresh is Best: For maximum nutrients, use fresh ingredients whenever possible. However, frozen ingredients can add creaminess and chill without diluting the flavor.
  • Experiment with Add-Ins: Try adding protein powder, spirulina, or other superfoods to boost the nutritional content.
  • Keep it Simple: Start with a few ingredients and gradually add more as you find your preferred flavor combinations.
  • Blend Thoroughly: Ensure your smoothie is blended until silky smooth for the best texture.
  • Invest in a Good Blender: A high-quality blender can make a world of difference in achieving that perfect consistency.

Avoiding Common Mistakes

Even seasoned smoothie makers can run into hiccups. Here’s how to avoid common pitfalls:

  • Too Much Liquid: Adding too much liquid can dilute the flavor. Start with less and add more as needed.
  • Overloading with Ingredients: Too many ingredients can create a muddled flavor. Stick to a few key flavors.
  • Skipping Protein: For a balanced smoothie that keeps you full, consider adding a source of protein.
  • Not Prepping Ingredients: Prepare ingredients in advance to save time. Chop fruits and veggies ahead of time and store them in the fridge or freezer.
  • Not Cleaning the Blender Immediately: Clean your blender right after use to avoid stubborn residue.

Delicious Variations to Try

Feeling adventurous? Here are some tasty variations to keep your smoothie routine exciting:

  • Berry Bliss Smoothie: Replace the green apple with a handful of mixed berries for a fruity twist.
  • Minty Avocado Delight: Add half an avocado and a handful of mint for a creamy, refreshing smoothie.
  • Chocolate Green Dream: Add a tablespoon of unsweetened cocoa powder for a chocolatey treat that’s still healthy.
  • Protein-Packed Smoothie: Add a scoop of your favorite protein powder to keep you energized throughout the day.

How to Store and Make Ahead

Want to save time without compromising on freshness? Here’s how to make your smoothies ahead of time:

  • Make Ahead Packs: Pre-portion ingredients in freezer bags and store them in the freezer. When you’re ready to blend, just add your liquid and blend!
  • Storage Tips: If you have leftover smoothie, store it in an airtight container in the fridge for up to 24 hours. Shake well before drinking.
  • Freezing Smoothies: You can freeze smoothies in ice cube trays, then blend them with a bit of liquid for a quick smoothie later.

Frequently Asked Questions

Let’s address some common questions about green detox smoothies:

  • Can I use frozen fruits and vegetables? Yes, frozen produce works great in smoothies and can even enhance the texture.
  • How often can I drink detox smoothies? It’s generally safe to enjoy a detox smoothie daily, as long as you maintain a balanced diet.
  • Will this smoothie help with weight loss? While it can be a part of a weight loss plan, it’s essential to consume a variety of foods for overall health.
  • Can I add supplements to my smoothie? Absolutely! You can include protein powders, superfood powders, and other supplements as desired.
  • Is this smoothie suitable for kids? Yes, it’s a tasty way to sneak in some greens. Adjust sweetness as needed.
  • Can I make this smoothie vegan? Yes, all ingredients are plant-based, making it a perfect vegan option.
  • What if I don’t like a certain ingredient? Feel free to substitute any ingredient with something you enjoy more.
  • How can I make my smoothie more filling? Adding a source of protein, like yogurt or protein powder, can help keep you full longer.

Nutritional Tips and Dietary Adaptations

Understanding the nutritional aspects of your green detox smoothie can help you make informed choices:

  • Caloric Intake: Be mindful of the calorie content if you’re tracking your intake. Use lower-calorie ingredients if desired.
  • Fiber Boost: Ingredients like chia seeds and flaxseeds add fiber, which is beneficial for digestion.
  • Protein Power: If you need more protein, consider adding nuts, seeds, or a scoop of protein powder.
  • Dairy-Free Options: Use plant-based milk or water instead of dairy milk to keep it dairy-free.

Essential Equipment for Smoothie Making

To make the best green detox smoothie, consider investing in these tools:

  • High-Performance Blender: A powerful blender is essential for achieving a smooth, creamy texture.
  • Measuring Cups and Spoons: Accurate measurements ensure consistent results.
  • Storage Containers: Airtight containers help keep your smoothies fresh and ready to go.

Serving Suggestions

Enjoy your green detox smoothie in various ways:

  • As a Breakfast Replacement: Pair it with a slice of whole-grain toast for a balanced breakfast.
  • Post-Workout Fuel: Drink it after your workout for a refreshing recovery boost.
  • As a Midday Snack: Perfect for a quick pick-me-up in the afternoon.

Wrap Up Your Smoothie Journey

Green detox smoothies are more than just a trend; they’re a delicious way to nourish your body and enhance your overall well-being. By incorporating fresh, nutrient-dense ingredients, you can create a smoothie that supports glowing skin, boosts energy, and aids digestion. Remember, the key to a fantastic smoothie lies in the balance of flavors, textures, and nutrients. So grab your blender, get creative, and enjoy the journey to better health—one green smoothie at a time!

Green Detox Smoothie For Glowing Skin

Prep Time 5 minutes
Total Time 5 minutes
Servings 1 cup
Calories 150
This vibrant smoothie is packed with greens and fresh ingredients to boost your skin’s glow and overall health.

Ingredients

liquids

  • 1 cup unsweetened coconut water or water

soft ingredients

  • 1 packed cup baby spinach or kale
  • 1/2 small cucumber, sliced

hard ingredients

  • 1 tablespoon fresh lemon juice
  • 1/2 inch fresh ginger, peeled

seeds

  • 1 tablespoon chia seeds or ground flaxseed

optional

  • handful of mint Optional

Instructions 

  • Add liquids first, then soft ingredients, then harder ingredients.
  • Blend until smooth and silky.
  • If too thick, add water; if too thin, add ice or more banana.
  • Taste and adjust with lemon or ginger as desired.

Notes

Use fresh ingredients for best flavor and nutrition.
Calories: 150kcal
Cost: $10
Course: Breakfast, Smoothie
Cuisine: Healthy
Keyword: Detox, Green, Skin

Indulge in the Joy of Mango Sago: A Quick, Refreshing Dessert

Welcome to a culinary journey that celebrates simplicity and flavor! Today, I’m excited to share a delightful dessert that’s not just easy to make, but also a feast for the senses—**Mango Sago**. This luscious treat combines the sweetness of ripe mangos, the unique texture of **tapioca pearls**, and the creamy richness of **coconut milk**. In just a few minutes, you can whip up this tropical delight, perfect for any occasion!

Why You’ll Love This Recipe

Before we dive into the ingredients and preparation, let’s explore why this **Mango Sago** recipe is a must-try:

  • Quick and Easy: With just four main ingredients, you can make this dessert in no time, making it perfect for last-minute gatherings.
  • Versatile Flavor: The combination of sweet mangos and coconut milk creates a flavor profile that’s both refreshing and satisfying.
  • Customizable: You can easily adjust the sweetness or add additional ingredients to suit your taste.
  • Healthier Dessert Option: This recipe uses fresh fruits and natural ingredients, making it a healthier choice compared to many store-bought desserts.
  • Impressive Presentation: The beautiful layers of mango and sago make for a stunning dessert that will wow your guests.

Ingredients You’ll Need

Let’s gather our ingredients to create this delightful dessert. Here’s what you’ll need:

  • Fresh ripe mangos: Ensure they are fully ripe for the best flavor. You can also use frozen mangos if fresh isn’t available.
  • Small tapioca pearls: These give the dessert its signature texture. Small pearls are recommended for a more pleasant mouthfeel.
  • Sweetened condensed milk: This adds a rich sweetness; you can substitute with coconut cream for a dairy-free option.
  • Whole fat coconut milk: Provides a creamy consistency; low-fat versions can be used but may alter the texture.
  • Fresh mint leaves (optional garnish): Adds a refreshing touch and a pop of color to your dessert.

Step-by-Step Instructions

Now that we have our ingredients ready, let’s get started!

  1. Fill a medium-size pot with 5 cups (1250 ml) water and bring it to a boil. Reduce to medium heat, add the **tapioca pearls**, and boil for 10 minutes, stirring occasionally.
  2. Turn off the heat, cover the pot, and let the pearls rest for 10-15 minutes on the heat source until they are fully translucent.
  3. Strain the tapioca using a fine mesh sieve and rinse off the excess starch with cold running water. Strain again and transfer to a large mixing bowl.
  4. Add **coconut milk** to the tapioca and mix well. Set aside.
  5. Peel, de-pit, and slice two mangos, transferring them into a blender with the **condensed milk**. Blend until smooth and set aside.
  6. Peel, de-pit, and dice the last mango into 1-cm cubes and set aside.
  7. Divide the mango mixture between four dessert bowls or glasses. Then, pour the coconut sago mixture over the mango puree. Top off with the cubed mangos. Garnish with fresh mint and enjoy cold!

Pro Tips for Perfect Mango Sago

Here are some expert tips to ensure your **Mango Sago** turns out perfectly:

  • Quality Ingredients: Use the ripest **mangos** you can find for maximum sweetness and flavor.
  • Don’t Overcook the Tapioca: Keep an eye on the pearls while cooking; overcooking can make them mushy.
  • Resting Time: Allowing the pearls to rest after cooking helps them achieve the perfect chewy texture.
  • Chill Before Serving: Let your dessert chill in the fridge for at least an hour before serving for the best experience.
  • Customize Sweetness: Taste your mango puree and adjust the sweetness by adding more condensed milk if needed.
  • Layering Technique: For a beautiful presentation, layer the mango puree and coconut sago carefully.
  • Experiment with Flavors: Consider adding a splash of lime juice or a hint of vanilla extract for an extra flavor dimension.
  • Serve Immediately: While it can be stored, this dessert is best enjoyed fresh to appreciate the texture of the tapioca.

Common Mistakes and Troubleshooting

Even the best chefs make mistakes! Here are some common pitfalls and how to avoid them:

  • Too Much Water: If you add too much water while cooking the tapioca, it can become watery. Measure accurately!
  • Overblending the Mango: Blend just until smooth; overblending can make the mango puree too thin.
  • Not Rinsing Tapioca: Failing to rinse the tapioca can result in a sticky texture. Always rinse thoroughly!

Variations to Try

Feel free to experiment with these delicious variations of **Mango Sago**:

  • Berry Bliss: Add a layer of blended berries for a mixed fruit version.
  • Coconut-Infused: Use coconut cream instead of condensed milk for a richer coconut flavor.
  • Chocolate Drizzle: Drizzle melted dark chocolate on top for a decadent touch.
  • Vegan Delight: Replace condensed milk with agave syrup or maple syrup for a vegan option.

Storage and Make-Ahead Instructions

If you want to prepare in advance, here’s how to store your **Mango Sago**:

  • **In the Fridge:** Store in an airtight container for up to 2 days. The texture may slightly change, but it will still be delicious!
  • **Make Ahead:** Prepare the tapioca and mango puree separately a day in advance, and combine just before serving to maintain freshness.

Comprehensive FAQ

Here are some frequently asked questions to help clarify any doubts:

  • Can I use frozen mangos? Yes, frozen mangos work well; just thaw them before blending.
  • What can I substitute for tapioca pearls? You can use chia seeds for a different texture, although the taste will be slightly different.
  • Is this dessert gluten-free? Absolutely! All the ingredients are gluten-free, making it suitable for those with gluten sensitivities.
  • How can I make this dessert less sweet? Simply reduce the amount of condensed milk or use unsweetened coconut milk.
  • Can I include other fruits? Yes! Try adding diced kiwi or strawberries for a colorful fruit medley.
  • How do I know when the tapioca is cooked? The pearls should be translucent and chewy when ready.
  • Is there a way to make it sugar-free? You can omit the condensed milk and use a sugar substitute like stevia.
  • What’s the best way to serve Mango Sago? Serve it chilled in individual cups or bowls for an elegant presentation.

Nutritional Considerations

This dessert is not only delicious but also offers some nutritional benefits:

  • Rich in Vitamins: Mangos are high in vitamin C and A, which are great for immunity and skin health.
  • Energy Boosting: The natural sugars in mangos and condensed milk provide a quick energy boost.
  • Healthy Fats: Coconut milk contains medium-chain triglycerides (MCTs), which can provide energy and support metabolism.

Equipment Recommendations

To make your cooking experience seamless, here are some tools I recommend:

  • Blender: A high-speed blender is ideal for achieving a smooth mango puree.
  • Fine Mesh Sieve: Essential for rinsing and straining the tapioca pearls.
  • Measuring Cups and Spoons: Accurate measurements will help ensure your dessert turns out perfectly.
  • Mixing Bowls: Use large bowls for mixing the tapioca and coconut milk.

Serving Suggestions

For a memorable presentation, consider these serving ideas:

  • Layered Dessert Cups: Create a visual treat by layering the mango puree and sago in clear cups.
  • Garnish Creatively: Use fresh mint leaves or edible flowers to enhance the visual appeal.
  • Pair with Tea: Serve alongside a refreshing herbal tea for a delightful afternoon treat.

Final Thoughts

Making **Mango Sago** is not just about following a recipe; it’s about creating moments of joy and connection around the table. This dessert is a perfect reflection of that philosophy—simple, delightful, and full of flavor. Whether you’re treating yourself or impressing guests, this recipe is sure to be a hit. So gather your ingredients, roll up your sleeves, and let’s make some sweet memories together!

Quick & Easy 4-ingredient Mango Sago

Prep Time 15 minutes
Cook Time 15 minutes
Total Time 30 minutes
Servings 4 servings
Calories 250
A refreshing and simple dessert combining ripe mangoes, tapioca pearls, coconut milk, and condensed milk for a delightful treat.

Ingredients

Main ingredients

  • 2 pieces Fresh ripe mangos (peeled, de-pitted, sliced)
  • 1/4 cup Small tapioca pearls
  • 1/2 cup Sweetened condensed milk
  • 1 cup Whole fat coconut milk
  • Optional Fresh mint leaves (optional garnish)

Instructions 

  • Boil water, add tapioca pearls, and cook for 10 minutes. Rest covered for 10-15 minutes.
  • Strain and rinse tapioca, then transfer to a bowl. Mix with coconut milk and set aside.
  • Blend peeled mangoes with condensed milk until smooth.
  • Dice the remaining mango into 1-cm cubes and set aside.
  • Divide mango puree into bowls, top with coconut sago, add mango cubes, and garnish with mint. Serve cold.

Notes

For extra flavor, add a few mint leaves on top before serving.
Calories: 250kcal
Cost: $10
Course: Dessert
Cuisine: fusion
Keyword: Mango

Indulge in the Delight of Strawberry Shortcake Cups

Welcome to a delightful culinary adventure where we transform simple ingredients into a truly incredible dessert. Strawberry shortcake cups are not just a treat; they are a celebration of fresh strawberries, fluffy cake, and the lightness of whipped cream. This recipe is perfect for any occasion, whether you’re hosting a gathering or just treating yourself to something special. With just 10 amazing ingredients, you can create a dessert that’s not only visually stunning but also bursting with flavor. Let’s dive into the world of strawberry shortcake cups and discover why you’ll love making this delightful dessert!

Why You’ll Love This Recipe

  • Easy to Make: This recipe requires minimal time and effort, making it perfect for both novice and experienced cooks.
  • Fresh and Flavorful: The combination of ripe strawberries and whipped cream creates a refreshing taste that’s ideal for warm weather.
  • Customizable: You can easily adapt the recipe to include different fruits or cake bases, allowing you to make it your own.
  • Impressive Presentation: Serving in individual cups not only looks elegant but also makes portion control easy.
  • Perfect for Any Occasion: Whether it’s a picnic, birthday party, or a casual weeknight dessert, these cups are always a hit!

Ingredients Breakdown

Here’s what you’ll need to make these scrumptious strawberry shortcake cups:

  • 2 cups of strawberries, chopped: Use fresh, ripe strawberries for the best flavor. If strawberries aren’t in season, feel free to substitute with other berries like raspberries or blueberries.
  • 1/4 cup granulated sugar: This will help macerate the strawberries, enhancing their natural sweetness.
  • 1 teaspoon vanilla extract: Adds depth to the flavor profile of the cream and the cake.
  • 1 cup all-purpose flour: The base for your cake layers. For a gluten-free option, you can substitute with almond flour or a gluten-free blend.
  • 1/4 cup granulated sugar (for cake): This is separate from the sugar used for the strawberries; it adds sweetness to the cake.
  • 2 teaspoons baking powder: Essential for making the cake rise and become fluffy.
  • 1/4 teaspoon salt: Enhances the overall flavor of the dessert.
  • 1/2 cup milk: Adds moisture to the cake. You can use almond milk for a dairy-free option.
  • 1/3 cup vegetable oil: Keeps the cake moist—feel free to use melted butter for a richer flavor.
  • 1 large egg: Binds the ingredients together for a cohesive structure.
  • 1 cup heavy whipping cream: The star of the show, whipped cream adds a light, airy quality.
  • Additional sugar for sweetening whipped cream (optional): Adjust to taste!

Step-by-Step Instructions

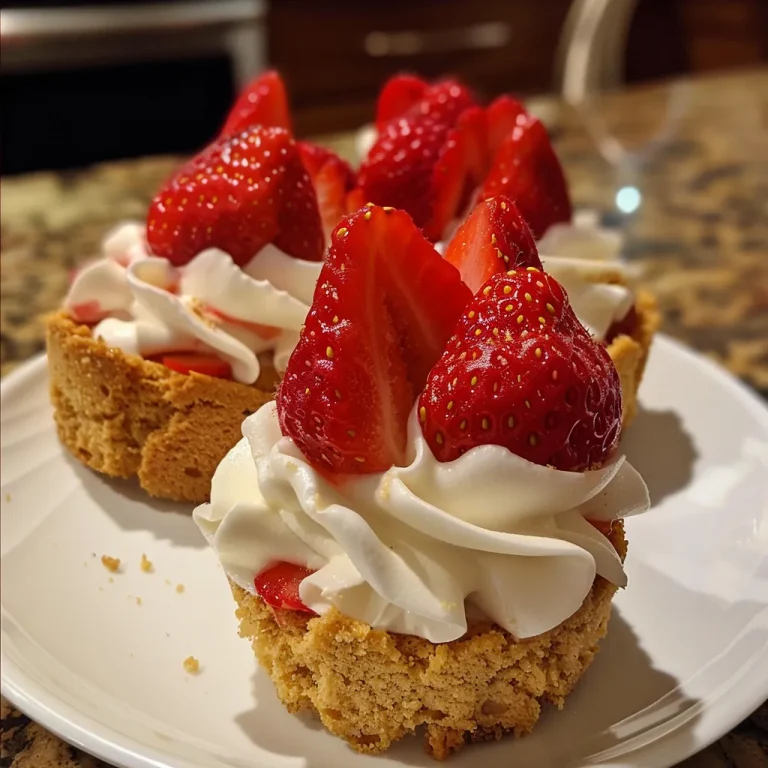
Detailed image of Strawberry Shortcake Cups filled with strawberries and topped with fluffy cream.

Now that we have our ingredients ready, let’s go through the process of creating these delightful strawberry shortcake cups:

  • Prepare the Strawberries: In a bowl, combine the chopped strawberries and 1/4 cup of granulated sugar. Let them sit for about 15-20 minutes to macerate, releasing their juices.
  • Make the Cake: Preheat your oven to 350°F (175°C). In a mixing bowl, whisk together the flour, 1/4 cup of sugar, baking powder, and salt.
  • Add Wet Ingredients: In another bowl, mix the milk, vegetable oil, egg, and vanilla extract. Combine the wet ingredients with the dry ingredients until just mixed.
  • Bake the Cake: Pour the batter into a greased baking dish and bake for 20-25 minutes or until a toothpick comes out clean. Let it cool completely.
  • Whip the Cream: In a chilled bowl, whip the heavy cream until soft peaks form. If desired, add a bit of sugar to sweeten it.
  • Assemble the Cups: Cut the cooled cake into small cubes. Layer the cake, macerated strawberries, and whipped cream in individual cups. Repeat the layers until the cups are filled.
  • Garnish: Top with additional strawberries and a dollop of whipped cream for an elegant finish.

Pro Tips for Success

  • Use Fresh Ingredients: Always opt for the freshest strawberries and quality cream for the best flavor.
  • Adjust Sweetness: Taste the strawberries before adding sugar; their sweetness can vary. Adjust the sugar accordingly!
  • Chill Your Equipment: For fluffier whipped cream, chill your mixing bowl and beaters before whipping.
  • Don’t Overmix: When combining wet and dry ingredients, mix until just combined to keep your cake light and fluffy.
  • Experiment with Flavors: Add a splash of almond extract or citrus zest to the whipped cream for a unique twist.
  • Layering Technique: For a stunning presentation, alternate layers of strawberries and cake for visual appeal.
  • Serve Cold: These cups are best served chilled, allowing the flavors to meld beautifully.
  • Make Ahead: You can prepare the macerated strawberries and whipped cream a day in advance for convenience.

Common Mistakes and Troubleshooting

  • Dry Cake: Ensure you don’t overbake the cake; monitor closely during the last few minutes.
  • Runny Whipped Cream: If the cream isn’t whipping, make sure it’s cold enough and try adding a bit of cornstarch or gelatin to stabilize it.
  • Too Sweet: If you find the dessert too sweet, try balancing it with a pinch of salt or a splash of lemon juice.

Variations to Try

Get creative with your strawberry shortcake cups! Here are a few variations you might enjoy:

  • Chocolate Strawberry Cups: Add cocoa powder to the cake batter or layer in chocolate mousse for a rich twist.
  • Berry Medley: Mix in other berries like blueberries or raspberries for a colorful and flavorful mix.
  • Nutty Crunch: Sprinkle chopped nuts or granola between layers for added texture and flavor.
  • Vegan Option: Substitute the egg with flaxseed meal and use coconut cream in place of heavy whipping cream.

Storage and Make-Ahead Instructions

To store your strawberry shortcake cups:

  • Refrigerate: These cups can be stored in the refrigerator for up to 2 days. Cover them with plastic wrap to maintain freshness.
  • Freezing: While the whipped cream may not freeze well, you can freeze the cake and strawberries separately and assemble fresh when ready to serve.

Frequently Asked Questions

  • Can I use frozen strawberries? Yes, but be sure to thaw and drain them well before use to prevent excess moisture.
  • Can I make these cups a day in advance? Yes, you can prepare the components ahead of time and assemble them just before serving.
  • What can I substitute for heavy cream? Coconut cream or a dairy-free whipping cream alternative works well.
  • How do I make the whipped cream stable? Add a tablespoon of powdered sugar or cornstarch to the cream while whipping.
  • Can I use store-bought cake? Absolutely! For a quicker option, use store-bought pound cake or angel food cake.
  • What’s the best way to cut strawberries? A sharp knife works best; slice them in halves or quarters depending on your preference.
  • Can I add other flavors to the cake? Yes! Experiment with lemon zest or almond extract for a unique flavor profile.
  • What’s the best way to serve these cups? Serve chilled for the best flavor and texture, garnished with fresh mint if desired.

Nutritional Tips and Dietary Adaptations

This strawberry shortcake cups recipe can be adapted to fit various dietary needs:

  • Gluten-Free: Use a gluten-free flour blend for the cake.
  • Dairy-Free: Substitute dairy ingredients with coconut milk and dairy-free whipped cream.
  • Lower Sugar: Substitute regular sugar with a natural sweetener or reduce the sugar in the recipe.

Essential Equipment Recommendations

To make your strawberry shortcake cups, you’ll need:

  • Mixing Bowls: A set of nesting bowls for mixing ingredients.
  • Whisk: For combining dry ingredients and whipping cream.
  • Baking Dish: A square or rectangular dish for baking the cake.
  • Spoon or Spatula: For layering the cups.
  • Cups or Glasses: Individual serving cups for a beautiful presentation.

Serving Suggestions

When it comes to serving your delightful strawberry shortcake cups, here are a few ideas:

  • Garnish with Mint: A sprig of fresh mint adds a pop of color and freshness.
  • Chocolate Drizzle: Drizzle melted chocolate over the whipped cream for a decadent touch.
  • Serve with Ice Cream: Pairing with a scoop of vanilla ice cream elevates the dessert experience.

Conclusion

Now that you have the ultimate recipe for strawberry shortcake cups, it’s time to gather your ingredients and get started! This incredible dessert is sure to impress your family and friends, and the best part is that it’s deceptively simple to make. With its layers of fluffy cake, fresh strawberries, and whipped cream, you’ll not only create a delightful treat but also unforgettable memories around the table. Happy cooking, and enjoy every sweet moment!

Strawberry Shortcake Cups: An Incredible Ultimate Recipe with 10 Amazing Ingredients

Prep Time 20 minutes
Cook Time 15 minutes
Total Time 35 minutes
Servings 4 cups
Calories 350
Delight in these easy-to-make strawberry shortcake cups, combining fresh strawberries, fluffy cake, and whipped cream for a perfect treat.

Ingredients

Fruits

  • 2 cups strawberries, chopped
  • 1/4 cup granulated sugar
  • 1 teaspoon vanilla extract

Cake

  • 1 cup all-purpose flour
  • 1/4 cup granulated sugar (for cake)
  • 2 teaspoons baking powder
  • 1/4 teaspoon salt
  • 1/2 cup milk
  • 1/3 cup vegetable oil
  • 1 large egg

Whipped Cream

  • 1 cup heavy whipping cream
  • Additional sugar for sweetening whipped cream (optional)

Instructions 

  • Mix strawberries with 1/4 cup sugar and vanilla; set aside.
  • Combine flour, 1/4 cup sugar, baking powder, and salt; add milk, oil, and egg; mix until smooth.
  • Pour batter into cups and bake at 350°F (175°C) for 15 minutes.
  • Whip heavy cream until soft peaks form; sweeten if desired.
  • Assemble cups with cake, strawberries, and whipped cream. Serve immediately.

Notes

Use fresh strawberries for best flavor and consider adding a drizzle of honey for extra sweetness.
Calories: 350kcal
Cost: $12
Course: Dessert
Cuisine: American
Keyword: strawberry

Elevate Your Dessert Experience with Quick Strawberry Shortcake Cups

Welcome to the delightful world of Quick Strawberry Shortcake Cups! This easy dessert recipe is perfect for any gathering, whether it’s a summer barbecue, a family get-together, or a cozy dinner at home. With fresh strawberries, rich whipped cream, and soft cake, these cups are not just visually stunning but also bursting with flavor. Let’s dive into how you can create this delicious dessert that will impress your friends and family!

Why You’ll Love This Recipe

This recipe for strawberry shortcake cups is designed to be quick, easy, and utterly satisfying. Here are five reasons why you’ll adore making this dessert:

  • Quick Preparation: In just under 30 minutes, you can whip up these delightful cups, making them perfect for last-minute gatherings.
  • Customizable: Easily adjust the recipe by using different fruits or cake bases, ensuring every batch is unique and suited to your taste.
  • Layered Delight: The combination of macerated strawberries, whipped cream, and cake creates a delicious balance of flavors and textures.
  • Visual Appeal: These cups are not only tasty but also beautiful, adding a pop of color to your dessert table.
  • Make-Ahead Friendly: Prepare the components in advance and assemble them just before serving for a stress-free dessert experience.

Ingredients Breakdown

Let’s gather our ingredients to make these Quick Strawberry Shortcake Cups:

  • 2 pounds fresh strawberries: Choose ripe, fragrant strawberries for the best flavor. Look for berries that are glossy and firm.
  • 1/4 cup granulated sugar: This sugar helps to macerate the strawberries, enhancing their natural sweetness.
  • 2 cups heavy whipping cream, very cold: For the richest whipped cream, chill your mixing bowl and beaters for at least 10 minutes before whipping.
  • 1/2 cup powdered sugar: This will sweeten the whipped cream without making it grainy.
  • 1 teaspoon pure vanilla extract: Adds depth and richness to the whipped cream.
  • 1 (10-12 ounce) store-bought angel food cake or pound cake: Choose your favorite cake for a base. Angel food cake offers a light texture, while pound cake provides a richer flavor.

Step-by-Step Instructions

Delicious individual strawberry shortcake servings, showcasing layers of cake and cream.

Now that we have our ingredients, let’s get started with the step-by-step instructions to create your strawberry shortcake cups:

  1. In a medium bowl, combine sliced strawberries and sugar. Let sit for 10 minutes, allowing the strawberries to release their juices.
  2. If using store-bought shortcakes, crumble them into bite-sized pieces. If using pound cake, cut or crumble it into small pieces.
  3. In serving cups or glasses, layer the crumbled shortcake or pound cake.
  4. Spoon a layer of macerated strawberries and their juices over the cake layer.
  5. Top with a generous dollop of whipped cream.
  6. Repeat layers until cups are filled, ending with a swirl of whipped cream on top.
  7. Garnish with a fresh strawberry slice and mint leaf, if desired.
  8. Serve immediately or refrigerate for up to 1 hour before serving.

Pro Tips for Perfect Strawberry Shortcake Cups

To ensure your dessert turns out perfectly every time, consider the following expert tips:

  • Choose the Right Strawberries: Look for ripe, sweet strawberries. If they’re not in season, consider using frozen strawberries that have been thawed and drained.
  • Chill Your Equipment: For the best whipped cream, ensure your mixing bowl, beaters, or whisk are cold. This helps the cream whip up faster and hold its shape.
  • Layer Strategically: To keep the cake from becoming soggy, avoid over-saturating it with strawberry juices.
  • Sweeten to Taste: Adjust the amount of sugar in the maceration step based on the sweetness of your strawberries.
  • Experiment with Flavors: Add a splash of almond extract or citrus zest to the whipped cream for a unique twist.
  • Use Quality Ingredients: The better the ingredients, the better your dessert will taste. Opt for high-quality vanilla extract and fresh cream.
  • Make it Ahead of Time: Prepare the strawberry mixture and whipped cream in advance, and assemble the cups just before serving.
  • Serve in Clear Glasses: This allows the beautiful layers of strawberries, cream, and cake to shine through, enhancing visual appeal.

Common Mistakes and Troubleshooting

Even the best chefs can run into issues. Here are some common pitfalls and how to avoid them:

  • Soggy Cake: If your cake layers are too wet, reduce the amount of strawberry juice you add over the cake.
  • Runny Whipped Cream: If your whipped cream isn’t holding its shape, it may not have been whipped long enough. Continue whipping until stiff peaks form.
  • Bitter Strawberries: If strawberries are not sweet enough, add a little extra sugar to the maceration step.
  • Too Much Cream: If you prefer a lighter dessert, reduce the amount of whipped cream or add more cake.

Variations & Substitutions

Feel free to customize your strawberry shortcake cups with these delicious variations:

  • Mixed Berry Cups: Substitute half of the strawberries with blueberries or raspberries for a mixed berry experience.
  • Chocolate Drizzle: Drizzle melted chocolate over the whipped cream for a decadent touch.
  • Peach Shortcake Cups: Replace strawberries with fresh peaches for a summery twist.
  • Gluten-Free Option: Use gluten-free cake or consider making your own from gluten-free flour blends.

Storage and Make-Ahead Instructions

To keep your strawberry shortcake cups fresh:

  • Storage: Keep assembled cups in the refrigerator for up to 1 hour. After that, the cake may become soggy.
  • Make-Ahead: Prepare the strawberry mixture and whipped cream ahead of time. Store separately in the refrigerator and assemble just before serving.

Frequently Asked Questions

Here are answers to some common questions about making strawberry shortcake cups:

  • Can I use frozen strawberries? Yes, thaw and drain frozen strawberries before using them in this recipe.
  • How long do the cups last? They are best enjoyed fresh but can be stored in the fridge for up to 1 hour after assembly.
  • What can I use instead of heavy cream? You can use coconut cream or a non-dairy whipped topping as a substitute.
  • Can I use homemade cake instead of store-bought? Absolutely! Homemade angel food or pound cake works wonderfully in this recipe.
  • How do I make the whipped cream sweeter? Add more powdered sugar to taste while whipping.
  • Is this dessert suitable for kids? Yes! Kids love the fun layers and sweet flavors.
  • Can I make these cups in advance? Prepare the components ahead of time, but assemble the cups just before serving for best results.
  • What should I do with leftovers? If you have any leftover ingredients, you can layer them in a bowl for a quick parfait!

Nutrition Tips and Dietary Adaptations

To make this dessert more nutritious or tailored to specific dietary needs:

  • Lower Sugar: Reduce the sugar in the maceration process or use a sugar substitute.
  • Vegan Option: Substitute the heavy cream with coconut cream and use a vegan cake.
  • High-Protein Version: Add Greek yogurt into the whipped cream for added protein.
  • Gluten-Free Option: Ensure to use gluten-free cake or alternative ingredients.

Equipment Recommendations

Here’s what you’ll need to create your strawberry shortcake cups:

  • Mixing Bowls: For combining ingredients and macerating strawberries.
  • Electric Mixer: To whip the cream quickly and efficiently.
  • Measuring Cups and Spoons: For precise ingredient measurements.
  • Serving Cups or Glasses: Clear glasses work best to showcase the beautiful layers.

Serving Suggestions

Finally, here are some tips on how to present your strawberry shortcake cups:

  • Garnish with Fresh Herbs: A sprig of mint adds a refreshing touch.
  • Serve with Beverages: These cups pair wonderfully with iced tea, lemonade, or sparkling wine.
  • Plate Presentation: Consider serving on a decorative platter for a more elegant display.

In conclusion, Quick Strawberry Shortcake Cups are an effortless yet impressive dessert you can create without fuss. With the right ingredients and a few simple steps, you’ll be able to serve up a dish that’s not only delicious but also visually appealing. Enjoy the process of making these delightful cups, and don’t hesitate to experiment with flavors and presentations. Happy cooking!

Quick Strawberry Shortcake Cups

Prep Time 15 minutes
Total Time 15 minutes
Servings 4 cups
Calories 250
A delightful and easy-to-make dessert featuring fresh strawberries, cake, and whipped cream layered in individual cups.

Ingredients

Fruits and toppings

  • 2 pounds fresh strawberries
  • 1/4 cup granulated sugar
  • 2 cups heavy whipping cream (very cold)
  • 1/2 cup powdered sugar
  • 1 teaspoon pure vanilla extract
  • 1 10-12 ounce store-bought angel food cake or pound cake (crumbled or cut into small pieces)

Instructions 

  • Combine sliced strawberries and sugar; let sit for 10 minutes.
  • Crumble or cut cake into small pieces.
  • Layer cake pieces and strawberries in cups, then add whipped cream.
  • Repeat layers, ending with whipped cream and garnish.
  • Serve immediately or refrigerate for up to 1 hour.

Notes

For best flavor, serve shortly after assembly.
Calories: 250kcal
Cost: $15
Course: Dessert
Cuisine: American
Keyword: dessert, shortcake, strawberry

Unleash the Refreshing Power of Mint Juice

If you’re looking for a revitalizing drink that embodies freshness, look no further than mint juice. This delightful beverage combines the vibrant flavors of fresh mint leaves with zesty lemon juice, creating a refreshing experience perfect for any occasion. Whether it’s a hot summer day or a cozy gathering with friends, this mint juice recipe is a must-try.

In this ultimate guide, we’ll explore everything you need to know about making the best mint juice possible, including the benefits of the ingredients, helpful tips, variations to try, and a comprehensive FAQ. Let’s dive in!

Why You’ll Love This Recipe

  • Boosts hydration: With its high-water content, mint juice keeps you refreshed and hydrated throughout the day.
  • Aids digestion: Mint has natural digestive properties, making this juice a perfect choice after meals.
  • Rich in antioxidants: The ingredients contribute to a healthy immune system, helping to combat free radicals.
  • Customizable flavor: You can easily adjust the sweetness and tartness to match your personal preferences.
  • Quick and easy preparation: With just a few ingredients, you can whip up a delicious drink in minutes!

Ingredients Breakdown

To create the perfect mint juice, you’ll need the following ingredients:

  • Fresh mint leaves: Use a generous amount of fresh mint for the best flavor. If you can’t find fresh mint, you can use dried mint, but the taste will differ.
  • Lemon juice: Freshly squeezed lemon juice enhances the mint’s flavor and adds a zesty kick.
  • Honey: A natural sweetener that balances the tartness of the lemon juice. You can substitute with agave syrup or sugar if preferred.
  • Ice cubes: These keep your mint juice chilled and refreshing.
  • Water: Essential for blending and achieving the desired consistency.

Substitutions

  • Sweetener alternatives: If you prefer not to use honey, consider maple syrup or stevia.
  • Mint alternatives: If mint isn’t available, you can try using basil for a unique twist.
  • Lemon juice alternatives: Lime juice can also work well for a similar but distinct flavor.

Step-by-Step Instructions

Making mint juice is simple. Follow these steps for a refreshing drink:

  1. Prepare your mint: Rinse the fresh mint leaves under cold water and pat dry.
  2. Blend the ingredients: In a blender, combine mint leaves, lemon juice, honey, and water. Blend until smooth.
  3. Strain for smoothness: Use a fine mesh strainer or cheesecloth to strain the mixture into a pitcher, discarding solids.
  4. Add ice cubes: Pour the strained mint juice over ice cubes to serve chilled.
  5. Garnish and enjoy: Optionally, garnish with mint leaves or lemon slices before serving.

Pro Tips for the Perfect Mint Juice

  • Choose the right mint: Peppermint has a stronger flavor compared to spearmint. Choose based on your taste preference.
  • Fresh ingredients are key: Always opt for fresh mint and lemons for the best flavor and health benefits.
  • Adjust sweetness: Taste the juice before serving and adjust the sweetness by adding more honey or sugar if needed.
  • Experiment with flavors: Try adding ginger or cucumber for a refreshing twist.
  • Make it a cocktail: Add a splash of your favorite spirit for an adult version!
  • Serve immediately: This juice is best enjoyed fresh; it may lose flavor when stored.
  • Chill your glass: For an extra refreshing experience, chill your serving glasses in the freezer before pouring.
  • Use filtered water: If possible, use filtered water for the best taste.

Common Mistakes and Troubleshooting

  • Over-blending: Don’t blend too long; otherwise, the juice may become too frothy and lose its refreshing appeal.
  • Using too much honey: Start with a small amount of sweetener and adjust according to taste.
  • Not straining properly: Ensure you strain the juice well to avoid a gritty texture.
  • Serving without ice: Always serve chilled for the best experience!

Mint Juice Variations

While the classic mint juice is delightful as it is, here are some variations to consider:

  • Lemon Mint Cooler: Add sparkling water to the mint juice for a fizzy treat.
  • Mint Ginger Juice: Blend in a small piece of fresh ginger for an added kick.
  • Mint & Cucumber Refreshment: Incorporate cucumber slices for a hydrating element.
  • Mint Mojito Mocktail: Mix the mint juice with club soda and garnish with lime for a refreshing mocktail.

Storage and Make-Ahead Instructions

Mint juice is best enjoyed fresh. However, if you have leftovers:

  • Store in the fridge: Keep the mint juice in an airtight container and consume within 24 hours for the best flavor.
  • Make-ahead option: Prepare the mint juice base without adding ice, and store it in the fridge. Add ice just before serving.

Frequently Asked Questions

  • Can I use dried mint instead of fresh? Yes, but fresh mint offers a much brighter flavor.
  • How long does mint juice last? It’s best consumed within 24 hours, but can be stored for up to 48 hours in the fridge.
  • Can I freeze mint juice? Yes, you can freeze it in ice cube trays for later use in smoothies.
  • Is mint juice good for digestion? Yes, mint aids digestion and can help soothe an upset stomach.
  • Can I add other fruits to mint juice? Absolutely! Fruits like watermelon or berries can enhance the flavor.
  • Is this recipe vegan? Yes, it’s entirely plant-based!
  • What sweeteners can I use besides honey? Agave syrup, sugar, or even stevia work well.
  • How can I enhance the nutritional value? Add chia seeds or flaxseeds for an extra boost of nutrients.

Nutritional Tips and Dietary Adaptations

This mint juice is not only refreshing but also nutritious. Here are some tips:

  • Low-calorie option: Use less honey or a sugar substitute for a lower-calorie drink.
  • Gluten-free and dairy-free: This recipe is naturally free from gluten and dairy.
  • Boost with protein: For a post-workout drink, blend in some protein powder.

Equipment Recommendations

To make the best mint juice, consider having the following tools on hand:

  • High-speed blender: A powerful blender will ensure a smooth consistency.
  • Fine mesh strainer: Essential for straining out solids and achieving a smooth texture.
  • Measuring cups and spoons: Accurate measurements help balance flavors.
  • Pitcher or serving jug: To hold and serve your refreshing mint juice.

Serving Suggestions

Mint juice is versatile and can be served in various ways:

  • Serve in chilled glasses: Elevate the experience with fancy glassware.
  • Garnish with mint leaves: Fresh mint leaves add a lovely touch and enhance the aroma.
  • Pair with snacks: Enjoy it with light snacks like cucumber sandwiches or fruit platters for a refreshing combination.

In conclusion, making your own mint juice is not just easy; it’s an adventure in flavor that can bring a refreshing twist to your day. With its vibrant taste and health benefits, you’ll find yourself reaching for this delightful drink time and again. So gather your ingredients, follow the steps, and enjoy the ultimate mint juice experience!

How to Make Refreshing Mint Juice: The Ultimate Guide -

Prep Time 5 minutes
Total Time 5 minutes
Servings 2 glasses
Calories 80
Enjoy a quick, healthy, and refreshing mint juice that's perfect for hot days and easy to customize to your taste.

Ingredients

Fresh mint leaves

  • 1 cup Fresh mint leaves
  • 0.5 cup Lemon juice
  • 2 tablespoons Honey
  • 1 cup Ice cubes
  • 1 cup Water

Instructions 

  • Blend mint leaves, lemon juice, honey, water, and ice until smooth.
  • Strain if desired and serve immediately.

Notes

Adjust sweetness by adding more honey or lemon to taste.
Calories: 80kcal
Cost: $5
Course: Beverage
Cuisine: fusion
Keyword: Mint

Discover the Joy of Baking: Strawberry Vanilla Sheet Cake

Welcome to the delightful world of baking! Today, we’re diving into crafting the perfect Strawberry Vanilla Sheet Cake. This cake is not only a feast for the eyes but also a celebration of flavors, integrating the sweet essence of fresh strawberries with the creamy richness of vanilla frosting. Whether you’re preparing for a family gathering or treating yourself to a homemade dessert, this cake promises to be a hit. Let’s get started!

Why You’ll Love This Recipe

This strawberry sheet cake is an absolute must-try for several reasons:

  • Easy to Make: The simple steps ensure you can whip up this cake in no time, perfect for beginners and seasoned bakers alike.
  • Fresh Ingredients: Using fresh strawberries elevates the flavor, giving you a taste of summer in every bite.
  • Versatile Serving Options: This cake pairs beautifully with ice cream, whipped cream, or can be enjoyed on its own.
  • Perfect for Any Occasion: Whether it’s a birthday, picnic, or family dinner, this cake fits right in.
  • Make-Ahead Friendly: You can bake this cake in advance and store it for later, making it an excellent choice for busy schedules.

Ingredient Breakdown

Understanding your ingredients is key to baking success. Here’s what you’ll need for this Strawberry Vanilla Sheet Cake:

  • 2 1/2 cups cake flour: Provides a light and fluffy texture.
  • 1 1/2 tsp aluminum-free baking powder: Ensures the cake rises beautifully.
  • 1/2 tsp baking soda: Balances the acidity from the yogurt.
  • 1/2 tsp salt: Enhances all the flavors.
  • 1/2 cup unsalted butter: At room temperature, for a rich flavor.
  • 1 1/4 cups granulated sugar: For sweetness and moisture.
  • 2 tsp vanilla extract: Adds aromatic sweetness.
  • 2 large eggs: Room temperature for better emulsification.
  • 1 cup low-fat buttermilk: For a tender crumb.
  • 1/2 cup plain fat-free Greek yogurt: Adds moisture and a slight tang.
  • 1 cup fresh sliced strawberries: The star of the show!
  • 3/4 cup unsalted butter (for frosting): At room temperature.
  • 4 oz cream cheese: Adds richness to the frosting.
  • 1/2 tsp salt (for frosting): Balances sweetness.
  • 1 1/2 tsp vanilla extract (for frosting): For flavor.
  • 3 cups powdered sugar: For a sweet, creamy texture.
  • 2 cups fresh sliced strawberries (for topping): For that fresh finish.

How to Make This Cake

Follow these detailed steps to create your scrumptious Strawberry Vanilla Sheet Cake:

  1. Preheat your oven to 350°F. Prepare a 13 x 9” baking pan by spraying it with nonstick spray and lining it with parchment paper.
  2. Mix the dry ingredients: In a medium bowl, whisk together the cake flour, baking powder, baking soda, and salt.
  3. Cream the butter and sugar: In a large mixer bowl, beat the unsalted butter and granulated sugar at medium speed until the mixture is light and fluffy. Add the vanilla extract.
  4. Add the eggs: Incorporate the eggs one at a time, beating until fully combined.
  5. Combine wet ingredients: In a separate small bowl, mix the buttermilk and Greek yogurt. Gradually add the dry ingredients in three additions, alternating with the buttermilk mixture. Start and end with the flour mixture.
  6. Prepare the batter: Spoon the batter into the prepared baking pan and smooth the top using an offset spatula. Tap the pan sharply to eliminate air bubbles, then top the batter with sliced strawberries.
  7. Bake: Place in the oven and bake for 25 to 28 minutes. The cake is done when the edges are golden and a toothpick inserted in the center comes out clean or with a few crumbs.
  8. Cool the cake: Allow the cake to cool completely in the pan on a wire rack.
  9. Make the frosting: In a large mixer bowl, beat the unsalted butter, cream cheese, and salt at medium speed until smooth. Gradually mix in the powdered sugar one cup at a time, then beat on medium-high for 1 minute until light and fluffy.
  10. Frost the cake: Dollop the frosting over the cooled cake and swirl it with an offset spatula. Chill in the refrigerator for 20 minutes before slicing and serving, topped with fresh strawberries.

Pro Tips for the Best Strawberry Vanilla Sheet Cake

Here are some expert insights to elevate your baking game:

  • Room Temperature Ingredients: Ensure that your butter, eggs, and buttermilk are at room temperature for a smoother batter.
  • Do Not Overmix: Mixing just until combined helps maintain a light texture in the cake.
  • Fresh Strawberries: Use ripe strawberries for the best flavor and avoid frozen ones, which can add excess moisture.
  • Test for Doneness: Keep an eye on your cake towards the end of the baking time; ovens can vary.
  • Frosting Consistency: If your frosting is too thick, add a splash of milk to reach the desired consistency.
  • Chill the Cake: Chilling before serving helps set the frosting and makes slicing easier.
  • Variations: Experiment with different fruits like raspberries or blueberries for a twist on the classic.
  • Presentation: Garnish with mint leaves for a pop of color and freshness.

Common Mistakes and Troubleshooting

Even the best bakers make mistakes. Here’s how to avoid common pitfalls:

  • Dense Cake: This can happen if you overmix the batter. Mix just until combined.
  • Dry Cake: Ensure you measure your flour correctly; too much can lead to dryness.
  • Frosting Too Sweet: Balance with a pinch of salt or add a splash of lemon juice for brightness.
  • Uneven Baking: Rotate your cake halfway through baking for even heat distribution.

Variations of Strawberry Vanilla Sheet Cake

Get creative with these delicious variations:

  • Strawberry Lemonade Sheet Cake: Add lemon zest to the batter for a citrusy twist.
  • Chocolate Strawberry Cake: Swirl in melted chocolate into the batter for a rich flavor.
  • Almond Strawberry Cake: Substitute some vanilla with almond extract for a nutty essence.
  • Gluten-Free Strawberry Cake: Use a gluten-free flour blend for a lighter version.

Storage and Make-Ahead Instructions

You can prepare this cake in advance:

  • Storage: Keep the cake covered in the refrigerator for up to 5 days. It can also be frozen for up to 3 months without frosting.
  • Make-Ahead: Bake the cake a day prior, frost it the next day, and let it sit in the fridge for optimal flavor.

Frequently Asked Questions

Here are some common queries answered:

  • Can I use frozen strawberries? While fresh strawberries are best, frozen can work in a pinch—just thaw and drain excess moisture.
  • How can I make the cake more moist? Ensure you’re measuring your ingredients accurately and consider adding a bit more Greek yogurt.
  • What can I substitute for buttermilk? You can mix regular milk with a teaspoon of vinegar or lemon juice and let it sit for 5 minutes.
  • Is it possible to make this cake dairy-free? Yes! Substitute dairy ingredients with plant-based alternatives like almond milk and coconut yogurt.
  • How can I make this cake less sweet? Reduce the sugar in the frosting or use less powdered sugar to taste.
  • Can I add other fruits? Absolutely! Blueberries, raspberries, or blackberries can add a fun twist.
  • What kind of frosting can I use? Feel free to experiment with whipped cream or a lighter cream cheese frosting.
  • How do I know when my cake is done? Use a toothpick inserted into the center; if it comes out clean or with a few crumbs, it’s ready!

Nutrition Tips and Dietary Adaptations

This Strawberry Vanilla Sheet Cake can be adapted for various dietary needs:

  • Lower Sugar: Reduce sugar in the cake and frosting to cater to those watching their sugar intake.
  • Whole Grain Option: Substitute half the cake flour with whole wheat pastry flour for added fiber.
  • Vegan Adaptation: Replace eggs with flax eggs and use dairy-free yogurt and butter alternatives.

Equipment Recommendations

To make your baking experience smoother, consider these tools:

  • Mixing Bowls: A set of nesting mixing bowls is essential for easy ingredient preparation.
  • Electric Mixer: A stand or hand mixer will save you time and effort when creaming butter and sugar.
  • Baking Pan: A high-quality nonstick 13 x 9” pan ensures even baking.
  • Offset Spatula: Ideal for spreading frosting and smoothing the top of your cake.

Serving Suggestions

When it comes to serving your Strawberry Vanilla Sheet Cake, consider these ideas:

  • With Ice Cream: A scoop of vanilla or strawberry ice cream is a classic pairing.
  • Fresh Berries: Add a side of mixed berries for a pop of color and extra flavor.
  • Mint Garnish: A few mint leaves can add freshness and elevate presentation.
  • Whipped Cream: A dollop of whipped cream on top enhances the cake’s richness.

In conclusion, baking this Strawberry Vanilla Sheet Cake is a rewarding endeavor that not only fills your home with delightful aromas but also brings joy to any gathering. With this comprehensive guide, you’re well-equipped to create a cake that will impress friends and family alike. Happy baking!

Strawberry Vanilla Sheet Cake (with Fresh Strawberries!)

Prep Time 20 minutes
Cook Time 25 minutes
Total Time 45 minutes
Servings 12 slices
Calories 420
A delightful and moist sheet cake featuring fresh strawberries and a luscious vanilla frosting, perfect for any celebration or casual gathering.

Ingredients

Cake ingredients

  • 2 1/2 cups cake flour
  • 1 1/2 tsp aluminum-free baking powder
  • 1/2 tsp baking soda
  • 1/2 tsp salt
  • 1/2 cup unsalted butter, at room temperature
  • 1 1/4 cups granulated sugar
  • 2 tsp vanilla extract
  • 2 large eggs, at room temperature
  • 1 cup low-fat buttermilk, at room temperature
  • 1/2 cup plain fat-free Greek yogurt, at room temperature
  • 1 cup fresh sliced strawberries

Frosting ingredients

  • 3/4 cup unsalted butter, at room temperature (for frosting)
  • 4 oz cream cheese, at cool room temperature
  • 1/2 tsp salt (for frosting)
  • 1 1/2 tsp vanilla extract (for frosting)
  • 3 cups powdered sugar
  • 2 cups fresh sliced strawberries (for topping)

Instructions 

  • Preheat oven to 350°F (175°C). Prepare a 13x9 inch pan with nonstick spray and parchment paper.
  • Mix dry ingredients. Beat butter and sugar until fluffy, add vanilla and eggs. Alternate adding dry ingredients and buttermilk mixture to batter.
  • Pour batter into pan, smooth, top with sliced strawberries, and bake for 25-28 minutes. Cool completely.
  • Make frosting by beating butter, cream cheese, salt, vanilla, and powdered sugar until smooth and fluffy.
  • Spread frosting over cooled cake, chill for 20 minutes, then top with fresh strawberries before serving.

Notes

For best results, use fresh strawberries and ensure all ingredients are at room temperature.
Calories: 420kcal
Cost: $15
Course: Dessert
Keyword: Strawberries