Author

Mike

Browsing

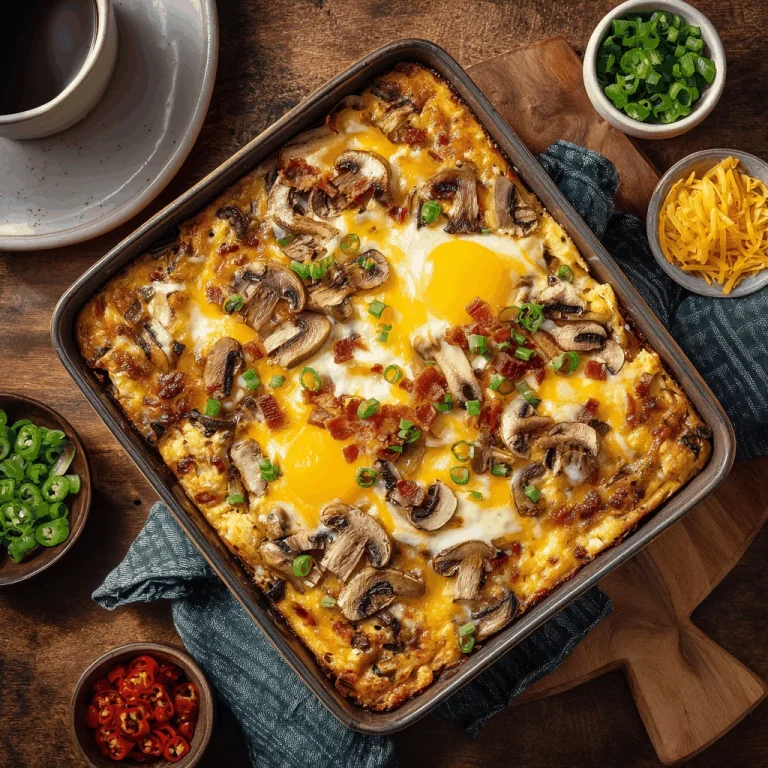
Good morning, food lovers! If there’s one thing I’ve learned over my two decades in the kitchen, it’s that breakfast is more than just the first meal of the day—it’s the opening act to your daily performance. And let me tell you, my Crack Breakfast Casserole is the kind of symphony that will make your mornings sing. This recipe brings back memories of Sunday brunches with my family, where the kitchen buzzed with laughter and the aroma of hearty cooking. It’s a dish that’s not only easy to make but also brings people together, creating moments of warmth and connection.

Why You’ll Absolutely Love This Recipe

  • **It’s so easy, it feels like a little kitchen victory!** Whether you’re a seasoned chef or a beginner, this dish is foolproof.
  • **Hearty and satisfying, perfect for any crowd.** This casserole is your go-to for family gatherings or a cozy morning at home.
  • **Prep it in advance!** You can assemble it the night before, making it a Fast Breakfast Casserole for busy mornings.
  • **Versatile and customizable.** Swap out ingredients to suit your taste—think Ham And Sausage Breakfast Casserole variations!

Simple Ingredients for a Delicious Treat

When it comes to making a dish that resonates with comfort, the ingredients are key. I love using pork sausage and bacon for that savory, smoky flavor that sets the tone for the day. The cream cheese and sour cream add a delightful creaminess, while the dry ranch seasoning gives it a subtle zesty kick. Don’t forget the cheddar cheese—it’s the crown jewel that makes this the Best Ever Breakfast Casserole.

You’ll find the full ingredient list with exact measurements in the recipe card below!

Let’s Make Some Magic: Step-by-Step

Alright, let’s dive into the magic of making this casserole. Start by cooking the sausage and chopped bacon in a large skillet over medium-high heat until they’re browned and fully cooked. Once done, drain the excess fat and set them aside. In a large bowl, blend the softened cream cheese and sour cream until smooth. Add the milk, eggs, ranch seasoning, onion powder, garlic powder, salt, and pepper, and mix until well combined. Now, stir in the cooked meats, thawed hash browns, and one cup of shredded cheddar cheese into the egg mixture until everything is well incorporated.

Preheat your oven to 350°F (175°C). Lightly grease a 9×13-inch (23x33cm) baking dish, pour the mixture in, and spread it evenly. Top with the remaining cup of cheddar cheese. Cover the dish with aluminum foil and bake for 50–60 minutes. Then, remove the foil and bake for an additional 8–10 minutes, or until the cheese is bubbly and golden. Let it rest for a few minutes before slicing. Serve warm and enjoy the smiles around your table.

A Few of My Favorite Tips

Here’s a little secret: you can Freeze Breakfast Casserole portions for those mornings when you’re in a rush but still want something hearty. Just make sure to wrap them well and they’ll keep beautifully in the freezer. And if you’re looking to add a twist, try mixing in some vegetables like bell peppers or spinach for an extra layer of flavor and nutrition.

How I Like to Serve This

I love serving this casserole with a side of fresh fruit or a simple green salad. It balances the richness of the dish and adds a refreshing contrast. A dollop of salsa or a sprinkle of fresh herbs like chives or parsley can also elevate the flavors beautifully.

Storing & Reheating (If There’s Any Left!)

If you have leftovers, store them in an airtight container in the refrigerator for up to three days. To reheat, simply pop a portion in the microwave or warm it in the oven at 350°F (175°C) until heated through. This way, you can enjoy the deliciousness all over again!

Crack Breakfast Casserole

Prep Time 20 minutes
Cook Time 1 hour
Total Time 1 hour 20 minutes
Servings 8 servings
Calories 600
A hearty and delicious breakfast casserole packed with sausage, bacon, and cheese, perfect for feeding a crowd.

Ingredients

Meats

  • 1 pound pork sausage
  • 1 pound bacon, chopped

Dairy

  • 4 ounces cream cheese, softened
  • ½ cup sour cream
  • 1 cup whole milk
  • 8 large eggs
  • 2 cups shredded cheddar cheese, divided

Potatoes

  • 1 30-ounce bag frozen shredded hash browns, thawed and drained

Seasonings

  • 1 packet dry ranch seasoning mix
  • ½ teaspoon onion powder
  • ½ teaspoon garlic powder
  • ½ teaspoon salt
  • ½ teaspoon freshly ground black pepper

Instructions 

  • Cook sausage and bacon in a skillet until browned; drain fat.
  • Blend cream cheese and sour cream; add milk, eggs, ranch seasoning, onion powder, garlic powder, salt, and pepper.
  • Stir in cooked meats, hash browns, and 1 cup cheddar cheese.
  • Preheat oven to 350°F (175°C); pour mixture into greased baking dish and top with remaining cheese.
  • Bake covered for 50–60 minutes, then uncovered for 8–10 minutes until cheese is bubbly.
  • Let rest before slicing; serve warm.
Notes

For extra flavor, consider adding diced vegetables or spices to the mixture.
Calories: 600kcal
Cost: $15.00
Course: Breakfast
Cuisine: American
Keyword: Sausage

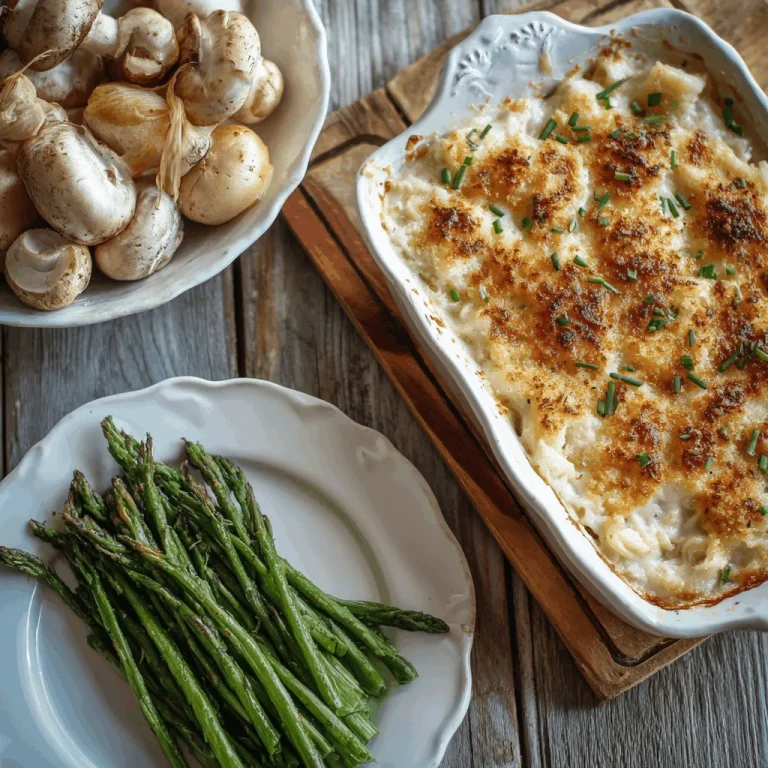
The kitchen has always been my haven, a place where tradition meets innovation. Growing up in Chicago, Sunday dinners were a sacred ritual, filled with laughter, warmth, and the comforting aroma of home-cooked meals. Now, as a professional chef, I’ve carried those memories into my kitchen studio, where I strive to create recipes that are not only delicious but also accessible for everyone. Today, I’m thrilled to share a collection of 25 Inexpensive Gluten Free Dinners Your Family Will Love. These meals are not just about feeding the body but nourishing the soul, bringing families together around the table.

Why You’ll Absolutely Love This Recipe

  • Effortless and Enjoyable: These recipes are so easy, they feel like little kitchen victories!
  • Family-Friendly: Designed with Gluten Free Kids in mind, these meals are sure to please even the pickiest eaters.
  • Budget-Conscious: Perfect for those looking for Cheap Gluten Free Meals without compromising on flavor.
  • Nutritious Choices: Many of these meals double as Gluten Free Healthy Dinners, packed with wholesome ingredients.

Simple Ingredients for a Delicious Treat

When it comes to creating delicious meals, I believe in the magic of simple ingredients. From the earthy sweetness of sweet potatoes to the creamy richness of cheddar cheese, every ingredient has a purpose. One of my personal favorites is the humble ground beef, a versatile staple that forms the heart of many Gluten Free Main Dishes. And let’s not forget the Gluten Free Casserole Recipes that bring comfort in every bite.

You’ll find the full ingredient list with exact measurements in the recipe card below!

Let’s Make Some Magic: Step-by-Step

Cooking should be an experience filled with joy and discovery. As you embark on this culinary journey, know that I’m right there with you, cheering you on! Start by layering tortillas and ground beef for a taco casserole and bake until golden. Try combining pasta and hamburger for a sloppy joe casserole, or perhaps use hamburger in a slow cooker for a tender meatloaf. Each step is a chance to create something wonderful, and with every dish, you’re crafting memories to cherish.

A Few of My Favorite Tips

Here’s a secret from my kitchen to yours: when making tamale pie in a cast iron skillet, let the cornbread develop a crispy edge for that extra crunch. And when preparing chicken parmesan pasta casserole, add a sprinkle of fresh basil for a burst of flavor. Remember, the beauty of cooking lies in personalization, so feel free to add your own twist!

How I Like to Serve This

In my kitchen, presentation is all about warmth and hospitality. For a cozy family dinner, I love serving these dishes with a side of vibrant green salad or roasted vegetables. For a more relaxed gathering, consider a buffet-style setup where everyone can help themselves to their favorites. It’s all about creating an atmosphere of sharing and joy.

Storing & Reheating (If There’s Any Left!)

If you’re lucky enough to have leftovers, most of these dishes store beautifully. Place them in airtight containers and refrigerate for up to three days. For reheating, I recommend using the oven to maintain the texture, but a quick microwave session works just as well for a speedy meal. Enjoy the convenience of having delicious meals ready to go!

25 Inexpensive Gluten Free Dinners Your Family Will Love

Prep Time 30 minutes
Cook Time 1 hour
Total Time 1 hour 30 minutes
Servings 6 people
Calories 600
Discover a variety of delicious and budget-friendly gluten-free dinners that your family will adore.

Ingredients

Main Ingredients

  • 10 pieces tortillas
  • 1 kg ground beef
  • 500 g pasta (gluten free)
  • 500 g cheddar cheese
  • 250 g cream cheese
  • 400 g diced tomatoes (canned)

Instructions 

  • Layer tortillas and ground beef for taco casserole and bake.
  • Combine pasta and hamburger for sloppy joe casserole and bake.
  • Make tamale pie in a cast iron skillet with seasoned beef and cornbread.
  • Prepare nacho casserole with ground beef and tortilla chips.
  • Cook chili mac and cheese in an Instant Pot with ground beef and beans.

Notes

Use fresh ingredients for the best flavor and texture.
Calories: 600kcal
Cost: $50
Course: Dinner
Cuisine: American
Keyword: gluten free

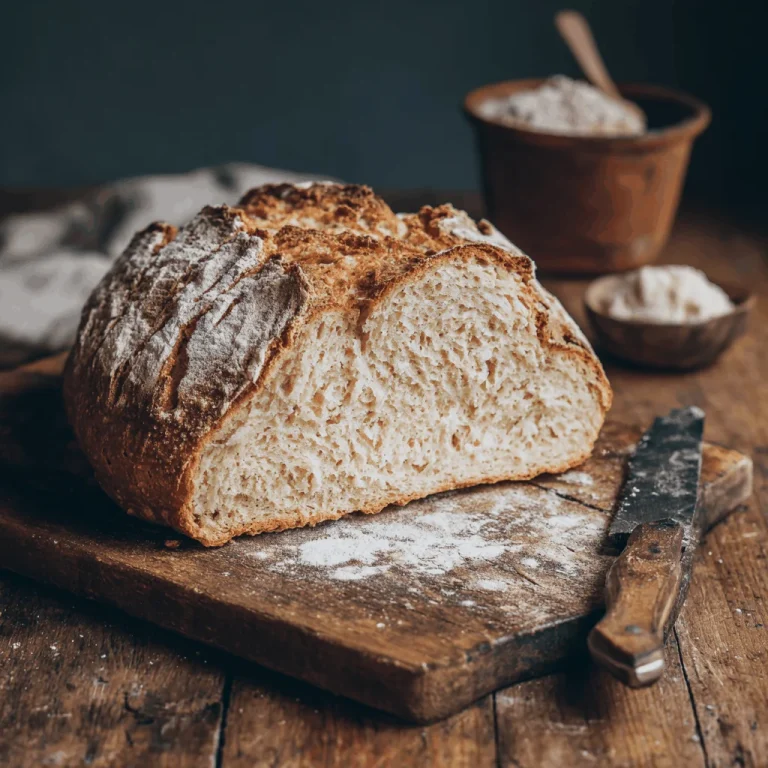
There’s something truly magical about the smell of freshly baked bread wafting through the kitchen. It’s a scent that transports me back to Sundays spent in my grandmother’s kitchen, where the warmth of the oven and the love in every bite made even the simplest of meals feel extraordinary. Today, I’m thrilled to share a recipe that brings that same sense of comfort and joy, with a modern twist: The No Knead Gluten Free Bread That’s a Game Changer.

Why You’ll Absolutely Love This Recipe

  • It’s so easy, it feels like a little kitchen victory!
  • No kneading required, making it perfect for busy days or for those new to bread making.
  • Delivers a delightful crusty exterior with a soft, tender crumb inside.
  • It’s a versatile canvas for all your favorite toppings and spreads.
  • Perfect for anyone looking for a reliable gluten-free bread recipe.

Simple Ingredients for a Delicious Treat

Let’s talk about the stars of this recipe. We’re using gluten-free all-purpose flour, a staple in Bread Gluten Free Recipes, ensuring our bread is just as satisfying as its gluten-containing counterparts. The instant yeast is our secret weapon for that perfect rise, and a touch of salt rounds out the flavors beautifully. Warm water brings it all together, creating a dough that’s wonderfully sticky and full of potential. For a little extra depth, I love adding a splash of olive oil and apple cider vinegar—these are optional, but they elevate the flavor profile to new heights.

You’ll find the full ingredient list with exact measurements in the recipe card below!

Let’s Make Some Magic: Step-by-Step

Follow these steps, and I promise you’ll have a loaf that rivals any bakery’s offering. Start by whisking together your dry ingredients: gluten-free flour, salt, and yeast. Next, slowly incorporate the warm water, olive oil, and apple cider vinegar into the mix. The dough will be sticky, and that’s exactly what we want! Cover your bowl and let the dough rise overnight. This slow rise is where the magic happens, developing flavor and texture. Once you’re ready to bake, preheat your oven with a Dutch oven inside—this creates the perfect environment for a crusty finish. Shape your dough gently, and let it rest one last time before baking. The result? A beautifully golden, crusty gluten free bread that’s sure to impress.

A Few of My Favorite Tips

Here’s a little secret: don’t rush the rise. Letting the dough sit for 8-12 hours allows the flavors to fully develop. And when shaping your dough, remember to handle it with care—overworking can lead to a denser loaf. For a delightful twist, try sprinkling some seeds on top before baking for added texture and flavor.

How I Like to Serve This

This bread is incredibly versatile. I love serving it warm with a generous spread of butter or as a base for my favorite open-faced sandwiches. It’s also fantastic paired with soups and stews, soaking up all the delicious flavors.

Storing & Reheating (If There’s Any Left!)

If you find yourself with leftovers, store the bread in an airtight container at room temperature for up to three days. For longer storage, slice and freeze the bread, then simply reheat slices in the oven or toaster as needed. This way, you can enjoy fresh-tasting bread even days later!

For more baking inspiration, check out why my family can’t get enough of this pumpkin bread, or unlock the secrets to super moist pumpkin bread here. These recipes are sure to add some seasonal warmth to your baking repertoire!

No Knead Gluten Free Bread: An Amazing Ultimate Recipe

Prep Time 10 minutes
Cook Time 45 minutes
Total Time 55 minutes
Servings 8 slices
Calories 200
This no-knead gluten-free bread is easy to make and yields a deliciously crusty loaf that everyone will love.

Ingredients

Dry Ingredients

  • 3 cups gluten-free all-purpose flour
  • 1.5 teaspoons salt
  • 1 teaspoon instant yeast

Wet Ingredients

  • 1.5 cups warm water
  • 2 tablespoons olive oil (optional)
  • 1 teaspoon apple cider vinegar (optional)

Instructions 

  • In a large bowl, whisk together flour, salt, and yeast.
  • Stir in warm water, olive oil, and vinegar until combined; the dough will be sticky.
  • Cover and let rise at room temperature for 8-12 hours.
  • Preheat oven to 450°F (232°C) and prepare a Dutch oven.
  • Shape the dough into a ball and let it rest for 30 minutes.
  • Bake covered for 30 minutes, then uncovered for 15 minutes.

Notes

Allow the bread to cool completely before slicing for the best texture.
Calories: 200kcal
Cost: $8.00
Course: bread
Cuisine: Gluten-Free
Keyword: Gluten-Free Flour

There’s something truly magical about a warm bowl of soup that brings people together, especially when it’s a dish that’s close to my heart. Growing up in Chicago, lasagna was a staple at family gatherings—layers of pasta, cheese, and rich tomato sauce that seemed to capture the essence of comfort and joy. As a chef, I’ve spent years perfecting traditional dishes, but there’s always room for a little innovation. That’s why I’m thrilled to share my Gluten Free Lasagna Soup recipe with you. It’s a delightful twist on a classic that holds all the warmth of family dinners, yet caters to modern dietary needs. Whether you’re gluten sensitive or just looking to try something new, this soup is a hug in a bowl.

Why You’ll Absolutely Love This Recipe

  • It’s so easy, it feels like a little kitchen victory!
  • Perfect for those cozy nights when you crave something hearty and warm.
  • Rich in flavor, yet light on the stomach—ideal for Gluten Free Eating.
  • Great for a Dairy Free Dinner if you swap the cheese for a dairy-free alternative.
  • Feeds the soul and warms the heart, just like any good meal should.

Simple Ingredients for a Delicious Treat

When it comes to making this soup, simplicity is key. We use ingredients that are easy to find and full of flavor. Here’s what you’ll need:

  • Ground beef or turkey: Adds a rich, hearty element.
  • Onion and garlic: The aromatic base that sets the stage for flavor.
  • Tomato paste and diced tomatoes: For that classic lasagna essence.
  • Gluten-free lasagna noodles: The star of the show, bringing texture and familiarity.
  • Italian seasoning: A blend of herbs that ties the dish together.
  • Vegetable broth: Keeps it light and complements the other ingredients.
  • Spinach: For a pop of color and nutrition.
  • Cheese or dairy-free alternative: To top it off with creamy goodness.

You’ll find the full ingredient list with exact measurements in the recipe card below!

Let’s Make Some Magic: Step-by-Step

Ready to dive in? Let’s make this Gluten Free Lasagna Soup together. Imagine me right there with you, guiding you through each step:

  1. Start by browning the ground meat in a large pot over medium heat until it’s fully cooked. Drain any excess fat.
  2. Add the chopped onion and minced garlic to the pot, sautéing until the onion is translucent and fragrant.
  3. Stir in the tomato paste and diced tomatoes, letting them mingle with the meat and aromatics.
  4. Pour in the vegetable broth and sprinkle in the Italian seasoning. Give it a good stir and let it simmer for about 15 minutes.
  5. Break the gluten-free lasagna noodles into smaller pieces and add them to the pot. Allow them to cook in the simmering soup until tender.
  6. Just before serving, stir in the fresh spinach, letting it wilt in the hot soup.
  7. Ladle the soup into bowls and sprinkle with cheese or your favorite dairy-free alternative.

A Few of My Favorite Tips

Here are a couple of secrets to elevate your soup experience:

  • For an extra depth of flavor, consider adding a splash of balsamic vinegar or a pinch of red pepper flakes.
  • If you’re making this ahead of time, cook the noodles separately and add them to each bowl before serving to prevent them from becoming too soft.

How I Like to Serve This

I love serving this soup with a side of crusty gluten-free bread or a fresh green salad. It’s the perfect way to round out the meal and soak up every last drop of that delicious broth.

Storing & Reheating (If There’s Any Left!)

Should you find yourself with leftovers, store the soup in an airtight container in the refrigerator for up to 3 days. When reheating, you might want to add a bit more broth to maintain the soup’s consistency. It makes for a great lunch the next day!

Gluten Free Lasagna Soup

Prep Time 15 minutes
Cook Time 30 minutes
Total Time 45 minutes
Servings 6 servings
Calories 350
A comforting and hearty soup that captures the flavors of traditional lasagna without the gluten.

Ingredients

Soup Base

  • 1 tablespoon olive oil
  • 1 medium onion, chopped
  • 2 cloves garlic, minced
  • 1 can crushed tomatoes (28 oz can)
  • 4 cups chicken broth
  • 2 cups gluten-free pasta
  • 1 cup ricotta cheese
  • 1 cup shredded mozzarella cheese
  • 1 tablespoon Italian seasoning

Instructions 

  • Heat olive oil in a large pot over medium heat. Add onion and garlic, sauté until softened.
  • Add crushed tomatoes, chicken broth, and Italian seasoning. Bring to a boil.
  • Stir in gluten-free pasta and cook until tender, about 10 minutes.
  • Remove from heat and stir in ricotta cheese until well combined.
  • Serve hot, topped with shredded mozzarella cheese.

Notes

For extra flavor, add fresh basil before serving.
Calories: 350kcal
Cost: $15.00
Course: Soup
Cuisine: Italian
Keyword: lasagna

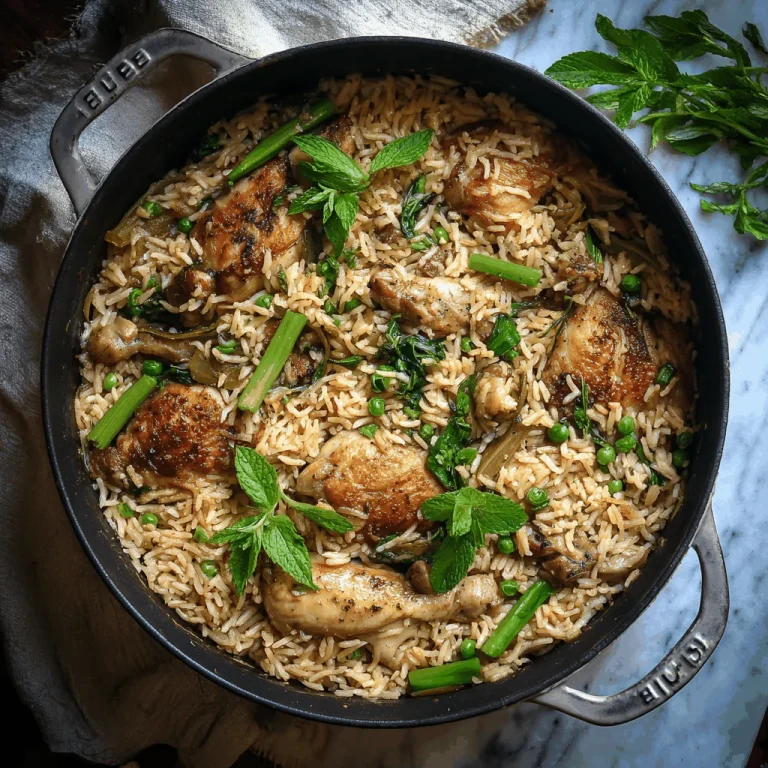
There’s something about the aroma of chicken and rice simmering away in a pot that transports me back to my childhood kitchen. Growing up, this dish was a staple in our household, a recipe passed down through generations. Now, as a professional chef and a father, I cherish the same tradition with my own family. It’s a dish that brings us comfort and togetherness, especially on chilly Chicago evenings. This One-Pot Chicken & Rice (Gluten-Free) recipe is more than just a meal; it’s a memory maker, a heart warmer, and a symbol of home.

Why You’ll Absolutely Love This Recipe

  • It’s so easy, it feels like a little kitchen victory!
  • Perfect for those busy weeknights when time is of the essence.
  • Gluten-free and adaptable for a dairy-free diet, making it inclusive for various dietary needs.
  • A wholesome, comforting dish that doesn’t compromise on flavor.
  • Minimal cleanup means more time spent at the table with loved ones.

Simple Ingredients for a Delicious Treat

Let’s talk ingredients. I love how this dish combines basic pantry staples with fresh produce to create something truly special. The chicken, tender and juicy, is the star of the show, while the rice acts as the perfect canvas, soaking up all those delightful flavors. Carrots add a touch of sweetness and a pop of color, while fresh parsley finishes it all off with a burst of herby freshness.

Don’t be shy with the garlic—its aroma and flavor are what turn a simple meal into a feast. And remember, using low-sodium chicken broth allows for more control over the seasoning, making it a healthier choice. You’ll find the full ingredient list with exact measurements in the recipe card below!

Let’s Make Some Magic: Step-by-Step

I’m right here with you as we dive into this recipe. Start by heating olive oil in a large pot or deep skillet over medium heat. Add the diced chicken and let it cook for about 5–6 minutes until it’s lightly browned. This step is where you build the foundation of flavor, so take your time.

Next, stir in the chopped onion and let it soften for a couple of minutes before adding the garlic. The aroma at this point is nothing short of magical. Then, it’s time to add the rice, carrots, broth, thyme, salt, and pepper. Stir everything together and bring it to a boil.

Once boiling, reduce the heat to low, cover the pot, and let it simmer for 18–20 minutes. Stir occasionally to ensure nothing sticks to the bottom. The rice should be tender, and most of the liquid absorbed.

Finally, stir in the milk and fresh parsley, allowing it to simmer uncovered for another 3–4 minutes until creamy. Taste and adjust the seasoning if needed. Serve warm, and don’t forget to sprinkle some extra parsley on top if you like.

A Few of My Favorite Tips

Here’s a little secret from my kitchen to yours: if you prefer a richer flavor, try browning the chicken in batches. This adds a deeper caramelized flavor that’s simply irresistible. And if you’re a fan of spice, a pinch of red pepper flakes can add a pleasant kick.

For a dairy-free version, almond milk is a fantastic substitute that keeps the dish creamy without the dairy.

How I Like to Serve This

I love serving this dish with a side of steamed greens, like broccoli or green beans, to add some extra nutrients and color to the plate. A simple green salad with a light vinaigrette also pairs beautifully, balancing the richness of the dish.

For a sweet ending, consider trying one of my family’s other favorites: **Why My Family Can’t Get Enough of This Pumpkin Bread**. It’s a delightful way to round off the meal.

Storing & Reheating (If There’s Any Left!)

If you happen to have leftovers, store them in an airtight container in the fridge for up to three days. When you’re ready to reheat, simply add a splash of water or broth to the pot and warm it over low heat, stirring occasionally to maintain that creamy texture.

This dish is perfect for meal prep, ensuring you have a delicious, home-cooked meal ready to go, even on the busiest of days.

One-Pot Chicken & Rice (Gluten-Free)

Prep Time 10 minutes
Cook Time 25 minutes
Total Time 35 minutes
Servings 4 servings
Calories 450
A comforting and easy one-pot meal featuring tender chicken and flavorful rice, perfect for a weeknight dinner.

Ingredients

Protein

  • 1 lb chicken fillet, diced

Fats

  • 1 tablespoon olive oil

Vegetables

  • 1 small onion, finely chopped
  • 2 cloves garlic, minced
  • 1 cup long grain white rice
  • 2 medium carrots, sliced

Liquids

  • 3 cups low-sodium chicken broth

Spices

  • 1/4 teaspoon dried thyme
  • 1/2 teaspoon salt
  • 1/4 teaspoon black pepper
  • 1/2 cup unsweetened almond milk or milk of choice

Herbs

  • 2 tablespoons fresh parsley, chopped

Instructions 

  • Heat olive oil in a large pot over medium heat. Cook chicken for 5–6 minutes until browned.
  • Add onion and cook for 2–3 minutes. Stir in garlic and sauté for 30 seconds.
  • Add rice, carrots, broth, thyme, salt, and pepper. Stir to combine.
  • Bring to a boil, reduce heat to low, cover, and simmer for 18–20 minutes until rice is tender.
  • Stir in milk and parsley. Simmer uncovered for 3–4 minutes until creamy. Adjust seasoning and serve.

Notes

For extra flavor, consider adding your favorite vegetables or spices.
Calories: 450kcal
Cost: $12.00
Course: Main Course
Cuisine: American
Keyword: Chicken

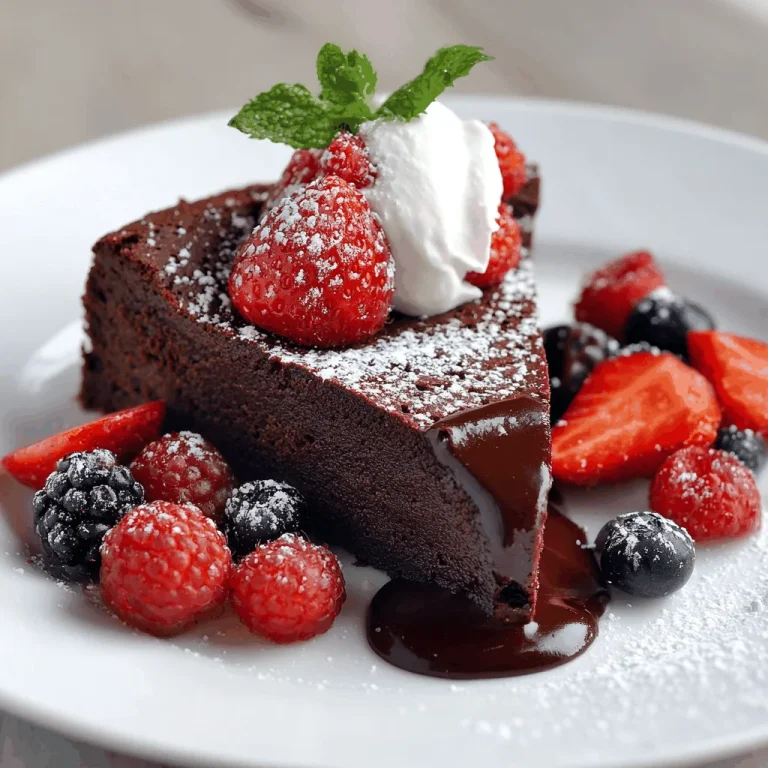
There’s a certain magic in the air when you walk into a kitchen filled with the rich, intoxicating aroma of chocolate. It’s a smell that instantly transports me back to my grandmother’s cozy kitchen, where I first learned to appreciate the simple joys of baking. This Heavenly Flourless Chocolate Cake is a recipe that’s close to my heart, not just because of its decadent taste, but because it embodies the warmth and connection that food can bring. Every time I make it, I’m reminded of the Sunday afternoons spent with family, sharing stories and laughter over a rich, chocolatey delight. Today, I’m thrilled to share this recipe with you, hoping it brings as much joy to your home as it has to mine.

Why You’ll Absolutely Love This Recipe

  • It’s so easy, it feels like a little kitchen victory!
  • Rich and indulgent, yet simple enough for a weeknight.
  • Perfect for any occasion—whether it’s a cozy night in or a fancy dinner party.
  • Gluten-free, so everyone can enjoy a slice (or two)!

Simple Ingredients for a Delicious Treat

When it comes to this cake, the ingredients may be few, but they are mighty. Each one plays a crucial role in creating that perfect balance of rich chocolate flavor and a light, almost mousse-like texture. I love using high-quality dark chocolate—it’s the star of the show, after all. And don’t skimp on the butter; it adds a luxurious richness that’s simply irresistible. A touch of vanilla and a hint of salt bring everything together beautifully, enhancing the chocolate without overpowering it.

You’ll find the full ingredient list with exact measurements in the recipe card below!

Let’s Make Some Magic: Step-by-Step

Ready to dive in? I’m right here with you, every step of the way. First, preheat your oven and prepare your cake pan. Melting the chocolate and butter together is a therapeutic process—watch as they blend into a silky, glossy mixture. Next, you’ll whisk the eggs and sugar until they’re light and frothy. Gently fold the chocolate mixture into the eggs, being careful not to deflate them. Pour it all into the pan, and let the oven work its magic. Remember, this cake is at its best when it’s just set, with a slight wobble in the center. Trust me, patience here will be rewarded!

A Few of My Favorite Tips

Here’s a little secret: let the cake cool in the pan before transferring it to a plate. This helps it set beautifully and makes serving a breeze. Also, try using a serrated knife to cut the cake—this helps achieve clean slices without any crumbling. And if you’re feeling adventurous, sprinkle a touch of sea salt on top before serving. It’s a game-changer!

How I Like to Serve This

Personally, I love serving this cake with a dollop of freshly whipped cream and a handful of berries. The creaminess complements the rich chocolate, and the berries add a delightful freshness. It’s a simple yet elegant presentation that never fails to impress.

Storing & Reheating (If There’s Any Left!)

If you happen to have leftovers (a rare occurrence in my house), store the cake in an airtight container in the fridge. It keeps beautifully for up to a week, and the flavors only deepen over time. To reheat, a quick zap in the microwave for about 15 seconds is all it takes to bring back that freshly baked warmth.

For more delightful treats, check out my other dessert recipes: **Indulge in Sweetness with Air Fryer Churro Bites** and **Why You’ll Love Making Funnel Cake Donuts at Home**. And if you’re in the mood for something fruity, try **Indulge in These Delightful Caramel Apple Dessert Cups**. Happy baking!

Heavenly Flourless Chocolate Cake Recipe

Prep Time 15 minutes
Cook Time 25 minutes
Total Time 40 minutes
Servings 8 slices
Calories 350
This rich and decadent flourless chocolate cake is a chocolate lover's dream, perfect for special occasions.

Ingredients

Cake Ingredients

  • 200 g dark chocolate (preferably 70% cocoa)
  • 100 g butter (unsalted)
  • 150 g sugar
  • 3 large eggs
  • 50 g cocoa powder (unsweetened)

Instructions 

  • Melt dark chocolate and butter together in a double boiler.
  • Remove from heat and stir in sugar until dissolved.
  • Add eggs one at a time, mixing well after each addition.
  • Fold in cocoa powder until just combined.
  • Pour batter into a greased cake pan and bake at 180°C for 25 minutes.
  • Let cool before serving.

Notes

Serve with whipped cream or fresh berries for an extra touch.
Calories: 350kcal
Cost: $15.00
Course: Dessert
Cuisine: French
Keyword: chocolate

There’s something special about cheesecake that always brings a smile to my face. It takes me back to weekends spent in my grandmother’s kitchen, where the air was always filled with the comforting scent of fresh berries and the warmth of family laughter. Today, I want to share with you my recipe for Gluten-Free Blueberry Cheesecake Bars. This delightful dessert combines the creaminess of classic cheesecake with the vibrant burst of fresh blueberries, all on a buttery, gluten-free crust. It’s a dish that embodies both tradition and a touch of modern flair, perfect for creating your own cherished memories.

Why You’ll Absolutely Love This Recipe

  • It’s gluten-free, making it a guilt-free dessert that everyone can enjoy!
  • With its creamy texture and fresh fruit toppings, it’s a delicious treat that feels both indulgent and light.
  • The recipe is straightforward and easy, making it a perfect choice for both beginners and seasoned bakers.
  • These bars are versatile enough for a casual family dinner or a sophisticated gathering.

Simple Ingredients for a Delicious Treat

What I love about this recipe is how simple yet effective the ingredients are. The gluten-free all-purpose flour blend ensures a tender, crumbly crust, while the fresh blueberries add a natural sweetness and vibrant color. Using cream cheese gives that rich, creamy texture we all adore in a cheesecake. And don’t forget the lemon juice—it adds just the right amount of tang to balance the sweetness. It’s these little details that make each bite a delightful experience.

You’ll find the full ingredient list with exact measurements in the recipe card below!

Let’s Make Some Magic: Step-by-Step

Start by preheating your oven to 350°F (175°C). In a medium bowl, whisk together the gluten-free flour, sugar, and salt. Cut in the cold butter using a pastry blender or your fingertips until the mixture resembles coarse crumbs. Add the ice water, one tablespoon at a time, mixing until the dough just comes together. Press this dough into the bottom of a 9×13 inch baking pan and bake for 15-20 minutes, or until lightly golden. Let it cool slightly while you prepare the filling.

In a large bowl, using an electric mixer, beat the softened cream cheese until smooth and creamy. Gradually add the sugar and continue beating until well combined. Beat in the eggs one at a time, then stir in the vanilla extract and sour cream. Be careful not to overmix.

For the blueberry topping, combine the blueberries, sugar, lemon juice, and cornstarch in a medium saucepan. Cook over medium heat, stirring constantly, until the blueberries release their juices and the mixture thickens, about 5-7 minutes. Remove from heat and let cool slightly.

Pour the cheesecake filling over the pre-baked crust, spreading evenly. Spoon the blueberry topping evenly over the cheesecake filling. Bake for 30-35 minutes, or until the cheesecake is set around the edges but still slightly jiggly in the center. Turn off the oven and let the cheesecake cool completely in the oven with the door slightly ajar. Once cooled, refrigerate the cheesecake bars for at least 4 hours, or preferably overnight, before cutting into squares.

A Few of My Favorite Tips

Here’s a little secret: if you’re short on time, you can prepare the blueberry topping a day ahead. Also, using room temperature cream cheese will help you achieve that ultra-smooth filling. And remember, patience is key—let those bars chill completely for the perfect slice!

How I Like to Serve This

I love serving these bars chilled, cut into neat squares. They pair beautifully with a hot cup of coffee or a refreshing glass of iced tea. For a touch of elegance, garnish with a few fresh blueberries and a sprig of mint.

Storing & Reheating (If There’s Any Left!)

Store any leftover bars in an airtight container in the refrigerator for up to five days. For the best texture, serve them chilled. If you must reheat, a quick 10-second zap in the microwave will do the trick, but honestly, they’re best enjoyed cold!

If you’re in the mood for more sweet treats, why not check out some of my other favorites? Try these **Indulge in Sweetness with Air Fryer Churro Bites**, or perhaps **This 4-Ingredient Lemon Cream Cheese Dump Cake Will Wow You**. And for a fruity twist, you might enjoy these **Indulge in These Delightful Caramel Apple Dessert Cups**.

Gluten-Free Blueberry Cheesecake Bars – Fresh & Creamy

Prep Time 20 minutes
Cook Time 50 minutes
Total Time 1 hour 10 minutes
Servings 12 bars
Calories 300
Indulge in these creamy and fresh gluten-free blueberry cheesecake bars, perfect for any occasion!

Ingredients

Crust

  • 1.5 cups gluten-free all-purpose flour blend (with xanthan gum)
  • 0.5 cup granulated sugar
  • 0.5 teaspoon salt
  • 0.5 cup unsalted butter, cold and cubed
  • 2 tablespoons ice water

Filling

  • 24 oz cream cheese, softened
  • 1 cup granulated sugar
  • 2 large eggs
  • 1 teaspoon vanilla extract
  • 0.5 cup sour cream
  • 1.5 cups fresh blueberries
  • 2 tablespoons granulated sugar
  • 1 tablespoon lemon juice
  • 1 tablespoon cornstarch

Instructions 

  • Preheat oven to 350°F (175°C).
  • Mix flour, sugar, and salt; cut in butter until crumbly. Add ice water until dough forms.
  • Press dough into a 9×13 inch pan and bake for 15-20 minutes until golden.
  • Beat cream cheese and sugar, add eggs, vanilla, and sour cream. Mix blueberries with sugar, lemon juice, and cornstarch, then cook until thick.
  • Pour filling over crust, top with blueberries, and bake for 30-35 minutes until set.
  • Cool in oven, then refrigerate for at least 4 hours before cutting into bars.

Notes

For best results, refrigerate overnight before serving.
Calories: 300kcal
Cost: $15.00
Course: Dessert
Cuisine: American
Keyword: Blueberry

Lemon bars have always held a special place in my heart. I remember my grandmother’s kitchen, filled with the aroma of freshly squeezed lemons and the warmth of family gathered around. It was in those moments that I learned the power of simple ingredients combined to create something truly magical. Today, I’m excited to share a recipe that not only brings back those cherished memories but also meets the needs of those seeking gluten-free options. These Tasty Gluten Free Lemon Bars are a delightful blend of tangy and sweet, perfect for any occasion.

Why You’ll Absolutely Love This Recipe

  • It’s a simple pleasure, transforming a few ingredients into a delicious treat.
  • The balance of tart lemon and sweet sugar is a delightful dance for your taste buds.
  • A perfect example of Simple Gf Desserts that anyone can make at home.
  • Great for sharing moments of joy and comfort with family and friends.
  • These bars are a wonderful addition to your list of Best Gf Dessert Recipes.

Simple Ingredients for a Delicious Treat

Each ingredient in this recipe plays a crucial role, and I love how they come together so effortlessly. The gluten-free flour mix provides a tender base, while the lemon zest and juice bring a refreshing zing. The combination of butter and sugar creates a rich, satisfying flavor that pairs perfectly with the tartness of the lemon. And let’s not forget the eggs, adding structure and a lovely velvety texture. These ingredients make these bars a standout in the realm of Gluten Free Recipes Sweets.

You’ll find the full ingredient list with exact measurements in the recipe card below!

Let’s Make Some Magic: Step-by-Step

Let’s dive into the process. First, preheat your oven to 350°F (175°C) and line an 8×8 inch baking dish with parchment paper. This will ensure your lemon bars are easy to remove once baked. In a bowl, whisk together the gluten-free flour, powdered sugar, kosher salt, and lemon zest. Add the melted butter and mix until a crumbly dough forms. Press this mixture evenly into the bottom of your prepared baking dish and bake for 15-20 minutes until lightly golden.

While the crust is baking, prepare the lemon filling. In another bowl, whisk together the eggs and sugar until smooth. Add the baking powder and lemon juice, mixing until fully combined. Once the crust is ready, pour the filling over it and return to the oven for an additional 20-25 minutes, or until the filling is set. Allow to cool completely before dusting with powdered sugar and slicing into bars. Trust me, I’m right there with you every step of the way!

A Few of My Favorite Tips

Here’s a little secret: let your lemon bars chill in the fridge for a couple of hours before serving. This not only enhances the flavors but also makes them easier to cut. If you’re looking for another lemony delight, check out **This 4 Ingredient Lemon Cream Cheese Dump Cake Will Wow You**. Also, remember to use freshly squeezed lemon juice for the best flavor—trust me, it makes a world of difference!

How I Like to Serve This

I love serving these lemon bars with a sprinkle of powdered sugar and a side of fresh berries. They’re perfect for afternoon tea or as a light dessert after a hearty meal. Pair them with a cup of herbal tea or a refreshing lemonade for a truly delightful experience.

Storing & Reheating (If There’s Any Left!)

These lemon bars can be stored in an airtight container in the refrigerator for up to a week. If you want to enjoy them warm, simply let them sit at room temperature for a few minutes before serving. They also freeze well, making them a convenient treat to have on hand whenever the craving strikes.

Tasty Gluten Free Lemon Bars

Prep Time 15 minutes
Cook Time 25 minutes
Total Time 40 minutes
Servings 12 bars
Calories 150
Delight in these tangy and sweet gluten-free lemon bars, perfect for any occasion!

Ingredients

Base

  • 1.67 cups plain gluten-free flour mix without gum
  • 0.5 cups powdered sugar (extra for sprinkling)
  • 0.5 teaspoon kosher salt
  • 1 large lemon zest (from one large lemon)
  • 9 tablespoons butter, unsalted (melted and cooled)
  • 4 eggs eggs (room temperature)
  • 1 cup white sugar
  • 0.75 teaspoon baking powder
  • 0.67 cups lemon juice (freshly squeezed)

Instructions 

  • Preheat the oven to 350°F (175°C) and grease a baking dish.
  • In a bowl, mix the gluten-free flour, powdered sugar, salt, and baking powder.
  • In another bowl, whisk together melted butter, eggs, lemon juice, and zest.
  • Combine the wet and dry ingredients, then pour into the prepared dish.
  • Bake for 25 minutes or until set, then cool and sprinkle with powdered sugar.

Notes

For a stronger lemon flavor, add more lemon zest or juice.
Calories: 150kcal
Cost: $10.00
Course: Dessert
Cuisine: American
Keyword: lemon

Every time I bake this Sweet Sourdough Pumpkin Bread with Cinnamon and Pecans, I’m transported back to the cozy autumn mornings in Chicago, where the air is crisp and the leaves crunch underfoot. This bread is like a warm hug from the inside out, reminding me of family gatherings and the joy of sharing something delicious with the people I love. It’s not just a recipe; it’s a tradition, a moment of connection, a slice of happiness.

Why You’ll Absolutely Love This Recipe

  • It’s a delightful blend of sweet and savory, perfect for any time of the day.
  • Using a sourdough starter gives the bread a unique tangy flavor that pairs beautifully with the sweetness of pumpkin and pecans.
  • The aroma that fills your kitchen as it bakes is simply irresistible.
  • It’s so easy, it feels like a little kitchen victory!
  • This recipe is versatile enough to be enjoyed as a warm breakfast or a comforting dessert.

Simple Ingredients for a Delicious Treat

Let’s talk about the ingredients. Each one plays a crucial role in bringing this pumpkin bread to life. The sourdough starter is the heart of the recipe, providing that lovely tang. Roasted pumpkin adds a natural sweetness and moisture, while the maple syrup enhances its fall flavors. A pinch of turmeric gives it a beautiful color, and of course, cinnamon and pecans add warmth and crunch.

You’ll find the full ingredient list with exact measurements in the recipe card below!

Let’s Make Some Magic: Step-by-Step

Let’s dive into the process. Trust me, I’m right there with you every step of the way. Start your sourdough process early in the day to give your dough plenty of time to rise. In a large bowl, combine your starter, roasted pumpkin, flour, water, maple syrup, turmeric, and cinnamon. Knead until you’ve got a uniform dough ball—think of it as a little workout with a delicious reward at the end!

After letting the dough rest, sprinkle salt over it and knead again. The process of stretching and folding might seem repetitive, but it’s crucial for developing the perfect texture. When you add the filling of brown sugar, cinnamon, nutmeg, and pecans, it’s like adding a layer of joy. Remember, some pecans might peek through the dough, but that’s okay. It adds character!

Once your dough has rested and shaped into a perfect loaf, it’s time for an overnight stay in the fridge. This slow fermentation is what gives the bread its depth of flavor. The next day, bake it in a preheated Dutch oven, and soon your home will smell like a cozy bakery.

A Few of My Favorite Tips

Here are some tips I hold dear, like sharing a secret with a friend. Make sure your sourdough starter is active and bubbly before you begin. If you’re new to sourdough, don’t worry about perfection; each loaf has its personality! If the dough feels too sticky, a bench scraper is your best friend. And remember, patience is key; good things come to those who wait.

How I Like to Serve This

Personally, I love serving this bread slightly warm with a generous smear of butter or cream cheese. It pairs beautifully with a hot cup of coffee on a chilly morning or a scoop of vanilla ice cream for dessert. You might also enjoy it with a drizzle of honey, which complements the bread’s natural sweetness.

Storing & Reheating (If There’s Any Left!)

If you find yourself with leftovers, store the bread in an airtight container at room temperature for up to three days. For longer storage, freeze it in slices, so you can easily reheat them in a toaster or oven as needed. This way, you can enjoy a taste of autumn any time you like.

For more pumpkin-inspired delights, check out **Why My Family Can’t Get Enough of This Pumpkin Bread** or **Fall in Love with This Moist Pumpkin Bread Recipe**. Happy baking!

Sweet Sourdough Pumpkin Bread with Cinnamon and Pecans

Prep Time 3 hours
Cook Time 1 hour
Total Time 4 hours
Servings 8 slices
Calories 250
This delightful pumpkin bread combines the tang of sourdough with warm spices and crunchy pecans, perfect for any occasion.

Ingredients

Main Ingredients

  • 100 g sourdough starter (fed and bubbly)
  • 200 g roasted pumpkin
  • 500 g white bread flour
  • 180 g warm water
  • 30 g maple syrup
  • 10 g salt
  • 50 g roasted pumpkin (filling)
  • 100 g brown sugar (filling)
  • 15 g flour (filling)
  • 60 g crushed pecans (filling)

Instructions 

  • Combine starter, pumpkin, flour, water, maple syrup, salt, turmeric, and cinnamon in a bowl.
  • Knead until a uniform dough forms, then let it rest for 45 minutes.
  • Mix filling ingredients, then stretch and fold the dough, incorporating the filling.
  • Shape the dough, place in a floured proofing basket, and refrigerate overnight.
  • Bake in a preheated dutch oven at 450°F for 35 minutes covered, then 20-30 minutes uncovered.
  • Cool for at least 1 hour before slicing.

Notes

Monitor dough closely to avoid over proofing.
Calories: 250kcal
Cost: $10.00
Course: bread
Cuisine: American
Keyword: Pumpkin

As the leaves turn and the air takes on that crisp edge, I find myself drawn back to the warmth of my kitchen, where the scent of spices and the promise of comfort await. This Sourdough Pumpkin Bread recipe holds a special place in my heart, not just for its delightful flavor, but for the memories it evokes. Growing up, autumn meant gathering around the table with family, sharing stories and laughter over warm slices of homemade bread. This recipe is my way of bringing those cherished moments into your home, blending the tang of sourdough with the sweet, earthy notes of pumpkin—a marriage of flavors that feels like a hug on a chilly day.

Why You’ll Absolutely Love This Recipe

  • It’s so easy, it feels like a little kitchen victory!
  • The sourdough starter adds a unique tang, elevating the classic pumpkin bread.
  • This recipe uses a sourdough discard, so nothing goes to waste!
  • The aroma alone is worth the effort—your home will smell like a cozy, autumn haven.
  • Perfect for breakfast, dessert, or a comforting snack with a cup of tea.

Simple Ingredients for a Delicious Treat

Each ingredient in this Pumpkin Sourdough Bread plays a vital role, bringing its own magic to the mix. The melted butter gives it a rich, moist texture, while the dark brown sugar deepens the sweetness. I love using pumpkin puree for its natural sweetness and velvety smoothness, which pairs beautifully with the tangy sourdough starter. The pumpkin spice blend—a mix of cinnamon, nutmeg, and cloves—adds warmth and depth, making each bite a celebration of fall.

You’ll find the full ingredient list with exact measurements in the recipe card below!

Let’s Make Some Magic: Step-by-Step

Preheat your oven to 350 degrees and let’s get started on this culinary journey. Lightly grease a 9×5 loaf pan with butter or line it with parchment paper. In your stand mixer or a large bowl, combine the melted butter, dark brown sugar, and regular sugar. Mix for five minutes until light and fluffy. Next, combine the dry ingredients—flour, baking soda, baking powder, pumpkin spice, and salt—in a separate bowl.

Add the eggs, vanilla, pumpkin puree, and sourdough starter to the sugar and butter mixture. Mix until everything is well combined. Slowly fold in the dry ingredients, a third at a time, to avoid over-mixing. Pour the batter into your prepared pan and bake for 50-60 minutes. Start checking at the 50-minute mark by inserting a toothpick into the center; if it comes out clean, your bread is ready. Allow it to cool in the pan for an hour to set.

A Few of My Favorite Tips

Here’s a little secret from my kitchen to yours: if you want an extra punch of flavor, try adding a handful of chopped walnuts or chocolate chips to the batter. They add a delightful crunch and richness. Also, don’t rush the cooling process. Letting the bread cool in the pan allows the flavors to meld and the texture to firm up beautifully.

How I Like to Serve This

Personally, I enjoy a slice of this Sweet Pumpkin Sourdough Bread slightly toasted, with a thin layer of salted butter or cream cheese. It’s also divine with a drizzle of honey or maple syrup. Pair it with a steaming mug of coffee or tea for a perfect fall treat.

Storing & Reheating (If There’s Any Left!)

To store, wrap the bread tightly in plastic wrap or store it in an airtight container. It keeps well at room temperature for up to three days. For longer storage, freeze the bread in slices and reheat them in the toaster or oven. This way, you can enjoy a slice of autumn any time!

For more autumnal delights, check out Fall in Love with This Moist Pumpkin Bread Recipe or discover why This Pumpkin Bread Will Become Your New Fall Favorite. And if you have a sweet tooth, don’t miss out on Why You’ll Love Making Funnel Cake Donuts at Home.

Sourdough Pumpkin Bread

Prep Time 15 minutes
Cook Time 1 hour
Total Time 1 hour 15 minutes
Servings 8 slices
Calories 250
This moist and flavorful sourdough pumpkin bread is perfect for fall, combining the tang of sourdough with the sweetness of pumpkin.

Ingredients

Baking Essentials

  • 1/2 cup melted butter
  • 1 cup dark brown sugar
  • 1/4 cup sugar
  • 1 1/2 cups pumpkin puree
  • 2 large eggs
  • 1/2 cup sourdough starter discard
  • 1 teaspoon vanilla
  • 2 cups all-purpose flour
  • 1 teaspoon baking soda
  • 2 teaspoons baking powder
  • 1 teaspoon salt
  • 2 teaspoons pumpkin spice

Instructions 

  • Preheat oven to 350°F (175°C) and grease a 9×5 loaf pan.
  • Mix melted butter, brown sugar, and sugar until fluffy.
  • Combine dry ingredients in a bowl.
  • Add eggs, vanilla, pumpkin puree, and sourdough starter to the butter mixture and mix well.
  • Fold in dry ingredients until just combined.
  • Pour into the pan and bake for 50-60 minutes.

Notes

Let the bread cool in the pan for one hour before slicing.
Calories: 250kcal
Cost: $10.00
Course: Dessert
Cuisine: American
Keyword: Pumpkin