
Author

Mike

Browsing

Imagine waking up to the enticing aroma of pancakes wafting through your kitchen, knowing that they are not only delicious but also incredibly easy to make. Welcome to the world of 2-Ingredient Banana Pancakes, where simplicity meets flavor in a delightful breakfast experience. In just a few minutes, you can whip up a batch of banana egg pancakes that are perfect for any occasion, whether it’s a busy weekday morning or a leisurely weekend brunch.

In this comprehensive guide, you’ll discover everything you need to know about making these pancakes, from the benefits of the ingredients to various ways to customize your recipe. Let’s dive in!

Why You’ll Love This Recipe

These pancakes are not just easy; they offer a range of benefits that make them a must-try:

  • Quick and easy: With just two main ingredients, this recipe takes less than 10 minutes from start to finish.
  • Healthy option: Packed with protein and fiber, these pancakes are naturally sweetened without added sugars, making them a wholesome choice.
  • Customizable flavors: Add optional ingredients like cinnamon or blueberries to create your unique twist on the classic recipe.
  • Kid-friendly: Even picky eaters love these pancakes, making them perfect for family breakfasts.
  • Gluten-free and dairy-free: This recipe is suitable for various dietary needs, allowing everyone to enjoy a delicious meal.

Ingredient Breakdown

Let’s take a closer look at the ingredients that make these pancakes so special:

  • 2 eggs: Provides structure and protein, making the pancakes fluffy.
  • 1 large banana: Acts as a natural sweetener and adds moisture to the batter.
  • Optional: You can also incorporate 1/2 tsp of cinnamon for added warmth and flavor or mix in 2-4 Tbsp of blueberries for a fruity punch.

For those with dietary restrictions or preferences, here are a few substitutions you might consider:

  • Egg substitute: Use flax eggs or applesauce for a vegan version.
  • Banana alternative: Unsweetened applesauce can be used if you’re out of bananas.

How to Make Banana Egg Pancakes

Follow these simple steps to create your delicious pancakes:

  1. Whisk together the eggs in a medium bowl.
  2. Break the banana into chunks and mash or mix it into the egg mixture until well blended.
  3. Optional: Add cinnamon or blueberries and gently fold them into the batter.
  4. Cook the pancakes over medium heat until the edges begin to brown; flip and cook for an additional 30-60 seconds until fully cooked.
  5. Remove from the pan and serve with your favorite toppings.

Pro Tips for Perfect Pancakes
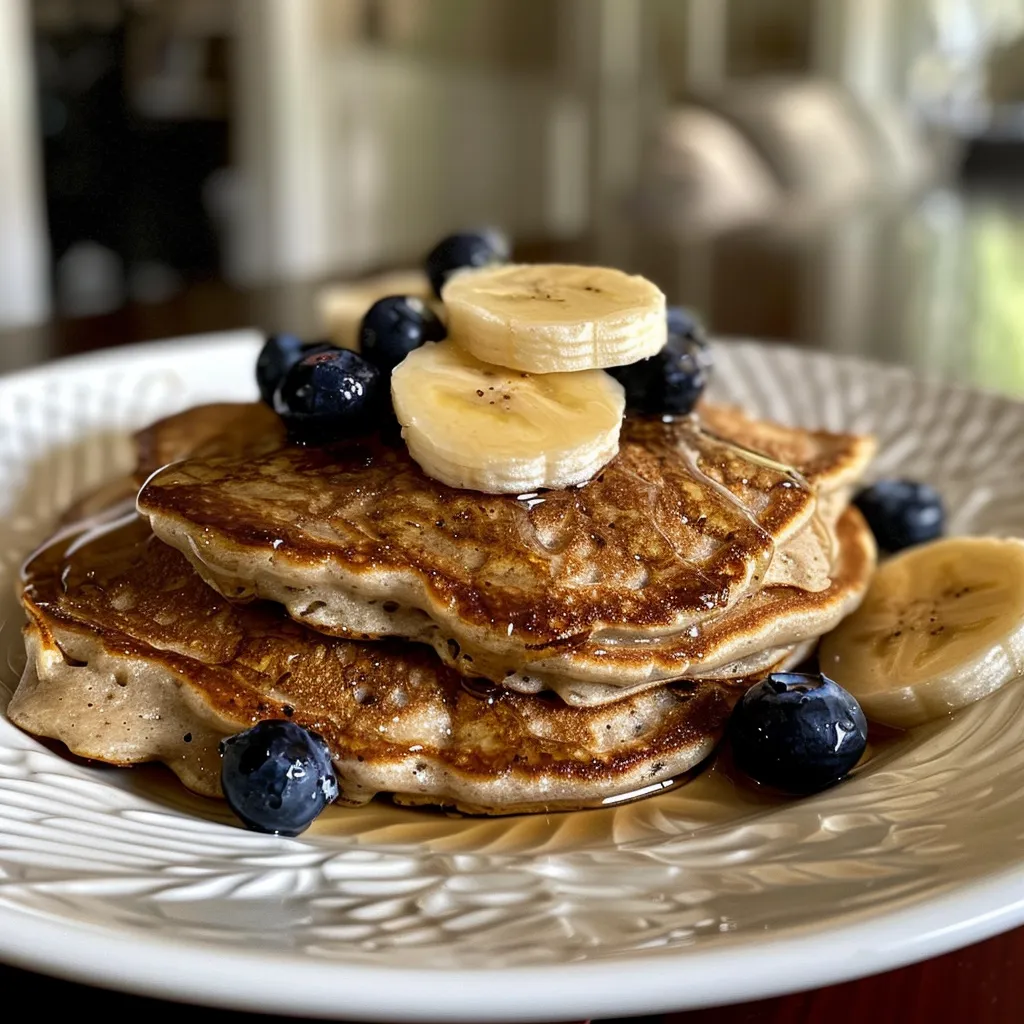
Delicious stack of banana pancakes with visible blueberries and cinnamon dusting.

To ensure your pancakes turn out perfectly every time, consider these expert tips:

  • Don’t overmix: Mix just until combined; a few lumps are okay. Overmixing can lead to dense pancakes.
  • Use a non-stick skillet: This prevents sticking and ensures even cooking.
  • Cook on medium heat: Cooking too fast can burn the pancakes before they are done inside.
  • Let the batter rest: Allowing it to sit for a few minutes can enhance the texture.
  • Make them small: Smaller pancakes are easier to flip and cook more evenly.

Common Mistakes and Troubleshooting

Here are some common pitfalls and how to avoid them:

  • Pancakes fall apart: This usually happens if the batter is too thin or not mixed enough. Ensure you mash the banana well and whisk the eggs thoroughly.
  • Pancakes burn: If they’re browning too quickly, lower the heat. Medium heat is key for even cooking.
  • Pancakes are too dense: Overmixing can create a tough texture. Mix gently!

Exciting Variations

Don’t hesitate to get creative with your pancakes! Here are a few fun variations to try:

  • Chocolate Chip Banana Pancakes: Add mini chocolate chips to the batter for a decadent twist.
  • Coconut Banana Pancakes: Mix in shredded coconut for a tropical flavor experience.
  • Peanut Butter Banana Pancakes: Swirl in peanut butter for a rich, nutty taste.
  • Spiced Banana Pancakes: Add a pinch of nutmeg or pumpkin spice for a cozy flavor profile.

Storage and Make-Ahead Instructions

These pancakes can be made ahead of time and stored for later:

  • Refrigerate: Store cooked pancakes in an airtight container in the fridge for up to 3 days.
  • Freeze: Place pancakes in a single layer on a baking sheet, freeze until solid, then transfer to a freezer bag. They can last for up to 2 months.
  • Reheat: Warm them in the microwave or toaster until heated through.

Frequently Asked Questions

Here are some common questions about banana pancakes:

  • Can I use ripe bananas? Yes! Ripe bananas are sweeter and will enhance the flavor of your pancakes.
  • Can I add protein powder? Absolutely! Mix in a scoop of protein powder for an extra boost.
  • Are these pancakes suitable for meal prep? Yes! They freeze well and can be reheated easily.
  • What toppings work best? Fresh fruits, yogurt, or a drizzle of honey or maple syrup all make great toppings.
  • Can I make these pancakes vegan? Yes! Substitute the eggs with flax eggs or applesauce.
  • How do I know when they’re done? Look for edges that are set and a golden-brown color when flipping.
  • Can I double the recipe? Yes! Just keep the same ingredient ratios.
  • What if I don’t have a non-stick pan? Use a bit of oil or butter to prevent sticking.

Nutrition Tips and Dietary Adaptations

This recipe is already a nutritious choice, but here are some tips for enhancing its health benefits:

  • Boost fiber: Consider adding ground flaxseed or chia seeds to the batter.
  • Increase protein: Add a scoop of your favorite protein powder to the mix.
  • Low-carb option: Use almond flour in place of the banana for a keto-friendly pancake.

Equipment Recommendations

To make your pancake-making experience seamless, here’s what you’ll need:

  • Non-stick skillet: Essential for easy cooking and flipping.
  • Mixing bowls: A medium bowl for mixing the batter and a small bowl for optional ingredients.
  • Whisk: For combining the eggs and banana smoothly.
  • Spatula: A good spatula will help you flip without breaking the pancakes.

Serving Suggestions

Serve your banana egg pancakes with a variety of toppings for a delightful breakfast:

  • Fresh fruit: Slices of strawberries, blueberries, or bananas on top.
  • Nut butter: Spread almond or peanut butter for added creaminess.
  • Yogurt: A dollop of Greek yogurt adds a tangy contrast.
  • Maple syrup: Drizzle on top for a classic touch.

Now that you have all the tools, tips, and tricks to make perfect banana pancakes, it’s time to get cooking! Remember, making these pancakes is not just about the food; it’s about creating moments with loved ones, enjoying the process, and celebrating the joy of cooking.

Happy cooking, and enjoy your delicious banana egg pancakes!

2-Ingredient Banana Pancakes

Prep Time 5 minutes
Cook Time 5 minutes
Total Time 10 minutes
Servings 2 pancakes
Calories 210
Enjoy quick and healthy banana pancakes made with just two main ingredients, perfect for a nutritious breakfast or snack.

Ingredients

Main ingredients

  • 2 pieces eggs
  • 1 large banana banana

Optional toppings

  • 1/2 tsp cinnamon (optional)
  • 2-4 Tbsp blueberries (optional)

Instructions 

  • Whisk eggs in a bowl. Mash banana into eggs until blended.
  • Optional: add cinnamon or blueberries for flavor.
  • Cook over medium heat until edges brown, then flip and cook 30-60 seconds.
  • Remove and serve hot.

Notes

For extra flavor, top with fresh fruit or a drizzle of honey.
Calories: 210kcal
Cost: $5
Course: Breakfast
Cuisine: American
Keyword: Banana

Unleashing the Flavors: Your Guide to Homemade Rosemary Garlic Focaccia

Welcome to the ultimate guide on crafting the perfect Homemade Rosemary Garlic Focaccia! This delightful bread is not only a staple in Italian cuisine but also a canvas for your culinary creativity. Whether you’re a seasoned baker or just starting your journey in the kitchen, this article will walk you through every step to ensure that your focaccia turns out flavorful and aromatic every time. With over two decades of culinary experience, I’m here to share my insights and tips for making this classic bread a standout at your table.

Why You’ll Love This Recipe

This Rosemary Garlic Focaccia embodies the essence of homemade bread. Here are just a few reasons why you’ll fall in love with this recipe:

  • Easy to Make: With simple ingredients and straightforward steps, even novice bakers can create this beautiful bread.
  • Versatile: Perfect as an appetizer, a side for soups, or a base for sandwiches, this focaccia is adaptable for any meal.
  • Flavor Packed: Infused with garlic and fresh rosemary, each bite is bursting with rich, aromatic flavors that elevate your dining experience.
  • Textural Delight: The golden crust and tender interior provide a satisfying contrast that bread lovers crave.
  • Customizable: Feel free to experiment with toppings like olives, sun-dried tomatoes, or cheeses to make it your own!

Ingredients You’ll Need

Before you start baking, let’s look at the ingredients. Here’s what you’ll need to create this delicious focaccia:

  • 4 cups (480 g) all-purpose flour (or bread flour for a chewier texture): The backbone of your bread. Choose quality flour for the best results.
  • 1 ½ cups (360 ml) warm water (about 105°F / 40°C): Essential for activating the yeast.
  • 2 ¼ teaspoons (7 g) instant yeast (equivalent to 1 packet): The key ingredient that makes the dough rise.
  • 2 teaspoons sugar: This helps feed the yeast, contributing to a lovely rise and a hint of sweetness.
  • 2 teaspoons kosher salt: Enhances the flavor of the bread.
  • ¼ cup (60 ml) extra-virgin olive oil (plus more for greasing and topping): Adds richness and moisture to the dough.
  • 3–4 cloves garlic, thinly sliced or roasted whole: Infuses the bread with a savory aroma.
  • 2 tablespoons fresh rosemary, chopped (plus sprigs for garnish): Provides that signature herbal flavor.
  • 2–3 tablespoons extra-virgin olive oil: For drizzling over the dough before baking.
  • 1 teaspoon flaky sea salt (Maldon or similar): For finishing the focaccia with a touch of briny goodness.

Step-by-Step Instructions

Detailed image of homemade focaccia featuring rosemary sprigs and garlic pieces.

Now that you have all your ingredients, let’s dive into the baking process!

  1. Activate the Yeast: In a large mixing bowl, combine the warm water, sugar, and yeast. Let this mixture sit for 5–10 minutes until it becomes frothy, indicating that the yeast is active.
  2. Prepare the Dough: Add the flour, salt, and olive oil to the yeast mixture. Stir until a shaggy dough forms, then transfer to a lightly floured surface and knead for 8–10 minutes until smooth and elastic.
  3. First Rise: Lightly oil a large bowl, place the dough inside, and cover it with plastic wrap or a damp towel. Let it rise in a warm spot for 1–2 hours, or until doubled in size.
  4. Prepare the Baking Pan: Generously oil a 9×13-inch baking pan or a large cast-iron skillet. Punch down the risen dough and stretch it to fit the pan.
  5. Second Rise: Cover the dough and let it rest for another 30–40 minutes until puffy. Preheat your oven to 425°F (220°C).
  6. Dimpling and Topping: With oiled fingers, press deep dimples all over the surface of the dough. Drizzle with olive oil, scatter rosemary and garlic evenly, and sprinkle with flaky sea salt.
  7. Bake: Place in the preheated oven and bake for 20–25 minutes, or until golden brown on top and crisp at the edges. Remove from the oven and allow it to cool slightly before slicing.

Pro Tips for Perfect Focaccia

Here are some expert insights to elevate your focaccia game:

  • Use Fresh Ingredients: Ensure your yeast is fresh for optimal rising. Check the expiration date on the package.
  • Don’t Skip the Dimples: These dimples not only create a beautiful texture but also hold the olive oil and toppings, enhancing flavor.
  • Experiment with Herbs: Feel free to swap rosemary for other herbs like thyme or oregano for a different flavor profile.
  • Cool Before Slicing: Allow the focaccia to cool slightly before slicing to maintain its structure and texture.
  • Use High-Quality Olive Oil: A good quality extra-virgin olive oil makes a significant difference in flavor.
  • Try Different Toppings: Get creative with toppings. Consider adding Parmesan cheese, olives, or caramelized onions for added depth.
  • Adjust Baking Time: Ovens can vary; keep an eye on your focaccia to prevent over-baking.
  • Store Properly: To maintain freshness, store leftover focaccia in an airtight container at room temperature.

Common Mistakes and Troubleshooting

Even the best cooks can run into challenges. Here are some common mistakes and how to avoid them:

  • Dense Bread: If your focaccia doesn’t rise well, it could be due to inactive yeast. Always check the yeast’s freshness.
  • Overworking the Dough: Knead just enough to bring the dough together; over-kneading can lead to a tough texture.
  • Poor Flavor: Ensure you’re using enough salt and quality olive oil to enhance the flavor of the bread.
  • Burnt Edges: If the edges brown too quickly, consider lowering the oven temperature slightly.
  • Sticky Dough: If your dough is too sticky, dust with a little more flour while kneading, but avoid adding too much.

Variations to Try

Looking to mix things up? Here are some delicious variations you can try:

  • Olive Focaccia: Add chopped olives to the dough or as a topping before baking.
  • Cheesy Focaccia: Sprinkle shredded cheese (like mozzarella or cheddar) on top before baking for a gooey finish.
  • Sun-Dried Tomato and Basil: Incorporate chopped sun-dried tomatoes and fresh basil into the dough for a Mediterranean twist.
  • Sweet Focaccia: Drizzle with honey and top with figs or peaches for a sweet version perfect for brunch.

Storage and Make-Ahead Instructions

Planning ahead? Here’s how to store and prepare your focaccia:

  • Room Temperature: Store in an airtight container for up to 3 days. Reheat in the oven for a few minutes before serving.
  • Freezing: Slice and freeze individual pieces wrapped in plastic wrap and placed in a freezer bag for up to 3 months. Reheat in the oven directly from frozen.
  • Make-Ahead: You can prepare the dough in advance. Let it rise, then punch down and refrigerate overnight. Bring to room temperature before shaping and baking.

Frequently Asked Questions

Here are some common questions about making focaccia:

  • Can I use whole wheat flour? Yes, you can substitute part or all of the all-purpose flour with whole wheat flour for a nuttier flavor.
  • What can I substitute for rosemary? Thyme, oregano, or even sage could be great alternatives, depending on your preference.
  • Is it necessary to use olive oil? While olive oil is traditional, you can use other oils, but they may alter the flavor.
  • How do I know when it’s done? The focaccia should be golden brown on top and have a hollow sound when tapped on the bottom.
  • Can I add toppings? Absolutely! Just be mindful not to overload it, as this can affect the dough’s rise.
  • What’s the best way to reheat focaccia? Preheat your oven to 350°F (175°C) and warm for about 10 minutes for the best texture.
  • Can I make it gluten-free? Yes, use a gluten-free flour blend designed for bread baking.
  • How thick should focaccia be? Aim for about 1-inch thick for a perfect rise and texture.

Nutritional Tips and Dietary Adaptations

Focaccia can be adjusted to fit various dietary needs:

  • Vegan Option: This recipe is already vegan-friendly; ensure your toppings comply with your dietary preferences.
  • Low-Sodium Version: Reduce or omit salt, but consider adding herbs for flavor enhancement.
  • Whole Grain Alternative: Swap out all-purpose flour for whole wheat or spelt flour for additional fiber.

Equipment Recommendations

To achieve the best results, consider using the following equipment:

  • Mixing Bowls: A large bowl for mixing the dough.
  • Baking Pan: A 9×13-inch baking pan or cast-iron skillet for optimal browning.
  • Kitchen Scale: For precise measurements, especially for flour.
  • Instant Read Thermometer: To check the temperature of your water for yeast activation.

Serving Suggestions

Now that your focaccia is ready, here are some delightful ways to serve it:

  • As an Appetizer: Serve warm with olive oil and balsamic vinegar for dipping.
  • With Soups: Pair with hearty soups like minestrone or tomato basil.
  • Sandwich Base: Use slices to create delicious sandwiches or paninis.
  • With Cheese: A perfect companion to a cheese platter, complementing various cheeses.

In conclusion, making your own Homemade Rosemary Garlic Focaccia is not just a baking project; it’s an experience filled with flavor and joy. Whether you’re enjoying it fresh out of the oven or using it to enhance a meal, this focaccia will surely impress. So gather your ingredients, unleash your inner baker, and enjoy the wonderful world of homemade bread!

Homemade Rosemary Garlic Focaccia

Prep Time 20 minutes
Cook Time 25 minutes
Total Time 45 minutes
Servings 8 slices
Calories 250
Enjoy this flavorful homemade focaccia infused with garlic and rosemary, perfect as a snack or side dish.

Ingredients

Dough

  • 4 cups all-purpose flour (or bread flour for chewier texture)
  • 1.5 cups warm water (about 105°F / 40°C)
  • 2.25 teaspoons instant yeast (1 packet)
  • 2 teaspoons sugar (to feed the yeast)
  • 2 teaspoons kosher salt
  • 0.25 cup extra-virgin olive oil (plus more for greasing and topping)
  • 3-4 cloves garlic, thinly sliced or roasted whole
  • 2 tablespoons fresh rosemary, chopped (plus sprigs for garnish)
  • 2-3 tablespoons extra-virgin olive oil
  • 1 teaspoon flaky sea salt (Maldon or similar)

Instructions 

  • Combine warm water, sugar, and yeast; let sit 5–10 minutes until frothy.
  • Add flour, salt, and olive oil; knead until smooth. Let rise 1–2 hours until doubled.
  • Transfer dough to oiled pan, stretch to fit, and let rest 30–40 minutes. Preheat oven to 425°F (220°C).
  • Deeply dimple the dough with oiled fingers, drizzle with olive oil, add garlic, rosemary, and sea salt.
  • Bake for 20–25 minutes until golden and crisp. Cool slightly before slicing.

Notes

For extra flavor, roast garlic before adding.
Calories: 250kcal
Cost: $15
Course: Side Dish
Cuisine: Italian
Keyword: Focaccia