Author

Mike

Browsing

Discover the Joy of Crafting Sticky Buns

Welcome to the delightful world of sticky buns! If you’re looking for a recipe that transforms simple ingredients into a sweet, gooey masterpiece, you’ve come to the right place. Sticky buns are the perfect blend of rich dough, sweet caramel, and crunchy pecans, making them a favorite for breakfast or dessert. In this comprehensive guide, we’ll take you through every step of the process, ensuring that you create sticky buns that will impress your family and friends. Plus, we’ll share expert tips, variations, and answers to your burning questions!

Why You’ll Love This Recipe

  • Easy to Follow: This recipe breaks down the steps clearly, making it accessible for both beginner and seasoned bakers.
  • Irresistible Flavor: The combination of cinnamon, brown sugar, and maple syrup creates a flavor explosion that’s hard to resist.
  • Customizable: You can easily adapt the recipe to include your favorite nuts or dried fruits, making it versatile for any occasion.
  • Perfect for Meal Prep: These sticky buns can be made ahead of time and stored, so you can enjoy them fresh whenever cravings hit.
  • Great for Sharing: Whether for a brunch gathering or a family breakfast, sticky buns are a crowd-pleaser that brings people together.

Ingredients You’ll Need

To make the perfect sticky buns, gather the following ingredients:

  • 3/4 cup warm whole milk (115-125°F) – Non-dairy milk or 2% works too!
  • 1 Tablespoon + 1 teaspoon Instant Yeast – This will help the dough rise beautifully.
  • 1/3 cup granulated sugar – Sweetens the dough and filling.
  • 2 teaspoons salt – Enhances flavor.
  • 5 large eggs (room temperature) – Adds richness and moisture.
  • 1/2 cup (1 stick) very soft unsalted butter – For a tender dough.
  • 3 cups bread flour – Gives the buns their structure.
  • 2 cups all-purpose flour – For a light and fluffy texture.
  • 2/3 cup light brown sugar (packed) – Sweet caramel topping.
  • 2/3 cup heavy cream – Adds richness to the caramel.
  • 1/3 cup pure maple syrup – For a delightful flavor twist.
  • 1 1/2 cups chopped pecans – Crunchy topping.
  • 1/2 teaspoon salt – To balance sweetness.
  • 3 teaspoons ground cinnamon – The spice that brings everything together.
  • 1/4 teaspoon ground nutmeg – Adds a warm, comforting flavor.

How to Make Sticky Buns: Step-by-Step Instructions
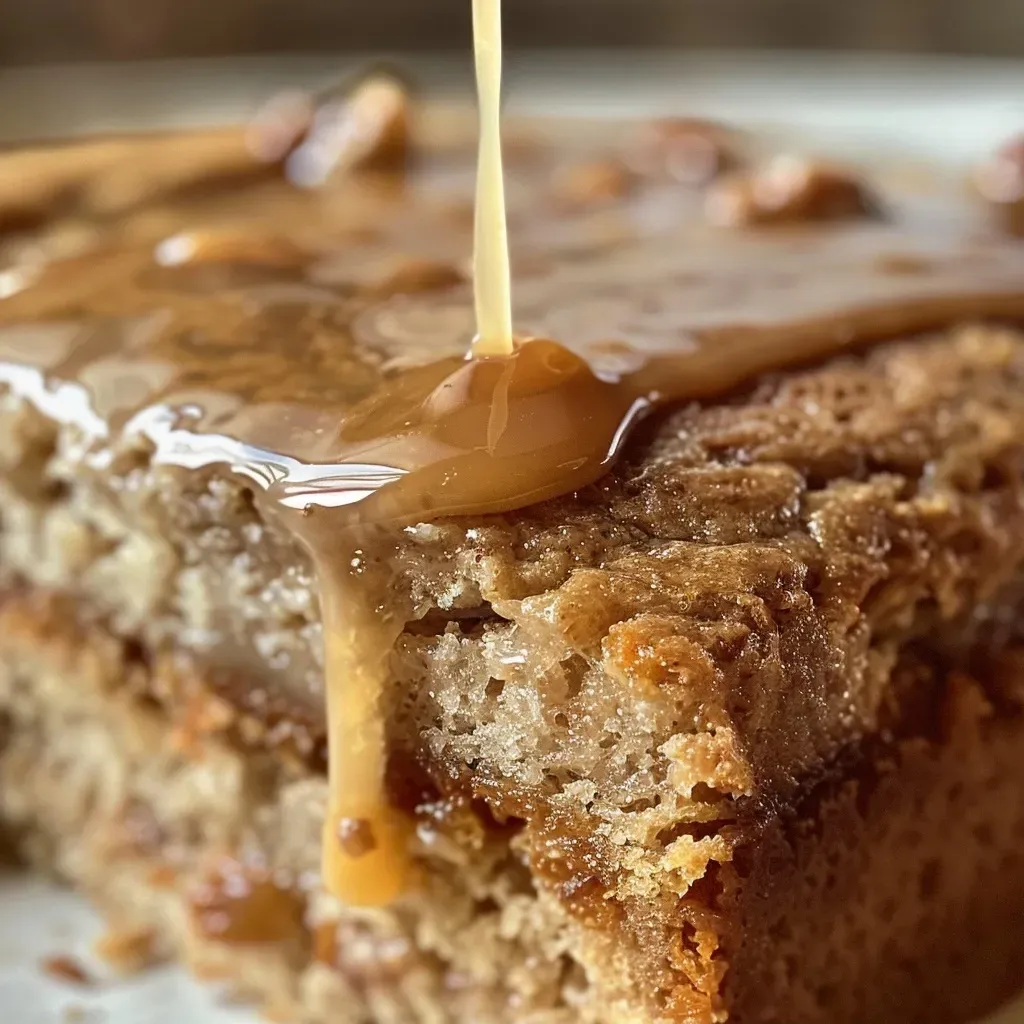
Delicious sticky buns showcasing a golden-brown crust and gooey filling.

Ready to dive into the sticky bun-making process? Let’s get started!


Silicone Baking Cups Set

★ Recommended Kitchen Tool

Silicone Baking Cups Set

Make this recipe even easier with a quality Silicone Baking Cups Set — a must-have kitchen staple!


🛒 Shop This Tool →

As an Amazon Associate, we earn from qualifying purchases.
  1. Activate the Yeast: In a small bowl, combine the warm milk and instant yeast. Let it sit for about 5 minutes until it becomes frothy.
  2. Mix Dry Ingredients: In a large mixing bowl, whisk together the bread flour, all-purpose flour, sugar, and salt.
  3. Combine Wet Ingredients: In another bowl, whisk the eggs and melted butter. Add the frothy yeast mixture and stir until well combined.
  4. Form the Dough: Gradually add the wet mixture to the dry ingredients, mixing until a soft dough forms. Knead on a floured surface for about 8-10 minutes until smooth and elastic.
  5. Let It Rise: Place the dough in a greased bowl, cover it with a damp cloth, and let it rise in a warm spot for about 1-2 hours, or until doubled in size.
  6. Prepare the Filling: Mix together the brown sugar, cinnamon, nutmeg, and chopped pecans in a bowl.
  7. Roll Out the Dough: Once the dough has risen, punch it down and roll it out into a rectangle about 1/4 inch thick.
  8. Add the Filling: Spread the soft butter over the dough, then sprinkle the cinnamon-sugar mixture evenly across the surface.
  9. Roll and Cut: Roll the dough tightly from the long side, then slice it into 12 equal pieces.
  10. Prepare the Caramel: In a saucepan, combine the heavy cream, maple syrup, and brown sugar. Cook over medium heat until the sugar dissolves and the mixture is smooth.
  11. Arrange in a Pan: Pour the caramel mixture into a greased baking dish and arrange the cut sticky buns on top. Let them rise again for about 30 minutes.
  12. Bake: Preheat your oven to 350°F (175°C). Bake for 25-30 minutes until golden brown.
  13. Cool and Serve: Let the sticky buns cool for a few minutes before inverting onto a serving platter. Enjoy warm!

Expert Tips for Perfect Sticky Buns

  • Use Fresh Yeast: Always check the expiration date on your yeast to ensure it’s active for the best rise.
  • Room Temperature Ingredients: Make sure your eggs and butter are at room temperature for better mixing.
  • Don’t Rush the Rising: Allow the dough to rise until it’s doubled in size for maximum fluffiness.
  • Customize Your Nuts: Feel free to swap pecans for walnuts or almonds based on your preference.
  • Experiment with Spices: Try adding cardamom or ginger for a spicier twist!
  • Store Properly: Keep any leftovers in an airtight container to maintain freshness.
  • Reheat for Softness: Warm leftover sticky buns in the microwave for a few seconds before serving.
  • Check for Doneness: The sticky buns should be golden brown on top; use a toothpick to check if they are fully baked.
  • Serve Immediately: These buns are best enjoyed fresh out of the oven while they’re still gooey!

Common Mistakes and Troubleshooting

  • Sticky Dough: If your dough is too sticky, add a bit more flour until it’s manageable.
  • Flat Buns: If they don’t rise enough, your yeast might be expired. Always test for frothiness.
  • Overbaking: Keep an eye on your buns; overbaking can make them dry. Start checking a few minutes before the suggested time.
  • Uneven Caramel: Make sure to evenly distribute the caramel in the pan before placing the buns.

Variations to Try

  • Chocolate Chip Sticky Buns: Add chocolate chips to the filling for a decadent twist.
  • Apple Cinnamon Sticky Buns: Incorporate diced apples into the filling for a fruity flavor.
  • Maple Pecan Sticky Buns: Swap out the sugar for maple sugar for a more robust maple flavor.
  • Vegan Sticky Buns: Use plant-based butter and non-dairy milk for a vegan-friendly option.

Storage and Make-Ahead Instructions

Sticky buns can be made ahead of time for convenience. Here’s how:

  • Make Ahead: Prepare the dough and filling, then refrigerate overnight. Bake in the morning!
  • Storing: Keep leftover sticky buns in an airtight container at room temperature for up to 3 days.
  • Freezing: Freeze unbaked buns in a single layer, then transfer to a freezer bag. Bake from frozen, adding a few extra minutes to the baking time.

Frequently Asked Questions

  • Can I use active dry yeast instead of instant yeast? Yes, but you’ll need to activate it in warm water first.
  • How do I know when my sticky buns are done? They should be golden brown and spring back when lightly touched.
  • What’s the best way to reheat sticky buns? Microwave for a few seconds or warm in the oven at a low temperature.
  • Can I make these sticky buns gluten-free? Yes, substitute with a gluten-free flour blend.
  • Why are my sticky buns dense? This might occur if the dough didn’t rise enough; ensure your yeast is fresh.
  • Can I add nuts to the dough? Absolutely! Fold in chopped nuts for added texture.
  • What’s the difference between sticky buns and cinnamon rolls? Sticky buns are baked in a caramel sauce while cinnamon rolls are usually topped with icing.
  • How long do sticky buns last? They’re best consumed within 3 days, but can be frozen for longer storage.

Nutrition Tips and Dietary Adaptations

For those watching their nutrition, here are some tips:

  • Use Whole Wheat Flour: Swap half of the all-purpose flour for whole wheat flour for added fiber.
  • Reduce Sugar: Cut down on the sugar in the dough and filling without compromising taste.
  • Try Low-Fat Options: Use low-fat milk and butter substitutes to reduce calories.

Essential Equipment for Making Sticky Buns

Ensure you have the right tools to make your baking experience seamless:

  • Mixing Bowls: A set of large mixing bowls for combining ingredients.
  • Measuring Cups and Spoons: Accurate measurements are key to perfect baking.
  • Rolling Pin: For rolling out the dough evenly.
  • Baking Dish: A deep baking dish to hold the sticky buns as they bake.
  • Whisk: For mixing dry ingredients and wet mixtures effectively.

Serving Suggestions

Sticky buns are delicious on their own, but here are some serving ideas:

  • With Fresh Fruit: Serve alongside fresh berries or slices of banana for a well-rounded meal.
  • Drizzled with Extra Caramel: A touch of warm caramel sauce on top elevates the experience.
  • Paired with Coffee: Enjoy your sticky buns with a hot cup of coffee or tea for a perfect breakfast.

In conclusion, making sticky buns is a rewarding experience that brings warmth and joy to any table. With this detailed guide, you’re well-equipped to create your very own batch of delicious sticky buns. Whether you stick to the classic recipe or explore the variations, remember that the best part of baking is sharing your creations with loved ones. Happy baking!

Sticky Buns

Prep Time 30 minutes
Cook Time 20 minutes
Total Time 50 minutes
Servings 8 pieces
Calories 350
Delight in these sweet, gooey cinnamon rolls topped with pecans and drizzled with maple syrup for a perfect breakfast treat.

Ingredients

Dough

  • 0.19 cup warm whole milk (115-125°F, non-dairy or 2% milk works)
  • 1 Tbsp Instant Yeast
  • 0.33 cup granulated sugar
  • 2 tsp salt
  • 5 large eggs (room temperature)
  • 0.5 cup unsalted butter (very soft)
  • 3 cups bread flour

Filling & Topping

  • 0.5 cup unsalted butter (very soft)
  • 0.67 cup light brown sugar (packed)
  • 0.67 cup heavy cream (whole milk optional)
  • 0.33 cup pure maple syrup
  • 1.5 cups chopped pecans
  • 0.5 tsp salt
  • 0.5 cup unsalted butter (very soft)
  • 0.75 cup light brown sugar (packed)
  • 3 tsp ground cinnamon
  • 0.25 tsp ground nutmeg

Instructions 

  • Prepare the dough by warming milk, dissolving yeast, and mixing with flour, sugar, eggs, and butter. Let rise until doubled.
  • Roll out the dough, spread with softened butter, then sprinkle with brown sugar, cinnamon, nutmeg, and chopped pecans.
  • Roll up the dough tightly and cut into slices. Place in a baking dish and let rise again.
  • Bake at 350°F (175°C) for 20 minutes until golden brown.
  • While baking, prepare the glaze by heating cream and maple syrup, then drizzle over warm buns.

Notes

For best results, use fresh yeast and ensure dough is properly risen before baking.
Calories: 350kcal
Cost: $15
Course: Dessert
Cuisine: American
Keyword: cinnamon, Pecans, sweet

Welcome to the World of Pumpkin Bread

There’s something undeniably comforting about the scent of freshly baked pumpkin bread wafting through your home. This pumpkin bread recipe is not just a seasonal favorite; it’s a delightful treat that anyone can master. Perfect for fall gatherings or cozy afternoons, this flavorful loaf captures the essence of autumn in every bite. In this guide, not only will you find a delicious recipe, but also valuable tips, variations, and a wealth of knowledge to ensure your pumpkin bread turns out perfectly every time.

Why You’ll Love This Recipe

  • Moist and Flavorful: This pumpkin bread is infused with spices and pure pumpkin puree, resulting in a rich, moist loaf that’s packed with flavor.
  • Easy to Make: With straightforward steps and common ingredients, you’ll have this pumpkin bread in the oven in no time.
  • Versatile Options: Customize the recipe with different add-ins like nuts, chocolate chips, or dried fruits for a unique twist.
  • Perfect for Sharing: Whether for brunch, dessert, or a thoughtful gift, this bread is sure to please everyone at the table.
  • Freezes Well: Make a double batch and freeze one for later; it retains its deliciousness for months.

Ingredients for Pumpkin Bread

Here’s what you’ll need to create this scrumptious pumpkin bread:

  • 1/4 cup (55g) unsalted butter, melted: This adds richness and depth to the flavor.
  • 1/2 cup (65g) all-purpose flour: A foundational ingredient for structure.
  • 1/4 cup (50g) light brown sugar, packed: For a hint of caramel flavor.
  • 2 tbsp granulated sugar: Balances the sweetness.
  • 1/2 tsp pumpkin pie spice: Adds that signature fall flavor.
  • 1 15oz can pure pumpkin puree: Essential for moisture and taste.
  • 1 cup (200g) granulated sugar: A primary sweetener for the recipe.
  • 1/2 cup (100g) light brown sugar, packed: Enhances the loaf’s moistness.
  • 1/2 cup (100ml) vegetable oil: Keeps the bread moist and tender.
  • 2 large eggs: Provide structure and richness.
  • 1/2 tsp vanilla extract: Adds a lovely aroma.
  • 1/2 cup (110ml) milk: Improves texture and moisture.
  • 1 3/4 cups (230g) all-purpose flour: The foundation of the bread.
  • 1 tsp baking soda: Acts as a leavening agent.
  • 1 tsp cinnamon: A warm spice that complements pumpkin.
  • 3/4 tsp pumpkin pie spice: For extra flavor depth.
  • 1/2 tsp kosher salt: Balances sweetness and enhances flavors.
  • 1/2 cup (60g) powdered sugar: For the glaze.
  • 1/4 cup (85g) pure maple syrup: Adds a deliciously sweet finish.

Pro Tips for Perfect Pumpkin Bread

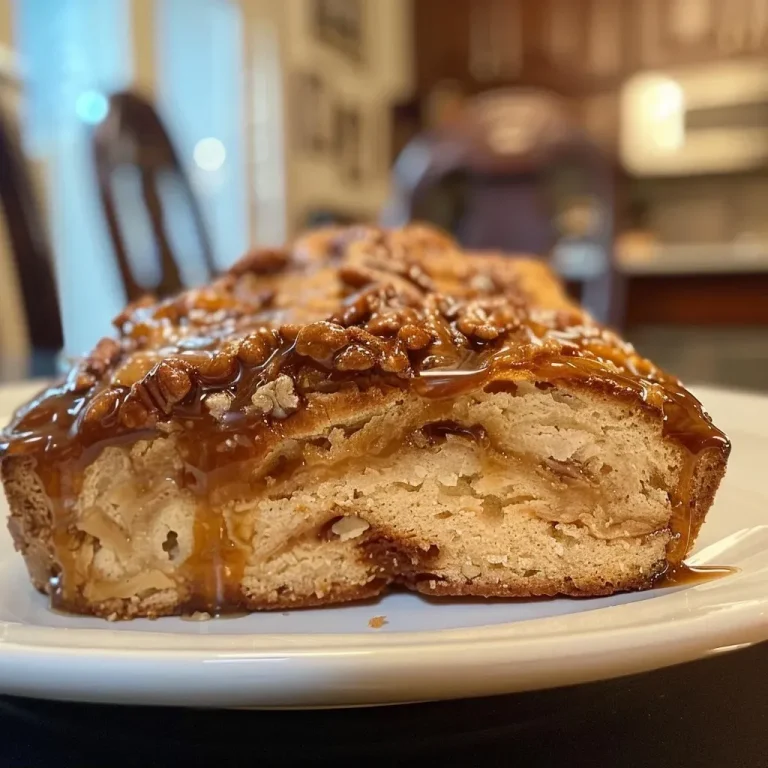
Slice of pumpkin bread with a shiny maple glaze, showcasing its texture and richness.
  • Don’t Overmix: Mix just until combined. Overmixing can lead to dense bread.
  • Use Room Temperature Ingredients: This ensures a smoother batter and better rise.
  • Check for Doneness: Insert a toothpick in the center; it should come out clean or with a few crumbs.
  • Cool Completely Before Slicing: This helps the bread set and prevents it from crumbling.
  • Experiment with Add-Ins: Consider adding nuts, chocolate chips, or even dried cranberries for extra texture and flavor.
  • Mind Your Oven Temperature: Ensure your oven is preheated and use an oven thermometer for accuracy.
  • Store Properly: Keep in an airtight container to maintain moisture.
  • Make It a Meal: Serve warm with butter, cream cheese, or even ice cream for a delightful dessert.

Common Mistakes and Troubleshooting

  • Too Dense: This could be due to overmixing. Mix just until the ingredients are combined.
  • Sinking in the Middle: Ensure the baking powder is fresh and avoid opening the oven door too soon.
  • Not Sweet Enough: Adjust sugar levels to your preference, but remember that pumpkin itself is not very sweet.
  • Dry Texture: Make sure you’re measuring flour correctly and not packing it into the cup.

Delicious Variations of Pumpkin Bread

Feel free to customize this pumpkin bread recipe to suit your taste:


Professional Chef Knife Set

★ Recommended Kitchen Tool

Professional Chef Knife Set

Make this recipe even easier with a quality Professional Chef Knife Set — a must-have kitchen staple!


🛒 View on Amazon →

As an Amazon Associate, we earn from qualifying purchases.
  • Chocolate Chip Pumpkin Bread: Fold in a cup of chocolate chips for a sweet surprise.
  • Nuts & Seeds: Add walnuts or pecans for crunch and richness.
  • Spiced Pumpkin Bread: Enhance with additional spices like nutmeg or ginger.
  • Cream Cheese Swirl: Create a delicious swirl by adding a cream cheese mixture to the batter.

How to Store Pumpkin Bread

Proper storage is key to keeping your pumpkin bread fresh:

  • Room Temperature: Store in an airtight container for up to 3 days.
  • Refrigerator: Can be stored in the fridge for up to a week in an airtight container.
  • Freezing: Wrap tightly in plastic wrap and foil for up to 3 months. Thaw overnight in the fridge before serving.

Make-Ahead Instructions

You can prepare this pumpkin bread ahead of time:

  • Batter Prep: You can mix the batter a day in advance and store it in the fridge.
  • Baked Bread: Bake the bread and freeze it until you need it, then thaw and enjoy!

Frequently Asked Questions

  • Can I use fresh pumpkin?: Yes, you can roast and puree fresh pumpkin; just ensure it’s well-drained.
  • How do I know when my pumpkin bread is done?: A toothpick inserted should come out clean or with a few moist crumbs.
  • Can I use whole wheat flour?: Absolutely! Substitute up to half with whole wheat flour for added nutrition.
  • What if my batter is too thick?: Add a tablespoon of milk at a time until the desired consistency is reached.
  • Can I make this bread gluten-free?: Yes, use a gluten-free flour blend for a suitable alternative.
  • What’s the best way to serve pumpkin bread?: It’s delightful warm with butter or cream cheese, or even as a base for French toast!
  • How long does pumpkin bread last?: Properly stored, it can last up to a week in the refrigerator.
  • Can I add more spices?: Absolutely! Feel free to adjust spices to suit your preference.

Nutritional Tips and Dietary Adaptations

For a healthier version of this pumpkin bread, consider these adaptations:

  • Reduce Sugar: Cut the sugar by a third or use natural sweeteners like honey or maple syrup.
  • Healthy Fats: Substitute vegetable oil with applesauce or Greek yogurt for lower fat.
  • Add Fiber: Incorporate ground flaxseeds or chia seeds for extra nutrients.

Essential Kitchen Equipment

To make the process easier, here are some tools you’ll need:

  • Loaf Pan: A standard 9×5 inch loaf pan is perfect for this recipe.
  • Mixing Bowls: Use a large bowl for mixing wet and dry ingredients.
  • Whisk: A sturdy whisk helps in incorporating ingredients smoothly.
  • Spatula: A rubber spatula is great for scraping down the sides and folding in ingredients.

Serving Suggestions

For an elevated experience, consider these delicious serving options:

  • Maple Glaze: A drizzle of maple glaze adds sweetness and a beautiful finish.
  • Chopped Nuts: Top with toasted nuts for a delightful crunch.
  • Whipped Cream: A dollop of whipped cream or cream cheese frosting enhances the flavor.

Conclusion

Now that you have the keys to creating the perfect pumpkin bread, it’s time to get baking! This recipe combines simplicity with rich flavors, making it a staple in your autumn recipe collection. Whether you enjoy it fresh from the oven or as part of an elaborate brunch spread, this pumpkin bread will surely bring joy to your table. Happy baking!

Pumpkin Bread with Maple Glaze

Prep Time 15 minutes
Cook Time 1 hour
Total Time 1 hour 15 minutes
Servings 8 slices
Calories 350
A moist and flavorful pumpkin bread topped with a sweet maple glaze, perfect for fall baking.

Ingredients

Butter

  • 55 g unsalted butter, melted

Flour

  • 65 g all-purpose flour
  • 50 g light brown sugar, packed
  • 2 tbsp granulated sugar
  • 0.5 tsp pumpkin pie spice
  • 1 can (15oz) pure pumpkin puree (*SEE NOTES)
  • 200 g granulated sugar
  • 100 g light brown sugar, packed
  • 100 ml vegetable oil
  • 2 large eggs
  • 0.5 tsp vanilla extract
  • 110 ml milk
  • 230 g all-purpose flour
  • 1 tsp baking soda
  • 1 tsp cinnamon
  • 0.75 tsp pumpkin pie spice
  • 0.5 tsp kosher salt

Powdered Sugar

  • 60 g powdered sugar
  • 85 g pure maple syrup

Instructions 

  • Preheat oven to 350°F (175°C). Grease a loaf pan.
  • Mix melted butter, sugars, pumpkin puree, eggs, vanilla, and oil until smooth.
  • In a separate bowl, whisk together flour, baking soda, spices, and salt.
  • Combine wet and dry ingredients, then pour into the prepared pan.
  • Bake for 60 minutes or until a toothpick inserted comes out clean. Let cool.

Notes

For best results, use fresh pumpkin puree and measure ingredients accurately.
Calories: 350kcal
Cost: $15
Course: Dessert
Cuisine: American
Keyword: Pumpkin

Discover the Heartwarming Flavor of Apple Cider Beef Stew

As the leaves turn and the air becomes crisp, there’s nothing quite like a warm, comforting dish to bring family and friends together. Welcome to my Apple Cider Beef Stew recipe, where savory beef meets the delightful sweetness of apple cider, creating a dish that’s perfect for cozy evenings. This stew not only warms your body but also your soul, making it an ideal choice for family gatherings or a comforting dinner after a long day. In this comprehensive guide, we’ll explore every aspect of making this delicious stew, ensuring your cooking experience is as enjoyable as the meal itself.

Why You’ll Love This Recipe

This Apple Cider Beef Stew isn’t just a meal; it’s an experience. Here are five compelling reasons to add this recipe to your culinary repertoire:

  • Rich and Flavorful: The combination of tender beef and sweet apple cider creates a depth of flavor that’s both comforting and satisfying.
  • Seasonal Ingredients: Utilizing fruits and vegetables that are in season enhances the stew’s taste and nutritional value.
  • Easy to Prepare: With straightforward steps, this recipe allows even novice cooks to conjure up a comforting dish with ease.
  • Versatile Variations: Customize the stew with various ingredients to suit your taste preferences or dietary needs.
  • Make Ahead Friendly: This stew tastes even better the next day, making it perfect for meal prep!

Ingredients for Apple Cider Beef Stew

To create this delicious Apple Cider Beef Stew, you’ll need the following ingredients:


Digital Meat Thermometer

★ Recommended Kitchen Tool

Digital Meat Thermometer

Make this recipe even easier with a quality Digital Meat Thermometer — a must-have kitchen staple!


🛒 Check Price on Amazon →

As an Amazon Associate, we earn from qualifying purchases.
  • 1/3 cup all-purpose flour: For coating the beef to create a nice sear.
  • 2 teaspoons salt: Enhances the overall flavor of the stew.
  • 1 teaspoon black pepper: Adds a touch of spice.
  • 2 lbs beef stew meat: Look for cuts like chuck roast, cut into 1-inch cubes for tenderness.
  • 4 tablespoons vegetable oil: For searing the beef, providing richness and flavor.
  • 2 cups apple cider: The star ingredient, adding sweetness and depth.
  • 1 cup water: To adjust the stew’s consistency.
  • 2 tablespoons vinegar: Balances the sweetness of the cider.
  • 1 teaspoon dried thyme: For an aromatic flavor.
  • 2 bay leaves: Imparts a subtle, earthy flavor.
  • 4 large carrots: Cut into 1-inch pieces for sweetness and texture.
  • 2 large potatoes: Added to create a hearty, filling stew.
  • 2 medium onions: Halved and sliced for sweetness and depth of flavor.

How to Make Apple Cider Beef Stew

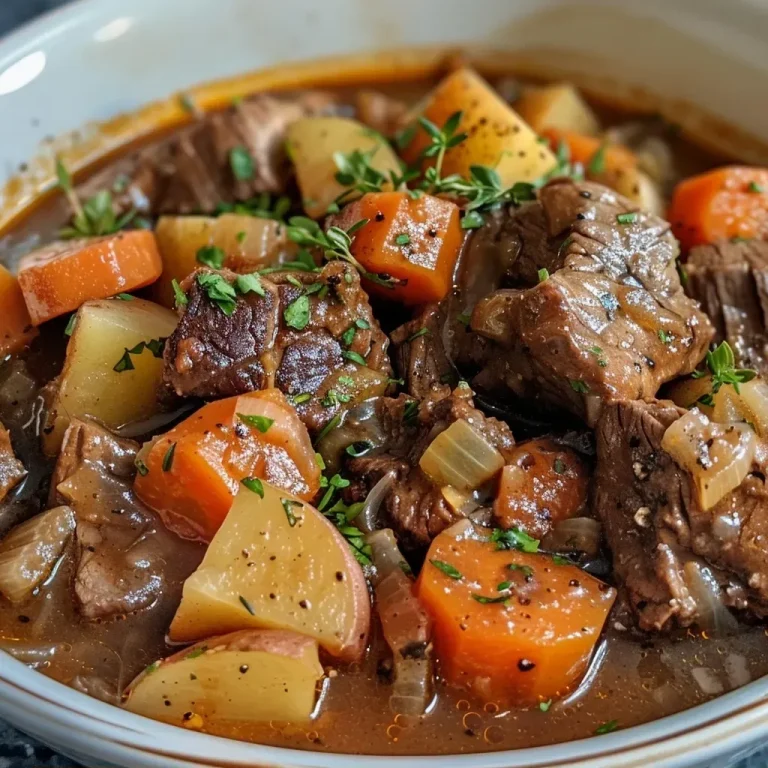
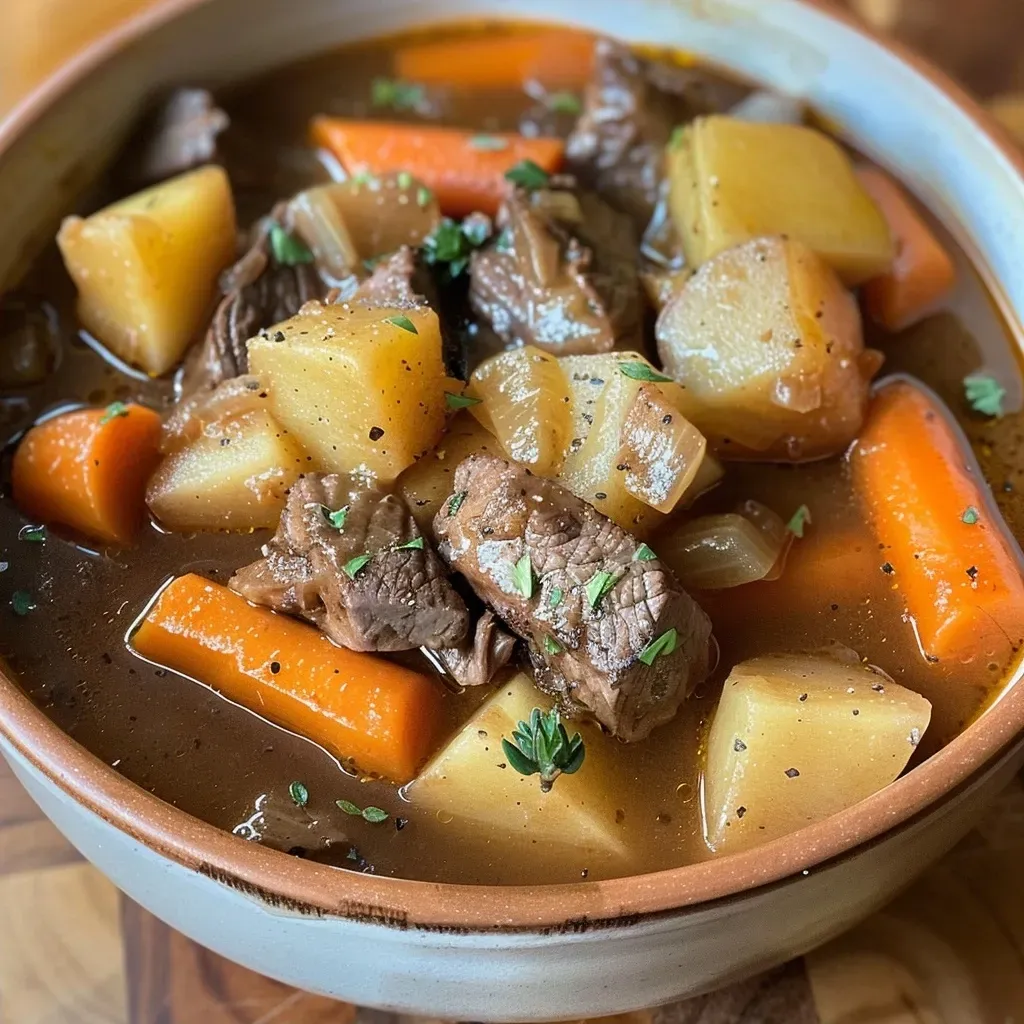
Side view of a steaming bowl of apple cider beef stew with chunks of meat and carrots.

Step 1: Prepare the Beef

In a large mixing bowl, combine the flour, salt, and pepper. Toss the beef stew meat in this seasoned flour mixture, ensuring all pieces are coated evenly.

Step 2: Sear the Beef

Heat the vegetable oil in a large saucepan or Dutch oven over medium-high heat. Add the coated beef in a single layer (working in batches if necessary) and sear until golden-brown on all sides, about 3-4 minutes per side. Remove the beef and set it aside.

Step 3: Build the Base

After removing the beef, reduce the heat slightly and pour the apple cider into the pan. Scrape the bottom of the pan with a wooden spoon to loosen any browned bits, then add 1 cup of water, vinegar, dried thyme, and bay leaves.

Step 4: Simmer the Stew

Return the browned beef to the pot and stir to combine. Bring the mixture to a boil over medium-high heat. Once boiling, reduce the heat to low, cover the pot, and let it simmer gently for about 1 hour.

Step 5: Add the Vegetables

While the beef simmers, prepare your vegetables. Peel and cut the carrots and potatoes into 1-inch chunks and halve and slice the onions. After 1 hour, add these vegetables to the stew.

Step 6: Final Cooking

Stir the vegetables into the stew, ensuring they are submerged in the liquid. Increase the heat to bring the mixture back to a gentle boil, then reduce the heat again to low, cover, and simmer for another 45 minutes, or until the vegetables are tender and the meat is fully cooked.

Step 7: Taste and Serve

After the stew is done, taste and adjust the seasoning if necessary. Remove from heat and let it rest for a few minutes. Discard the bay leaves and serve the stew hot, either on its own or with crusty bread for dipping.

Pro Tips for Perfect Apple Cider Beef Stew

  • Choose the right cut: Opt for tougher cuts of beef like chuck roast that become tender during slow cooking.
  • Don’t rush the searing: This step is crucial for building flavor; take your time to get a nice golden crust.
  • Use homemade or high-quality apple cider: It makes a significant difference in flavor.
  • Adjust seasoning gradually: Taste as you go to find the perfect balance.
  • Let it rest: Allowing the stew to sit for a few minutes helps flavors meld together.
  • Don’t skip the vinegar: It adds a necessary acidity that balances the sweetness of the cider.
  • Use a Dutch oven: It retains heat well and provides even cooking.
  • Experiment with herbs: Try adding rosemary or parsley for an extra flavor dimension.

Common Mistakes and Troubleshooting

Even the best chefs can encounter challenges. Here are some common mistakes and how to avoid them:

  • Overcooking the beef: Keep an eye on the timing; overcooked beef can become tough.
  • Not enough liquid: Ensure there’s enough liquid to cover the ingredients adequately; add more water or cider if needed.
  • Skipping the browning step: This is essential for developing flavor; don’t rush it!
  • Using too many potatoes: Balance is key; too many can make the stew overly starchy.

Variations to Try

This Apple Cider Beef Stew is wonderfully versatile. Here are some delicious variations to consider:

  • Add beer: Substitute half of the apple cider with a stout or porter for a richer flavor.
  • Incorporate mushrooms: Add sliced mushrooms for an earthier flavor and extra texture.
  • Make it spicy: Toss in diced jalapeños or a dash of cayenne pepper for some heat.
  • Use sweet potatoes: Swap regular potatoes for sweet potatoes for a hint of sweetness and added nutrition.

Storage and Make-Ahead Instructions

This stew is a fantastic make-ahead meal. Here’s how to store it:

  • Refrigerate: Store leftovers in an airtight container in the refrigerator for up to 4 days.
  • Freeze: Freeze in individual portions for up to 3 months. Thaw overnight in the refrigerator before reheating.
  • Reheat: Warm gently on the stove or in the microwave, adding a splash of water or cider if needed.

Frequently Asked Questions

  • Can I use a slow cooker for this recipe? Yes, brown the beef first, then transfer everything to a slow cooker and cook on low for 6-8 hours.
  • Can I omit the flour? Yes, but the stew will be less thick. Consider using cornstarch as a thickener at the end.
  • What type of apple cider should I use? Fresh, unfiltered apple cider works best, but you can use bottled cider as well.
  • Can I add other vegetables? Absolutely! Feel free to include peas, green beans, or any seasonal vegetables you enjoy.
  • Is this recipe gluten-free? Substitute flour with a gluten-free blend or cornstarch to make it gluten-free.
  • How long does it take to cook? Total cooking time is approximately 2.5 hours, including simmering time.
  • Can I use frozen beef? Yes, but thaw it completely before searing for the best results.
  • What should I serve with this stew? Crusty bread, a fresh salad, or even a side of mashed potatoes work great.

Nutritional Tips and Dietary Adaptations

This stew can easily be adapted to meet various dietary needs:

  • Low-carb option: Substitute potatoes with cauliflower for a lower-carb version.
  • Paleo-friendly: Use coconut flour instead of all-purpose flour and skip the vinegar.
  • Low-sodium: Use low-sodium broth and less salt for a healthier option.

Recommended Equipment

  • Large saucepan or Dutch oven: Essential for even cooking and flavor development.
  • Wooden spoon: Perfect for scraping up those flavorful browned bits.
  • Measuring cups and spoons: For precise ingredient measurements.

Serving Suggestions

Serve your Apple Cider Beef Stew hot, garnished with fresh herbs like parsley or thyme for a pop of color. Pair it with:

  • Crusty bread: Ideal for dipping and soaking up the delicious broth.
  • Green salad: A light salad balances the richness of the stew.
  • Rice or mashed potatoes: For those who love extra comfort food!

Conclusion

As the weather cools, there’s something incredibly satisfying about a warm bowl of Apple Cider Beef Stew. This recipe not only delivers on flavor but also offers flexibility and ease, making it a go-to for any home cook. Whether you’re sharing it with family or enjoying a quiet night in, the heartwarming essence of this stew will surely create moments of connection and joy around your table. So roll up your sleeves, gather your ingredients, and let’s make some magic in the kitchen!

Apple Cider Beef Stew

Prep Time 20 minutes
Cook Time 1 hour 45 minutes
Total Time 2 hours 5 minutes
Servings 6 servings
Calories 450
A hearty and flavorful stew combining tender beef with sweet apple cider and vegetables, perfect for a comforting meal.

Ingredients

Dried spices and seasonings

  • 1/3 cup all-purpose flour
  • 2 teaspoons salt
  • 1 teaspoon black pepper

Meat and vegetables

  • 2 lbs beef stew meat, cut into 1-inch cubes
  • 4 tablespoons vegetable oil
  • 2 cups apple cider
  • 1 cup water
  • 2 tablespoons vinegar
  • 1 teaspoon dried thyme
  • 4 large carrots, cut into 1-inch pieces
  • 2 large potatoes, cut into 1-inch pieces
  • 2 medium onions, halved and sliced

Instructions 

  • Mix flour, salt, and pepper; coat beef with seasoned flour.
  • Brown beef in oil, then deglaze pan with apple cider, water, vinegar, thyme, and bay leaves.
  • Return beef to pan, bring to boil, then simmer covered for 1 hour.
  • Add vegetables, bring to boil, then simmer for 45 minutes until tender.
  • Adjust seasoning, discard bay leaves, and serve hot.

Notes

For extra flavor, add fresh herbs or a splash of red wine during simmering.
Calories: 450kcal
Cost: $15
Course: Main Course
Cuisine: American
Keyword: apple cider, Beef, Stew

Indulge in the Comfort of Apple Crisp Pancakes

Welcome to a delightful culinary experience that brings the essence of autumn right to your breakfast table! Today, we’re diving into a recipe that marries the warm flavors of apple crisp with the fluffy goodness of pancakes. Imagine waking up to the sweet aroma of cinnamon, nutmeg, and freshly diced apples wafting through your kitchen. These Apple Crisp Pancakes are not just a breakfast dish; they are a celebration of flavors, perfect for cozy family gatherings or a special weekend treat.

In this comprehensive guide, I’ll walk you through everything you need to know to create the perfect stack of apple crisp pancakes, from ingredient breakdowns to expert tips. Let’s get started on this delicious adventure!

Why You’ll Love This Recipe

  • Perfectly balanced flavors: The combination of sweet apples and warm spices creates a harmonious taste that’s both comforting and delightful.
  • Easy to make: This recipe is straightforward and requires minimal preparation, making it perfect for both novice and experienced cooks.
  • Customizable: Feel free to mix in your favorite ingredients or toppings, making each pancake experience unique.
  • Great for meal prep: These pancakes can be made ahead and stored for quick breakfasts throughout the week.
  • Family-approved: Kids and adults alike will love the taste and texture of these pancakes, making them a hit for any breakfast table.

Ingredients Breakdown

To create these delicious Apple Crisp Pancakes, you’ll need the following ingredients:


Cake Decorating Set

★ Recommended Kitchen Tool

Cake Decorating Set

Make this recipe even easier with a quality Cake Decorating Set — a must-have kitchen staple!


🛒 See Deals on Amazon →

As an Amazon Associate, we earn from qualifying purchases.
  • 1/4 cup (50g) brown sugar: Adds a deep caramel flavor to the streusel topping.
  • 1/4 cup (30g) flour: This is used in the streusel for a crumbly texture.
  • 1/4 cup (25g) oats: Adds a wholesome crunch to the topping.
  • 3 tbsp (45g) butter: For richness and flavor in the streusel.
  • 1/2 tsp (2g) cinnamon: Infuses warm spice into the pancakes.
  • 1 ¼ cups (160g) flour: The base of the pancake batter.
  • 1 tbsp (15g) sugar: Just a hint of sweetness in the pancake mixture.
  • 1/2 tsp (2g) salt: Balances the sweetness and enhances flavor.
  • 1 ½ tsp (6g) baking powder: Ensures fluffy pancakes.
  • 1/4 tsp (1g) nutmeg: A warm spice that complements the cinnamon perfectly.
  • 1 egg: Binds the ingredients and adds richness.
  • 1 cup (240ml) milk: For a creamy batter consistency.
  • 2 tbsp (28g) vegetable oil: Keeps the pancakes moist and tender.
  • 1 cup apple (peeled and diced): The star ingredient, adding natural sweetness and moisture.

These ingredients come together to create layers of flavor that make each bite a delight. You can easily substitute some ingredients to suit your dietary preferences. For example, use whole wheat flour for a healthier option or almond milk for a dairy-free version.

Pro Tips for Perfect Pancakes

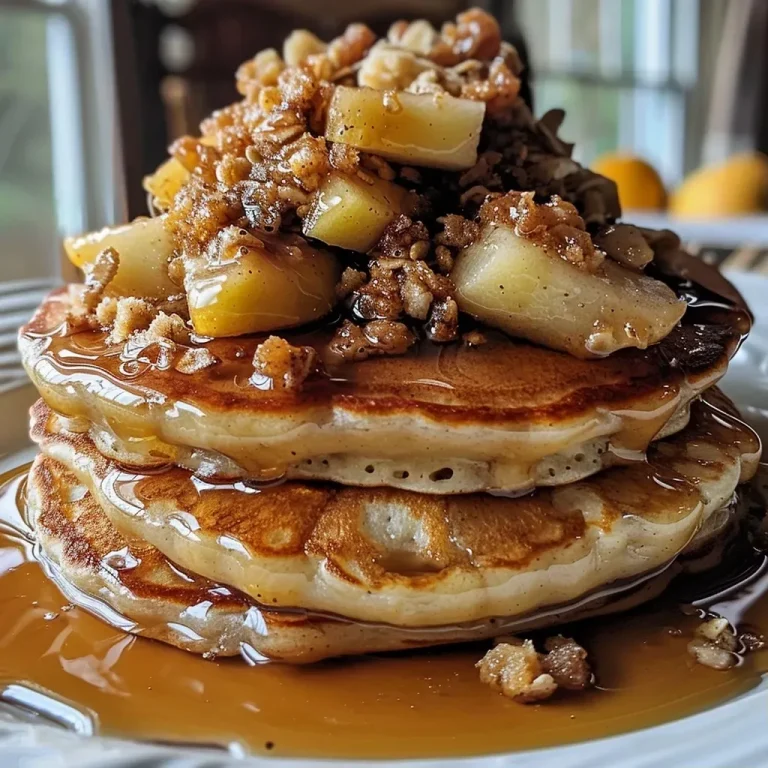
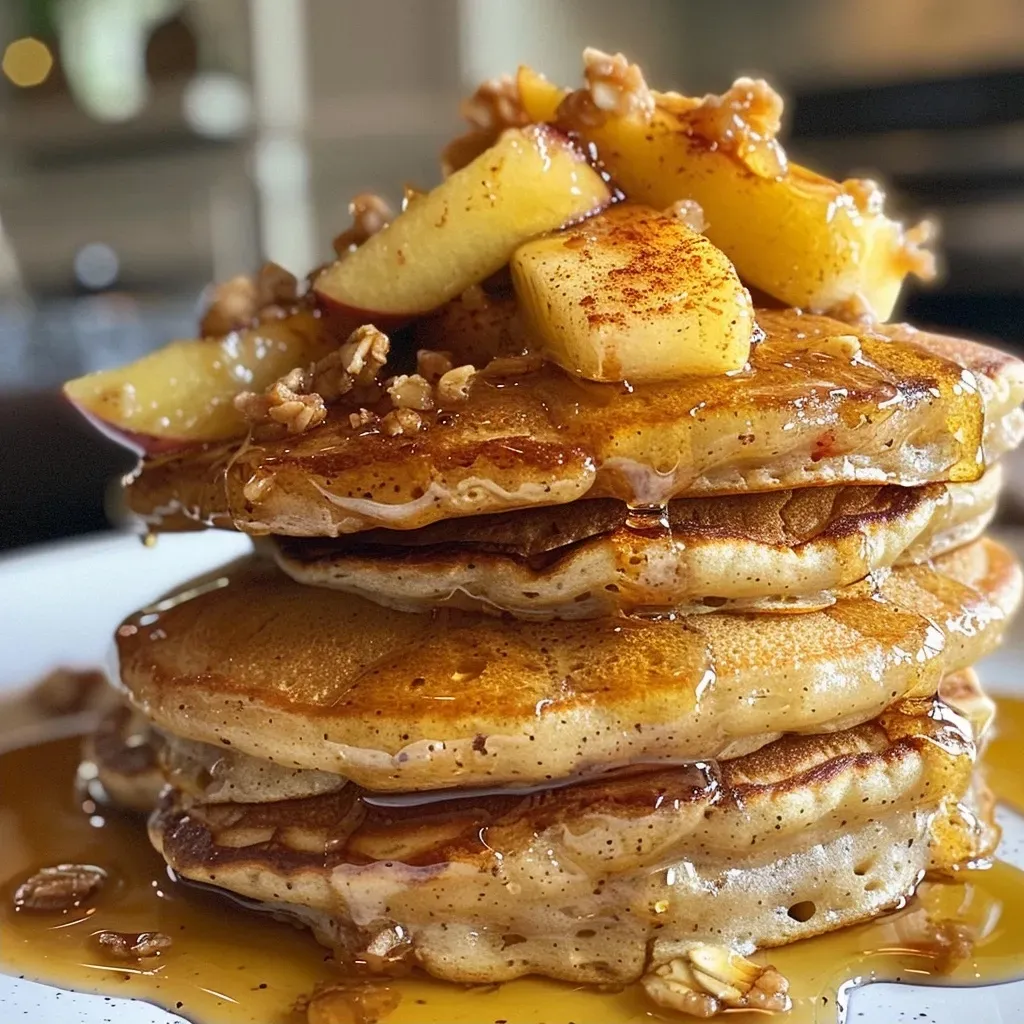
Side angle of fluffy apple crisp pancakes drizzled with syrup and sprinkled with oats.
  • Let the batter rest: Allow your pancake batter to sit for about 10 minutes before cooking. This helps create fluffier pancakes.
  • Don’t overmix: Mix the batter just until combined; a few lumps are okay. Overmixing can lead to dense pancakes.
  • Preheat your skillet: Ensure your cooking surface is hot before pouring in the batter for evenly cooked pancakes.
  • Use the right pan: A non-stick skillet or griddle works best to prevent sticking and ensure even cooking.
  • Test for doneness: Cook pancakes until bubbles form on the surface, then flip them over for a golden-brown finish.
  • Keep them warm: If cooking in batches, place cooked pancakes on a baking sheet in a warm oven (200°F or 93°C) to keep them warm until serving.
  • Experiment with toppings: Try adding whipped cream, maple syrup, or even a sprinkle of powdered sugar for extra flair.
  • Make it a family affair: Get the kids involved in the cooking process; it’s a fun way to bond over breakfast!

Common Mistakes and Troubleshooting

Even the best chefs make mistakes! Here are some common pitfalls to avoid when making apple crisp pancakes:

  • Pancakes too flat: Ensure your baking powder is fresh; expired leavening agents can lead to flat pancakes.
  • Burnt pancakes: If your pancakes are burning, reduce the heat. Cooking on medium-low heat allows for even cooking without burning.
  • Too dry or dense: If your pancakes turn out dry, you may have overmixed the batter. Remember, a few lumps are okay!
  • Streusel topping clumping: If your streusel topping isn’t crumbly, ensure your butter is cold and cut into small pieces before mixing.

Delicious Variations

Want to switch things up? Here are some variations to try:

  • Blueberry Apple Crisp Pancakes: Add fresh blueberries to the batter for a fruity twist.
  • Vegan Apple Crisp Pancakes: Substitute the egg with a flaxseed meal and use a plant-based milk for a vegan-friendly option.
  • Gluten-Free Apple Crisp Pancakes: Use a gluten-free flour blend to make these pancakes suitable for gluten-sensitive eaters.
  • Spiced Apple Crisp Pancakes: Enhance the spices by adding ginger or allspice to the batter for a more complex flavor profile.

Storage and Make-Ahead Instructions

If you’d like to prepare these pancakes ahead of time, here’s how to store and reheat them:

  • Refrigerate: Store leftover pancakes in an airtight container in the refrigerator for up to 3 days.
  • Freeze: For longer storage, freeze pancakes layered between parchment paper in a freezer-safe bag for up to 2 months.
  • Reheat: To reheat, simply pop them in the toaster, microwave, or on a skillet until warmed through.

Frequently Asked Questions (FAQ)

  • Can I use frozen apples? Yes, thaw and drain excess moisture before adding them to the batter.
  • What’s the best way to serve these pancakes? Serve warm with maple syrup, whipped cream, or your favorite toppings.
  • How do I make the streusel topping crispy? Bake it separately for a few minutes before adding it to the pancakes for an extra crunch.
  • Can I double the recipe? Absolutely! Just ensure your pan is large enough to accommodate the extra batter.
  • Is there a way to make them less sweet? Reduce the amount of sugar in both the batter and the streusel topping.
  • What if I don’t have milk? You can use any non-dairy milk alternative or even water in a pinch.
  • How can I make my pancakes more flavorful? Add vanilla extract or a splash of orange juice to the batter for extra zest.
  • What’s the best way to store leftover pancakes? Store them in an airtight container in the fridge or freeze them for later use.

Nutrition Tips and Dietary Adaptations

While these pancakes are a treat, they can be adapted to fit various dietary needs:

  • Low sugar options: Use a sugar substitute to keep the sweetness while reducing calories.
  • High fiber additions: Incorporate whole grain flour or add flaxseed for added fiber.
  • Protein boost: Mix in protein powder for a more filling breakfast.

Essential Equipment Recommendations

To make the cooking process easier, here’s a list of essential equipment you’ll need:

  • Non-stick skillet or griddle: For perfectly cooked pancakes without sticking.
  • Mixing bowls: For combining your ingredients seamlessly.
  • Whisk: To mix the batter thoroughly without lumps.
  • Spatula: For flipping pancakes with ease.

Serving Suggestions

These Apple Crisp Pancakes are delightful on their own, but they can be even better with some thoughtful serving suggestions:

  • Add fresh fruit: Serve with sliced bananas or additional diced apples for a fruity touch.
  • Include nuts: Sprinkle chopped walnuts or pecans for added crunch and nutrition.
  • Drizzle with syrup: Maple syrup is a classic, but you can also try caramel or honey for a different flavor.

In conclusion, Apple Crisp Pancakes are not just a recipe; they’re an experience that brings warmth and joy to your breakfast table. With this comprehensive guide, you have all the tools you need to make these pancakes a beloved staple in your home. So, gather your ingredients, roll up your sleeves, and enjoy the process of creating something delicious. Happy cooking!

Apple Crisp Pancakes

Prep Time 10 minutes
Cook Time 15 minutes
Total Time 25 minutes
Servings 4 servings
Calories 350
Delight in fluffy pancakes infused with cinnamon and topped with sweet apple chunks and a crunchy crumble topping.

Ingredients

Dough

  • 1 ¼ cups flour
  • 1 cup milk
  • 3 tbsp butter (melted)
  • 2 tbsp vegetable oil
  • 1 tbsp sugar
  • 1/4 cup brown sugar
  • 1/4 cup flour (for crumble topping)
  • 1/4 cup oats (for crumble topping)
  • 3 tbsp butter (for crumble topping)
  • 1/2 tsp cinnamon
  • 1 ¼ cups flour (for batter)
  • 1 tbsp sugar
  • 1/2 tsp salt
  • 1 ½ tsp baking powder
  • 1/4 tsp nutmeg
  • 1 egg egg
  • 1 cup apple (peeled and diced)

Instructions 

  • Mix dry ingredients and wet ingredients separately.
  • Combine wet and dry to form batter, fold in diced apples.
  • Pour batter onto a hot griddle and cook until golden brown.
  • Prepare crumble topping by mixing oats, flour, brown sugar, cinnamon, and melted butter.
  • Top pancakes with crumble and serve warm.

Notes

For extra flavor, add a splash of vanilla extract to the batter.
Calories: 350kcal
Cost: $12
Course: Breakfast
Cuisine: American
Keyword: apple, Pancakes

Why You’ll Love This Caramel Cobbler Recipe

Indulging in the sweet simplicity of caramel cobbler is a culinary experience that engages all your senses. This recipe combines simple ingredients to create a rich and comforting dessert that can be enjoyed on any occasion. Whether you’re treating your family to a cozy night in or impressing guests at a gathering, this dessert is sure to delight. Here are five compelling reasons why you’ll love making this caramel cobbler:

  • Effortless Preparation: With a straightforward method and minimal ingredients, you can whip up this dessert in no time, making it perfect for spontaneous gatherings.
  • Decadent Flavor: The combination of brown sugar and butter creates a luscious caramel sauce that seeps into the cobbler, offering a heavenly flavor with every bite.
  • Versatile Serving Options: Enjoy it warm with a scoop of vanilla ice cream or topped with whipped cream for an extra indulgent experience.
  • Comforting Appeal: This dessert evokes fond memories and feelings of home, making it a perfect choice for family gatherings or cozy evenings.
  • Customizable Ingredients: You can easily adapt this recipe to suit dietary preferences or use seasonal fruits to add a personal touch.

Ingredients Breakdown

To create the perfect caramel cobbler, you will need the following ingredients. Each component plays a crucial role in achieving that delightful caramel flavor and texture.

  • 1/2 cup (1 stick) butter: Provides richness and helps create the gooey caramel layer.
  • 1-1/2 cups all-purpose flour: The base for the cobbler, giving it structure.
  • 1-1/2 cups granulated sugar: Sweetens the dish and enhances the caramel flavor.
  • 2 teaspoons baking powder: Helps the cobbler rise and achieve a light texture.
  • 1/2 teaspoon salt: Balances the sweetness and enhances overall flavor.
  • 3/4 cup milk: Adds moisture and richness to the batter.
  • 2 tablespoons bourbon (can omit): Adds depth and complexity to the flavor; optional for those who prefer a non-alcoholic version.
  • 1 teaspoon vanilla: Enhances the sweet aroma and flavor.
  • 1-1/2 cups light brown sugar, packed: Creates that signature caramel layer when mixed with boiling water.
  • 1-1/2 cups boiling water: Activates the brown sugar to form the caramel topping.

Pro Tips for Perfect Caramel Cobbler

To ensure your caramel cobbler turns out perfectly every time, keep these expert tips in mind:


Silicone Baking Cups Set

★ Recommended Kitchen Tool

Silicone Baking Cups Set

Make this recipe even easier with a quality Silicone Baking Cups Set — a must-have kitchen staple!


🛒 Check Price on Amazon →

As an Amazon Associate, we earn from qualifying purchases.
  • Use fresh ingredients: Ensure your baking powder is fresh for optimal rise in the cobbler.
  • Don’t overmix the batter: Stir just until combined to avoid a dense texture.
  • Distribute the butter evenly: Allow the melted butter to cover the bottom of the dish for even caramelization.
  • Keep the oven door closed: Avoid opening the oven while baking to maintain consistent temperature.
  • Allow to cool slightly: Let the cobbler rest for a few minutes before serving to allow the caramel to set.
  • Experiment with flavors: Try adding spices like cinnamon or nutmeg for a warm twist.
  • Use a glass baking dish: It helps to monitor the caramelization process better than metal.
  • Garnish creatively: Consider adding a sprinkle of sea salt or fresh fruit for added texture and flavor.

Common Mistakes and Troubleshooting

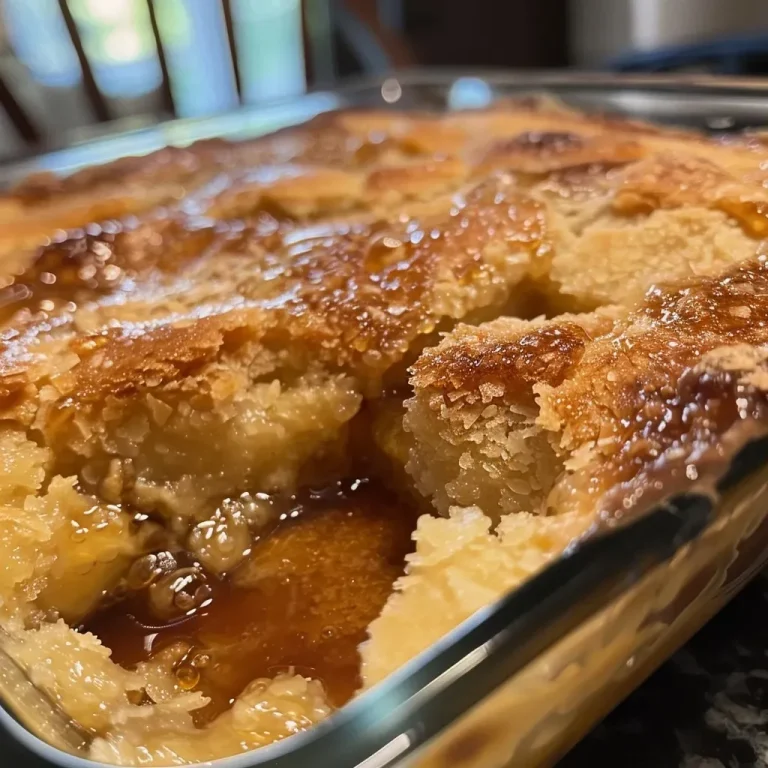
Side view of a decadent caramel cobbler, showcasing its rich texture and color.

Even seasoned bakers can run into issues. Here are common mistakes to watch for and how to fix them:

  • Underbaking: If your cobbler is too gooey, return it to the oven for an additional 5-10 minutes.
  • Overbaking: If it looks dry, cover with foil to prevent further browning and monitor closely.
  • Not enough caramel: Ensure you use packed brown sugar and pour boiling water evenly over the batter.
  • Too dense: Avoid overmixing the batter to maintain a light texture.
  • Flavorless cobbler: Always taste your batter before baking, adding extra vanilla or salt if needed.

Delicious Variations to Try

Caramel cobbler is a blank canvas for creativity. Here are four delightful variations to try:

  • Peach Cobbler with Caramel Topping: Substitute fresh or canned peaches for a fruity twist.
  • Chocolate Caramel Cobbler: Add cocoa powder to the batter for a chocolatey flavor that pairs beautifully with caramel.
  • Nutty Cobbler: Stir in chopped walnuts or pecans for added crunch and richness.
  • Spiced Apple Cobbler: Incorporate diced apples and a sprinkle of cinnamon for a fall-inspired treat.

Storage and Make-Ahead Instructions

Planning ahead? Here’s how to store and prepare your cobbler in advance:

  • Refrigeration: Store any leftover cobbler in an airtight container in the refrigerator for up to 3 days.
  • Freezing: Wrap tightly in plastic wrap and foil to freeze for up to 2 months. Reheat in the oven before serving.
  • Make Ahead: Prepare the batter and caramel layer in advance, then bake just before serving for fresh, warm cobbler.

Frequently Asked Questions

Here are some common inquiries regarding this caramel cobbler recipe:

  • Can I substitute the butter? Yes, you can use margarine or a dairy-free alternative for a similar effect.
  • What if I don’t have bourbon? You can omit it entirely or substitute with vanilla extract for flavor.
  • Can I use whole wheat flour? Yes, but the texture may be denser. Consider mixing with all-purpose flour for best results.
  • How do I know when it’s done? The cobbler should be firm with caramel bubbling at the top. A toothpick inserted should come out clean.
  • What toppings do you recommend? Serve with a scoop of vanilla ice cream or fresh whipped cream for a decadent finish.
  • Can I make this gluten-free? Substitute with a gluten-free flour blend, and ensure other ingredients are gluten-free.
  • How should I reheat leftovers? Microwave for a quick option or warm in the oven for the best texture.
  • Can I add fruit? Absolutely! Berries or stone fruits can enhance the flavor and add a fresh element.

Nutritional Information and Dietary Adaptations

Being aware of nutritional content can enhance your culinary experience. While caramel cobbler is a treat, consider these adaptations:

  • Lower Sugar Option: Reduce granulated sugar by half and add mashed bananas for natural sweetness.
  • Dairy-Free Version: Use almond or coconut milk and a dairy-free butter substitute.
  • Portion Control: Serve smaller portions alongside fresh fruit to balance the richness.

Essential Equipment Recommendations

To achieve the best results, consider using the following kitchen tools:

  • 9×13 inch baking dish: Ideal for even baking and caramelization.
  • Mixing bowls: Have both large and medium-sized bowls for easy ingredient mixing.
  • Whisk and spatula: Essential for mixing the batter smoothly and spreading it evenly.
  • Measuring cups and spoons: Accurate measuring is critical for baking success.

Serving Suggestions

To elevate your caramel cobbler experience, consider these serving ideas:

  • Pair with ice cream: A scoop of vanilla ice cream adds a delightful creaminess that complements the warm cobbler.
  • Top with whipped cream: Lightly sweetened whipped cream enhances the flavors without overpowering.
  • Sprinkle with nuts: Chopped pecans or almonds add texture and a nutty flavor that pairs beautifully with caramel.
  • Garnish with caramel sauce: Drizzle extra caramel sauce over the top for an indulgent touch.

In conclusion, caramel cobbler is more than just a dessert; it’s a heartfelt creation that brings people together. With its easy preparation and rich flavors, it’s perfect for any occasion. Remember that cooking is about connection, creativity, and warmth—just like every meal shared around the table. So, gather your loved ones, bake this delicious cobbler, and savor the moments together!

Caramel Cobbler

Prep Time 10 minutes
Cook Time 30 minutes
Total Time 40 minutes
Servings 8 pieces
Calories 450
A warm, caramel-flavored cobbler with a rich, gooey topping and a hint of bourbon, perfect for cozy desserts.

Ingredients

Butter

  • 1/2 cup butter

Dry ingredients

  • 1-1/2 cups all-purpose flour
  • 1-1/2 cups granulated sugar
  • 2 teaspoons baking powder
  • 1/2 teaspoon salt
  • 3/4 cup milk
  • 2 tablespoons bourbon (can omit)
  • 1 teaspoon vanilla

Brown sugar topping

  • 1-1/2 cups light brown sugar, packed
  • 1-1/2 cups boiling water

Instructions 

  • Preheat oven to 350°F (175°C). Melt butter in a 9x13 inch dish in the oven.
  • Mix flour, sugar, baking powder, and salt. Combine milk, bourbon, and vanilla; add to dry ingredients and stir until smooth.
  • Pour batter over melted butter. Sprinkle brown sugar evenly over top.
  • Slowly pour boiling water over the mixture. Bake for 30 minutes until bubbly and caramelized.
  • Serve warm with vanilla ice cream for a delightful dessert.

Notes

For a richer flavor, use high-quality bourbon or omit it entirely.
Calories: 450kcal
Cost: $15
Course: Dessert
Cuisine: American
Keyword: caramel

Unlock the Richness of Flavor with Air Fryer Garlic Confit

Welcome to the world of garlic confit, where the ordinary transforms into the extraordinary! This simple yet elegant recipe will teach you how to turn humble garlic cloves into a rich, aromatic delight using your air fryer. Ideal for adding depth to a variety of dishes, garlic confit is a versatile ingredient that every home cook should have in their kitchen arsenal. In this guide, we’ll explore everything you need to know about making air fryer garlic confit—from the ingredients to the techniques, and even creative ways to use your confit. Let’s dive in!

Why You’ll Love This Recipe

  • Ease of preparation: With just a few simple steps, you can create a gourmet ingredient right in your kitchen.
  • Rich flavor: The slow cooking method brings out the natural sweetness of the garlic, resulting in buttery soft and delicious cloves.
  • Versatile usage: Use garlic confit in pasta, on toast, in dressings, or as a flavor booster for meats and vegetables.
  • Long shelf life: Properly stored, garlic confit can last up to a month, making it a great make-ahead ingredient.
  • Health benefits: Garlic is known for its numerous health benefits, including immune support and anti-inflammatory properties.

Ingredients Breakdown

To make air fryer garlic confit, you’ll need the following ingredients:

  • 2-3 heads of garlic: Approximately 20-30 peeled cloves—feel free to adjust based on your flavor preference.
  • ½ – 1 cup of olive oil: Enough to fully cover the garlic in your container, ensuring even cooking and flavor infusion.
  • Fresh herbs (optional): A sprig of thyme or rosemary adds an herbal aroma and makes your confit look fancy.

Expert Pro Tips

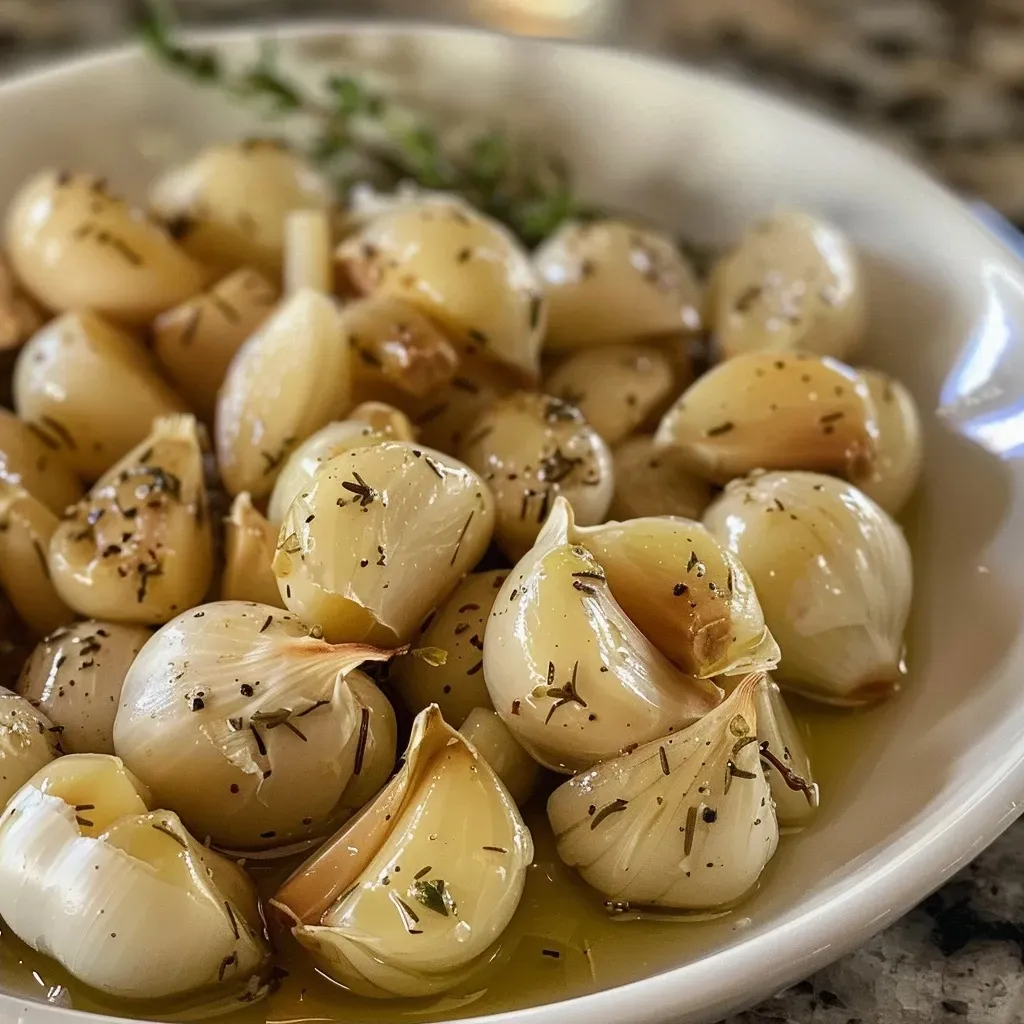
Side view of roasted garlic cloves submerged in olive oil with herbs.
  • Temperature control: Start cooking at 250°F, but if your air fryer runs hot, lower the temperature to 200°F to prevent burning.
  • Check halfway: Monitor your garlic halfway through the cooking process; if browning occurs, lower the heat.
  • Cooling time: Allow your garlic confit to cool in the air fryer to avoid burns from splattering oil.
  • Reuse the oil: Don’t discard the infused olive oil; it’s perfect for dressings or drizzling on vegetables.
  • Storage solution: Transfer garlic and oil to a jar and refrigerate for up to a month.
  • Experiment with flavors: Try adding different herbs or spices to customize your confit.
  • Texture matters: The garlic should be soft and tender; if not, adjust cooking times accordingly.
  • Label jars: Always label your storage jars with the date for tracking freshness.

Common Mistakes and Troubleshooting

Even the best chefs can run into issues. Here’s how to avoid common pitfalls:


Digital Kitchen Scale

★ Recommended Kitchen Tool

Digital Kitchen Scale

Make this recipe even easier with a quality Digital Kitchen Scale — a must-have kitchen staple!


🛒 Shop This Tool →

As an Amazon Associate, we earn from qualifying purchases.
  • Burning garlic: If your garlic is browning too quickly, lower the temperature and check regularly.
  • Too much oil: Ensure the oil just covers the garlic; too much can lead to greasy texture.
  • Not enough flavor: Make sure to infuse your garlic with herbs, as they add depth to the flavor.

Variations of Garlic Confit

While our basic garlic confit recipe is fantastic, here are some tasty variations to consider:

  • Spicy garlic confit: Add a few crushed red pepper flakes for a kick.
  • Lemon-infused garlic confit: Add lemon zest for a fresh, citrusy twist.
  • Herbed garlic confit: Use a combination of rosemary, thyme, and basil for a fragrant blend.
  • Smoked garlic confit: Use smoked olive oil to impart a unique flavor.

Storage and Make-Ahead Instructions

Garlic confit is perfect for meal prep. Here’s how to store it:

  • Refrigeration: Store in an airtight jar in the refrigerator for up to 1 month.
  • Freezing: You can also freeze garlic confit in ice cube trays for easy portioning later.

FAQs About Garlic Confit

Here are some frequently asked questions to help you on your garlic confit journey:

  • Can I use garlic confit in baking? Yes, it adds a wonderful flavor to savory baked goods.
  • Is garlic confit vegan? Yes, it’s entirely plant-based as long as you use vegetable oils.
  • What dishes pair well with garlic confit? It complements pastas, pizzas, roasted vegetables, and even spreads for sandwiches.
  • Can I use other types of oil? Absolutely! Avocado oil or grapeseed oil can be used as alternatives.
  • How can I tell if garlic confit has gone bad? Look for off smells or unusual colors. When in doubt, throw it out!
  • Can I use unpeeled garlic? While peeled is preferred for even cooking, you can use unpeeled garlic; just make sure to adjust cooking times.
  • What is the best way to use garlic confit? Use it in dressings, sauces, and as a topping for meats or vegetables.
  • Is garlic confit safe to eat? Yes, as long as it’s stored correctly and used within the recommended timeframe.

Nutrition Tips and Dietary Adaptations

Garlic confit is not only delicious but also boasts several health benefits:

  • Heart health: Garlic has been shown to support cardiovascular health.
  • Antioxidants: Garlic contains antioxidants, which can help reduce inflammation.
  • Low-carb friendly: Perfect for keto and low-carb diets, garlic confit is a flavorful addition to your meals.

Equipment Recommendations

To make garlic confit, you’ll need:

  • Air fryer: A reliable air fryer will ensure even cooking.
  • Oven-safe container: Choose a small dish that fits comfortably in your air fryer basket.
  • Storage jars: Make sure to have airtight containers for storing your confit.

Serving Suggestions

There are countless ways to enjoy garlic confit. Here are some ideas:

  • Spread on toast: Use it as a flavorful base for bruschetta or crostini.
  • Pasta sauce: Toss garlic confit with spaghetti for a quick, delicious meal.
  • Enhance roasted veggies: Drizzle garlic oil over roasted vegetables for added flavor.
  • Savory salad dressing: Blend garlic confit with vinegar and mustard for a robust vinaigrette.

In conclusion, air fryer garlic confit is not just a recipe; it’s an invitation to explore the rich flavors garlic can bring to your cooking. Whether you’re an experienced chef or a home cook, this guide equips you with all the tools you need to create this delectable condiment. Embrace the joy of cooking, and let your kitchen be your canvas!

Air Fryer Garlic Confit

Prep Time 10 minutes
Cook Time 1 hour
Total Time 1 hour 10 minutes
Servings 4 servings
Calories 50
Enjoy tender, flavorful garlic confit made effortlessly in your air fryer, perfect for salads, spreads, and cooking.

Ingredients

Garlic

  • 2-3 heads garlic (peeled, about 20-30 cloves) (use as many as desired)
  • ½ - 1 cup olive oil (enough to fully cover garlic)
  • 1 sprig fresh thyme or rosemary (optional)

Instructions 

  • Place garlic cloves and herbs in a small oven-safe container, cover with olive oil.
  • Air fry at 250°F (120°C) for 1 hour, checking halfway and adjusting temperature if needed.
  • Allow the container to cool before handling, then use immediately or refrigerate for up to 1 month.
  • Transfer garlic and oil to a jar; use in salads, spreads, or cooking.
  • Let refrigerated oil come to room temperature before use; it will liquefy again.

Notes

Check your air fryer’s temperature to prevent burning; start with lower heat if needed.
Calories: 50kcal
Cost: $10
Course: Appetizer, Side Dish
Keyword: air fryer, confit, garlic

If you’re looking for a crowd-pleasing appetizer that’s both delicious and easy to prepare, look no further! This creamy white bean dip with a spicy twist of harissa is the perfect addition to your next gathering or cozy night in. With just a few simple ingredients, you’ll whip up a dip that’s rich in flavor and texture, making it a standout dish that everyone will love.

In this definitive guide, we’ll dive deep into the world of white bean dips, exploring everything from ingredient breakdowns and variations to pro tips and common mistakes. By the end, you’ll not only have the recipe down but also the confidence to experiment and make it your own!

Why You’ll Love This Recipe

  • Quick and Easy: This white bean dip can be made in under 10 minutes, making it a perfect last-minute appetizer.
  • Healthier Option: Packed with protein and fiber from white beans, this dip is a nutritious choice compared to traditional creamy dips.
  • Customizable Flavors: The addition of harissa allows you to adjust the spice level to your liking, or you can explore other flavors based on your preferences.
  • Versatile Usage: Enjoy it as a dip with veggies or chips, spread it on sandwiches, or serve it as a condiment with grilled meats.
  • Make Ahead Friendly: This dip stores well in the fridge, allowing you to prepare it in advance and enjoy it later without losing flavor.

Ingredient Breakdown

Here’s what you’ll need to make this creamy white bean dip:


Professional Chef Knife Set

★ Recommended Kitchen Tool

Professional Chef Knife Set

Make this recipe even easier with a quality Professional Chef Knife Set — a must-have kitchen staple!


🛒 Shop This Tool →

As an Amazon Associate, we earn from qualifying purchases.
  • 12-ounce can white beans: Use drained cannellini or white northern beans for a creamy texture.
  • 3 tablespoons harissa: Spice it up with homemade harissa or store-bought varieties. Adjust the quantity based on your spice tolerance.
  • 1/4 cup crema or sour cream: For a creamier dip, use up to 1/2 cup. This adds richness and balances the spice.
  • 2 tablespoons extra virgin olive oil: This is key for a smooth consistency and adds healthy fats.
  • 2 tablespoons lemon juice: Freshly squeezed lemon juice brightens up the flavors.
  • 1/2 teaspoon lemon zest: Enhances the citrus notes in the dip.
  • Salt to taste: Don’t forget to season appropriately to bring all the flavors together.

How to Make Creamy White Bean Dip – Step by Step

Follow these simple steps to create your dip:

  1. Add all of the ingredients to a food processor.
  2. Process until smooth, scraping down the sides as needed.
  3. Taste and adjust for salt and harissa based on your preference.
  4. Scoop into a bowl and serve with your favorite dippers!

Pro Tips for the Best White Bean Dip

Side view of a bowl filled with creamy white bean dip, topped with a drizzle of harissa.
  • Choose the Right Beans: While canned beans are convenient, cooking your own can elevate the taste. Simmer them with aromatics like onion and garlic for extra flavor.
  • Roast the Garlic: If you enjoy a deeper garlic flavor, roast a head of garlic and blend it into the dip for a sweeter, more mellow taste.
  • Adjust the Creaminess: For an ultra-creamy texture, consider adding a splash of bean cooking liquid or more olive oil during blending.
  • Experiment with Herbs: Fresh herbs like parsley or basil can be blended in or used as a garnish for added freshness.
  • Play with Spices: If harissa isn’t your thing, experiment with smoked paprika or a dash of cayenne pepper for a different kick.
  • Let it Chill: For the best flavor, let your dip sit in the fridge for at least an hour before serving to allow the flavors to meld.
  • Use Quality Ingredients: The flavor of your dip will be enhanced by using high-quality olive oil and fresh lemon juice.
  • Variations are Key: Don’t hesitate to swap out ingredients or add in your favorites to make the recipe your own.

Common Mistakes and Troubleshooting

Here are a few common pitfalls to avoid when making your white bean dip:

  • Over-blending: While a smooth texture is desirable, over-blending can lead to a gummy consistency. Blend just until combined.
  • Neglecting Seasoning: A little salt can enhance the flavors significantly. Taste and adjust until it’s just right.
  • Skipping the Zest: Lemon zest adds a bright note that elevates the dip. Don’t skip this step!
  • Using Dried Out Beans: If you’re using dried beans, ensure they are cooked properly and remain moist for the best texture.

Recipe Variations

Feel free to get creative with these variations of the classic white bean dip:

  • Herbed White Bean Dip: Add fresh herbs like dill, parsley, or basil for a refreshing twist.
  • Smoky Chipotle White Bean Dip: Substitute harissa for chipotle peppers in adobo sauce for a smoky flavor.
  • Sun-Dried Tomato & White Bean Dip: Blend in chopped sun-dried tomatoes for a Mediterranean flair.
  • Cheesy White Bean Dip: Fold in some grated parmesan or nutritional yeast for a cheesy depth of flavor.

Storage and Make-Ahead Instructions

This creamy white bean dip can be made ahead of time and stored in the refrigerator:

  • Refrigeration: Store in an airtight container for up to 5 days.
  • Freezing: While it’s best fresh, you can freeze the dip for up to 3 months. Thaw overnight in the refrigerator before serving.
  • Serving Suggestion: Drizzle with extra olive oil and garnish with fresh herbs before serving for a beautiful presentation.

FAQ: Your White Bean Dip Questions Answered

  • Can I use dried beans instead of canned? Yes! Just be sure to soak and cook them until tender before using.
  • What can I serve with white bean dip? Great options include pita chips, veggie sticks, crackers, or even as a spread on sandwiches.
  • How spicy is this dip? The spice level can be adjusted based on the amount of harissa you use, making it as mild or spicy as you prefer.
  • Can I make this dip vegan? Absolutely! Just use a non-dairy sour cream alternative.
  • Is this dip gluten-free? Yes, all ingredients are naturally gluten-free.
  • How can I make this dip creamier? Increase the amount of crema or olive oil for a richer texture.
  • Can I add additional flavors? Yes! Feel free to add roasted garlic, lemon zest, or even a splash of balsamic vinegar for a unique twist.
  • How long does this dip keep? It can last up to 5 days in the refrigerator, making it perfect for meal prep.

Nutrition Tips and Dietary Adaptations

This creamy white bean dip is not only delicious but also nutritious. Here are some tips to make it even healthier:

  • Add More Veggies: Blend in cooked spinach or kale for added nutrients.
  • Reduce Oil: If you’re watching your fat intake, reduce the olive oil and replace it with a little water or bean liquid.
  • Protein Boost: Add a scoop of Greek yogurt for additional protein without compromising the flavor.

Equipment Recommendations

To make the process easier, here’s a quick list of essential tools:

  • Food Processor: Essential for achieving that creamy texture effortlessly.
  • Measuring Cups and Spoons: For accurate ingredient measurement.
  • Spatula: Great for scraping down the sides of the food processor.

Serving Suggestions

When it’s time to serve your creamy white bean dip, consider these delightful pairings:

  • Fresh Veggies: Carrot sticks, cucumber slices, and bell pepper strips make for a colorful platter.
  • Crunchy Chips: Tortilla chips or pita chips add texture and contrast.
  • Artisan Bread: A sliced baguette or rustic bread pairs beautifully with the creamy dip.

In conclusion, this creamy white bean dip with harissa not only elevates your appetizer game but also invites creativity in the kitchen. With its rich flavors and smooth texture, it’s sure to impress your guests while being easy to prepare. So gather your ingredients, follow the steps, and get ready to enjoy a delicious dip that’s perfect for any occasion!

Creamy White Bean Dip Recipe with Harissa

Prep Time 10 minutes
Total Time 10 minutes
Servings 4 servings
Calories 180
This flavorful and creamy white bean dip with harissa is perfect for snacking or as a spread. Easy to make and full of bold flavors.

Ingredients

Canned Goods

  • 12 ounces white beans (cannellini or northern beans) (drained)
  • 3 tablespoons harissa (see homemade or store-bought)
  • 0.25 cup crema or sour cream (use 0.5 cup for creamier)
  • 2 tablespoons olive oil (extra virgin)
  • 2 tablespoons lemon juice
  • 0.5 teaspoon lemon zest
  • to taste salt

Instructions 

  • Add all ingredients to a food processor and blend until smooth.
  • Taste and adjust salt as needed.
  • Scoop into a bowl and serve.

Notes

This dip pairs well with pita chips, vegetables, or as a spread on sandwiches.
Calories: 180kcal
Cost: $8
Course: Appetizer
Cuisine: Mediterranean
Keyword: Dip, harissa, white beans

Welcome to the delightful world of low carb baking! As a seasoned chef with over two decades of experience, I’m thrilled to share this enchanting recipe for Low Carb Chocolate Cauldron Cupcakes. Perfectly suited for special occasions like Halloween or simply to satisfy your sweet tooth, these cupcakes are not only delicious but also guilt-free. With rich chocolate flavor and a unique presentation, they are sure to impress family and friends while keeping your carb count in check.

In this comprehensive guide, we will explore everything you need to know about making the best low carb chocolate cupcakes, from ingredient breakdowns to troubleshooting tips. Let’s dive in!

Why You’ll Love This Recipe

  • Guilt-free indulgence: These cupcakes are low in carbs and sugar, allowing you to enjoy a sweet treat without the guilt.
  • Easy to make: With simple ingredients and straightforward steps, even novice bakers can create these cupcakes with confidence.
  • Customizable flavors: This recipe serves as a fantastic base, allowing you to experiment with different flavors and toppings.
  • Perfect for gatherings: Their festive cauldron shape makes them an appealing dessert for parties and celebrations.
  • Diet-friendly: Suitable for keto diets, gluten-free lifestyles, and anyone looking to reduce sugar intake.

Ingredients Breakdown

To create your enchanting cauldron cupcakes, you’ll need the following ingredients:


5-Speed Electric Hand Mixer

★ Recommended Kitchen Tool

5-Speed Electric Hand Mixer

Make this recipe even easier with a quality 5-Speed Electric Hand Mixer — a must-have kitchen staple!


🛒 Check Price on Amazon →

As an Amazon Associate, we earn from qualifying purchases.
  • 3/4 cup almond flour: A fantastic low-carb alternative to regular flour, almond flour provides moisture and richness.
  • 3 large whole eggs: Eggs add structure and help bind the ingredients together.
  • 1 tbsp. baking powder: This will help your cupcakes rise and become fluffy.
  • 1/2 cup light flavored oil: Grapeseed oil works well, but feel free to use any neutral oil of your choice.
  • 1/2 cup erythritol: A natural low-carb sweetener that mimics sugar without the calories.
  • 1/4 cup unsweetened cocoa powder: For that rich chocolate flavor, ensuring your cupcakes are decadent.
  • 1 tsp. pure vanilla extract: Adds depth and enhances the flavor of the chocolate.
  • 1/2 cup coconut fat: A great addition for moisture; you can substitute with unsalted butter if preferred.
  • 1/4 cup erythritol (for frosting): Sweetens your frosting without the carbs.
  • 1/4 cup unsweetened cocoa powder (for frosting): Ensures your frosting remains chocolatey and delicious.

Pro Tips for Perfect Cupcakes

Here are some expert insights to elevate your cupcake game:

  • Room temperature ingredients: Make sure your eggs and oils are at room temperature for better mixing.
  • Don’t overmix: Mix just until combined to avoid dense cupcakes; a light-handed approach is key.
  • Check for doneness: Use a toothpick to test if the cupcakes are done; it should come out clean.
  • Cool completely: Allow cupcakes to cool before frosting to prevent melting.
  • Experiment with sweeteners: If you prefer a different sweetness level, adjust the amount of erythritol to your taste.
  • Frosting alternatives: Try cream cheese frosting or whipped coconut cream for a different twist.
  • Use quality cocoa: A high-quality cocoa powder will enhance the flavor of your cupcakes significantly.
  • Store properly: Keep leftovers in an airtight container to maintain freshness.

Common Mistakes and Troubleshooting

Close-up image of low-carb chocolate cupcakes decorated with dark chocolate.

Here are some common pitfalls to avoid and how to remedy them:

  • Dry cupcakes: If your cupcakes turn out dry, try using more fat or check your oven temperature to ensure it’s not too high.
  • Flat cupcakes: Make sure your baking powder is fresh and that you’re using the right oven temperature.
  • Overly sweet: Reduce the erythritol if you find the cupcakes too sweet; remember, it can be adjusted to your taste.
  • Burnt edges: Check your oven positioning; placing your cupcake tray in the center can help prevent uneven baking.

Variations to Try

You can easily customize this recipe to suit your taste or occasion. Here are some fun variations:

  • Peanut Butter Swirl: Add a spoonful of natural peanut butter to the batter for a delightful flavor combination.
  • Minty Fresh: Incorporate peppermint extract into the batter for a refreshing twist, perfect for the holidays.
  • Spicy Pumpkin: Replace part of the cocoa powder with pumpkin puree and add pumpkin spice for a seasonal touch.
  • Chocolate Chip: Fold in sugar-free chocolate chips to the batter for added texture and sweetness.

Storage and Make-Ahead Instructions

Planning ahead? Here’s how to store and make these cupcakes in advance:

  • Room Temperature Storage: Cupcakes can be kept at room temperature for up to 3 days in an airtight container.
  • Refrigeration: Store in the fridge for up to a week if you’ve used cream cheese frosting.
  • Freezing: Freeze unfrosted cupcakes by placing them in a single layer on a baking sheet, then transfer to a freezer bag once solid.
  • Make Ahead: You can prepare the batter in advance and refrigerate it overnight before baking.

Frequently Asked Questions (FAQ)

Here are some common questions about low carb chocolate cupcakes:

  • Can I use coconut flour instead of almond flour? Yes, but remember to adjust the liquid as coconut flour absorbs more moisture.
  • How do I know if my cupcakes are done? Insert a toothpick; if it comes out clean, they are ready!
  • Can I make these cupcakes without eggs? You can substitute eggs with flaxseed meal or applesauce, but the texture may vary.
  • What sweeteners can I use? Other low-carb sweeteners like monk fruit or stevia can be used, but adjust the quantity as needed.
  • How can I make these cupcakes dairy-free? Substitute the coconut fat with dairy-free butter or olive oil.
  • What toppings can I use? Feel free to add nuts, berries, or sugar-free chocolate chips!
  • Are these cupcakes gluten-free? Yes! All the ingredients used are naturally gluten-free.
  • Can I use a different frosting? Absolutely! Try whipped cream or a different low-carb frosting recipe.

Nutrition Tips and Dietary Adaptations

For those watching their dietary intake, here are some nutritional insights:

  • Low carb: Each cupcake contains approximately 2g of net carbs, making them perfect for keto diets.
  • High protein: The eggs contribute protein, which helps keep you full longer.
  • Dairy-free options: Easily make the recipe dairy-free by substituting the coconut fat and using a dairy-free frosting.
  • Vegan Adaptation: Substitute eggs with flaxseed meal and ensure your sweeteners are plant-based.

Equipment Recommendations

To make your baking experience seamless, here’s a list of recommended tools:

  • Muffin tin or silicone molds: For baking the cauldron cupcakes.
  • Mixing bowls: A medium and a large bowl will suffice for mixing ingredients.
  • Electric mixer: Ideal for whipping up the frosting quickly and evenly.
  • Measuring cups and spoons: Accurate measurements are key to successful baking.

Serving Suggestions

To enhance the experience, consider these serving ideas:

  • Decorative presentation: Serve cupcakes on a festive platter with Halloween-themed decorations.
  • Pair with coffee or tea: The rich chocolate flavor pairs beautifully with a warm beverage.
  • Add fresh berries: Garnish with low-carb berries for a pop of color and added nutrition.
  • Festive toppings: Use whipped cream, sugar-free chocolate drizzle, or nuts for added texture.

As you embark on your baking adventure, remember that cooking is about connection and joy. These Low Carb Chocolate Cauldron Cupcakes are not just a recipe; they’re an opportunity to create memories with loved ones. Whether you’re enjoying them on a cozy evening or at a festive gathering, I hope they bring you the same warmth and happiness they bring to my kitchen. Thank you for joining me on this culinary journey—happy baking!

Low Carb Chocolate Cauldron Cupcakes

Prep Time 10 minutes
Cook Time 25 minutes
Total Time 35 minutes
Servings 12 cupcakes
Calories 150
Delight in these low carb, chocolatey cupcakes baked in cauldrons for a spooky twist. Perfect for a guilt-free treat that impresses.

Ingredients

Dry ingredients

  • 3/4 cup almond flour
  • 1 tbsp. baking powder
  • 1/4 cup unsweetened cocoa powder

Wet ingredients

  • 3 large whole eggs
  • 1 tbsp. baking powder
  • 1/2 cup light flavored oil ((grapeseed))
  • 1/2 cup erythritol
  • 1/4 cup unsweetened cocoa powder
  • 1 tsp. pure vanilla extract

Additional fats

  • 1/2 cup coconut fat ((see note above))
  • 1/4 cup erythritol

Instructions 

  • Preheat oven to 350°F (175°C). Line cauldrons or muffin tins.
  • Mix dry ingredients in a bowl. In another bowl, whisk eggs, oil, vanilla, and sweeteners.
  • Combine wet and dry mixtures until smooth. Portion into cauldrons or liners.
  • Bake for 20-30 minutes until a cake tester comes out clean.
  • Cool completely, then frost as desired. Serve and enjoy!

Notes

Ensure cupcakes are fully cooled before frosting for best results.
Calories: 150kcal
Cost: $15
Course: Dessert
Cuisine: American
Keyword: chocolate, cupcakes, Low Carb

Crafting the Perfect Healthy Beef Stew: A Culinary Journey

Welcome to a world of rich flavors and nourishing ingredients! In this guide, I’ll take you through the art of making a **healthy beef stew** that’s not just delicious but also packed with nutrients. Whether you’re looking to warm up on a chilly evening or impress your family with a comforting meal, this stew recipe is your answer. With tender chunks of beef, vibrant vegetables, and a medley of spices, you’ll discover a dish that truly warms the soul.

In this article, we’ll explore everything from the choice of ingredients to cooking techniques, ensuring that you create a stew that’s both satisfying and healthy. So, roll up your sleeves and let’s dive into making this **healthy beef stew** that will become a staple in your home!

Why You’ll Love This Healthy Beef Stew

This healthy beef stew isn’t just a meal; it’s a comforting embrace in a bowl. Here’s why you’ll love it:


Cast Iron Skillet

★ Recommended Kitchen Tool

Cast Iron Skillet

Make this recipe even easier with a quality Cast Iron Skillet — a must-have kitchen staple!


🛒 View on Amazon →

As an Amazon Associate, we earn from qualifying purchases.
  • Wholesome Ingredients: Made with fresh vegetables and lean cuts of beef, this stew is nutrient-rich and satisfying.
  • Easy to Make: Even if you’re a novice in the kitchen, this recipe is straightforward with clear steps to follow.
  • Versatile: Customize the stew with your favorite veggies or spices to suit your taste preferences.
  • Perfect for Meal Prep: This stew stores well, making it an excellent option for batch cooking and enjoying throughout the week.
  • Family-Friendly: Kids and adults alike will love the hearty flavors and tender texture, making it a great choice for family dinners.

Essential Ingredients for Your Healthy Beef Stew

To create this delightful dish, here’s what you’ll need:

  • 2.5 lbs boneless beef chuck: Cut into 1-inch pieces for optimal tenderness.
  • 2 tsp kosher salt: Enhances the flavor without overpowering the dish.
  • Freshly ground black pepper: For seasoning and depth of flavor.
  • 3 tbsp avocado oil: A healthy fat for sautéing and browning the beef.
  • 1 large yellow onion: Chopped for sweetness and aroma.
  • 5 cloves garlic: Smashed to release its robust flavor.
  • 2 tbsp tomato paste: Adds richness and depth to the broth.
  • ¼ cup all-purpose flour: Use gluten-free flour if needed for thickening.
  • 6 cups beef broth or bone broth: A flavorful base that adds richness and extra protein.
  • 2 tbsp balsamic vinegar: For a hint of acidity and brightness.
  • 1 lb small Yukon gold potatoes: Cut into 1-inch pieces; they hold their shape well.
  • 4 large carrots: Sliced into ¼-inch coins for sweetness and color.
  • 4 large celery stalks: Sliced ¼-inch thick for crunch and flavor.
  • 1 cup frozen peas: Added at the end for freshness and color.

Step-by-Step Instructions to Make Healthy Beef Stew

Side angle of a steaming bowl of beef stew featuring vegetables and beef pieces.

Let’s get cooking! Follow these detailed steps to create a flavorful and healthy beef stew:

  • Prep the Beef: Pat the beef dry with paper towels. This helps it brown beautifully. Season generously with salt and pepper.
  • Sear the Beef: In a large Dutch oven, heat avocado oil over medium-high heat. Brown the beef in batches for 3–5 minutes per side. Transfer to a plate and set aside.
  • Cook the Onions: Remove excess fat from the pot, leaving a bit for flavor. Add the chopped onion and cook for about 5 minutes, stirring to scrape up the browned bits.
  • Add the Vegetables & Garlic: Stir in the carrots and celery, cooking for 3–4 minutes. Add the smashed garlic and cook for 30 seconds until fragrant.
  • Return the Beef: Add the beef back into the pot along with any juices.
  • Add the Flour: Sprinkle flour over the mixture, stirring well to coat everything evenly.
  • Add Liquids: Pour in the beef broth, tomato paste, and balsamic vinegar. Stir until the tomato paste dissolves.
  • Simmer: Add the potatoes, bring to a gentle boil, then reduce heat to low. Cover and simmer for about 2 hours, stirring occasionally, until the beef is fork-tender.
  • Add the Peas: Stir in frozen peas during the last 5 minutes of cooking for freshness.
  • Make the Slurry (Optional): For a thicker stew, whisk 1½–2 tablespoons cornstarch with 1–2 tablespoons cold water until smooth.
  • Thicken the Stew: Slowly pour the slurry into the simmering stew while stirring continuously. Cook for 2–3 minutes until thickened.

Expert Tips for the Best Healthy Beef Stew

Here are some expert insights to elevate your stew-making game:

  • Use Quality Beef: Always choose fresh, high-quality beef chuck for the best taste and tenderness.
  • Don’t Rush the Browning: Properly searing the beef creates depth of flavor, so take your time during this step.
  • Layer Flavors: Consider adding herbs like thyme or bay leaves during cooking for an aromatic experience.
  • Adjust Seasoning: Taste your stew before serving and adjust the salt and pepper as needed.
  • Let It Rest: Allow the stew to sit for a few minutes before serving to meld the flavors.
  • Garnish: Fresh parsley or a sprinkle of lemon zest can brighten the dish just before serving.

Common Mistakes and Troubleshooting

Here are some common pitfalls to avoid when making beef stew:

  • Overcrowding the Pot: Searing too much beef at once can cause it to steam instead of brown. Work in batches.
  • Skipping the Browning: Don’t skip this step; it’s essential for flavor.
  • Using Too Much Liquid: For a thick stew, keep an eye on the amount of broth added.
  • Not Cooking Long Enough: For fork-tender beef, ensure you simmer long enough; patience is key!

Delicious Variations to Try

Feel free to get creative with your healthy beef stew! Here are some tasty variations:

  • Spicy Kick: Add red pepper flakes or diced jalapeños for a spicy version.
  • Herb Infusion: Experiment with fresh herbs like rosemary, thyme, or oregano for added flavor.
  • Asian Twist: Incorporate soy sauce and ginger for an Asian-inspired stew.
  • Vegetarian Option: Substitute beef with hearty mushrooms and vegetable broth for a plant-based alternative.

Storage and Make-Ahead Instructions

This healthy beef stew is perfect for meal prep!

  • Refrigerator: Store leftovers in an airtight container for up to 4 days. Reheat on the stovetop or microwave.
  • Freezer: Freeze in portions for up to 3 months. Thaw overnight in the refrigerator before reheating.
  • Make-Ahead: Prepare the stew a day in advance; flavors improve overnight!

Frequently Asked Questions (FAQ)

Here are some common questions about making healthy beef stew:

  • Can I use a different cut of beef? Yes, cuts like brisket or round can also work well.
  • Is beef stew healthy? Absolutely! When made with lean beef and plenty of vegetables, it’s a nutritious meal.
  • Can I make this stew in a slow cooker? Yes, you can adapt the recipe for slow cooker or Instant Pot methods.
  • What can I serve with beef stew? Consider crusty bread, mashed potatoes, or a fresh salad.
  • Can I add more vegetables? Definitely! Feel free to add bell peppers, mushrooms, or green beans.
  • How do I know when the beef is tender? The beef should be fork-tender and easy to pull apart when it’s done.
  • Can this stew be gluten-free? Yes, just use gluten-free flour for thickening.
  • What’s the best way to reheat leftovers? Gently reheat on the stovetop for even warming without overcooking.

Nutritional Benefits and Dietary Adaptations

This healthy beef stew is not only delicious but also packed with nutritional benefits:

  • High in Protein: The beef provides significant protein, helping to support muscle health.
  • Rich in Vitamins: Vegetables like carrots and celery deliver essential vitamins and minerals.
  • Low in Saturated Fat: By using lean cuts of beef and healthy cooking oils, you keep saturated fat content in check.
  • Dairy-Free: This recipe contains no dairy, making it suitable for those with lactose intolerance.

Equipment Recommendations

To make your cooking experience smoother, here’s what you’ll need:

  • Large Dutch Oven: Ideal for browning beef and simmering the stew.
  • Wooden Spoon: Great for stirring and scraping up those delicious browned bits.
  • Measuring Cups and Spoons: For precise ingredient measurements.
  • Sharp Knife: Essential for cutting beef and vegetables easily.

Serving Suggestions

When it comes to serving your healthy beef stew, consider these delightful pairings:

  • Crusty Bread: Perfect for dipping and soaking up the delicious broth.
  • Side Salad: A fresh green salad can balance the hearty stew beautifully.
  • Mashed Potatoes: For those who love an extra comforting side, serve it with creamy mashed potatoes.
  • Herb Garnish: Fresh parsley or thyme adds a pop of color and freshness.

In conclusion, this healthy beef stew is more than just a meal; it’s a comforting experience filled with warmth and flavor. With the tips and variations provided, you can make it your own and enjoy it any night of the week. So gather your ingredients and get ready to create a dish that nourishes both the body and soul. Happy cooking!

Healthy Beef Stew

Prep Time 20 minutes
Cook Time 2 hours
Total Time 2 hours 20 minutes
Servings 6 servings
Calories 450
A hearty and nutritious beef stew packed with vegetables and rich flavors, perfect for a comforting meal.

Ingredients

Meat

  • 2.5 lbs boneless beef chuck (cut into 1-inch pieces)
  • 2 tsp kosher salt
  • Freshly ground black pepper
  • 3 tbsp avocado oil
  • 1 large yellow onion (chopped)
  • 5 cloves garlic (smashed)
  • 2 tbsp tomato paste
  • ¼ cup all-purpose flour (gluten-free if needed)
  • 6 cups beef broth or bone broth (or 3 cups broth + 3 cups water)
  • 2 tbsp balsamic vinegar
  • 1 lb small Yukon gold potatoes (cut into 1-inch pieces)
  • 4 large carrots (sliced into ¼-inch coins)
  • 4 large celery stalks (sliced ¼-inch thick)
  • 1 cup frozen peas

Instructions 

  • Pat the beef dry, season with salt and pepper, then brown in batches in hot oil. Set aside.
  • Sauté onions in the same pot until softened, then add carrots and celery, cooking for a few minutes. Add garlic and cook briefly.
  • Return beef to the pot, sprinkle with flour, and stir to coat. Pour in broth, tomato paste, and vinegar, stirring until combined.
  • Add potatoes, bring to a boil, then reduce heat, cover, and simmer for 2 hours until beef is tender. Stir in peas in the last 5 minutes.
  • If desired, whisk cornstarch with water and stir into the stew to thicken, cooking for a few more minutes.

Notes

For a thicker stew, add a cornstarch slurry during the final step.
Calories: 450kcal
Cost: $15
Course: Main Course
Cuisine: American
Keyword: Beef, healthy, Stew

Welcome to the ultimate guide for creating Spider Hot Dogs, a fun and spooky twist on a classic favorite! These delightful creations are perfect for family gatherings, Halloween celebrations, or simply to bring a smile to your kids’ faces. In just a few simple steps, you can transform ordinary hot dogs into whimsical spider shapes that will impress children and adults alike. Let’s dive into the details and discover how to make your next BBQ or family meal truly memorable!

Why You’ll Love This Recipe

There are many reasons to fall in love with these Spider Hot Dogs. Here are some benefits that make this recipe a must-try:

  • Fun Presentation: These spider-shaped hot dogs are not only tasty but also visually engaging, making them a hit at any gathering.
  • Quick and Easy: With just a few ingredients and minimal prep time, you can whip up these spooky snacks in no time.
  • Kid-Friendly: This recipe is perfect for kids, making mealtime more enjoyable and encouraging them to eat with enthusiasm.
  • Customizable: You can easily modify the recipe to suit your taste preferences by adding different spices or toppings.
  • Great for All Occasions: Whether it’s Halloween, a BBQ, or just a fun dinner at home, these Spider Hot Dogs fit the bill!

Ingredients for Spider Hot Dogs

Here’s what you’ll need to create your spooky hot dog masterpiece:


Digital Kitchen Scale

★ Recommended Kitchen Tool

Digital Kitchen Scale

Make this recipe even easier with a quality Digital Kitchen Scale — a must-have kitchen staple!


🛒 View on Amazon →

As an Amazon Associate, we earn from qualifying purchases.
  • Hot Dogs: Choose your favorite brand. Beef, turkey, or plant-based options work well.
  • Knife: A sharp knife will help you create precise cuts for the spider legs.
  • Grill: You can use a gas grill, charcoal grill, or even a stovetop grill pan.

Optional ingredients for added fun:

  • Crescent Dough: Wrap hot dogs in crescent dough for a delicious twist.
  • Mustard & Ketchup: For serving, these condiments can enhance the spooky look of your Spider Hot Dogs.

How to Make Spider Hot Dogs

Ready to create your own Spider Hot Dogs? Follow these simple steps:

1. Preheat the Grill

Before you start, preheat your grill to medium heat. This ensures even cooking and the perfect crispy texture.

2. Cut the Hot Dogs

Using your knife, make an X cut into both ends of each hot dog:

  • Cut about 1-1.5 inches from each end, leaving the center intact (around 1.5 inches) to form the spider’s body.
  • The cuts will create spider legs that curl up while grilling, giving an authentic look.

3. Grill the Hot Dogs

Place the prepared hot dogs on the grill. Cook them for about 5-7 minutes, turning occasionally:

  • Watch as the legs start to curl up, resembling real spider legs.
  • Ensure they are heated through and have grill marks for added flavor.

4. Arrange on a Plate

Once grilled, carefully arrange the hot dogs on a serving plate. You can position the legs to enhance the spidery look.

5. Add the Eyes

For an extra touch of fun, you can use small dots of mustard or ketchup to create eyes on your spider hot dogs!

Tips for the Best Spider Hot Dogs

Side view of juicy Spider Hot Dogs being grilled, with grill marks visible.

Here are some expert insights to ensure your Spider Hot Dogs turn out perfectly:

  • Cut Carefully: Use a sharp knife to make precise cuts, which helps the legs curl nicely.
  • Watch the Heat: Maintain medium heat on the grill to avoid burning the hot dogs.
  • Experiment with Flavors: Try adding spices to your hot dogs before grilling for a flavor boost.
  • Use Toothpicks: For added stability, insert toothpicks into the hot dogs to help hold them in place.
  • Try Different Shapes: Cut the hot dogs in various ways to create different spider designs.
  • Make it a Family Activity: Involve the kids in the preparation for added fun!
  • Pair with Dips: Serve with a variety of dips for a more dynamic flavor experience.
  • Safety First: Always supervise children while using knives or handling hot grills.

Variations of Spider Hot Dogs

Feeling creative? Here are some fun variations of the classic Spider Hot Dogs:

  • Spider Dogs with Crescent Rolls: Wrap hot dogs in crescent dough before grilling for a flaky, delicious twist.
  • Cheesy Spider Dogs: Insert cheese slices in the cuts before grilling for a gooey surprise.
  • Veggie Spider Dogs: Use veggie hot dogs for a healthier option that everyone can enjoy.
  • Spicy Spider Dogs: Add jalapeños or your favorite spicy sauce for a kick.

Storage and Make-Ahead Instructions

If you have leftovers or want to prepare ahead of time, here’s how to store and serve:

  • Refrigeration: Store leftover Spider Hot Dogs in an airtight container in the refrigerator for up to 3 days.
  • Reheating: Reheat in the microwave or on the grill until heated through before serving.
  • Make Ahead: You can pre-cut the hot dogs and store them in the refrigerator for up to a day before grilling.

Common Questions About Spider Hot Dogs

Here are some frequently asked questions that can help you with your Spider Hot Dogs:

  • Can I use turkey hot dogs? Yes! Turkey or plant-based hot dogs work wonderfully as alternatives.
  • What can I serve with Spider Hot Dogs? Serve with baked beans, coleslaw, or a fresh salad for a complete meal.
  • Can I freeze Spider Hot Dogs? While it’s not recommended to freeze them after grilling, you can freeze uncooked hot dogs and add them to a meal later.
  • How can I make them less spicy? Use mild hot dogs and avoid adding spicy toppings or sauces.
  • What’s the best way to grill them? Use indirect heat for even cooking and avoid burning.
  • Do I need to soak wooden skewers? If using skewers for decoration, soak them in water for 30 minutes to prevent burning on the grill.
  • Can I add vegetables to the grill? Absolutely! Grilled vegetables make a great side dish.
  • How do I create a spider web effect with sauce? Use a squeeze bottle to drizzle ketchup and mustard in a web pattern on the plate.

Nutrition Tips and Dietary Adaptations

This recipe can be adjusted to fit various dietary needs:

  • Low-Sodium Option: Choose low-sodium hot dogs to reduce salt intake.
  • Gluten-Free: Use gluten-free hot dogs and crescent dough for a gluten-free version.
  • Vegan Option: Opt for vegan hot dogs and use plant-based crescent dough.
  • Low-Calorie Version: Use turkey or chicken hot dogs for fewer calories.

Equipment Recommendations

To get the best results, here’s some equipment you might consider:

  • Grill: A reliable grill is essential for even cooking.
  • Sharp Knife: A chef’s knife or paring knife for precise cutting.
  • Grilling Tongs: To safely flip and remove hot dogs from the grill.
  • Serving Platter: A fun platter can enhance the presentation of your Spider Hot Dogs.

Serving Suggestions

When it comes to serving your Spider Hot Dogs, consider these ideas:

  • Fun Presentation: Serve them on a platter with a spooky theme for Halloween.
  • Condiment Station: Set up a variety of condiments for guests to customize their hot dogs.
  • Pair with Sides: Baked beans, corn on the cob, or potato salad make great sides.
  • Family Style: Allow everyone to create their own Spider Hot Dogs with various toppings.

In conclusion, making Spider Hot Dogs is not just about food; it’s about creating memories and having fun in the kitchen. So gather your ingredients, get the kids involved, and enjoy a delightful cooking experience. Happy grilling!

Spider Hot Dogs on the Grill

Prep Time 5 minutes
Cook Time 10 minutes
Total Time 15 minutes
Servings 4 pieces
Calories 150
Create fun and spooky spider-shaped hot dogs perfect for summer barbecues or Halloween parties. Simple to prepare and sure to impress!

Ingredients

Main

  • 4 pieces hot dogs
  • 1 knife knife (for cutting)
  • 1 grill grill (for cooking)

Instructions 

  • Cut an X into both edges of each hot dog.
  • Slice 1 to 1.5 inches from each end, leaving the middle intact to form the body.
  • Grill the hot dogs until the ends curl, resembling spider legs.
  • Arrange the hot dogs on a plate to look like spiders' legs.

Notes

Use skewers or toothpicks to help arrange the legs if needed.
Calories: 150kcal
Cost: $5
Course: Appetizer
Cuisine: American
Keyword: hot dogs