Author

Mike

Browsing

Discover the Joy of Apple Cider Braised Brisket

Welcome to a culinary journey that brings together the rich flavors of beef and the sweet, tangy notes of apple cider. This Apple Cider Braised Brisket recipe is not just a meal; it’s an experience that transforms your kitchen into a warm, inviting space filled with comforting aromas. Perfect for family gatherings or cozy dinners, this dish is sure to impress your guests and become a beloved staple in your home.

In this definitive guide, we’ll explore every aspect of this recipe, from ingredient selection to cooking techniques, ensuring that you can create a perfectly tender and flavorful brisket every time. Let’s dive in!

Why You’ll Love This Recipe

  • Unforgettable Flavor: The combination of apple cider and spices creates a complex flavor profile that enhances the natural taste of the beef brisket.
  • Effortless Cooking: With a hands-off approach, this recipe allows you to set it and forget it, making it perfect for busy weeknights or weekend gatherings.
  • Impressive Presentation: Serve this dish with its rich sauce and colorful vegetables for a stunning centerpiece that will wow your guests.
  • Family-Friendly: The mild sweetness of the apple cider makes this dish appealing to both kids and adults, ensuring everyone at the table will enjoy it.
  • Versatile Pairings: This brisket pairs wonderfully with a variety of sides, from creamy mashed potatoes to crisp green salads, making it a flexible dish for any occasion.

Ingredient Breakdown

Understanding your ingredients is key to mastering this beef brisket recipe. Here’s a detailed look at what you’ll need:


Digital Meat Thermometer

★ Recommended Kitchen Tool

Digital Meat Thermometer

Make this recipe even easier with a quality Digital Meat Thermometer — a must-have kitchen staple!


🛒 View on Amazon →

As an Amazon Associate, we earn from qualifying purchases.
  • Beef Brisket: 1 (3- to 4-lb.) cut is ideal for this recipe. Look for a brisket with good marbling, as this will help keep the meat tender during cooking.
  • Kosher Salt: Essential for seasoning the brisket and enhancing its flavor.
  • Freshly Ground Black Pepper: Adds depth and a mild heat to the dish.
  • Neutral Oil: 2 tablespoons for searing the brisket; can use canola or vegetable oil.
  • Baby Potatoes: 1 1/2 lbs, halved. These add heartiness to the dish and soak up the delicious sauce.
  • Carrots: 4 large, peeled and cut into 2-inch pieces for sweetness and color.
  • Shallots: Sliced into 1/4-inch thick rounds for a mild onion flavor.
  • Apple Cider: 4 cups, the star of the show that will tenderize the brisket and add sweetness.
  • Broth: 1 1/2 cups low-sodium beef or chicken broth to complement the cider.
  • Fresh Thyme: 6 sprigs for aromatic flavor.
  • Bay Leaves: 2 leaves to enhance the savory notes.
  • Cayenne Pepper: 3/4 teaspoon for a hint of heat, adjustable to your preference.

Pro Tips for Perfect Braised Brisket

Side angle of tender apple cider braised brisket, surrounded by potatoes and carrots.
  • Choose the Right Cut: For best results, opt for the flat cut brisket; it’s leaner and cooks evenly.
  • Season Generously: Don’t skimp on salt and pepper; they enhance the overall flavor of the dish.
  • Sear for Flavor: Browning the brisket before braising adds depth and richness to the sauce.
  • Low and Slow: Braise the brisket at a low temperature for several hours to achieve that fork-tender texture.
  • Rest the Meat: Allow the brisket to rest after cooking to let the juices redistribute for a juicier bite.
  • Use a Dutch Oven: A heavy pot retains heat well and provides even cooking.
  • Don’t Overcrowd the Pot: Ensure there’s enough space for the brisket to cook evenly; overcrowding leads to steaming instead of braising.
  • Save the Juices: The sauce is a treasure! Use it to drizzle over the meat and vegetables when serving.

Avoiding Common Mistakes

Here are some common pitfalls and how to avoid them:

  • Skipping the Sear: Always sear your brisket for better flavor.
  • Not Enough Liquid: Ensure there’s enough liquid in the pot to keep the meat moist.
  • Overcooking: Keep an eye on the cooking time; it should be tender but not falling apart.
  • Neglecting to Taste: Always taste and adjust seasonings before serving.

Delicious Variations to Try

Want to switch things up? Here are some variations of the classic Apple Cider Braised Brisket:

  • Spicy Apple Cider: Add sliced jalapeños or crushed red pepper flakes for a kick.
  • Herb-Infused: Experiment with different herbs like rosemary or oregano for varied flavors.
  • Fruit-Infused: Add chopped apples or pears to the braising liquid for additional sweetness.
  • Smoky Flavor: Incorporate smoked paprika or chipotle powder for a smoky twist.

Storage and Make-Ahead Instructions

This dish is perfect for meal prep:

  • Make Ahead: Prepare the brisket a day in advance and refrigerate overnight. The flavors will deepen as it sits.
  • Storage: Store leftovers in an airtight container in the fridge for up to 4 days.
  • Freezing: Braised brisket can be frozen for up to 3 months. Thaw in the refrigerator before reheating.

Frequently Asked Questions

  • Can I use another cut of beef? Yes, you can use chuck roast or round, but cooking times may vary.
  • What can I substitute for apple cider? You can use apple juice or a mixture of vinegar and water for a similar effect.
  • How do I know when the brisket is done? It should be tender enough to shred easily with a fork.
  • Can I cook this in a slow cooker? Absolutely! Follow the same steps and cook on low for 6-8 hours.
  • Is this recipe gluten-free? Yes, as long as you ensure your broth is gluten-free.
  • How can I make it spicier? Add more cayenne pepper or fresh chili peppers to the cooking liquid.
  • Can I add more vegetables? Yes! Feel free to add your favorites like parsnips or green beans.
  • What do I serve with brisket? Mashed potatoes, roasted vegetables, or a fresh salad are great sides.

Nutritional Tips and Dietary Adaptations

This dish can be adapted to various dietary needs:

  • Low-Carb: Serve with cauliflower mash instead of potatoes.
  • Paleo-Friendly: Ensure all ingredients are compliant and skip any non-Paleo sides.
  • Whole30: Check your broth and cider labels for compliance.

Essential Equipment for Success

Here’s what you’ll need to create this dish:

  • Heavy Dutch Oven: Ideal for both searing and slow cooking.
  • Sharp Knife: For slicing the brisket and prepping vegetables.
  • Cutting Board: A sturdy board to handle all your chopping.
  • Meat Thermometer: To ensure your brisket is cooked to perfection.

Serving Suggestions

When it comes to serving your cider braised beef, consider these delightful options:

  • On a Platter: Arrange the brisket on a large platter with the vegetables and drizzle with sauce.
  • In Tacos: Shred the brisket and serve in soft tortillas with fresh toppings.
  • With Crusty Bread: Serve with a side of crusty bread to soak up the delicious sauce.

Conclusion

With its rich flavors and melt-in-your-mouth texture, this Apple Cider Braised Brisket is a dish that truly embodies comfort food. Whether you’re cooking for a special occasion or just a cozy night in, this recipe will surely impress and satisfy your loved ones. So gather your ingredients, follow the steps, and embrace the joy of cooking. Happy braising!

Apple Cider Braised Brisket

Prep Time 20 minutes
Cook Time 3 hours
Total Time 3 hours 20 minutes
Servings 6 servings
Calories 650
A hearty and flavorful braised brisket cooked in apple cider with vegetables, perfect for a comforting meal.

Ingredients

Meat

  • 3 lb beef brisket (3-4 lb.)
  • 1.5 tsp Kosher salt
  • 0.5 tsp Freshly ground black pepper

Vegetables

  • 1.5 lb baby potatoes (halved)
  • 4 large carrots (peeled and cut into 2" pieces)
  • 2 shallots (sliced into 1/4" rounds)

Liquids

  • 4 cups apple cider
  • 1.5 cups low-sodium beef or chicken broth
  • 6 sprigs thyme
  • 2 bay leaves bay leaves
  • 0.75 tsp cayenne pepper

Instructions 

  • Preheat oven to 325°F. Season brisket with salt and pepper. Brown in oil, then transfer to a baking dish.
  • Sauté potatoes, carrots, and shallots in the same pot. Return brisket, add cider, broth, thyme, bay leaves, and cayenne. Cover and bring to a boil.
  • Transfer to oven and roast for 2.5 to 3 hours until tender. Shred brisket and serve with vegetables and juices.
Notes

Let the brisket rest before shredding for best results.
Calories: 650kcal
Cost: $20
Course: Main Course
Cuisine: American
Keyword: Brisket

As the leaves turn and the air gets crisp, there’s nothing quite like a warm bowl of vegan pumpkin curry to bring comfort and joy to your dinner table. This recipe is a perfect blend of seasonal ingredients, featuring butternut squash, vibrant veggies, and a blend of spices that creates a deliciously satisfying meal. Whether you’re a seasoned chef or a kitchen novice, this dish is designed to inspire you to explore the cozy flavors of fall.

Why You’ll Love This Recipe

Here are just a few reasons why this vegan pumpkin curry will become a staple in your fall cooking:

  • Rich Flavor Profile: The combination of spices, coconut milk, and pumpkin creates a depth of flavor that will delight your taste buds.
  • Healthy & Nutritious: Packed with vitamins and minerals from the vegetables, this dish supports a balanced diet while being completely vegan.
  • Versatile Dish: You can easily customize the recipe by adding your favorite vegetables or proteins, making it perfect for a variety of dietary preferences.
  • Quick & Easy: With simple ingredients and straightforward steps, you can whip up this dish in less than an hour, perfect for busy weeknights.
  • Comforting & Filling: The creamy texture and hearty ingredients make this dish satisfying, perfect for cozy dinners with family and friends.

Ingredient Breakdown

Here’s what you’ll need to make this vegan pumpkin curry, along with some substitution options to suit your taste:


Vegetable Spiralizer

★ Recommended Kitchen Tool

Vegetable Spiralizer

Make this recipe even easier with a quality Vegetable Spiralizer — a must-have kitchen staple!


🛒 Check Price on Amazon →

As an Amazon Associate, we earn from qualifying purchases.
  • 1-6 Naan breads: For serving; feel free to substitute with rice or gluten-free bread.
  • 2 Tbsps Extra virgin olive oil: You can use coconut oil for a tropical flavor.
  • 1 lb. butternut squash, peeled + cubed: Sweet potatoes or acorn squash work well too.
  • 2 carrots, peeled + chopped: You can substitute with parsnips for a unique flavor.
  • 1/2 red onion, chopped: Yellow onion or shallots can also be used.
  • 2 cups mini sweet peppers, chopped: Bell peppers can be a great alternative.
  • 3 garlic cloves, minced: Adjust according to your garlic preference.
  • 1-2 fresh thyme sprigs: Dried thyme can be used if fresh isn’t available.
  • 1 ounce ginger root, peeled + chopped: Ground ginger is a good substitute.
  • 1 (14 oz) can full-fat coconut cream/milk: Almond or cashew milk can work for a lighter version.
  • 1/2 cup organic vegetable stock/broth: Make sure to adjust the amount based on your desired consistency.
  • 2 1/2 Tbsps curry powder, organic: Feel free to experiment with Thai curry pastes for a spicier kick.
  • 1 cup organic 100% pumpkin puree: You can make your own or use canned for convenience.
  • 1 tsp sea salt: Adjust to taste.
  • 1 tsp black pepper: Freshly ground is always best.
  • 1 tsp garlic powder: Optional, for an extra garlic punch.
  • 1 tsp dried parsley: Fresh parsley can be used for garnish.
  • 1 tsp ground allspice: Adds a warm, aromatic flavor.
  • 1-2 cups chopped kale, fresh or frozen: Spinach can be a great substitute for a different texture.

Cooking Steps

Follow these simple steps to create your vegan pumpkin curry:

  1. In a large pot, heat the olive oil over medium heat. Add the chopped red onion and sauté until translucent.
  2. Stir in the minced garlic, ginger, and thyme, cooking until fragrant (about 1 minute).
  3. Add the butternut squash and carrots; cook for 5-7 minutes until they begin to soften.
  4. Mix in the mini sweet peppers and coconut milk, followed by the vegetable stock. Bring to a gentle simmer.
  5. Stir in the pumpkin puree and curry powder, season with salt and pepper, and let it simmer for about 15-20 minutes, until the vegetables are tender.
  6. Finally, stir in the chopped kale and cook until wilted, about 3-5 minutes.
  7. Serve the curry hot over naan or rice, and enjoy!

Pro Tips for Perfect Pumpkin Curry

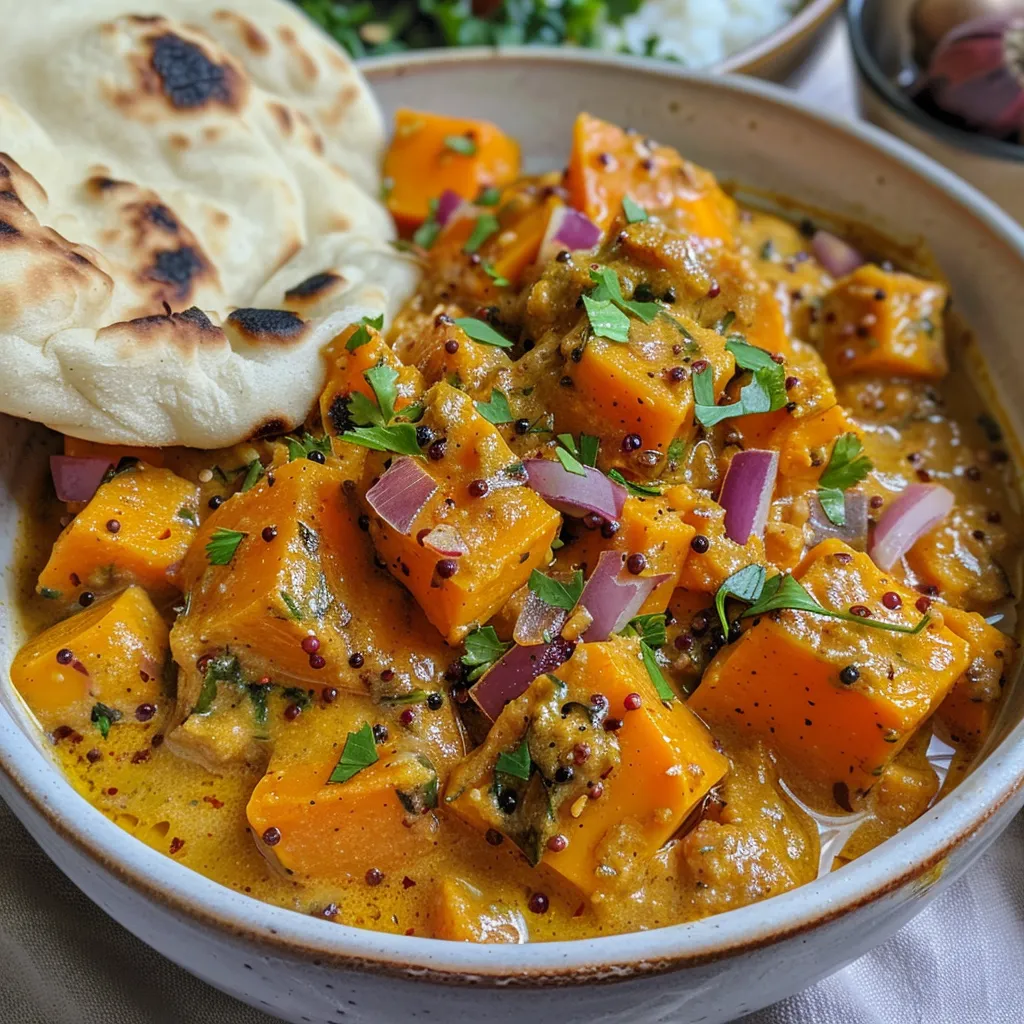
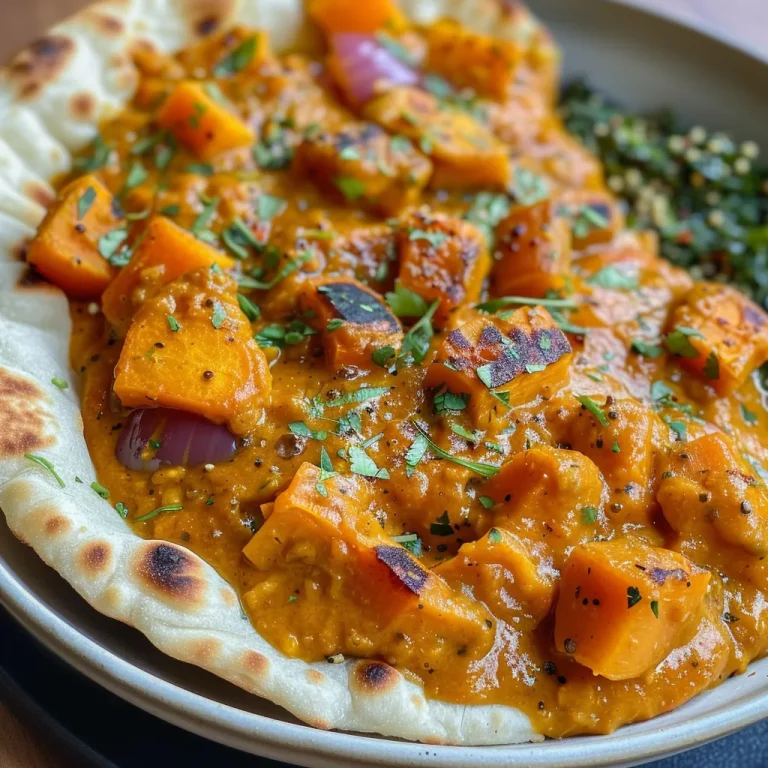
Side view of a bowl filled with Vegan Pumpkin Curry featuring butternut squash, carrots, and peppers.

Here are some expert insights to elevate your cooking game:

  • Balance the Flavors: Taste as you go! Adjust the seasoning if needed by adding more salt, pepper, or spices.
  • Texture Matters: For a creamier curry, blend a portion of the stew before adding the kale.
  • Make It Spicy: If you enjoy heat, consider adding red pepper flakes or a diced chili pepper during cooking.
  • Fresh Herbs: Garnish with fresh cilantro or basil for an added burst of flavor.
  • Cook in Batches: Double the recipe to have leftovers that taste even better the next day!
  • Storage Tips: Store in an airtight container in the fridge for up to 5 days or freeze for up to 3 months.
  • Meal Prep: Prepare the vegetables in advance to save time during the week.
  • Explore Variations: Feel free to substitute other vegetables or even add chickpeas for extra protein.

Common Mistakes & Troubleshooting

Even great chefs encounter challenges. Here are some common pitfalls and how to overcome them:

  • Too Thick?: If your curry is too thick, add a bit more vegetable broth or coconut milk until you reach your desired consistency.
  • Not Enough Flavor?: Always taste as you cook. If the flavors seem muted, a squeeze of fresh lime or an extra pinch of salt can enhance the dish.
  • Vegetables Overcooked?: Add heartier vegetables like carrots or squash first and softer greens like kale towards the end to keep them vibrant.
  • Too Spicy?: If you’ve added too much heat, counter it with a bit of sugar or honey to balance the flavors.

Delicious Variations

Customize your vegan pumpkin curry with these tasty variations:

  • Thai Pumpkin Curry: Incorporate coconut curry paste and serve with jasmine rice for a more traditional Thai flavor.
  • Chickpea Pumpkin Curry: Add canned chickpeas for a protein boost and a heartier meal.
  • Fall Harvest Curry: Mix in seasonal vegetables like Brussels sprouts or sweet potatoes for a fall-inspired twist.
  • Spicy Pumpkin Curry: Ignite your taste buds by adding jalapeños or serrano peppers for a fiery kick.

Storage & Make-Ahead Instructions

This curry is perfect for meal prep and can be stored for later:

  • Refrigeration: Store in an airtight container in the fridge for up to 5 days.
  • Freezing: Allow the curry to cool completely before transferring it to a freezer-safe container for up to 3 months. Thaw in the fridge overnight before reheating.
  • Make-Ahead: Prep the ingredients a day in advance and store them separately in the fridge to make cooking on the day a breeze.

Frequently Asked Questions

Here are some answers to common questions about making vegan pumpkin curry:

  • Can I use canned pumpkin instead of fresh? Yes, canned pumpkin puree works perfectly and saves time!
  • What can I serve with this curry? It pairs beautifully with naan, rice, or quinoa.
  • Is this curry gluten-free? Yes, as long as you use gluten-free naan or rice.
  • Can I make this curry nut-free? Substitute coconut milk with sunflower seed milk or just use water.
  • How can I make this dish spicier? Add fresh chilies or cayenne pepper to increase heat.
  • What other vegetables can I add? Feel free to experiment with vegetables you love, like zucchini or eggplant.
  • Can I use other types of curry powder? Absolutely! Feel free to try red or green curry powders for different flavor profiles.
  • How long does it take to make this curry? This recipe takes approximately 30-40 minutes from start to finish.

Nutritional Tips & Dietary Adaptations

This vegan pumpkin curry is not only delicious but also packed with nutrients. Here are some tips for making it healthier:

  • Add Protein: Consider adding lentils, quinoa, or tempeh for an extra protein boost.
  • Increase Fiber: Incorporate more vegetables like spinach or broccoli to enhance the fiber content.
  • Watch the Sodium: Use low-sodium vegetable broth to control the salt content.
  • Healthy Fats: Coconut milk adds healthy fats, but you can reduce the amount if you prefer a lighter version.

Equipment Recommendations

To make this vegan pumpkin curry, you will need:

  • Large Pot or Dutch Oven: For even cooking and the ability to simmer for long periods.
  • Sharp Knife: Essential for chopping vegetables efficiently.
  • Cutting Board: A sturdy cutting board will make prep work smoother.
  • Measuring Cups and Spoons: Ensure accuracy in your ingredients for the best results.

Serving Suggestions

This vegan pumpkin curry can be served in various delightful ways:

  • With Naan: Serve it with warm naan bread for dipping and scooping.
  • Over Rice: Jasmine or basmati rice absorbs the curry beautifully.
  • With a Side Salad: A fresh green salad can balance the richness of the curry.
  • As a Wrap: Use it as a filling in wraps alongside fresh greens for a hearty lunch.

Embrace the flavors of autumn with this easy and delicious vegan pumpkin curry. Whether it’s a weekday meal or a cozy dinner with friends, this dish promises to bring warmth and satisfaction to your table. So gather your ingredients and enjoy the comforting embrace of this delightful recipe!

Vegan Pumpkin Curry Butternut Squash

Prep Time 15 minutes
Cook Time 30 minutes
Total Time 45 minutes
Servings 4 servings
Calories 350
A hearty and flavorful vegan curry combining roasted butternut squash, pumpkin, and fresh vegetables in a fragrant coconut and spice sauce.

Ingredients

Bread

  • 2 Tbsps Extra virgin olive oil
  • 1 lb butternut squash, peeled + cubed
  • 2 carrots carrots, peeled + chopped
  • 1/2 red onion, chopped
  • 2 cups mini sweet peppers, chopped (or bell peppers)
  • 3 cloves garlic, minced
  • 1-2 sprigs fresh thyme
  • 1 oz ginger root, peeled + chopped
  • 1 can (14 oz) full-fat coconut cream/milk
  • 1/2 cup organic vegetable stock/broth (plus more if needed)
  • 2 1/2 Tbsps curry powder, organic (or turmeric)
  • 1 cup organic 100% pumpkin puree (see post on how to make homemade)
  • 1 tsp sea salt
  • 1 tsp black pepper
  • 1 tsp garlic powder
  • 1 tsp dried parsley
  • 1 tsp ground allspice
  • 1-2 cups chopped kale, fresh or frozen (about a handful)

Instructions 

  • Roast the butternut squash until tender, about 20 minutes.
  • Heat olive oil in a large pot, sauté garlic, ginger, onion, and peppers for 5 minutes.
  • Add curry powder, spices, pumpkin puree, coconut milk, and vegetable broth; simmer for 10 minutes.
  • Stir in roasted butternut squash and kale; cook for another 5 minutes.
  • Season with salt, pepper, and parsley; serve hot.

Notes

For extra flavor, garnish with fresh herbs or a squeeze of lime.
Calories: 350kcal
Cost: $15
Course: Main Course
Cuisine: vegan
Keyword: butternut squash, Pumpkin

Welcome to the World of Pumpkin Streusel Bread

As autumn graces us with its cozy presence, the craving for warm, spiced baked goods emerges. One delightful treat that captures the essence of the season is pumpkin streusel bread. This recipe combines the rich flavors of pumpkin puree, warm spices, and a luscious streusel topping to create a moist and flavorful loaf that is simply irresistible. Whether you’re hosting a gathering, enjoying a quiet afternoon with coffee, or looking to impress friends and family, this pumpkin bread is your go-to solution.

In this definitive guide, we’ll explore everything you need to know about crafting the perfect pumpkin streusel bread, from ingredient breakdown to expert tips and variations. Let’s dive in!

Why You’ll Love This Pumpkin Streusel Bread

This bread is more than just a seasonal treat; it’s a celebration of flavors, textures, and comforting aromas. Here are five reasons why you’ll love this recipe:


Meal Prep Container Set

★ Recommended Kitchen Tool

Meal Prep Container Set

Make this recipe even easier with a quality Meal Prep Container Set — a must-have kitchen staple!


🛒 See Deals on Amazon →

As an Amazon Associate, we earn from qualifying purchases.
  • Moist and Flavorful: The combination of pumpkin puree and spices creates a rich, moist loaf that stays fresh for days.
  • Irresistible Streusel Topping: A buttery, crumbly streusel topping adds a delightful crunch and enhances the overall taste.
  • Easy to Make: This recipe requires simple ingredients and straightforward steps, making it perfect for bakers of all levels.
  • Customizable: You can easily adapt the recipe with nuts, chocolate chips, or different spices to suit your taste.
  • Perfect for Sharing: Ideal for autumn gatherings, this loaf is a crowd-pleaser that brings everyone together around the table.

Ingredient Breakdown

Let’s take a closer look at the ingredients that make this pumpkin streusel bread a standout. Each component plays a vital role in the flavor and texture of the final product:

  • Unsalted Butter: Adds richness and moisture. Make sure it’s softened for easy mixing.
  • Dark Brown Sugar: This adds a deep, caramel flavor. You can substitute with light brown sugar if needed.
  • Pumpkin Puree: Use pure pumpkin puree for the best results; avoid pumpkin pie filling which contains added sugars and spices.
  • Eggs: Provides structure and helps bind the ingredients together.
  • Ground Spices: A blend of cinnamon, ginger, nutmeg, and cloves creates a warm, aromatic flavor profile.
  • Baking Soda and Baking Powder: These leavening agents ensure the bread rises properly, resulting in a light texture.
  • All-Purpose Flour: The base of the loaf, providing structure. You can substitute with whole wheat flour for added nutrition.
  • Maple Extract: Adds a subtle sweetness to the glaze; you can replace it with vanilla extract if preferred.

Pro Tips for Perfect Pumpkin Streusel Bread

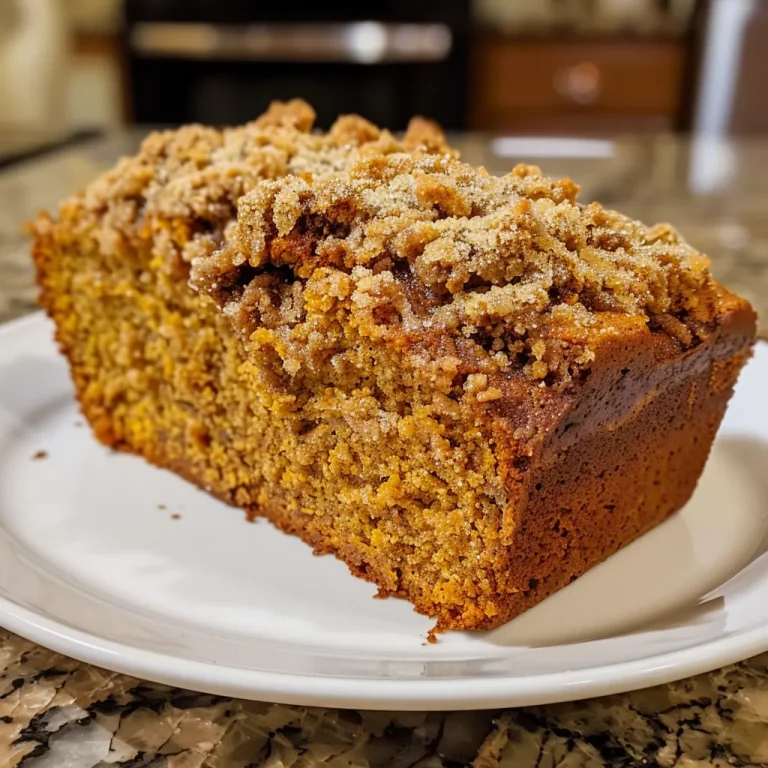
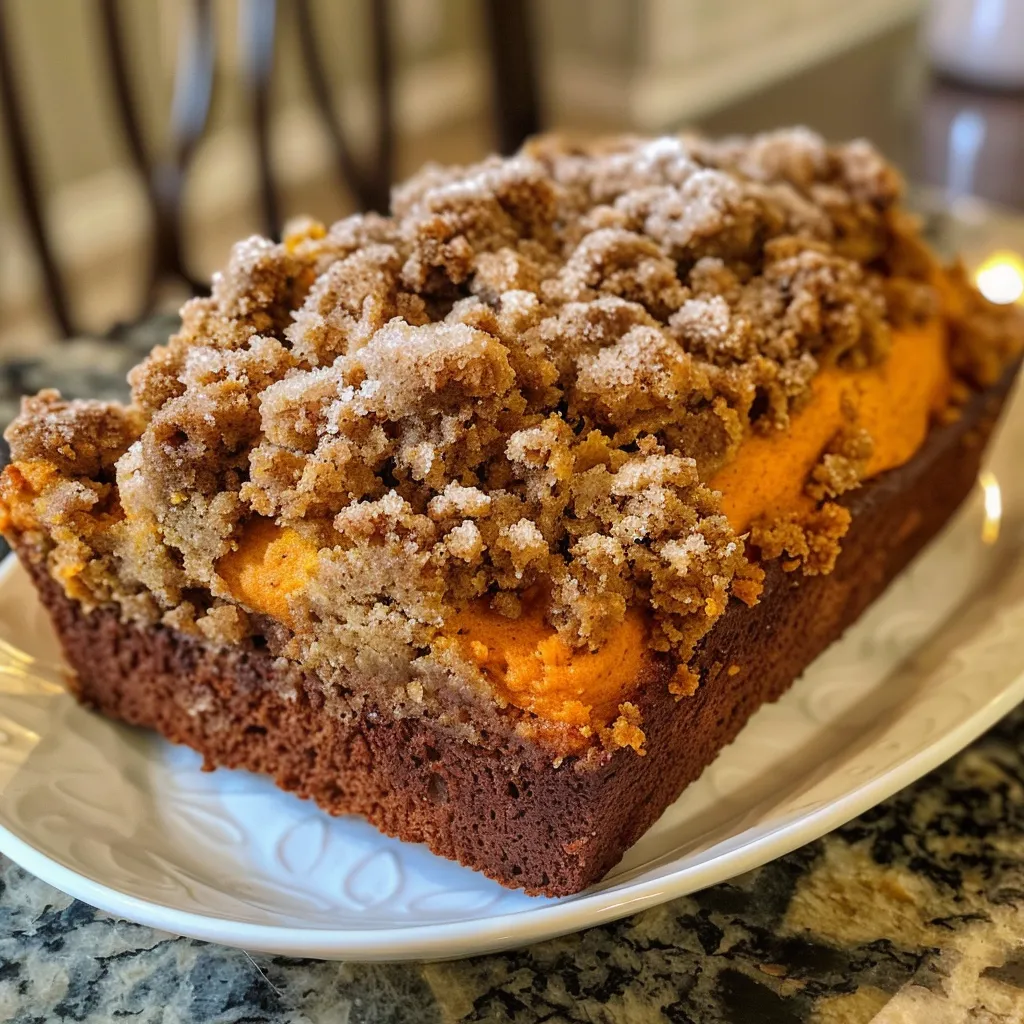
A side view of Pumpkin Streusel Bread, highlighting its moist interior and crumbly streusel crust.

To ensure your pumpkin streusel bread turns out perfectly every time, consider these expert tips:

  • Don’t Overmix: Mix the batter just until combined to avoid tough bread. A few lumps are okay!
  • Use Light Metal Pans: They conduct heat evenly, preventing over-browning. Avoid glass or dark pans.
  • Check for Doneness: Use a toothpick to test; it should come out clean or with a few moist crumbs.
  • Let It Cool: Allow the bread to cool completely on a wire rack before slicing to maintain its moisture.
  • Experiment with Spices: Feel free to add or adjust spices according to your taste preferences.
  • Store Properly: Wrap the bread in plastic wrap and store at room temperature for up to 3 days, or refrigerate for longer freshness.
  • Chill the Glaze: If the glaze seems too runny, refrigerate for a few minutes to thicken before drizzling.
  • Make Ahead: Bake the bread a day in advance to allow the flavors to meld.

Common Mistakes and Troubleshooting

Even the best bakers can run into issues. Here’s how to troubleshoot common problems:

  • Dense Texture: This can happen if the batter is overmixed or too much flour is added. Measure flour accurately.
  • Uneven Baking: If the bread browns too quickly, cover it with foil halfway through baking.
  • Too Dry: Ensure you’re using the right amount of pumpkin puree and not overbaking the bread.
  • Streusel Sinking: If your streusel sinks into the batter, consider chilling it before adding to help it hold its structure.

Variations on Pumpkin Streusel Bread

While the classic recipe is delicious, here are some fun variations to try:

  • Pumpkin Chocolate Chip Bread: Add 1 cup of semi-sweet chocolate chips to the batter for a sweet twist.
  • Nuts Galore: Incorporate 1 cup of chopped walnuts or pecans for added crunch and flavor.
  • Maple Pecan Streusel: Replace the traditional streusel topping with one made from chopped pecans and maple syrup.
  • Spiced Apple Pumpkin Bread: Add 1 cup of finely chopped apples and a sprinkle of nutmeg for a seasonal twist.

Storage and Make-Ahead Instructions

To enjoy your pumpkin streusel bread at its best, here are some storage tips:

  • Room Temperature: Wrap the cooled loaf tightly in plastic wrap and store in a cool, dry place for up to 3 days.
  • Refrigerator: For extended freshness, refrigerate the wrapped bread for up to a week.
  • Freezing: Wrap the bread in foil and place it in a freezer-safe bag. It can be frozen for up to 3 months. Thaw overnight in the refrigerator before serving.
  • Make Ahead: Bake the bread one day in advance; it often tastes even better the next day!

Comprehensive FAQ

Here are some frequently asked questions about pumpkin streusel bread:

  • Can I use fresh pumpkin instead of canned? Yes, but you’ll need to cook and puree the pumpkin first.
  • Is this recipe suitable for vegans? To make it vegan, substitute eggs with flax eggs and use plant-based butter.
  • Can I use gluten-free flour? Yes, a 1-to-1 gluten-free flour blend works well in this recipe.
  • What’s the best way to store leftovers? Wrap in plastic and keep at room temperature or refrigerate for longer freshness.
  • Can I add more spices? Absolutely! Feel free to adjust the spice levels to your liking.
  • How can I make the glaze thicker? Add more confectioners’ sugar until you reach your desired consistency.
  • Can I double the recipe? Yes, you can double the ingredients and bake in two pans or a larger pan.
  • What if my bread sinks in the middle? This could be due to underbaking or overmixing; ensure you follow the mixing instructions closely.

Nutritional Tips and Dietary Adaptations

This pumpkin streusel bread can be enjoyed in moderation as part of a balanced diet. Here are some tips for making it healthier:

  • Reduce Sugar: Cut down the sugar in the batter and streusel for a healthier option.
  • Use Whole Wheat Flour: For added fiber, substitute half of the all-purpose flour with whole wheat flour.
  • Add Flaxseed: Incorporate ground flaxseed for added omega-3 fatty acids.
  • Portion Control: Slice bread into smaller pieces to enjoy while keeping portions in check.

Equipment Recommendations

To craft this pumpkin streusel bread, you’ll need some essential kitchen tools:

  • Mixing Bowls: A set of mixing bowls in various sizes for combining ingredients.
  • Handheld Electric Mixer: For easy creaming of butter and sugar.
  • Measuring Cups and Spoons: Accurate measurements ensure consistent results.
  • Light Metal Loaf Pan: A 8 or 9-inch pan is ideal for even baking.
  • Wire Rack: For cooling the bread after baking.

Serving Suggestions

To enjoy your pumpkin streusel bread to the fullest, consider these serving ideas:

  • With Butter: Spread a little butter on warm slices for a comforting treat.
  • Pair with Coffee: This bread pairs beautifully with a cup of coffee or spiced chai.
  • Top with Cream Cheese: A smear of cream cheese adds a creamy contrast to the spiced loaf.
  • Serve with Ice Cream: Warm slices topped with vanilla ice cream make for an indulgent dessert.

In conclusion, crafting the perfect pumpkin streusel bread is a rewarding endeavor that fills your home with the delightful scents of fall. With its rich flavor, moist texture, and a crunchy topping, this recipe is sure to become a cherished tradition. So, gather your ingredients, unleash your creativity in the kitchen, and enjoy this delightful loaf shared with loved ones. Happy baking!

Pumpkin Streusel Bread

Prep Time 15 minutes
Cook Time 1 hour
Total Time 1 hour 15 minutes
Servings 8 slices
Calories 350
A moist and flavorful pumpkin bread topped with a crunchy streusel and finished with a sweet glaze, perfect for fall.

Ingredients

Main

  • 1/2 cup unsalted butter, softened
  • 1 cup dark brown sugar, lightly packed (can substitute with light brown sugar)
  • 1 cup pumpkin puree (do not use pumpkin pie filling)
  • 2 large eggs
  • 2 tsp ground cinnamon
  • 1/2 tsp ground ginger
  • 1/4 tsp ground nutmeg
  • 1/4 tsp ground cloves
  • 1 tsp baking soda
  • 1 tsp baking powder
  • 1 tsp salt
  • 1.5 cups all-purpose flour
  • 6 Tbsp unsalted butter, melted
  • 3/4 cup all-purpose flour
  • 1/2 cup brown sugar (light or dark)
  • 1/2 tsp pumpkin pie spice or ground cinnamon
  • 1 cup confectioners' sugar
  • 1/4 tsp maple extract (can substitute vanilla)
  • 1 Tbsp maple syrup
  • 1 Tbsp milk or cream

Instructions 

  • Preheat oven to 350℉ and prepare a loaf pan.
  • Mix butter and brown sugar, add pumpkin and eggs, then combine with spices, baking powder, baking soda, salt, and flour.
  • Pour batter into pan, then prepare streusel by mixing melted butter, flour, sugar, and spices; sprinkle over batter.
  • Bake for 55-60 minutes until a toothpick comes out clean; cool completely.
  • Whisk together confectioners' sugar, maple extract, syrup, and milk; drizzle over cooled bread and set.

Notes

Ensure not to over-mix the batter to keep the bread tender.
Calories: 350kcal
Cost: $15
Course: Dessert
Cuisine: American
Keyword: Pumpkin

Unlock the Joy of Cooking with Crispy Vegetable Fritters

Welcome to the delightful world of crispy vegetable fritters! If you’re searching for a delicious way to incorporate more vegetables into your meals, this recipe is your perfect destination. Not only are these fritters gluten-free and vegan, but they also fuse the vibrant flavors of zucchini, potato, and carrot into a harmonious dish that’s sure to please everyone at the table.

In this comprehensive guide, we’ll explore why you’ll love this recipe, delve into the ingredient breakdown, share expert tips, and provide variations to suit every palate. Whether you’re an experienced cook or a novice in the kitchen, making vegetable fritters can be both fun and rewarding. Let’s dive in!

Why You’ll Love This Recipe

  • Healthy and Delicious: Packed with nutrients, these fritters are a guilt-free snack or meal option.
  • Easy to Make: With simple ingredients and straightforward steps, you’ll whip these up in no time.
  • Versatile: Customize with your favorite vegetables and spices for a unique twist.
  • Meal Prep Friendly: Make a batch ahead and store them for quick meals throughout the week.
  • Kid-Friendly: These fritters are a great way to sneak vegetables into your kids’ diets without them even noticing!

Ingredient Breakdown

Here’s what you need to make these crispy vegetable fritters:


Meal Prep Container Set

★ Recommended Kitchen Tool

Meal Prep Container Set

Make this recipe even easier with a quality Meal Prep Container Set — a must-have kitchen staple!


🛒 Shop This Tool →

As an Amazon Associate, we earn from qualifying purchases.
  • 12 oz zucchini (2 medium-sized): Adds moisture and a subtle flavor.
  • 7 oz potato (1 large): Provides a hearty base and helps bind the fritters.
  • 3.5 oz carrot (1 medium-sized): Adds sweetness and vibrant color.
  • 1/2 cup chickpea flour: The perfect gluten-free alternative for binding.
  • 2 chia eggs (or flax eggs): Acts as a binding agent while keeping it vegan.
  • 2 Tbsp olive oil: For frying and adding richness.
  • 1/2 tsp thyme: A fragrant herb that complements the vegetables.
  • 1/2 tsp paprika: Adds a mild spice and vibrant color.
  • 1/2 tsp garlic powder: Enhances the overall flavor.
  • 1/2 tsp onion powder: Adds depth and sweetness.
  • 1/2 tsp salt: Essential for enhancing flavors.
  • 1/4 tsp black pepper: For a mild kick.

Substitutions and Add-Ins

Close-up of crispy vegetable fritters showcasing their crunchy texture and vibrant colors.

If you don’t have all the ingredients on hand, here are some substitutions and optional add-ins:

  • Flour alternatives: Use almond flour or brown rice flour for a different texture.
  • Vegetables: Feel free to use grated sweet potato, bell pepper, or spinach.
  • Herbs and spices: Experiment with cumin, cilantro, or Italian seasoning for varied flavors.
  • Cheese lovers: Add some nutritional yeast or vegan cheese for a cheesy flavor.

How to Make Crispy Vegetable Fritters

Let’s walk through the steps to making these perfectly crispy fritters:

Step 1: Prepare the Vegetables

Grate the zucchini, potato, and carrot. Use a clean kitchen towel to squeeze out excess moisture from the zucchini. This step is crucial for achieving that crispy texture.

Step 2: Create the Batter

In a large mixing bowl, combine the grated vegetables with the chickpea flour and spices. If using chia eggs, mix the chia seeds with water and let them sit for about 5 minutes until it forms a gel-like consistency. Add this to the vegetable mixture.

Step 3: Fry the Fritters

Heat olive oil in a non-stick pan over medium heat. Scoop about 1/4 cup of the mixture and flatten it gently in the pan. Fry for about 3-4 minutes on each side or until golden brown and crispy. Repeat until the batter is finished.

Pro Tips for Perfect Fritters

  • Don’t overcrowd the pan: Fry in batches to prevent steaming and ensure crispiness.
  • Use a non-stick skillet: This helps prevent sticking and makes cleanup easier.
  • Adjust the heat: Too high will burn the fritters, while too low won’t cook them through properly.
  • Let them rest: After frying, place fritters on paper towels to absorb excess oil.
  • Experiment with spices: Adding different spices can elevate the flavor profile significantly.
  • Chill the batter: If you have time, refrigerate the batter for 30 minutes before frying; this can enhance the fritter’s texture.
  • Use fresh ingredients: The fresher the veggies, the better the flavor!
  • Batch cooking: Make a larger batch and freeze for quick meals later.

Common Mistakes and Troubleshooting

Here are some common pitfalls to avoid when making your fritters:

  • Too much moisture: Always squeeze out excess moisture, especially from zucchini.
  • Using too much flour: This can make your fritters dense; stick to the measurements.
  • Not cooking long enough: Ensure they are golden brown for the best flavor and texture.

Delicious Variations

Here are some fun variations to try:

  • Spicy Fritters: Add chopped jalapeños or red pepper flakes for a kick.
  • Herbed Fritters: Incorporate fresh herbs like parsley or basil.
  • Cheesy Spinach Fritters: Add spinach and a vegan cheese alternative for a creamy texture.
  • Asian-Inspired Fritters: Mix in ginger, sesame oil, and soy sauce for an Asian twist.

Storage and Make-Ahead Instructions

These fritters can be stored in an airtight container in the refrigerator for up to 3 days. For longer storage, freeze them in a single layer on a baking sheet, then transfer to a freezer bag. Reheat in the oven or air fryer for optimal crispiness.

FAQ

  • Can I make these fritters in an air fryer?
    Yes! Spray the fritters lightly with oil and air fry at 375°F for about 12-15 minutes, flipping halfway through.
  • What can I serve with fritters?
    These fritters pair wonderfully with a yogurt sauce, avocado dip, or simply a squeeze of lemon.
  • Are these fritters suitable for meal prep?
    Absolutely! Prepare a batch and enjoy them throughout the week.
  • Can I use regular eggs instead of chia eggs?
    Yes, you can substitute the chia eggs with regular eggs if you are not following a vegan diet.
  • How do I know when the fritters are done?
    They should be golden brown on the outside and cooked through in the center.
  • What other vegetables can I use?
    Feel free to experiment with any vegetables you like, such as beetroot or sweet potato!
  • Can I bake these fritters instead of frying?
    Yes, you can bake them at 400°F for about 20-25 minutes, flipping halfway.
  • How do I make these fritters spicier?
    Add more spices like cayenne pepper or finely chopped chili peppers to the mixture.

Nutritional Tips and Dietary Adaptations

These fritters are not only delicious but also nutritious. They provide a great source of fiber from the vegetables and protein from the chickpea flour. If you want to boost the nutritional value further, consider adding seeds or nuts to the batter for added crunch and healthy fats.

Essential Equipment Recommendations

To make the fritters, you’ll need:

  • Non-stick skillet: Essential for frying without sticking.
  • Grater: For efficiently shredding vegetables.
  • Mixing bowls: To combine all your ingredients.
  • Spatula: For flipping the fritters.

Serving Suggestions

Serve these crispy vegetable fritters with a side of:

  • Yogurt dip: A tangy complement that balances the flavors.
  • Fresh salad: A side of greens adds a refreshing crunch.
  • Hummus: For a creamy and protein-rich pairing.

Conclusion

Now you’re equipped with all the knowledge to create the perfect crispy vegetable fritters that are not only delicious but also healthy! Don’t hesitate to experiment with flavors and ingredients to make this recipe truly your own. Cooking should be a joyful experience, and with these fritters, you’ll be able to share wonderful moments around the table with family and friends. Happy cooking!

Crispy Vegetable Fritters (Gluten-free, Vegan)

Prep Time 15 minutes
Cook Time 10 minutes
Total Time 25 minutes
Servings 4 pieces
Calories 180
Enjoy these crispy, flavorful vegetable fritters that are both gluten-free and vegan, perfect for a healthy snack or meal.

Ingredients

Vegetables

  • 12 oz zucchini (grated)
  • 7 oz potato (mashed or grated)
  • 3.5 oz carrot (grated)

Dry ingredients

  • 1/2 cup chickpea flour

Wet ingredients

  • 2 Tbsp olive oil
  • 2 chia eggs chia eggs (or flax eggs)

Spices & Seasonings

  • 1/2 tsp thyme
  • 1/2 tsp paprika
  • 1/2 tsp garlic powder
  • 1/2 tsp onion powder
  • 1/2 tsp salt
  • 1/4 tsp black pepper

Instructions 

  • Grate the zucchini, potato, and carrot. Mix with chickpea flour and spices.
  • In a small bowl, combine chia eggs with a little water and let sit for 5 minutes.
  • Add the chia eggs and olive oil to the vegetable mixture and stir until well combined.
  • Form the mixture into small patties and cook in a skillet over medium heat for 3-4 minutes per side until golden and crispy.
  • Serve warm with your favorite dipping sauce or salad.

Notes

For extra crispiness, bake the fritters in the oven at 400°F (200°C) for 15 minutes.
Calories: 180kcal
Cost: $12
Course: Appetizer, Snack
Cuisine: vegan
Keyword: Vegetables

Unleash the Magic: Create Spellbinding Witches’ Brew Cupcakes

Welcome to a world of culinary enchantment where baking becomes a fun Halloween tradition! In this guide, we’ll walk you through crafting the delightful Witches’ Brew Cupcakes—a treat that’s sure to dazzle your guests and bring a smile to every face. With vibrant colors, playful decorations, and a deliciously spooky flair, these cupcakes are perfect for any Halloween gathering. Let’s dive into the cauldron of creativity and whip up some fun food!

Why You’ll Love This Recipe

These cupcakes are not just visually stunning; they also deliver on flavor and fun. Here are some reasons why this recipe has become a favorite:

  • Interactive Fun: Involve the kids in decorating! The colorful icing and candy toppings allow for creativity, making this a fantastic family activity.
  • Perfect for Parties: Whether it’s a Halloween bash or a cozy get-together, these cupcakes are sure to be a crowd-pleaser.
  • Unique Presentation: The vibrant colors and spooky decorations transform ordinary cupcakes into showstoppers.
  • Simple Ingredients: Made with readily available ingredients, this recipe is approachable for bakers of all skill levels.
  • Customizable: Feel free to get creative with your toppings and colors, tailoring them to your personal taste or party theme.

Ingredients Breakdown

To make Witches’ Brew Cupcakes, gather the following ingredients:


Silicone Baking Cups Set

★ Recommended Kitchen Tool

Silicone Baking Cups Set

Make this recipe even easier with a quality Silicone Baking Cups Set — a must-have kitchen staple!


🛒 See Deals on Amazon →

As an Amazon Associate, we earn from qualifying purchases.
  • 1 Box of White Cake Mix: The foundation for our cupcakes. You can use any brand, but I prefer a moist mix.
  • 1 cup Milk: Whole milk adds richness. For a dairy-free option, substitute with almond or oat milk.
  • 1 Stick Butter (softened): Butter enhances flavor and texture. You can also use margarine or coconut oil for a dairy-free version.
  • 3 Eggs: These bind the ingredients together. For a vegan alternative, use flax eggs (1 tbsp flaxseed meal + 2.5 tbsp water per egg).
  • Vanilla Icing: A sweet touch that complements the cupcakes. Store-bought is fine, but homemade is even better!
  • Neon Green and Purple Food Coloring: Essential for that magical look! Use gel colors for better vibrancy.
  • Cauldron Cupcake Holders: These add a whimsical touch—perfect for presenting your cupcakes.
  • Candy Eyeballs, Bats, Bones, and Assorted Halloween Sprinkles: These are the fun toppings that make your cupcakes come alive!

Step-by-Step Instructions

Juicy green and purple cupcakes topped with Halloween-themed decorations.

Follow these easy steps to create your enchanting Witches’ Brew Cupcakes:

  1. Preheat your oven to 350°F (175°C). Line your cupcake pans with cauldron holders and set aside.
  2. In a medium bowl, combine the white cake mix, milk, softened butter, and eggs. Mix until well combined and smooth.
  3. Fill each cupcake liner approximately 2/3 full with the batter. Bake for 20-25 minutes, or until a toothpick inserted in the center comes out clean. Let them cool completely.
  4. Divide the vanilla icing evenly between two bowls. Tint one bowl with neon green food coloring and the other with neon purple. Add a little water to each to smooth out the icing.
  5. Dip the tops of the cooled cupcakes in the tinted icing, allowing excess to drip off. Place the cupcakes in the cauldrons.
  6. Decorate with candy eyeballs, bats, bones, and Halloween sprinkles to create a spooky scene.

Expert Tips for Perfect Cupcakes

Enhance your baking skills with these expert insights:

  • Room Temperature Ingredients: Ensuring your butter and eggs are at room temperature helps create a smooth batter and fluffier cupcakes.
  • Don’t Overmix: Mix just until combined to avoid dense cupcakes. Overmixing can lead to tough texture.
  • Check Oven Temperature: Use an oven thermometer to ensure your oven is at the correct temperature for even baking.
  • Cupcake Cooling: Let the cupcakes cool in the pan for 5-10 minutes before transferring them to a wire rack to cool completely.
  • Make It Ahead: Prepare the cupcakes a day in advance. Store them in an airtight container to retain moisture.

Common Mistakes & Troubleshooting

Even experienced bakers can hit a few bumps. Here’s how to troubleshoot:

  • Dry Cupcakes: This can happen if you overbake. Always follow the baking time and do a toothpick test.
  • Flat Cupcakes: Ensure your baking powder is fresh. If it’s expired, it may not provide enough lift.
  • Too Sweet Icing: If your icing is overly sweet, add a pinch of salt to balance the flavors.

Creative Variations

Mix things up by trying these fun variations:

  • Chocolate Cauldron Cupcakes: Use chocolate cake mix instead of white for a rich twist.
  • Vegan Witches’ Brew: Substitute eggs with flax eggs and use plant-based butter and milk.
  • Gluten-Free Option: Use gluten-free cake mix for a celiac-friendly treat.
  • Spooky Spider Cupcakes: Instead of candy eyeballs, use chocolate-covered pretzels to create spider shapes.

Storage and Make-Ahead Instructions

Store your Witches’ Brew Cupcakes properly to maintain freshness:

  • At Room Temperature: Keep cupcakes in an airtight container for up to 3 days.
  • In the Refrigerator: Store in an airtight container for up to a week. Bring to room temperature before serving.
  • Freezing: Freeze unfrosted cupcakes for up to 3 months. Thaw before decorating.

Frequently Asked Questions

Here are some common queries about Witches’ Brew Cupcakes:

  • Can I use a different cake mix? Absolutely! Feel free to use any flavor you prefer.
  • Can I make the icing ahead of time? Yes, make the icing a day in advance and refrigerate it. Bring it back to room temperature before using.
  • What if I don’t have cauldron holders? Regular cupcake liners work just fine. Get creative with your presentation!
  • How can I make these cupcakes less sweet? Use less icing or opt for a cream cheese frosting for a tangy balance.
  • Can I add fillings to the cupcakes? Yes! Consider adding a chocolate ganache or fruit filling for an extra surprise.
  • How long do these cupcakes last? They can be stored for up to a week in the fridge but taste best within the first few days.
  • Can I make mini versions? Yes! Adjust the baking time to about 15-18 minutes for mini cupcakes.
  • What’s the best way to transport these cupcakes? Use a cupcake carrier or a sturdy box lined with parchment paper to prevent shifting.

Nutritional Tips and Dietary Adaptations

For those considering health while enjoying Halloween treats:

  • Reduce Sugar: Substitute half of the sugar in the cake mix for a lower-sugar option.
  • Whole Wheat Flour: Mix whole wheat flour with the cake mix for added fiber.
  • Low-Calorie Icing: Use a light whipped topping instead of traditional icing for fewer calories.

Essential Equipment Recommendations

Here’s what you’ll need to make your baking experience smooth:

  • Mixing Bowls: A set of various sizes for mixing ingredients.
  • Measuring Cups and Spoons: Accurate measurements ensure perfect results.
  • Whisk or Electric Mixer: For a smooth batter, a whisk or electric mixer is a must.
  • Cooling Rack: Essential for cooling your cupcakes evenly.
  • Spatula: For easily spreading the icing on your cupcakes.

Serving Suggestions

Make your presentation pop with these serving ideas:

  • Halloween-Themed Platter: Arrange your cupcakes on a spooky-themed platter for a festive touch.
  • Pair with Spooky Drinks: Serve alongside themed beverages like “Witch’s Brew Punch” or eerie green smoothies.
  • Interactive Cupcake Bar: Set up a cupcake decorating station with extra toppings for guests to customize their treats.

In conclusion, crafting Witches’ Brew Cupcakes is not only a fun activity but can also become a cherished tradition in your home. With this comprehensive guide, you now have all the tips, tricks, and insights needed to create this magical treat. So grab your ingredients, invite your family, and let the baking begin! Happy Halloween!

Witches' Brew Cupcakes

Prep Time 15 minutes
Cook Time 25 minutes
Total Time 40 minutes
Servings 12 cupcakes
Calories 250
Celebrate Halloween with spooky, colorful cupcakes decorated as witches' brews, perfect for festive gatherings.

Ingredients

Cake Mix

  • 1 box White Cake Mix
  • 1 cup milk
  • 1 stick butter softened
  • 3 eggs eggs
  • to taste Vanilla Icing
  • to tint Neon Green Food Coloring
  • to tint Neon Purple Food Coloring
  • 1 set Cauldron Cupcake Holders
  • various Candy Eyeballs
  • various Candy Bats
  • various Candy Bones
  • various Assorted Halloween Sprinkles

Instructions 

  • Preheat oven to 350°F (175°C). Line cupcake pans.
  • Mix cake mix with milk, softened butter, and eggs until smooth. Fill cupcake liners 2/3 full.
  • Bake for 20-25 minutes, then cool completely.
  • Divide vanilla icing into two bowls. Tint one with neon green and the other with neon purple. Thin with water if needed.
  • Dip cupcakes in colored icing, place in cauldrons, and decorate with Halloween candies.

Notes

Use food coloring sparingly to achieve vibrant colors.
Calories: 250kcal
Cost: $15
Course: Dessert
Cuisine: Halloween
Keyword: cupcakes

Unleash Your Creativity with Spooktacular Vampire Donuts

Halloween is the perfect time to get creative in the kitchen, and what better way to celebrate than by making these delightful vampire donuts? These whimsical treats, adorned with vampire teeth and candy googly eyes, will enchant both kids and adults alike. In this comprehensive guide, you’ll discover everything you need to know about crafting these spooky delights, from ingredients to variations and expert tips that ensure your donuts are a hit at any Halloween gathering.

Why You’ll Love This Recipe

If you’re looking to impress your guests with a fun and festive treat, these vampire donuts are sure to be the star of the show. Here’s why you’ll love this recipe:

  • Fun and Festive: These donuts are not just delicious; they’re a playful addition to your Halloween festivities, sure to bring smiles and laughter.
  • Easy to Assemble: With minimal effort, you can transform simple donuts into spooky delights that look impressive and taste amazing.
  • Customizable: This recipe allows for various toppings and decorations, making it easy to get creative and personalize your donuts.
  • Kid-Friendly Activity: Involve the little ones in decorating these donuts, making it a memorable family bonding experience.
  • Perfect for Any Occasion: While ideal for Halloween, these donuts can easily be adapted for birthday parties, celebrations, or just a fun weekend treat.

Ingredients You’ll Need

To make these delicious vampire donuts, gather the following ingredients:


Meal Prep Container Set

★ Recommended Kitchen Tool

Meal Prep Container Set

Make this recipe even easier with a quality Meal Prep Container Set — a must-have kitchen staple!


🛒 Check Price on Amazon →

As an Amazon Associate, we earn from qualifying purchases.
  • Glazed Donuts: Make your own or use store-bought donuts for convenience.
  • Vampire Teeth: Get a pack of novelty vampire teeth, washed and cleaned, to create the spooky effect.
  • Candy Googly Eyes: These are essential for giving your donuts a fun, creepy look.

Ingredient Substitutions

If you’re looking to make adjustments based on dietary preferences or availability, consider these substitutions:

  • Gluten-Free: Use gluten-free all-purpose flour for a celiac-friendly option.
  • Dairy-Free: Substitute regular milk and butter with almond milk and coconut oil for a dairy-free version.
  • Flavor Variations: Add a teaspoon of cinnamon or nutmeg to the glaze for a warm, festive flavor that’s perfect for fall.

How to Make Vampire Donuts

Side view of decorated donuts featuring vampire-themed toppings, showing glossy glaze.

Follow these simple steps to create your spooky vampire donuts:

  • Step 1: Start by taking a pair of vampire teeth and pinch them closed. Gently push the back end into the donut’s hole so they can get nice and stuck. This is the most crucial step, so take your time to ensure they fit well!
  • Step 2: Slightly open the teeth to give them an “attack” look, adding to the spooky effect.
  • Step 3: Add the candy eyes to the donut. The glaze should be enough to hold them in place; if necessary, use a tiny dot of gel frosting for extra security.

Expert Tips for Perfect Vampire Donuts

To ensure your vampire donuts turn out perfectly, keep these expert tips in mind:

  • Use Fresh Donuts: For the best flavor and texture, use fresh donuts. If using store-bought, check the expiration date.
  • Get Creative: Feel free to add other decorations like edible glitter or festive sprinkles to enhance the visual appeal.
  • Don’t Rush: Take your time when assembling the donuts; attention to detail will make your decorations pop!
  • Practice Safety: If using small decorations, keep them away from younger children who might put them in their mouths.
  • Make It a Family Activity: Invite family members to help with decorating, making it a fun bonding experience.

Common Mistakes and Troubleshooting

Even experienced bakers can encounter issues. Here are some common mistakes and how to avoid them:

  • Teeth Falling Out: Ensure the vampire teeth are pushed in securely; if they’re loose, try using gel frosting to hold them in place.
  • Donuts Losing Shape: If your donuts start to lose their shape, try refrigerating them for a short time before decorating.
  • Too Much Glaze: Use just enough glaze to coat the donuts lightly; a thick layer can overpower the flavor.

Vampire Donuts Variations

Customize your vampire donuts with these fun variations:

  • Chocolate Glaze: Use a chocolate glaze instead of a vanilla one for a richer flavor.
  • Red Velvet Donuts: Make red velvet donuts as a base for a festive twist on the classic recipe.
  • Mini Donuts: Use a mini donut pan to create bite-sized versions that are perfect for parties.
  • Fillings: Consider adding raspberry or strawberry jam inside for a “bloody” surprise!

How to Store and Freeze Vampire Donuts

To keep your donuts fresh, follow these tips:

  • Room Temperature: Store donuts in an airtight container at room temperature for up to 2 days.
  • Refrigeration: If you need to keep them longer, refrigerate them for up to a week.
  • Freezing: You can freeze unglazed donuts for up to 3 months. Thaw and glaze when ready to serve.

Make Ahead Options

For those planning a big gathering, here’s how to prepare in advance:

  • Prepare Donuts Ahead: Make and freeze the donuts a few days in advance, and glaze them right before serving.
  • Prep Decorations: Set aside your vampire teeth and candy eyes in advance to streamline the decorating process.

Vampire Donuts Recipe FAQs

Here are some frequently asked questions to help you with your vampire donut-making:

  • Can I use cake donuts instead of glazed? Absolutely! Cake donuts can add a delightful texture to your vampire donuts.
  • What type of glaze works best? A simple powdered sugar glaze is versatile and easy to make.
  • How do I make the donuts more festive? Consider adding colorful sprinkles or themed decorations like candy corn.
  • Are these donuts suitable for children? Yes! Just ensure that the decorations are safe for younger kids.
  • Can I make these donuts vegan? Yes! Use plant-based substitutes for the milk and butter.
  • What can I serve with vampire donuts? Pair them with hot chocolate or pumpkin spice coffee for a complete Halloween experience.
  • How do I add flavor to the donuts? You can incorporate spices like cinnamon or nutmeg into the glaze for added warmth.
  • Can I customize the decorations? Definitely! Get creative with different toppings and designs to make them your own.

Nutrition Tips and Dietary Adaptations

For those keeping an eye on nutrition, consider these tips:

  • Portion Control: Enjoy these donuts in moderation, especially if serving at a party.
  • Healthier Alternatives: Substitute some sugar with applesauce or use whole wheat flour for a healthier twist.

Recommended Equipment

To make your baking experience smooth, here’s what you’ll need:

  • Donut Cutter: This will help you shape your donuts perfectly.
  • Mixing Bowls: Have a variety of sizes on hand for mixing ingredients.
  • Baking Sheet: Essential for baking your donuts if you’re making them from scratch.
  • Airtight Container: For storing your finished donuts.

Serving Suggestions

When it’s time to serve your vampire donuts, consider these ideas:

  • Display Creatively: Arrange donuts on a spooky platter for an eye-catching Halloween display.
  • Pair with Beverages: Serve alongside festive drinks like apple cider or themed cocktails.
  • Include Treat Bags: Wrap a few donuts in clear bags tied with ribbon for party favors.

Conclusion

These vampire donuts are more than just a dessert; they’re an opportunity to unleash your creativity and create lasting memories. Whether you’re hosting a Halloween party or just want to enjoy some spooky fun at home, this recipe is sure to delight. So gather your ingredients, invite your family to help, and get ready to craft these spooktacular treats that will be the highlight of your Halloween festivities!

Vampire Donuts Recipe

Prep Time 10 minutes
Cook Time 5 minutes
Total Time 15 minutes
Servings 12 pieces
Calories 150
Spookify your treats with these fun vampire-themed donuts, perfect for Halloween or a themed party.

Ingredients

Donuts

  • 12 pieces Glazed Donuts (store-bought or homemade)

Vampire Teeth

  • 12 pieces Vampire Teeth (washed and cleaned)

Candy Googly Eyes

  • 12 pieces Candy Googly Eyes

Instructions 

  • Pinch vampire teeth closed and insert into donut holes.
  • Gently open the teeth for an attack look.
  • Place candy googly eyes on the glazed surface, using glaze or a small dot of frosting to secure if needed.

Notes

Use fresh donuts for best appearance and taste.
Calories: 150kcal
Cost: $15
Course: Dessert
Cuisine: American
Keyword: donuts, Halloween, vampire

Elevate Your Pizza Night with Butternut Squash Flatbread

Welcome to a delightful culinary journey that transforms your typical pizza night into an extraordinary experience! This Butternut Squash Flatbread is not just a dish; it’s a celebration of seasonal ingredients that blend together to create comfort, flavor, and creativity in your kitchen. With a harmonious mix of roasted butternut squash, fresh kale, savory pancetta, and creamy mozzarella, this recipe promises to impress both family and friends alike. Whether you’re a novice cook or a seasoned chef, this guide will walk you through every step, ensuring success from the first bite to the last.

Why You’ll Love This Recipe

This butternut squash flatbread isn’t just delicious; it offers a myriad of benefits that make it a standout dish:

  • Health Benefits: Packed with seasonal ingredients, this flatbread is rich in vitamins and antioxidants, making it a nutritious choice for any meal.
  • Versatility: You can easily customize this dish by adding your favorite toppings or using different types of dough, from store-bought to homemade.
  • Quick and Easy: With straightforward steps and minimal prep time, you can have this delectable flatbread ready in about 30 minutes.
  • Impressive Presentation: The vibrant colors of the roasted squash and greens create a visually stunning dish that’s perfect for entertaining.
  • Comfort Food Vibes: The combination of flavors and textures—from creamy cheese to crispy pancetta—will warm your heart and satisfy your cravings.

Ingredient Breakdown

Let’s dive into the essential components required to make this scrumptious Butternut Squash Flatbread. Here’s what you’ll need:


Professional Chef Knife Set

★ Recommended Kitchen Tool

Professional Chef Knife Set

Make this recipe even easier with a quality Professional Chef Knife Set — a must-have kitchen staple!


🛒 View on Amazon →

As an Amazon Associate, we earn from qualifying purchases.
  • Pizza Dough: 2 (8-ounce) balls, at room temperature. You can use store-bought or make your own dough for a personal touch.
  • Butternut Squash: 1 small, peeled, seeded, and cut into 1-inch cubes (about 3 cups total). This gives the flatbread its signature flavor.
  • Olive Oil: 1/3 cup, plus extra for brushing. This adds richness and helps in roasting the squash.
  • Salt & Pepper: Essential for seasoning and enhancing the flavor of your ingredients.
  • Kale: 1 small bunch of Lacinato kale (or regular kale), coarsely chopped. It adds a nutritious green element.
  • Pancetta: 6 ounces, cubed. This savory meat adds an irresistible flavor and texture.
  • Garlic Confit: 4 tablespoons, for a sweet, mellow garlic flavor that complements the squash.
  • Mozzarella Cheese: 12 ounces, shredded. The melty cheese binds the ingredients together and adds creaminess.

How to Make Butternut Squash Flatbread

Side view of a delicious flatbread featuring roasted garlic, mozzarella, and colorful vegetables.

Follow these simple steps to create your delicious flatbread:

  1. Preheat your oven to 400 degrees F.
  2. Line a baking sheet with aluminum foil. Toss the squash cubes with 3 tablespoons of olive oil, then spread evenly on the sheet. Season with salt and pepper.
  3. Set the squash aside until needed.
  4. Increase the oven temperature to 425 degrees F.
  5. In a frying pan, cook the pancetta over medium heat until lightly crisp and browned. Set aside.
  6. Remove the kale leaves from the stems, coarsely chop, and set aside.
  7. Bring a pot of lightly salted water to a boil, and cook the kale until tender, about 2-3 minutes. Drain, then cool slightly and squeeze out excess water.
  8. Sprinkle a sheet of parchment paper with flour; roll out one ball of dough into an oval shape about 1/4 inch thick. Carefully move the parchment with the dough onto a baking sheet.
  9. Repeat with the second ball of dough.
  10. Brush both flatbreads with olive oil. Evenly distribute the shredded mozzarella over the top of each.
  11. Divide the kale, butternut squash, garlic confit, and pancetta evenly between the two flatbreads.
  12. Bake for about 20-25 minutes or until the cheese is bubbly and lightly browned.
  13. Allow to cool for 5 minutes before slicing. Enjoy!

Expert Tips for Perfect Flatbread

To ensure your butternut squash flatbread turns out perfectly, consider these expert tips:

  • Pre-roast the Squash: Roasting the squash before adding it to the flatbread enhances its flavor and sweetness.
  • Use Fresh Ingredients: Fresh kale and quality olive oil make a noticeable difference in the overall taste.
  • Monitor Baking Time: Keep an eye on the flatbread as baking times can vary based on oven efficiency and thickness of the dough.
  • Slicing Technique: For easier serving, slice the flatbread while it’s still warm, using a sharp pizza cutter.
  • Experiment with Cheeses: Try using different types of cheese like goat cheese for a tangy flavor or a blend of cheeses for depth.
  • Store Leftovers Correctly: Store any leftovers in an airtight container in the fridge for up to 3 days.
  • Make-ahead Option: You can prepare the dough and toppings a day in advance; just assemble and bake when you’re ready.
  • Garnish Ideas: Fresh herbs, a drizzle of balsamic glaze, or a sprinkle of red pepper flakes can elevate the flavors further.

Common Mistakes and Troubleshooting

Even the best cooks can make mistakes. Here are some common pitfalls and how to avoid them:

  • Overcooking the Squash: Ensure the squash is tender but not mushy; it should hold its shape when baked on the flatbread.
  • Too Much Topping: Keep the toppings balanced; overloading can make the flatbread soggy.
  • Not Preheating the Oven: A properly preheated oven is crucial for achieving that perfect bubbly cheese and crispy crust.
  • Ignoring the Dough Resting Time: Let the pizza dough come to room temperature before rolling it out; this makes it easier to work with.

Variations to Try

Feeling adventurous? Here are some creative variations of the butternut squash flatbread:

  • Vegan Version: Substitute mozzarella with vegan cheese and omit pancetta for a plant-based alternative.
  • Spicy Twist: Add sliced jalapeños or crushed red pepper flakes to introduce some heat to the flatbread.
  • Herbed Flatbread: Incorporate fresh herbs like rosemary or thyme into the dough for added flavor.
  • Sweet and Savory: Drizzle a bit of maple syrup over the squash before baking for a sweet contrast.

Storage and Make-Ahead Instructions

To keep your butternut squash flatbread fresh:

  • Refrigerate: Store in an airtight container in the fridge for up to 3 days.
  • Freeze: You can freeze baked flatbread for up to 2 months. Wrap it tightly in plastic wrap and aluminum foil.
  • Reheat: To enjoy leftovers, reheat in the oven at 350 degrees F until warmed through, about 10 minutes.

Frequently Asked Questions

Here are some common questions about making butternut squash flatbread:

  • Can I use other types of squash? Yes, you can use acorn or pumpkin squash as substitutes for butternut squash.
  • Is this flatbread gluten-free? You can use gluten-free pizza dough to make this recipe gluten-free.
  • Can I make my own pizza dough? Absolutely! Making your own dough is simple and adds a personal touch.
  • How can I add protein? Grilled chicken or chickpeas are excellent additions for extra protein.
  • What’s the best way to serve this flatbread? Serve warm as an appetizer, main course, or part of a charcuterie board.
  • Can I prepare the toppings in advance? Yes, you can prep the squash, kale, and pancetta a day ahead.
  • What if my dough is too sticky? Dust your work surface and rolling pin with flour to help manage stickiness.
  • How can I make this recipe dairy-free? Use dairy-free cheese alternatives and omit any dairy products.

Nutrition Tips and Dietary Adaptations

This recipe can easily be adapted to fit various dietary needs:

  • Low-Carb Option: Use a cauliflower crust instead of traditional pizza dough for a low-carb alternative.
  • Vegetarian: Omit the pancetta or replace it with sautéed mushrooms for a hearty vegetarian option.
  • Lower Calorie: Reduce the amount of cheese or use a lighter cheese option to cut calories.

Equipment Recommendations

Here are some essential tools that will make your cooking experience easier:

  • Rolling Pin: For rolling out the dough evenly.
  • Baking Sheets: Non-stick or lined with parchment paper for easy cleanup.
  • Frying Pan: For sautéing the pancetta and cooking the kale.
  • Sharp Knife: For slicing the butternut squash and other ingredients.

Serving Suggestions

When it comes to enjoying your butternut squash flatbread, consider these serving ideas:

  • Pair with a Salad: A light arugula salad with lemon vinaigrette complements the richness of the flatbread.
  • Wine Pairing: A crisp white wine, such as Sauvignon Blanc, pairs beautifully with the flavors.
  • Garnish with Fresh Herbs: Sprinkle fresh basil or parsley on top before serving for added freshness.

In conclusion, this Butternut Squash Flatbread recipe is a delightful blend of flavors, textures, and colors that will undoubtedly elevate your pizza night. With the detailed guidance provided, you can confidently create a dish that not only tastes great but also satisfies your desire for something unique and comforting. So gather your ingredients, roll up your sleeves, and enjoy the process of making this delicious flatbread. Happy cooking!

Butternut Squash, Kale, Roasted Garlic, & Pancetta Flatbread

Prep Time 20 minutes
Cook Time 25 minutes
Total Time 45 minutes
Servings 2 flatbreads
Calories 650
A flavorful flatbread topped with roasted butternut squash, sautéed kale, garlic, and crispy pancetta, perfect for a cozy meal.

Ingredients

Dough

  • 2 pieces pizza dough balls (at room temperature)
  • 1 small butternut squash (peeled, seeded, cut into 1-inch cubes)
  • 1/3 cup olive oil
  • to taste salt & pepper
  • 1 small bunch lacinato kale (or regular kale)
  • 6 ounces cubed pancetta
  • 4 tablespoons garlic confit
  • 12 ounces shredded mozzarella cheese

Instructions 

  • Preheat oven to 400°F (200°C). Toss squash with 3 tbsp olive oil and roast on a baking sheet for 20 minutes.
  • Cook pancetta in a pan until crispy. Blanch kale in boiling water, drain, and squeeze out excess water.
  • Roll out dough into two oval shapes on parchment, brush with olive oil, and sprinkle with mozzarella.
  • Divide kale, roasted squash, garlic confit, and pancetta evenly over the flatbreads.
  • Bake at 425°F (220°C) for 20-25 minutes until bubbly and browned. Cool for 5 minutes, then slice and serve.

Notes

For extra flavor, drizzle with balsamic glaze before serving.
Calories: 650kcal
Cost: $15
Course: Main Course
Cuisine: American
Keyword: Flatbread

Welcome to Your New Favorite Dessert!

Are you ready to indulge in a dessert that combines the rich, nutty flavor of a classic pecan pie with the soft, fluffy texture of a cupcake? Our Pecan Pie Cupcakes are not just a treat; they’re a delightful experience that brings together the best of both worlds. Perfect for any occasion, these cupcakes are a crowd-pleaser that you can whip up with ease in your home kitchen.

In this guide, we’ll explore everything you need to know to make these scrumptious cupcakes, from detailed ingredient breakdowns to tips for achieving perfection. Whether you’re a seasoned baker or a novice in the kitchen, you’ll find that making pecan pie cupcakes is easier than you think!

Why You’ll Love This Recipe

  • Irresistible flavor combination: The blend of pecans, brown sugar, and buttery richness delivers a taste that’s both comforting and indulgent.
  • Moist and fluffy texture: Using cake flour ensures a light, tender crumb that contrasts beautifully with the crunchy pecans.
  • Easy to customize: This recipe offers plenty of variations, so you can make it your own or adapt it for different dietary needs.
  • Perfect for gatherings: Whether it’s a holiday dinner or a casual get-together, these cupcakes will impress your guests.
  • Simplified baking: With straightforward instructions and common ingredients, you can create bakery-quality cupcakes at home!

Ingredient Breakdown

Let’s dive into the essential ingredients that make these cupcakes so special:


Silicone Baking Cups Set

★ Recommended Kitchen Tool

Silicone Baking Cups Set

Make this recipe even easier with a quality Silicone Baking Cups Set — a must-have kitchen staple!


🛒 Shop This Tool →

As an Amazon Associate, we earn from qualifying purchases.
  • Butter: 1 1/8 cups of softened butter (1 cup + 2 tablespoons) adds richness and moisture.
  • Pecans: Use 2 cups of chopped pecans for the batter and an additional 2/3 cup for garnishing, ensuring a delightful crunch in every bite.
  • Sugar: 2 cups of granulated sugar provide sweetness, complemented by 3/4 cup of brown sugar for a hint of caramel flavor.
  • Eggs: 4 large eggs help bind the ingredients and create a fluffy texture.
  • Vanilla extract: 2 teaspoons enhance the overall flavor profile.
  • Flour: A combination of 1 cup of all-purpose flour and 2 cups of cake flour contributes to the light, airy texture.
  • Baking powder: 2 teaspoons ensure the cupcakes rise perfectly.
  • Salt: 1/2 teaspoon balances the sweetness.
  • Cinnamon: 1 teaspoon adds warmth and depth to the flavor.
  • Whole milk: 1 cup of whole milk keeps the batter moist and rich.
  • Cream cheese: 8 ounces of room temperature cream cheese create a creamy frosting that pairs beautifully with the cupcakes.
  • Powdered sugar: 3 cups of powdered sugar for the frosting gives it the perfect sweetness and texture.
  • Toasted pecans: For garnishing, 2/3 cup of toasted and chopped pecans adds a lovely crunch.

Pro Tips for Perfect Pecan Pie Cupcakes

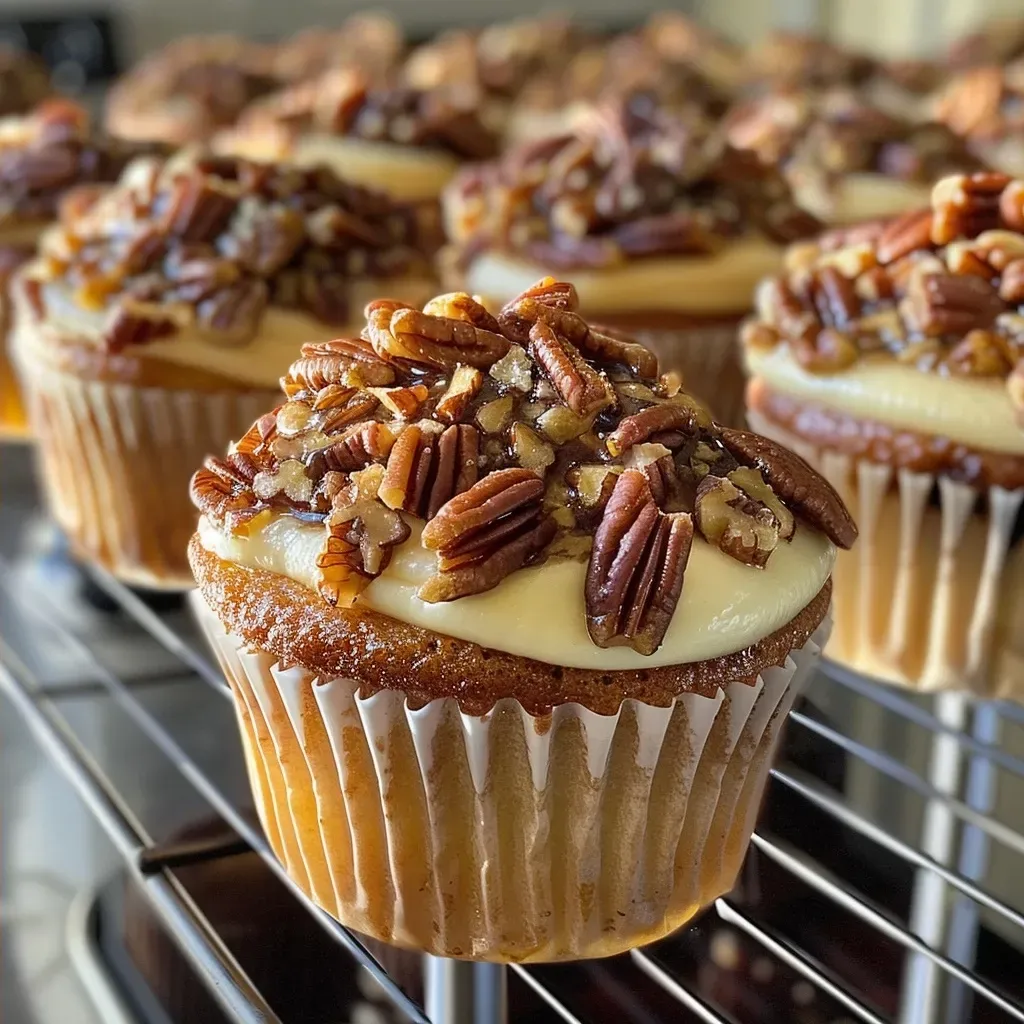
Delicious Pecan Pie Cupcakes with cream cheese frosting and pecan garnish.

Here are some expert insights to help you make the best pecan pie cupcakes:

  • Softened butter: Ensure your butter is at room temperature for easy mixing.
  • Room temperature ingredients: Use room temperature eggs and cream cheese for a smoother batter.
  • Don’t overmix: Mix the batter just until combined to avoid dense cupcakes.
  • Check for doneness: Insert a toothpick in the center; it should come out clean or with a few moist crumbs.
  • Cool completely: Allow the cupcakes to cool completely before frosting to prevent melting.
  • Frosting variations: Consider adding flavors like caramel or maple to your cream cheese frosting for a twist.
  • Storage tips: Keep any leftover cupcakes in an airtight container at room temperature for up to 3 days.
  • Make-ahead option: Prepare the batter and store it in the fridge for up to 24 hours before baking.
  • Garnishing: Top with a whole pecan or a drizzle of caramel sauce for added flair.

Common Mistakes and Troubleshooting

Even the best chefs make mistakes! Here are some common pitfalls and how to avoid them:

  • Dry cupcakes: Overbaking can lead to dryness; always keep an eye on the baking time.
  • Too sweet: If the cupcakes are too sweet, consider reducing the sugar slightly or adding a pinch of salt.
  • Heavy texture: Ensure you’re using the correct flour measurements, as too much flour can make the cupcakes dense.
  • Cracked tops: This may happen if the oven temperature is too high; use an oven thermometer to check accuracy.

Variations to Try

Get creative with your pecan pie cupcakes! Here are some tempting variations:

  • Chocolate pecan pie cupcakes: Add cocoa powder to the batter for a chocolatey twist.
  • Spiced pecan pie cupcakes: Enhance the flavor with spices like nutmeg or ginger.
  • Gluten-free version: Substitute all-purpose flour with a gluten-free blend for a gluten-free treat.
  • Vegan pecan pie cupcakes: Use flax eggs, dairy-free butter, and a non-dairy milk for a vegan alternative.

Storage and Make-Ahead Instructions

Planning ahead? Here’s how to store and prepare your pecan pie cupcakes for later:

  • Room temperature storage: Store cupcakes in an airtight container for up to 3 days.
  • Refrigeration: If frosted, keep them in the refrigerator for up to 5 days.
  • Freezing: Freeze unfrosted cupcakes for up to 2 months; thaw before frosting.
  • Make-ahead batter: Prepare the batter a day in advance and refrigerate until ready to bake.

Frequently Asked Questions

Here are some common questions you might have about making pecan pie cupcakes:

  • Can I use a different nut?: Absolutely! Try walnuts or hazelnuts for a different flavor profile.
  • What can I substitute for eggs?: Use flax eggs or applesauce for egg replacements in vegan versions.
  • How do I know when the cupcakes are done?: The tops will be golden, and a toothpick inserted in the center should come out clean.
  • Can I make mini cupcakes?: Yes! Adjust the baking time to about 15-18 minutes for mini versions.
  • What frosting works best?: Cream cheese frosting pairs beautifully, but you can also use chocolate or caramel frosting.
  • How do I prevent my cupcakes from sticking?: Use cupcake liners or grease the pan well before adding batter.
  • Can I add chocolate chips?: Definitely! Fold in some chocolate chips for an extra treat.
  • Is this recipe scalable?: Yes, you can easily double or halve the recipe based on your needs.

Nutrition Tips and Dietary Adaptations

While these cupcakes are a delightful indulgence, you can make them healthier with a few adjustments:

  • Reduce sugar: Cut back on the granulated sugar for a less sweet version.
  • Whole grain flour: Substitute half of the all-purpose flour with whole wheat flour for added fiber.
  • Lower fat options: Use low-fat cream cheese and butter for a lighter frosting.

Equipment Recommendations

To make your baking experience smooth, here’s a list of essential kitchen tools:

  • Mixing bowls: A set of various sizes for mixing ingredients.
  • Cupcake tin: A standard 12-cup cupcake pan for even baking.
  • Electric mixer: For quick and easy mixing of the batter and frosting.
  • Measuring cups and spoons: Accurate measurements are key to a successful recipe.
  • Cooling rack: Allows cupcakes to cool evenly after baking.

Serving Suggestions

These pecan pie cupcakes are best enjoyed fresh, but here are some serving ideas to elevate your dessert:

  • Top with whipped cream: A dollop of whipped cream adds a light touch.
  • Drizzle with caramel sauce: For an extra touch of sweetness, drizzle some caramel sauce over the cupcakes.
  • Serve with coffee: Pair them with a hot cup of coffee or tea for a delightful afternoon treat.

In Conclusion

There you have it! With this comprehensive guide, you’re well-equipped to make Delightful Pecan Pie Cupcakes that will impress everyone at your next gathering. Remember, cooking is all about making connections and sharing joy—so gather your loved ones and enjoy the process. Happy baking!

Pecan Pie Cupcakes

Prep Time 20 minutes
Cook Time 25 minutes
Total Time 45 minutes
Servings 12 pieces
Calories 350
Delightful cupcakes with rich pecan filling and a sweet frosting, perfect for any occasion.

Ingredients

Butter

  • 1 1/8 cups butter (softened, divided (1 cup + 2 tablespoons))

Pecans

  • 2 cups pecans (chopped)

Granulated Sugar

  • 2 cups granulated sugar

Eggs

  • 4 eggs eggs

Vanilla Extract

  • 2 teaspoons vanilla extract

All-purpose Flour

  • 1 cup all-purpose flour

Cake Flour

  • 2 cups cake flour

Baking Powder

  • 2 teaspoons baking powder

Salt

  • 1/2 teaspoon salt

Cinnamon

  • 1 teaspoon cinnamon

Whole Milk

  • 1 cup whole milk

Cream Cheese

  • 8 ounces cream cheese (room temperature)

Unsalted Butter

  • 3/4 cup unsalted butter (room temperature (1 1/2 sticks))

Dark Brown Sugar

  • 3/4 cup dark brown sugar

Powdered Sugar

  • 3 cups powdered sugar

Toasted and Chopped Pecans (for garnish)

  • 2/3 cup pecans (toasted and chopped, for garnish)

Instructions 

  • Preheat oven to 350°F (175°C) and prepare cupcake liners.
  • Cream together butter, cream cheese, and sugars until smooth.
  • Add eggs one at a time, then mix in vanilla and cinnamon.
  • Combine dry ingredients and alternate adding with milk to the wet mixture.
  • Fill cupcake liners with batter, top with chopped pecans, and bake for 25 minutes.

Notes

Ensure all ingredients are at room temperature for best results.
Calories: 350kcal
Cost: $15
Course: Dessert
Cuisine: American
Keyword: Pecans

Unleash Your Creativity with Spooktacular Frankenstein Pretzels

Halloween is a time for fun, creativity, and, of course, delicious treats! These easy-to-make Frankenstein pretzels are perfect for parties, gatherings, or just a spooky snack at home. Combining the salty crunch of pretzels with the vibrant sweetness of neon green candy coating, these treats are sure to be a hit with kids and adults alike. Plus, they’re customizable, allowing you to express your artistic side. Let’s dive into this delightful recipe!

Why You’ll Love This Recipe

This recipe isn’t just about creating a fun Halloween snack; it’s about crafting memorable moments. Here are five reasons why you’ll love making these Frankenstein pretzels:

  • Fun for All Ages: Kids will love getting involved in the decorating process, while adults can enjoy the nostalgia of Halloween treats.
  • Customizable Design: Use mismatched candy eyeballs and different toppings to give each pretzel its own personality.
  • Quick and Easy to Prepare: With minimal ingredients and straightforward steps, these treats can be whipped up in no time.
  • Perfect for Parties: These pretzels are a visually appealing addition to any Halloween spread, sure to impress your guests.
  • Delicious Flavor Combination: The salty pretzel balances perfectly with the sweet neon green coating, making them irresistible.

Ingredient Breakdown

Before we dive into the preparation, let’s look at the ingredients you’ll need to create your Frankenstein pretzels:


Professional Chef Knife Set

★ Recommended Kitchen Tool

Professional Chef Knife Set

Make this recipe even easier with a quality Professional Chef Knife Set — a must-have kitchen staple!


🛒 Shop This Tool →

As an Amazon Associate, we earn from qualifying purchases.
  • 12 long salted pretzel rods (approx 7-8 inches long): These serve as the crunchy base for your spooky creation.
  • 12 oz green candy wafers (340g, neon or slime green color): This vibrant coating brings your Frankenstein to life!
  • 1 tsp coconut oil (5ml): A small amount helps give the green coating a smooth, satin finish.
  • 0.5 cup black royal icing (120ml): Use this for the hair and facial features of your Frankenstein.
  • 24 edible candy eyeballs (mismatched sizes recommended): These add personality and fun to your pretzels.
  • 24 dark chocolate jimmies: These sprinkles can be used for bolts, adding to the character of your treat.

Pro Tips for Perfect Frankenstein Pretzels

Side view of Halloween pretzels resembling Frankenstein, featuring green coating and candy eyes.

Follow these expert insights to elevate your pretzel-making game:

  • Use Parchment Paper: Line your baking sheet with parchment paper to prevent sticking when cooling the coated pretzels.
  • Chill the Coating: If the green candy coating is too runny, refrigerate it for a few minutes to thicken it up before dipping.
  • Practice Your Zig-Zag: For the hair, practice creating a zig-zag pattern with the royal icing for an authentic look.
  • Experiment with Colors: Try using different colored candy melts to create variations of Frankenstein or other spooky characters.
  • Set Up a Decorating Station: Have all your ingredients laid out for easy access, making the process more fun and efficient.
  • Make It a Group Activity: Invite friends or family to join in, turning the pretzel-making into a festive gathering.
  • Store Properly: Keep your finished pretzels in an airtight container to maintain their freshness and crunch.
  • Use a Double Boiler: When melting chocolate or candy melts, use a double boiler for even melting without burning.

Avoid Common Mistakes

Here are some common pitfalls and how to avoid them:

  • Too Thick of a Coat: If your coating is too thick, it may not set properly. Aim for a thin, even layer.
  • Not Letting Them Cool: Ensure your pretzels cool fully before storing to avoid sogginess.
  • Overheating Candy Wafers: Melt your candy wafers slowly to prevent burning and achieve a smooth consistency.

Delicious Variations to Try

Looking to mix things up? Here are four fun variations on the classic recipe:

  • Vampire Pretzels: Use red candy melts instead of green and add white chocolate fangs.
  • Monster Pretzels: Decorate with colorful sprinkles and use different colored candy melts for variety.
  • Ghostly Pretzels: Dip in white chocolate and use chocolate chips for eyes, creating a spooky ghost effect.
  • Pumpkin Pretzels: Use orange candy melts and top with green icing for leaves, making them festive for Halloween.

Storage and Make-Ahead Instructions

Want to prepare these treats ahead of time? Here’s how to store them:

  • Store in an Airtight Container: Keep your pretzels in a cool, dry place to maintain their crunch.
  • Make Ahead: You can make these pretzels up to a week in advance. Just be sure to store them properly!

Frequently Asked Questions

Here are some common questions about making Frankenstein pretzels:

  • Can I use different types of pretzels? Yes! Mini pretzel twists or even chocolate-covered pretzels can work for a different taste.
  • What if I can’t find green candy wafers? You can use regular white chocolate and add green food coloring.
  • How do I make royal icing? Mix powdered sugar with egg whites or meringue powder and water until smooth.
  • Can I freeze these pretzels? While it’s not recommended, you can freeze them for a short period; just be aware they may lose some crunch.
  • How do I make the eyes stay on? Use a small dot of melted candy on the back of the candy eyeballs to attach them securely.
  • What are good toppings for these pretzels? Get creative with toppings like crushed candy, coconut flakes, or even edible glitter!
  • How long do these pretzels last? When stored properly, they can last up to a week.
  • Can I use dark chocolate instead of candy melts? Absolutely! Just be mindful of melting it properly to maintain a smooth coating.

Nutrition Tips and Dietary Adaptations

If you’re looking for ways to adapt this recipe to fit dietary needs:

  • Gluten-Free Options: Use gluten-free pretzel rods available at most grocery stores.
  • Vegan Substitutes: Choose plant-based candy melts and royal icing made without egg whites.
  • Reduce Sugar: Consider using sugar-free candy melts for a lower-sugar option.

Recommended Equipment

To ensure your pretzel-making experience goes smoothly, here are some essential tools:

  • Baking Sheet: A large, flat surface is necessary for cooling your pretzels.
  • Parchment Paper: Prevents sticking and makes cleanup easier.
  • Double Boiler: Ideal for melting candy wafers without burning them.
  • Spoon or Dipping Tool: For easy dipping into the melted candy.

Serving Suggestions

Ready to serve your delicious Frankenstein pretzels? Here are some fun ideas:

  • Halloween Snack Table: Place them on a festive platter alongside other Halloween treats.
  • Party Favors: Wrap individual pretzels in clear bags with a spooky tag for guests to take home.
  • Movie Night Treats: Serve them up during your Halloween movie marathon for a fun snack.

Conclusion

Making Frankenstein pretzels is an enjoyable and rewarding experience that brings a festive spirit to your Halloween celebrations. With this comprehensive guide, you now have all the tools and tips needed to create these delightful treats. So gather your ingredients, invite your friends and family, and get ready for a spooky, fun-filled kitchen adventure!

Frankenstein Pretzels: Easy Spooky Halloween Treats

Prep Time 15 minutes
Cook Time 10 minutes
Total Time 25 minutes
Servings 12 pieces
Calories 150
Create fun and spooky Halloween treats with these adorable Frankenstein pretzels, perfect for parties or festive snacking.

Ingredients

Pretzel Rods

  • 12 count long salted pretzel rods (approx 7-8 inches long)
  • 12 oz green candy wafers (neon or slime green color)
  • 1 tsp coconut oil (for a satin finish)
  • 0.5 cup black royal icing (for the hair)
  • 24 count edible candy eyeballs (mismatched sizes recommended)
  • 24 count dark chocolate jimmies (used for bolts)

Instructions 

  • Melt the green candy wafers with coconut oil until smooth.
  • Allow the treats to set completely before serving.

Notes

Use high-quality melting wafers for best results and work quickly to prevent the coating from hardening.
Calories: 150kcal
Cost: $12
Course: Dessert
Cuisine: Halloween
Keyword: Candy, Pretzels, spooky

Discover the Joy of Jiffy Corn Casserole

Welcome to the ultimate comfort food experience! In this article, we will delve into the delightful world of Jiffy Corn Casserole, a dish that offers both simplicity and heartwarming flavors. This easy-to-make casserole recipe is perfect for family gatherings, potlucks, or just a cozy weeknight dinner. With its creamy texture and sweet corn goodness, you’ll find it hard to resist second servings!

In the first 100 words, let’s explore why this Jiffy Corn Casserole is not just another recipe in your cookbook, but a cherished dish that brings people together. Whether you’re a seasoned chef or a beginner in the kitchen, you can master this recipe with ease and enjoy the delightful results.

Why You’ll Love This Recipe

  • Quick and Easy: This casserole can be whipped up in under an hour, making it a fantastic option for busy weeknights.
  • Minimal Ingredients: With only a handful of pantry staples required, you can create a delicious dish without a lengthy shopping list.
  • Versatile Dish: Perfect as a side or a main dish, this casserole pairs wonderfully with grilled meats or a fresh salad.
  • Crowd-Pleaser: Its sweet and savory flavors make it a hit with both kids and adults alike.
  • Make-Ahead Friendly: You can prep this dish ahead of time and simply bake it when you’re ready to serve.

Ingredient Breakdown

Let’s take a closer look at the ingredients that make up this delightful Jiffy Corn Casserole:


Digital Kitchen Scale

★ Recommended Kitchen Tool

Digital Kitchen Scale

Make this recipe even easier with a quality Digital Kitchen Scale — a must-have kitchen staple!


🛒 View on Amazon →

As an Amazon Associate, we earn from qualifying purchases.
  • ½ cup unsalted butter: Softened to bring richness to the dish.
  • 1 can cream-style corn: Adds creaminess and moisture—keep it undrained for the best results.
  • 1 can corn: Whole kernels contribute texture and sweetness; don’t drain this one either!
  • 1 cup sour cream: Offers a creamy consistency and a tangy flavor that balances the sweetness.
  • 2 eggs: Helps bind the mixture together, providing a fluffy texture.
  • 1 box corn muffin mix: The heart of this recipe; Jiffy brand is recommended for its lightness and flavor.
  • ½ tsp salt: Enhances the overall flavor profile.

Pro Tips for Perfection

Side view of a freshly baked corn casserole with a crispy top, showcasing its creamy corn interior.

To ensure your Jiffy Corn Casserole turns out perfectly every time, consider these expert tips:

  • Use Room Temperature Ingredients: Let your butter, eggs, and sour cream sit out for a bit. This helps them combine more easily.
  • Don’t Overmix: When combining your ingredients, mix just until blended to keep the casserole light and fluffy.
  • Check for Doneness: A slight jiggle in the center is okay, but make sure the top is golden brown before taking it out.
  • Let it Rest: Allow the casserole to cool for about 10 minutes before serving; this helps it set up nicely.
  • Add Cheese: Stir in some shredded cheese for a cheesy twist—cheddar or Monterey Jack works beautifully!
  • Experiment with Spices: Consider adding a pinch of paprika or cayenne for a subtle kick.
  • Fresh Herbs: Garnish with fresh chives or parsley for a pop of color and flavor.
  • Serving Temperature: This casserole is best enjoyed warm, but it can also be served at room temperature.

Common Mistakes to Avoid

Even the most seasoned cooks can make simple errors. Here are common pitfalls to watch for:

  • Overbaking: Keep an eye on your casserole; overbaking can lead to a dry texture.
  • Skipping the Grease: Always grease your casserole dish to prevent sticking.
  • Using Low-Fat Ingredients: While tempting, low-fat versions can alter the texture and flavor significantly.
  • Not Following Instructions: Each step in the recipe is designed for the best outcome, so follow them closely!

Variations to Try

Feel free to get creative with your Jiffy Corn Casserole! Here are a few variations to consider:

  • Cheesy Jalapeño Corn Casserole: Add diced jalapeños and shredded cheese for a spicy kick.
  • Mexican-Style Corn Casserole: Incorporate black beans, corn, and taco seasoning for a southwestern twist.
  • Vegetable-Loaded Casserole: Mix in diced bell peppers, onions, or zucchini for added nutrition and flavor.
  • Sweet Corn and Bacon Casserole: Fold in crispy bacon bits for a savory, indulgent version.

Storage and Make-Ahead Instructions

Jiffy Corn Casserole is great for meal prep! Here’s how to store and reheat it:

  • Refrigeration: Store leftovers in an airtight container in the fridge for up to 4 days.
  • Freezing: You can freeze uncooked casserole for up to 3 months. Thaw in the fridge overnight before baking.
  • Reheating: Warm in the oven at 350°F (175°C) until heated through, about 20-25 minutes.

Comprehensive FAQ

Here are some frequently asked questions about Jiffy Corn Casserole:

  • Can I use a different brand of corn muffin mix? Yes, but Jiffy is recommended for its unique texture and flavor.
  • Is this casserole gluten-free? It depends on the corn muffin mix used; check the label for gluten-free options.
  • Can I make this casserole without eggs? Yes, substitute with a flax egg or applesauce for a vegan option.
  • What should I serve with Jiffy Corn Casserole? This dish pairs well with grilled chicken, steak, or a fresh garden salad.
  • How can I adjust the sweetness? You can reduce the amount of cream-style corn for a less sweet dish.
  • Can I make it dairy-free? Yes, use dairy-free sour cream and a non-dairy butter alternative.
  • How long does it take to bake? Bake for 30 to 45 minutes, depending on your oven and dish size.
  • Can I add meat to the casserole? Absolutely! Cooked ground beef or sausage can be mixed in for a heartier meal.

Nutrition Tips and Dietary Adaptations

For those mindful of nutrition, consider these tips:

  • Make it Healthier: Opt for reduced-fat sour cream and add fresh vegetables.
  • Watch the Portions: While delicious, be mindful of portion sizes to maintain a balanced diet.
  • Protein Additions: Add beans or cooked chicken to increase protein content.

Essential Equipment Recommendations

To make your cooking experience smoother, here’s what you’ll need:

  • Casserole Dish: A 9×13 inch glass or ceramic dish is ideal for even baking.
  • Mixing Bowls: Use large bowls to comfortably mix your ingredients.
  • Measuring Cups and Spoons: Accurate measurements are key to the best results.
  • Spatula: A good spatula helps in mixing and transferring the batter easily.

Serving Suggestions

How you serve your Jiffy Corn Casserole can enhance the dining experience:

  • Warm and Cozy: Serve it directly from the oven, allowing guests to enjoy it warm.
  • Garnished Plates: Top with fresh herbs or a dollop of sour cream for added flair.
  • Accompanied by Sides: Pair with a crisp salad or grilled vegetables for a well-rounded meal.

Conclusion

In conclusion, the Jiffy Corn Casserole is more than just a dish; it’s a celebration of comfort, flavor, and community. With easy preparation, endless variations, and a recipe that’s hard to mess up, it’s a perfect addition to any meal. So, gather your loved ones, whip up this delightful casserole, and create memorable moments around the table. Happy cooking!

Easiest Jiffy Corn Casserole Recipe

Prep Time 10 minutes
Cook Time 35 minutes
Total Time 45 minutes
Servings 8 servings
Calories 250
A quick and delicious side dish perfect for any meal, combining creamy corn and cheesy muffin mix baked to golden perfection.

Ingredients

Dairy and Canned Goods

  • 0.5 cup unsalted butter (softened, 1 stick, 115 g)
  • 1 can cream-style corn (15 oz can, 425 g)
  • 1 can corn (15 oz can, drained, 425 g)
  • 1 cup sour cream (220 g)
  • 2 eggs eggs
  • 1 box corn muffin mix (8.5 oz box, Jiffy brand)
  • 0.5 tsp salt

Instructions 

  • Preheat oven to 375°F (186°C) and grease a 9x13 inch casserole dish.
  • Microwave butter for 15 seconds until softened. Mix all ingredients in a large bowl.
  • Transfer mixture to prepared dish, smooth surface, and bake for 30-45 minutes until golden and set.
  • Let cool slightly, then cut into squares and serve warm.

Notes

For extra flavor, add shredded cheese or chopped green onions before baking.
Calories: 250kcal
Cost: $10
Course: Side Dish
Cuisine: American
Keyword: Casserole, Corn, easy