Author

Mike

Browsing

Unlocking the Vibrant World of Smoothie Bowls

Welcome to the colorful and delicious universe of smoothie bowls! These delightful creations are not just a feast for your eyes but also a powerhouse of nutrition. If you’re looking for a **healthy breakfast** or a quick snack, smoothie bowls are the perfect solution. Packed with **frozen fruits**, creamy yogurt, and topped with all your favorite goodies, they are as versatile as they are satisfying. In this comprehensive guide, we’ll explore everything you need to know about making stunning smoothie bowls that will impress both your taste buds and your guests.

Why You’ll Love This Recipe

Discovering smoothie bowls can transform your breakfast game. Here are five reasons why you’ll fall in love with them:

  • Quick and Easy: With just a few ingredients and a blender, these bowls can be whipped up in under 10 minutes, making them perfect for busy mornings.
  • Nutritious: Combining fruits, greens, and healthy fats, smoothie bowls provide essential vitamins and minerals to kickstart your day.
  • Customizable: You can tailor your smoothie bowl to suit your taste and dietary needs, from vegan to high-protein options.
  • Visually Appealing: The vibrant colors and artistic toppings make smoothie bowls Instagram-worthy!
  • Family-Friendly: Get the kids involved in the kitchen—let them choose their favorite toppings for a fun family activity.

Detailed Ingredient Breakdown

Let’s dive into the ingredients that make up a classic smoothie bowl, along with some **substitutions** to cater to your preferences:

  • Fruits: The base of any smoothie bowl! Common choices include frozen strawberries, blueberries, mango chunks, and pineapple. You can also use fresh fruit, but frozen fruit gives a thicker texture.
  • Yogurt: Greek yogurt adds creaminess and protein. For a dairy-free option, substitute with coconut yogurt or a plant-based yogurt.
  • Liquid: Coconut water or almond milk works great for blending. You can also use juices for added flavor.
  • Sweeteners: Honey, maple syrup, or agave nectar can enhance sweetness. Adjust based on your taste!
  • Superfoods: Add-ins like chia seeds, hemp seeds, or turmeric boost nutrition and add unique flavors.

How to Make a Smoothie Bowl

Here’s a simple step-by-step guide to create your delicious smoothie bowl:

  1. Combine all your ingredients in a blender. Make sure to include your frozen fruits, yogurt, and any superfood additions.
  2. Blend on high speed for 1-2 minutes until the mixture is completely smooth. Stop occasionally to scrape down the sides of the blender.
  3. If your blend is too thick, add a tablespoon of your chosen liquid until you reach the desired consistency.
  4. Taste and adjust sweetness as needed by adding honey or another sweetener.
  5. Pour into a bowl and top with your favorite garnishes, such as fresh fruit, nuts, seeds, or granola.
  6. Serve immediately for the best flavor and texture.

Pro Tips for Perfect Smoothie Bowls

To elevate your smoothie bowl game, consider these expert tips:

  • Texture matters: For a creamier bowl, use frozen bananas or add a scoop of nut butter.
  • Layer your toppings: Create a beautiful presentation by layering different types of fruits and seeds.
  • Chill your bowl: For an extra refreshing experience, chill your serving bowl in the fridge before serving.
  • Experiment with greens: Adding spinach or kale boosts nutrition without altering the taste significantly.
  • Balance flavors: Pair sweet fruits with tart options like berries for a great flavor contrast.
  • Mind the moisture: If your smoothie is too runny, add more frozen fruit to thicken.
  • Use quality equipment: A high-speed blender makes all the difference in achieving a smooth consistency.
  • Keep it fresh: Use fresh ingredients whenever possible for maximum flavor and nutrition.

Common Mistakes and Troubleshooting

Even seasoned chefs can make mistakes when creating smoothie bowls. Here’s how to avoid common pitfalls:

  • Too thick: If your smoothie bowl is too thick to blend, add liquid incrementally until it reaches the right consistency.
  • Too sweet: If you accidentally add too much sweetener, balance it out with a touch of lemon juice or a pinch of salt.
  • Watery texture: This can happen if you use too much liquid. Start with less liquid and add more only if necessary.
  • Flavor imbalance: Always taste your blend before serving. Adjust flavors according to your preference.

Variations to Try

Feeling adventurous? Here are four delicious variations to explore:

  • Green Smoothie Bowl: Blend spinach or kale with banana, avocado, and coconut water for a nutrient-rich bowl.
  • Chocolate Banana Smoothie Bowl: Add cocoa powder and use almond milk for a rich, chocolatey treat.
  • Tropical Smoothie Bowl: Blend mango, pineapple, and coconut milk for a refreshing island-inspired bowl.
  • Protein-Packed Bowl: Incorporate protein powder or Greek yogurt for an extra boost, especially great post-workout.

Storage and Make-Ahead Instructions

Want to prep your smoothie bowls in advance? Here’s how:

  • Make-Ahead: You can prepare your base smoothie in advance and store it in an airtight container in the fridge for up to 24 hours.
  • Freezing: If you want to make smoothie packs, portion your fruits and greens into freezer bags. Just blend with your liquid when you’re ready to eat.
  • Storage Tips: Store any leftovers in a sealed jar or bowl in the fridge for up to 24 hours. Add toppings just before serving to keep them fresh.

Frequently Asked Questions

Here are some common questions about smoothie bowls:

  • Can I use fresh fruit instead of frozen? Yes, but using frozen fruit gives a thicker consistency.
  • Are smoothie bowls healthy? Absolutely! They can be packed with nutrients depending on your chosen ingredients.
  • Can I make them vegan? Yes! Use plant-based yogurt and sweeteners like maple syrup.
  • How can I make my smoothie bowl thicker? Use more frozen fruit or less liquid when blending.
  • What are good toppings for smoothie bowls? Fresh fruit, nuts, seeds, granola, and coconut flakes are all excellent choices.
  • How long do smoothie bowls last? It’s best to eat them fresh, but they can last in the fridge for up to 24 hours.
  • Can I add protein powder? Yes! It’s a great way to boost your smoothie bowl’s nutritional value.
  • How do I make a smoothie bowl for kids? Involve them in the process and let them choose their favorite toppings!

Nutrition Tips and Dietary Adaptations

Making your smoothie bowl nutritious is easy with a few adjustments:

  • Boost Fiber: Include oats or chia seeds for added fiber that keeps you full longer.
  • Reduce Sugar: Opt for unsweetened yogurt and limit added sweeteners.
  • Add Healthy Fats: Incorporate avocado or nut butter for a creamy texture and healthy fats.
  • Consider Allergies: Always check for potential allergens in toppings and substitutions.

Equipment Recommendations

To make your smoothie bowl experience seamless, consider these essential tools:

  • High-Speed Blender: Invest in a good quality blender for smooth results.
  • Measuring Cups: Accurate measurements ensure balanced flavors and textures.
  • Spatula: Use a spatula to help scrape down the sides of the blender.
  • Bowls and Spoons: Choose visually appealing bowls and spoons to enhance your serving experience.

Serving Suggestions

When it comes to serving smoothie bowls, presentation matters:

  • Artistic Arrangements: Arrange your toppings in a visually appealing way for a stunning presentation.
  • Flavor Combinations: Pair different flavor profiles to surprise your palate.
  • Seasonal Toppings: Use seasonal fruits for freshness and variety.

In conclusion, smoothie bowls are a delightful and nutritious choice for any meal of the day. With endless variations and the ability to customize according to your taste and dietary needs, you can easily create a bowl that not only nourishes your body but also brings joy to your kitchen. So grab your blender, gather your ingredients, and start blending your way to a colorful and delicious experience!

Smoothie Bowls

Prep Time 10 minutes
Total Time 10 minutes
Servings 2 bowl
Calories 350
Enjoy a vibrant and nutritious smoothie bowl packed with fresh fruits, greens, and superfoods for a delicious breakfast or snack.

Ingredients

Fruits and Greens

  • 1 cup frozen strawberries
  • 1 cup frozen blueberries
  • 1 cup frozen mango chunks
  • 1 cup frozen pineapple chunks
  • 1 cup spinach (loosely packed)

Dairy and liquids

  • 0.25 cup greek yogurt
  • 1 tablespoon honey
  • 1 tablespoon chia seeds
  • 1 Banana slices, frozen
  • 1 cup frozen mango chunks
  • 0.25 cup coconut water
  • 2 tablespoons shredded coconut
  • 0.5 teaspoon turmeric

Additional liquids

  • 2 tablespoons coconut water
  • 1 tablespoon hemp seeds

Instructions 

  • Add all ingredients to a blender and blend until smooth, about 1-2 minutes. Add liquid if needed.
  • Taste and adjust sweetness if desired.
  • Scoop into bowls and top with fresh fruit, nuts, or seeds. Serve immediately.
Notes

Feel free to customize toppings for added flavor and texture.
Calories: 350kcal
Cost: $15
Course: Breakfast
Keyword: Fruit, healthy, Smoothie

Welcome to Your Ultimate Guide for Baking the Best Vanilla Cake

Are you ready to take your baking skills to the next level? In this comprehensive guide, we’ll explore everything you need to know about creating the best vanilla cake—from ingredients to techniques, and even expert tips to ensure your cake turns out perfectly every time. Whether you’re an experienced baker or just starting out, this recipe will help you achieve that light, fluffy texture and rich flavor that makes vanilla cake a timeless favorite. Let’s dive into the world of baking and discover how you can create a cake that not only tastes fantastic but also makes every gathering special.

Why You’ll Love This Recipe

  • Perfect for Any Occasion: This vanilla cake recipe is versatile and suitable for birthdays, weddings, or just a cozy family gathering.
  • Easy to Make: With straightforward steps, even novice bakers can create a stunning cake without stress.
  • Moist and Fluffy: The combination of high-quality ingredients ensures a cake that is both moist and fluffy, providing a delightful texture in every bite.
  • Rich Flavor: With the perfect balance of vanilla and butter, this cake offers a flavor profile that stands out without being overpowering.
  • Customizable: Easily adapt the recipe to suit your taste with different fillings, frostings, or even cake flavors.

Ingredients Breakdown

To create the best vanilla cake, you’ll need the following ingredients:

  • 2 cups all-purpose flour: Provides the structure needed for the cake.
  • 1 ½ cups granulated sugar: Sweetens the cake while contributing to its moisture.
  • 1 tbsp baking powder: Acts as a leavening agent, helping the cake rise.
  • ½ tsp salt: Enhances the flavors and balances the sweetness.
  • ½ cup unsalted butter (softened): Adds richness and flavor.
  • 4 large eggs: Binds the ingredients together and contributes to the cake’s rise.
  • 2 tsp pure vanilla extract: Infuses the cake with a delightful vanilla flavor.
  • 1 cup whole milk: Keeps the cake moist and tender.

Ingredient Substitutions

If you need to make adjustments, here are some effective substitutions:

  • Flour: Substitute with cake flour for an even lighter texture.
  • Sugar: Use brown sugar for added moisture and a deeper flavor.
  • Butter: You can use vegetable oil for a lighter cake, but this may change the flavor slightly.
  • Milk: Almond milk or buttermilk can be used as alternatives for a different taste.

How to Make the Best Vanilla Cake

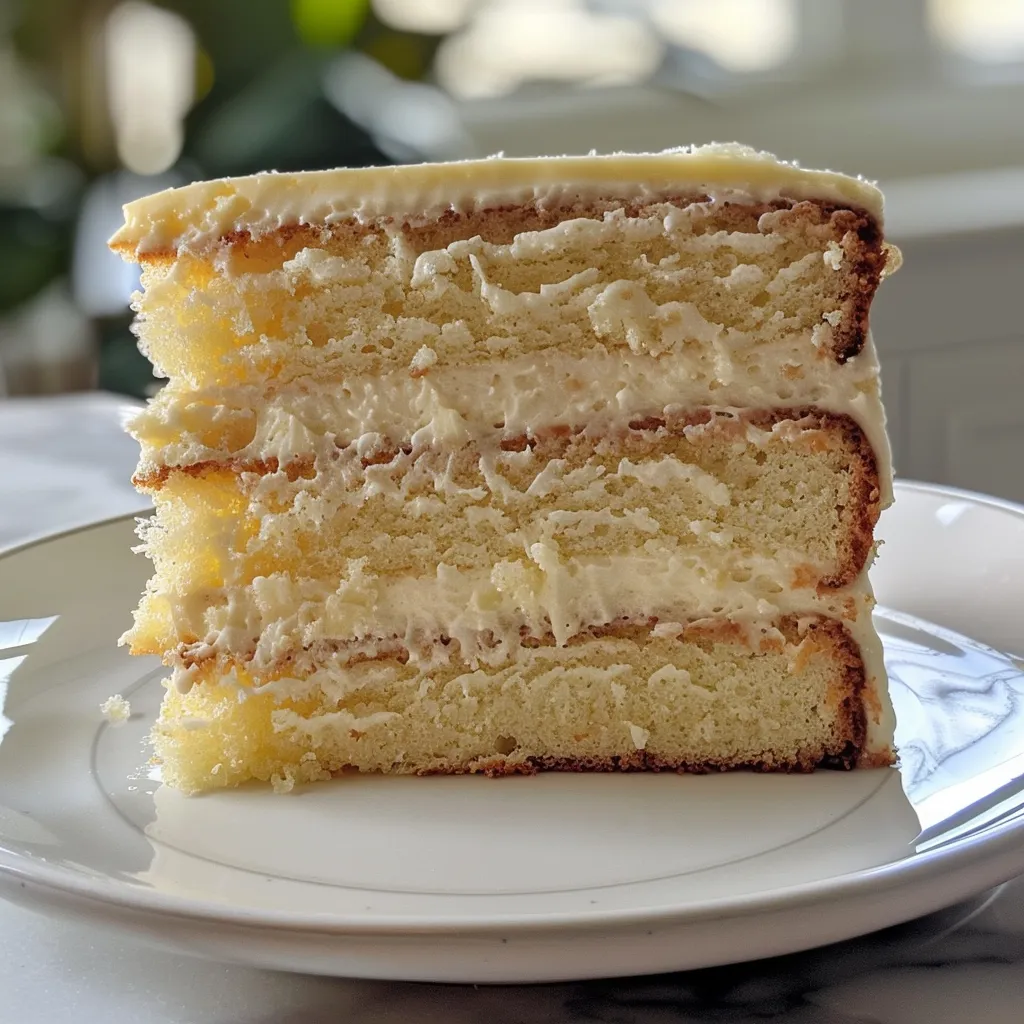
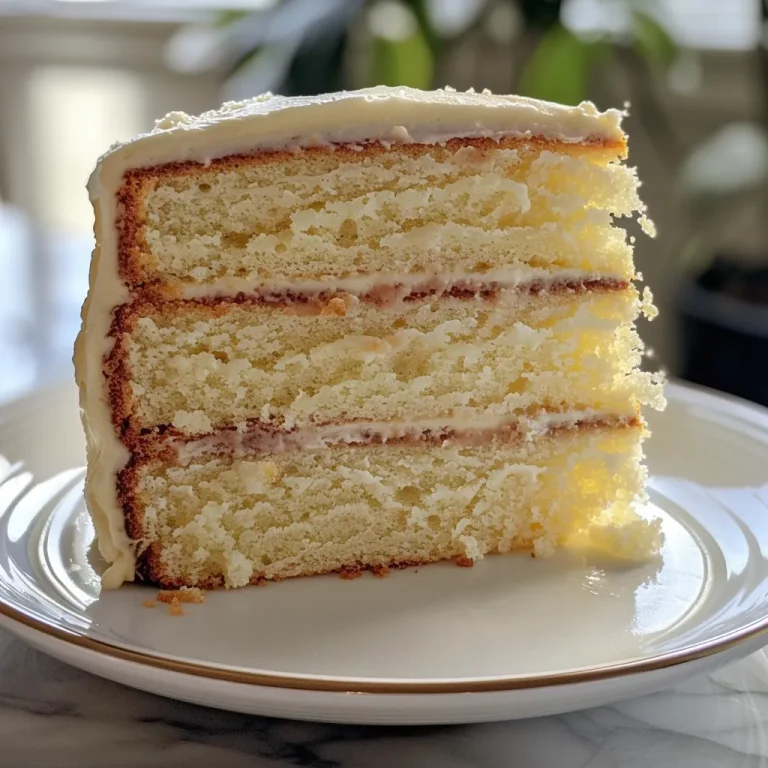
A juicy and delicious vanilla cake viewed from the side, displaying rich layers.

Now that you have your ingredients ready, let’s walk through the steps to bake the perfect vanilla cake:

  1. Preheat your oven to 350°F (175°C). Prepare two round cake pans by greasing them and lining with parchment paper.
  2. In a large bowl, whisk together flour, sugar, baking powder, and salt.
  3. In another bowl, beat the softened butter until creamy. Gradually add sugar and mix until light and fluffy.
  4. Add eggs one at a time, mixing well after each addition. Stir in vanilla extract.
  5. Gradually mix in the dry ingredients alternating with milk until smooth.
  6. Pour the batter into prepared pans and bake for 25-30 minutes or until a toothpick comes out clean.
  7. Allow cakes to cool for about ten minutes before transferring to wire racks to cool completely before frosting.

Expert Pro Tips for Baking Success

To help you achieve the best results, consider these expert baking tips:

  • Use Room Temperature Ingredients: Ensure butter, eggs, and milk are at room temperature for better blending and a lighter cake.
  • Don’t Overmix: Mix just until combined to avoid a dense cake. Overmixing activates gluten, which can toughen the cake.
  • Measure Flour Properly: Use the spoon and level method to avoid packing too much flour, which can lead to a dry cake.
  • Test for Doneness: Check your cake a few minutes before the suggested time. It’s better to underbake slightly than overbake.
  • Cool Completely Before Frosting: Frosting a warm cake can cause the frosting to melt and slide off.
  • Use Quality Ingredients: High-quality vanilla extract and butter significantly enhance the cake’s flavor.
  • Experiment with Flavors: Don’t hesitate to add lemon zest or almond extract for a unique twist on the classic flavor.
  • Keep It Simple: Sometimes, less is more. A dusting of powdered sugar can be just as delightful as elaborate frostings.

Common Mistakes and Troubleshooting

Even the most seasoned bakers can encounter issues. Here’s how to troubleshoot common problems:

  • Cake is Too Dense: This usually happens due to overmixing or too much flour. Ensure to measure accurately and mix gently.
  • Cake Sinks in the Middle: This can occur from underbaking or a sudden temperature change. Always check for doneness and avoid opening the oven door too often.
  • Cake Crumbles When Slicing: Ensure the cake has cooled completely and that you’re using a serrated knife for clean slices.
  • Frosting Melts: This can happen if the cake is warm. Allow it to cool completely or refrigerate the cake briefly before frosting.

Delicious Variations to Try

To keep things interesting, consider these delightful variations:

  • Chocolate Vanilla Cake: Add ½ cup of cocoa powder to the dry ingredients for a chocolate twist.
  • Almond Vanilla Cake: Substitute half of the vanilla extract with almond extract for a nutty flavor.
  • Lemon Vanilla Cake: Incorporate lemon zest and a bit of lemon juice for a refreshing citrus touch.
  • Spiced Vanilla Cake: Add a teaspoon of cinnamon or nutmeg to the dry ingredients for warmth and complexity.

Storage and Make-Ahead Instructions

To keep your cake fresh and delicious, follow these storage tips:

  • Room Temperature: Store the cake in an airtight container at room temperature for up to 3 days.
  • Refrigeration: If your cake is frosted, refrigerate it for up to a week. Just make sure it’s covered to prevent drying out.
  • Freezing: Wrap layers tightly in plastic wrap and foil to freeze for up to 3 months. Thaw in the fridge before frosting and serving.
  • Make Ahead: You can prepare the cake layers a day in advance. Just cool completely, wrap, and refrigerate until ready to frost.

Comprehensive FAQ

Here are answers to some frequently asked questions about baking the best vanilla cake:

  • What makes this vanilla cake recipe the best? The combination of quality ingredients, precise measurements, and expert techniques ensures a moist and flavorful cake.
  • Can I use a different type of flour? Yes, cake flour can be used for a lighter texture, but all-purpose flour works perfectly too.
  • How can I tell when my cake is done? A toothpick inserted into the center should come out clean or with a few crumbs attached, not wet batter.
  • Can I make this cake gluten-free? Yes, substitute with a gluten-free all-purpose flour blend, adjusting liquid as necessary.
  • How do I prevent my cake from sticking to the pan? Greasing and lining the pans with parchment paper is crucial for easy removal.
  • What frosting pairs well with vanilla cake? Classic buttercream, cream cheese frosting, or even whipped cream are excellent choices.
  • Can I add fruit to the batter? Yes, but make sure to adjust the liquid content and keep fruit pieces small to prevent sinking.
  • How can I add more flavor to my cake? Experiment with flavored extracts, zests, or fillings to enhance the cake’s profile.

Nutritional Tips and Dietary Adaptations

If you’re looking to make this cake healthier, consider these adjustments:

  • Reduced Sugar: Substitute half of the sugar with applesauce or a natural sweetener.
  • Whole Wheat Flour: Use whole wheat flour for added fiber and nutrients, though the texture may differ.
  • Dairy-Free: Use coconut oil in place of butter and almond or oat milk instead of whole milk.
  • Lower Fat: You can use Greek yogurt or applesauce to replace some of the butter for a lighter cake.

Equipment Recommendations

Having the right tools can make your baking experience smoother:

  • Mixing Bowls: A set of mixing bowls in various sizes will help organize your ingredients.
  • Measuring Cups and Spoons: Accurate measurements are crucial for baking success.
  • Electric Mixer: A stand or hand mixer makes creaming butter and sugar effortless.
  • Cake Pans: Use high-quality, non-stick round cake pans for even baking.
  • Cooling Racks: Essential for cooling your cake evenly and preventing sogginess.

Serving Suggestions

Once your cake is baked and frosted, consider these serving ideas:

  • Fresh Berries: Serve with a side of fresh strawberries or raspberries for a pop of color and flavor.
  • Ice Cream: A scoop of vanilla or chocolate ice cream pairs perfectly with warm cake.
  • Coffee or Tea: A warm beverage complements the sweetness and rounds off the dessert experience.
  • Decorative Garnishes: Top with edible flowers or a dusting of powdered sugar for an elegant presentation.

Conclusion

Congratulations! You’re now equipped with all the knowledge to bake the best vanilla cake that will impress your family and friends. With its rich flavor, moist texture, and endless customization options, this cake is bound to be a favorite for years to come. Remember, baking is not just about following a recipe; it’s about creating joy and connection in every bite. So, preheat that oven, gather your ingredients, and enjoy the delightful process of making this classic treat. Happy baking!

Best Vanilla Cake Recipe

Prep Time 15 minutes
Cook Time 30 minutes
Total Time 45 minutes
Servings 8 pieces
Calories 350
This classic vanilla cake is moist, fluffy, and perfect for any celebration. Easy to make with simple ingredients, it’s a timeless dessert.

Ingredients

Dry Ingredients

  • 2 cups all-purpose flour
  • 1.5 cups granulated sugar
  • 1 tbsp baking powder
  • 0.5 tsp salt

Wet Ingredients

  • 0.5 cup unsalted butter (softened)
  • 4 large eggs eggs
  • 2 tsp pure vanilla extract
  • 1 cup whole milk

Instructions 

  • Preheat oven to 350°F (175°C). Grease pans and line with parchment.
  • Mix dry ingredients in a bowl. Beat butter until creamy, then add sugar and eggs, mixing well.
  • Stir in vanilla, then alternate adding dry ingredients and milk until smooth.
  • Pour batter into pans and bake for 25-30 minutes. Cool before frosting.

Notes

Ensure not to overmix the batter for a light, fluffy cake.
Calories: 350kcal
Cost: $15
Course: Dessert
Cuisine: American
Keyword: cake, vanilla

Welcome to the Joy of Baking a Classic New Year’s Cake

As the year comes to a close, celebrations abound, and what better way to ring in the New Year than with a delightful Classic New Year’s Cake? This delicious recipe is not just about flavors; it’s about creating memories and sharing joy with your loved ones. In this comprehensive guide, we will explore every facet of making this cake, from ingredients to expert tips, ensuring that your baking experience is both enjoyable and successful.

Why You’ll Love This Recipe

This Classic New Year’s Cake is not just another dessert; it’s a centerpiece for your celebrations. Here are some reasons why this cake will become your go-to recipe:

  • Simple Yet Elegant: The straightforward ingredient list makes it easy for novice bakers while still impressing guests with its elegant presentation.
  • Flavorful Delight: Combining all-purpose flour, sugar, and rich vanilla extract, this cake offers a moist and flavorful experience in every bite.
  • Versatile Base: This cake serves as a fantastic base for various frostings and toppings, allowing you to customize it for any occasion.
  • Perfect for Sharing: The generous portions make it ideal for celebrations, ensuring that everyone at your gathering can enjoy a slice of this delightful cake.
  • Memorable Moments: Baking this cake provides an opportunity to bond with family and friends, making it a cherished part of your New Year traditions.

Ingredients for Classic New Year’s Cake

To create the perfect Classic New Year’s Cake, you’ll need the following ingredients:

  • 2 cups all-purpose flour: The foundation of your cake, providing structure and texture.
  • 1.5 cups granulated sugar: For sweetness and moisture.
  • 1 tbsp baking powder: This helps the cake rise, creating a light, fluffy texture.
  • 0.5 tsp salt: Balances sweetness and enhances flavors.
  • 3 large eggs: Adds richness and binds the ingredients together.
  • 1 cup whole milk: Contributes moisture and softness.
  • 2 tsp vanilla extract: Infuses the cake with a warm, aromatic flavor.

Ingredient Substitutions

If you’re looking to modify your ingredients, here are some helpful substitutions:

  • Gluten-Free Flour: Substitute all-purpose flour with a 1:1 gluten-free baking blend.
  • Almond Milk: Use almond or oat milk instead of whole milk for a dairy-free option.
  • Honey or Maple Syrup: Replace granulated sugar with honey or maple syrup for a different sweetness profile.
  • Egg Replacer: Use flaxseed meal or a commercial egg replacer for a vegan version.

How to Make Classic New Year’s Cake

Now that we have our ingredients ready, let’s dive into the baking process! Follow these steps to create your masterpiece:

  1. Preheat your oven: Set your oven to 350°F (175°C) and grease two round cake pans with butter or cooking spray.
  2. Combine dry ingredients: In a mixing bowl, whisk together the flour, sugar, baking powder, and salt until well blended.
  3. Mix wet ingredients: In another bowl, beat the eggs, milk, and vanilla extract until smooth and creamy.
  4. Combine mixtures: Gradually add the wet ingredients into the dry ingredients, stirring gently until just combined. Avoid overmixing to keep the cake tender.
  5. Prepare for baking: Pour the batter evenly into the prepared cake pans, smoothing the tops with a spatula.
  6. Bake: Place the pans in the oven and bake for 25-30 minutes, or until the cakes are golden brown and a toothpick inserted in the center comes out clean.
  7. Cool the cakes: Allow the cakes to cool in the pans for 10 minutes before transferring them to wire racks to cool completely.

Perfecting the Cooking Process

While baking might seem straightforward, there are several tips to ensure your cake turns out perfectly:

  • Room Temperature Ingredients: Make sure your eggs and milk are at room temperature for better mixing and a fluffier texture.
  • Oven Thermometer: Use an oven thermometer to check that your oven is at the correct temperature, ensuring even baking.
  • Don’t Open the Oven Door: Avoid opening the oven door during baking to maintain a consistent temperature.
  • Cool Completely: Let your cakes cool completely before frosting to prevent melting and sliding.
  • Layering Technique: Level your cakes with a serrated knife for even layers, making frosting easier.

Common Mistakes and Troubleshooting

Even experienced bakers can encounter issues. Here’s how to troubleshoot common problems:

  • Dense Cake: This can occur from overmixing or too much flour. Measure carefully and mix until just combined.
  • Dry Texture: Ensure you’re using the correct amount of liquid. Adding a bit more milk can help.
  • Cake Sinking: This often happens if the batter is underbaked. Make sure to test for doneness with a toothpick.
  • Uneven Layers: Use a kitchen scale to weigh your batter when dividing it into pans for uniformity.

Variations to Try

While the Classic New Year’s Cake is delicious on its own, consider experimenting with these variations:

  • Chocolate Delight: Swirl in cocoa powder or melted chocolate for a rich chocolate version.
  • Citrus Zest: Add lemon or orange zest to the batter for a refreshing, citrus-infused cake.
  • Spiced Version: Incorporate spices like cinnamon or nutmeg for a warm, spiced flavor profile.
  • Fruity Twist: Fold in fresh berries or chopped fruits for a burst of flavor and color.

Storing and Make-Ahead Instructions

Your Classic New Year’s Cake can be prepared ahead of time and stored for later enjoyment:

  • Room Temperature Storage: Keep your cake at room temperature, covered with a cake dome or plastic wrap, for up to 3 days.
  • Refrigeration: If frosted, store in the refrigerator for up to a week. Ensure it is tightly wrapped to prevent drying out.
  • Freezing: You can freeze the un frosted cake layers for up to 3 months. Wrap them tightly in plastic wrap and aluminum foil.

FAQs About Classic New Year’s Cake

Here are some frequently asked questions to help you with your baking journey:

  • What is a Classic New Year’s Cake? A Classic New Year’s Cake is a moist, flavorful cake traditionally made to celebrate the New Year.
  • Can I make this cake ahead of time? Absolutely! You can bake the cake layers a few days in advance and store them properly.
  • What frosting pairs well with this cake? Cream cheese frosting, buttercream, or a simple glaze work wonderfully with this cake.
  • How can I make this cake gluten-free? Use a gluten-free flour blend in place of all-purpose flour, following the same measurements.
  • Can I add fruit to the batter? Yes, fresh berries or chopped fruit can add a delightful twist to the classic recipe.
  • How do I store leftover cake? Keep it covered at room temperature for a few days or refrigerate if frosted.
  • Can I use almond extract instead of vanilla? Certainly! Almond extract will give the cake a different but delicious flavor.
  • How do I know when my cake is done baking? A toothpick inserted into the center should come out clean or with just a few crumbs attached.

Nutritional Tips and Dietary Adaptations

Making your cake a bit healthier or accommodating dietary needs can be simple:

  • Reduce Sugar: Consider reducing sugar by 1/4 cup for a less sweet cake.
  • Whole Wheat Flour: Substitute half of the all-purpose flour with whole wheat flour for added fiber.
  • Vegan Option: Replace eggs with flaxseed meal and milk with plant-based alternatives.

Equipment Recommendations

Using the right tools can make your baking experience smoother:

  • Quality Mixing Bowls: Invest in sturdy mixing bowls that won’t tip over while mixing.
  • Electric Mixer: A hand mixer or stand mixer can speed up the process of creaming butter and sugar.
  • Measuring Cups and Spoons: Accurate measurements are vital for successful baking.
  • Cake Pans: Use non-stick round cake pans for easy release and even baking.

Serving Suggestions

When it’s time to serve your Classic New Year’s Cake, here are some delightful ideas:

  • Garnish with Fresh Berries: Top slices with fresh berries for a burst of color and flavor.
  • Dust with Powdered Sugar: A light dusting of powdered sugar adds a touch of elegance.
  • Serve with Whipped Cream: A dollop of whipped cream enhances the cake’s richness.

As you step into the New Year, enjoy the process of creating this Classic New Year’s Cake. Remember, each step is a chance to connect with your loved ones and celebrate the joy of baking. Happy New Year and happy baking!

Classic New Year’s Cake

Prep Time 10 minutes
Cook Time 30 minutes
Total Time 40 minutes
Servings 8 slices
Calories 350
A timeless cake perfect for celebrating the New Year with friends and family. Easy to make and delightfully delicious.

Ingredients

Dry ingredients

  • 2 cups all-purpose flour
  • 1.5 cups granulated sugar
  • 1 tbsp baking powder
  • 0.5 tsp salt

Wet ingredients

  • 3 large eggs eggs
  • 1 cup whole milk
  • 2 tsp vanilla extract

Instructions 

  • Preheat oven to 350°F (175°C) and grease two cake pans.
  • Mix dry ingredients in a bowl; beat eggs, milk, and vanilla separately.
  • Combine wet and dry ingredients gently until just mixed.
  • Pour batter into pans and bake for 25-30 minutes.
  • Cool for 10 minutes before transferring to racks.

Notes

Ensure not to overmix the batter for a light texture.
Calories: 350kcal
Cost: $15
Course: Dessert
Cuisine: American
Keyword: cake

Why an Avocado Smoothie is Your New Favorite Drink

Welcome to the world of smoothies, where flavor meets nutrition! This avocado smoothie is not just a drink; it’s a creamy indulgence that can elevate your mornings and refresh your afternoons. Packed with healthy fats, essential nutrients, and a delightful taste, this smoothie is perfect for anyone looking to embrace a healthier lifestyle without sacrificing flavor. Within this guide, we will explore the nuances of crafting the perfect avocado smoothie, ensuring you have all the tips, tricks, and variations you need to make this recipe truly your own.

Why You’ll Love This Recipe

  • Nutritious Benefits: Avocados are rich in healthy fats, vitamins, and minerals that support heart health and provide lasting energy.
  • Quick and Easy: With just a few ingredients and a blender, you can whip up this smoothie in under 10 minutes.
  • Versatile Flavor: The subtle creaminess of avocado pairs beautifully with various fruits, making it easy to customize.
  • Perfect for Any Time: Enjoy it as a breakfast boost, post-workout refreshment, or a mid-afternoon snack.
  • Kid-Friendly: This smoothie is a fun way to introduce avocados to your children, disguising their flavor in a delicious shake.

Ingredient Breakdown

Let’s dive into the ingredients that make this avocado smoothie so delicious and nutritious. Here’s what you’ll need:

  • Sweetener of choice: Use 2 tbsp pure maple syrup or stevia for a touch of sweetness without the calories.
  • Cold milk of choice: 1 1/2 cups of milk, such as almond, oat, or regular dairy milk, creates a creamy texture.
  • Avocado: 1/2 of a large avocado adds richness and healthy fats.
  • Pure vanilla extract: A scant 1 tsp enhances the flavor profile.
  • Salt: Just 1/8 tsp enhances the overall taste.
  • Protein powder (optional): For an extra protein boost, add a scoop of your favorite powder.

Pro Tips for the Perfect Smoothie

  • Use frozen fruit: For a chilled, ice-cream-like texture, consider adding frozen banana slices or berries.
  • Blend in coconut milk ice cubes: Freeze coconut milk in an ice cube tray for creaminess without diluting the flavor.
  • Experiment with flavors: Don’t hesitate to add spinach, kale, or even cacao to enhance the nutritional profile.
  • Adjust thickness: If you prefer a thicker shake, reduce the amount of milk or add more avocado.
  • Stay fresh: Consume your smoothie immediately for the best flavor and texture, but it can be stored for up to three days in the fridge.
  • Garnish creatively: Top with chia seeds, nuts, or fresh fruit for added texture and visual appeal.
  • Invest in a good blender: A high-speed blender will ensure a creamy consistency by fully breaking down the avocado and other ingredients.
  • Taste as you go: Adjust sweetness or flavors based on your personal preference.
  • Stay seasonal: Use seasonal fruits to keep flavors fresh and exciting throughout the year.

Common Mistakes and Troubleshooting

Even the best recipes can go awry. Here are some common pitfalls and how to avoid them:

  • Too thick? Add more liquid gradually until you reach your desired consistency.
  • Too sweet? Balance it out by adding a pinch of salt or a squeeze of lemon juice.
  • Not creamy enough? Ensure you’re using ripe avocados; under-ripe ones will yield a grainy texture.
  • Flavor too bland? Boost the flavor with spices like cinnamon or nutmeg, or add a splash of citrus juice.

Delicious Variations to Try

Feeling adventurous? Here are some variations of the classic avocado smoothie to keep things exciting:

  • Chocolate Avocado Smoothie: Add cocoa powder and a banana for a chocolatey twist.
  • Tropical Avocado Smoothie: Blend in pineapple and coconut milk for a taste of the tropics.
  • Berry Avocado Smoothie: Incorporate mixed berries for a pop of color and antioxidants.
  • Matcha Avocado Smoothie: Add matcha powder for a caffeine boost and a vibrant green color.

Storage and Make-Ahead Instructions

This avocado smoothie is best enjoyed fresh, but you can make it ahead of time with a few tips:

  • Refrigerate: Store in an airtight container for up to three days.
  • Freeze: Pour the smoothie into ice cube trays for later use, blending with fresh liquid when ready to enjoy.

Frequently Asked Questions (FAQs)

  • Can I use a different sweetener? Absolutely! Honey, agave, or even dates work well.
  • Is this smoothie vegan? Yes, if you use plant-based milk and sweeteners.
  • Can I add protein powder? Yes, a scoop can significantly enhance the protein content.
  • Can I use frozen avocado? Yes, just make sure it’s properly thawed for blending.
  • How can I make it dairy-free? Use non-dairy milk such as almond, soy, or oat milk.
  • Can this smoothie be a meal replacement? Yes, it’s filling enough to be a nutritious meal replacement.
  • What can I serve with this smoothie? Pair it with whole grain toast or a fruit salad for a balanced meal.
  • Is it suitable for kids? Definitely! Kids will love the creamy texture and mild flavor.

Nutritional Tips and Dietary Adaptations

Whether you’re watching your diet or have specific dietary needs, here are some tips:

  • Low-carb option: Reduce the amount of sweetener and use unsweetened almond milk.
  • High-fiber boost: Add chia seeds or flaxseeds for extra fiber.
  • Protein-packed: Incorporate Greek yogurt or a plant-based protein powder.
  • Heart-healthy fats: Avocado is great, but consider adding nuts or seeds for additional healthy fats.

Equipment Recommendations

To create the perfect avocado smoothie, consider investing in the right tools:

  • High-speed blender: A quality blender will ensure a smooth texture.
  • Measuring cups and spoons: For precise ingredient measurements.
  • Ice cube trays: Useful for freezing coconut milk or smoothie leftovers.

Serving Suggestions

Serve your delicious avocado smoothie in a chilled glass for an extra refreshing experience. You can also:

  • Garnish with nuts or seeds: This adds texture and a nutritious boost.
  • Pair with a smoothie bowl: Top with granola, fruits, and a drizzle of honey.
  • Enjoy with a side of whole grain toast: This creates a satisfying breakfast or snack.

Conclusion

Creating the perfect avocado smoothie is not just about combining ingredients; it’s about crafting a delightful experience that nourishes both body and soul. With its rich flavor, creamy texture, and adaptable nature, this smoothie is sure to become a staple in your kitchen. So grab your blender and start blending! Remember, cooking is all about experimenting and finding what works best for you. Enjoy every sip of your wholesome indulgence!

Avocado Smoothie Recipe

Prep Time 5 minutes
Total Time 5 minutes
Servings 2 cups
Calories 250
A creamy and nutritious avocado smoothie perfect for a quick breakfast or snack. Customize with your favorite sweetener and optional protein boost.

Ingredients

Sweetener of choice

  • 1.5 cups cold milk of choice
  • 0.5 large avocado avocado (half of a large avocado)
  • 1 tsp pure vanilla extract (scant 1 tsp)
  • 0.125 tsp salt
  • 1 scoop protein powder (optional)

Instructions 

  • Peel the avocado and remove the pit.
  • Combine all ingredients in a blender and blend until smooth.
  • For a thicker shake, blend in coconut milk ice cubes.
  • Serve immediately and store leftovers in the refrigerator for up to three days.

Notes

Use ripe avocados for the best flavor and texture.
Calories: 250kcal
Cost: $8
Course: Breakfast, Snack
Cuisine: fusion
Keyword: Avocado

Welcome to the world of festive baking! As we embrace the joy of new beginnings, there’s no better way to celebrate than with a stunning Classic New Year’s Cake. This delightful cake recipe is soft, buttery, and perfectly sweet, making it the centerpiece for your holiday gatherings. Whether you’re a seasoned baker or just starting out, this guide will walk you through every step to ensure your cake is a showstopper.

In this article, we’ll explore why you’ll love this recipe, provide a detailed breakdown of ingredients (including substitutions), share expert tips, and offer variations to suit your taste. So, let’s get started on creating a cake that brings warmth and delight to every celebration!

Why You’ll Love This Recipe

  • Easy to Follow: The straightforward steps make it perfect for novice bakers, allowing anyone to whip up this delightful cake.
  • Flavorful Delight: The combination of vanilla extract and buttery goodness creates a rich flavor profile that everyone will love.
  • Visually Stunning: With its vibrant colors and appealing layers, this cake is sure to impress your guests at any festive gathering.
  • Perfect for Any Occasion: Not just for New Year’s, this cake can be enjoyed at birthdays, anniversaries, or any celebration where joy is in the air.
  • Customizable: With a variety of variations and icing options, you can make this cake your own, tailoring it to suit your preferences.

Ingredients for Classic New Year’s Cake Recipe

To create the perfect Classic New Year’s Cake, gather the following ingredients:

  • 2 cups all-purpose flour
  • 1 cup sugar
  • 0.5 cup unsalted butter, softened
  • 3 large eggs (at room temperature)
  • 1 cup whole milk
  • 2 tsp baking powder
  • 1 tbsp vanilla extract

Ingredient Substitutions:

  • Dairy-Free: Substitute with almond milk or coconut milk and use a dairy-free butter alternative.
  • Gluten-Free: Use a gluten-free 1:1 baking flour to accommodate dietary needs.
  • Lower Sugar: You can reduce the sugar by half or use a sugar substitute if desired.
  • Flavor Variations: Add zests from citrus fruits to enhance the flavor profile.

How to Make Classic New Year’s Cake Recipe

Follow these steps to create your Classic New Year’s Cake:

  1. Preheat your oven to 350°F (175°C) and grease and flour two round cake pans.
  2. In a bowl, whisk together the flour, baking powder, and a pinch of salt.
  3. In another bowl, cream the softened butter and sugar until the mixture is light and fluffy.
  4. Add the eggs one at a time, mixing well after each addition, then mix in the vanilla extract.
  5. Gradually combine the dry ingredients with alternating portions of the milk until just blended.
  6. Divide the batter evenly between the prepared pans and bake for 25–30 minutes, or until a toothpick inserted comes out clean.
  7. Cool the cakes in the pans for 10 minutes before transferring them to wire racks to cool completely.

Perfecting the Cooking Process

Here are some expert tips to ensure your cake turns out perfect:

  • Room Temperature Ingredients: Ensure that your eggs and butter are at room temperature for better mixing.
  • Measure Accurately: Use a kitchen scale for precise measurements, especially for flour.
  • Don’t Overmix: Mix the batter until just combined to avoid a dense cake.
  • Use Parchment Paper: Lining your pans with parchment paper can help prevent sticking and make for easy removal.
  • Check for Doneness: Always test with a toothpick; if it comes out clean, your cake is ready.

Add Your Touch

Feel free to get creative with your Classic New Year’s Cake! Here are some variations to consider:

  • Chocolate Version: Substitute ½ cup of flour with cocoa powder for a rich chocolate flavor.
  • Citrus Twist: Add lemon or orange zest for a refreshing citrus note.
  • Layered Delight: Create a layered cake by adding your favorite frosting between the tiers.
  • Fruit-Filled: Incorporate fresh fruits like strawberries or blueberries in the batter for a fruity surprise.

Storing & Reheating

To keep your cake fresh:

  • Room Temperature: Store covered at room temperature for up to 2 days.
  • Refrigeration: If storing longer, keep it in the fridge for up to a week.
  • Freezing: Wrap tightly in plastic wrap and freeze for up to 3 months. Thaw in the fridge before serving.

FAQs

Here are answers to some common questions about the Classic New Year’s Cake:

  • What is the best way to frost my cake? Use a smooth buttercream or whipped cream for a delightful finish.
  • Can I make this cake ahead of time? Absolutely! Bake and freeze the cakes, then frost them the day before serving.
  • What should I do if my cake is too dense? Ensure you’re not overmixing the batter, and check your ingredient measurements.
  • How do I know when the cake is done? A toothpick inserted into the center should come out clean when the cake is done baking.
  • Can I use different types of flour? Yes, but make sure to adjust for the different absorption rates, especially with gluten-free flours.
  • How long does it take to make the Classic New Year’s Cake? The entire process takes about 1.5 hours, including baking and cooling time.
  • Can I add nuts to the batter? Absolutely! Chopped walnuts or almonds can add a delightful crunch.
  • What kind of frosting pairs best with this cake? Vanilla buttercream or a cream cheese frosting pairs wonderfully with the cake’s flavor.

Nutrition Tips and Dietary Adaptations

This Classic New Year’s Cake can be easily adapted to fit various dietary needs:

  • Low-Sugar: Use a sugar substitute to reduce calorie content.
  • Gluten-Free: Use certified gluten-free flour blends for those with gluten sensitivities.
  • Dairy-Free: Choose plant-based butter and milk alternatives to keep it dairy-free.

Equipment Recommendations

To achieve the best results, consider using the following equipment:

  • Mixing Bowls: A set of mixing bowls in various sizes for easy mixing.
  • Measuring Cups and Spoons: Accurate measurements are key to baking success.
  • Electric Mixer: A hand or stand mixer to ensure your butter and sugar are well creamed.
  • Cake Pans: Round cake pans for even baking and easy stacking.

Serving Suggestions

When it comes to serving your Classic New Year’s Cake, consider these ideas:

  • Garnish: Top with fresh berries or edible flowers for a beautiful presentation.
  • Pair with Beverages: Serve with a glass of sparkling cider or a warm cup of tea.
  • Slice and Share: Offer guests a slice along with a scoop of vanilla ice cream for a delightful dessert experience.

Conclusion

Now that you have all the tools and insights to create the perfect Classic New Year’s Cake, it’s time to get baking! This cake is not only a treat for the taste buds but also a way to create lasting memories with your loved ones. Embrace the joy of baking, and remember, every slice of cake is a slice of happiness. Happy baking, and may your New Year be as sweet as this cake!

Classic New Year’s Cake Recipe

Prep Time 15 minutes
Cook Time 30 minutes
Total Time 45 minutes
Servings 8 slices
Calories 350
A timeless cake perfect for celebrating the New Year with friends and family. Easy to make and delightfully delicious.

Ingredients

Dry ingredients

  • 2 cups all-purpose flour
  • 2 tsp baking powder

Wet ingredients

  • 1 cup sugar
  • 0.5 cup unsalted butter, softened
  • 3 large eggs (at room temperature)
  • 1 cup whole milk
  • 1 tbsp vanilla extract

Instructions 

  • Preheat oven to 350°F (175°C). Grease and flour two cake pans.
  • Mix dry ingredients in a bowl. Cream butter and sugar until fluffy.
  • Add eggs one at a time, then vanilla. Alternate adding dry mix and milk.
  • Divide batter into pans and bake for 25–30 minutes. Cool before serving.

Notes

Ensure eggs are at room temperature for best results.
Calories: 350kcal
Cost: $15
Course: Dessert
Cuisine: American
Keyword: cake

Mastering the Art of Garlic Bread Rolls

Welcome to the ultimate guide on making irresistible garlic bread rolls! If you’ve ever dreamed of fluffy, buttery rolls infused with the aromatic goodness of garlic, you’re in the right place. These rolls are perfect for any occasion, from family dinners to festive gatherings. In this comprehensive guide, we’ll explore everything you need to know, from ingredients and techniques to troubleshooting and serving suggestions. Let’s dive in!

Why You’ll Love This Recipe

These garlic bread rolls are more than just a side dish; they’re a culinary experience! Here are some reasons why you’ll adore this recipe:

  • Buttery richness: The combination of warm, melted garlic butter and soft rolls creates a decadent flavor profile that’s hard to resist.
  • Easy to make: With straightforward ingredients and simple steps, you can whip up these rolls even if you’re a beginner in the kitchen.
  • Versatile pairing: These rolls complement a variety of dishes, from pasta and soups to grilled meats and salads.
  • Make-ahead option: You can prepare the dough in advance, making it a stress-free addition to your meal prep.
  • Perfect for gatherings: Impress your guests with homemade rolls that are sure to elevate any meal!

Ingredients You’ll Need

Here’s a complete list of ingredients for making fabulous garlic bread rolls, along with suggested substitutions:

  • Unsalted butter: 4 1/2 tablespoons (for dough) and an additional 2 tablespoons (for garlic butter). If you prefer, you can use olive oil for a lighter option.
  • Minced garlic: 2 tablespoons, which infuses the rolls with a rich garlic flavor. You can use garlic powder as an alternative, but fresh garlic is recommended for the best taste.
  • All-purpose flour: 3 1/2 cups + 1 tablespoon. For a healthier twist, consider using whole wheat flour or a gluten-free blend.
  • Fresh parsley: 3 tablespoons, chopped. Dried parsley can be used in a pinch, but fresh herbs deliver superior flavor.
  • Granulated sugar: 1 tablespoon, which helps activate the yeast and creates a slightly sweet flavor. Brown sugar can be used for a deeper taste.
  • Instant yeast: 2 1/4 teaspoons, ensuring a quick rise. Active dry yeast can be substituted but requires proofing.
  • Fine sea salt: 1 teaspoon. Always opt for fine salt for an even distribution in the dough.
  • Warm milk: 1 cup (110°F), providing moisture and enriching the dough. You can use dairy-free milk such as almond or oat milk if desired.
  • Large egg: 1, at room temperature, which helps bind the ingredients. For a vegan option, try using a flax egg instead.
  • Flaky sea salt: For finishing, adding a beautiful touch of flavor and texture.

Step-by-Step Instructions to Make Garlic Bread Rolls

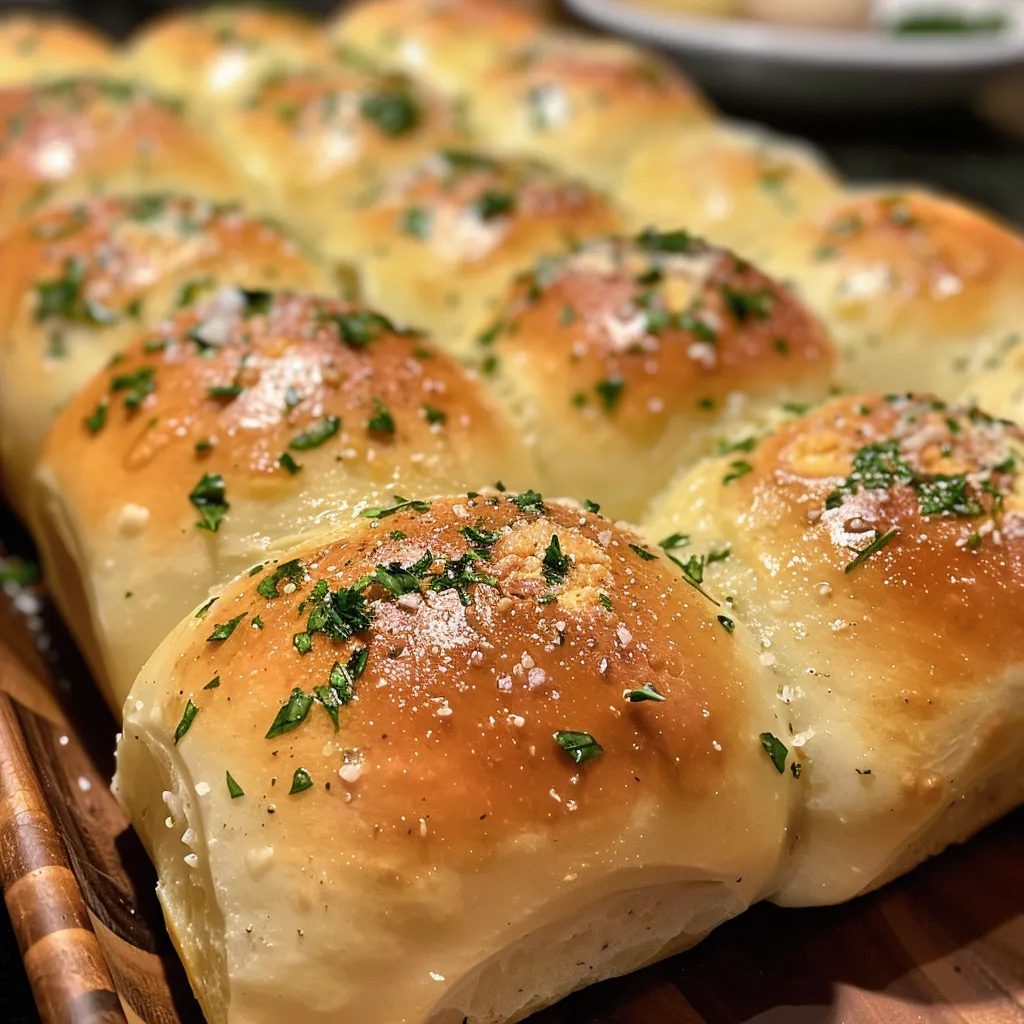
Soft, warm garlic bread rolls arranged on a wooden board.

Follow these detailed instructions for perfectly fluffy garlic bread rolls:

  1. Lightly butter the bottom and sides of a 9×13 pan and set it aside.
  2. In a small pot, melt the butter and add the minced garlic. Cook for 1-2 minutes or until the garlic is fragrant. Remove from heat and allow to cool.
  3. In a stand mixing bowl, combine flour, parsley, sugar, yeast, and salt. Add the warmed milk, egg, and cooled garlic butter. Knead on low speed with a dough hook until the dough is smooth and slightly tacky (about 10-12 minutes). If the dough is too sticky, add one tablespoon of flour at a time until workable.
  4. Divide the kneaded dough into 12 equal portions (about 67 grams each). Shape each piece into a smooth ball by pinching the seam tightly underneath. Place the rolls in the prepared pan. Cover and let rise in a warm place until doubled in size (1-2 hours).
  5. Preheat the oven to 350°F (180°C).
  6. Brush the tops of the rolls with the beaten egg wash. Bake for 20-30 minutes, or until golden brown.
  7. While the rolls bake, prepare the garlic butter by melting the remaining butter and stirring in minced garlic and parsley. Once the rolls are out of the oven, brush them with garlic butter and sprinkle with flaky sea salt.
  8. Serve warm and enjoy!

Pro Tips for Making Garlic Bread Rolls

Here are some expert insights to ensure your garlic bread rolls turn out perfectly every time:

  • Temperature is key: Ensure the milk is warmed to 110°F for optimal yeast activation.
  • Don’t rush the rise: Allow the dough to fully double in size; this is crucial for achieving fluffy rolls.
  • Watch your baking time: Keep an eye on the rolls; they should be golden brown on top but not overbaked.
  • Experiment with flavors: Try adding herbs like rosemary or thyme to the dough for a unique twist.
  • Keep rolls covered: During rising, cover the rolls with plastic wrap or a kitchen towel to prevent them from drying out.
  • Use a scale: For consistent results, weigh your ingredients, particularly the flour and dough portions.
  • Brush with garlic butter generously: Don’t skimp on the garlic butter after baking; it enhances flavor and makes the rolls irresistible.
  • Store properly: Keep leftover rolls in an airtight container to maintain freshness.

Common Mistakes and Troubleshooting

Even seasoned bakers can run into issues! Here’s how to troubleshoot common mistakes:

  • Dough too sticky? Add flour gradually until you achieve a workable consistency.
  • Dough not rising? Check your yeast’s expiration date or ensure the milk wasn’t too hot.
  • Rolls too dense? Ensure you knead the dough well to develop gluten, which gives structure.
  • Uneven baking? Rotate the pan halfway through baking to ensure even heat distribution.

Variations to Try

Feel free to customize your garlic bread rolls with these delicious variations:

  • Cheesy Garlic Rolls: Add shredded mozzarella or parmesan cheese to the dough for a cheesy twist.
  • Herb-Infused Rolls: Incorporate dried herbs like oregano or Italian seasoning into the dough for added flavor.
  • Spicy Garlic Rolls: Mix in red pepper flakes for a bit of heat.
  • Sweet Garlic Rolls: Add a touch of honey to the dough for a subtly sweet flavor that pairs wonderfully with garlic.

Make-Ahead and Storage Instructions

These rolls are perfect for meal prep! Here’s how to store and make them ahead:

  • Make-Ahead: After shaping the rolls, cover and refrigerate them overnight. Let them rise at room temperature for about an hour before baking.
  • Freezing: You can freeze unbaked rolls. Shape them, place on a baking sheet, freeze until solid, then transfer to a zip-top bag. Bake from frozen, adding a few extra minutes to the bake time.
  • Storing Leftovers: Keep leftover rolls in an airtight container at room temperature for up to 3 days. Reheat in the oven for a few minutes before serving.

Frequently Asked Questions

Here are some common questions about making garlic bread rolls:

  • Can I use whole wheat flour? Yes, using whole wheat flour will give the rolls a nuttier flavor, but they may be denser.
  • How can I make these rolls vegan? Substitute the egg with a flax egg and use plant-based milk and butter.
  • What can I serve these rolls with? They pair beautifully with pasta dishes, soups, salads, or as a side to grilled meats.
  • How do I know when the rolls are done? They should be golden brown on top and sound hollow when tapped.
  • Can I add cheese to the rolls? Absolutely! Adding cheese will enhance the flavor and make them extra delicious.
  • What’s the best way to reheat leftovers? Warm them in the oven at 350°F for a few minutes until heated through.
  • How long do these rolls last? They are best enjoyed fresh but can last up to 3 days at room temperature.
  • Can I make the dough in a bread machine? Yes, simply follow the same ingredient measurements and use the dough setting on your machine.

Nutrition Tips and Dietary Adaptations

Here are a few tips to make your garlic bread rolls a bit healthier:

  • Whole grains: Use whole wheat flour instead of all-purpose flour for added fiber.
  • Reduce fat: You can cut down on butter by using half the amount or replacing it with yogurt for moisture.
  • Lower sugar: You can reduce the sugar slightly without compromising the dough’s texture.
  • Gluten-free option: Substitute with a gluten-free flour blend and adjust the liquid as needed.

Essential Equipment for Success

To make these garlic bread rolls, you’ll need a few key pieces of equipment:

  • Stand mixer: Makes kneading the dough a breeze.
  • Baking pan: A 9×13 pan works perfectly for these rolls.
  • Measuring cups and spoons: Accurate measurements are crucial for baking success.
  • Kitchen scale: For precise dough portions, a scale is invaluable.
  • Plastic wrap or kitchen towel: For covering the dough while it rises.

Serving Suggestions

These garlic bread rolls are incredibly versatile. Here are some delightful serving suggestions:

  • As an appetizer: Serve warm with marinara sauce for dipping.
  • With soups: Pair them with creamy tomato soup or minestrone for a comforting meal.
  • With pasta: They complement any pasta dish beautifully, especially those with garlic or herb sauces.
  • At gatherings: Present them in a basket lined with a cloth for a rustic touch at your next dinner party.

There you have it—the definitive guide to making mouth-watering garlic bread rolls! With these tips, variations, and detailed instructions, you’re all set to create rolls that will delight family and friends alike. Happy baking!

Garlic Bread Rolls

Prep Time 20 minutes
Cook Time 25 minutes
Total Time 45 minutes
Servings 12 rolls
Calories 250
Delicious homemade garlic bread rolls with a soft interior and golden crust, perfect for any meal or as a snack.

Ingredients

Dough

  • 4.5 tablespoons unsalted butter
  • 2 tablespoons minced garlic
  • 3.5 cups all-purpose flour (*See notes below for measuring*)
  • 1 tablespoon chopped fresh parsley
  • 1 tablespoon granulated sugar
  • 2.25 teaspoons instant yeast
  • 1 teaspoon fine sea salt
  • 1 cup whole or 2% milk (warmed to 110°F)
  • 1 large egg (room temperature)
  • 1 beaten egg for brushing the tops

Garlic Butter

  • 2 tablespoons unsalted butter
  • 1 tablespoon minced garlic
  • 1 tablespoon chopped fresh parsley

Finishing

  • flaky sea salt for finishing flaky sea salt

Instructions 

  • Butter a 9x13 pan and set aside.
  • Melt butter, add minced garlic, cook 1-2 minutes, then cool.
  • Mix flour, parsley, sugar, yeast, and salt. Add milk, egg, and garlic butter. Knead until smooth, about 10-12 minutes.
  • Divide dough into 12 balls, shape, place in pan, cover, and let rise 1-2 hours.
  • Preheat oven to 350°F (180°C). Brush rolls with beaten egg and bake 20-30 minutes until golden.
  • Make garlic butter, brush on hot rolls, sprinkle with flaky sea salt, and serve warm.

Notes

For best results, measure flour carefully and ensure dough is soft but not sticky.
Calories: 250kcal
Cost: $15
Course: Side Dish
Cuisine: American
Keyword: baking, bread, garlic

Transform Your Snack Game with Crispy Air Fryer Cauliflower Bites

If you’re looking for a delicious, healthy snack, you’ve come to the right place! This crispy air fryer cauliflower bites recipe is a game changer, combining the rich flavors of garlic and paprika with the unbeatable crunch that only an air fryer can deliver. Perfect as a snack or a side dish, these bites are sure to wow your family and friends! Let’s dive in and explore how to make this delightful treat.

Why You’ll Love This Recipe

There are countless reasons to love these air fryer cauliflower bites. Here are just a few:

  • Healthier alternative: These bites are lower in calories and fat compared to traditional fried snacks, making them a guilt-free pleasure.
  • Quick and easy: You can whip these up in just 15 minutes from start to finish, making them a perfect last-minute snack.
  • Customizable flavors: Feel free to adjust the spices and seasonings to suit your taste—add some heat with cayenne pepper or sweetness with a sprinkle of sugar.
  • Kid-friendly: These crispy bites are a fun way to encourage kids to eat their veggies without any fuss.
  • Great for meal prep: Make a big batch on the weekend, and you’ll have healthy snacks ready for the week ahead!

Ingredients Breakdown

To make these tasty air fryer cauliflower bites, you will need the following ingredients:

  • 1 medium cauliflower: Cut into bite-sized florets. This veggie is packed with nutrients!
  • 2 tablespoons olive oil: Adds richness and helps achieve that perfect crisp.
  • 1 teaspoon garlic powder: For a flavorful punch.
  • 1 teaspoon paprika: This adds a beautiful color and smoky flavor.
  • Salt and pepper to taste: Essential seasonings to enhance the flavors.

Substitutions

If you don’t have some of the ingredients on hand, here are a few substitutions you can make:

  • Olive oil: You can use avocado oil or melted coconut oil if preferred.
  • Garlic powder: Fresh minced garlic works well too—just use about 1-2 cloves.
  • Paprika: Smoked paprika adds a deeper flavor, or you can use chili powder for some heat.
  • Cauliflower: Broccoli or Brussels sprouts can be used for a different twist!

How to Make Crispy Air Fryer Cauliflower Bites

Follow these simple steps to create your crispy cauliflower bites:

  1. Preheat your air fryer to 400°F (200°C) to ensure even cooking.
  2. In a large bowl, toss the cauliflower florets with olive oil, garlic powder, paprika, salt, and pepper until evenly coated.
  3. Place the cauliflower in the air fryer basket in a single layer to promote even cooking.
  4. Air fry for 12-15 minutes, shaking the basket halfway through for the best results.
  5. Remove from the air fryer and serve immediately while they’re hot and crispy!

Pro Tips for Perfect Cauliflower Bites

Want to ensure your cauliflower bites turn out perfectly every time? Here are some expert tips:

  • Even seasoning: Make sure all florets are well-coated for maximum flavor.
  • Evenly sized pieces: Cut your cauliflower into similar-sized pieces for uniform cooking.
  • Don’t overcrowd: If you’re making a large batch, cook them in batches to ensure they are crispy.
  • Check doneness: You want them golden brown and crispy—feel free to add an extra minute or two if needed.
  • Experiment with spices: Mix and match your favorite spices to make them uniquely yours!

Common Mistakes and Troubleshooting

Even seasoned cooks can run into hiccups. Here’s how to avoid common pitfalls:

  • Too soggy? If your bites come out soggy, it’s likely they were overcrowded in the basket or not tossed in enough oil.
  • Not crispy? Increase the cooking time slightly or check if your air fryer needs to be calibrated.
  • Flavorless? Adjust the seasonings to your preference—taste the mixture before cooking!

Variations to Try

Want to switch things up? Here are a few variations to consider:

  • Buffalo cauliflower bites: Toss cooked cauliflower in buffalo sauce for a spicy kick.
  • Cheesy bites: Sprinkle with nutritional yeast or your favorite cheese before air frying.
  • Herbed cauliflower: Try adding dried Italian herbs like oregano and thyme for a Mediterranean twist.
  • Sweet and spicy bites: Mix in a bit of honey and chili flakes for a sweet and spicy flavor.

Storage and Make-Ahead Instructions

You can prepare these cauliflower bites in advance:

  • Refrigerate: Store leftovers in an airtight container in the fridge for up to 3 days.
  • Reheat: To restore crispiness, reheat in the air fryer at 350°F (175°C) for 5-7 minutes.
  • Meal prep: You can prep the cauliflower and seasonings ahead of time. Just toss in oil and air fry when you’re ready to eat!

Comprehensive FAQ

Here are some common questions about making air fryer cauliflower bites:

  • Can I make these bites vegan? Absolutely! Omit cheese or use vegan cheese alternatives.
  • How can I make these gluten-free? The recipe is naturally gluten-free, but always check your seasonings!
  • Can I use frozen cauliflower? Yes, but ensure it’s thawed and drained well before seasoning.
  • What dips pair well with these bites? Try ranch dressing, garlic aioli, or a spicy sriracha mayo.
  • How do I know when they’re done? They should be golden and crispy on the outside when done.
  • Can I use other vegetables? Yes! Carrots and zucchini can also be used with similar cooking times.
  • Are these suitable for meal prep? Yes, they store well and can be reheated easily.
  • What’s the best way to serve them? Serve them hot, straight from the air fryer for the best texture.

Nutrition Tips and Dietary Adaptations

This recipe is not only delicious but also nutritious:

  • Low-carb option: Cauliflower is an excellent low-carb alternative to traditional snacks.
  • Rich in vitamins: Cauliflower is packed with vitamin C and K, promoting a healthy diet.
  • Customize for dietary needs: Adjust the recipe to fit vegan, gluten-free, or keto diets as needed.

Essential Equipment Recommendations

To make the best air fryer cauliflower bites, you’ll need:

  • Air fryer: A high-quality air fryer ensures even cooking and crispiness.
  • Mixing bowls: For combining ingredients before air frying.
  • Measuring spoons and cups: Accurate measurements help achieve the perfect flavor.

Serving Suggestions

These cauliflower bites can be served in various ways:

  • As a snack: Perfect for munching during movie night!
  • As a side dish: Pair them with your favorite protein for a balanced meal.
  • With dips: Serve with ranch, hummus, or guacamole for added flavor.

In conclusion, these crispy air fryer cauliflower bites are not just easy to make; they’re also a delightful way to enjoy healthy eating. With their customizable flavors, quick prep time, and nutritious benefits, you’ll find them a staple in your kitchen. So grab your ingredients, fire up the air fryer, and delight your taste buds with this simple yet satisfying recipe!

Easy Air Fryer Cauliflower Bites Recipe That'll Wow You

Prep Time 5 minutes
Cook Time 15 minutes
Total Time 20 minutes
Servings 4 servings
Calories 150
These crispy cauliflower bites are quick to make and perfect for a healthy snack or side dish.

Ingredients

Main

  • 1 medium cauliflower, cut into florets
  • 2 tablespoons olive oil
  • 1 teaspoon garlic powder
  • 1 teaspoon paprika
  • to taste Salt and pepper

Instructions 

  • Preheat air fryer to 400°F (200°C).
  • Toss cauliflower with olive oil, garlic powder, paprika, salt, and pepper.
  • Place in air fryer basket in a single layer.
  • Air fry for 12-15 minutes, shaking halfway.
  • Serve immediately.

Notes

For extra crunch, add a sprinkle of Parmesan cheese before serving.
Calories: 150kcal
Cost: $10
Course: Appetizer, Snack
Cuisine: American
Keyword: air fryer, Cauliflower

Ring in the New Year with a Classic Delight

As we bid farewell to the past and welcome the new, there’s no better way to celebrate than with a timeless New Year’s cake recipe. This classic cake embodies warmth, joy, and the spirit of togetherness, making it a perfect centerpiece for your New Year’s celebrations. With simple ingredients and easy-to-follow steps, this New Year’s cake is sure to impress your family and friends. Let’s dive into the world of baking this delightful classic and create sweet memories that last a lifetime!

Why You’ll Love This Recipe

  • Easy to Make: This New Year’s cake recipe is designed for everyone, whether you’re a novice baker or a seasoned pro. With straightforward steps, you can create a delicious cake without stress.
  • Deliciously Moist: The combination of butter and milk ensures a moist and tender crumb, making each slice a delight to savor.
  • Customizable: This recipe is a blank canvas! You can easily add your favorite flavors, fillings, or frosting to make it your own.
  • Perfect for Sharing: Ideal for gatherings, this cake is large enough to share with family and friends, fostering connection and joy during the celebration.
  • Stunning Presentation: With its beautiful layers and inviting aroma, this cake is sure to be the highlight of your table, impressing your guests from the moment they arrive.

Ingredients for Classic New Year’s Cake Recipe

To create this scrumptious cake, you’ll need the following ingredients:

  • 2 cups all-purpose flour: Provides the structure for the cake.
  • 1 cup sugar: Adds sweetness and moisture.
  • 0.5 cup unsalted butter, softened: Essential for a rich flavor and moist texture.
  • 3 large eggs (at room temperature): Helps create a light and airy cake.
  • 1 cup whole milk: Keeps the cake moist and delicious.
  • 2 tsp baking powder: Ensures the cake rises perfectly.
  • 1 tbsp vanilla extract: Adds a delightful flavor that complements the cake beautifully.

How to Make Classic New Year’s Cake

Follow these simple steps to bake your cake:

  1. Preheat your oven to 350°F (175°C). Grease and flour two round cake pans to prevent sticking.
  2. Combine dry ingredients: In a bowl, whisk together the flour, baking powder, and a pinch of salt.
  3. Cream butter and sugar: In another bowl, beat the softened butter and sugar together until light and fluffy.
  4. Add eggs and vanilla: Mix in the eggs one at a time, followed by the vanilla extract.
  5. Blend wet and dry ingredients: Gradually combine the dry ingredients with alternating portions of milk until just blended.
  6. Divide and bake: Pour the batter evenly into the prepared pans and bake for 25–30 minutes, or until a toothpick comes out clean.
  7. Cool the cakes: Let them cool in the pans for 10 minutes before transferring them to wire racks to cool completely.

Expert Tips for Perfecting Your Cake

To help you achieve baking success, here are some expert insights:

  • Room temperature ingredients: Ensure your eggs and butter are at room temperature for better incorporation and a smoother batter.
  • Don’t overmix: Mix until just combined to avoid a dense texture.
  • Check for doneness: Use a toothpick to check if the cake is done. It should come out clean or with a few moist crumbs.
  • Let cakes cool completely: This is crucial before frosting to prevent melting and sliding.
  • Experiment with flavors: Consider adding lemon zest, almond extract, or spices like cinnamon to enhance the flavor.
  • Use quality ingredients: High-quality butter and fresh eggs can significantly improve the cake’s flavor.
  • Layer with care: When assembling, ensure each layer is level for an even stack.
  • Chill your frosting: If using buttercream, chilling it slightly can make it easier to spread and pipe.

Common Mistakes to Avoid

Even the best bakers can encounter issues. Here are common pitfalls to look out for:

  • Skipping the preheating step: Always preheat your oven to ensure even baking.
  • Not measuring ingredients accurately: Use a kitchen scale or proper measuring cups for precision.
  • Opening the oven door too early: This can cause the cake to deflate.
  • Underbaking or overbaking: Keep an eye on the time and check for doneness to maintain the ideal texture.

Variations of New Year’s Cake

Feel free to mix things up with these delightful variations:

  • Chocolate New Year’s Cake: Replace 1 cup of flour with cocoa powder for a rich chocolate flavor.
  • Fruit-Filled Cake: Add layers of fresh fruit or fruit preserves between the cake layers for a burst of flavor.
  • Citrus Delight Cake: Incorporate orange or lemon zest into the batter for a refreshing twist.
  • Spiced Cake: Add ground cinnamon and nutmeg for a warm, festive taste, perfect for winter celebrations.

Storing and Make-Ahead Instructions

To keep your cake fresh:

  • Storing: Keep the cake in an airtight container at room temperature for up to 3 days. For longer storage, refrigerate it for up to a week.
  • Freezing: Wrap the cooled cakes tightly in plastic wrap and foil. They can be frozen for up to 3 months.
  • Make-ahead options: You can bake the cakes in advance and frost them the day of your gathering for the best presentation.

FAQs About New Year’s Cake

Here are some frequently asked questions to help guide you:

  • What ingredients are essential for a classic New Year’s cake? The key ingredients include flour, sugar, butter, eggs, milk, baking powder, and vanilla extract.
  • Can I use a different type of flour? Yes, you can use cake flour for a lighter texture, but adjust the quantity slightly as it is more absorbent.
  • How long does it take to prepare this cake? The preparation time is about 20 minutes, with an additional 25–30 minutes for baking.
  • Can I make this cake gluten-free? Certainly! Substitute all-purpose flour with a gluten-free flour blend.
  • What frosting pairs well with this cake? A classic vanilla buttercream or cream cheese frosting complements the cake beautifully.
  • How can I make this cake dairy-free? Use plant-based butter and milk alternatives to create a dairy-free version.
  • Can I decorate the cake in advance? Yes, but it’s best to store it in the refrigerator to keep the frosting fresh.
  • What should I serve with New Year’s cake? Pair it with a scoop of vanilla ice cream or a dollop of whipped cream for an extra treat!

Nutritional Tips and Dietary Adaptations

For those with dietary restrictions, consider these adaptations:

  • Lowering sugar content: You can reduce the sugar amount by substituting with natural sweeteners like honey or maple syrup.
  • Using egg substitutes: For a vegan option, use flax eggs or chia eggs in place of regular eggs.
  • Making it lighter: Substitute half of the butter with applesauce for a lower-fat option.

Equipment Recommendations

To ensure your baking process is smooth, consider having the following tools on hand:

  • Mixing bowls: A set of varying sizes for combining ingredients.
  • Measuring cups and spoons: Essential for accurate ingredient measurements.
  • Electric mixer: Saves time and effort for creaming butter and sugar.
  • Spatula: For folding ingredients and spreading frosting.
  • Wire racks: Ideal for cooling your cakes evenly.

Serving Suggestions for New Year’s Cake

To elevate your cake experience, here are some serving ideas:

  • Garnish with fresh fruit: Top with seasonal berries or citrus slices for a pop of color.
  • Pair with beverages: Serve alongside a glass of sparkling cider or champagne for a festive touch.
  • Create a dessert platter: Offer slices with assorted desserts like cookies and brownies for a delightful dessert spread.

Conclusion

As the clock strikes midnight, let this Classic New Year’s Cake be a symbol of new beginnings and cherished moments. With its delightful flavors and inviting aroma, it’s more than just a cake; it’s a way to connect with loved ones and celebrate the joy of the season. So, gather your ingredients, roll up your sleeves, and let’s make this New Year memorable with a slice of happiness!

Classic New Year’s Cake Recipe

Prep Time 15 minutes
Cook Time 30 minutes
Total Time 45 minutes
Servings 8 pieces
Calories 350
A timeless cake perfect for celebrating the New Year, combining simple ingredients into a delicious treat.

Ingredients

Dry ingredients

  • 2 cups all-purpose flour
  • 2 tsp teaspoons baking powder

Wet ingredients

  • 1 cup sugar
  • 0.5 cup unsalted butter, softened
  • 3 large eggs eggs (at room temperature)
  • 1 cup whole milk
  • 1 tbsp tablespoon vanilla extract

Instructions 

  • Preheat oven to 350°F (175°C). Grease and flour two cake pans.
  • Mix dry ingredients in a bowl. Cream butter and sugar, then add eggs and vanilla.
  • Alternate adding dry mixture and milk to the creamed mixture until combined.
  • Divide batter into pans and bake for 25–30 minutes. Cool before serving.

Notes

Ensure eggs are at room temperature for best results.
Calories: 350kcal
Cost: $15
Course: Dessert
Cuisine: American
Keyword: cake

Elevate Your Snacking with Irresistibly Spicy Air Fryer Cauliflower Bites

Welcome to a delicious adventure! If you’re looking for a quick, healthy snack that packs a punch, you’ve come to the right place. These Air Fryer Spicy Cauliflower Bites are not just simple to make; they are full of flavor and texture, perfect for any occasion. In just 25 minutes, you’ll have a dish that not only satisfies your cravings but also impresses your family and friends. Let’s dive into why this recipe will become a staple in your kitchen!

Why You’ll Love This Recipe

  • Quick and Easy: Ready in just 25 minutes, from prep to plate, perfect for busy weeknights or last-minute gatherings.
  • Healthy Alternative: Enjoy a crispy snack without the guilt—these bites use minimal oil compared to traditional frying.
  • Flavor Explosion: The blend of spices creates a mouthwatering taste that’s sure to please even the pickiest eaters.
  • Customizable: Adjust the spice level to your liking—whether you prefer mild or fiery hot, you can make it your own!
  • Versatile Serving Options: Perfect as a snack, appetizer, or even a side dish for your meals.

Ingredients You’ll Need

Here’s what you’ll need to whip up these delicious bites:

  • 1 head of cauliflower: Cut into bite-sized florets.
  • 2 tablespoons olive oil: Helps the spices adhere and promotes crispiness.
  • 1 teaspoon garlic powder: Adds depth and flavor.
  • 1 teaspoon paprika: For a smoky undertone.
  • 1 teaspoon cayenne pepper: Gives a spicy kick—adjust according to your heat preference.
  • Salt to taste: Enhances all the flavors.

How to Make Irresistibly Spicy Air Fryer Cauliflower Bites

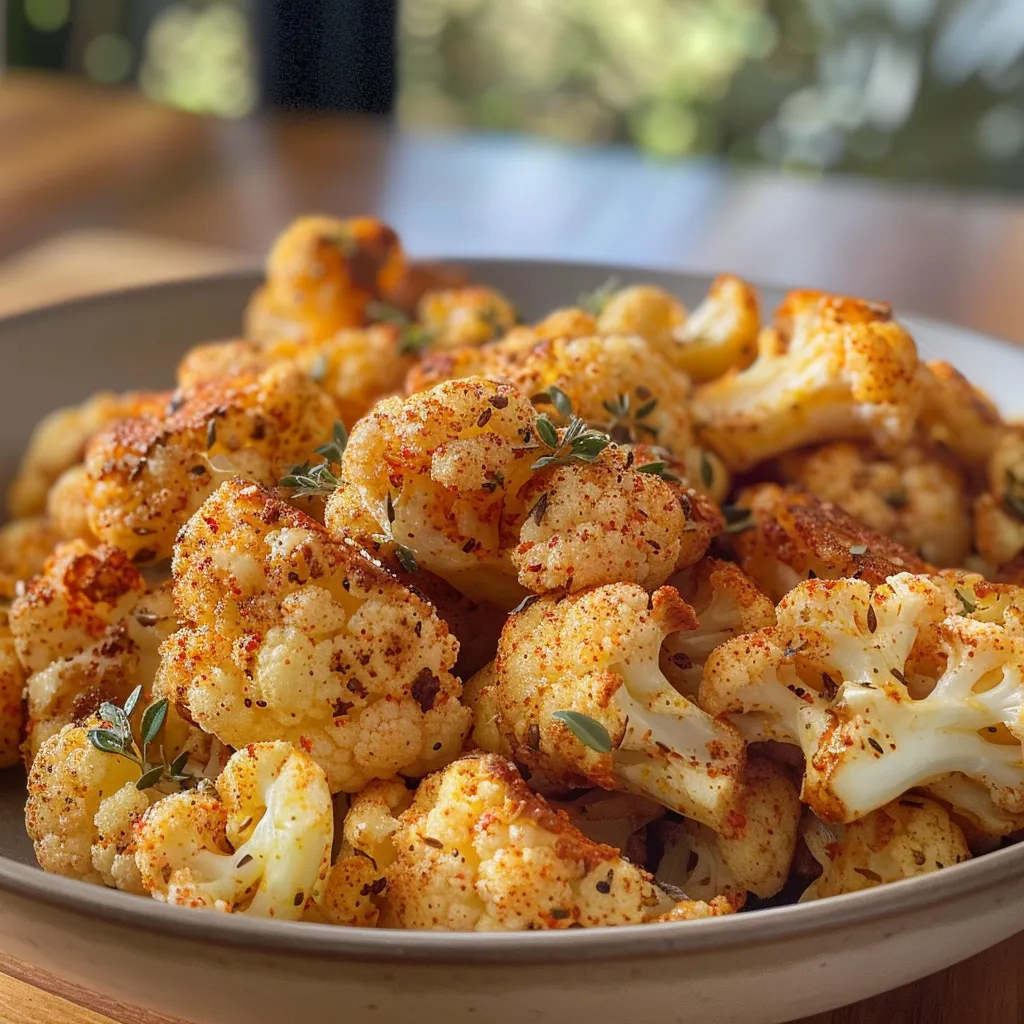
A tantalizing side view of spicy cauliflower bites, glistening with olive oil.

Follow these simple steps to create your new favorite snack:

  • Preheat the Air Fryer: Set it to 400°F (200°C) to ensure even cooking.
  • Toss the Cauliflower: In a mixing bowl, combine the cauliflower florets with olive oil, garlic powder, paprika, cayenne pepper, and salt. Make sure every floret is well coated.
  • Arrange in the Basket: Place the cauliflower in a single layer in the air fryer basket. Avoid overcrowding to ensure even cooking.
  • Cook to Perfection: Air fry for 15 minutes, shaking the basket halfway through to promote even crisping.
  • Adjust Cooking Time: Check for desired crispiness—add an extra 2-3 minutes if you prefer them crunchier.
  • Serve Hot: Remove from the air fryer and enjoy while warm!

Pro Tips for Perfect Cauliflower Bites

  • Dry Before Coating: Pat your cauliflower dry after washing to ensure the oil sticks and the bites get crispy.
  • Experiment with Spices: Feel free to add your favorite spices or herbs like cumin, oregano, or even lemon zest for an extra zing!
  • Don’t Overcrowd: Cook in batches if necessary to maintain the crispiness of each bite.
  • Use a Cooking Spray: A light spray of olive oil on the basket can help prevent sticking.
  • Keep an Eye on Them: Cooking times may vary based on your air fryer model—check frequently in the last few minutes.
  • Garnish Smartly: Sprinkle with fresh herbs like parsley or cilantro before serving for a fresh touch.
  • Serving Dips: Pair with your favorite dipping sauces such as ranch, hummus, or spicy mayo for added flavor.
  • Make Ahead: Prepare the cauliflower mix and store it in the fridge for a quick snack ready to go!

Common Mistakes and Troubleshooting

Even the best of us can encounter issues! Here are a few common mistakes and how to avoid them:

  • Too Soggy: If your bites are soggy, ensure you’ve dried the cauliflower well before coating and that you’re not using too much oil.
  • Not Crispy Enough: If they aren’t crispy, consider increasing the temperature slightly or cooking them a bit longer.
  • Uneven Cooking: Make sure to shake the basket halfway through cooking to promote even crisping.
  • Flavors Too Mild: Adjust the spice levels to your taste—add more cayenne or even a splash of hot sauce for more heat.

Variations to Try

Feel free to get creative with these variations:

  • Buffalo Cauliflower Bites: Toss the cooked bites in buffalo sauce for a spicy twist.
  • Cheesy Cauliflower Bites: Add grated parmesan cheese to the coating mixture for a cheesy flavor.
  • Asian-Inspired Bites: Use soy sauce, sesame oil, and ginger for an Asian flavor profile.
  • Herbed Cauliflower Bites: Mix dried herbs like thyme, rosemary, or oregano into the coating for an aromatic touch.

Storage and Make-Ahead Instructions

These bites are best enjoyed fresh, but you can store leftovers:

  • Refrigerate: Place any leftover cauliflower bites in an airtight container for up to 3 days.
  • Reheat: To restore crispiness, reheat in the air fryer for a few minutes before serving.
  • Make Ahead: Prep the cauliflower and coating ahead of time and store them separately in the refrigerator for quick cooking later.

Frequently Asked Questions

  • Can I make these bites vegan? Yes! Simply omit the egg (if used) and ensure your breadcrumbs are vegan-friendly.
  • How do I make these bites gluten-free? Use gluten-free breadcrumbs or almond flour instead of regular flour.
  • What dipping sauces pair well? Ranch, blue cheese, or a spicy yogurt dip complement these bites perfectly!
  • Can I use frozen cauliflower? Yes, but make sure to thaw and dry them well before cooking.
  • What if I don’t have an air fryer? You can bake them in the oven at 425°F (220°C) for about 25-30 minutes.
  • What spices can I use? Feel free to experiment! Curry powder, taco seasoning, or smoked paprika can add exciting flavors.
  • Are these bites healthy? Absolutely! They are low in calories and high in nutrients, making them a fantastic snack option.
  • How can I enhance the flavor? Marinating the cauliflower in spices or sauces before cooking can intensify the flavor.

Nutritional Benefits and Dietary Adaptations

These Air Fryer Spicy Cauliflower Bites are not only delicious but also packed with nutritional benefits:

  • Low-Calorie: Cauliflower is a low-calorie vegetable, making these bites a guilt-free snack.
  • Rich in Vitamins: Cauliflower is high in vitamin C, K, and B vitamins, supporting overall health.
  • High Fiber: The fiber content aids digestion and promotes satiety.
  • Low-Carb Option: Ideal for those following low-carb or keto diets.

Equipment Recommendations

For best results, here are some recommended tools:

  • Air Fryer: A reliable air fryer will ensure even cooking and crispiness.
  • Mixing Bowl: A large bowl for tossing the cauliflower with spices and oil.
  • Silicone Spatula: Great for mixing without damaging your bowl or cauliflower.
  • Measuring Spoons: Ensure precise measurements for consistent flavor.

Serving Suggestions

These bites can be served in various delightful ways:

  • As an Appetizer: Serve them at your next gathering with a selection of dips.
  • As a Side Dish: Pair them with your main course for a healthy side.
  • In a Salad: Add them to a fresh salad for an extra crunch.
  • As Part of a Platter: Include them in a veggie platter for a fun snack option.

Ready to get cooking? With this comprehensive guide, you are fully equipped to create the most delicious Air Fryer Spicy Cauliflower Bites in no time. So gather your ingredients, fire up that air fryer, and enjoy a fantastic snack that everyone will love. Happy cooking!

Air Fryer Spicy Cauliflower Bites That Wow in 25 Minutes

Prep Time 5 minutes
Cook Time 20 minutes
Total Time 25 minutes
Servings 4 servings
Calories 150
Enjoy crispy, spicy cauliflower bites cooked quickly in the air fryer for a flavorful snack or appetizer.

Ingredients

Cauliflower

  • 1 head cauliflower, cut into florets
  • 2 tablespoons olive oil
  • 1 teaspoon garlic powder
  • 1 teaspoon paprika
  • 1 teaspoon cayenne pepper
  • Salt to taste salt

Instructions 

  • Preheat air fryer to 400°F (200°C).
  • Toss cauliflower with olive oil, garlic powder, paprika, cayenne, and salt.
  • Place in air fryer basket in a single layer.
  • Cook for 15 minutes, shaking halfway.
  • Check crispiness; cook 2-3 minutes more if needed.
  • Serve hot.

Notes

Adjust seasoning to taste and enjoy!
Calories: 150kcal
Cost: $10
Course: Appetizer
Keyword: Cauliflower

Are you ready to transform your breakfast routine? These vegan gluten-free pancakes are more than just a meal; they’re a delightful way to start your day! With a light, fluffy texture and a simple ingredient list, you’re only moments away from enjoying a stack of pancakes that everyone will love. Whether you’re gluten-free, vegan, or just looking for a delicious breakfast option, these pancakes are designed to please.

Why You’ll Love This Recipe

This vegan gluten-free pancake recipe is not only easy to whip up, but it’s also versatile and packed with flavor. Here are five reasons why you’ll adore these pancakes:

  • Pillowy texture: These pancakes are light and fluffy, creating a delightful bite that melts in your mouth.
  • Quick preparation: With just a few simple steps, you can have pancakes ready in under 30 minutes.
  • Customizable: Feel free to add your favorite fruits or spices to make these pancakes uniquely yours.
  • Health-conscious: Made with wholesome ingredients, these pancakes are a guilt-free treat.
  • Family-friendly: Kids and adults alike will enjoy these delicious pancakes, making them perfect for family breakfasts.

Ingredient Breakdown

Let’s dive into the ingredients that make these pancakes so special. Here’s what you’ll need:

  • 1 ½ cups non-dairy milk (I used oat): A creamy base that keeps the pancakes moist.
  • 1 ½ tablespoons apple cider vinegar: This adds a slight tang that enhances the flavor.
  • 2 cups all-purpose gluten-free flour: The star ingredient that gives these pancakes their structure.
  • 2 teaspoons kosher salt: Balances the sweetness and enhances overall flavor.
  • 2 teaspoons baking powder: Ensures the pancakes rise beautifully.
  • ¼ cup sugar: Sweetens the batter without overpowering it.
  • ¼ cup vegetable oil or melted coconut oil: Adds richness and moisture to the pancakes.
  • Vegetable or coconut oil for frying: For that perfect golden crust.
  • Syrup: Essential for serving, but feel free to get creative with toppings!

Pro Tips for Perfect Pancakes

To help you achieve pancake perfection, here are some expert tips:

  • Mix gently: Over-mixing can make pancakes tough. Stir just until combined.
  • Let the batter rest: Allowing the batter to sit for a few minutes can enhance the fluffiness.
  • Use a hot pan: Ensure your skillet is hot enough before adding the batter for the best results.
  • Check for bubbles: Wait for bubbles to form before flipping, indicating the pancakes are ready.
  • Keep them warm: Place cooked pancakes in a warm oven while you finish the batch.
  • Experiment with flours: Try different gluten-free flour blends for unique flavors.
  • Add-ins: Consider adding chocolate chips, nuts, or fruit directly to the batter for extra flavor.
  • Adjust sweetness: If you prefer less sweet pancakes, reduce the sugar to your taste.

Common Mistakes and Troubleshooting

Even the best chefs make mistakes! Here are some common pitfalls and how to avoid them:

  • Pancakes are too dense: This often happens from over-mixing or not using enough baking powder. Stir just until combined and check your leavening agents.
  • Burnt pancakes: If your pancakes are browning too quickly, reduce the heat to medium or medium-low.
  • Pancakes stick to the pan: Ensure your skillet is adequately greased and hot before pouring in the batter.

Delicious Variations

One of the best things about pancakes is how easily they can be adapted. Here are four variations to try:

  • Blueberry Pancakes: Fold in 1 cup of fresh or frozen blueberries into the batter for a fruity twist.
  • Banana Pancakes: Mash 1 ripe banana and mix it into the batter for added sweetness and flavor.
  • Chocolate Chip Pancakes: Add ½ cup of dairy-free chocolate chips to the batter for a decadent treat.
  • Cinnamon Spice Pancakes: Add 1 teaspoon of cinnamon and a pinch of nutmeg to the dry ingredients for a warm, spiced flavor.

Storage and Make-Ahead Instructions

Want to prep ahead? Here’s how to store your pancakes:

  • Refrigerate: Store cooked pancakes in an airtight container in the fridge for up to 3 days.
  • Freeze: For longer storage, freeze pancakes in a single layer, then transfer to a freezer bag for up to 2 months.
  • Reheat: Heat pancakes in the microwave for 30-60 seconds or in a toaster for a quick breakfast.

Frequently Asked Questions

Here are answers to some common questions about making vegan gluten-free pancakes:

  • Can I use a different non-dairy milk? Yes, almond, soy, or coconut milk work well in this recipe.
  • What can I substitute for sugar? Maple syrup or agave nectar can be used instead, but adjust the liquid content accordingly.
  • Can I make these pancakes nut-free? Absolutely! Use sunflower oil instead of nut oils and ensure your flour blend is nut-free.
  • How do I make these pancakes fluffier? Ensure your batter is not over-mixed and let it rest before cooking.
  • What’s the best gluten-free flour to use? A good all-purpose gluten-free flour blend works best, ensuring it contains xanthan gum for structure.
  • Are these pancakes suitable for meal prep? Yes! They store well and can easily be reheated.
  • Can I double the recipe? Yes, simply double the ingredient amounts and follow the same steps.
  • What toppings pair well with these pancakes? Fresh fruits, nut butter, or a drizzle of syrup are all excellent choices!

Nutrition Tips and Dietary Adaptations

For those looking to make healthier choices, consider these tips:

  • Whole grains: Opt for whole grain gluten-free flour for added fiber and nutrients.
  • Reduce sugar: Cut down on sugar for a healthier version, or use natural sweeteners.
  • Protein boost: Add a scoop of plant-based protein powder to the batter for a filling breakfast option.

Recommended Equipment

To make the process easier, here’s what you’ll need:

  • Non-stick skillet or griddle: Essential for even cooking and easy flipping.
  • Mixing bowls: For combining ingredients.
  • Whisk: To ensure a smooth batter.
  • Spatula: For flipping those pancakes with ease.

Serving Suggestions

To elevate your pancake experience, consider these serving ideas:

  • Drizzle with syrup: Classic maple syrup is always a hit!
  • Add fresh fruit: Berries, banana slices, or even sautéed apples make great toppings.
  • Nut butters: Spread almond or peanut butter for added protein and flavor.
  • Yogurt: A dollop of dairy-free yogurt can add creaminess and tang.

In conclusion, these vegan gluten-free pancakes are more than just a breakfast option; they’re a canvas for your creativity and a way to bring joy to the table. With their fluffy texture and customizable nature, they’re sure to become a favorite in your household. So grab your ingredients, and let’s make some pancakes that everyone will love!

The Best Pancakes (Vegan and Gluten-free)

Prep Time 10 minutes
Cook Time 15 minutes
Total Time 25 minutes
Servings 4 servings
Calories 250
Enjoy fluffy, vegan, and gluten-free pancakes perfect for a delicious breakfast or brunch.

Ingredients

Dry ingredients

  • 1 ½ cups non-dairy milk (I used oat)
  • 1 ½ tablespoons apple cider vinegar
  • 2 cups all-purpose gluten-free flour
  • 2 teaspoons kosher salt
  • 2 teaspoons baking powder
  • ¼ cup sugar
  • ¼ cup vegetable oil or melted coconut oil

For frying

  • Vegetable or coconut oil for frying

Toppings

  • Syrup

Instructions 

  • Mix the non-dairy milk and vinegar; set aside.
  • Combine dry ingredients, then add oil and milk mixture; whisk until smooth.
  • Heat a greased skillet over medium-high heat.
  • Spoon batter onto skillet, cook until bubbles form and bottom is golden, then flip.
  • Cook until golden and serve hot with syrup.

Notes

For extra fluffiness, let the batter rest for a few minutes before cooking.
Calories: 250kcal
Cost: $15
Course: Breakfast
Cuisine: vegan
Keyword: Pancakes