Author

Mike

Browsing

Elevate Your Breakfast with the Ultimate French Toast Experience

Ah, French toast—the quintessential breakfast dish that brings joy and comfort to our mornings. If you’re looking to master the art of creating the best French toast ever, you’ve come to the right place! This recipe harnesses the delightful flavors of brioche or challah bread, creamy eggs, and a hint of cinnamon. Perfect for cozy weekends or special brunch gatherings, it’s a breakfast treat that’s both easy to prepare and utterly satisfying.

Let’s dive into why this French toast recipe stands out and how you can make it perfectly every time!

Why You’ll Love This Recipe

  • Quick and Easy: With just a few ingredients and simple steps, you can whip up delicious French toast in no time, making it perfect for busy mornings.
  • Versatile Base: The choice between rich brioche or soft challah allows you to customize the flavor and texture to your liking.
  • Customizable Toppings: Dress your French toast with a variety of toppings such as maple syrup, fresh fruits, whipped cream, or a dusting of powdered sugar to suit your taste.
  • Nutritious Ingredients: Using eggs and milk provides protein and essential nutrients, making your breakfast not just tasty but wholesome.
  • Perfect for Meal Prep: This recipe can be adjusted to make a large batch, allowing you to enjoy French toast throughout the week!

Ingredients You’ll Need

To make the best French toast, gather the following ingredients:

  • 4 slices of brioche or challah bread: Opt for thick slices to soak up the egg mixture without falling apart.
  • 2 eggs: Fresh eggs provide richness and help bind the mixture.
  • 1/2 cup milk (or dairy-free alternative): Use whole milk for creaminess, or substitute with almond or oat milk for a dairy-free version.
  • 1 tsp vanilla extract: This adds a lovely depth of flavor.
  • 1/2 tsp ground cinnamon: A classic spice that enhances the taste of French toast.
  • Butter or oil for cooking: Use unsalted butter for a rich flavor, or oil for a healthier option.

Step-by-Step Instructions

Appetizing French toast artfully arranged with a drizzle of syrup and a sprinkle of cinnamon.

Creating the ultimate French toast is straightforward. Follow these steps:

  1. In a shallow dish, whisk together the eggs, milk, vanilla extract, and ground cinnamon until combined.
  2. Dip each slice of bread into the egg mixture, ensuring both sides are well-coated. Allow excess to drip off.
  3. Heat a skillet or griddle over medium heat, then melt butter or heat oil until shimmering.
  4. Cook the bread slices for 2-3 minutes on each side until golden brown and crispy.
  5. Serve hot with your favorite toppings such as maple syrup, fresh fruits, or a dusting of powdered sugar.

Expert Tips for Success

  • Choose the right bread: Soft enriched breads like challah or brioche work best for texture and flavor.
  • Don’t rush the soaking: Let the bread soak in the egg mixture for a few seconds longer to achieve a custardy center.
  • Control the heat: Cooking on medium to medium-low heat prevents burning while ensuring the interior cooks through.
  • Use fresh spices: Fresh ground cinnamon and pure vanilla extract elevate the flavor profile significantly.
  • Experiment with flavors: Add a pinch of nutmeg or a splash of orange juice for a twist on the traditional recipe.
  • Try a make-ahead option: Prepare the egg mixture and bread slices the night before; refrigerate and cook in the morning for an easy breakfast.
  • Perfecting the flip: Use a wide spatula to carefully flip the bread without breaking it apart.
  • Let it rest: Allow cooked French toast to rest on a wire rack to maintain its crispness.

Common Mistakes and Troubleshooting

Even the best chefs make mistakes! Here’s how to avoid some common pitfalls:

  • Too soggy: Ensure the bread is not overly saturated by dipping briefly in the egg mixture.
  • Burnt outsides: Use medium heat and keep an eye on the cooking process to avoid burning.
  • Not enough flavor: Always use fresh ingredients and consider adding a pinch of salt to enhance the taste.

Delicious Variations to Try

Once you’ve mastered the classic version, experiment with these fun variations:

  • Banana Bread French Toast: Use slices of banana bread for a sweet twist.
  • Stuffed French Toast: Fill slices with cream cheese and berries before dipping in the egg mixture.
  • Savory French Toast: Add herbs and cheese to the egg mixture for a savory breakfast option.
  • French Toast Casserole: Assemble in a baking dish for a crowd-pleasing baked version.

Storage and Make-Ahead Instructions

Want to enjoy your French toast later? Here’s how to store and reheat:

  • Refrigerate leftovers: Store cooked French toast in an airtight container for up to 3 days.
  • Freeze for later: Place cooked slices between parchment paper and store in a freezer bag for up to 2 months.
  • Reheat in the oven: Warm frozen slices in a preheated oven at 350°F (175°C) for about 10-15 minutes.

Nutrition Tips and Dietary Adaptations

This recipe can be easily adapted to fit various dietary needs:

  • Gluten-Free: Use gluten-free bread for a delicious alternative.
  • Dairy-Free: Substitute milk with almond, soy, or oat milk.
  • Lower Sugar: Use sugar-free syrup or fresh fruit toppings to reduce sugar intake.

Essential Equipment Recommendations

To make your French toast journey smooth, here are essential tools:

  • Shallow dish: For whisking the egg mixture, a shallow dish allows for easy soaking of the bread.
  • Non-stick skillet or griddle: Ensures even cooking and prevents sticking.
  • Spatula: A wide spatula helps flip the toast without breaking it.

Serving Suggestions

Enhance your French toast experience with these serving ideas:

  • Classic toppings: Maple syrup, powdered sugar, or whipped cream for a sweet finish.
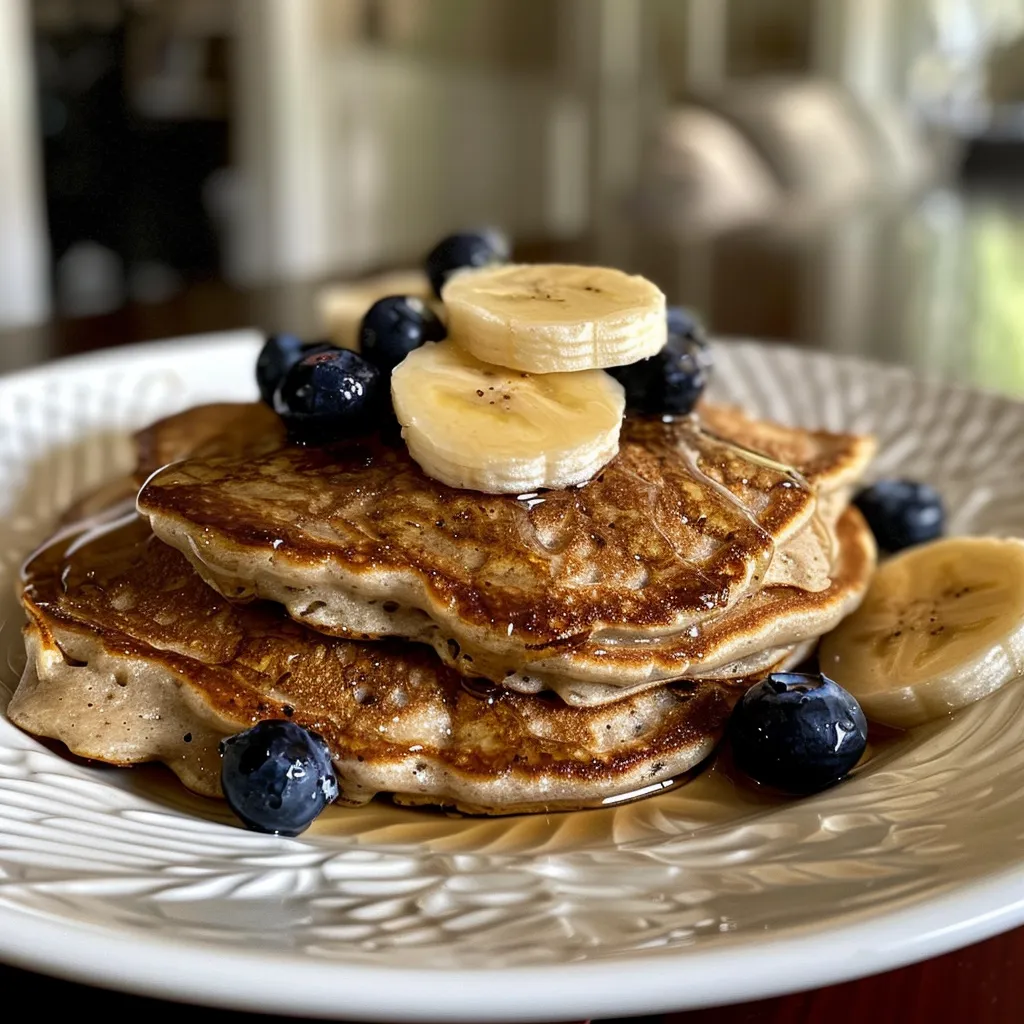
  • Fresh fruits: Strawberries, blueberries, or bananas add a burst of freshness.
  • Nuts: Sprinkle chopped pecans or walnuts for added crunch.

Frequently Asked Questions

Got questions? Here are answers to common inquiries:

  • Can I make French toast without eggs? Yes, you can substitute eggs with a mixture of flaxseed and water or silken tofu for a vegan option.
  • What bread is best for French toast? Brioche and challah are preferred for their texture, but you can also use sourdough or whole grain.
  • How do I keep French toast warm? Place cooked slices on a baking sheet in a warm oven (200°F or 93°C) while you finish cooking.
  • Can I use stale bread? Absolutely! Stale bread absorbs the egg mixture better and prevents sogginess.
  • How can I add flavor to the egg mixture? Experiment with spices like nutmeg, cardamom, or citrus zest for extra flavor.
  • Is French toast healthy? It can be! Use whole grain bread, limit added sugars, and top with fruits for a nutritious meal.
  • Can I double the recipe? Yes, simply multiply the ingredients and use a larger skillet or cook in batches.
  • How long does French toast last in the fridge? Cooked French toast can last in the refrigerator for up to 3 days.

Final Thoughts

French toast is more than just a breakfast item; it’s a canvas for creativity and flavor. With this comprehensive guide, you’re fully equipped to create the best French toast experience that your friends and family will love. Whether you stick with the classic recipe or explore exciting variations, remember that the heart of cooking lies in the joy of sharing delicious moments. So gather your ingredients, invite loved ones to the table, and enjoy the art of French toast together!

Best French Toast Ever

Prep Time 5 minutes
Cook Time 10 minutes
Total Time 15 minutes
Servings 4 slices
Calories 250
This classic French toast recipe delivers crispy, golden slices with a rich, flavorful custard. Perfect for a cozy breakfast or brunch treat.

Ingredients

Bread

  • 4 slices brioche or challah bread
  • 2 eggs eggs
  • 0.5 cup milk (or dairy-free alternative)
  • 1 tsp vanilla extract
  • 0.5 tsp ground cinnamon

For cooking

  • to taste butter or oil (for frying)

Instructions 

  • Whisk eggs, milk, vanilla, and cinnamon in a shallow dish.
  • Dip bread slices into the mixture, coating both sides.
  • Heat skillet with butter or oil over medium heat.
  • Cook slices 2-3 minutes per side until golden brown.
  • Serve hot with toppings like syrup or fruits.

Notes

Use day-old bread for best results.
Calories: 250kcal
Cost: $10
Course: Breakfast
Cuisine: French
Keyword: French Toast

Unlock the Secrets of Avocado Toast with Poached Eggs

Welcome to the wonderful world of avocado toast topped with a perfectly poached egg. This simple yet elegant dish has taken breakfast and brunch by storm, and for good reason. With its vibrant flavors and impressive presentation, it’s a meal that not only satisfies your taste buds but also nourishes your body. In this guide, we’ll explore every aspect of this beloved dish, ensuring that you can recreate it with confidence in your own kitchen.

Why You’ll Love This Recipe

Here are just a few reasons why this avocado toast with poached eggs should be your next breakfast go-to:

  • Nutrient-Rich: Avocados are packed with healthy fats, fiber, and various vitamins, making this dish a nutritious choice.
  • Quick to Prepare: In under 15 minutes, you can have a delicious and filling breakfast ready to enjoy.
  • Customizable: The recipe is versatile—add your favorite toppings or spices to make it uniquely yours.
  • Visually Stunning: The vibrant green of the avocado paired with the golden yolk of the poached egg makes for an Instagram-worthy dish.
  • Perfect for Any Meal: While it’s a fantastic breakfast option, it also serves well as a light lunch or dinner.

Ingredients Breakdown and Substitutions

To create the perfect avocado toast with poached egg, you’ll need the following ingredients:

  • Avocados: 2 ripe avocados will create a creamy base. If you prefer a stronger flavor, consider using a slightly firmer avocado.
  • Eggs: 2 large eggs, fresh for the best poaching results.
  • Bread Slices: 2 thick-cut slices of your choice (sourdough, whole grain, or gluten-free options work beautifully).
  • Lemon Juice: 1 teaspoon to enhance the flavor of the avocado and prevent browning.
  • Salt: ½ teaspoon for seasoning the avocado mash.
  • Black Pepper: ¼ teaspoon for added flavor.
  • White Vinegar: 1 tablespoon to help the eggs maintain their shape while poaching.
  • Olive Oil (optional): A drizzle adds richness and flavor.

Here are some substitutions to consider:

  • Avocado: If you’re out of avocados, try using hummus or a spreadable cheese for a different twist.
  • Eggs: For a vegan alternative, try tofu scramble or chickpea flour omelets.
  • Bread: Any bread will do, but for a low-carb option, consider using cloud bread or lettuce wraps.

Pro Tips for Perfect Poached Eggs

Delicious avocado toast with a poached egg, highlighting fresh ingredients and textures.

Achieving the perfect poached egg may seem daunting, but with these expert tips, you’ll master it in no time:

  • Fresh Eggs: Always use the freshest eggs possible; they hold their shape better when poached.
  • Temperature Control: Keep the water at a gentle simmer—too much boiling can break the eggs apart.
  • Use a Ramekin: Crack each egg into a ramekin first to make it easier to slide into the water.
  • Swirl the Water: Create a gentle whirlpool in the pot before adding the egg to help it form a nice shape.
  • Cooking Time: Poach for 3-4 minutes for a runny yolk; increase time for firmer yolks.
  • Vinegar Addition: Adding vinegar to the poaching water helps the egg whites coagulate more quickly.
  • Slotted Spoon: Use a slotted spoon to remove the eggs from the water, and gently blot them dry before placing them on the toast.
  • Experiment with Seasoning: A sprinkle of smoked salt or chili flakes can elevate your dish even more.

Common Mistakes and Troubleshooting

Even seasoned cooks can encounter issues while preparing poached eggs. Here are some common pitfalls and how to avoid them:

  • Eggs Spreading: This can happen if the eggs are not fresh. Always check the expiration date and look for reputable sources.
  • Overcooked Eggs: Keep an eye on the time! Use a timer to help achieve your desired yolk consistency.
  • Water Too Hot: If the water is boiling too vigorously, it can break the eggs apart. Maintain a gentle simmer.
  • Messy Presentation: If your eggs break during cooking, keep extra eggs on hand to try again.

Delicious Variations to Try

Feeling adventurous? Here are some delightful variations of this classic dish:

  • Spicy Avocado Toast: Add sliced jalapeños or a sprinkle of red pepper flakes for a kick.
  • Caprese Style: Layer fresh mozzarella and tomatoes on top of the avocado for an Italian twist.
  • Smoked Salmon Delight: Top with smoked salmon and capers for a luxurious brunch option.
  • Southwestern Flair: Mix in cilantro, lime juice, and diced tomatoes for a zesty flavor profile.

Storage and Make-Ahead Instructions

If you want to prepare elements of this dish in advance, here’s how:

  • Avocado Preparation: Mash the avocado just before serving to prevent browning. If you must prepare it early, add lemon juice and cover tightly with plastic wrap.
  • Eggs: Poach eggs ahead of time and store them in cold water in the refrigerator. Reheat in warm water for a minute before serving.
  • Bread: Toast bread right before serving for the best texture.

Frequently Asked Questions (FAQs)

Here are answers to some common questions about making avocado toast with poached eggs:

  • Can I use frozen avocados? Yes, but fresh avocados provide the best flavor and texture. If using frozen, make sure to thaw and drain excess water.
  • What’s the best way to store leftover avocado? Store mashed avocado in an airtight container with a layer of plastic wrap pressed directly against it to minimize air exposure.
  • Can I use other types of bread? Absolutely! Any bread can work; just make sure it’s sturdy enough to hold the toppings.
  • How do I know when my eggs are perfectly poached? The whites should be set, and the yolk should be slightly wobbly for a runny effect.
  • Is this recipe keto-friendly? Yes! Use keto-friendly bread or skip the bread altogether for a low-carb meal.
  • Can I add cheese to my avocado toast? Yes! Feta or goat cheese crumbles can enhance the flavor.
  • What are some good toppings to add? Try microgreens, radishes, or pickled onions for additional flavor and texture.
  • How can I make this dish vegan? Substitute the poached egg with tofu scramble or chickpea flour omelet.

Nutritional Tips and Dietary Adaptations

This avocado toast is naturally gluten-free and can easily be adapted for various dietary needs:

  • Low-Carb: Use lettuce wraps or low-carb bread alternatives.
  • Vegetarian: This recipe is already vegetarian-friendly; simply skip the egg for a vegan option.
  • Healthy Fats: Avocados offer a source of healthy fats, promoting heart health.

Essential Equipment Recommendations

To make your cooking experience smoother, consider the following tools:

  • Non-Stick Saucepan: Ideal for poaching eggs without them sticking.
  • Slotted Spoon: For gently lifting poached eggs out of the water.
  • Ramekins: Perfect for cracking your eggs before sliding them into the water.
  • Good Quality Knife: For slicing avocados and bread with ease.

Serving Suggestions for a Complete Meal

This dish pairs beautifully with a variety of sides. Here are some ideas:

  • Fruits: Fresh fruit salad or sliced seasonal fruits complement the richness of the avocado.
  • Salads: A light green salad can balance the meal nicely.
  • Coffee or Tea: Serve with your favorite morning beverage for a complete breakfast experience.

In conclusion, avocado toast topped with a perfectly poached egg is a dish that transcends the typical breakfast fare. With its rich flavors, vibrant colors, and nutritional benefits, it’s a recipe you’ll return to time and again. Whether you’re hosting brunch or simply treating yourself to a delightful morning meal, this guide will help you create a dish that impresses and satisfies. Happy cooking!

Avocado Toast with Poached Egg

Prep Time 5 minutes
Cook Time 10 minutes
Total Time 15 minutes
Servings 2 servings
Calories 350
A simple and nutritious breakfast featuring creamy avocado and perfectly poached eggs on toasted bread.

Ingredients

Main Ingredients

  • 2 pieces ripe avocados
  • 2 pieces eggs
  • 2 slices thick-cut bread (such as sourdough or whole grain)
  • 1 teaspoon lemon juice
  • 0.5 teaspoon salt
  • 0.25 teaspoon black pepper
  • 1 tablespoon white vinegar
  • 1 teaspoon olive oil (optional)

Instructions 

  • Simmer water with vinegar in a saucepan.
  • Mash avocados with lemon juice, salt, and pepper.
  • Poach eggs in simmering water for 3–4 minutes.
  • Toast bread and spread mashed avocado on each slice.
  • Remove eggs with a slotted spoon and place on toast.
  • Season with pepper and serve warm.

Notes

For extra flavor, add toppings like herbs or hot sauce.
Calories: 350kcal
Cost: $8
Course: Breakfast
Cuisine: American
Keyword: Avocado, Egg, Toast

Unlock the Secrets to Perfect Cheese and Herb Muffins

Welcome to a delightful culinary adventure where we elevate your breakfast game with Cheese and Herb Muffins. These muffins are not only fluffy and flavorful but also incredibly versatile, making them perfect for any meal of the day. In this comprehensive guide, you’ll discover everything you need to know about making these scrumptious muffins, from the essential ingredients to expert tips and variations that will impress even the pickiest eaters.

Why You’ll Love This Recipe

These Cheese and Herb Muffins are the perfect balance of savory and satisfying. Here’s why you’ll adore this recipe:

  • Quick and Easy: With just a few simple steps, you can whip up a batch of these muffins in under 30 minutes, perfect for busy mornings.
  • Flavor Explosion: The combination of cheese and fresh herbs creates a mouthwatering experience that’s sure to brighten your day.
  • Versatile Ingredients: Customize with your favorite cheeses and herbs, making these muffins a great way to use leftovers or seasonal produce.
  • Great for Any Meal: Serve them warm for breakfast, as a side dish at dinner, or even as a snack throughout the day.
  • Freezer-Friendly: Make a double batch and freeze them for quick breakfasts on the go!

Essential Ingredients

To make these delicious muffins, gather the following ingredients:

  • 2 cups all-purpose flour: This forms the base of your muffins, providing structure and a fluffy texture.
  • 1 tablespoon baking powder: A crucial leavening agent that helps the muffins rise beautifully.
  • 1/2 teaspoon salt: Enhances overall flavor; don’t skip this step!
  • 1 cup shredded cheese: Cheddar is classic, but feel free to experiment with mozzarella, feta, or goat cheese.
  • 1/4 cup chopped fresh herbs: Parsley, chives, or thyme work wonders, adding freshness and aroma.
  • 1 cup milk: Provides moisture; substitute with almond or oat milk for a dairy-free option.
  • 1/4 cup vegetable oil: Keeps the muffins moist and tender.
  • 2 large eggs: Bind the ingredients together and add richness.

Let’s Make It Together!

Deliciously baked Cheese and Herb Muffins, highlighting the moist crumb and bits of fresh herbs.

Follow these simple steps to create your Cheese and Herb Muffins:

  1. Preheat the oven to 375°F (190°C) and line a muffin tin with paper liners.
  2. In a large bowl, whisk together the flour, baking powder, and salt.
  3. Stir in the shredded cheese and chopped herbs until evenly distributed throughout the flour mixture.
  4. In another bowl, mix the milk, vegetable oil, and eggs until well combined.
  5. Pour the wet ingredients into the dry ingredients and stir until just combined; be careful not to overmix!
  6. Fill the muffin cups about 2/3 full with the batter.
  7. Bake for 20-25 minutes or until a toothpick inserted into the center comes out clean.
  8. Let the muffins cool in the pan for 5 minutes before transferring them to a wire rack to cool completely.

Pro Tips for Perfect Muffins

To ensure your muffins turn out perfectly every time, consider these expert insights:

  • Don’t Overmix: Overmixing can lead to dense muffins. Stir just until the ingredients are combined.
  • Room Temperature Ingredients: Using room temperature eggs and milk helps create a more uniform batter.
  • Check for Doneness: Insert a toothpick in the center of a muffin—if it comes out clean, they’re done!
  • Cool Properly: Letting the muffins cool in the pan for a few minutes prevents them from becoming soggy.
  • Experiment with Flavors: Add ingredients like sun-dried tomatoes, olives, or different types of cheese for unique flavor profiles.
  • Use Fresh Herbs: Fresh herbs provide a vibrant flavor; dried herbs can work in a pinch but won’t be as aromatic.
  • Watch Your Oven: Every oven is different; keep an eye on the muffins towards the end of the baking time.
  • Make a Double Batch: These muffins freeze well, so make extra for easy meals later!

Common Mistakes and Troubleshooting

If you encounter issues while baking, here are some common mistakes and how to avoid them:

  • Muffins are dense: This often occurs from overmixing. Mix just until combined for a lighter texture.
  • Muffins stick to the liners: Ensure you use quality liners or lightly grease the muffin tin.
  • Uneven baking: Make sure your oven is preheated and avoid opening the door during baking.
  • Too dry: Overbaking can dry out muffins. Start checking a few minutes before the recommended time.

Delicious Variations

Get creative with these variations to customize your muffins:

  • Spicy Kick: Add diced jalapeños or red pepper flakes for a spicy version.
  • Sweet and Savory: Incorporate a teaspoon of honey or maple syrup for a sweet touch.
  • Vegetable Medley: Throw in finely chopped spinach, bell peppers, or zucchini for added nutrition.
  • Cheesy Herb Swirl: Use different types of cheese like gouda or add a swirl of pesto into the batter before baking.

Storage and Make-Ahead Instructions

These muffins are great for meal prep! Here’s how to store them:

  • Room Temperature: Keep muffins in an airtight container for up to 3 days.
  • Refrigerator: Store them in the fridge for up to a week; reheat in the microwave.
  • Freezer: Freeze muffins in a ziplock bag for up to 3 months. Thaw overnight in the fridge or microwave.

Frequently Asked Questions

Here are some common questions about Cheese and Herb Muffins:

  • Can I use whole wheat flour? Yes, but you may need to adjust the liquid slightly as it absorbs more moisture.
  • What’s the best way to reheat muffins? Reheat in the microwave for 15-30 seconds or in a preheated oven at 350°F for about 10 minutes.
  • Can I make these muffins vegan? Substitute eggs with flax eggs and use plant-based milk and oil.
  • What herbs work best? Fresh herbs like chives, thyme, or rosemary add great flavor; experiment to find your favorite mix!
  • How do I know when they are done baking? A toothpick inserted into the center should come out clean.
  • Can I add meat? Diced cooked bacon or ham can add a delicious savory element.
  • What if my muffins are too salty? Ensure you measure your salt accurately and consider reducing it if using salty cheese.
  • Are these muffins healthy? They can be! Use whole grain flour and low-fat cheese for a healthier option.

Nutritional Tips and Dietary Adaptations

If you’re watching your diet, here are some tips to make your muffins healthier:

  • Lower Fat: Substitute Greek yogurt for oil to reduce fat content without sacrificing moisture.
  • Gluten-Free: Use a gluten-free flour blend to cater to gluten sensitivities.
  • Low Sodium: Opt for low-sodium cheese and omit salt for a heart-healthy option.
  • High Fiber: Add in ground flaxseed or chia seeds to boost fiber content.

Equipment Recommendations

To achieve the best results, here’s what you’ll need in your kitchen:

  • Muffin Tin: A standard 12-cup muffin tin is ideal for this recipe.
  • Mixing Bowls: Use large mixing bowls for combining wet and dry ingredients easily.
  • Whisk: A good whisk is essential for mixing ingredients thoroughly.
  • Measuring Cups and Spoons: Precision is key in baking; make sure to use proper measuring tools.
  • Rubber Spatula: Great for folding in ingredients without overmixing.

Serving Suggestions

These muffins can be enjoyed in numerous ways:

  • With Butter: Spread a little butter on warm muffins for a classic touch.
  • With Dips: Serve with hummus or a savory dip for a delightful snack.
  • As a Side: Pair with soups or salads for a hearty meal.
  • With Eggs: Serve alongside scrambled eggs for a fulfilling breakfast.

Wrap-Up: Your New Favorite Recipe

Now that you’ve mastered the art of making Cheese and Herb Muffins, it’s time to roll up your sleeves and get baking! With this comprehensive guide, you have all the tools, tips, and variations to create a delightful batch that will impress friends and family alike. Remember, cooking is about connection and joy, so gather your loved ones, share a muffin, and create beautiful moments around the table!

Cheese and Herb Muffins: Discover the Perfect Recipe!

Prep Time 10 minutes
Cook Time 20 minutes
Total Time 30 minutes
Servings 12 muffins
Calories 200
Enjoy these savory muffins packed with cheese and fresh herbs, perfect for breakfast or snacks.

Ingredients

Dry ingredients

  • 2 cups all-purpose flour
  • 1 tablespoon baking powder
  • 1/2 teaspoon salt

Wet ingredients

  • 1 cup milk
  • 1/4 cup vegetable oil
  • 2 large eggs

Main ingredients

  • 1 cup shredded cheese (cheddar or your choice)
  • 1/4 cup chopped fresh herbs (such as parsley, chives, or thyme)

Instructions 

  • Preheat oven to 375°F (190°C) and line a muffin tin.
  • Mix dry ingredients, then stir in cheese and herbs.
  • Combine wet ingredients and add to dry mixture; stir until just combined.
  • Fill muffin cups 2/3 full and bake for 20-25 minutes.
  • Cool muffins in pan 5 minutes, then transfer to wire rack.

Notes

Use fresh herbs for the best flavor.
Calories: 200kcal
Cost: $15
Course: Breakfast, Snack
Cuisine: American
Keyword: Cheese, herbs

Imagine waking up to the enticing aroma of pancakes wafting through your kitchen, knowing that they are not only delicious but also incredibly easy to make. Welcome to the world of 2-Ingredient Banana Pancakes, where simplicity meets flavor in a delightful breakfast experience. In just a few minutes, you can whip up a batch of banana egg pancakes that are perfect for any occasion, whether it’s a busy weekday morning or a leisurely weekend brunch.

In this comprehensive guide, you’ll discover everything you need to know about making these pancakes, from the benefits of the ingredients to various ways to customize your recipe. Let’s dive in!

Why You’ll Love This Recipe

These pancakes are not just easy; they offer a range of benefits that make them a must-try:

  • Quick and easy: With just two main ingredients, this recipe takes less than 10 minutes from start to finish.
  • Healthy option: Packed with protein and fiber, these pancakes are naturally sweetened without added sugars, making them a wholesome choice.
  • Customizable flavors: Add optional ingredients like cinnamon or blueberries to create your unique twist on the classic recipe.
  • Kid-friendly: Even picky eaters love these pancakes, making them perfect for family breakfasts.
  • Gluten-free and dairy-free: This recipe is suitable for various dietary needs, allowing everyone to enjoy a delicious meal.

Ingredient Breakdown

Let’s take a closer look at the ingredients that make these pancakes so special:

  • 2 eggs: Provides structure and protein, making the pancakes fluffy.
  • 1 large banana: Acts as a natural sweetener and adds moisture to the batter.
  • Optional: You can also incorporate 1/2 tsp of cinnamon for added warmth and flavor or mix in 2-4 Tbsp of blueberries for a fruity punch.

For those with dietary restrictions or preferences, here are a few substitutions you might consider:

  • Egg substitute: Use flax eggs or applesauce for a vegan version.
  • Banana alternative: Unsweetened applesauce can be used if you’re out of bananas.

How to Make Banana Egg Pancakes

Follow these simple steps to create your delicious pancakes:

  1. Whisk together the eggs in a medium bowl.
  2. Break the banana into chunks and mash or mix it into the egg mixture until well blended.
  3. Optional: Add cinnamon or blueberries and gently fold them into the batter.
  4. Cook the pancakes over medium heat until the edges begin to brown; flip and cook for an additional 30-60 seconds until fully cooked.
  5. Remove from the pan and serve with your favorite toppings.

Pro Tips for Perfect Pancakes

Delicious stack of banana pancakes with visible blueberries and cinnamon dusting.

To ensure your pancakes turn out perfectly every time, consider these expert tips:

  • Don’t overmix: Mix just until combined; a few lumps are okay. Overmixing can lead to dense pancakes.
  • Use a non-stick skillet: This prevents sticking and ensures even cooking.
  • Cook on medium heat: Cooking too fast can burn the pancakes before they are done inside.
  • Let the batter rest: Allowing it to sit for a few minutes can enhance the texture.
  • Make them small: Smaller pancakes are easier to flip and cook more evenly.

Common Mistakes and Troubleshooting

Here are some common pitfalls and how to avoid them:

  • Pancakes fall apart: This usually happens if the batter is too thin or not mixed enough. Ensure you mash the banana well and whisk the eggs thoroughly.
  • Pancakes burn: If they’re browning too quickly, lower the heat. Medium heat is key for even cooking.
  • Pancakes are too dense: Overmixing can create a tough texture. Mix gently!

Exciting Variations

Don’t hesitate to get creative with your pancakes! Here are a few fun variations to try:

  • Chocolate Chip Banana Pancakes: Add mini chocolate chips to the batter for a decadent twist.
  • Coconut Banana Pancakes: Mix in shredded coconut for a tropical flavor experience.
  • Peanut Butter Banana Pancakes: Swirl in peanut butter for a rich, nutty taste.
  • Spiced Banana Pancakes: Add a pinch of nutmeg or pumpkin spice for a cozy flavor profile.

Storage and Make-Ahead Instructions

These pancakes can be made ahead of time and stored for later:

  • Refrigerate: Store cooked pancakes in an airtight container in the fridge for up to 3 days.
  • Freeze: Place pancakes in a single layer on a baking sheet, freeze until solid, then transfer to a freezer bag. They can last for up to 2 months.
  • Reheat: Warm them in the microwave or toaster until heated through.

Frequently Asked Questions

Here are some common questions about banana pancakes:

  • Can I use ripe bananas? Yes! Ripe bananas are sweeter and will enhance the flavor of your pancakes.
  • Can I add protein powder? Absolutely! Mix in a scoop of protein powder for an extra boost.
  • Are these pancakes suitable for meal prep? Yes! They freeze well and can be reheated easily.
  • What toppings work best? Fresh fruits, yogurt, or a drizzle of honey or maple syrup all make great toppings.
  • Can I make these pancakes vegan? Yes! Substitute the eggs with flax eggs or applesauce.
  • How do I know when they’re done? Look for edges that are set and a golden-brown color when flipping.
  • Can I double the recipe? Yes! Just keep the same ingredient ratios.
  • What if I don’t have a non-stick pan? Use a bit of oil or butter to prevent sticking.

Nutrition Tips and Dietary Adaptations

This recipe is already a nutritious choice, but here are some tips for enhancing its health benefits:

  • Boost fiber: Consider adding ground flaxseed or chia seeds to the batter.
  • Increase protein: Add a scoop of your favorite protein powder to the mix.
  • Low-carb option: Use almond flour in place of the banana for a keto-friendly pancake.

Equipment Recommendations

To make your pancake-making experience seamless, here’s what you’ll need:

  • Non-stick skillet: Essential for easy cooking and flipping.
  • Mixing bowls: A medium bowl for mixing the batter and a small bowl for optional ingredients.
  • Whisk: For combining the eggs and banana smoothly.
  • Spatula: A good spatula will help you flip without breaking the pancakes.

Serving Suggestions

Serve your banana egg pancakes with a variety of toppings for a delightful breakfast:

  • Fresh fruit: Slices of strawberries, blueberries, or bananas on top.
  • Nut butter: Spread almond or peanut butter for added creaminess.
  • Yogurt: A dollop of Greek yogurt adds a tangy contrast.
  • Maple syrup: Drizzle on top for a classic touch.

Now that you have all the tools, tips, and tricks to make perfect banana pancakes, it’s time to get cooking! Remember, making these pancakes is not just about the food; it’s about creating moments with loved ones, enjoying the process, and celebrating the joy of cooking.

Happy cooking, and enjoy your delicious banana egg pancakes!

2-Ingredient Banana Pancakes

Prep Time 5 minutes
Cook Time 5 minutes
Total Time 10 minutes
Servings 2 pancakes
Calories 210
Enjoy quick and healthy banana pancakes made with just two main ingredients, perfect for a nutritious breakfast or snack.

Ingredients

Main ingredients

  • 2 pieces eggs
  • 1 large banana banana

Optional toppings

  • 1/2 tsp cinnamon (optional)
  • 2-4 Tbsp blueberries (optional)

Instructions 

  • Whisk eggs in a bowl. Mash banana into eggs until blended.
  • Optional: add cinnamon or blueberries for flavor.
  • Cook over medium heat until edges brown, then flip and cook 30-60 seconds.
  • Remove and serve hot.

Notes

For extra flavor, top with fresh fruit or a drizzle of honey.
Calories: 210kcal
Cost: $5
Course: Breakfast
Cuisine: American
Keyword: Banana

Unleashing the Flavors: Your Guide to Homemade Rosemary Garlic Focaccia

Welcome to the ultimate guide on crafting the perfect Homemade Rosemary Garlic Focaccia! This delightful bread is not only a staple in Italian cuisine but also a canvas for your culinary creativity. Whether you’re a seasoned baker or just starting your journey in the kitchen, this article will walk you through every step to ensure that your focaccia turns out flavorful and aromatic every time. With over two decades of culinary experience, I’m here to share my insights and tips for making this classic bread a standout at your table.

Why You’ll Love This Recipe

This Rosemary Garlic Focaccia embodies the essence of homemade bread. Here are just a few reasons why you’ll fall in love with this recipe:

  • Easy to Make: With simple ingredients and straightforward steps, even novice bakers can create this beautiful bread.
  • Versatile: Perfect as an appetizer, a side for soups, or a base for sandwiches, this focaccia is adaptable for any meal.
  • Flavor Packed: Infused with garlic and fresh rosemary, each bite is bursting with rich, aromatic flavors that elevate your dining experience.
  • Textural Delight: The golden crust and tender interior provide a satisfying contrast that bread lovers crave.
  • Customizable: Feel free to experiment with toppings like olives, sun-dried tomatoes, or cheeses to make it your own!

Ingredients You’ll Need

Before you start baking, let’s look at the ingredients. Here’s what you’ll need to create this delicious focaccia:

  • 4 cups (480 g) all-purpose flour (or bread flour for a chewier texture): The backbone of your bread. Choose quality flour for the best results.
  • 1 ½ cups (360 ml) warm water (about 105°F / 40°C): Essential for activating the yeast.
  • 2 ¼ teaspoons (7 g) instant yeast (equivalent to 1 packet): The key ingredient that makes the dough rise.
  • 2 teaspoons sugar: This helps feed the yeast, contributing to a lovely rise and a hint of sweetness.
  • 2 teaspoons kosher salt: Enhances the flavor of the bread.
  • ¼ cup (60 ml) extra-virgin olive oil (plus more for greasing and topping): Adds richness and moisture to the dough.
  • 3–4 cloves garlic, thinly sliced or roasted whole: Infuses the bread with a savory aroma.
  • 2 tablespoons fresh rosemary, chopped (plus sprigs for garnish): Provides that signature herbal flavor.
  • 2–3 tablespoons extra-virgin olive oil: For drizzling over the dough before baking.
  • 1 teaspoon flaky sea salt (Maldon or similar): For finishing the focaccia with a touch of briny goodness.

Step-by-Step Instructions

Detailed image of homemade focaccia featuring rosemary sprigs and garlic pieces.

Now that you have all your ingredients, let’s dive into the baking process!

  1. Activate the Yeast: In a large mixing bowl, combine the warm water, sugar, and yeast. Let this mixture sit for 5–10 minutes until it becomes frothy, indicating that the yeast is active.
  2. Prepare the Dough: Add the flour, salt, and olive oil to the yeast mixture. Stir until a shaggy dough forms, then transfer to a lightly floured surface and knead for 8–10 minutes until smooth and elastic.
  3. First Rise: Lightly oil a large bowl, place the dough inside, and cover it with plastic wrap or a damp towel. Let it rise in a warm spot for 1–2 hours, or until doubled in size.
  4. Prepare the Baking Pan: Generously oil a 9×13-inch baking pan or a large cast-iron skillet. Punch down the risen dough and stretch it to fit the pan.
  5. Second Rise: Cover the dough and let it rest for another 30–40 minutes until puffy. Preheat your oven to 425°F (220°C).
  6. Dimpling and Topping: With oiled fingers, press deep dimples all over the surface of the dough. Drizzle with olive oil, scatter rosemary and garlic evenly, and sprinkle with flaky sea salt.
  7. Bake: Place in the preheated oven and bake for 20–25 minutes, or until golden brown on top and crisp at the edges. Remove from the oven and allow it to cool slightly before slicing.

Pro Tips for Perfect Focaccia

Here are some expert insights to elevate your focaccia game:

  • Use Fresh Ingredients: Ensure your yeast is fresh for optimal rising. Check the expiration date on the package.
  • Don’t Skip the Dimples: These dimples not only create a beautiful texture but also hold the olive oil and toppings, enhancing flavor.
  • Experiment with Herbs: Feel free to swap rosemary for other herbs like thyme or oregano for a different flavor profile.
  • Cool Before Slicing: Allow the focaccia to cool slightly before slicing to maintain its structure and texture.
  • Use High-Quality Olive Oil: A good quality extra-virgin olive oil makes a significant difference in flavor.
  • Try Different Toppings: Get creative with toppings. Consider adding Parmesan cheese, olives, or caramelized onions for added depth.
  • Adjust Baking Time: Ovens can vary; keep an eye on your focaccia to prevent over-baking.
  • Store Properly: To maintain freshness, store leftover focaccia in an airtight container at room temperature.

Common Mistakes and Troubleshooting

Even the best cooks can run into challenges. Here are some common mistakes and how to avoid them:

  • Dense Bread: If your focaccia doesn’t rise well, it could be due to inactive yeast. Always check the yeast’s freshness.
  • Overworking the Dough: Knead just enough to bring the dough together; over-kneading can lead to a tough texture.
  • Poor Flavor: Ensure you’re using enough salt and quality olive oil to enhance the flavor of the bread.
  • Burnt Edges: If the edges brown too quickly, consider lowering the oven temperature slightly.
  • Sticky Dough: If your dough is too sticky, dust with a little more flour while kneading, but avoid adding too much.

Variations to Try

Looking to mix things up? Here are some delicious variations you can try:

  • Olive Focaccia: Add chopped olives to the dough or as a topping before baking.
  • Cheesy Focaccia: Sprinkle shredded cheese (like mozzarella or cheddar) on top before baking for a gooey finish.
  • Sun-Dried Tomato and Basil: Incorporate chopped sun-dried tomatoes and fresh basil into the dough for a Mediterranean twist.
  • Sweet Focaccia: Drizzle with honey and top with figs or peaches for a sweet version perfect for brunch.

Storage and Make-Ahead Instructions

Planning ahead? Here’s how to store and prepare your focaccia:

  • Room Temperature: Store in an airtight container for up to 3 days. Reheat in the oven for a few minutes before serving.
  • Freezing: Slice and freeze individual pieces wrapped in plastic wrap and placed in a freezer bag for up to 3 months. Reheat in the oven directly from frozen.
  • Make-Ahead: You can prepare the dough in advance. Let it rise, then punch down and refrigerate overnight. Bring to room temperature before shaping and baking.

Frequently Asked Questions

Here are some common questions about making focaccia:

  • Can I use whole wheat flour? Yes, you can substitute part or all of the all-purpose flour with whole wheat flour for a nuttier flavor.
  • What can I substitute for rosemary? Thyme, oregano, or even sage could be great alternatives, depending on your preference.
  • Is it necessary to use olive oil? While olive oil is traditional, you can use other oils, but they may alter the flavor.
  • How do I know when it’s done? The focaccia should be golden brown on top and have a hollow sound when tapped on the bottom.
  • Can I add toppings? Absolutely! Just be mindful not to overload it, as this can affect the dough’s rise.
  • What’s the best way to reheat focaccia? Preheat your oven to 350°F (175°C) and warm for about 10 minutes for the best texture.
  • Can I make it gluten-free? Yes, use a gluten-free flour blend designed for bread baking.
  • How thick should focaccia be? Aim for about 1-inch thick for a perfect rise and texture.

Nutritional Tips and Dietary Adaptations

Focaccia can be adjusted to fit various dietary needs:

  • Vegan Option: This recipe is already vegan-friendly; ensure your toppings comply with your dietary preferences.
  • Low-Sodium Version: Reduce or omit salt, but consider adding herbs for flavor enhancement.
  • Whole Grain Alternative: Swap out all-purpose flour for whole wheat or spelt flour for additional fiber.

Equipment Recommendations

To achieve the best results, consider using the following equipment:

  • Mixing Bowls: A large bowl for mixing the dough.
  • Baking Pan: A 9×13-inch baking pan or cast-iron skillet for optimal browning.
  • Kitchen Scale: For precise measurements, especially for flour.
  • Instant Read Thermometer: To check the temperature of your water for yeast activation.

Serving Suggestions

Now that your focaccia is ready, here are some delightful ways to serve it:

  • As an Appetizer: Serve warm with olive oil and balsamic vinegar for dipping.
  • With Soups: Pair with hearty soups like minestrone or tomato basil.
  • Sandwich Base: Use slices to create delicious sandwiches or paninis.
  • With Cheese: A perfect companion to a cheese platter, complementing various cheeses.

In conclusion, making your own Homemade Rosemary Garlic Focaccia is not just a baking project; it’s an experience filled with flavor and joy. Whether you’re enjoying it fresh out of the oven or using it to enhance a meal, this focaccia will surely impress. So gather your ingredients, unleash your inner baker, and enjoy the wonderful world of homemade bread!

Homemade Rosemary Garlic Focaccia

Prep Time 20 minutes
Cook Time 25 minutes
Total Time 45 minutes
Servings 8 slices
Calories 250
Enjoy this flavorful homemade focaccia infused with garlic and rosemary, perfect as a snack or side dish.

Ingredients

Dough

  • 4 cups all-purpose flour (or bread flour for chewier texture)
  • 1.5 cups warm water (about 105°F / 40°C)
  • 2.25 teaspoons instant yeast (1 packet)
  • 2 teaspoons sugar (to feed the yeast)
  • 2 teaspoons kosher salt
  • 0.25 cup extra-virgin olive oil (plus more for greasing and topping)
  • 3-4 cloves garlic, thinly sliced or roasted whole
  • 2 tablespoons fresh rosemary, chopped (plus sprigs for garnish)
  • 2-3 tablespoons extra-virgin olive oil
  • 1 teaspoon flaky sea salt (Maldon or similar)

Instructions 

  • Combine warm water, sugar, and yeast; let sit 5–10 minutes until frothy.
  • Add flour, salt, and olive oil; knead until smooth. Let rise 1–2 hours until doubled.
  • Transfer dough to oiled pan, stretch to fit, and let rest 30–40 minutes. Preheat oven to 425°F (220°C).
  • Deeply dimple the dough with oiled fingers, drizzle with olive oil, add garlic, rosemary, and sea salt.
  • Bake for 20–25 minutes until golden and crisp. Cool slightly before slicing.

Notes

For extra flavor, roast garlic before adding.
Calories: 250kcal
Cost: $15
Course: Side Dish
Cuisine: Italian
Keyword: Focaccia