Author

Mike

Browsing

There’s something truly magical about the morning light streaming through the kitchen window, the aroma of freshly brewed coffee mingling with the tantalizing scent of a delicious breakfast dish in the making. This is exactly how I feel every time I prepare my latest breakfast obsession: Baked Feta Eggs. This recipe not only fills my kitchen with warmth but also takes me back to cherished family meals, where food was the language of love and connection. It’s a dish that embodies the core of my culinary philosophy—balancing tradition with a touch of innovation, creating something that feels both comforting and exciting. Let me take you on this flavorful journey.

Why You’ll Absolutely Love This Recipe

  • It’s so easy, it feels like a little kitchen victory!
  • Perfect for those leisurely weekend brunches or a quick weekday breakfast.
  • Packed with Mediterranean flavors that transport you to sunny coastlines.
  • Healthy and satisfying—ideal for anyone following Easy Mediterranean Diet Recipes.
  • Versatile enough to customize with your favorite veggies or herbs.

Simple Ingredients for a Delicious Treat

In my kitchen, I firmly believe that simplicity is often the key to culinary greatness. This recipe is a testament to that belief. The ingredients are straightforward yet bursting with flavor. Cherry tomatoes and red bell peppers bring a natural sweetness, while red onion and garlic add a savory depth. Feta cheese, with its creamy, tangy profile, is the star of the show, bringing everything together in a delightful harmony. And let’s not forget the aromatic herbs—dried oregano, thyme, and a touch of red pepper flakes—that elevate the dish to another level of deliciousness.

You’ll find the full ingredient list with exact measurements in the recipe card below!

Let’s Make Some Magic: Step-by-Step

Let’s dive into the process, shall we? Preheat your oven to 400 degrees F. If you’re using ramekins, divide the cherry tomatoes, diced bell pepper, red onion, and garlic among them, placing a generous block of feta in each. Drizzle with olive oil, ensuring every nook and cranny is coated. If you’re opting for a larger dish, simply combine the veggies and garlic, placing the feta in the center. Mix your spices in a small bowl, then sprinkle them over the feta and veggies. Pop your dishes into the oven and let them work their magic for 25 minutes.

Once the timer dings, remove your creations and give them a good stir, incorporating the baby spinach until it’s just wilted. Now comes the fun part—creating little wells for your eggs. Crack them in, let them nestle in their new home, and return the dishes to the oven for an additional 10 minutes. The result? Perfectly baked eggs with a luscious, creamy center.

A Few of My Favorite Tips

Here’s a little secret from my kitchen to yours: If you like a bit of heat, don’t shy away from adding an extra pinch of red pepper flakes. And for a burst of freshness, finish with a sprinkle of chopped basil or chives. Not only do they add color, but they also complement the flavors beautifully.

How I Like to Serve This

Personally, I love serving Baked Feta Eggs with crusty baguette slices or warm pita bread. It turns each bite into a delightful medley of textures—soft eggs, creamy feta, and crunchy bread. It’s a perfect dish for sharing, making it an ideal choice for brunch gatherings or a special family breakfast.

Storing & Reheating (If There’s Any Left!)

If you find yourself with leftovers (which is rare in my household!), store them in an airtight container in the fridge. To reheat, simply pop them back in the oven at a low temperature until warmed through. This dish retains its flavors beautifully, making it a great option for meal prep.

Looking for more breakfast inspiration? You might enjoy exploring Why You’ll Love Making Funnel Cake Donuts at Home or indulge in These Delightful Caramel Apple Dessert Cups for a sweet treat.

Baked Feta Eggs

Prep Time 10 minutes
Cook Time 35 minutes
Total Time 45 minutes
Servings 4 servings
Calories 350
A delicious and easy baked dish featuring creamy feta, fresh vegetables, and eggs, perfect for breakfast or brunch.

Ingredients

Vegetables

  • 2 cups cherry or grape tomatoes
  • 1 piece red bell pepper, diced
  • 1/2 small red onion, diced
  • 3 cloves minced garlic
  • 8 ounces feta cheese
  • 4 tablespoons olive oil
  • 1 teaspoon dried oregano
  • 1 teaspoon sea salt
  • 1/2 teaspoon dried thyme
  • 1/2 teaspoon ground black pepper
  • 1/2 teaspoon red pepper flakes
  • 1 cup chopped baby spinach
  • 4 large eggs
  • optional for topping - chopped fresh basil or fresh chives

Instructions 

  • Preheat oven to 400 degrees F.
  • Combine tomatoes, bell pepper, onion, and garlic in a dish, place feta in center, and drizzle with olive oil.
  • Sprinkle spice mixture over the feta and veggies.
  • Bake for 25 minutes, stir in spinach, create wells, and crack eggs into them.
  • Bake for an additional 10 minutes and top with fresh herbs.
  • Serve with crusty bread for dipping.

Notes

Serve with crusty baguette, toast, or pita for dipping.
Calories: 350kcal
Cost: $15.00
Course: Breakfast
Cuisine: Mediterranean
Keyword: Feta

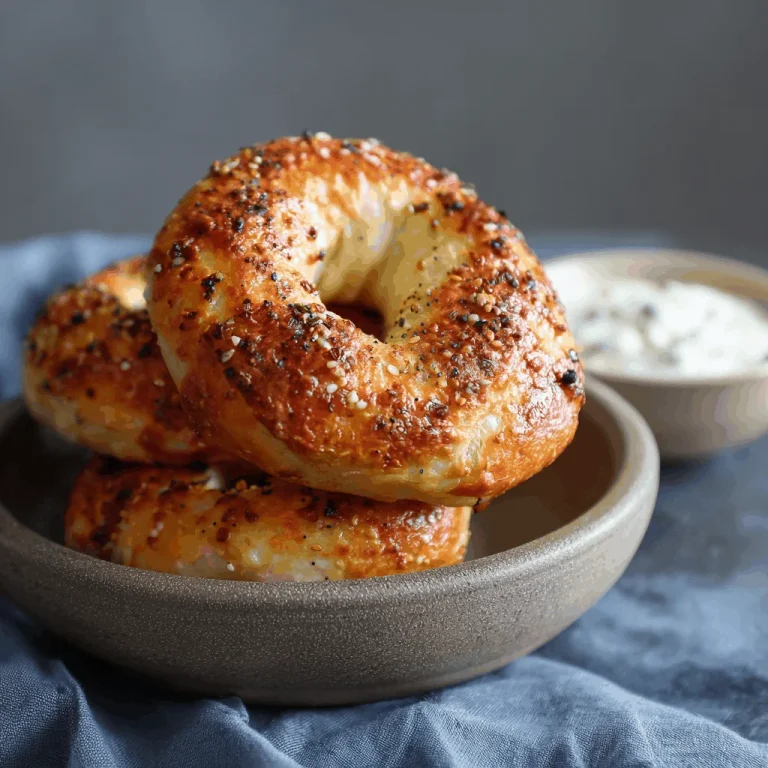
There’s something truly magical about starting your day with a warm, freshly baked bagel. For me, it’s a ritual that brings back fond memories of bustling mornings at my grandmother’s house. The aroma of freshly baked bread would fill the air, and we’d gather around the table, eager to dive into the day’s first meal. Today, I want to share a modern twist on this classic breakfast staple—Greek Yogurt Bagels. These are not just bagels; they’re a delicious blend of tradition and innovation, offering a high-protein punch to fuel your morning.

Why You’ll Absolutely Love This Recipe

  • Effortless and Rewarding: This recipe is so easy, it feels like a little kitchen victory every time you make it!
  • Versatile Flavor: Whether you prefer savory or sweet, these bagels can be customized with your favorite toppings.
  • High-Protein Power: Thanks to the Greek yogurt, these bagels are a natural high-protein snack, perfect for a weekday breakfast idea that’s healthy and satisfying.
  • Quick Baking: In just 25 minutes, you have golden, delicious bagels ready to enjoy.

Simple Ingredients for a Delicious Treat

One of the things I love most about this recipe is its simplicity. With just a handful of ingredients, you can whip up these delightful bagels. Let’s talk about what you’ll need:

  • Flour: You can use all-purpose flour or swap it with whole wheat flour for a heartier texture.
  • Baking Powder & Salt: These help the bagels rise and enhance their flavor.
  • Greek Yogurt: The star of the show! Its creamy texture gives the bagels a moist interior and a protein boost.
  • Egg: Used for an egg wash to give the bagels a beautiful golden finish.
  • Optional Toppings: Everything bagel seasoning, cinnamon, shredded cheese, garlic & herbs, or even chocolate chips for a sweet twist.

You’ll find the full ingredient list with exact measurements in the recipe card below!

Let’s Make Some Magic: Step-by-Step

Ready to get started? Let’s dive into the process of making these delightful Greek Yogurt Bagels. I’m right here with you, every step of the way.

  1. Preheat & Prep: Start by setting your oven to 400°F and lining a baking sheet with parchment paper or a silicone baking mat.
  2. Mix It Up: In a large bowl, whisk together the flour, baking powder, and salt. If you’re feeling adventurous, add 2 teaspoons of cinnamon for a sweet twist.
  3. Add the Star Ingredient: Stir in the Greek yogurt using a spatula until the dough begins to form. Then, use your hands to knead it together. This is where the magic happens!
  4. Shape Your Bagels: On a lightly floured work surface, divide the dough into four equal portions. Roll each into a ball, slightly flatten, and create a hole in the center using a spoon handle or by rolling the dough into a log and connecting the ends.
  5. Egg Wash & Toppings: Whisk the egg and brush it over each bagel. Sprinkle with your favorite toppings for that extra burst of flavor.
  6. Bake to Golden Goodness: Place the bagels on the prepared baking sheet and bake for 22-25 minutes, until they’re golden brown on top.
  7. Cool & Enjoy: Let them cool before slicing and serving. This is the moment to savor your creation!

A Few of My Favorite Tips

Here are some insider tips to make your bagel-making experience even better:

  • Thick Greek Yogurt: Opt for a thicker consistency to avoid a sticky dough.
  • Experiment with Toppings: Don’t be afraid to mix and match toppings for unique flavors. Garlic onion protein bagels, anyone?
  • Flour Your Hands: Lightly flour your hands to prevent the dough from sticking while shaping the bagels.

How I Like to Serve This

Personally, I love serving these bagels with a dollop of cream cheese and a sprinkle of everything bagel seasoning. For a sweet option, try spreading some almond butter and topping with banana slices—it’s a deliciously balanced breakfast or snack.

Storing & Reheating (If There’s Any Left!)

If you have any leftovers, store the bagels in an airtight container at room temperature for up to two days. For longer storage, pop them in the freezer. To reheat, simply toast them for a few minutes until warm and crispy.

Greek Yogurt Bagels: A High-Protein Twist on a Classic Favorite

Prep Time 10 minutes
Cook Time 25 minutes
Total Time 35 minutes
Servings 4 bagels
Calories 200
These Greek yogurt bagels are a delicious and protein-packed twist on a classic favorite, perfect for breakfast or a snack.

Ingredients

Dry Ingredients

  • 1 cup all-purpose flour (or substitute with whole wheat flour)
  • 2 tsp baking powder
  • ¼ tsp salt

Wet Ingredients

  • 1 cup greek yogurt (thick consistency recommended)
  • 1 egg for egg wash

Optional Toppings

  • everything bagel seasoning, cinnamon, shredded cheese, garlic & herbs, chocolate chips (to taste)

Instructions 

  • Preheat oven to 400°F and line a baking sheet.
  • Whisk flour, baking powder, and salt in a bowl.
  • Stir in Greek yogurt until dough forms, then knead.
  • Shape dough into bagels and create holes in the center.
  • Brush with egg wash and add toppings.
  • Bake for 22-25 minutes until golden brown.

Notes

For a sweeter bagel, consider adding chocolate chips or cinnamon.
Calories: 200kcal
Cost: $5.00
Course: Breakfast
Cuisine: Greek
Keyword: yogurt

Picture this: a crisp Chicago morning, the city slowly waking up as the sun peeks through the skyline. In my kitchen studio, the aroma of freshly baked biscuits fills the air, reminding me of the weekends spent with my grandmother. She taught me that breakfast isn’t just a meal; it’s a moment to connect. With that in mind, I’m thrilled to share my Breakfast Protein Biscuits—a recipe that’s as comforting as it is energizing, perfect for starting your day right.

Why You’ll Absolutely Love This Recipe

  • It’s an Egg Biscuits Recipe that’s packed with protein, keeping you full and fueled.
  • These biscuits are a breeze to make—an Easy Prep Breakfast Idea that feels like a little kitchen victory!
  • Perfect for Meal Prep Breakfast For Kids or adults, making them a versatile choice for busy mornings.
  • They’re an excellent option for Easy Freezer Breakfast Ideas, ensuring you have a delicious breakfast ready whenever you need it.

Simple Ingredients for a Delicious Treat

Let’s talk about these ingredients. We’re using plain 2% Greek yogurt and eggs as the base, giving these biscuits a rich, creamy texture. The blend of all-purpose flour and ground flaxseed adds body and heartiness, while baking powder ensures they rise beautifully. A hint of garlic powder and optional red pepper flakes bring a subtle kick, making each bite exciting.

Spinach adds a lovely green hue and nutrients, while chives lend a fresh, oniony note. We’re using two types of cheese—cheddar for its sharpness and feta for a creamy tang. For the protein, diced ham and Italian chicken sausage are the stars, and sun-dried tomatoes provide a sweet, chewy contrast. Dried basil ties all these flavors together, creating a biscuit that’s hearty and wholesome.

You’ll find the full ingredient list with exact measurements in the recipe card below!

Let’s Make Some Magic: Step-by-Step

Ready to bake? Here’s how we do it! Start by preheating your oven to 375°F (190°C). Line a baking sheet or grease a muffin tin—whichever you prefer.

In a large bowl, whisk together the yogurt and eggs until smooth. This is our wet base. Next, add the flour, flaxseed, baking powder, salt, garlic powder, and red pepper flakes. Stir until everything is just combined—no overmixing!

Here comes the fun part: fold in your choice of mix-ins. Whether you’re in the mood for the savory ham and cheese or the Mediterranean-inspired combo, the choice is yours.

Using a ⅓ cup measure, scoop the dough and place it on your prepared sheet or fill the muffin wells. Sprinkle the reserved cheese or feta on top, then bake for 25 minutes until the biscuits are golden and firm. Let them cool for about 10 minutes before serving or storing.

A Few of My Favorite Tips

Here’s a little secret: if you’re using fresh basil, add it after baking for a burst of freshness. Also, when wilting the spinach, make sure to squeeze out as much moisture as possible to prevent soggy biscuits.

Want to make these Healthy Breakfast Biscuits even more nutritious? Swap out half of the all-purpose flour for whole wheat flour.

How I Like to Serve This

I love serving these biscuits warm, with a side of fresh fruit or a simple green salad. They’re also fantastic on their own as Grab And Go High Protein Snacks, perfect for those rushed mornings.

Storing & Reheating (If There’s Any Left!)

To store, let the biscuits cool completely before placing them in an airtight container. They’ll keep in the fridge for up to a week. For longer storage, freeze them individually wrapped for up to three months. To reheat, simply warm them in the oven or microwave until heated through.

Breakfast Protein Biscuits

Prep Time 15 minutes
Cook Time 25 minutes
Total Time 40 minutes
Servings 12 biscuits
Calories 350
Start your day with these hearty and nutritious protein-packed biscuits, perfect for breakfast or a snack!

Ingredients

Wet Ingredients

  • 1.75 cups plain 2% greek yogurt
  • 4 large eggs (room temp)

Dry Ingredients

  • 2.5 cups all-purpose flour
  • 0.25 cup ground flaxseed
  • 1 tbsp baking powder
  • 2 tsp salt
  • 1 tsp garlic powder
  • 0.5 tsp red pepper flakes (optional)

Mix-ins

  • 1.5 cups spinach, wilted & squeezed dry
  • 0.5 cup chives, chopped
  • 1.5 cups cheddar cheese (½ cup reserved)
  • 2 cups diced ham
  • 2 cups cooked italian chicken sausage, crumbled
  • 0.5 cup sun-dried tomatoes, chopped
  • 1.5 cups feta (½ cup reserved)
  • 2 tsp dried basil (or ¼ cup fresh, added after baking)

Instructions 

  • Preheat oven to 375°F (190°C) and prepare baking sheet or muffin tin.
  • Whisk yogurt and eggs until smooth.
  • Stir in flour, flaxseed, baking powder, salt, garlic powder, and red pepper flakes until just combined.
  • Fold in ham and cheese or Mediterranean mix-ins.
  • Scoop ⅓ cup of dough per biscuit onto the sheet or into muffin wells.
  • Sprinkle reserved cheese or feta and bake for 25 mins until golden.

Notes

These biscuits can be frozen for later use; just reheat before serving.
Calories: 350kcal
Cost: $15.00
Course: Breakfast
Cuisine: American
Keyword: Protein

There’s something magical about a dish that brings together the best of breakfast and the joy of snacking. Imagine a lazy Sunday morning in Chicago, the sun barely peeking through my kitchen window, as the aroma of crispy hashbrowns and savory sausage wafts through the air. These Crispy Hashbrown Sausage Bites are more than just a snack—they’re a warm hug on a plate, a reminder of family breakfasts and cozy brunches with friends. Crafted with love and a dash of nostalgia, they are my go-to for creating those small moments of joy that food can bring.

Why You’ll Absolutely Love This Recipe

  • It’s so easy, it feels like a little kitchen victory!
  • Perfect for any occasion, whether it’s a casual snack or a part of your Small Brunch Menu Ideas.
  • These bites are versatile and can be adapted to suit your taste preferences.
  • They bring the comfort of breakfast into any hour of the day.
  • They’re an excellent choice for Easy Brunch Food For A Crowd.

Simple Ingredients for a Delicious Treat

In the world of culinary delights, sometimes simplicity reigns supreme. Each ingredient in these bites plays its part in creating a symphony of flavors and textures. The hashbrowns provide that irresistible crunch, while the sausage brings a hearty, savory note. I love using cheddar cheese for its rich, creamy texture that melts beautifully, but mozzarella works just as well if you prefer a milder taste. Breadcrumbs add a touch of structure, and an egg binds everything together in perfect harmony. Don’t forget to season with salt and pepper to bring out the best in each component.

You’ll find the full ingredient list with exact measurements in the recipe card below!

Let’s Make Some Magic: Step-by-Step

Ready to dive in? Let’s start by browning the sausage in a skillet over medium heat. As you break it apart, let the savory aromas fill your kitchen. Once cooked, drain the excess fat, and set it aside. In a large bowl, combine the thawed hashbrowns, cooked sausage, shredded cheese, breadcrumbs, egg, and a dash of salt and pepper. Mix until well combined, and shape the mixture into small, bite-sized balls.

Heat oil in a skillet over medium heat, and fry the bites until they’re golden and crispy on all sides—this should take about 4-5 minutes per side. Once cooked to perfection, drain them on paper towels. Serve them warm, perhaps with a dipping sauce of your choice to elevate the experience.

A Few of My Favorite Tips

Here’s a little secret: if you’re preparing these for a Breakfast Party Appetizers, you can make them ahead of time and freeze them. Just pop them in the oven to reheat, and they’ll be as crispy as ever. Also, feel free to experiment with different types of sausage to find your favorite flavor combination.

How I Like to Serve This

I love serving these bites with a side of sour cream or a spicy ketchup. They also pair beautifully with a light salad for a more balanced meal. If you’re planning a Sunday Brunch Food Ideas gathering, these bites can be the star of your table, alongside other delightful treats like my Funnel Cake Donuts or Caramel Apple Dessert Cups.

Storing & Reheating (If There’s Any Left!)

Should you find yourself with leftovers, these bites store wonderfully in an airtight container in the fridge for up to three days. To reheat, simply place them in a preheated oven at 350°F for about 10 minutes, or until they’re heated through. This way, they retain their delightful crispiness, ready to be enjoyed once more.

Crispy Hashbrown Sausage Bites

Prep Time 15 minutes
Cook Time 20 minutes
Total Time 35 minutes
Servings 4 servings
Calories 300
Deliciously crispy bites made with hashbrowns and sausage, perfect for snacking or as an appetizer.

Ingredients

Main Ingredients

  • 2 cups frozen hashbrowns, thawed
  • 0.5 lb sausage (pork or turkey)
  • 0.5 cup shredded cheese (cheddar or mozzarella)
  • 0.25 cup breadcrumbs
  • salt and pepper, to taste
  • 1 tbsp oil (for frying)

Instructions 

  • Brown sausage in a skillet, breaking it apart. Drain excess fat.
  • Combine hashbrowns, sausage, cheese, breadcrumbs, egg, salt, and pepper in a bowl.
  • Shape mixture into small balls.
  • Heat oil in a skillet and fry bites until golden and crispy, about 4-5 minutes per side.
  • Drain on paper towels and serve warm.

Notes

Serve with your favorite dipping sauce for extra flavor!
Calories: 300kcal
Cost: $10.00
Course: Appetizer
Cuisine: American
Keyword: Hashbrowns

Picture this: a crisp Chicago morning, where the streets are just beginning to stir, and the aroma of a hearty breakfast is gently coaxing you out of bed. As someone who has spent countless mornings in bustling kitchens, I’ve come to appreciate the quiet joy of a meal that practically cooks itself, allowing me to savor the moment. This easy crockpot breakfast recipe holds a special place in my heart. It reminds me of the weekends spent with family, where the kitchen was filled with laughter, and the table was a gathering place for stories and shared experiences. Whether you’re gearing up for a cozy family brunch or a football breakfast party, this dish is your ticket to a memorable morning.

Why You’ll Absolutely Love This Recipe

  • It’s the epitome of a “set it and forget it” meal, making it perfect for busy mornings.
  • The flavors meld beautifully overnight, giving you a breakfast that feels like a warm hug.
  • Great for entertaining, as it’s an easy breakfast for a crowd, ensuring everyone starts their day with a smile.
  • Versatile enough to cater to various tastes and dietary preferences.

Simple Ingredients for a Delicious Treat

In my years of cooking, I’ve learned that simplicity often leads to the most delightful results. This recipe is a testament to that. We’re working with ingredients that are not only easy to find but also bring a comforting richness to the table. Think of hearty potatoes, flavorful sausages, and creamy cheeses. These elements come together to create a breakfast that’s as satisfying as it is nourishing.

You’ll find the full ingredient list with exact measurements in the recipe card below!

Let’s Make Some Magic: Step-by-Step

Alright, let’s dive in. Imagine I’m right there with you, guiding you through each step. First, gather your ingredients—this is your mise en place, an essential part of any successful cooking adventure. Layer your potatoes, sausages, and cheese in the crockpot, letting each layer build upon the flavors of the last. Pour in the beaten eggs, ensuring they cover everything nicely. Set your crockpot on low, and let it work its magic overnight. In the morning, you’ll be greeted by a savory, aromatic breakfast that’s ready to serve.

A Few of My Favorite Tips

Here are some insider tips to elevate your dish: For an extra flavor kick, try adding diced bell peppers or onions. If you’re a fan of a little heat, a sprinkle of chili flakes or a dash of hot sauce can do wonders. And remember, the key to a perfect crockpot breakfast casserole is patience—let it cook low and slow for the best results.

How I Like to Serve This

When it comes to serving, I love to add a fresh twist. A handful of chopped herbs like parsley or chives can add a burst of color and freshness. Pair your breakfast with a side of fresh fruit or a simple green salad to balance the richness of the dish. Whether it’s a casual brunch or a more festive breakfast brunch party, this meal is sure to impress.

Storing & Reheating (If There’s Any Left!)

If you find yourself with leftovers, fear not! This dish stores beautifully. Simply transfer it to an airtight container and refrigerate for up to three days. When you’re ready to enjoy it again, reheat in the microwave or oven until warmed through. It’s a dish that keeps on giving, perfect for those busy weekday mornings when you need a quick, hearty start.

This breakfast is a crowd pleaser!

Prep Time 15 minutes
Cook Time 8 hours
Total Time 8 hours 15 minutes
Servings 8 servings
Calories 300
This easy crockpot breakfast is perfect for feeding a crowd and will keep everyone satisfied!

Ingredients

Breakfast Ingredients

  • 1 cup oats
  • 4 cups milk
  • 1 cup brown sugar

Instructions 

  • Combine oats, milk, and brown sugar in the crockpot.
  • Stir well to mix all ingredients.
  • Cover and cook on low for 8 hours.
  • Serve warm with toppings of choice.

Notes

For added flavor, consider adding fruits or nuts as toppings.
Calories: 300kcal
Cost: $15.00
Course: Breakfast
Cuisine: American
Keyword: crockpot

Picture this: It’s a crisp Chicago morning, and the sun is just peeking through the windows of my kitchen studio. There’s a comforting aroma wafting through the air, one that instantly transports me back to leisurely Sunday mornings with family, gathered around the breakfast table. These Crockpot Cheesy Breakfast Potatoes are more than just a meal; they are a warm hug on a plate, a simple pleasure that brings people together. Every time I make them, I’m reminded of the joy food can bring, and I’m excited to share this recipe with you.

Why You’ll Absolutely Love This Recipe

  • It’s so easy, it feels like a little kitchen victory!
  • Perfect for those lazy mornings when you want something hearty without the fuss.
  • A family favorite that’s sure to please even the pickiest eaters.
  • Great for any occasion: whether it’s an Easy Brunch Idea for Crock Pots or a Breakfast For A Potluck.
  • Let the crockpot do the work while you enjoy your morning coffee.

Simple Ingredients for a Delicious Treat

In my years of cooking, I’ve found that the best dishes often come from the humblest ingredients. These Crockpot Cheesy Breakfast Potatoes are no exception. Here’s why I love each of these ingredients:

  • **Frozen potatoes**: They are a lifesaver on busy mornings, offering the perfect texture without any peeling or chopping.
  • **Cooked ham**: Adds a delightful, savory note that pairs beautifully with the cheese.
  • **Onion and bell pepper**: These veggies bring a fresh crunch and a burst of color, making the dish as visually appealing as it is tasty.
  • **Heavy cream**: This is where the magic happens, giving the dish its creamy, indulgent texture.
  • **Cheddar cheese**: Because who doesn’t love that gooey, melty goodness?
  • **Seasonings**: Salt, garlic powder, and pepper—simple yet effective, enhancing the flavors without overpowering them.

You’ll find the full ingredient list with exact measurements in the recipe card below!

Let’s Make Some Magic: Step-by-Step

Now, let’s dive into making these delicious potatoes. Trust me, you’re going to love how easy it is:

  1. Start by generously spraying your slow cooker with cooking spray. This ensures nothing sticks and makes cleanup a breeze.
  2. Add the frozen potatoes, cooked ham, diced onion, bell pepper, heavy cream, salt, pepper, garlic powder, and half of the shredded cheddar cheese into the slow cooker. Stir gently to mix everything well. Top it all with the remaining cheese.
  3. Set your slow cooker to HIGH for 2 to 3 hours or LOW for 4 to 6 hours. Then, let it do its magic while you enjoy the rest of your morning!

A Few of My Favorite Tips

Here are some little nuggets of wisdom to make this dish even better:

  • For an extra kick, try adding a pinch of cayenne pepper or some chopped jalapeños.
  • If you’re a fan of crispy edges, transfer the cooked potatoes to a baking dish and broil for a few minutes before serving.
  • Want to make it vegetarian? Just skip the ham and add some sautéed mushrooms for a meaty texture.

How I Like to Serve This

These potatoes are a star on their own, but I love serving them alongside a simple green salad or some scrambled eggs for a complete meal. They’re also fantastic as a base for a breakfast burrito—just wrap them in a warm tortilla with some salsa and avocado!

Storing & Reheating (If There’s Any Left!)

If you’re lucky enough to have leftovers, store them in an airtight container in the fridge for up to 3 days. To reheat, simply pop them in the microwave or warm them up in the oven until heated through. They taste just as good, if not better, the next day!

Crockpot Cheesy Breakfast Potatoes

Prep Time 10 minutes
Cook Time 3 hours
Total Time 3 hours 10 minutes
Servings 6 servings
Calories 350
A delicious and easy breakfast dish made with cheesy potatoes, ham, and veggies, perfect for busy mornings.

Ingredients

Frozen Ingredients

  • 16 ounces frozen potatoes
  • 8 ounces cooked ham
  • 1/3 cup onion, diced
  • 1 small bell pepper, diced
  • 1/2 cup heavy cream
  • 2 cups shredded cheddar cheese
  • 1/2 teaspoon salt (or more)
  • 1/2 teaspoon garlic powder
  • 1/4 teaspoon pepper

Instructions 

  • Spray the slow cooker generously with cooking spray.
  • Add all ingredients except half of the cheese to the slow cooker and stir gently. Top with remaining cheese.
  • Cook on HIGH for 2 to 3 hours or LOW for 4 to 6 hours.

Notes

For extra flavor, consider adding spices or herbs of your choice.
Calories: 350kcal
Cost: $15.00
Course: Breakfast
Cuisine: American
Keyword: Potatoes

There’s something truly magical about waking up to the aroma of a home-cooked meal. It’s like a gentle hug, coaxing you to start your day with warmth and comfort. For me, this Crockpot Breakfast Casserole is more than just a dish; it’s a cherished tradition that brings back the sweet memories of family breakfasts. Growing up in a bustling household in Chicago, our mornings were always filled with laughter, stories, and the enticing smell of breakfast wafting through the air. This casserole embodies that spirit of connection and joy, making mornings feel special, even in the midst of a busy schedule.

Why You’ll Absolutely Love This Recipe

  • It’s a time-saver, letting you focus on what truly matters in the morning—enjoying those precious moments with loved ones.
  • The flavors meld together overnight, creating a symphony of taste that’s both hearty and satisfying.
  • It’s incredibly versatile; whether you’re hosting a brunch or feeding a hungry family, it’s a guaranteed hit.
  • Perfect for meal prep, ensuring you have a delicious start to your day all week long.

Simple Ingredients for a Delicious Treat

Let’s talk about the ingredients that make this dish shine. We’re using breakfast sausage as the star of the show, bringing that savory richness we all crave in the morning. The bell peppers and onions add a burst of color and a sweet, subtle crunch that complements the sausage perfectly. And then there are the eggs, providing a creamy, fluffy texture when mixed with sour cream. Finally, a generous sprinkle of shredded cheese ties everything together with its gooey, melty goodness. As a chef, I’ve learned that great cooking often comes down to the quality and harmony of your ingredients.

You’ll find the full ingredient list with exact measurements in the recipe card below!

Let’s Make Some Magic: Step-by-Step

Ready to create something special? Let’s dive in together! Start by cooking the breakfast sausage in a pan. As the sausage sizzles, its rich aroma fills your kitchen, setting the stage for the deliciousness to come. Once cooked, remove it from the pan and add in your diced bell peppers and onions. Sautéing these helps unlock their flavors, turning them sweet and savory.

Next, add all the cooked ingredients into your crockpot. In a separate bowl, combine the eggs, sour cream, salt, and pepper. Use a hand mixer to beat until the mixture is smooth. This step ensures a creamy, cohesive texture in your casserole.

Pour the beaten eggs into the crockpot and add the shredded cheese. Gently fold everything together, ensuring every bite will be packed with flavor. Now, set your crockpot on low for 6-8 hours, or overnight. Imagine waking up to a kitchen filled with the comforting scent of breakfast, ready to greet you when you rise.

A Few of My Favorite Tips

Here’s a little chef’s secret: If you want an extra depth of flavor, try using a mix of sharp cheddar and mozzarella for the cheese. And don’t be afraid to experiment with spices—some paprika or a dash of hot sauce can add a delightful kick!

How I Like to Serve This

This casserole pairs beautifully with a side of fresh fruit or a simple green salad, adding a refreshing balance to the richness. I love serving it with a dollop of salsa or a sprinkle of fresh herbs like chives or parsley, giving it a vibrant finish.

Storing & Reheating (If There’s Any Left!)

If you happen to have leftovers, they store wonderfully! Simply place them in an airtight container and refrigerate for up to 3 days. To reheat, pop a portion into the microwave or warm it gently in the oven at 300°F until heated through. It’s like enjoying a little piece of morning magic all over again.

Crockpot Breakfast Casserole

Prep Time 20 minutes
Cook Time 8 hours
Total Time 8 hours 20 minutes
Servings 8 servings
Calories 450
A hearty and delicious breakfast casserole that cooks overnight in your crockpot, perfect for busy mornings.

Ingredients

Meat

  • 2 pounds breakfast sausage

Vegetables

  • 0.5 medium yellow onion, diced
  • 0.5 medium green bell pepper, diced
  • 0.5 medium red bell pepper, diced

Dairy

  • 12 large egg
  • 1 cup sour cream ((equals to 8 ounces))
  • 2 cup shredded cheese
  • 1 teaspoon salt
  • 0.5 teaspoon black pepper

Instructions 

  • Cook the breakfast sausage, then sauté the bell peppers and onions.
  • Add cooked ingredients to the crockpot. Mix eggs, sour cream, salt, and pepper until smooth.
  • Pour beaten eggs into the crockpot with shredded cheese and fold together.
  • Cook on low for 6-8 hours or overnight.

Notes

For extra flavor, sauté the vegetables before adding them to the crockpot.
Calories: 450kcal
Cost: $15.00
Course: Breakfast
Cuisine: American
Keyword: Breakfast Sausage

There’s something magical about waking up to the comforting aroma of a delicious breakfast that’s been slowly cooking overnight. I remember the first time I tried a crockpot breakfast casserole. It was a cold Chicago morning, and I woke up to the enticing smell of sausage, cheese, and potatoes wafting through the house. It reminded me of the warmth of family breakfasts during the holidays, where everyone gathered around the table, sharing laughter and stories. Today, I’m excited to share with you my Crockpot Sausage and Potato Breakfast Casserole—a dish that brings back those cherished memories and creates new ones every time it’s served.

Why You’ll Absolutely Love This Recipe

  • It’s so easy, it feels like a little kitchen victory!
  • Perfect for an Overnight Crockpot Breakfast, letting you wake up to a ready-to-serve meal.
  • Combines the heartiness of potatoes with the savory delight of sausage and cheese.
  • Ideal for feeding a crowd or meal prepping for the week.
  • Customizable with your favorite toppings or additional ingredients.

Simple Ingredients for a Delicious Treat

This casserole uses ingredients that are as humble as they are delicious. I love using breakfast sausage for its rich flavor, but turkey or chicken sausage works beautifully if you’re looking for a lighter option. The potatoes are the heart of this dish, providing that classic comfort food feel. I recommend using medium potatoes, peeled and diced into small cubes for even cooking. The addition of onion adds a subtle sweetness, while shredded cheddar cheese brings everything together with its creamy, gooey goodness. And of course, the eggs and milk mixture ensures everything sets perfectly. Remember, salt and pepper are your best friends here, enhancing all the flavors in the pot.

You’ll find the full ingredient list with exact measurements in the recipe card below!

Let’s Make Some Magic: Step-by-Step

Cooking this casserole is as easy as it gets. Start by browning the sausage in a skillet over medium heat until it’s fully cooked, breaking it into crumbles. Drain any excess fat and set aside. Next, spray your crockpot with non-stick cooking spray or lightly grease it with butter or oil. Layer the bottom with the diced potatoes, followed by the cooked sausage and diced onions. In a mixing bowl, whisk together the eggs, milk, salt, and pepper, then pour this mixture over the sausage and potatoes in the crockpot. Sprinkle the shredded cheddar cheese on top, cover, and cook on low for 8 hours or until the potatoes are tender and the eggs are set. Serve warm and enjoy!

A Few of My Favorite Tips

Here’s a little secret from my kitchen to yours: try adding some diced bell peppers or spinach for an extra pop of color and nutrients. If you’re feeling adventurous, a dash of smoked paprika or garlic powder can elevate the flavor profile even further. And don’t forget, if you love a bit of heat, a sprinkle of red pepper flakes can do wonders.

How I Like to Serve This

This casserole is a star on its own, but I love serving it with a side of fresh fruit or a simple green salad to balance the richness. For those who enjoy a bit of zest, a dollop of sour cream or a splash of hot sauce works wonders. And if you’re hosting a brunch, why not pair it with a slice of my favorite pumpkin bread for a sweet finish?

Storing & Reheating (If There’s Any Left!)

If you have leftovers, this casserole stores beautifully. Simply transfer it to an airtight container and refrigerate for up to 3 days. To reheat, place a serving in the microwave for a couple of minutes or warm it in the oven at 350°F until heated through. This dish also freezes well, making it a great option for future meals. Just be sure to thaw it in the refrigerator overnight before reheating.

Crockpot Sausage and Potato Breakfast Casserole

Prep Time 15 minutes
Cook Time 8 hours
Total Time 8 hours 15 minutes
Servings 6 servings
Calories 450
A hearty and delicious breakfast casserole made with sausage, potatoes, and cheese, perfect for busy mornings!

Ingredients

Main Ingredients

  • 1 lb breakfast sausage (turkey or chicken sausage)
  • 4 medium potatoes, peeled and diced
  • 1 small onion, diced
  • 1 cup shredded cheddar cheese
  • 6 large eggs
  • 1 cup milk
  • salt and pepper to taste

Instructions 

  • Brown the sausage in a skillet, drain fat, and set aside.
  • Spray the crockpot with non-stick spray.
  • Layer potatoes, sausage, and onions in the crockpot.
  • Whisk eggs, milk, salt, and pepper; pour over the mixture.
  • Sprinkle cheese on top and cook on low for 8 hours.
  • Serve warm with optional toppings.

Notes

For extra flavor, add your favorite herbs or spices!
Calories: 450kcal
Cost: $15.00
Course: Breakfast
Cuisine: American
Keyword: Sausage

There’s something magical about waking up to the aroma of a warm, hearty breakfast already waiting for you. As a chef who has spent countless mornings in bustling kitchens, I’ve always believed that breakfast should be a moment of joy, not a rush. My Crockpot Overnight Oatmeal brings back fond memories of those leisurely mornings at home with my family, sharing stories and laughter over steaming bowls of oatmeal. It’s a comforting ritual that I hope to share with you, bringing a little piece of my kitchen to yours.

Why You’ll Absolutely Love This Recipe

  • It’s so easy, it feels like a little kitchen victory!
  • A delightful solution for an Easy Crowd Breakfast or a Brunch Crockpot gathering.
  • The perfect blend of tradition and innovation, with a warm, creamy texture that hugs your soul.
  • Customizable to suit any taste—add your favorite fruits, nuts, or sweeteners.
  • Effortlessly cook while you sleep, and wake up to a breakfast that’s ready to go.

Simple Ingredients for a Delicious Treat

One of the joys of this recipe is its simplicity. With just a handful of ingredients, you can create something truly special. I love using rolled oats for their hearty texture, and the combination of water or milk can be adjusted to your preference. The touch of brown sugar and cinnamon adds a warm, comforting sweetness, while a pinch of salt enhances the flavors beautifully. And don’t forget the optional diced apples or berries—they add a burst of freshness that brightens every bite.

You’ll find the full ingredient list with exact measurements in the recipe card below!

Let’s Make Some Magic: Step-by-Step

Ready to dive in? Let’s make some magic together! Start by combining the rolled oats, your choice of water or milk, brown sugar, cinnamon, and salt in your Crockpot. Give it a good stir to ensure everything’s well mixed. If you’re adding diced apples or berries, now’s the time to gently fold them in. Cover your Crockpot and set it to cook on low for 6-8 hours. Go ahead, get some rest! In the morning, just stir your oatmeal and serve with your favorite toppings like nuts, honey, yogurt, or additional fruit. It’s as easy as that, and I’ll be cheering you on every step of the way!

A Few of My Favorite Tips

Here’s a little chef’s secret: for an extra creamy texture, try using a mix of milk and water. And if you’re in the mood for something a bit more indulgent, a splash of vanilla extract or a sprinkle of nutmeg can elevate the flavors even further. Remember, this is your canvas—don’t be afraid to experiment and make it your own.

How I Like to Serve This

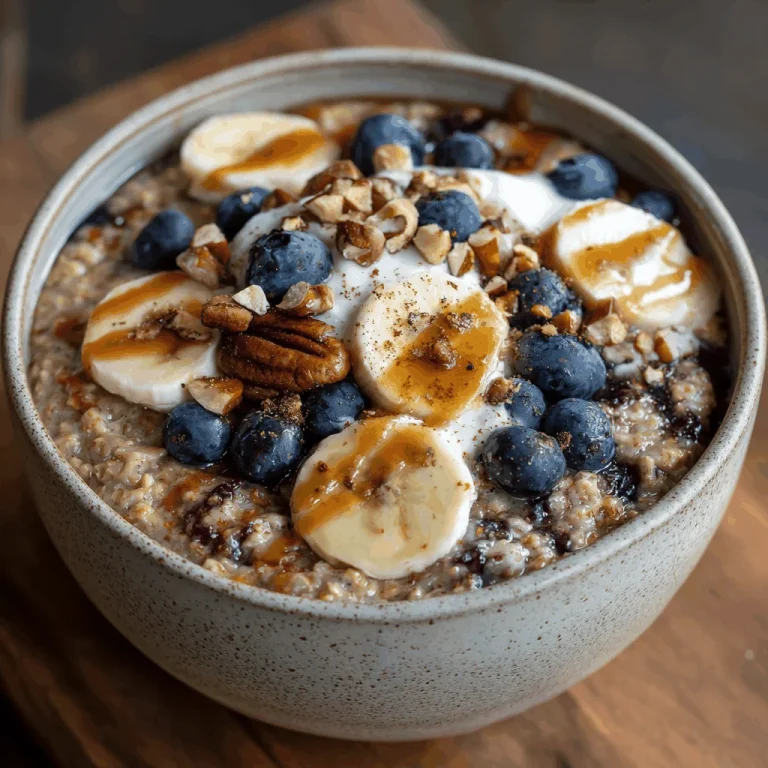
Personally, I love serving this oatmeal with a dollop of Greek yogurt and a drizzle of honey. The tanginess of the yogurt balances the sweetness beautifully, while the honey adds a touch of luxury. For a bit of crunch, a handful of toasted almonds or walnuts does the trick. Whether you’re enjoying it alone or sharing it with family, it’s a meal that brings warmth and joy to the table.

Storing & Reheating (If There’s Any Left!)

If you find yourself with leftovers, simply store them in an airtight container in the refrigerator for up to 3 days. When you’re ready to enjoy it again, just reheat in the microwave or on the stovetop with a splash of milk or water to loosen it up. It’s the gift that keeps on giving!

And if you’re in the mood for more cozy breakfast ideas, why not explore some of my other favorites? Check out **Why My Family Can’t Get Enough of This Pumpkin Bread**, **Fall in Love with This Moist Pumpkin Bread Recipe**, and **Why This Pumpkin Bread Will Become Your New Fall Favorite**. Happy cooking, and here’s to many delicious mornings ahead!

Crockpot Overnight Oatmeal

Prep Time 10 minutes
Cook Time 8 hours
Total Time 8 hours 10 minutes
Servings 6 servings
Calories 300
A warm and hearty breakfast that cooks overnight in your Crockpot, perfect for busy mornings.

Ingredients

Dry Ingredients

  • 2 cups rolled oats
  • 4 cups water or milk (or a combination)
  • 1/2 cup brown sugar (adjust to taste)
  • 1 teaspoon cinnamon
  • 1/2 teaspoon salt
  • 1 cup diced apples or berries (optional)

Instructions 

  • Combine oats, water or milk, brown sugar, cinnamon, and salt in the Crockpot.
  • Add diced apples or berries if using.
  • Cover and cook on low for 6-8 hours overnight.
  • Stir the oatmeal in the morning and serve with toppings.

Notes

Customize with your favorite toppings for added flavor!
Calories: 300kcal
Cost: $10
Course: Breakfast
Cuisine: American
Keyword: oats

There’s something about fall that warms my heart and fills my kitchen with joy. The crisp air, the vibrant colors, and the comforting flavors of the season inspire me to create recipes that bring people together. One of my absolute favorites is the Pumpkin Chocolate Chip Muffin Recipe. These muffins are more than just a treat; they’re a reminder of family gatherings, bustling kitchens, and the simple pleasure of sharing good food. Every bite is like a warm hug, combining the rich, earthy taste of pumpkin with the decadent sweetness of chocolate chips. It’s a recipe that never fails to make me smile, and I’m thrilled to share it with you.

Why You’ll Absolutely Love This Recipe

  • It’s so easy, it feels like a little kitchen victory!
  • The perfect blend of spices makes it taste like autumn in every bite.
  • Moist and fluffy, these muffins are a surefire crowd-pleaser.
  • They’re versatile enough to enjoy as a breakfast treat or a delightful dessert.
  • Plus, who doesn’t love the combination of pumpkin and chocolate?

Simple Ingredients for a Delicious Treat

Creating these Pumpkin Chocolate Chip Muffins is like painting with flavors. Each ingredient plays a vital role in crafting the perfect muffin. I love using pumpkin puree for its natural sweetness and moisture, which is key to making these muffins irresistibly soft. The spices, cinnamon and pumpkin pie spice, add warmth and depth, turning each bite into a cozy moment. And let’s not forget the chocolate chips—they’re the little bursts of joy that make this recipe truly special. When choosing chocolate chips, I recommend using semi-sweet to balance the sweetness beautifully.

You’ll find the full ingredient list with exact measurements in the recipe card below!

Let’s Make Some Magic: Step-by-Step

Let’s get our hands dirty and create something delicious, shall we? First, preheat your oven to 375°F and line a 12-cup muffin tin with liners. This is the perfect time to get excited about the delicious aroma that’s about to fill your kitchen.

In a bowl, sift together the flour, baking soda, baking powder, cinnamon, pumpkin pie spice, and salt. This step ensures that our muffins are light and airy. Set it aside and get ready to mix the wet ingredients.

In another bowl, whisk together the oil, granulated sugar, brown sugar, pumpkin puree, eggs, and whole milk. The mixture should be smooth and beautifully orange. Now, gently fold the dry ingredients into the wet ingredients. Remember, the key here is to not overmix—just combine until you no longer see flour streaks. Finally, stir in those lovely chocolate chip morsels.

Using a 1/3 measuring cup, scoop the batter into your muffin tins, filling each about 2/3 full. Bake for 20-25 minutes or until a toothpick runs clean through the muffins. Let them cool on a rack, and then it’s time to enjoy!

A Few of My Favorite Tips

Here’s a little secret from my kitchen to yours: if you prefer a nutty crunch, sprinkle some chopped nuts on top before baking to create your own Nut-topped Pumpkin Muffins. Also, for a richer flavor, try using coconut oil instead of vegetable oil. It adds a subtle depth that pairs beautifully with pumpkin.

How I Like to Serve This

These muffins are perfect on their own, but I love serving them warm with a dollop of whipped cream or a scoop of vanilla ice cream for an indulgent dessert. They’re also fantastic with a cup of hot coffee or spiced tea for a comforting afternoon snack.

Storing & Reheating (If There’s Any Left!)

Should you find yourself with leftovers, store these muffins in an airtight container at room temperature for up to 3 days. For longer storage, freeze them for up to 3 months. Just pop them in the microwave or oven to reheat, and they’ll taste as fresh as the day you baked them.

If you’re as passionate about pumpkin as I am, you might also enjoy exploring other delightful recipes like Why Your Fall Needs This Pumpkin Banana Chocolate Chip Bread and Fall in Love with This Moist Pumpkin Bread Recipe. Happy baking!

Pumpkin Chocolate Chip Muffins

Prep Time 15 minutes
Cook Time 25 minutes
Total Time 40 minutes
Servings 12 muffins
Calories 200
Deliciously moist pumpkin muffins packed with chocolate chips, perfect for a cozy treat.

Ingredients

Dry Ingredients

  • 1.33 cup all-purpose flour (sifted)
  • 1 tsp baking soda
  • 0.5 tsp baking powder
  • 0.5 tsp cinnamon
  • 1.5 tsp pumpkin pie spice
  • 1 pinch salt

Wet Ingredients

  • 0.33 cup vegetable oil
  • 0.5 cup granulated sugar
  • 0.25 cup brown sugar
  • 1.33 cup pumpkin puree
  • 2 large eggs
  • 0.25 cup whole milk
  • 1.5 cup chocolate chip morsels

Instructions 

  • Preheat oven to 375°F and line muffin tin.
  • Sift together dry ingredients in a bowl.
  • Whisk wet ingredients in another bowl.
  • Fold dry into wet ingredients, then mix in chocolate chips.
  • Scoop batter into muffin tins, filling 2/3 full.
  • Bake for 20-25 minutes until a toothpick comes out clean.

Notes

Enjoy warm or cool for the best flavor!
Calories: 200kcal
Cost: $10.00
Course: Snack
Cuisine: American
Keyword: Pumpkin