Author

Mike

Browsing

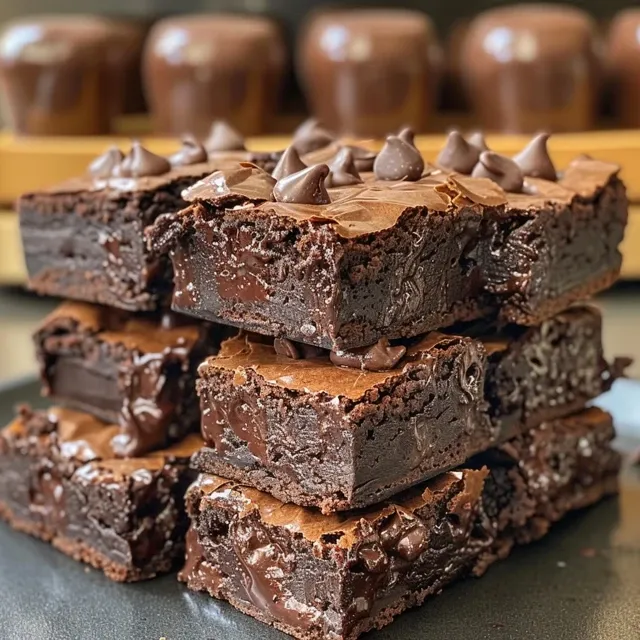
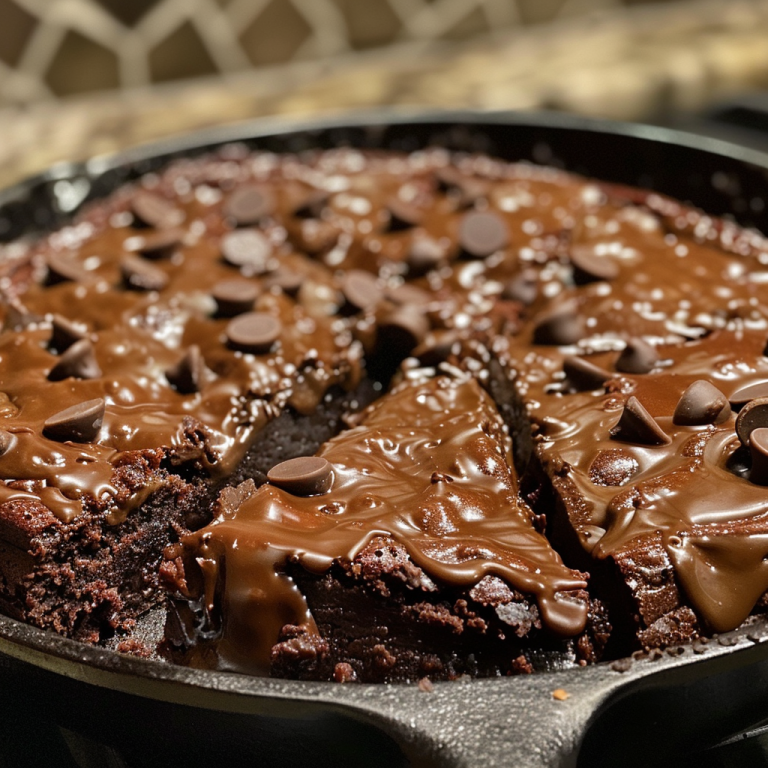
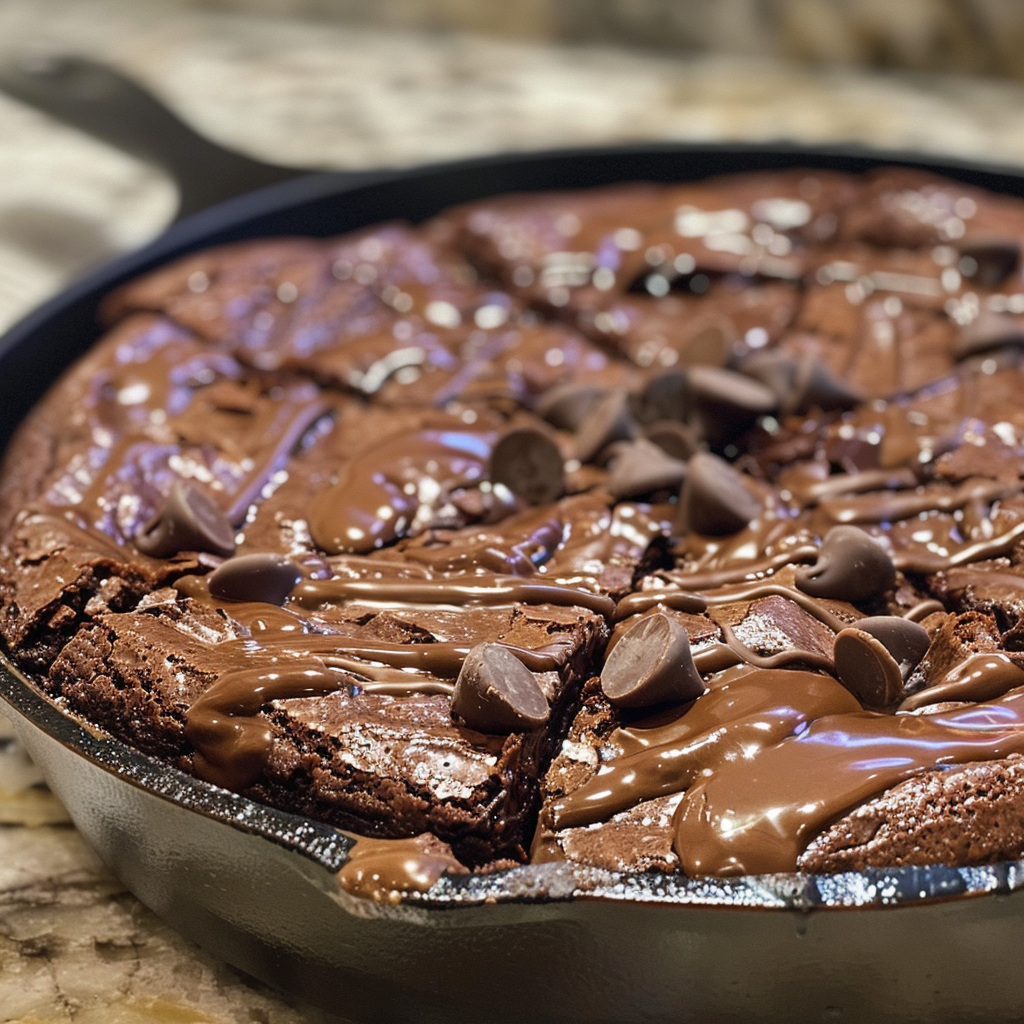
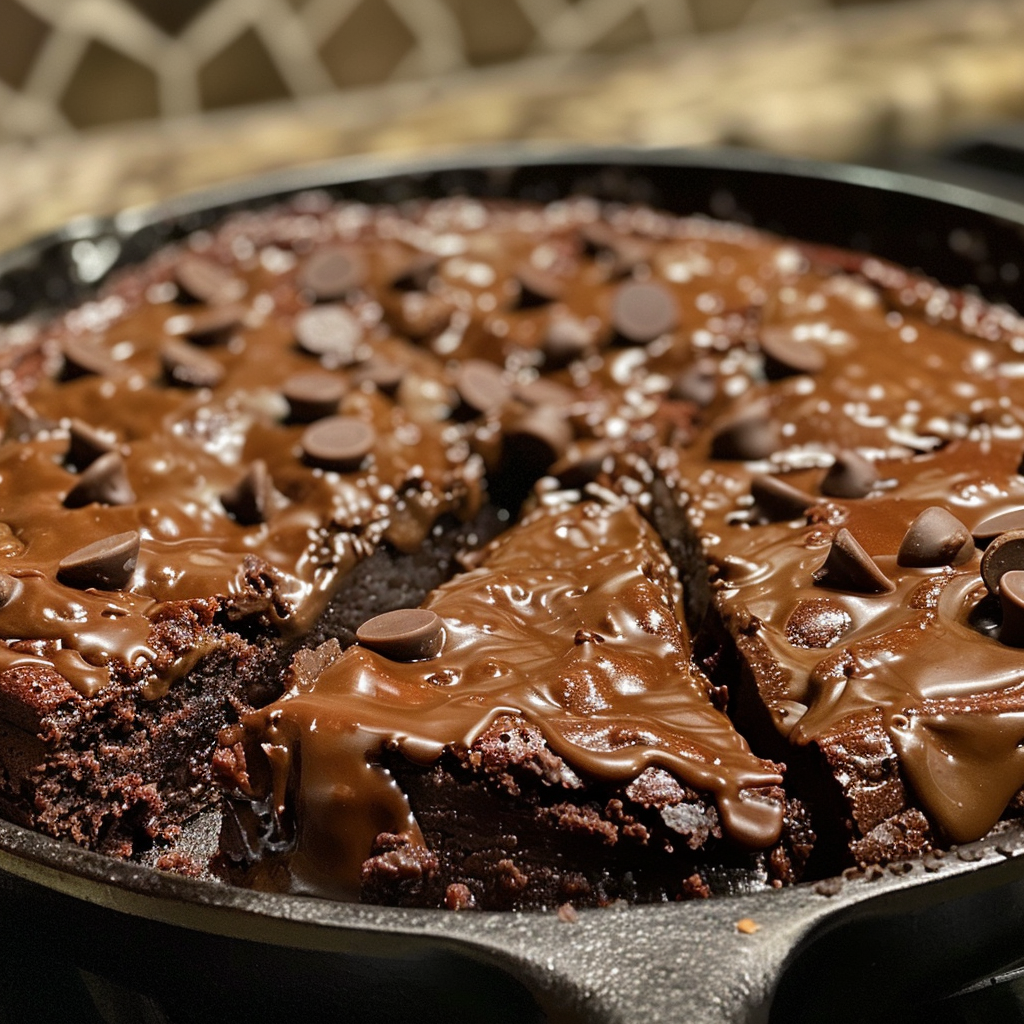
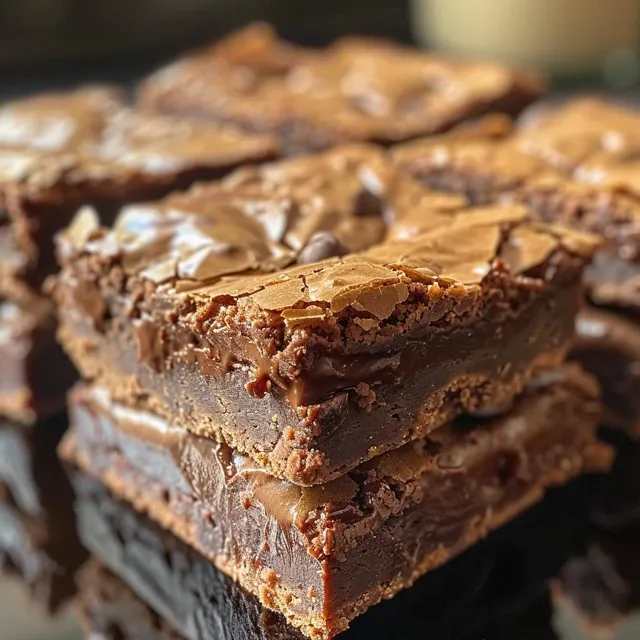
Are you ready to experience the ultimate chocolate indulgence? Skillet brownies are not just a dessert; they are a delightful culinary adventure that brings the warmth of home cooking straight to your table. With simple ingredients and a straightforward cooking method, these fudgy, gooey treats are perfect for chocolate lovers who crave a comforting dessert that’s sure to impress. Let’s dive into the world of skillet brownies and explore why this recipe will become your new favorite!
Why You’ll Love This Recipe

  • Quick and easy: This recipe takes less than an hour from start to finish, making it perfect for spontaneous dessert cravings.
  • Fudgy texture: The combination of melted chocolate and butter creates a rich, moist brownie that melts in your mouth.
  • One-pan wonder: Cooking in a skillet means less cleanup, and you can serve directly from the pan for a rustic touch.
  • Customizable: With various mix-ins and toppings, you can create a unique brownie experience every time.
  • Perfect for sharing: The large skillet yields generous portions, making it ideal for gatherings and celebrations.

Ingredients Breakdown

Here’s what you need to whip up these delicious skillet brownies:

  • 1/2 cup unsalted butter: This lends richness and moisture to your brownies.
  • 7 ounces semisweet chocolate: The star of the show! Choose high-quality chocolate for the best flavor.
  • 3/4 cup granulated sugar: Sweetens the brownies while also contributing to their fudgy texture.
  • 3 large eggs: Eggs help bind the ingredients and provide structure.
  • 1 teaspoon pure vanilla extract: Enhances the chocolate flavor and adds depth.
  • 1/2 cup Dutch-processed cocoa: Creates a rich, dark chocolate flavor.
  • 1/2 cup all-purpose flour: Provides stability without making the brownies too cake-like.
  • 1/2 teaspoon salt: Balances sweetness and enhances flavor.

Ingredient Substitutions

  • Dairy-free option: Substitute unsalted butter with coconut oil or vegan butter.
  • Gluten-free option: Use a gluten-free all-purpose flour blend in place of regular flour.
  • Egg-free option: Replace each egg with 1/4 cup unsweetened applesauce or a flax egg (1 tablespoon flaxseed meal + 2.5 tablespoons water).
  • Chocolate alternatives: Use dark chocolate or a mix of dark and milk chocolate for a different flavor profile.

Expert Pro Tips for Perfect Brownies

  • Use room temperature ingredients: This helps the batter mix smoothly and evenly, creating a consistent texture.
  • Don’t overmix: Mix until ingredients are just combined to avoid tough brownies.
  • Check for doneness: Insert a toothpick into the center; it should come out with a few moist crumbs, not wet batter.
  • Let them cool: Allow brownies to cool in the skillet for at least 10 minutes before slicing for cleaner edges.
  • Enhance with toppings: Top with whipped cream, ice cream, or a sprinkle of sea salt for added flavor.
  • Experiment with mix-ins: Consider adding nuts, chocolate chips, or caramel swirls for extra texture and taste.
  • Skillet size matters: Use a 10-inch skillet for optimal baking; smaller skillets require shorter baking times.
  • Store properly: Keep leftovers in an airtight container to maintain freshness.

Avoid Common Mistakes

Even the best cooks can make mistakes. Here are some common pitfalls and how to avoid them:

  • Overbaking: Check your brownies a few minutes before the recommended time to ensure they stay fudgy.
  • Using cold ingredients: Cold butter or eggs can lead to uneven mixing; always use room temperature.
  • Skipping the cooling step: Cutting into warm brownies can result in a gooey mess; patience is key.
  • Ignoring ingredient quality: Cheap chocolate can result in bland brownies; invest in quality ingredients.

Delicious Variations to Try

Feeling adventurous? Here are some fun variations to customize your skillet brownies:

  • Oreo Skillet Brownies: Fold in crushed Oreos or layer them on top before baking for a cookies-and-cream twist.
  • Nutty Brownies: Add chopped walnuts or pecans for a crunchy texture contrast.
  • Mint Chocolate: Incorporate mint extract and chocolate chips for a refreshing flavor.
  • Peanut Butter Swirl: Dollop peanut butter on top of the batter before baking and swirl it for a rich, nutty flavor.

Storage and Make-Ahead Instructions

Want to prepare ahead of time? Here’s how to store and make your skillet brownies last:

  • Room temperature: Store in an airtight container for up to 3 days.
  • Refrigeration: For longer storage, keep in the fridge for up to a week.
  • Freezing: Freeze individual slices wrapped tightly in plastic wrap and then foil for up to 3 months.
  • Reheating: Warm in the microwave for 10-15 seconds or in the oven at 350°F until warmed through.

Frequently Asked Questions

Got questions? Here are some common inquiries about skillet brownies:

  • Can I use a different skillet? Yes, but ensure it’s oven-safe and adjust baking times as needed.
  • What’s the best way to serve brownies? Serve warm with ice cream, whipped cream, or a dusting of powdered sugar.
  • Can I make these brownies in advance? Absolutely! They are great for making ahead and storing for later.
  • How do I know when they are done? A toothpick inserted should come out with a few moist crumbs.
  • Can I double the recipe? Yes, but use a larger skillet or bake in batches for even cooking.
  • Why are my brownies cakey? Overmixing or too much flour can lead to cakey brownies; stick to the recipe for the best texture.
  • What can I add for extra flavor? Try adding espresso powder, flavored extracts, or a pinch of sea salt!
  • How should I store leftovers? Keep in an airtight container at room temperature or in the fridge for longer shelf life.

Nutrition Tips and Dietary Adaptations

Looking to make your skillet brownies a bit healthier? Here are some tips:

  • Reduce sugar: Use less sugar or a sugar substitute to cut calories.
  • Boost nutrients: Add ground flaxseed or protein powder for an extra nutritional punch.
  • Consider portion sizes: Cut smaller squares to enjoy the flavor while watching your portions.

Equipment Recommendations

To make the perfect skillet brownies, here’s what you’ll need:

  • 10-inch cast iron skillet: Perfect for even heat distribution and a rustic presentation.
  • Mixing bowls: Use different sizes for mixing dry and wet ingredients separately.
  • Rubber spatula: Ideal for folding ingredients together without overmixing.
  • Measuring cups and spoons: Accurate measurements are key to baking success.

Serving Suggestions

Looking for creative ways to serve your skillet brownies? Here are some ideas:

  • À la mode: Top with a scoop of vanilla ice cream for a decadent experience.
  • With fruit: Serve alongside fresh berries or a berry sauce for a refreshing contrast.
  • Drizzled with sauce: Drizzle with chocolate or caramel sauce for added richness.
  • With whipped cream: A dollop of whipped cream adds a light, airy contrast to the dense brownies.

In conclusion, skillet brownies represent the perfect union of simplicity and indulgence. With their rich flavor and gooey texture, they are sure to become a staple in your dessert repertoire. Whether you’re entertaining guests or simply treating yourself, these brownies are a delightful way to create memorable moments around the table. Remember, cooking is all about connection and joy; let your skillet brownies be a part of your culinary journey!
Skillet Brownies

Prep Time 10 minutes
Cook Time 30 minutes
Total Time 40 minutes
Servings 8 pieces
Calories 350
Indulge in rich, fudgy brownies baked right in a skillet for a warm, comforting treat.

Ingredients

Dairy

  • 0.5 cup unsalted butter
  • 7 ounces semisweet chocolate
  • 0.75 cup granulated sugar
  • 3 large eggs, room temperature
  • 1 teaspoon pure vanilla extract
  • 0.5 cup Dutch-processed cocoa
  • 0.5 cup all-purpose flour
  • 0.5 teaspoon salt

Instructions 

  • Preheat oven to 350°F (175°C).
  • Melt butter and chocolate together, then stir in sugar.
  • Mix in eggs and vanilla until smooth.
  • Fold in cocoa, flour, and salt; stir until just combined.
  • Bake in skillet for 28-30 minutes, then cool slightly before serving.
Notes

For extra fudginess, slightly underbake and let cool before slicing.
Calories: 350kcal
Cost: $15
Course: Dessert
Cuisine: American
Keyword: chocolate

Indulge in the Decadence of Gooey Skillet Brownies

Welcome to the ultimate chocolate experience! If you’re a chocoholic, the Gooey Skillet Brownies recipe is going to become your new favorite dessert. This delightful treat combines rich chocolate flavors with a warm, fudgy texture that melts in your mouth. Perfect for sharing or enjoying solo, this dessert is not just another brownie recipe; it’s a celebration of flavor and comfort. Let’s dive into why this skillet brownie is the sweet indulgence you need in your life!

Why You’ll Love This Recipe

This skillet brownie recipe is more than just a dessert; it’s an experience filled with rich flavors and textures. Here are five reasons to love it:

  • Irresistible texture: The combination of a crispy top and a gooey center creates a delightful contrast in each bite.
  • Easy one-bowl preparation: You’ll love how simple it is to prepare. Just mix everything in one bowl and bake—minimal cleanup!
  • Customizable flavors: From adding nuts to different types of chocolate, you can easily tailor it to your personal taste.
  • Perfect for sharing: This recipe serves a crowd, making it ideal for gatherings, potlucks, or just a cozy night at home.
  • Pairs beautifully with ice cream: A warm skillet brownie topped with a scoop of vanilla ice cream is a match made in heaven!

Your Shopping List for Fudgy Brownie Bliss

Before you start, make sure you have the following ingredients on hand:

  • Unsalted butter: 4 oz (115 g) for richness.
  • Hershey’s semisweet chocolate chips: 7 oz (200 g) total, adding deep chocolate flavor.
  • Unsweetened chocolate: 1.4 oz (40 g) for an intense chocolate base.
  • Extra-large eggs: 2, for binding and moisture.
  • Vanilla extract: 1.5 tsp, to enhance the chocolate notes.
  • Instant coffee powder: 2 tsp, to deepen the chocolate flavor.
  • Sugar: 4.2 oz (120 g) granulated and 0.5 oz (15 g) for coating chocolate chips.
  • All-purpose flour: 1.2 oz (35 g) for structure.
  • Baking powder: 1 tsp, for lift.
  • Kosher salt: ¼ tsp, to balance sweetness.
  • Vanilla ice cream: 19.2 fl oz (568 ml), for serving.

How to Make Gooey Skillet Brownies

Tasty brownies filled with chocolate goodness, served in a cast iron skillet.

Now, let’s get into the step-by-step process of creating these luscious brownies. Follow these simple instructions to achieve perfection:

Step 1: Preheat and Prepare Your Skillet

Preheat your oven to 350°F (175°C). Grease your cast-iron skillet generously with butter to ensure easy removal of the brownies later.

Step 2: Chocolate Fusion

Melt together 4 oz of semisweet chocolate chips, 1.4 oz unsweetened chocolate, and 4 oz unsalted butter in a heatproof bowl placed over simmering water. Stir until the mixture is smooth and glossy.

Step 3: Combine the Wet Ingredients

In a large mixing bowl, whisk together 2 extra-large eggs, 1.5 tsp vanilla extract, 2 tsp instant coffee powder, and 4.2 oz of granulated sugar until well combined.

Step 4: Chocolate Incorporation

Allow the melted chocolate mixture to cool slightly before folding it into your egg mixture, creating a dark, luxurious batter.

Step 5: Dry Ingredient Integration

Sift together 1.2 oz of flour, 1 tsp baking powder, and ¼ tsp salt. Gently fold this dry mixture into the chocolate batter until just combined—be careful not to overmix!

Step 6: Chocolate Chip Distribution

Coat the remaining 3 oz of chocolate chips with 0.5 oz of flour (this helps prevent them from sinking) and gently fold them into the batter.

Step 7: Skillet Preparation

Transfer the brownie batter evenly into your prepared cast-iron skillet, ensuring uniform depth for consistent baking.

Step 8: Baking Perfection

Bake in the preheated oven for 22 minutes. The center should be slightly soft; a toothpick inserted in the center should come out with a few moist crumbs for that perfect fudgy texture.

Step 9: Serving Suggestion

Serve your warm skillet brownies with a generous scoop of vanilla ice cream on top, allowing it to melt slightly for a decadent finish.

Pro Tips for Skillet Brownie Success

To ensure your brownies turn out perfectly every time, consider these expert tips:

  • Don’t overbake: Keep an eye on your brownies as they bake; overbaking can lead to dry brownies. Aim for that gooey center!
  • Use quality chocolate: The better the chocolate, the richer your brownies will taste. Opt for high-quality semisweet chocolate.
  • Let them cool: Allow your brownies to cool slightly before serving to enhance the flavors and make cutting easier.
  • Try different add-ins: Experiment with nuts, caramel swirls, or even a sprinkle of sea salt for an elevated flavor.
  • Store properly: If you have leftovers, store them in an airtight container at room temperature for up to 3 days.

Common Mistakes and Troubleshooting

Here are some common pitfalls to avoid when making skillet brownies:

  • Skipping the flour coating: Not coating chocolate chips in flour can lead to sinking, resulting in uneven distribution.
  • Overmixing the batter: Overmixing can lead to tough brownies. Mix just until combined for the best texture.
  • Using a different skillet: Stick with a cast-iron skillet for the best results; it provides even heat distribution.

Flavor Variations

Want to switch things up? Here are four delicious variations of your skillet brownies:

  • Nutty Delight: Add 1 cup of chopped walnuts or pecans for a crunchy texture.
  • Mint Chocolate Chip: Incorporate 1 tsp of peppermint extract and 3 oz of mint chocolate chips for a refreshing twist.
  • Peanut Butter Swirl: Drop spoonfuls of peanut butter into the batter before baking and swirl with a knife for a decadent flavor.
  • Caramel Surprise: Fold in ½ cup of caramel bits into the batter for a gooey surprise in every bite.

Storage and Make-Ahead Instructions

These skillet brownies can be made ahead of time and stored correctly:

  • Storing leftovers: Keep in an airtight container at room temperature for up to 3 days, or refrigerate for up to a week.
  • Freezing: Wrap individual brownies in plastic wrap and place them in a freezer bag. They can be frozen for up to 3 months.
  • Reheating: To enjoy leftovers, warm them in the microwave for a few seconds or pop them back in the oven at a low temperature.

Frequently Asked Questions

Here are some common questions about making skillet brownies:

  • Can I use a different type of skillet? Yes, but cast iron provides the best texture and flavor.
  • What if I don’t have instant coffee? You can omit it or substitute with espresso powder for a similar flavor boost.
  • Can I make these brownies gluten-free? Absolutely! Substitute with a 1:1 gluten-free baking flour.
  • How can I make my brownies more fudgy? Reduce the baking time slightly to achieve a softer center.
  • What’s the best way to serve these brownies? They are best served warm with a scoop of vanilla ice cream on top!
  • Can I add more chocolate chips? Yes! Feel free to add extra for a more decadent treat.
  • How long do these brownies last? They can stay fresh for up to 3 days at room temperature or a week in the refrigerator.
  • Can I double the recipe? Yes, just make sure to use a larger skillet or bake in batches.

Nutrition Tips and Dietary Adaptations

If you’re looking to adapt this recipe for dietary needs, consider these options:

  • Reduce sugar: You can reduce the sugar by up to 25% without affecting the taste too much.
  • Use coconut oil: Substitute butter with coconut oil for a dairy-free version.
  • Experiment with sweeteners: Consider using natural sweeteners like honey or maple syrup for a healthier alternative.

Equipment Recommendations

To achieve the best results, here’s what you’ll need:

  • Cast-iron skillet: Essential for even baking and achieving that perfect crispy edge.
  • Mixing bowls: Use at least two—one for wet ingredients and one for dry.
  • Heatproof spatula: Great for folding in ingredients without overmixing.
  • Measuring cups and spoons: Accurate measurements ensure the best results.

Serving Suggestions

To elevate your brownie experience, consider these serving suggestions:

  • Top with whipped cream: A dollop of homemade whipped cream adds lightness.
  • Drizzle with chocolate sauce: Enhance the chocolate flavor with a rich chocolate drizzle.
  • Pair with seasonal fruits: Fresh berries or sliced bananas add a refreshing contrast.
  • Offer a variety of ice cream: Serve with different flavors like mint chocolate chip or caramel swirl for fun!

With this comprehensive guide, you’re all set to create the most delicious skillet brownies that will impress anyone. Remember, cooking is about joy and connection, so gather your loved ones and make this recipe together. Happy baking!

Gooey Barefoot Contessa Skillet Brownies Recipe

Prep Time 15 minutes
Cook Time 22 minutes
Total Time 37 minutes
Servings 8 pieces
Calories 420
Indulge in rich, fudgy brownies with a glossy chocolate exterior, topped with vanilla ice cream for the ultimate treat.

Ingredients

Dairy & Chocolate

  • 4 oz unsalted butter
  • 4 oz Hershey's semisweet chocolate chips
  • 3 oz Hershey's semisweet chocolate chips
  • 1.4 oz unsweetened chocolate
  • 2 extra-large eggs eggs
  • 1.5 tsp pure vanilla extract
  • 2 tsp instant coffee powder (Nescafé)
  • 19.2 fl oz vanilla ice cream (Häagen-Dazs)
  • 4.2 oz sugar
  • 0.5 oz sugar
  • 1.2 oz all-purpose flour
  • 0.5 oz all-purpose flour
  • 1 tsp baking powder
  • ¼ tsp kosher salt

Instructions 

  • Preheat oven to 175°C (350°F).
  • Melt chocolate and butter, then cool slightly.
  • Whisk eggs, coffee, vanilla, and sugar until blended.
  • Fold in melted chocolate, then sift and add dry ingredients.
  • Mix in flour-coated chocolate chips, transfer to skillet, and bake for 22 minutes.
  • Serve warm with a scoop of vanilla ice cream.

Notes

For extra fudginess, slightly underbake and serve immediately.
Calories: 420kcal
Cost: $15
Course: Dessert
Cuisine: American
Keyword: chocolate

Kickstart Your Day with a Delicious Smoothie Bowl

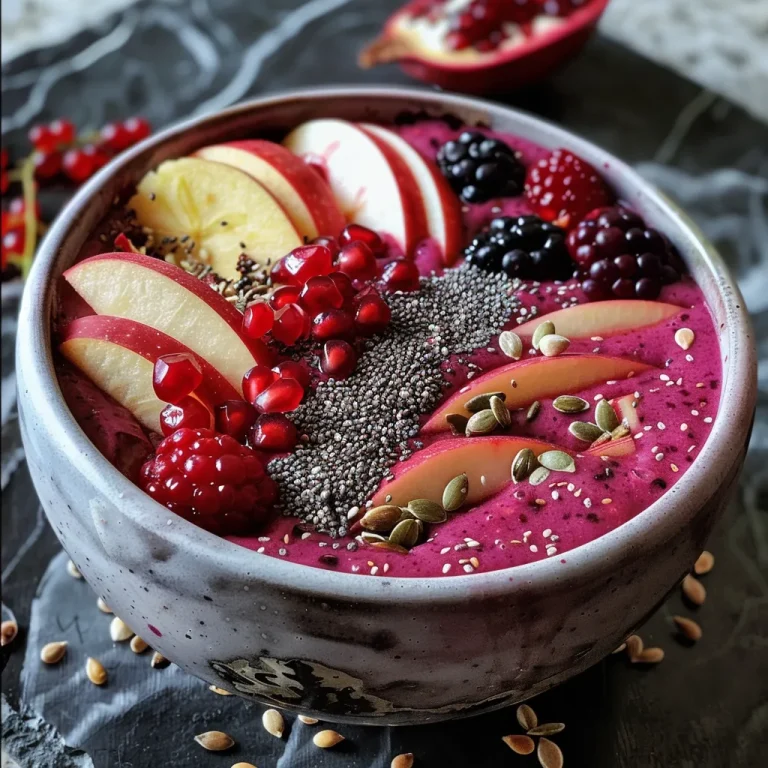
Are you ready to elevate your breakfast game? The KORU Apple Berry Smoothie Bowl is not just a meal; it’s an experience packed with vibrant flavors and nourishing ingredients. This delightful bowl is perfect for busy mornings, lazy weekends, or whenever you crave something fresh and revitalizing. Let’s dive into the world of smoothie bowls and discover why this recipe is a must-try!

Why You’ll Love This Recipe

This KORU Apple Berry Smoothie Bowl is not only delicious but also brimming with health benefits. Here are five reasons to whip up this recipe:

  • Rich in Nutrients: Packed with fruits and vegetables, this bowl offers vitamins, minerals, and antioxidants essential for a healthy lifestyle.
  • Versatile Base: The smooth, creamy blend can be customized to suit your taste preferences or dietary needs.
  • Quick and Easy: This recipe takes less than 10 minutes to prepare, making it ideal for a busy morning.
  • Perfectly Satisfying: With the addition of protein-rich hemp seeds and fiber from fruits, this bowl will keep you full and energized.
  • Visual Appeal: The vibrant colors and beautiful toppings make this smoothie bowl a feast for the eyes, perfect for sharing on social media!

Ingredients Breakdown

Let’s take a closer look at the ingredients that make this smoothie bowl a delight:

  • KORU® Apple: This variety is known for its crisp texture and sweet-tart flavor, perfect for a refreshing smoothie.
  • Mixed Berries: Fresh or frozen, these add natural sweetness and antioxidants. Feel free to mix and match!
  • Cooked Beets: These provide a subtle earthiness and vibrant color, enhancing both flavor and nutrition.
  • Fresh Ginger: A small piece adds a zingy kick that complements the sweetness of the fruits.
  • Hemp Seeds: Packed with protein and omega fatty acids, they add a nutty flavor and crunch.
  • Medjool Dates: These naturally sweeten the smoothie while providing fiber.
  • Water or Plant-Based Milk: Use your favorite nut milk for extra creaminess or water for a lighter option.

Feel free to make substitutions based on your preferences: swap the beets for spinach or add a scoop of protein powder for an extra boost!

Step-by-Step Instructions

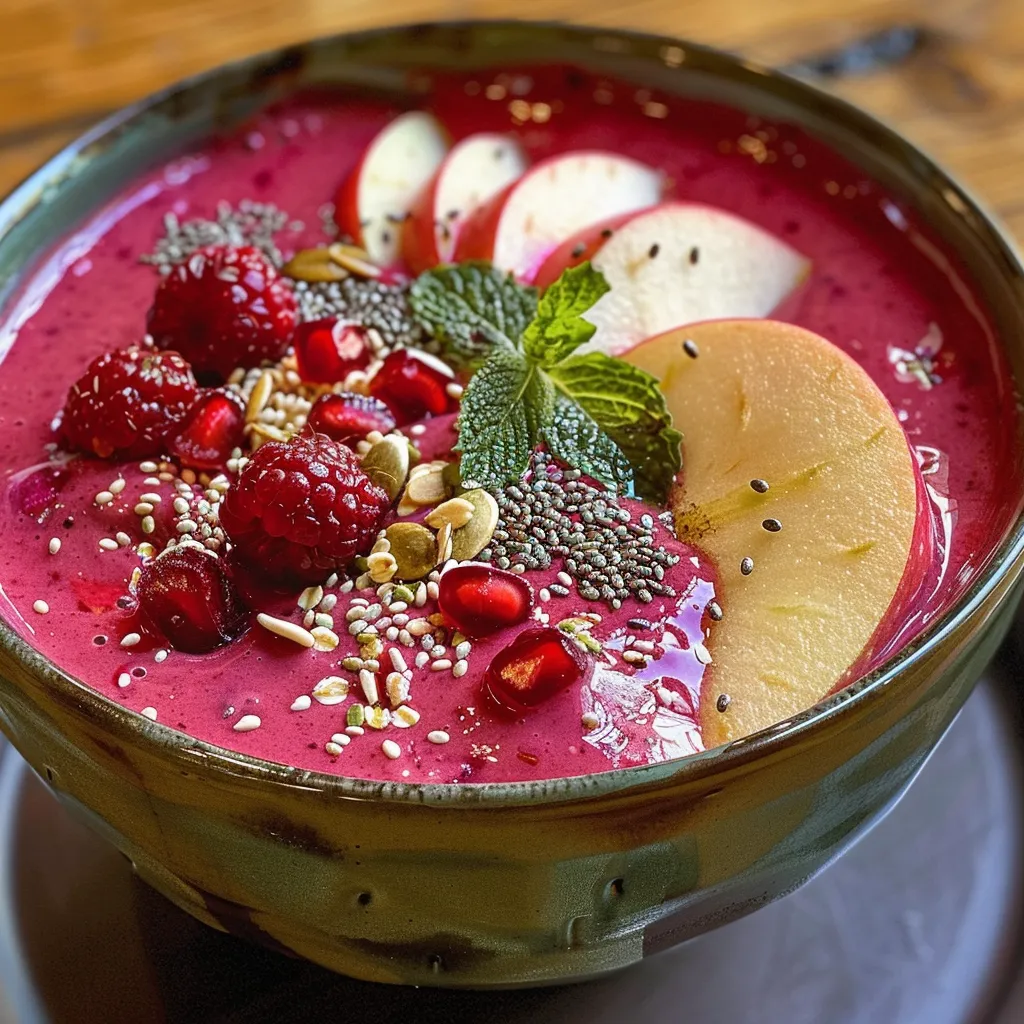
A visually appealing smoothie bowl showcasing fresh produce and healthy toppings, captured from a side angle.

Ready to blend? Follow these simple steps to create your smoothie bowl:

  • Step 1: Place all smoothie ingredients in a high-speed blender.
  • Step 2: Blend until smooth but thick, adding water or nut milk as needed to achieve your desired consistency.
  • Step 3: Pour the smoothie blend into a bowl and add your favorite toppings.
  • Step 4: Enjoy immediately for the best flavor and texture!

Pro Tips for the Perfect Smoothie Bowl

To ensure your smoothie bowl turns out perfectly every time, keep these expert tips in mind:

  • Use Frozen Ingredients: For a thicker texture, consider using frozen fruits and vegetables in your smoothie blend.
  • Don’t Overblend: Blend just until smooth; overmixing can result in a runny consistency.
  • Experiment with Toppings: Get creative! Add granola, nuts, seeds, and even coconut flakes for extra crunch.
  • Adjust Sweetness: Taste your smoothie before serving and add more dates or a drizzle of honey if you prefer a sweeter bowl.
  • Keep It Cold: Chill your bowl or pre-chill your ingredients to keep your smoothie cold and refreshing.
  • Layer Flavors: Try adding spices like cinnamon or vanilla extract for an extra flavor dimension.
  • Presentation Matters: Arrange your toppings artfully to make your smoothie bowl visually appealing.
  • Meal Prep: Pre-portion your ingredients the night before for a quick breakfast option.

Common Mistakes and Troubleshooting

Even experienced cooks can run into issues. Here are some common mistakes and how to avoid them:

  • Too Runny: Add more frozen fruits or ice to thicken the smoothie.
  • Not Smooth Enough: Ensure you’re using a high-speed blender for a creamy texture.
  • Too Sweet: Balance out with a splash of lemon juice or add spinach to offset sweetness.
  • Flavor Lacking: Incorporate fresh herbs like mint or basil for an unexpected twist.

Variations to Try

Your smoothie bowl can be as versatile as your cravings! Here are some delicious variations to explore:

  • Tropical Delight: Use mango, pineapple, and coconut milk for a refreshing tropical twist.
  • Green Goddess: Blend spinach or kale with green apples for a nutrient-packed green smoothie bowl.
  • Chocolate Indulgence: Add cocoa powder and banana for a chocolate-flavored treat.
  • Nutty Banana: Blend in banana and almond butter for a hearty, protein-rich bowl.

Storage and Make-Ahead Instructions

If you’re preparing in advance, here’s how to store your smoothie bowl:

  • Refrigeration: Store the blended smoothie in an airtight container in the fridge for up to 24 hours.
  • Freezing: Freeze your smoothie in ice cube trays. Blend with a bit of liquid for a quick treat later.

Frequently Asked Questions

Here are some common questions about smoothie bowls:

  • Are smoothie bowls healthy? Yes! They are packed with nutrients from fruits and vegetables.
  • Can I make this dairy-free? Absolutely! Use plant-based milk instead of regular milk.
  • How do I make my smoothie bowl thicker? Use frozen fruits and less liquid when blending.
  • What toppings do you recommend? Consider seeds, nuts, granola, and fresh fruit for added texture and flavor.
  • Can I use other fruits? Yes! Feel free to substitute with your favorite fruits.
  • How long does it take to make? This recipe takes about 10 minutes from start to finish.
  • Can I add protein powder? Yes! Adding protein powder can enhance the nutritional profile.
  • What’s the best way to serve it? Serve immediately in a chilled bowl for the best experience.

Nutritional Tips and Dietary Adaptations

For those with specific dietary needs, here are some tips:

  • Vegan: Use plant-based milk and skip the honey.
  • Gluten-Free: All ingredients are naturally gluten-free.
  • Low Sugar: Use unsweetened almond milk and reduce or omit dates.
  • High Protein: Add Greek yogurt or a scoop of protein powder for extra protein.

Equipment Recommendations

To make your smoothie bowl, consider these essential tools:

  • High-Speed Blender: A good blender is crucial for achieving the perfect smoothie consistency.
  • Measuring Cups and Spoons: Precision is key, especially when trying new recipes.
  • Bowl and Spoon: A beautiful bowl makes every meal more enjoyable!

Serving Suggestions

Serve your KORU Apple Berry Smoothie Bowl with:

  • Fresh Juice: Pair with a glass of freshly squeezed orange juice for a refreshing breakfast.
  • Herbal Tea: A warm cup of herbal tea complements the cold smoothie bowl beautifully.
  • Granola Bars: For a grab-and-go option, pair it with homemade granola bars.

Conclusion

The KORU Apple Berry Smoothie Bowl is more than just a breakfast; it’s a delightful way to nourish your body and soul. With its vibrant colors and delicious flavors, this recipe is sure to become a favorite in your kitchen. So grab your blender, get creative with toppings, and enjoy a bowl of goodness that fuels your day!

KORU® Apple Berry Smoothie Bowl

Prep Time 10 minutes
Total Time 10 minutes
Servings 2 servings
Calories 350
A vibrant and nutritious smoothie bowl packed with fresh fruits, beets, and seeds for a healthy start to your day.

Ingredients

Main ingredients

  • 1 piece KORU® apple, cored and quartered
  • 1 cup fresh or frozen mixed berries
  • 0.5 cup fresh or frozen cooked beets, roughly chopped
  • 1 inch piece of fresh ginger, peeled and roughly chopped
  • 0.25 cup hemp seeds
  • 2 pitted dates (Medjool recommended)
  • 1 cup water or plant-based milk
  • Slices KORU® apple (for topping)
  • Chia seeds for topping
  • Pumpkin seeds for topping
  • Pomegranate seeds for topping
  • Hemp seeds for topping

Instructions 

  • Place all smoothie ingredients in a blender.
  • Blend until smooth and thick, adding water or plant milk as needed.
  • Pour into a bowl, add toppings, and enjoy immediately.

Notes

Use frozen berries for a thicker smoothie and add more liquid if needed.
Calories: 350kcal
Cost: $15
Course: Breakfast
Cuisine: Healthy
Keyword: Fruit, Seeds, Smoothie

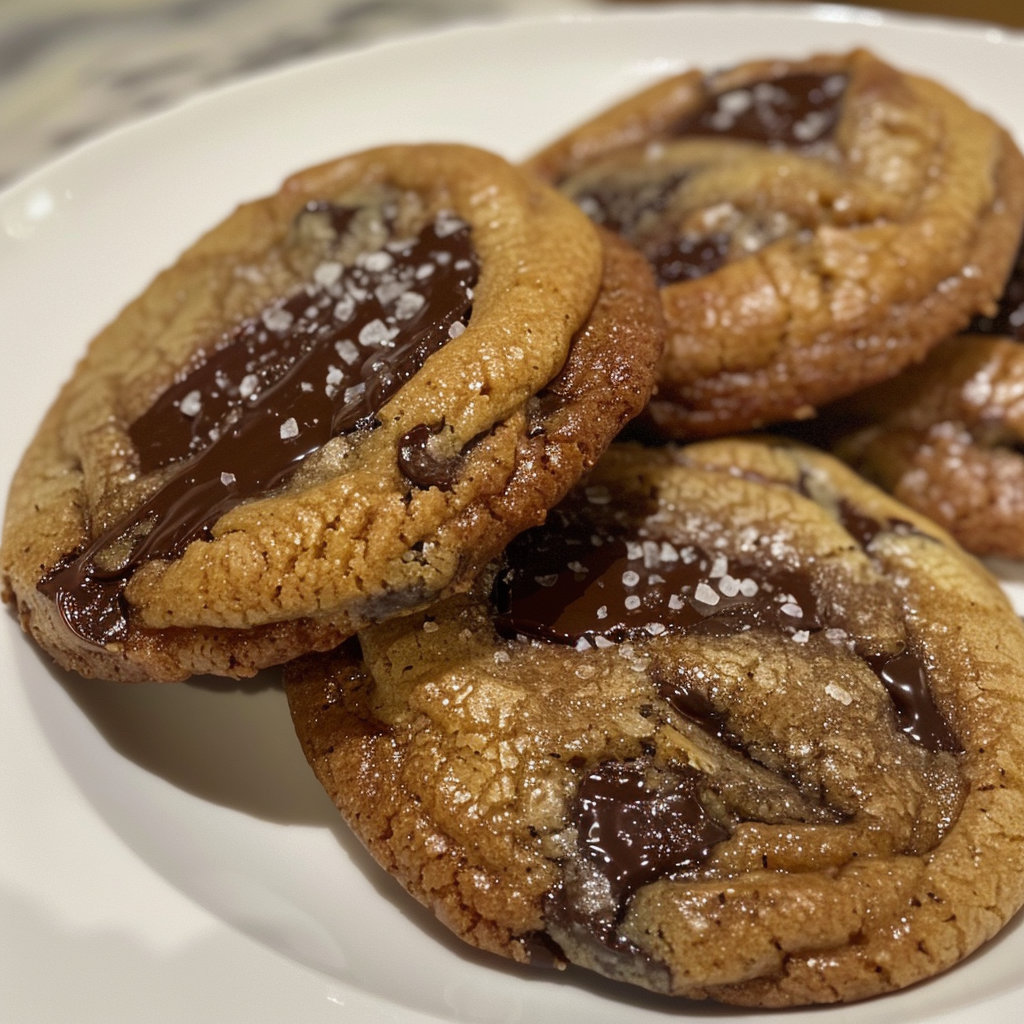
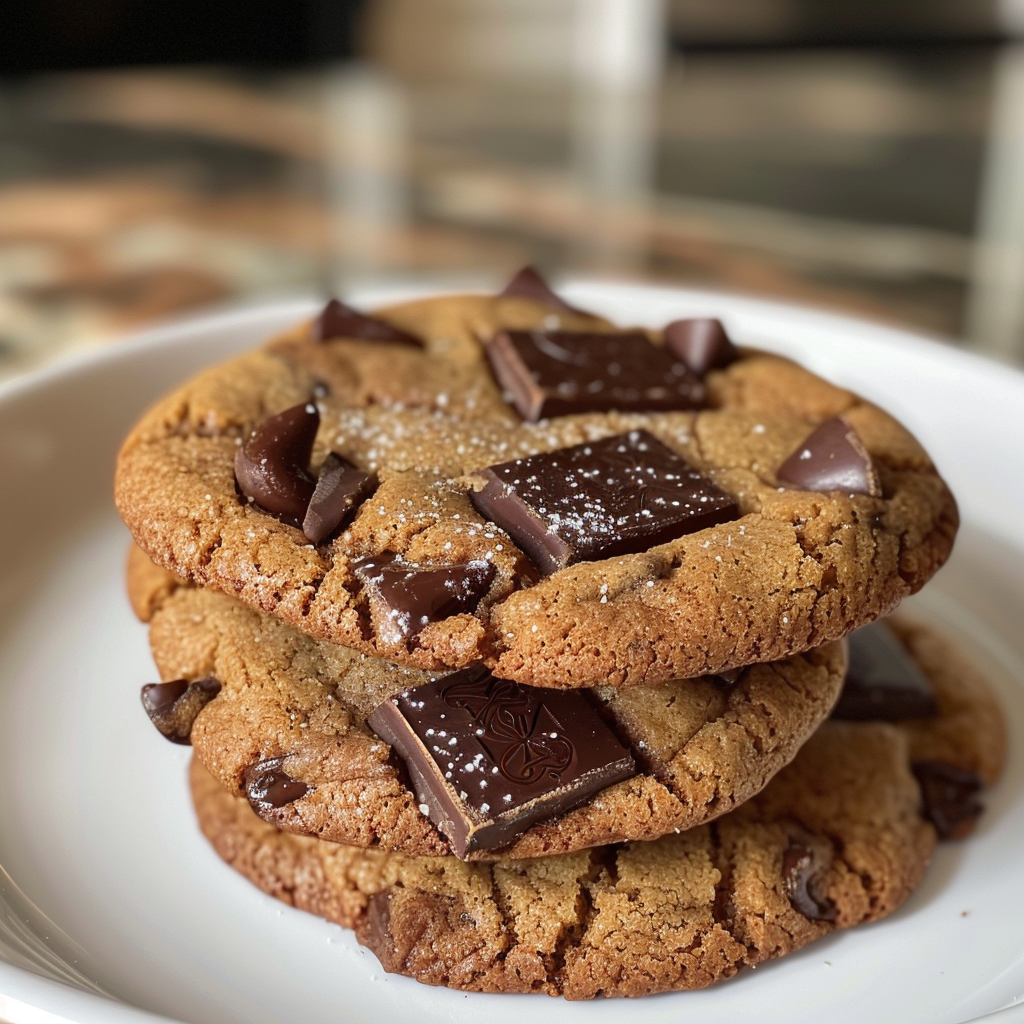
Unlock the Joy of Baking with Small-Batch Gluten-Free Chocolate Chip Cookies

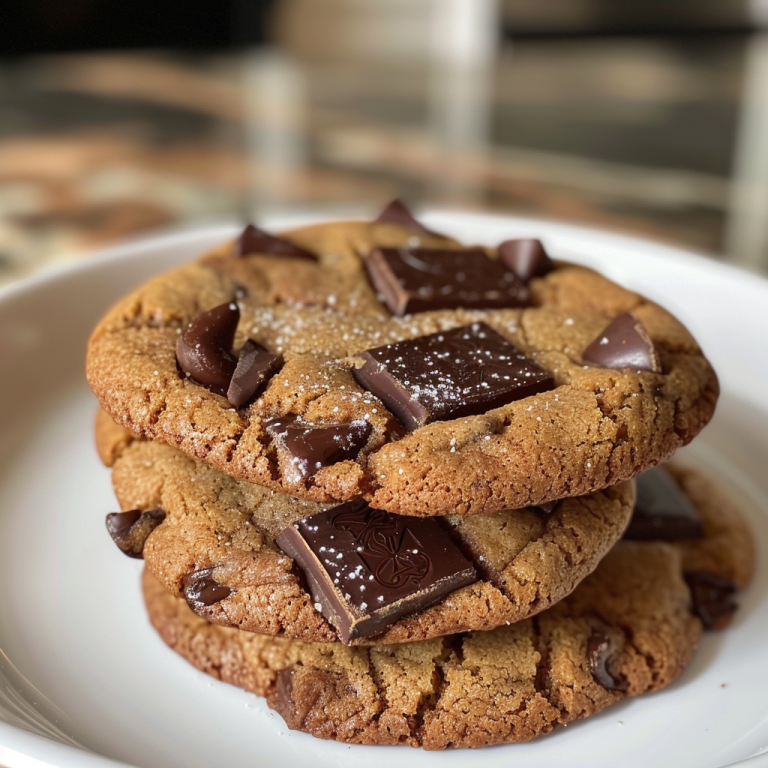
There’s something magical about the aroma of freshly baked cookies wafting through your kitchen. If you’re on a gluten-free diet or just looking for a delightful treat, these small-batch gluten-free chocolate chip cookies made with brown butter are bound to become your new favorite. This recipe combines rich flavors and a comforting texture, allowing you to indulge without the gluten. Perfect for satisfying your sweet tooth or impressing guests, these cookies are easy to make and packed with deliciousness. Dive into this comprehensive guide and discover why this recipe is worth baking today!

Why You’ll Love This Recipe

  • Perfectly Balanced Flavors: The combination of brown butter, sugars, and high-quality chocolate creates a rich, decadent flavor profile.
  • Quick and Easy: This small-batch recipe means you can whip up just a few cookies without the fuss of making a large batch.
  • Gluten-Free Goodness: Enjoy delicious cookies without worrying about gluten, thanks to our specially selected gluten-free flour.
  • Customizable: Personalize your cookies with various mix-ins or toppings to suit your taste preferences.
  • Perfect for Sharing: The small batch is ideal for a quick treat or for sharing with friends and family.

Ingredient Breakdown

Before you start baking, let’s take a closer look at the ingredients you’ll need. Each component plays a crucial role in the final outcome of your cookies.

  • Unsalted Butter: 40 grams of unsalted butter, browned to enhance flavor and aroma.
  • Light Brown Sugar: 45 grams of light brown sugar adds moisture and a rich caramel taste. Dark brown sugar can be substituted for a deeper flavor.
  • Granulated Sugar: 12 grams helps to achieve the perfect texture and sweetness.
  • Egg Yolk: Using one room temperature egg yolk ensures the dough binds well and provides a chewy texture.
  • Vanilla Extract: 1/2 teaspoon enhances the overall flavor profile of the cookies.
  • Gluten-Free Multipurpose Flour: 56 grams is essential for the structure of the cookies. Make sure to choose a high-quality mix.
  • Baking Soda: 1/4 teaspoon helps the cookies rise and achieve a light texture.
  • Kosher Salt: 1/4 teaspoon balances the sweetness and enhances the flavors.
  • Darker Chocolate: 50-75 grams of chopped dark chocolate adds richness; feel free to mix in semi-sweet if preferred.
  • Flaky Sea Salt: Optional but recommended for a burst of flavor on top.

Pro Tips for Success

To ensure your cookies turn out perfectly every time, consider these expert insights:

  • Brown the butter properly: Watch for a nutty aroma and a medium amber color—this enhances the flavor significantly.
  • Measure accurately: Use a kitchen scale to weigh your ingredients for consistency and best results.
  • Cool the butter: Allow the browned butter to cool slightly before mixing to prevent cooking the egg yolk.
  • Don’t overmix: Gently fold the ingredients together to keep the cookies tender.
  • Chill the dough: If you have time, chilling the dough for at least 30 minutes can improve the texture of your cookies.
  • Watch the baking time: Ovens vary, so keep a close eye on your cookies; remove them when they’re golden around the edges.
  • Use quality chocolate: Invest in good-quality chocolate; it makes a noticeable difference in taste.
  • Shape them right: For evenly shaped cookies, use a cookie scoop for consistent sizing.
  • Experiment with add-ins: Feel free to add nuts, dried fruit, or coconut for extra flavor and texture.

Avoiding Common Mistakes

Here are some common pitfalls and how to avoid them:

  • Dry dough: If your dough is crumbly, it could be due to too much flour or not enough moisture. Adjust as needed by adding a bit more butter or an additional egg yolk.
  • Cookies spreading too much: This can happen if the butter is too warm or the dough is not chilled long enough. Make sure to chill your dough before baking.
  • Overbaking: To ensure soft cookies, take them out when they look slightly underdone; they will continue to cook on the baking sheet.
  • Uneven flavors: Ensure all ingredients are fresh and properly measured for balanced flavors.

Delicious Variations

Switch things up with these creative variations:

  • Nutty Delight: Add chopped walnuts or pecans for a crunchy texture.
  • Fruity Twist: Incorporate dried cranberries or cherries for a pop of flavor.
  • Coconut Bliss: Mix in shredded coconut for a tropical flair.
  • Spicy Kick: Add a pinch of cinnamon or nutmeg to the dough for a warm, spiced flavor.

Storage and Make-Ahead Instructions

To keep your cookies fresh:

  • Room Temperature: Store baked cookies in an airtight container at room temperature for up to 5 days.
  • Refrigeration: For longer storage, keep them in the fridge for up to 2 weeks.
  • Freezing Dough: Freeze unbaked dough balls in a single layer on a baking sheet, then transfer to a zip-top bag. They can be baked directly from the freezer; just add a couple of extra minutes to the baking time.

Frequently Asked Questions

Here are some common questions about baking these cookies:

  • Can I use a different flour? Yes, but ensure it’s a gluten-free blend that contains xanthan gum for best results.
  • What if I don’t have brown sugar? You can substitute with granulated sugar, but the flavor will not be as rich.
  • Can I make these cookies dairy-free? Absolutely! Use a non-dairy butter substitute for the same quantity.
  • How do I know when they’re done? They should be golden around the edges and soft in the middle.
  • Can I double the recipe? Yes, just remember to adjust the baking time accordingly.
  • What’s the best way to store leftover cookies? Place them in an airtight container to keep them fresh and soft.
  • Can I freeze the cookies? Yes, baked cookies can be frozen for up to 3 months in an airtight container.
  • How do I make the cookies chewier? Add an extra egg yolk for more moisture and chewiness.

Nutritional Insights and Dietary Adaptations

These cookies not only satisfy your sweet tooth but can also be adapted to fit various dietary needs:

  • Lower Sugar Option: Reduce the sugar by 25% for a less sweet cookie.
  • Vegan Version: Substitute the egg yolk with a flax or chia egg (1 tablespoon of ground flaxseed or chia seeds mixed with 2.5 tablespoons of water).
  • Protein Boost: Add protein powder to the flour mixture for an extra nutritional kick.

Essential Equipment

For a seamless baking experience, consider using the following tools:

  • Baking Sheet: A heavy-duty, rimmed baking sheet is ideal to ensure even baking.
  • Parchment Paper: Line your baking sheet for easy clean-up and to prevent sticking.
  • Mixing Bowls: Have a set of mixing bowls in various sizes for all your ingredient needs.
  • Cookie Scoop: Use a cookie scoop for uniform cookie sizes, ensuring even baking.

Serving Suggestions

Once your cookies are baked to perfection, consider these delightful serving ideas:

  • Serve Warm: Enjoy them fresh from the oven for a gooey chocolate experience.
  • With Ice Cream: Pair with a scoop of vanilla ice cream for an indulgent dessert.
  • Coffee Companion: These cookies make a perfect pairing with your morning coffee or afternoon tea.

Conclusion

These small-batch gluten-free chocolate chip cookies are sure to become a staple in your baking repertoire. With their rich flavor, chewy texture, and customizable options, you’ll find them perfect for any occasion. Whether you’re treating yourself or sharing with loved ones, these cookies will create moments of joy and connection around the table. So preheat your oven and get ready to enjoy the irresistible charm of homemade cookies!

Gluten Free Chocolate Chip Cookies (Small Batch)

Prep Time 10 minutes
Cook Time 10 minutes
Total Time 20 minutes
Servings 2 cookies
Calories 150
Delight in these small-batch, gluten-free chocolate chip cookies with rich brown butter flavor and optional flaky sea salt topping.

Ingredients

Butter

  • 40 grams unsalted butter (which we will brown)
  • 45 grams light brown sugar (dark brown sugar works as well)
  • 12 grams granulated white sugar
  • 1 egg yolk egg yolk (room temp)
  • 0.5 teaspoon vanilla extract
  • 56 grams gluten-free multipurpose flour
  • 0.25 teaspoon baking soda
  • 0.25 teaspoon kosher salt (1 gram)
  • 50-75 grams chopped dark chocolate
  • Additional chocolate
  • Flaky sea salt (optional)

Instructions 

  • Preheat oven to 350°F and line a baking sheet with parchment.
  • Brown the butter until nutty and amber, then cool for 5-10 minutes.
  • Mix cooled butter with sugars and vanilla, then add egg yolk and combine.
  • Fold in dry ingredients and chocolate, then form 2-3 cookies and top with extra chocolate.
  • Bake for 9-14 minutes until golden and puffy, then optionally sprinkle with sea salt and cool.

Notes

Use high-quality dark chocolate for best flavor.
Calories: 150kcal
Cost: $8
Course: Dessert
Cuisine: American
Keyword: chocolate chip, gluten free

Elevate Your Gatherings with Exuberant Canapes

Are you ready to impress your guests with a vibrant and delicious appetizer? Look no further than these Exuberant Canapes featuring creamy garlic herb cheese and ripe avocado. These delightful bites are perfect for any gathering, from casual get-togethers to elegant parties. Not only are they simple to prepare, but they also pack a punch of flavor that will leave your guests raving about your culinary skills. In this comprehensive guide, we’ll walk you through everything you need to know to create these stunning canapés that will elevate your entertaining game.

Why You’ll Love This Recipe

  • Quick Preparation: With only a few ingredients and simple steps, you can whip these up in no time, making them perfect for last-minute gatherings.
  • Delicious Flavor Combination: The creamy garlic herb cheese paired with fresh avocado creates a rich and satisfying bite that appeals to all palates.
  • Versatile Serving Options: These canapés can be served as appetizers, snacks, or even as part of a larger charcuterie board.
  • Beautiful Presentation: Their vibrant colors and elegant garnishes make these canapés visually stunning, sure to impress your guests.
  • Healthier Snack Option: Packed with healthy fats from avocado and the goodness of herbs, these bites are a guilt-free treat.

Ingredient Breakdown

To create these Exuberant Canapes, you will need the following ingredients:

  • 1 small baguette: This will serve as the perfect base for your canapés. You can substitute with gluten-free bread or crackers for dietary preferences.
  • 2 medium-sized ripe avocados: Ensure they are perfectly ripe for easy mashing. If unavailable, you can use pre-made guacamole.
  • 4-6 ounces of garlic herb cream cheese: This ingredient adds creaminess and a burst of flavor. You can substitute with plain cream cheese mixed with herbs.
  • 1/4 teaspoon salt and pepper: Essential for seasoning the avocado to enhance its flavor.

Pro Tips for Perfection

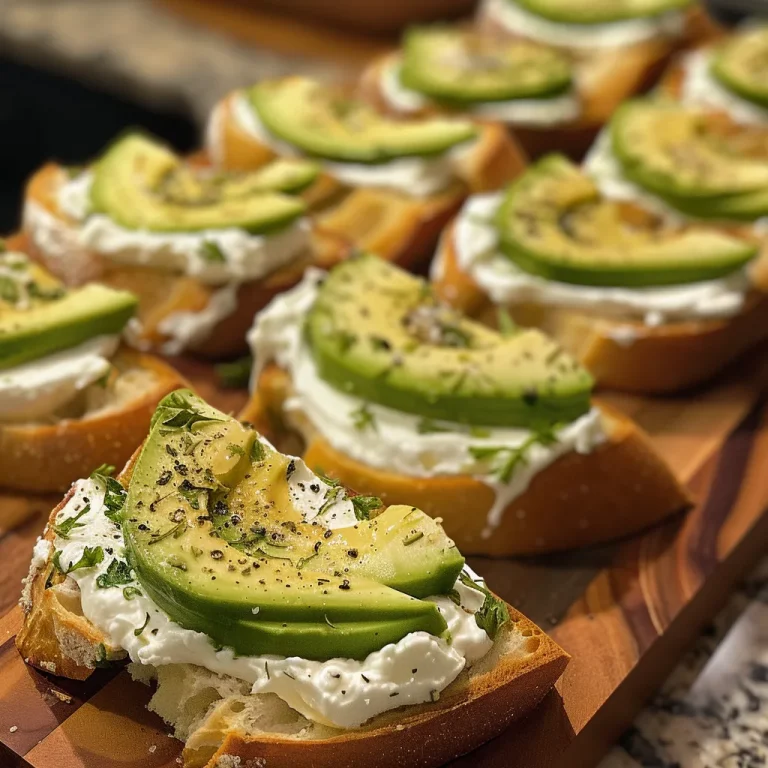
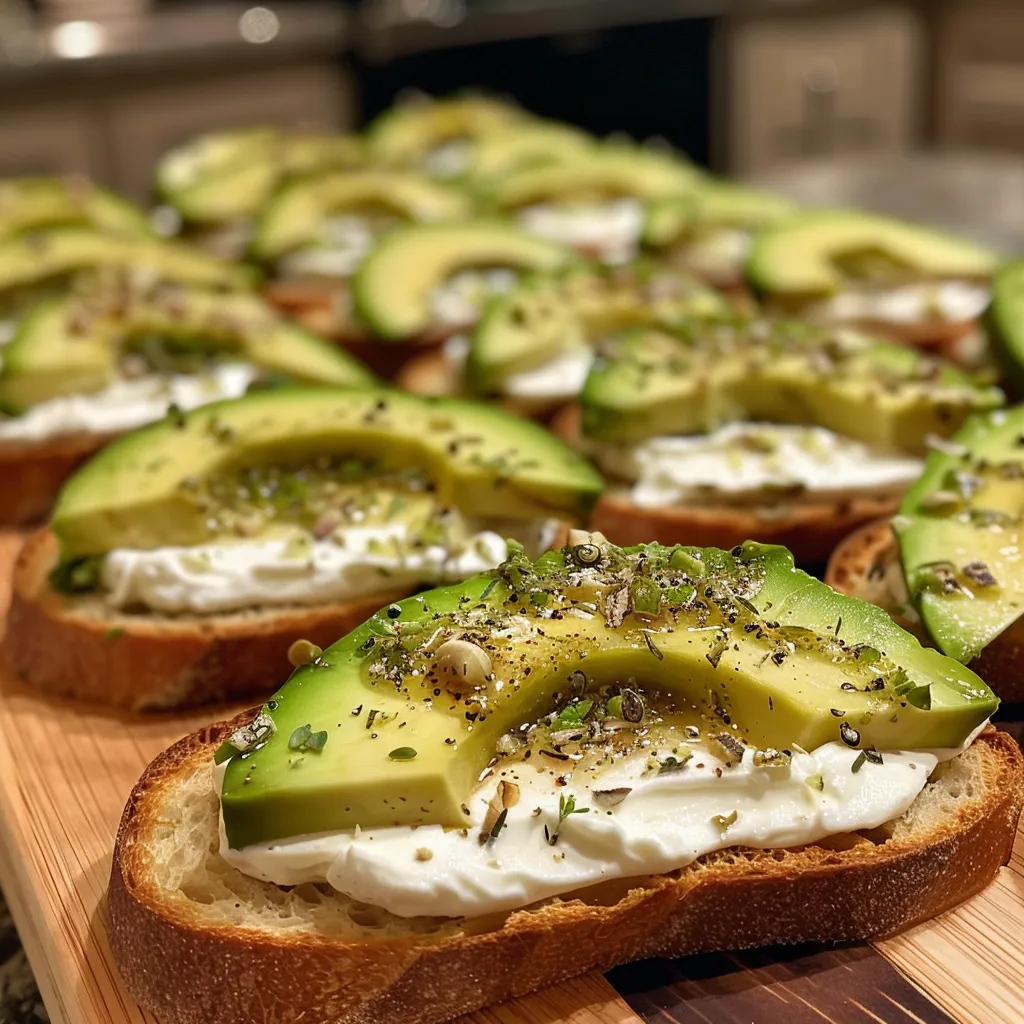
Gourmet canapes showcasing a blend of garlic herb cream cheese and ripe avocado.

Follow these expert insights to ensure your canapés turn out perfectly every time:

  • Choose the right avocado: Look for avocados that yield slightly to gentle pressure. This ensures they are ripe and creamy.
  • Toast the bread: Toasting the baguette not only adds texture but also prevents sogginess from the toppings.
  • Don’t skip the lemon juice: A squeeze of lemon juice in the mashed avocado not only enhances flavor but also prevents browning.
  • Experiment with herbs: Feel free to mix in additional herbs into the cream cheese for a unique flavor profile.
  • Keep it fresh: Assemble the canapés just before serving to maintain their freshness and flavor.
  • Garnish generously: Use fresh herbs, microgreens, or a drizzle of balsamic glaze to add visual appeal and flavor.
  • Make it ahead: You can prepare the cream cheese and mashed avocado ahead of time, just assemble before serving.
  • Portion control: Keep the canapés bite-sized to encourage guests to enjoy them as finger food.

Common Mistakes and Troubleshooting

Avoid these common pitfalls when making your canapés:

  • Overripe avocados: Make sure your avocados are ripe but not mushy, which can lead to a less appealing texture.
  • Too much cream cheese: Balance the cream cheese with the avocado for a harmonious flavor; too much can overwhelm the dish.
  • Underseasoning: Always taste and adjust seasoning—salt and pepper are essential for enhancing the flavors.
  • Assembling too early: If assembled too soon, the bread can become soggy. Assemble right before serving.

Variations to Try

Feel free to get creative with these variations:

  • Smoked Salmon Canapés: Add slices of smoked salmon on top of the avocado for an extra gourmet touch.
  • Spicy Avocado Canapés: Mix in diced jalapeños or a dash of hot sauce in the mashed avocado for some heat.
  • Caprese Style: Top with cherry tomatoes and fresh basil for a classic Italian twist.
  • Herbed Goat Cheese: Swap the garlic herb cream cheese for herbed goat cheese for a tangy variation.

Storage and Make-Ahead Instructions

If you want to prepare these canapés ahead of time, follow these guidelines:

  • Make-Ahead Cream Cheese: Prepare the garlic herb cream cheese up to 3 days in advance and store it in the refrigerator.
  • Avocado Preparation: Mash the avocado and mix in lemon juice, storing it in an airtight container in the fridge. Use within 24 hours.
  • Bread Storage: Toast the baguette just before serving to keep it crispy. Store un-toasted bread in a cool, dry place.

FAQ: Your Canapé Questions Answered

  • Can I use different toppings? Yes, feel free to add your favorite toppings like olives, pickles, or even a sprinkle of feta cheese.
  • How can I make these gluten-free? Use gluten-free crackers or bread as a base.
  • What if I can’t find garlic herb cream cheese? Mix plain cream cheese with minced garlic, fresh herbs, and a bit of salt for a quick substitute.
  • How many canapés does this recipe make? The recipe yields approximately 10-12 canapés, depending on how thickly you spread the toppings.
  • How do I prevent the avocado from browning? Use fresh lemon juice and cover tightly with plastic wrap to minimize air exposure.
  • Can I freeze these canapés? It’s not recommended to freeze assembled canapés as the texture will change. However, you can freeze the cream cheese mixture.
  • What drinks pair well with these canapés? Light white wines, spritzers, or sparkling water with lemon make great pairings.
  • Can I add protein to this recipe? Absolutely! Adding cooked shrimp or grilled chicken can make these canapés heartier.

Nutritional Tips and Dietary Adaptations

For a healthier version or dietary needs, consider these options:

  • Low-Fat Cream Cheese: Use low-fat or fat-free cream cheese to reduce calories.
  • Vegan Options: Substitute cream cheese with a vegan cream cheese alternative and use a plant-based baguette.
  • Increased Fiber: Serve with whole grain baguette for added fiber and nutrients.

Equipment Recommendations

Having the right tools can make your canapé preparation easier:

  • Cutting Board: A sturdy cutting board is essential for slicing the baguette and preparing your ingredients.
  • Sharp Knife: A good knife will help you neatly slice the baguette and prepare the avocados.
  • Mixing Bowl: Use a mixing bowl for mashing the avocados and mixing the cream cheese.
  • Toaster or Oven: Either will work to toast your baguette slices to perfection.

Serving Suggestions

These canapés are versatile and can be served in various ways:

  • Platter Arrangement: Arrange on a beautiful serving platter with garnishes for an elegant display.
  • Pair with Dips: Serve alongside dips like hummus or salsa for a varied appetizer spread.
  • Accompanying Drinks: Pair with your favorite cocktails or mocktails for a complete gathering experience.

Conclusion

Creating these Exuberant Canapés with Garlic Herb Cream Cheese and Avocado is a delightful way to impress your guests effortlessly. With their stunning presentation and delectable flavors, they are sure to become a crowd favorite. Remember, cooking is not just about the food but also about the memories you create around the table. So gather your ingredients, follow these steps, and enjoy the process of bringing people together with delicious food. Happy cooking!

Exuberant Canapes with Garlic Herb Cream Cheese and Avocado Recipe

Prep Time 10 minutes
Cook Time 10 minutes
Total Time 20 minutes
Servings 8 pieces
Calories 250
Delight your guests with these elegant canapés featuring creamy garlic herb cheese and ripe avocado on toasted bread.

Ingredients

Bread

  • 1 small baguette bread slices (Approximately 10-12 slices)

Avocado

  • 2 medium-sized ripe avocados ripe avocados

Garlic Herb Cream Cheese

  • 4-6 ounces garlic herb cream cheese

Salt and Pepper

  • 0.25 teaspoon salt and pepper

Instructions 

  • Preheat oven to 350°F (175°C) and toast bread slices until crisp. Cool slightly.
  • Halve, pit, and mash avocados; add lemon juice, salt, and pepper.
  • Mix garlic herb cream cheese until smooth.
  • Spread cream cheese on toasted bread, then top with mashed avocado.
  • Optional: garnish with herbs, red pepper flakes, cherry tomatoes, microgreens, and drizzle with balsamic glaze. Serve immediately.

Notes

For extra flavor, add fresh herbs or a squeeze of lemon.
Calories: 250kcal
Cost: $15
Course: Appetizer
Keyword: Avocado

Welcome to the delightful world of boozy chocolate truffles! If you’re looking for an easy and indulgent treat that’s perfect for parties or a special treat for yourself, you’ve come to the right place. In this comprehensive guide, we’ll explore everything you need to know to make delicious boozy chocolate truffles that will impress your friends and family. With just a few simple ingredients and steps, you’ll create delectable bites of chocolate goodness that combine rich chocolate with a splash of your favorite liqueur.

Why You’ll Love This Recipe

  • Quick and Easy: This recipe is simple and quick, making it perfect for both novice and seasoned cooks. You’ll have your truffles ready in no time!
  • Customizable Flavors: With various liqueur options such as triple sec, rum, or whiskey, you can easily tailor the flavor to your preference.
  • Impressive Presentation: These truffles not only taste amazing but also look stunning on any dessert table, making them a great choice for entertaining.
  • Perfect for Any Occasion: Whether it’s a holiday gathering, birthday party, or just a cozy night in, these truffles are appropriate for any celebration.
  • Make-Ahead Friendly: You can prepare these truffles in advance, saving you time on the day of your event.

Ingredients Breakdown

Let’s dive into the ingredients you’ll need to create these delightful treats. Each component plays a crucial role in achieving the perfect flavor and texture.

  • 4 ounces chocolate: Choose high-quality chocolate for the best flavor. You can use dark, milk, or semi-sweet chocolate, depending on your taste.
  • 4 tbsp heavy cream: This will help create a rich and creamy ganache. If you want a lighter version, you can use half-and-half or coconut cream.
  • 1 tbsp butter: Adding butter will enhance the creaminess of the truffles and give them a silky texture.
  • 1.5 tbsp triple sec: A classic choice for adding a hint of citrus flavor. You can substitute with other liqueurs like rum, bourbon, or even flavored vodkas.
  • 1/4 tsp vanilla extract: This adds depth to the flavor profile. You can also experiment with almond extract for a different twist.
  • Toppings: 1/4 cup each of coconut flakes, cacao powder, and/or chopped nuts. Feel free to get creative with your toppings!

Step-by-Step Instructions

Now, let’s transform these ingredients into delicious boozy chocolate truffles!

  • Step 1: Chop the Chocolate: Use a large sharp knife to chop the chocolate into small pieces. Place it into a medium bowl and set aside.
  • Step 2: Prepare the Cream Mixture: Measure out the heavy cream and pour it into a microwave-safe bowl. Add the butter and microwave on high for 30 seconds, until very warm but not boiling.
  • Step 3: Combine Cream and Chocolate: Pour the warm cream mixture over the chopped chocolate and let it sit for 5 to 7 minutes. This allows the chocolate to melt.
  • Step 4: Whisk Together: Use a whisk to blend the chocolate and cream until smooth. If the chocolate hasn’t melted completely, microwave for an additional 15 seconds and stir until smooth.
  • Step 5: Add Flavorings: Stir in the triple sec and vanilla extract until fully combined. The mixture should be glossy and fluid.
  • Step 6: Chill the Mixture: Place the bowl in the refrigerator for about 1.5 to 2 hours until the mixture is firm but still soft to the touch.
  • Step 7: Prep Your Toppings: While the mixture chills, prepare your topping ingredients. Chop nuts finely if using and place your toppings in small dishes.
  • Step 8: Form the Truffles: Using a melon baller or measuring spoon, scoop out the chocolate mixture and roll it into balls using your fingers. Aim for about 1 inch in diameter.
  • Step 9: Roll in Toppings: Roll each truffle in your chosen topping until fully coated, then place on parchment paper.
  • Step 10: Serve and Enjoy: Once all truffles are rolled, refrigerate them for another 30 minutes before serving for the best texture.

Pro Tips for Perfect Truffles

To ensure your truffles turn out perfectly every time, consider these professional tips:

  • Quality Ingredients: Always use high-quality chocolate and fresh cream. The better the ingredients, the better the flavor!
  • Temperature Control: Allow the cream to cool slightly before adding it to the chocolate to prevent seizing.
  • Chill Time: Don’t skip the chilling time! It’s essential for creating the right consistency for rolling.
  • Use Gloves: If your hands are warm, consider using disposable gloves to prevent the chocolate from melting as you roll.
  • Experiment with Flavors: Don’t hesitate to try different liqueurs and toppings to find your favorite combinations!
  • Uniform Size: Use a cookie scoop for consistent truffle sizes, ensuring even coating and presentation.
  • Dusting Toppings: If using powdered toppings, dust them lightly for a beautiful finish.
  • Don’t Overheat: Be cautious when reheating the chocolate mixture; overheating can cause it to become grainy.
  • Creative Pairings: Pair your truffles with dessert wine or coffee for a delightful tasting experience.

Common Mistakes and Troubleshooting

If you encounter issues while making your truffles, here are some common mistakes and their solutions:

  • Seized Chocolate: If the chocolate seizes, it’s often due to moisture. Keep all utensils dry and avoid adding liquid before the chocolate melts.
  • Too Soft to Roll: If the mixture is too soft, chill it longer before attempting to roll into balls.
  • Uneven Coating: Ensure that your toppings are finely chopped for an even coating on the truffles.
  • Flavor Too Strong: If the liqueur flavor is overpowering, try reducing the amount or using a milder spirit.

Variations to Try

Here are some creative variations to elevate your boozy chocolate truffles:

  • Mint Chocolate Truffles: Substitute peppermint schnapps for the triple sec for a refreshing twist.
  • Mocha Truffles: Add espresso powder to the chocolate mixture for a rich coffee flavor.
  • Spiced Rum Truffles: Use spiced rum instead of triple sec and roll in crushed gingerbread cookies for a festive touch.
  • White Chocolate Raspberry Truffles: Replace dark chocolate with white chocolate and incorporate raspberry liqueur for a fruity delight.

Storage and Make-Ahead Instructions

These truffles can be stored in an airtight container in the refrigerator for up to two weeks. If making them ahead, simply prepare the truffles as instructed and refrigerate. For optimal taste, allow them to come to room temperature before serving.

Frequently Asked Questions

Here are some common questions regarding boozy chocolate truffles:

  • How long do boozy chocolate truffles last? They can last up to two weeks in the fridge if stored properly in an airtight container.
  • Can I use chocolate chips instead of chocolate bars? Yes, but for best results, use high-quality chocolate bars for smoother ganache.
  • Is it possible to make these truffles non-alcoholic? Absolutely! Simply omit the alcohol and add a splash of vanilla extract for flavor.
  • What toppings can I use? You can use a variety of toppings such as chopped nuts, cocoa powder, shredded coconut, or even crushed cookies.
  • Can I freeze the truffles? Yes, you can freeze them for up to three months. Just ensure they are well-wrapped.
  • What’s the best way to serve them? Serve at room temperature for the best flavor and texture. Pair with coffee or dessert wine for a delightful experience.
  • Can I add more than one type of liqueur? Yes! Experimenting with different liqueurs can create unique flavor profiles.
  • Do I have to use heavy cream? You can substitute with a lighter version, but the texture may differ slightly.

Nutrition Tips and Dietary Adaptations

For those who are health-conscious or have dietary restrictions, consider these tips:

  • Dark Chocolate: Opt for dark chocolate with a high cocoa percentage for added health benefits.
  • Low-Fat Alternatives: Use low-fat cream or alternative dairy substitutes for a healthier version.
  • Vegan Options: Substitute dairy with coconut cream and use vegan chocolate for a plant-based treat.

Equipment Recommendations

To make your truffle-making process easier, consider these essential tools:

  • Sharp Knife: A good quality knife is essential for chopping chocolate neatly.
  • Mixing Bowls: Use medium-sized mixing bowls for combining ingredients.
  • Whisk: A whisk is necessary for blending the chocolate and cream smoothly.
  • Melon Baller or Cookie Scoop: These tools help in forming uniform-sized truffles.
  • Parchment Paper: Use it to prevent sticking when placing your truffles to cool.

Serving Suggestions

These truffles are best enjoyed fresh, but here are some serving ideas:

  • On a Dessert Platter: Arrange truffles on a decorative platter with fresh fruit or flowers for a stunning presentation.
  • With Coffee: Serve alongside a cup of espresso or coffee for a delightful pairing.
  • Gift Wrapping: Package them in a decorative box or jar to create a thoughtful gift for friends or family.

In conclusion, making boozy chocolate truffles is not just about the final product; it’s about the joy of crafting something delicious that can bring people together. With this guide, you now have the knowledge and confidence to create these delightful treats at home. So gather your ingredients, put on your apron, and let’s get started! Happy cooking!

Boozy Chocolate Truffles

Prep Time 20 minutes
Cook Time 10 minutes
Total Time 30 minutes
Servings 12 pieces
Calories 150
Indulge in these rich, boozy chocolate truffles coated with your favorite toppings for a decadent treat.

Ingredients

Chocolate

  • 4 ounces chocolate (finely chopped)
  • 4 tbsp heavy cream
  • 1 tbsp butter
  • 1.5 tbsp triple sec
  • 1/4 tsp vanilla extract

Toppings

  • 1/4 cup coconut flakes (finely processed)
  • 1/4 cup cacao powder
  • 1/4 cup chopped nuts

Instructions 

  • Chop the chocolate and place in a bowl.
  • Heat cream and butter, pour over chocolate, and let sit. Whisk until smooth, then add triple sec and vanilla. Chill for 1.5-2 hours.
  • Scoop and roll chocolate into 1-inch balls, then coat with toppings. Place on parchment paper.

Notes

Use a melon baller for uniform truffles and work quickly to prevent melting.
Calories: 150kcal
Cost: $15
Course: Dessert
Keyword: boozy, chocolate, truffles

Indulge in the Magic of No Bake Reese’s Truffle Cups

Welcome, dessert aficionados! Today, we’re diving into an incredibly delightful treat that’s sure to satisfy your sweet tooth: No Bake Reese’s Chocolate Peanut Butter Truffle Cups. This dessert is a perfect blend of creamy peanut butter, rich chocolate, and crunchy Reese’s Pieces. Not only is it easy to make, but it also requires no baking, making it a fantastic option for any occasion. Let’s explore why you’ll love this recipe and how you can whip it up in no time!

Why You’ll Love This Recipe

  • No baking required: This recipe is perfect for those hot summer days when you want a sweet treat without heating up the kitchen.
  • Quick and easy: With just a few simple ingredients and minimal effort, you’ll have a delicious dessert ready in under an hour!
  • Decadent flavor: The combination of creamy peanut butter and rich chocolate creates a mouthwatering flavor that’s hard to resist.
  • Customizable: You can easily swap out ingredients to suit your taste—try different chocolates or add nuts for a unique twist!
  • Perfect for sharing: Whether it’s a family gathering or a party with friends, these truffle cups are sure to impress and delight everyone!

Ingredients Breakdown

To create these indulgent truffle cups, you’ll need the following ingredients:

  • 2 cups semi-sweet chocolate chips: Melted, these will form the outer layer of your truffle cups.
  • 1 cup creamy peanut butter: The star of the show, adding richness and texture.
  • 1/2 cup powdered sugar: For sweetness and to help bind the ingredients.
  • 1/2 teaspoon vanilla extract: Enhances the flavor of the peanut butter.
  • 1 cup mini Reese’s Pieces: Adds a delightful crunch and bursts of chocolate flavor.
  • 1/2 cup dark chocolate chunks: For an extra layer of chocolatey goodness.

Optional Substitutions

  • Chocolate type: Swap semi-sweet chocolate chips for milk chocolate or white chocolate for a sweeter treat.
  • Peanut-free version: Use almond or sunflower butter in place of peanut butter.
  • Alternative candies: Replace Reese’s Pieces with mini M&M’s or chopped nuts for a different texture.

How to Make Reese’s Chocolate Peanut Butter Truffle Cups – Step by Step

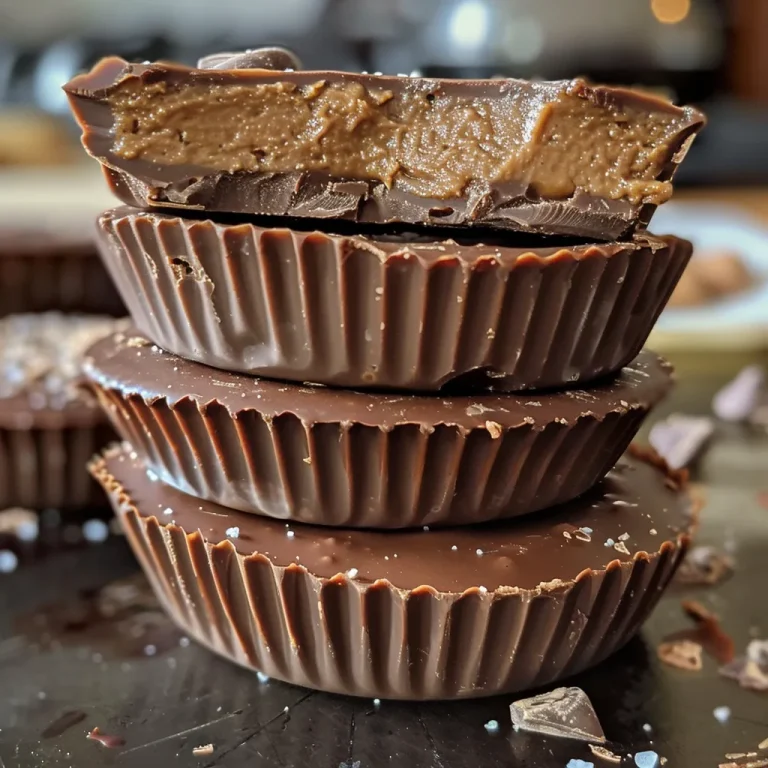
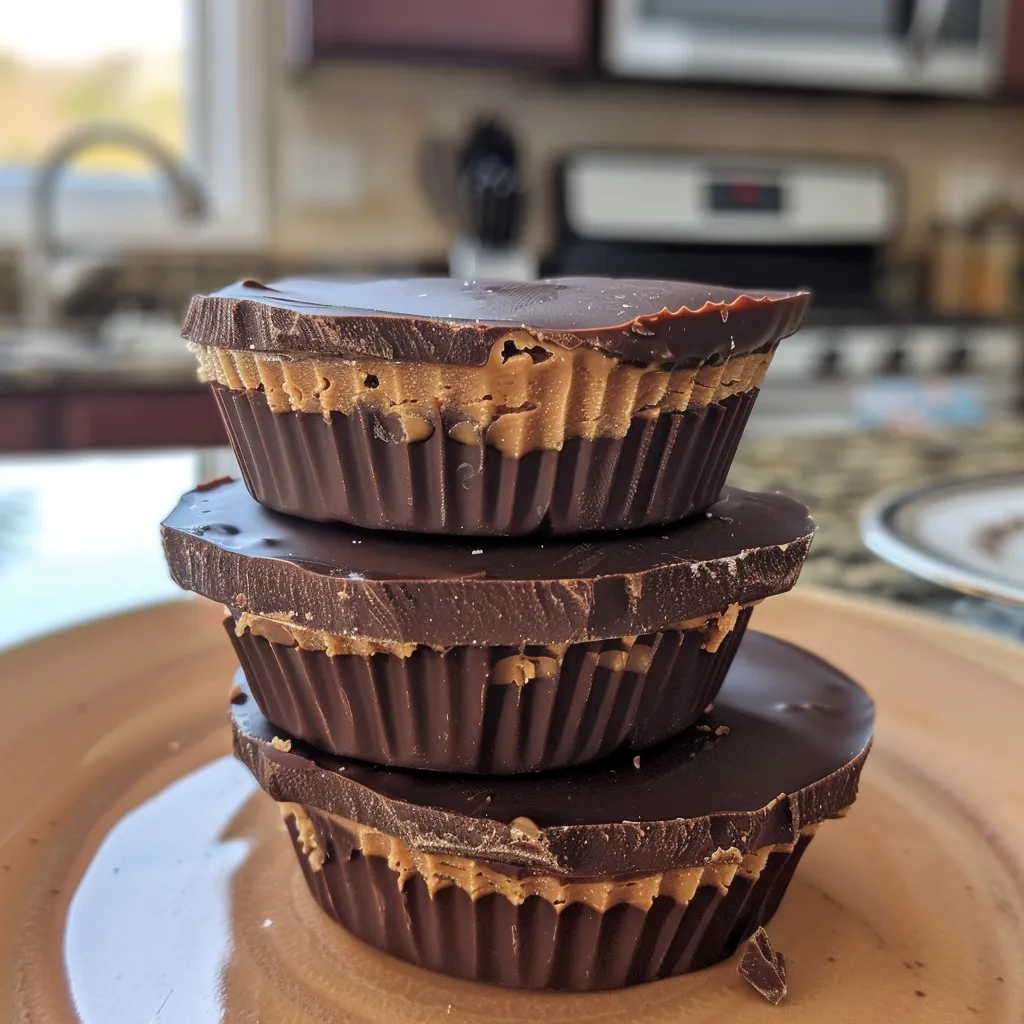
Mouth-watering close-up of No Bake Reese's Truffle Cups featuring a glossy chocolate coating.

Ready to get started? Follow these simple steps to create your truffle cups:

Step 1: Melt the Chocolate

In a microwave-safe bowl, melt the semi-sweet chocolate chips in 30-second intervals, stirring in between, until smooth. Be careful not to overheat!

Step 2: Prep the Base

Using a muffin tin, line with cupcake liners. Spoon a small amount of melted chocolate into each liner, ensuring it coats the bottom and sides. Place in the refrigerator to set for about 10 minutes.

Step 3: Mix the Peanut Butter Filling

In a mixing bowl, combine the creamy peanut butter, powdered sugar, and vanilla extract. Mix until smooth and creamy. Stir in the mini Reese’s Pieces for added texture.

Step 4: Assemble the Truffle Cups

Once the chocolate base has set, spoon a generous amount of the peanut butter filling into each cup, leveling it off with a spatula.

Step 5: Decorate

Top each filled cup with the remaining melted chocolate, ensuring the peanut butter filling is completely covered. Sprinkle additional Reese’s Pieces on top for decoration.

Step 6: Chill and Serve

Return the truffle cups to the refrigerator and let them chill for at least 30 minutes until the chocolate is firm. Once set, they’re ready to enjoy!

Expert Pro Tips

  • Use quality chocolate: For the best flavor, opt for high-quality semi-sweet chocolate. It makes a difference!
  • Don’t rush the melting process: Heat the chocolate slowly to avoid burning. Stir frequently for a smooth texture.
  • Chill between steps: Allow the chocolate to set properly before adding the filling to prevent mixing.
  • Experiment with toppings: Consider adding crushed nuts, sprinkles, or sea salt for an extra flavor dimension.
  • Make ahead: These truffle cups can be made a day in advance and stored in the fridge until serving.
  • Use mini cupcake liners: They help create perfectly portioned truffles that are easy to eat.
  • Check for firmness: Before serving, ensure the chocolate has fully set to avoid messiness.
  • Share the love: Package them beautifully for gifts or share with friends and family!

Common Mistakes and Troubleshooting

  • Overheating chocolate: Always melt chocolate in short intervals to prevent burning.
  • Too sticky filling: If the peanut butter mixture is too sticky, add a bit more powdered sugar to achieve the right consistency.
  • Chocolate not setting: Ensure your refrigerator is cold enough and allow ample time for the chocolate to set.

Variations to Try

  • Mint chocolate: Add a few drops of peppermint extract to the peanut butter filling for a refreshing twist.
  • Nutty crunch: Mix in chopped nuts or crushed pretzels for added texture and flavor.
  • Spicy kick: Incorporate a pinch of cayenne pepper into the chocolate for a surprising heat.
  • Fruit infusion: Fold in dried fruits like cranberries or raisins for a unique flavor profile.

Storage and Make-Ahead Instructions

These Reese’s Chocolate Peanut Butter Truffle Cups can be stored in an airtight container in the refrigerator for up to one week. For longer storage, they can also be frozen for up to three months. Just make sure to separate layers with parchment paper to avoid sticking.

Frequently Asked Questions

  • Can I use almond butter instead of peanut butter? Yes, almond butter or sunflower butter works well for a peanut-free version.
  • How do I make these truffles vegan? Use dairy-free chocolate and a plant-based cream alternative for the filling.
  • What’s the best way to melt chocolate? The microwave works well, but using a double boiler helps prevent overheating.
  • Can I make these truffles ahead of time? Absolutely! They can be made a day in advance and stored in the fridge.
  • What if my chocolate is too thick? Add a small amount of vegetable oil to thin it out for easier coating.
  • How do I get a shiny chocolate coating? Ensure the chocolate is tempered correctly and not overheated during melting.
  • Can I use different types of chocolate? Yes, feel free to experiment with dark, milk, or white chocolate for different flavor profiles.
  • How do I serve these truffles? Serve chilled or at room temperature on a decorative platter for an impressive presentation.

Nutritional Tips and Dietary Adaptations

For those mindful of their diet, consider using sugar-free chocolate chips and natural sweeteners to reduce calorie intake. Always check labels for allergens if catering to specific dietary needs.

Equipment Recommendations

To make your truffle-making experience smoother, here are some recommended tools:

  • Microwave-safe bowl: Essential for melting chocolate safely.
  • Muffin tin: Ideal for shaping your truffle cups.
  • Silicone spatula: Great for mixing and scraping down sides of bowls.
  • Measuring cups and spoons: Accurate measurements ensure the best results.

Serving Suggestions

These truffle cups are delicious on their own, but you can enhance the presentation by serving them with:

  • Whipped cream: A dollop of whipped cream adds a light, airy contrast.
  • Chocolate sauce: Drizzle chocolate sauce over the top for extra decadence.
  • Fresh fruit: Berries provide a refreshing balance to the rich flavors.
  • Coffee or tea: A warm beverage pairs beautifully with these sweet treats.

Final Thoughts

Creating these No Bake Reese’s Chocolate Peanut Butter Truffle Cups is not only simple but also incredibly rewarding. With their rich flavors and delightful textures, they are bound to be a hit at any gathering. So gather your ingredients, unleash your inner chef, and enjoy the sweet satisfaction of crafting this irresistible dessert. Your taste buds will thank you!

Reese's Chocolate Peanut Butter Truffle Cups – No Bake Dessert

Prep Time 15 minutes
Total Time 15 minutes
Servings 12 pieces
Calories 150
Indulge in these rich, no-bake truffle cups combining creamy peanut butter, melted chocolate, and crunchy Reese’s Pieces for a delightful treat.

Ingredients

Chocolate

  • 2 cups semi-sweet chocolate chips (melted)

Peanut Butter

  • 1 cup creamy peanut butter

Dry Ingredients

  • 1/2 cup powdered sugar
  • 1/2 teaspoon vanilla extract

Add-ins

  • 1 cup mini Reese’s Pieces
  • 1/2 cup dark chocolate chunks

Notes

  • Swap semi-sweet chocolate chips for milk chocolate or white chocolate for a sweeter twist.
  • Use almond or sunflower butter for a peanut-free version.
  • Replace Reese’s Pieces with mini M&M’s for added variety.

Instructions 

  • Line a mini muffin tin with paper liners.
  • Mix peanut butter with powdered sugar and vanilla until smooth.
  • Spoon a layer of melted chocolate into each liner, then add a spoonful of peanut butter mixture, topped with more melted chocolate.
  • Sprinkle mini Reese’s Pieces and dark chocolate chunks on top.
  • Refrigerate for at least 30 minutes until set.

Notes

Keep refrigerated for best results and enjoy within a week.
Calories: 150kcal
Cost: $15
Course: Dessert
Cuisine: American
Keyword: chocolate, no bake, peanut butter

Indulge Your Sweet Tooth with No Bake Reese’s Chocolate Peanut Butter Truffle Cups

If you’re a fan of rich and creamy desserts that require zero baking, you’ve landed in the right place! These Reese’s Chocolate Peanut Butter Truffle Cups are the perfect blend of creamy peanut butter and luscious chocolate. This treat is not only easy to make but also guarantees a delightful experience for anyone lucky enough to indulge. Let’s dive into why you’ll love this recipe!

Why You’ll Love This Recipe

  • Quick and Easy: With no baking required, you can whip these truffles together in under 30 minutes, making them perfect for spontaneous gatherings.
  • Decadent Flavor: The combination of creamy peanut butter and rich chocolate creates a flavor explosion that is simply irresistible.
  • Customizable: This recipe offers several substitution options and variations, allowing you to tailor it to your taste or dietary needs.
  • Perfect for Any Occasion: Whether it’s a birthday celebration, holiday party, or a simple treat for yourself, these truffles are sure to impress.
  • Kid-Friendly: Involving kids in the preparation process not only makes it fun but also helps foster their love for cooking.

Ingredients Breakdown

Let’s gather what we need for these delicious truffles:

  • 2 cups semi-sweet chocolate chips (melted)
  • 1 cup creamy peanut butter
  • 1/2 cup powdered sugar
  • 1/2 teaspoon vanilla extract
  • 1 cup mini Reese’s Pieces
  • 1/2 cup dark chocolate chunks

**Optional Substitutions:**

  • Chocolate: Swap semi-sweet chocolate chips for milk chocolate or white chocolate for a sweeter twist.
  • Nut Butter: Use almond or sunflower butter for a peanut-free version.
  • Mix-ins: Replace Reese’s Pieces with mini M&M’s or chopped nuts for added variety.

How to Make Reese’s Chocolate Peanut Butter Truffle Cups – Step by Step

  1. Melt the Chocolate: In a microwave-safe bowl, melt the semi-sweet chocolate chips in 30-second intervals, stirring between each, until smooth.
  2. Prep the Base: Line a muffin tin with cupcake liners to hold the truffles.
  3. Mix the Peanut Butter Filling: In another bowl, combine the creamy peanut butter, powdered sugar, and vanilla extract until smooth and creamy.
  4. Assemble the Truffle Cups: Spoon a layer of melted chocolate into the bottom of each liner, followed by a layer of the peanut butter mixture, and top with more melted chocolate.
  5. Decorate: Sprinkle mini Reese’s Pieces on top of the melted chocolate for an extra crunch and burst of color.
  6. Chill and Serve: Place the muffin tin in the refrigerator for at least 2 hours, allowing the chocolate to set before serving.

Pro Tips for Success

  • Temperature Control: Make sure your ingredients are at room temperature for easier mixing.
  • Use Quality Chocolate: Higher quality chocolate will yield better flavor and texture in your truffles.
  • Chill Time Matters: Don’t rush the chilling process. Proper setting ensures that the truffles hold their shape.
  • Clean Melting: Use a double boiler for melting chocolate to prevent it from scorching.
  • Use a Cookie Scoop: This helps portion out even amounts of filling for uniform truffles.
  • Experiment with Toppings: Try adding crushed nuts, sprinkles, or coconut flakes for added texture and flavor.
  • Keep It Cool: Store leftover truffles in the refrigerator for a longer shelf life.
  • Be Mindful of the Peanut Butter: Natural peanut butter may create a different texture; using creamy peanut butter works best for this recipe.

Common Mistakes and Troubleshooting

Even the best chefs make mistakes! Here’s how to avoid common pitfalls:

  • Too Crumbly: If your peanut butter mixture is too crumbly, add a little more peanut butter or a splash of milk to achieve a smoother consistency.
  • Chocolate Not Setting: Ensure your truffles are completely chilled. If they’re still soft, give them more time in the fridge.
  • Chocolate Overheating: If your chocolate seizes or becomes grainy, try adding a teaspoon of vegetable oil to rescue it.

Variations to Elevate Your Truffles

Here are some exciting variations to personalize your truffle experience:

  • Nutty Delight: Add chopped nuts (like pecans or walnuts) to the peanut butter filling for extra crunch.
  • Mint Chocolate: Incorporate mint extract into the chocolate layer for a refreshing twist.
  • Cookie Dough: Mix in tiny pieces of edible cookie dough into the peanut butter mixture for a fun surprise.
  • Fruit-Filled: Fold in dried cranberries or cherries for a sweet and tart contrast.

Storage and Make-Ahead Instructions

These truffles can be made ahead of time and stored for later enjoyment:

  • Store in an airtight container in the refrigerator for up to 2 weeks.
  • For longer storage, freeze truffles in a single layer on a baking sheet, then transfer to a freezer-safe container for up to 3 months.

Frequently Asked Questions (FAQs)

  • Can I use crunchy peanut butter? Yes, crunchy peanut butter adds a delightful texture to the truffles!
  • How do I make these truffles vegan? Substitute the chocolate with dairy-free chocolate chips and use a plant-based butter alternative.
  • Can I double the recipe? Absolutely! Just make sure to use a larger mixing bowl and muffin tin.
  • What if my chocolate is too thick? You can thin it out by adding a small amount of coconut oil or vegetable oil.
  • Can I use other chocolates? Yes, feel free to experiment with milk chocolate, white chocolate, or even dark chocolate!
  • How long do they take to set? They usually need about 2 hours in the fridge to set properly.
  • Are these truffles gluten-free? Yes, as long as the chocolate and other ingredients used are gluten-free.
  • What’s the best way to serve these? Serve them chilled or at room temperature with a drizzle of melted chocolate on top for an elegant touch.

Nutrition Tips and Dietary Adaptations

These truffles can be adapted for various dietary needs:

  • Low Sugar: Use sugar-free chocolate and a sugar substitute for a healthier option.
  • Protein Boost: Add protein powder to the peanut butter mixture for a nutritious twist.
  • Dairy-Free: Ensure all ingredients, including chocolate, are dairy-free.

Equipment Recommendations

Here’s what you’ll need to create these truffles:

  • Microwave-safe bowl: For melting chocolate.
  • Muffin tin: To shape your truffles.
  • Cookie scoop: For evenly portioning your truffles.
  • Parchment paper: Optional, for easy cleanup and to prevent sticking.

Serving Suggestions

Pair your truffles with:

  • Coffee: The rich flavors complement a warm cup perfectly.
  • Milk: A classic pairing that balances the sweetness.
  • Ice Cream: Serve alongside a scoop of vanilla or chocolate ice cream for a decadent dessert.

Conclusion

Creating these Reese’s Chocolate Peanut Butter Truffle Cups is not just about making a dessert; it’s about crafting a moment of joy and indulgence. With their rich flavors and simple preparation, they’re bound to become a favorite in your household. So gather your ingredients, roll up your sleeves, and let the magic happen. Enjoy your sweet creation, and remember: great cooking is possible for everyone!

Reese's Chocolate Peanut Butter Truffle Cups – No Bake Dessert

Prep Time 15 minutes
Total Time 15 minutes
Servings 12 pieces
Calories 150
Indulge in these rich, no-bake chocolate peanut butter truffle cups, perfect for a quick and satisfying treat.

Ingredients

Chocolate Coating

  • 2 cups semi-sweet chocolate chips (melted)

Filling

  • 1 cup creamy peanut butter
  • 0.5 cup powdered sugar
  • 0.5 teaspoon vanilla extract

Add-ins

  • 1 cup mini Reese’s Pieces
  • 0.5 cup dark chocolate chunks

Variations

  • Swap semi-sweet chocolate chips for milk chocolate or white chocolate for a sweeter twist.
  • Use almond or sunflower butter for a peanut-free version.
  • Replace Reese’s Pieces with mini M&M’s for added variety.

Instructions 

  • Line mini muffin tins with paper liners.
  • Melt the chocolate chips until smooth.
  • Spoon melted chocolate into liners, filling halfway, then chill until set.
  • Mix peanut butter, powdered sugar, and vanilla to make the filling.
  • Add a spoonful of peanut butter mixture and top with remaining melted chocolate. Garnish with Reese’s Pieces and dark chocolate chunks. Chill until firm.

Notes

For best results, chill the cups thoroughly before serving.
Calories: 150kcal
Cost: $15
Course: Dessert
Cuisine: American
Keyword: chocolate, peanut butter

Are you ready to elevate your snacking experience? Cheesy Garlic Bombs are the ultimate fusion of gooey cheese, aromatic garlic, and fluffy dough, creating a bite-sized snack that your guests won’t be able to resist! Whether you’re preparing for a game night, a cozy family dinner, or a festive gathering, these savory delights are sure to impress. In this comprehensive guide, we’ll explore everything you need to know about crafting these mouthwatering garlic bombs, from ingredients to cooking tips!

Why You’ll Love This Recipe

This recipe for cheesy garlic bombs is not just about flavor; it’s about creating delightful moments around the table. Here are five reasons to love this dish:

  • Quick and Easy: With just a handful of ingredients and minimal prep time, you can whip up these cheesy bites in under 30 minutes!
  • Customizable: You can easily adapt the filling to suit your taste, whether you prefer classic mozzarella or want to experiment with different cheeses.
  • Perfect for Sharing: These bombs are ideal for parties, serving as a crowd-pleasing appetizer or side dish that everyone will enjoy.
  • Kid-Friendly: Children love the gooey cheese and buttery flavor, making this a fantastic way to introduce them to cooking.
  • Impressive Presentation: With their golden-brown crusts and bubbling cheese, these bombs look as good as they taste!

Ingredient Breakdown

Let’s dive into the ingredients that make these cheesy garlic bombs irresistible. Each component plays a vital role in achieving that perfect balance of flavor and texture:

  • Refrigerated Biscuit Dough: This forms the base of your cheesy garlic bombs. You can use an 8-count can for convenience, or make your own dough if you prefer.
  • Mozzarella Cheese: The star of the show! Use small cubes or shredded mozzarella for that gooey, melty center.
  • Butter: Melted butter adds richness and helps the garlic and herbs adhere to the dough.
  • Garlic: Freshly minced garlic is essential for that aromatic flavor. You can use more or less depending on your preference.
  • Italian Seasoning: A blend of herbs adds depth to the flavor profile, enhancing the overall taste.
  • Salt and Pepper: Basic seasonings that elevate the taste of your cheesy garlic bombs.
  • Fresh Parsley: Chopped parsley not only adds a pop of color but also freshness to the dish.
  • Parmesan Cheese: A sprinkle of grated Parmesan on top provides an extra layer of flavor and a delightful crust.

Pro Tips for Perfect Cheesy Garlic Bombs

To ensure your cheesy garlic bombs turn out perfectly every time, keep these expert tips in mind:

  • Seal the Dough: Make sure to pinch the dough tightly after stuffing to prevent cheese leakage during baking.
  • Baking Sheet Preparation: Line your baking sheet with parchment paper to avoid sticking and make cleanup easier.
  • Use Fresh Ingredients: Fresh garlic and herbs will significantly enhance the flavor compared to dried versions.
  • Experiment with Cheeses: Don’t limit yourself to mozzarella! Try cheddar, pepper jack, or even cream cheese for different flavor profiles.
  • Adjust Garlic Levels: If you’re not a fan of strong garlic flavors, reduce the amount or roast the garlic for a milder taste.
  • Keep an Eye on Baking: Watch your bombs closely during the last few minutes of baking to avoid over-browning.
  • Serve Warm: These cheesy garlic bombs are best enjoyed fresh out of the oven while the cheese is still gooey!
  • Make Ahead: Prepare the bombs and freeze before baking. This way, you can pop them in the oven whenever you’re ready!

Common Mistakes and Troubleshooting

Delicious cheesy garlic bombs arranged on a plate, topped with parsley and garlic seasoning.

Even seasoned chefs can encounter challenges while making cheesy garlic bombs. Here are some common mistakes and how to avoid them:

  • Too Much Filling: Overstuffing can cause the dough to burst open during baking. Stick to the recommended amount of cheese and filling.
  • Undercooked Dough: If your bombs are golden outside but doughy inside, they may need more time in the oven. Always check for doneness!
  • Cheese Leakage: Ensure the dough is properly sealed to prevent cheese from escaping during baking.
  • Burnt Garlic: If using fresh garlic, add it to the melted butter just before brushing to avoid burning it.

Variations to Try

While the classic cheesy garlic bomb recipe is delicious on its own, here are some exciting variations to explore:

  • Spicy Bombs: Add jalapeños or crushed red pepper flakes to the cheese mixture for a kick of heat.
  • Pizza Style: Incorporate pepperoni or Italian sausage into the filling to create a pizza-inspired treat.
  • Herb-Infused: Mix in fresh basil or oregano with the cheese for a burst of freshness.
  • Sweet Variation: Replace the garlic butter with cinnamon sugar and stuff with chocolate or cream cheese for a dessert version!

Storage and Make-Ahead Instructions

If you want to prepare cheesy garlic bombs in advance, here’s how to store them:

  • Refrigerator: Store baked bombs in an airtight container for up to 3 days. Reheat in the oven for best results.
  • Freezer: Freeze unbaked bombs for up to 3 months. Bake directly from frozen, adding an extra 5-10 minutes to the baking time.
  • Make-Ahead: Assemble the bombs and refrigerate them for up to 24 hours before baking.

Frequently Asked Questions (FAQ)

Here are some common questions about cheesy garlic bombs and their answers:

  • Can I use frozen dough? Yes, frozen dough works well. Just thaw it completely before use.
  • What cheese works best? Mozzarella is ideal for its meltability, but feel free to mix in other cheeses!
  • How do I prevent soggy bottoms? Bake on a preheated baking sheet to ensure the bottoms crisp up nicely.
  • Can I make these dairy-free? Absolutely! Substitute with dairy-free cheese and use vegan butter.
  • What dipping sauces pair well? Marinara, ranch, or garlic butter are fantastic choices for dipping.
  • How can I add more flavor? Consider adding spices like smoked paprika or using flavored butters.
  • Can I use homemade dough? Yes! Homemade dough can add a personal touch and enhance flavor.
  • What if my garlic bombs are too greasy? Make sure to drain any excess butter before serving to keep them light.

Nutrition Tips and Dietary Adaptations

For those watching their dietary intake, here are some tips to adapt this recipe:

  • Low-Carb Option: Use cauliflower dough or almond flour biscuits for a lower-carb alternative.
  • Gluten-Free: Substitute with gluten-free biscuit dough to cater to gluten sensitivity.
  • Healthier Cheese: Opt for low-fat cheese options to reduce calories without sacrificing flavor.

Equipment Recommendations

To create your cheesy garlic bombs, here’s a list of recommended equipment:

  • Baking Sheet: A large, flat baking sheet is essential for even baking.
  • Parchment Paper: Use it to line your baking sheet for easy cleanup.
  • Mixing Bowl: A medium-sized bowl for mixing your garlic butter and seasoning.
  • Brush: A pastry brush helps evenly apply garlic butter over the bombs.

Serving Suggestions

These cheesy garlic bombs shine when served fresh. Here are some creative serving ideas:

  • As a Starter: Serve them warm as an appetizer with dipping sauces on the side.
  • With a Salad: Pair with a fresh garden salad for a balanced meal.
  • For Game Day: Present them on a platter for parties—guests will love grabbing them!

In conclusion, cheesy garlic bombs are not just a snack; they are an experience. With their irresistible flavors and customizable options, they can suit any occasion. Whether you choose to stick to the classic recipe or explore exciting variations, you’re sure to create a dish that brings joy and satisfaction to your table. So gather your ingredients, roll up your sleeves, and let’s start making these delightful cheesy garlic bombs that your friends and family will rave about!

Cheesy Garlic Bombs – Gooey, Buttery & Irresistible

Prep Time 10 minutes
Cook Time 15 minutes
Total Time 25 minutes
Servings 8 pieces
Calories 250
These cheesy garlic bombs are a delightful treat, combining gooey mozzarella, fragrant garlic, and buttery goodness in every bite.

Ingredients

Dough

  • 1 can refrigerated biscuit dough (8-count, cut into halves)
  • 12 small mozzarella cubes
  • 3 tablespoons butter (melted)
  • 2 cloves garlic (minced)
  • 1 teaspoon Italian seasoning
  • 0.5 teaspoon salt
  • 0.5 teaspoon black pepper
  • 1 tablespoon fresh parsley (chopped)
  • 0.25 cup grated Parmesan cheese

Instructions 

  • Preheat oven to 375°F (190°C).
  • Cut biscuit dough into halves and flatten each piece.
  • Place a mozzarella cube in the center of each dough piece, then fold and seal.
  • Mix melted butter, minced garlic, Italian seasoning, salt, pepper, and parsley; brush over the bombs.
  • Sprinkle Parmesan cheese on top and bake for 15 minutes until golden.

Notes

For extra flavor, add a sprinkle of red pepper flakes before baking.
Calories: 250kcal
Cost: $12
Course: Appetizer
Cuisine: American
Keyword: Cheese, garlic

Discover the Joy of Fluffy Vegan Pancakes

Welcome to a delightful culinary journey where we explore the world of fluffy vegan pancakes. This recipe is not just any pancake recipe; it’s a celebration of simple, wholesome ingredients that come together to create a breakfast that everyone will love. Whether you’re a seasoned chef or a kitchen novice, these pancakes are sure to impress. Let’s dive into the deliciousness!

Why You’ll Love This Recipe

This vegan pancake recipe is loved for many reasons. Here are just a few:

  • Quick and Easy: With simple ingredients and straightforward steps, you can whip these pancakes up in no time—perfect for busy mornings!
  • Wholesome Ingredients: Made with plant-based ingredients, these pancakes are not only delicious but also healthy, making them an ideal breakfast choice.
  • Customizable: You can easily adapt this recipe to suit your taste, whether you prefer adding chocolate chips or fresh fruits.
  • Perfect Texture: This recipe delivers pancakes that are light, fluffy, and golden brown, ensuring a delightful bite every time.
  • Family-Friendly: Whether you’re cooking for kids or adults, everyone will enjoy these pancakes, making them a great choice for family breakfasts.

Ingredients Breakdown

Let’s take a closer look at the ingredients you’ll need for this delicious pancake recipe:

  • 1 cup all-purpose flour: The base of the pancakes. For a healthier alternative, you can substitute with whole wheat flour.
  • 1 tablespoon baking powder: This ingredient helps the pancakes rise, giving them that fluffy texture.
  • 2 tablespoons sugar: Sweetens the batter. Feel free to adjust the quantity or use alternatives like maple syrup or agave.
  • 1/8 teaspoon salt: Enhances the flavor of the pancakes.
  • 1 cup almond milk (or any plant-based milk): Adds moisture. You can use soy milk, oat milk, or coconut milk for different flavors.
  • 1 tablespoon apple cider vinegar: When combined with almond milk, it creates a vegan buttermilk, adding tanginess.
  • 1 teaspoon vanilla extract: For a touch of sweetness and aroma.
  • 2 tablespoons melted coconut oil (or neutral oil): Adds richness to the batter. You can use canola or vegetable oil if you prefer.

Step-by-Step Instructions

Follow these simple steps to create your fluffy vegan pancakes:

  1. Make Vegan Buttermilk: In a small bowl, mix the almond milk with apple cider vinegar. Let it sit for 5 minutes to curdle slightly.
  2. Mix Dry Ingredients: In a large bowl, whisk together the flour, baking powder, sugar, and salt.
  3. Mix Wet Ingredients: In another bowl, combine the vegan buttermilk, vanilla extract, and melted coconut oil.
  4. Combine Batter: Pour the wet mixture into the dry ingredients. Stir gently until just combined. A few lumps are okay—don’t overmix!
  5. Heat Pan: Heat a non-stick skillet or griddle over medium heat. Lightly grease if needed.
  6. Cook Pancakes: Pour 1/4 cup of batter per pancake. Cook for 2–3 minutes until bubbles form on top. Flip and cook for another 2–3 minutes until golden brown.
  7. Serve Warm: Stack the pancakes, add your favorite toppings, and serve immediately.

Pro Tips for Perfect Pancakes

Enhance your pancake-making skills with these expert insights:

  • Don’t Overmix: A few lumps in the batter are perfectly fine. Overmixing can lead to dense pancakes.
  • Heat Control: Keep the skillet at medium heat. Too hot can burn the pancakes, while too low won’t cook them properly.
  • Experiment with Toppings: Try fresh berries, maple syrup, or a sprinkle of powdered sugar for added flavor.
  • Use a Measuring Cup: For uniform pancakes, use a measuring cup to pour the batter.
  • Make Ahead: You can prepare the batter a day ahead and store it in the refrigerator for quick breakfast options.
  • Use a Non-Stick Surface: A non-stick skillet is ideal for achieving that perfect golden brown finish.
  • Test the Batter: Drop a small amount of batter on the skillet to check if it’s ready. If it sizzles, you’re good to go!
  • Store Leftovers Properly: Keep any leftover pancakes in an airtight container in the fridge for up to three days.

Common Mistakes and Troubleshooting

Even the best chefs make mistakes. Here are some common pitfalls and how to avoid them:

  • Pancakes are too dense: This can happen if you overmix the batter or use too much flour. Always measure accurately!
  • Pancakes stick to the pan: Ensure your skillet is adequately heated and greased before pouring the batter.
  • Pancakes are unevenly cooked: Make sure the heat is evenly distributed and adjust as necessary.
  • Pancakes taste bland: Adjust the sweetness and vanilla extract to enhance flavor.

Delicious Variations

Feel free to customize your pancakes with these tasty variations:

  • Chocolate Chip Pancakes: Fold in vegan chocolate chips for a sweet treat.
  • Banana Pancakes: Mash ripe bananas into the batter for a fruity twist.
  • Blueberry Pancakes: Add fresh or frozen blueberries for a burst of flavor.
  • Spiced Pancakes: Incorporate cinnamon or nutmeg for a warm, aromatic touch.

Storage and Make-Ahead Instructions

Want to enjoy these pancakes later? Here’s how to store them:

  • Refrigeration: Store leftover pancakes in an airtight container in the fridge for up to 3 days.
  • Freezing: For longer storage, freeze pancakes between layers of parchment paper in a freezer bag for up to 2 months. Reheat in the toaster or microwave.
  • Make Ahead: Prepare the batter the night before and keep it refrigerated. Just give it a gentle stir before cooking.

Nutritional Information and Dietary Adaptations

This vegan pancake recipe is not only delicious but also nutritious. Here are some dietary adaptations:

  • Low Sugar Option: Reduce the sugar to make it lower in calories.
  • Gluten-Free Version: Substitute all-purpose flour with a gluten-free blend.
  • Higher Protein: Add a scoop of protein powder to the batter for a protein boost.

Frequently Asked Questions

Here are some common questions about making vegan pancakes:

  • Can I use different plant-based milks? Absolutely! Soy, oat, or coconut milk work great.
  • How can I make these pancakes fluffier? Ensure your baking powder is fresh and don’t overmix the batter.
  • Can I make these pancakes without sugar? Yes, you can use ripe bananas or applesauce for natural sweetness.
  • What toppings do you recommend? Fresh fruits, vegan whipped cream, or maple syrup are all great choices.
  • How do I know when to flip the pancakes? Flip when bubbles form on the surface of the pancake.
  • Can I add protein powder to this recipe? Yes, just replace a small amount of the flour with protein powder.
  • How long do leftovers last? In the fridge, they can last up to 3 days; in the freezer, up to 2 months.
  • Can I double the recipe? Yes, feel free to scale up the recipe as needed!

Recommended Kitchen Equipment

To make your pancake-making experience even better, consider these tools:

  • Non-Stick Skillet: Ensures easy flipping and prevents sticking.
  • Mixing Bowls: A good set of mixing bowls will make the preparation easier.
  • Whisk: Essential for combining dry and wet ingredients smoothly.
  • Measuring Cups and Spoons: Accurate measurements are key to perfect pancakes.
  • Spatula: A good spatula makes flipping pancakes a breeze.

Serving Suggestions

Serve your fluffy vegan pancakes with a variety of toppings to enhance their flavor:

  • Fresh Fruits: Strawberries, blueberries, or sliced bananas add natural sweetness.
  • Vegan Whipped Cream: A dollop of coconut whipped cream elevates the dish.
  • Maple Syrup: A classic choice that pairs perfectly with pancakes.
  • Nut Butters: Almond or peanut butter adds a rich, creamy texture.

In conclusion, making fluffy vegan pancakes is not only straightforward but also incredibly rewarding. With this recipe, you can create a dish that’s sure to bring smiles around the breakfast table. So grab your ingredients and start cooking—your perfect pancake adventure awaits!

Vegan Pancake Recipe

Prep Time 10 minutes
Cook Time 10 minutes
Total Time 20 minutes
Servings 4 pancakes
Calories 180
Enjoy fluffy, plant-based pancakes perfect for a quick breakfast or brunch. Simple ingredients come together for a delicious vegan treat.

Ingredients

Dry Ingredients

  • 1 cup all-purpose flour
  • 1 tablespoon baking powder
  • 2 tablespoons sugar
  • 1/8 teaspoon salt

Wet Ingredients

  • 1 cup almond milk (or any plant-based milk)
  • 1 tablespoon apple cider vinegar
  • 1 teaspoon vanilla extract
  • 2 tablespoons melted coconut oil (or neutral oil)

Instructions 

  • Mix almond milk with apple cider vinegar and let sit for 5 minutes.
  • Whisk together dry ingredients in a large bowl.
  • Combine vegan buttermilk, vanilla, and melted coconut oil in another bowl.
  • Pour wet mixture into dry ingredients and stir until just combined.
  • Heat a skillet over medium heat and cook 1/4 cup batter for 2-3 minutes per side until golden.
  • Serve pancakes warm with toppings of choice.

Notes

Ensure not to overmix the batter for fluffy pancakes.
Calories: 180kcal
Cost: $10
Course: Breakfast
Cuisine: vegan
Keyword: Pancake