Author

Mike

Browsing

Discover the Symphony of Flavors in Honey Garlic Butter Steak and Rice

Welcome to a culinary experience that marries sweet and savory in a delightful dance—our Honey Garlic Butter Steak and Rice Skillet. This dish is more than just a meal; it’s a comforting embrace of flavors that transforms a simple weeknight dinner into a special occasion. With tender steak strips, aromatic garlic, and a luscious honey garlic sauce, you’ll find yourself savoring every bite. Plus, it’s quick to prepare, making it perfect for busy individuals or families looking for a delicious solution to dinner.

In this article, we’ll explore everything you need to know about making this scrumptious dish, from ingredient breakdowns to expert tips and common pitfalls. Let’s get cooking!

Why You’ll Love This Recipe

  • Quick and Easy: Ready in under 30 minutes, this one-pan meal is perfect for busy weeknights.
  • Flavor Explosion: The combination of sweet honey and savory garlic creates an irresistible sauce that enhances every bite.
  • Customizable: Easily adapt the recipe to suit your taste preferences with variations and substitutions.
  • Healthy Ingredients: Packed with protein and wholesome ingredients, it’s a nutritious option for any meal.
  • Minimal Cleanup: Cooked in just one skillet, it reduces the hassle of washing multiple pots and pans.

Ingredients Breakdown

To create the perfect Honey Garlic Butter Steak and Rice Skillet, you will need the following ingredients:


Cast Iron Skillet

★ Recommended Kitchen Tool

Cast Iron Skillet

Make this recipe even easier with a quality Cast Iron Skillet — a must-have kitchen staple!


🛒 View on Amazon →

As an Amazon Associate, we earn from qualifying purchases.
  • 1 lb steak, cut into strips: Choose tender cuts like sirloin or ribeye for the best flavor and texture.
  • 1 cup uncooked rice: Long-grain white rice or jasmine rice works beautifully, but you can also use brown rice for a healthier option.
  • 2 cups beef broth: Enhance the flavor of the rice; you can substitute with vegetable broth if preferred.
  • 1/4 cup honey: The sweet star of this dish. Maple syrup can be a substitute for a different flavor profile.
  • 4 cloves garlic, minced: Fresh garlic adds depth; avoid pre-minced for the best taste.
  • 1 tablespoon soy sauce: Adds umami and richness; low-sodium soy sauce can be used for a healthier choice.
  • 1 tablespoon butter: Essential for flavor; you can also use olive oil as a substitute.
  • Salt and pepper to taste: Essential for seasoning.

How to Make Honey Garlic Butter Steak and Rice Skillet
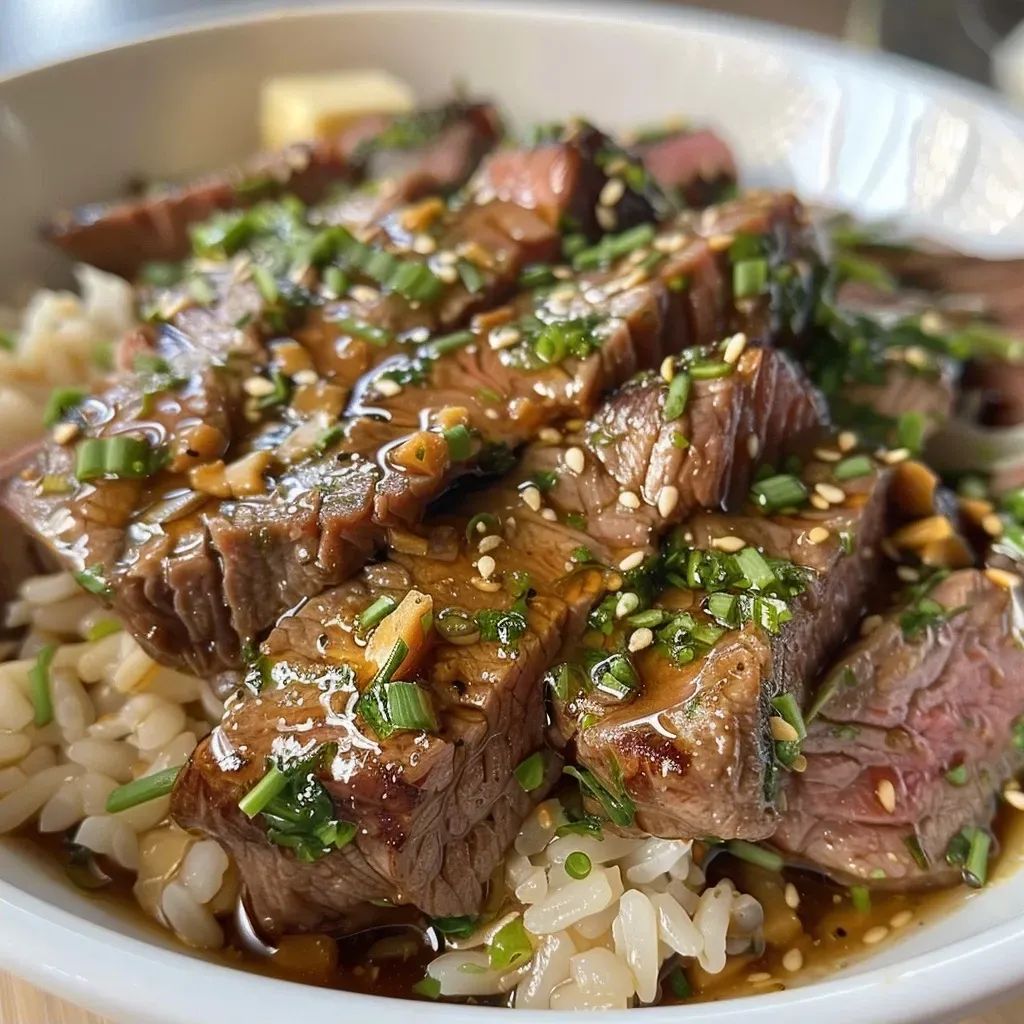
Close-up view of a shiny, plated Honey Garlic Butter Steak and Rice Skillet filled with juicy steak strips and rice.

Follow these simple steps to create your dish:

  1. In a large skillet, heat olive oil over medium-high heat. Season steak with salt and pepper; sear for 3-4 minutes until browned. Remove and set aside.
  2. In the same skillet, reduce heat to medium and melt butter. Add minced garlic and sauté for 1 minute until fragrant.
  3. Stir in honey, soy sauce, and Dijon mustard; bring to a simmer.
  4. Add uncooked rice, stirring to coat in the sauce. Pour in beef broth and bring to a boil.
  5. Reduce heat to low, cover, and simmer for about 15 minutes until rice absorbs liquid.
  6. Return steak to skillet; stir gently to combine and heat through for an additional 2-3 minutes.
  7. Garnish with fresh parsley before serving.

Expert Tips for Perfecting Your Dish

  • Use a Cast Iron Skillet: For the best heat retention and searing, opt for a cast iron skillet.
  • Let the Steak Rest: Allow the steak to rest before slicing to retain its juices.
  • Adjust Seasoning: Taste as you go; adjust salt and pepper to enhance the flavor.
  • Don’t Overcook the Rice: Follow the timing closely to ensure the rice is perfectly cooked and not mushy.
  • Add Fresh Herbs: Fresh parsley or cilantro can brighten the dish and add flavor.
  • Double the Sauce: If you love extra sauce, feel free to double the honey garlic mixture for more flavor.
  • Use a Meat Thermometer: For perfectly cooked steak, aim for an internal temperature of 130°F for medium-rare.
  • Try Marinades: Marinade the steak for a few hours in advance for enhanced flavor.

Common Mistakes and Troubleshooting

Even the best chefs encounter hiccups in the kitchen. Here are some common mistakes to avoid:

  • Not Prepping Ingredients: Have everything chopped and measured before you start cooking—this makes the process smoother.
  • Skipping the Resting Period: Allow your steak to rest after cooking to keep it juicy.
  • Using Cold Ingredients: Ensure your steak is at room temperature before cooking for even cooking.
  • Overcrowding the Pan: Cook in batches if necessary to achieve a good sear on the steak.

Variations to Try

Feel free to customize your Honey Garlic Butter Steak and Rice Skillet with these variations:

  • Vegetable Additions: Toss in bell peppers, snap peas, or broccoli for added nutrition and color.
  • Switch Up the Protein: Substitute the steak with chicken or shrimp for a different protein profile.
  • Spicy Kick: Add red pepper flakes or sriracha to the sauce for a spicy version.
  • Herb Infusion: Experiment with fresh thyme or rosemary for a fragrant twist.

Storage and Make-Ahead Instructions

This dish can be prepared in advance and stored for later enjoyment:

  • Refrigerator: Store leftovers in an airtight container for up to 3 days.
  • Freezer: Freeze individual portions in freezer-safe containers for up to 2 months. Thaw overnight in the refrigerator before reheating.
  • Reheating: Gently reheat in a skillet over low heat, adding a splash of beef broth if needed to moisten.

Comprehensive FAQ

  • Can I use other types of rice? Yes, brown rice is a great alternative but may require longer cooking time.
  • What can I substitute for honey? Maple syrup or agave nectar can be used as substitutes.
  • Is this dish gluten-free? Use gluten-free soy sauce to make it gluten-free.
  • Can I use pre-cooked steak? Yes, just warm it up in the sauce before serving.
  • How do I know when the steak is done? Use a meat thermometer; 130°F is ideal for medium-rare.
  • What should I serve with this dish? It’s delicious on its own but pairs well with a side salad or steamed vegetables.
  • Can I make this dish vegetarian? Absolutely! Substitute the steak with tofu or tempeh and use vegetable broth.
  • How spicy is this dish? It’s not spicy unless you add chili flakes or sauce; feel free to adjust to your taste.

Nutritional Tips and Dietary Adaptations

This meal is not only delicious but can also be adapted to meet various dietary needs:

  • Low-Carb: Substitute rice with cauliflower rice for a low-carb option.
  • High-Protein: Add cooked beans or lentils for extra protein.
  • Dairy-Free: Use olive oil instead of butter for a dairy-free version.

Equipment Recommendations

To make your cooking experience easier, here are some essential tools you’ll need:

  • Large Skillet: A heavy-bottomed skillet or cast iron pan is ideal for even cooking.
  • Sharp Knife: A good chef’s knife for cutting the steak into strips.
  • Meat Thermometer: To ensure perfect cooking temperatures for your steak.

Serving Suggestions

This Honey Garlic Butter Steak and Rice Skillet is delicious served as is, but here are some ideas to elevate your meal:

  • Garnish: Fresh chopped parsley or cilantro adds color and freshness.
  • Side Dishes: Pair with a crisp green salad or steamed vegetables for a complete meal.
  • Wine Pairing: A glass of red wine, like a Merlot or Cabernet Sauvignon, complements the flavors beautifully.

Conclusion

In conclusion, our Honey Garlic Butter Steak and Rice Skillet is a fantastic choice for anyone looking to create a hearty, flavorful meal in no time. With its delightful blend of sweet and savory flavors and the ease of preparation, it’s destined to become a favorite in your kitchen. Whether you’re entertaining guests or enjoying a quiet family dinner, this dish promises satisfaction and joy. So roll up your sleeves and let’s make some culinary magic happen tonight!

Honey Garlic Butter Steak and Rice Skillet

Prep Time 10 minutes
Cook Time 20 minutes
Total Time 30 minutes
Servings 4 servings
Calories 550
A quick and flavorful skillet dish combining tender steak, fragrant garlic, sweet honey, and savory rice for a satisfying meal.

Ingredients

Meat

  • 1 lb steak, cut into strips

Grains

  • 1 cup uncooked rice

Broth

  • 2 cups beef broth

Sweeteners

  • 1/4 cup honey

Aromatics

  • 4 cloves garlic, minced

Sauces & Condiments

  • 1 tablespoon soy sauce

Dairy & Fats

  • 1 tablespoon butter

Seasonings

  • to taste Salt and pepper

Instructions 

  • Sear seasoned steak in a skillet until browned, then set aside.
  • Melt butter in the same skillet, sauté garlic for 1 minute.
  • Add honey, soy sauce, and simmer briefly.
  • Stir in rice, pour in beef broth, bring to boil, then simmer covered for 15 minutes.
  • Return steak to skillet, stir gently, cook 2-3 minutes, then serve garnished with parsley.

Notes

Adjust seasoning to taste and serve hot.
Calories: 550kcal
Cost: $15
Course: Main Course
Cuisine: American
Keyword: Honey, Rice, Steak

Discover the Delight of Honey Garlic Ground Turkey

Welcome to a culinary journey where simplicity meets flavor! This honey garlic ground turkey recipe is not just any dish; it’s a quick and delicious solution for busy weeknights that packs a punch of sweetness and savory goodness. In just 25 minutes, you can create a meal that’s not only satisfying but also brimming with nutrients. Let’s dive into the magic of this recipe and explore why it deserves a spot on your dinner table!

Why You’ll Love This Recipe

  • Quick to Prepare: This recipe is ready in just 25 minutes, making it perfect for those hectic evenings when time is of the essence.
  • Flavor Explosion: The combination of honey and garlic creates a deliciously sticky glaze that is both sweet and savory, ensuring every bite is packed with flavor.
  • Versatile Serving Options: You can serve this dish over rice, noodles, or even in lettuce cups for a fresh twist, making it adaptable to your preferences.
  • Healthy Choice: Ground turkey is a lean protein that is lower in fat compared to other meats, making it a healthier alternative without sacrificing taste.
  • Simple Ingredients: With a short list of common pantry staples, this recipe is accessible and easy to customize based on what you have at home.

Ingredients Breakdown

Let’s take a closer look at the ingredients you’ll need to create this scrumptious dish, along with some handy substitutions.

  • 1 lb Ground Turkey: Opt for extra-lean for a healthier dish, or substitute with ground chicken or beef if preferred.
  • 3-4 cloves Garlic: Fresh minced garlic enhances the flavor profile dramatically, ensuring a rich taste.
  • 1/4 cup Honey: This ingredient creates a sticky glaze; if you’re looking for a different flavor, maple syrup can be a fantastic substitute.
  • 1/4 cup Low-Sodium Soy Sauce: Use tamari for gluten-free options; this adds depth and umami to the dish.
  • 1 tbsp Rice Vinegar: This adds tang; apple cider vinegar works well as a substitute.
  • 1 tsp Sesame Oil: Adds a nutty depth; however, you can omit this for a lighter version.
  • optional Red Pepper Flakes: For those who enjoy a little heat, feel free to add these or use fresh chili or chili paste.
  • 2 stalks Green Onions: These add freshness and crunch; chives can be used as a substitute.
  • 1 tbsp Neutral Oil: For sautéing, use canola or avocado oil instead of olive oil.

How to Make Honey Garlic Ground Turkey

Close-up view of honey garlic ground turkey served in a bowl, garnished with green onions.

Now that we have our ingredients ready, it’s time to cook! Follow these simple steps to bring your dish to life.


Meal Prep Container Set

★ Recommended Kitchen Tool

Meal Prep Container Set

Make this recipe even easier with a quality Meal Prep Container Set — a must-have kitchen staple!


🛒 See Deals on Amazon →

As an Amazon Associate, we earn from qualifying purchases.
  • Step 1: Cook the Turkey: In a large skillet, heat the neutral oil over medium-high heat. Add the ground turkey, breaking it apart with a spatula. Cook until browned and no longer pink, about 5-7 minutes.
  • Step 2: Add Garlic: Once the turkey is cooked, add the minced garlic to the pan. Sauté for an additional 1-2 minutes until fragrant.
  • Step 3: Prepare the Sauce: In a bowl, whisk together the honey, soy sauce, rice vinegar, and sesame oil. Pour this sauce over the turkey, stirring to combine.
  • Step 4: Combine and Cook: Let the mixture simmer for about 3-5 minutes, allowing the flavors to meld and the sauce to thicken slightly. If desired, sprinkle in red pepper flakes for heat.

Pro Tips for the Perfect Dish

To elevate your cooking game, consider these expert insights:

  • Don’t Crowd the Pan: This will help ensure the turkey browns properly. If needed, cook in batches.
  • Use Fresh Garlic: Fresh garlic is key for the best flavor; powdered garlic will not provide the same depth.
  • Adjust Sweetness: If you prefer a sweeter sauce, add more honey; for a tangy twist, increase the vinegar.
  • Experiment with Proteins: Feel free to swap the turkey for chicken, beef, or even tofu for a vegetarian option.
  • Check for Doneness: Ensure that the turkey reaches an internal temperature of 165°F (74°C) for safety.
  • Garnish Generously: Top your dish with additional green onions for a pop of color and flavor.
  • Make it Ahead: This dish holds up well in the fridge, making it a great option for meal prep.
  • Mix Up the Spices: Don’t hesitate to add spices like ginger or five-spice powder for a unique twist.

Common Mistakes and Troubleshooting

Even the best chefs can encounter issues. Here are some common pitfalls and how to avoid them:

  • Turkey Too Dry: Ensure not to overcook the turkey; it should be cooked just until no longer pink.
  • Sauce Too Runny: If your sauce is too thin, allow it to simmer longer to thicken, or add a cornstarch slurry.
  • Too Salty: If the dish turns out too salty, balance it with a bit of sugar or honey to counteract the saltiness.
  • Burnt Garlic: Garlic can burn quickly; add it after the turkey is mostly cooked to avoid this.

Delicious Variations to Try

This recipe is versatile, and here are a few variations to experiment with:

  • Honey Garlic Ground Turkey Lettuce Cups: Serve the turkey mixture in crisp lettuce leaves for a fresh, low-carb option.
  • Honey Garlic Turkey Bowl: Serve over a bed of rice or grains, topped with steamed vegetables for a wholesome meal.
  • Spicy Honey Garlic Turkey: Add more red pepper flakes or a dash of sriracha for an extra kick.
  • Honey Garlic Turkey Tacos: Use corn tortillas and top with avocado and salsa for a tasty taco night.

Storage and Make-Ahead Instructions

This dish is perfect for meal prep! Here’s how to store it:

  • Refrigeration: Store leftovers in an airtight container in the fridge for up to 4 days.
  • Freezing: You can freeze the cooked turkey for up to 3 months. Thaw in the fridge before reheating.
  • Reheating: Reheat gently on the stovetop over low heat, adding a splash of water if needed to loosen the sauce.

Frequently Asked Questions

  • Can I use ground chicken instead of turkey? Yes, ground chicken makes a great substitute and will yield a similar texture and flavor.
  • Is this recipe gluten-free? Use tamari instead of soy sauce to make it gluten-free.
  • How can I make this dish spicier? Add more red pepper flakes or fresh chilies to increase the heat.
  • Can I make this with other meats? Absolutely! Ground beef or pork works well too.
  • What can I serve with this dish? Rice, noodles, or steamed vegetables are excellent accompaniments.
  • How long does it take to prepare? The entire recipe takes about 25 minutes from start to finish.
  • Can I use sugar instead of honey? Yes, but the flavor profile will change; honey adds unique sweetness and depth.
  • Is there a vegetarian version? Yes, replace the turkey with crumbled tofu or tempeh for a tasty vegetarian option.

Nutrition Tips and Dietary Adaptations

This recipe is not only quick but can also be tailored to fit various dietary needs:

  • Low-Carb: Serve over cauliflower rice or in lettuce cups for a low-carb meal.
  • Paleo-Friendly: Substitute honey with a natural sweetener like coconut sugar.
  • Whole30 Compliant: Ensure that your soy sauce is compliant or use coconut aminos.
  • Protein Boost: Add beans or lentils to increase the protein content of the dish.

Equipment Recommendations

Here are some tools you might find helpful when making this dish:

  • Non-stick skillet: Ideal for cooking ground meat without sticking.
  • Spatula: For breaking apart the turkey while it cooks.
  • Measuring cups and spoons: Essential for accurate ingredient measurements.
  • Mixing bowl: For combining your sauce ingredients before adding them to the turkey.

Serving Suggestions

When it comes to serving, you have plenty of delicious options:

  • Over Rice: Serve the honey garlic ground turkey over a bowl of steamed jasmine or brown rice.
  • In Tacos: Use soft tortillas and top with your favorite taco toppings for a fun twist.
  • With Noodles: Toss with rice noodles for a quick and satisfying meal.
  • In Lettuce Cups: For a fresh and crunchy experience, spoon the turkey into crisp lettuce leaves.

Conclusion

In just 25 minutes, you can whip up this honey garlic ground turkey recipe that’s not only quick and easy but also bursting with flavor and nutrition. With its versatility, you can customize it to suit your taste, dietary needs, or whatever you have on hand. So, gather your ingredients, follow the steps, and enjoy the wonderful experience of creating a dish that brings joy to the table. Happy cooking!

Sweet and Savory Honey Garlic Ground Turkey Recipe in 25 Minutes

Prep Time 10 minutes
Cook Time 15 minutes
Total Time 25 minutes
Servings 4 servings
Calories 350
This quick and flavorful ground turkey dish combines sweet honey and savory soy sauce with garlic for a delicious meal ready in just 25 minutes.

Ingredients

Meat

  • 1 lb Ground Turkey (Opt for extra-lean or substitute with ground chicken or beef)
  • 3-4 cloves Garlic (Fresh minced garlic)
  • 0.25 cup Honey (Creates a sticky glaze; can substitute with maple syrup)
  • 0.25 cup Low-Sodium Soy Sauce (Use tamari for gluten-free)
  • 1 tbsp Rice Vinegar (Apple cider vinegar works as a substitute)
  • 1 tsp Sesame Oil (Adds a nutty depth; can omit for a lighter version)
  • optional Red Pepper Flakes (For extra heat; can use fresh chili or chili paste)
  • 2 stalks Green Onions (Add freshness and crunch, chives are a good substitute)
  • 1 tbsp Neutral Oil (Canola or Avocado; for sautéing)

Instructions 

  • Heat oil in a skillet over medium heat.
  • Add ground turkey and cook until browned, about 5-7 minutes.
  • Add minced garlic and cook for 1 minute until fragrant.
  • Stir in honey, soy sauce, rice vinegar, and sesame oil; cook for another 3-5 minutes until sauce thickens.
  • Garnish with chopped green onions and red pepper flakes if desired. Serve hot.

Notes

For a lower sodium version, reduce soy sauce or use a low-sodium variety.
Calories: 350kcal
Cost: $15
Course: Main Course
Cuisine: American
Keyword: ground turkey

Welcome to the world of mouthwatering, homemade pizza subs! If you’re looking for a simple yet satisfying dinner that the whole family will adore, you’ve come to the right place. This recipe is not only easy to prepare, but it also allows for a variety of personalization with ingredients while delivering a burst of flavors in every bite. Read on to discover why these pizza subs deserve a spot on your dining table!

Why You’ll Love This Recipe

  • Quick and Easy: This pizza subs recipe comes together in just under 30 minutes, making it perfect for a busy weeknight dinner.
  • Family-Friendly: Kids and adults alike will love customizing their own subs with their favorite toppings and sauces.
  • Versatile Ingredients: You can swap out ingredients based on your preferences or what you have on hand, ensuring that your pizza subs are unique every time.
  • Perfect for Leftovers: These subs are delicious when reheated, making them great for meal prep or leftovers.
  • Great for Gatherings: Serve these pizza subs at parties or gatherings; they are sure to be a hit with guests!

Ingredients Needed

To create these delectable pizza subs, gather the following ingredients:

  • 4 x 9 inch sub rolls: Choose your favorite type—white, whole wheat, or gluten-free!
  • 1 cup pizza sauce: You can use store-bought or homemade for added flavor.
  • 2 cups shredded mozzarella cheese: For a gooey, cheesy experience, mozzarella is the best choice.
  • 4 oz pepperoni slices: Feel free to substitute with turkey pepperoni or omit for a vegetarian option.
  • 1 medium green pepper, sliced: Add some crunch and freshness to your subs.
  • 1/2 teaspoon Italian seasoning: This adds a delightful herbaceous note to the dish.

Step-by-Step Instructions

Follow these easy steps to assemble and bake your pizza subs:


Meal Prep Container Set

★ Recommended Kitchen Tool

Meal Prep Container Set

Make this recipe even easier with a quality Meal Prep Container Set — a must-have kitchen staple!


🛒 View on Amazon →

As an Amazon Associate, we earn from qualifying purchases.
  1. Preheat your oven to 400°F.
  2. Slice open the sub rolls and place them on a parchment-lined baking sheet.
  3. Spread both the top and bottom halves of the sub rolls generously with pizza sauce.
  4. Sprinkle the shredded mozzarella cheese evenly over both halves.
  5. Place the pepperoni slices on the bottom halves of the sub rolls.
  6. Add the sliced green peppers on top of the pepperoni.
  7. Sprinkle the Italian seasoning over all the ingredients.
  8. Place the baking sheet in the oven and bake for about 10-12 minutes or until the cheese is bubbly and starting to brown.
  9. Remove the baking sheet from the oven, let cool for a minute, then serve and enjoy!

Pro Tips for Perfect Pizza Subs

Close-up side view of a juicy pizza sub filled with cheese and toppings.
  • Use Fresh Ingredients: Opt for fresh vegetables and high-quality cheese for the best flavor.
  • Experiment with Sauces: Try different sauces like alfredo or pesto for a unique twist.
  • Cheese Options: Mix in provolone or cheddar cheese for a different taste profile.
  • Customize for Dietary Needs: Use gluten-free rolls or dairy-free cheese for specific dietary preferences.
  • Broil for Extra Crispiness: For an extra crispy top, broil the subs for the last minute of baking.
  • Keep the Bottoms Crispy: Toast the sub rolls briefly in the oven before assembling to prevent sogginess.
  • Make Ahead: Assemble the subs ahead of time and refrigerate; just pop them in the oven when ready to bake.
  • Serve with Dipping Sauces: Enhance the experience with extra pizza sauce, ranch, or garlic butter for dipping.

Common Mistakes and Troubleshooting

Here are some common pitfalls to avoid when making pizza subs:

  • Too Much Sauce: Overloading on sauce can make the subs soggy. Aim for a thin, even layer.
  • Not Preheating the Oven: Always preheat to ensure even cooking and melting of cheese.
  • Skipping the Parchment: Using parchment paper on your baking sheet makes cleanup easier and prevents sticking.
  • Uneven Baking: Rotate the baking sheet halfway through the cooking time for even browning.

Delicious Variations

Feel free to get creative with your pizza subs! Here are some variations to try:

  • Veggie Lover’s Delight: Add mushrooms, olives, and spinach for a veggie-packed option.
  • BBQ Chicken Subs: Replace pepperoni with shredded rotisserie chicken and BBQ sauce.
  • Meat Lovers: Stack on additional meats like ham, sausage, or bacon.
  • Buffalo Chicken Pizza Subs: Use buffalo sauce and shredded chicken, topped with blue cheese crumbles.

Storage and Make-Ahead Instructions

Want to prepare your pizza subs in advance? Here’s how to store and reheat them:

  • Refrigerate: Store any leftovers in an airtight container in the refrigerator for up to 3 days.
  • Freezing: Freeze assembled but unbaked subs for up to 2 months. Just bake from frozen, adding a few extra minutes to the baking time.
  • Reheating: Reheat leftover subs in the oven at 350°F until warmed through, about 10-15 minutes.

Frequently Asked Questions

Here are some answers to common questions about pizza subs:

  • Can I make pizza subs without meat? Yes! Simply omit the meat and load up on vegetables or other toppings.
  • What else can I use instead of pizza sauce? You can use marinara, pesto, or even a mixture of cream cheese and herbs for a different flavor.
  • How long do pizza subs take to bake? They typically take 10-12 minutes in a preheated oven.
  • Can I use other types of bread? Absolutely! Hoagie rolls, baguettes, or even pizza crusts can work well.
  • Are pizza subs healthy? They can be made healthier by using whole grain rolls and loading up on veggies.
  • What’s the best cheese for pizza subs? Mozzarella is classic, but feel free to experiment with provolone or a cheese blend.
  • Can I add different spices? Yes! Feel free to adjust the seasoning based on your taste preferences.
  • How do I keep pizza subs from getting soggy? Toast the sub rolls before adding ingredients and avoid overusing sauce.

Nutrition Tips and Dietary Adaptations

Here are some tips for making your pizza subs nutritious:

  • Whole Grain Rolls: Opt for whole grain or whole wheat sub rolls to increase fiber content.
  • Load Up on Veggies: Add a variety of vegetables like spinach, zucchini, or artichokes for added nutrients.
  • Lean Proteins: Choose lean meats or plant-based proteins to keep the subs lighter.
  • Low-Fat Cheese: Use low-fat cheese options to reduce calorie intake while still enjoying the cheesy goodness.

Essential Equipment Recommendations

To make your pizza subs, you’ll need:

  • Baking Sheet: A sturdy baking sheet lined with parchment paper for easy cleanup.
  • Sharp Knife: For slicing the sub rolls open with precision.
  • Measuring Cups and Spoons: To accurately measure your sauce and ingredients.

Serving Suggestions

Enhance your pizza subs with these complementary dishes:

  • Simple Side Salad: Serve with a fresh garden salad for a light and healthy side.
  • Chips or Fries: Pair with your favorite baked potato chips or sweet potato fries for a heartier meal.
  • Garlic Bread: A slice of garlic bread makes for a delicious sidekick to your pizza subs.

In conclusion, crafting the ultimate pizza subs is not just about the ingredients but also about the joy of cooking and sharing with loved ones. These versatile, easy-to-make subs are perfect for any occasion, whether it’s a casual family dinner or a festive gathering. Remember to have fun with your ingredients, and don’t hesitate to make this recipe your own! Happy cooking!

Pizza Subs

Prep Time 10 minutes
Cook Time 12 minutes
Total Time 22 minutes
Servings 4 servings
Calories 850
A delicious twist on classic subs topped with pizza flavors, perfect for a quick and satisfying meal.

Ingredients

Bread

  • 4 piece 9 inch sub buns
  • 1 cup pizza sauce
  • 2 cups shredded mozzarella cheese
  • 4 oz pepperoni slices
  • 1 med green pepper, sliced
  • 1/2 teaspoon Italian seasoning

Instructions 

  • Preheat oven to 400°F (200°C).
  • Slice buns, spread with pizza sauce, cheese, pepperoni, green peppers, and seasonings.
  • Bake for 10-12 minutes until cheese is browned.
  • Remove from oven, serve, and enjoy!

Notes

For a crispier crust, broil for an additional 1-2 minutes.
Calories: 850kcal
Cost: $15
Course: Main Course
Cuisine: American
Keyword: pizza, Subs

Discover the Joy of Easy Taco Rice

Are you looking for a delicious and hassle-free dish that brings everyone together? Look no further than this Easy Taco Rice recipe! This flavorful creation combines the comforting essence of rice with the zesty kick of taco seasoning, making it the perfect addition to any meal. Whether you’re serving it as a side dish, a base for burrito bowls, or as a main course, taco rice is sure to please. Let’s dive into how to make this delightful dish that will soon become a staple in your kitchen!

Why You’ll Love This Recipe

Here are just a few reasons why this Easy Taco Rice will become your new favorite:

  • Quick and Easy: With just a few simple ingredients and a straightforward cooking process, you can have a delicious meal on the table in less than 30 minutes.
  • Versatile: This recipe can be enjoyed on its own, as a side dish, or as a flavorful base for burrito bowls and tacos.
  • Customizable: Adjust the spices to your liking, add beans or veggies, or even mix in some shredded cheese for an extra treat.
  • Nutritious: Packed with protein and fiber, this dish is not only satisfying but also contributes to a balanced diet.
  • Kid-Friendly: The mild flavors and fun presentation make it a hit with kids, ensuring they’ll enjoy it just as much as adults!

Ingredients You’ll Need

Getting started on your Easy Taco Rice requires just a handful of ingredients. Here’s what you need:


Meal Prep Container Set

★ Recommended Kitchen Tool

Meal Prep Container Set

Make this recipe even easier with a quality Meal Prep Container Set — a must-have kitchen staple!


🛒 View on Amazon →

As an Amazon Associate, we earn from qualifying purchases.
  • 2 Tbsp cooking oil: For sautéing the onions and garlic, adding a rich flavor.
  • 1 small onion: Diced finely to provide a sweet base.
  • 1 clove garlic: Minced for an aromatic kick.
  • 2 cups long grain white rice: The star of the dish, providing texture and substance.
  • 1/2 Tbsp chili powder: For that classic taco flavor.
  • 1/2 tsp cumin: Adds warmth and depth.
  • 1/4 tsp oregano: For a hint of earthiness.
  • 3 cups water: Essential for cooking the rice.
  • 1 tsp salt: To enhance all the flavors.
  • 2 green onions, sliced: For garnish, adding a fresh crunch.

If you need substitutions, consider using brown rice for added fiber or vegetable broth instead of water for extra flavor.

Step-by-Step Instructions

A close-up side view of a bowl filled with colorful Easy Taco Rice, topped with sliced green onions.

Follow these easy steps to create your Easy Taco Rice:

  1. Finely dice the onion and mince the garlic.
  2. Add the onion, garlic, and cooking oil to a medium sauce pot.
  3. Sauté the onion and garlic over medium heat until the onions are soft and transparent.
  4. Add the uncooked rice, chili powder, cumin, and oregano to the pot.
  5. Continue to stir and cook for about 2 minutes to toast the rice and spices.
  6. Add the water and salt, and give everything a brief stir.
  7. Place a lid on the pot, turn the heat up to medium-high, and allow it to come to a boil.
  8. As soon as it reaches a full boil, turn the heat down to low, or slightly above low, and let it simmer for 15 minutes.
  9. After 15 minutes, turn the heat off and let it sit for 10 minutes without removing the lid.
  10. Fluff the rice with a fork and sprinkle sliced green onions over top just before serving.

Pro Tips for Perfect Taco Rice

To ensure your taco rice is a hit, keep these expert tips in mind:

  • Rinse the rice: Rinsing your rice before cooking can help remove excess starch for fluffier results.
  • Toast the spices: Toasting the chili powder, cumin, and oregano with the rice enhances their flavors.
  • Let it rest: Allowing the rice to sit after cooking helps it absorb any remaining moisture, resulting in a better texture.
  • Add protein: Mix in cooked chicken, ground beef, or black beans for a heartier meal.
  • Experiment with toppings: Try adding diced tomatoes, avocado, or shredded cheese for more flavor and texture.
  • Use fresh herbs: Garnish with fresh cilantro or parsley for a burst of freshness.
  • Adjust spice levels: Tailor the amount of chili powder to suit your taste—add more for a spicier kick!
  • Serve warm: Taco rice is best enjoyed warm, so serve it immediately for the best experience.

Common Mistakes and Troubleshooting

Even the best chefs can make mistakes! Here are some common pitfalls and how to avoid them:

  • Undercooking the rice: Ensure the rice is simmered long enough to absorb all the liquid completely.
  • Overcrowding the pot: If you’re making a larger batch, use a bigger pot to allow for even cooking.
  • Skipping the resting time: Resist the temptation to open the lid immediately after cooking—let it rest for best results.

Delicious Variations to Try

Want to mix things up? Here are some tasty variations of taco rice:

  • Mexican Street Corn Taco Rice: Add grilled corn, lime juice, and cotija cheese for a fresh twist.
  • Cheesy Taco Rice: Stir in shredded cheese right before serving for a creamy texture.
  • Vegetarian Taco Rice: Substitute the cooking oil with olive oil and add black beans and bell peppers.
  • Spicy Taco Rice: Increase the amount of chili powder and add jalapeños for added heat.

Storage and Make-Ahead Instructions

Meal prepping? Here’s how to store your taco rice:

  • Storing Leftovers: Allow the rice to cool, then transfer it to an airtight container. It can be stored in the refrigerator for up to 4 days.
  • Freezing: Taco rice freezes well. Store it in a freezer-safe container for up to 3 months.
  • Reheating: Reheat in the microwave or on the stovetop, adding a splash of water to restore moisture.

Frequently Asked Questions

Got questions? Here are some common queries about taco rice:

  • Can I use brown rice instead of white rice? Yes, but adjust the water and cooking time as brown rice takes longer to cook.
  • What can I serve with taco rice? It pairs well with grilled meats, salads, or as a filling for burritos.
  • Can I make this recipe vegan? Absolutely! Just skip the meat and use vegetable broth.
  • How do I make taco rice spicier? Add more chili powder, or mix in hot sauce when serving.
  • Is it possible to prepare this ahead of time? Yes, you can prep ingredients ahead and cook when ready!
  • How can I make it gluten-free? Ensure that all seasonings and ingredients are certified gluten-free.
  • Can I add beans to the recipe? Definitely! You can add black beans or pinto beans for added nutrition and flavor.
  • What type of rice is best for this recipe? Long grain white rice works best, but you can use jasmine or basmati for a fragrant twist.

Nutritional Tips and Dietary Adaptations

This Easy Taco Rice can be adapted to fit various dietary needs:

  • Low-Carb Option: Substitute rice with cauliflower rice for a lower-carb version.
  • Whole Grain Option: Use brown rice or quinoa for added fiber.
  • Dairy-Free: Omit cheese or use a dairy-free cheese alternative.

Essential Equipment for Making Taco Rice

To whip up this delightful dish, you’ll need:

  • Medium Sauce Pot: Essential for cooking the rice evenly.
  • Wooden Spoon: Perfect for stirring without scratching your pot.
  • Measuring Cups and Spoons: For precise ingredient measurements.

Serving Suggestions

Here are some inspiring ways to serve your taco rice:

  • Burrito Bowls: Layer taco rice with beans, grilled chicken, and your favorite toppings.
  • Taco Salad: Serve over a bed of greens with salsa and avocado.
  • Stuffed Peppers: Use taco rice as a stuffing for bell peppers, then bake until tender.

In conclusion, this Easy Taco Rice is more than just a meal; it’s a comforting dish that fosters connection and joy around the table. With its versatility and ease of preparation, you’ll find yourself returning to this recipe time and time again. So gather your ingredients, follow the steps, and enjoy a delightful culinary experience that everyone will love!

Easy Taco Rice

Prep Time 10 minutes
Cook Time 20 minutes
Total Time 30 minutes
Servings 4 servings
Calories 350
A quick and flavorful rice dish infused with taco spices, perfect for a satisfying meal.

Ingredients

Cooking Oil

  • 2 Tbsp cooking oil

Vegetables

  • 1 small onion (finely diced)
  • 1 clove garlic (minced)

Rice

  • 2 cups long grain white rice

Spices

  • 1/2 Tbsp chili powder
  • 1/2 tsp cumin
  • 1/4 tsp oregano

Liquids

  • 3 cups water
  • 1 tsp salt

Garnish

  • 2 green onions green onions, sliced

Instructions 

  • Dice the onion and mince the garlic.
  • Sauté onion, garlic, and oil until soft.
  • Add rice, spices, and toast for 2 minutes.
  • Pour in water and salt, bring to boil, then simmer 15 minutes.
  • Let sit 10 minutes, then fluff rice and garnish with green onions.

Notes

For extra flavor, add a squeeze of lime or shredded cheese.
Calories: 350kcal
Cost: $10
Course: Main Course
Cuisine: Mexican
Keyword: Rice

Quinoa is not just a trendy grain; it’s a powerhouse of nutrition and flavor. This buttery garlic quinoa recipe combines the rich, savory notes of butter and garlic with the wholesome goodness of quinoa, creating a dish that’s perfect as a side or a main course. In this comprehensive guide, we’ll explore everything from the ingredients to the cooking process, ensuring you have all the tools you need to make this delightful meal in your own kitchen.

Why You’ll Love This Recipe

This buttery garlic quinoa is a fantastic addition to your culinary repertoire. Here’s why:

  • Quick and Easy: With just a handful of ingredients and less than 30 minutes of prep time, this recipe is perfect for busy weeknights.
  • Flavorful Base: The combination of garlic and butter elevates quinoa into a dish that’s rich and satisfying—perfect for pairing with a variety of meals.
  • Nutritious: Quinoa is a complete protein, packed with essential amino acids, making it a healthy choice for any meal.
  • Versatile: You can serve it as a side dish, mix it into salads, or even use it as a base for grain bowls.
  • Customizable: This recipe allows for endless variations, so you can personalize it to your taste preferences.

Ingredients Breakdown

Here’s what you’ll need to make this delicious buttery garlic quinoa:


Digital Kitchen Scale

★ Recommended Kitchen Tool

Digital Kitchen Scale

Make this recipe even easier with a quality Digital Kitchen Scale — a must-have kitchen staple!


🛒 Shop This Tool →

As an Amazon Associate, we earn from qualifying purchases.
  • 2 tablespoons unsalted butter: Adds richness to the dish. You can substitute with olive oil for a vegan option.
  • 1/2 cup onion, chopped: Provides sweetness and depth. Red or yellow onions work well.
  • 4 cloves garlic, minced: The star of the show! Adjust the quantity based on your love for garlic.
  • 1 cup quinoa, rinsed well, and drained: A great source of protein and fiber.
  • 2 cups chicken broth: Enhances flavor. For a vegetarian option, use vegetable broth.
  • 1/2 teaspoon salt: Enhances all the flavors. Adjust to taste.

Cooking Instructions

Ready to get cooking? Follow these simple steps:

  1. Add butter to a medium saucepan on medium heat.
  2. Add onion, cooking for 5-6 minutes until it becomes translucent.
  3. Stir in garlic and cook for an additional 30 seconds, until fragrant.
  4. Add quinoa, chicken broth, and salt. Stir well to combine.
  5. Bring the mixture to a boil, then reduce the heat to a simmer.
  6. Cover and cook for 15-18 minutes until the broth is fully absorbed.
  7. Fluff the quinoa with a fork before serving.

Pro Tips for Perfect Quinoa

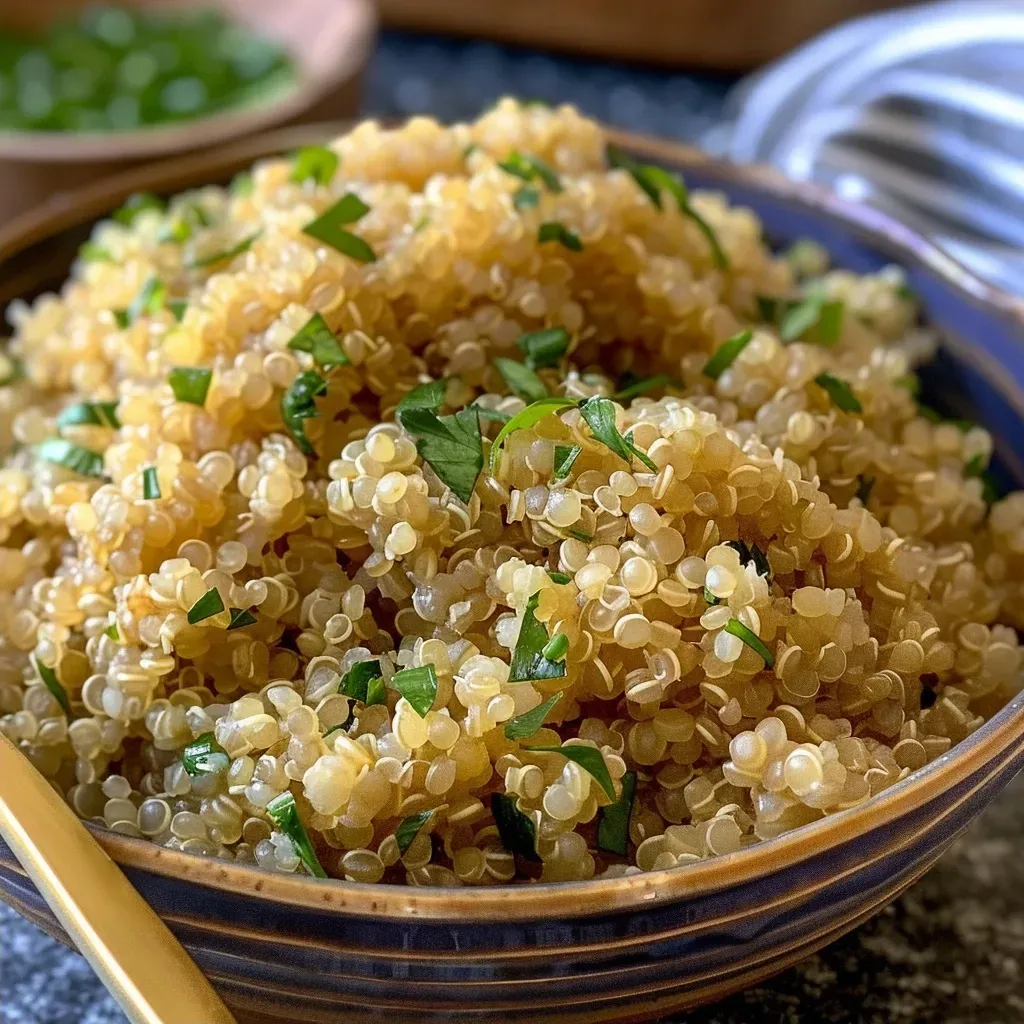
Close-up view of buttery garlic quinoa with visible grains and chopped onions.

Here are some expert insights to help you nail this recipe:

  • Rinse the Quinoa: Rinsing removes saponins, which can give a bitter taste. Always rinse before cooking.
  • Use Broth Instead of Water: Cooking quinoa in broth adds an extra layer of flavor.
  • Let It Rest: After cooking, let the quinoa sit covered for a few minutes for a better texture.
  • Customize the Flavor: Experiment with spices or herbs like cumin or parsley for added depth.
  • Batch Cooking: Make a larger batch and store leftovers for quick meals throughout the week.
  • Finishing Touch: A squeeze of lemon juice before serving can brighten the dish.
  • Check for Doneness: Quinoa should be fluffy and the grains should have a little tail (the germ) when fully cooked.
  • Use a Rice Cooker: For fuss-free cooking, a rice cooker can make perfect quinoa every time.

Common Mistakes and Troubleshooting

Even seasoned cooks make mistakes! Here are some common pitfalls and how to avoid them:

  • Too Much Liquid: If your quinoa turns out mushy, you may have added too much liquid. Stick to the 2:1 ratio (liquid to quinoa).
  • Overcooking: Keep an eye on the cooking time; overcooked quinoa can become gummy.
  • Not Fluffing: Always fluff the quinoa after cooking to separate the grains and enhance texture.

Variations to Try

This buttery garlic quinoa is versatile. Here are some delicious variations:

  • Herbed Quinoa: Stir in fresh herbs like parsley or cilantro after cooking for a fresh twist.
  • Vegetable Medley: Add sautéed vegetables like bell peppers, spinach, or zucchini for a colorful and nutritious addition.
  • Spicy Kick: Add a pinch of cayenne pepper or red pepper flakes to spice things up.
  • Cheesy Delight: Mix in some grated Parmesan cheese for a rich, cheesy flavor.

Storage and Make-Ahead Instructions

This dish can be made ahead of time and stored for later use:

  • Refrigeration: Store in an airtight container in the fridge for up to 5 days.
  • Freezing: Quinoa freezes well. Portion into freezer bags and store for up to 3 months.
  • Reheating: Reheat in the microwave or on the stovetop, adding a splash of broth or water to restore moisture.

Frequently Asked Questions

Here are some common questions about buttery garlic quinoa:

  • What is quinoa? Quinoa is a nutritious seed that cooks like a grain. It’s gluten-free and high in protein.
  • Can I use other grains? Yes! You can substitute with rice, farro, or barley, but cooking times may vary.
  • Is quinoa a complete protein? Yes, quinoa contains all nine essential amino acids, making it a great protein source.
  • How can I make it vegan? Substitute butter with olive oil and chicken broth with vegetable broth.
  • Can I make this dish spicy? Absolutely! Add some chili flakes or hot sauce to suit your taste.
  • What can I pair with this dish? It pairs well with grilled chicken, fish, or roasted vegetables.
  • How do I store leftovers? Store in an airtight container in the fridge for up to a week.
  • Can I serve this at a dinner party? Definitely! This dish is not only delicious but also visually appealing, making it a great addition to any meal.

Nutrition Tips and Dietary Adaptations

This buttery garlic quinoa not only tastes great but also offers a wealth of nutritional benefits:

  • High in Fiber: Quinoa is an excellent source of dietary fiber, which is beneficial for digestion.
  • Low Glycemic Index: It has a low glycemic index, making it suitable for those monitoring blood sugar levels.
  • Gluten-Free: A perfect alternative for those with gluten sensitivities or celiac disease.
  • Rich in Antioxidants: Quinoa is packed with antioxidants that combat free radicals in the body.

Equipment Recommendations

For the best results, consider using the following kitchen tools:

  • Medium Saucepan: A good-quality saucepan is essential for cooking quinoa evenly.
  • Measuring Cups and Spoons: Accurate measurements ensure the best flavor and texture.
  • Fork: For fluffing the quinoa after cooking—this step is key!

Serving Suggestions

Now that your buttery garlic quinoa is ready, here are a few serving suggestions:

  • As a Side Dish: Serve alongside grilled meats or fish for a complete meal.
  • Grain Bowl: Top with roasted vegetables, a poached egg, and your favorite sauce for a hearty grain bowl.
  • In Salads: Mix into salads for added texture and nutrition.
  • With Sauces: Drizzle with your favorite sauce or dressing to enhance flavor.

Conclusion

Your journey to mastering buttery garlic quinoa is just beginning! With its rich flavor and adaptability, this dish is sure to become a staple in your kitchen. Remember, cooking is all about experimentation and finding what works for you. Enjoy the process, and don’t hesitate to make this recipe your own. Happy cooking!

Buttery Garlic Quinoa Recipe

Prep Time 5 minutes
Cook Time 20 minutes
Total Time 25 minutes
Servings 4 servings
Calories 220
A flavorful and easy-to-make quinoa dish infused with butter and garlic, perfect as a side or light meal.

Ingredients

Dairy

  • 2 tablespoons unsalted butter
  • 1/2 cup onion, chopped
  • 4 cloves garlic, minced
  • 1 cup quinoa, rinsed well and drained
  • 2 cups chicken broth
  • 1/2 teaspoon salt

Instructions 

  • In a medium saucepan, melt butter over medium heat.
  • Add chopped onion and cook for 5-6 minutes until translucent.
  • Add minced garlic, stir, and cook for 30 seconds.
  • Add quinoa, chicken broth, and salt; stir well.
  • Bring to a boil, then reduce heat and simmer for 15-18 minutes until liquid is absorbed.
  • Fluff with a fork before serving.

Notes

You can add chopped herbs or a squeeze of lemon for extra flavor.
Calories: 220kcal
Cost: $8
Course: Side Dish
Cuisine: American
Keyword: quinoa

Transform Your Lunch with Honey-Lime Shrimp on a Sesame Bagel

Are you ready to elevate your lunch game? This Honey-Lime Shrimp on a sesame bagel is not just a meal; it’s an experience! In less than 30 minutes, you’ll create a dish that’s bursting with flavor and texture. The sweet and tangy essence of honey and lime pairs perfectly with succulent shrimp, all nestled on a crispy sesame bagel. Whether you’re looking for a quick weekday lunch or a gourmet treat, this recipe will impress.

Why You’ll Love This Recipe

This Honey-Lime Shrimp recipe is about more than just deliciousness; it brings a multitude of benefits that make it a must-try:

  • Quick Prep Time: With only about 10 minutes of marination and 10 minutes of cooking, you can have a gourmet meal ready in under 30 minutes.
  • Flavor Explosion: The combination of honey, lime juice, and spices creates a vibrant flavor profile that tantalizes your taste buds.
  • Versatile Ingredients: Use fresh or frozen shrimp, and feel free to customize the toppings based on what you have at home!
  • Healthy and Nutritious: Packed with protein and healthy fats, this dish is not only satisfying but also nutritious, making it a great choice for health-conscious eaters.
  • Perfect for Meal Prep: Easily double the recipe for quick lunches throughout the week without sacrificing taste or quality.

Ingredient Breakdown

Here’s everything you need to make this delicious dish:


Nonstick Wok

★ Recommended Kitchen Tool

Nonstick Wok

Make this recipe even easier with a quality Nonstick Wok — a must-have kitchen staple!


🛒 View on Amazon →

As an Amazon Associate, we earn from qualifying purchases.
  • 12 oz large raw shrimp: Peeled and deveined shrimp are best for this recipe, ensuring a tender and juicy bite.
  • 2 sesame bagels: Sliced for toasting; feel free to try whole-grain or everything bagels for a different flavor.
  • 3 limes (zest and juice): This is crucial for that zesty punch; fresh limes yield the best flavor.
  • 2 cloves garlic, minced: Adds depth and aroma to the shrimp.
  • 1 cup finely shredded cabbage: Provides a refreshing crunch that balances the richness of the shrimp.
  • 1/4 cup chopped fresh cilantro: Offers a burst of freshness; reserve some for garnish.
  • 1 1/2 tbsp honey: Sweetens the dish and helps create a sticky glaze.
  • 1 tbsp neutral oil: Use canola or avocado oil for sautéing the shrimp.
  • 1/4 cup mayonnaise: Forms the base for the creamy chili-lime sauce.
  • 1–2 tsp chili-garlic sauce or Sriracha: Adds a spicy kick; adjust to your taste.
  • Spices: Ground cumin, smoked paprika, salt, and pepper are essential for flavor. Add red pepper flakes for extra heat if desired.

Step-by-Step Instructions

Close-up view of a sesame bagel topped with honey-lime shrimp and chili mayo.

Follow these straightforward steps to create your Honey-Lime Shrimp:

  • Step 1: Pat the shrimp dry with paper towels. In a bowl, toss them with honey, lime juice and zest, minced garlic, oil, cumin, smoked paprika, salt, and pepper. Let them marinate for 10 minutes.
  • Step 2: In another bowl, combine the mayonnaise, chili-garlic sauce, lime juice, a bit of honey, and a pinch of salt. Thin it with a splash of water if necessary until you reach your desired consistency.
  • Step 3: Toss the shredded cabbage with lime juice, a pinch of salt, and some chopped cilantro in a small bowl.
  • Step 4: Heat a skillet over medium-high heat (about 375°F / 190°C). Sauté the marinated shrimp for 2-3 minutes per side until they are opaque and lightly caramelized.
  • Step 5: Toast the sesame bagels in a toaster or in a dry skillet; optionally, spread a very thin layer of butter on the cut sides while warm for added richness.
  • Step 6: Spread the chili-lime mayo on both halves of the bagel. Layer with the cabbage-cilantro slaw, followed by the honey-lime shrimp, extra cilantro, and a squeeze of lime. Cap with the top bagel and serve immediately.

Expert Tips for Perfecting Your Dish

To help you achieve the best results, here are some expert insights:

  • Use Fresh Ingredients: Fresh shrimp will yield the best texture and flavor. If you’re using frozen shrimp, ensure they are fully thawed and patted dry before marinating.
  • Marination Time: Don’t skip the marination step; it enhances the flavor significantly. If time allows, marinate for up to 30 minutes for even more flavor.
  • Adjust the Heat: If you prefer a milder flavor, reduce the amount of chili-garlic sauce or Sriracha. For more spice, add extra red pepper flakes or a dash of hot sauce.
  • Perfectly Toasted Bagels: For a delightful crunch, toast the bagels until golden brown. This adds a nice texture contrast to the soft shrimp and creamy sauce.
  • Leftovers: If you have leftovers, store the shrimp separately from the bagels to keep them from getting soggy. Enjoy the shrimp in salads or wraps the next day!
  • Experiment with Toppings: Try adding sliced avocado, pickled onions, or sliced jalapeños for an extra flavor boost and visual appeal.
  • Garnishing: A sprinkle of sesame seeds or a few slices of fresh lime can enhance presentation and add a pop of color.
  • Meal Prep: This dish is perfect for meal prepping! Cook the shrimp in advance and assemble the bagels fresh when you’re ready to eat.

Common Mistakes and Troubleshooting

Even the best chefs make mistakes! Here are some common pitfalls and how to avoid them:

  • Overcooking Shrimp: Shrimp cook quickly. Keep an eye on them; they should be opaque and firm but not rubbery.
  • Too Much Lime Juice: Adding too much lime can overpower the dish. Start with the recommended amount and adjust to taste.
  • Soggy Bagels: To prevent soggy bagels, toast them just before assembling the dish, and avoid adding sauces until you’re ready to serve.
  • Insufficient Flavor: If the shrimp lacks flavor, ensure your marinade is well-balanced with enough salt and spices. Taste and adjust before cooking!

Variations to Try

Want to switch things up? Here are some delicious variations:

  • Garlic Butter Shrimp: Substitute honey with melted garlic butter for a rich and savory twist.
  • Spicy Mango Shrimp: Add diced mango to the slaw for a sweet and spicy flavor combination.
  • Asian-Inspired: Use soy sauce instead of lime juice in the marinade and serve with pickled ginger.
  • Vegetarian Option: Swap shrimp for grilled tofu or tempeh, seasoned similarly for a satisfying vegetarian meal.

Storage and Make-Ahead Instructions

Planning ahead? Here’s how to store and prepare this dish:

  • Refrigeration: Store leftover shrimp in an airtight container in the refrigerator for up to 2 days. The assembled bagels are best enjoyed fresh.
  • Freezing: You can freeze cooked shrimp for up to 3 months. Thaw and reheat before serving.
  • Make-Ahead: Prep the marinade and shrimp in advance, and cook them just before serving for the best texture and flavor.

Frequently Asked Questions

Here are some common questions about the Honey-Lime Shrimp recipe:

  • Can I use frozen shrimp? Yes, just ensure they are completely thawed and patted dry before marinating.
  • How long can I marinate the shrimp? Marinate for at least 10 minutes, but up to 30 minutes will enhance the flavor even more.
  • What can I substitute for mayonnaise? Greek yogurt or avocado can be used as healthier alternatives to mayonnaise.
  • Is this recipe gluten-free? Yes, if you use gluten-free bagels and ensure all other ingredients are gluten-free.
  • How do I prevent shrimp from sticking to the pan? Ensure the skillet is hot before adding the shrimp and use enough oil to coat the bottom.
  • What else can I serve with this dish? Consider pairing it with a fresh salad, rice, or stir-fried vegetables.
  • Can I make this dish ahead of time? Yes, but it’s best to assemble the bagels just before serving to keep them fresh.
  • How do I make this dish spicier? Add extra chili-garlic sauce or top with sliced jalapeños for an added kick.

Nutritional Tips and Dietary Adaptations

This recipe is packed with nutrition! Here are some tips to make it even healthier:

  • Swap Out the Bagels: Use whole grain or gluten-free bagels for added fiber and nutrients.
  • Control the Sweetness: Adjust the amount of honey to lower the sugar content if desired.
  • Add More Veggies: Increase the amount of cabbage or add other veggies like bell peppers or carrots for added vitamins.
  • Low-Fat Options: Use low-fat mayonnaise or Greek yogurt to reduce calories and fat content.

Essential Equipment Recommendations

To prepare this delicious Honey-Lime Shrimp, you’ll need:

  • Non-stick skillet: Ensures even cooking and easy cleanup.
  • Mixing bowls: For marinating shrimp and preparing sauces.
  • Tongs: To flip shrimp easily while cooking.
  • Measuring cups and spoons: For precise ingredient measurements.
  • Toaster or skillet: For toasting bagels to perfection.

Serving Suggestions

To truly enjoy this dish, consider pairing it with:

  • Fresh salad: A light green salad with a citrus vinaigrette complements the dish well.
  • Chips or fries: Serve with sweet potato fries or tortilla chips for a crunchy side.
  • Fruit: A side of tropical fruit salad balances the richness of the shrimp.
  • Cold beverages: Enjoy with iced tea or a light cocktail for a refreshing drink.

In conclusion, this Honey-Lime Shrimp on a sesame bagel is not just a meal; it’s a culinary adventure that can be prepared quickly and easily. With its vibrant flavors and textures, it’s sure to become a favorite in your home. So, roll up your sleeves and get ready to impress yourself and your loved ones with this delightful dish!

Honey-Lime Shrimp Sesame Bagel With Chili Mayo

Prep Time 10 minutes
Cook Time 8 minutes
Total Time 18 minutes
Servings 2 servings
Calories 650
A flavorful and vibrant dish combining succulent shrimp, toasted sesame bagels, and a spicy chili-lime mayo for a satisfying meal.

Ingredients

Protein

  • 12 oz large raw shrimp, peeled and deveined

Bread

  • 2 slices sesame bagels, sliced

Fruits & Vegetables

  • 3 pcs limes (zest and juice)
  • 2 cloves garlic, minced
  • 1 cup finely shredded cabbage
  • 0.25 cup chopped fresh cilantro, plus extra leaves for garnish
  • 1.5 tbsp honey (plus 1/2 tsp for mayo)
  • 1 tbsp neutral oil (canola, avocado, or similar)
  • 0.25 cup mayonnaise
  • 1-2 tsp chili-garlic sauce or Sriracha

Spices

  • 0.5 tsp ground cumin
  • 0.5 tsp smoked paprika
  • to taste salt, pepper, red pepper flakes (optional)

Instructions 

  • Pat shrimp dry, then toss with honey, lime juice and zest, garlic, oil, cumin, paprika, salt, and pepper. Marinate 10 minutes.
  • Mix mayonnaise, chili-garlic sauce, lime juice, a little honey, and salt to make chili-lime mayo.
  • Toss shredded cabbage with lime juice, salt, and cilantro to make slaw.
  • Sauté shrimp in a skillet over medium-high heat 2–3 minutes per side until opaque and caramelized.
  • Toast bagels and spread with chili-lime mayo. Layer cabbage slaw, shrimp, cilantro, and lime, then top with the other bagel half.

Notes

For extra flavor, garnish with additional cilantro and a squeeze of lime before serving.
Calories: 650kcal
Cost: $15
Course: Main Course
Cuisine: fusion
Keyword: shrimp

Mastering the Art of Garlic Herb Roasted Vegetables

Welcome to a culinary journey where simplicity meets flavor! In this article, I’ll guide you through the delightful process of making Garlic Herb Roasted Potatoes, Carrots, and Zucchini. This dish is more than just a side; it’s a celebration of fresh ingredients and expert techniques that will elevate your home cooking. Whether you’re a novice or an experienced cook, you’ll find joy in roasting vegetables to perfection.

Roasting vegetables not only enhances their natural sweetness but also brings out complex flavors through caramelization. In just under an hour, you can create a colorful, nutritious dish that pairs beautifully with almost any main course. Ready to get started? Let’s dive in!

Why You’ll Love This Recipe

  • Easy to follow: With straightforward steps, this recipe is perfect for cooks of all levels.
  • Versatile ingredients: You can use seasonal vegetables or whatever you have on hand, making it adaptable to your pantry.
  • Healthy and nutritious: Packed with vitamins and minerals, this dish supports a balanced diet.
  • Flavor-packed: Fresh herbs and garlic add vibrant flavors that complement the natural sweetness of the vegetables.
  • Perfect for meal prep: Easily make a large batch to enjoy throughout the week or as a party dish.

Ingredient Breakdown and Substitutions

Let’s explore the ingredients that come together to create this mouthwatering dish. Here’s what you’ll need:


Belgian Waffle Maker

★ Recommended Kitchen Tool

Belgian Waffle Maker

Make this recipe even easier with a quality Belgian Waffle Maker — a must-have kitchen staple!


🛒 Shop This Tool →

As an Amazon Associate, we earn from qualifying purchases.
  • 1.5 lbs baby potatoes: Halved (or quartered if large). These provide a hearty base for your dish.
  • 1 lb carrots: Peeled and cut into 1.5-inch chunks (thick ends cut in half lengthwise). Sweet and vibrant, carrots add color and flavor.
  • 3 tbsp olive oil: Divided. A key ingredient for achieving crispy, caramelized edges.
  • 1 tbsp fresh thyme: Chopped (or 1 tsp dried). Thyme provides a lovely aromatic flavor.
  • 1 tbsp fresh rosemary: Chopped (or 1 tsp dried). Rosemary adds a robust, earthy note.
  • 1.5 tsp kosher salt: Divided. Essential for enhancing the natural flavors of the vegetables.
  • 1/2 tsp freshly ground black pepper: For a hint of heat.
  • 1 large zucchini: Approximately 12 oz, cut into thick 1-inch half-moons. Zucchini cooks quickly and adds a soft texture.
  • 5-6 whole garlic cloves: Peeled and gently smashed. Garlic infuses the dish with rich flavor.

Substitution Suggestions:

  • Potatoes: Sweet potatoes or parsnips can be used for a different flavor profile.
  • Carrots: Replace with parsnips or bell peppers for variety.
  • Zucchini: Eggplant or summer squash work well as alternatives.
  • Herbs: Feel free to mix in oregano or basil for a unique twist.

Step-by-Step Instructions

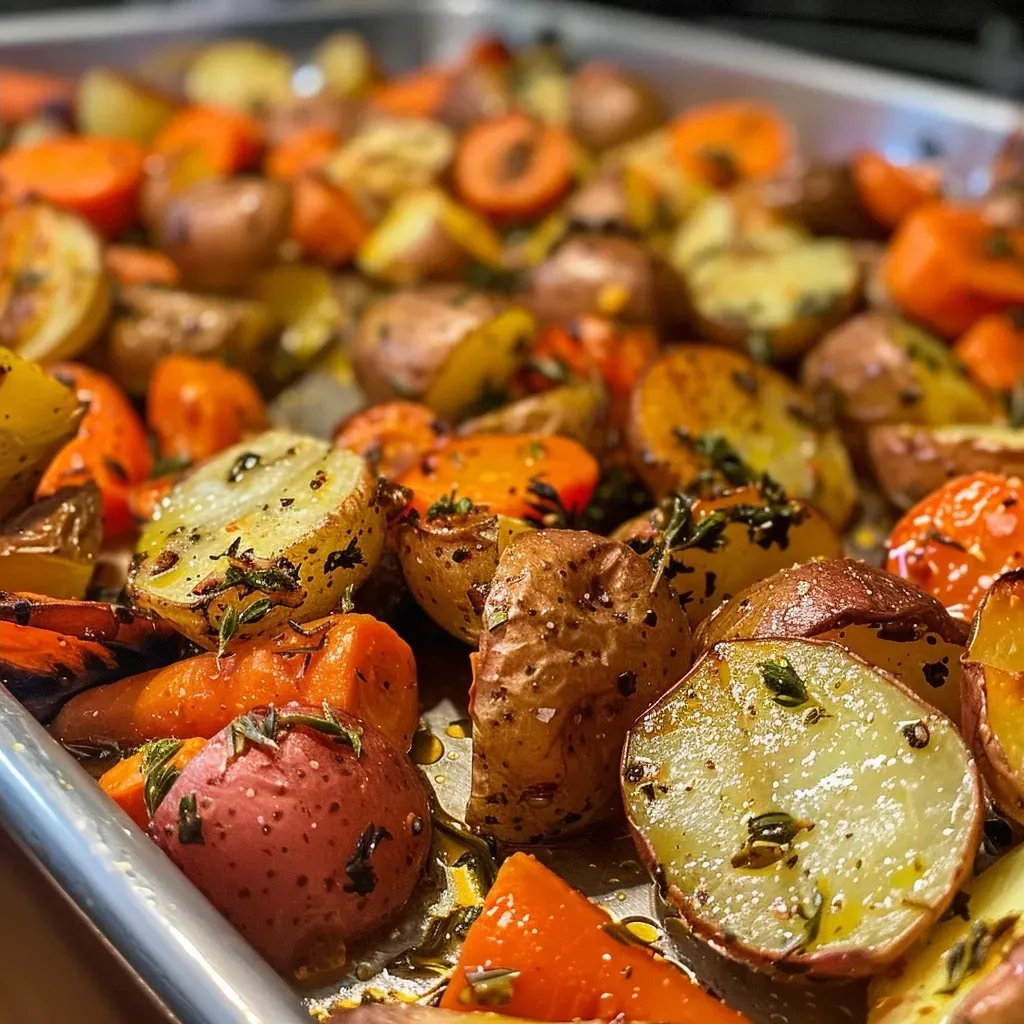
Close-up view of roasted potatoes, carrots, and zucchini with garlic and herbs.

Follow these simple steps to create roasted veggie perfection:

  • Preheat: Preheat your oven to 425°F (220°C) for optimal roasting.
  • Season hard vegetables: In a large bowl, combine the halved potatoes, carrot chunks, and whole smashed garlic cloves. Toss with 2 tablespoons of olive oil, thyme, rosemary, 1 teaspoon of salt, and black pepper.
  • First roast (20 mins): Spread the potato mixture onto a large, rimmed baking sheet in a single layer. Roast for 20 minutes, allowing them to start caramelizing.
  • Prep zucchini: Toss the zucchini half-moons in the same bowl with the remaining 1 tablespoon of olive oil and the remaining 1/2 teaspoon of salt.
  • Combine & finish: Remove the pan from the oven. Flip the potatoes and carrots for even cooking. Add the zucchini to the pan, spreading everything out to avoid overcrowding.
  • Final roast (20 mins): Return the pan to the oven and roast for an additional 15-20 minutes, until the potatoes are golden crisp and the zucchini is tender-crisp.
  • Serve: Taste and adjust seasoning if needed. Brighten with an optional squeeze of lemon juice before serving warm.

Pro Tips for Perfect Roasted Vegetables

To elevate your roasted vegetable game, consider these expert tips:

  • Use high heat: Roasting at 425°F (220°C) ensures caramelized edges and tender interiors.
  • Don’t skimp on oil: Olive oil helps achieve that crispy texture we all desire.
  • Space is key: Avoid overcrowding your baking sheet to prevent steaming. Use two pans if necessary.
  • Season at the end: Add a touch more salt after roasting to enhance flavors.
  • Experiment with herbs: Mix various fresh herbs to create your signature flavor.
  • Try different vegetables: Mix in seasonal greens like asparagus or broccoli for variety.
  • Preheat the baking sheet: This extra step can help achieve better browning.
  • Use lemon zest: Brightens flavors and adds freshness to the dish.

Common Mistakes and Troubleshooting

Even the best chefs make mistakes! Here are common pitfalls and how to avoid them:

  • Overcrowded pan: This leads to steaming instead of roasting. Ensure space between veggies.
  • Not enough oil: Insufficient oil can result in dry vegetables. Increase oil as needed.
  • Inconsistent cutting: Cut vegetables into uniform sizes to ensure even cooking.
  • Ignoring doneness: Check for doneness by tasting a piece; adjust roasting time accordingly.

Variations to Try

Get creative with these fun variations:

  • Spicy Roasted Veggies: Add red pepper flakes for a kick.
  • Mediterranean Style: Incorporate olives and feta cheese after roasting.
  • Balsamic Glaze: Drizzle with balsamic reduction before serving for added sweetness.
  • Asian-inspired: Toss with soy sauce and sesame oil before roasting.

Storage and Make-Ahead Instructions

This dish is perfect for meal prep! Here’s how to store and reheat:

  • Storage: Store leftovers in an airtight container in the refrigerator for up to 4 days.
  • Reheating: Reheat in the oven at 350°F (175°C) for about 10-15 minutes to regain crispiness.
  • Make-ahead: Prep and season vegetables a day in advance; roast them just before serving.

Comprehensive FAQ

Here are answers to common questions about roasting vegetables:

  • Can I use frozen vegetables? It’s best to use fresh vegetables for optimal texture, but if using frozen, thaw them completely before roasting.
  • What’s the best way to cut vegetables? Aim for uniform sizes to ensure even cooking, typically 1-1.5 inches in size.
  • Can I roast other vegetables? Absolutely! Feel free to experiment with seasonal veggies like Brussels sprouts or beets.
  • How do I know when they’re done? The vegetables should be golden brown and tender when pierced with a fork.
  • Can I add protein? Yes! You can roast chicken or tofu on the same sheet pan for a complete meal.
  • What if I don’t have fresh herbs? Dried herbs can be used, but adjust the quantity as they are more concentrated.
  • What’s the nutritional value of this dish? This recipe offers a healthy serving of vitamins, fiber, and antioxidants, making it a nutritious addition to any meal.
  • Can I serve this cold? Yes! Roasted vegetables can be enjoyed cold in salads or as a snack.

Nutrition Tips and Dietary Adaptations

This roasted vegetable dish is not only delicious but also healthy. Here are some tips for optimizing its nutritional value:

  • Low-carb option: Substitute potatoes with cauliflower for a low-carb alternative.
  • Vegan-friendly: This recipe is naturally vegan and gluten-free, accommodating various dietary preferences.
  • Boost fiber: Add beans or lentils to the mix for added protein and fiber.

Recommended Equipment

To achieve the best results, consider using the following kitchen tools:

  • Rimmed baking sheet: A sturdy sheet ensures even roasting.
  • Mixing bowl: For tossing and seasoning veggies before roasting.
  • Chef’s knife: A sharp knife makes cutting vegetables a breeze.
  • Spatula: Use for flipping and serving your roasted veggies.

Serving Suggestions

These garlic herb roasted vegetables can be enjoyed in various ways:

  • As a side dish: Pair with grilled meats or fish for a balanced meal.
  • In salads: Toss with greens for a hearty, nutritious salad.
  • In wraps: Use as a filling for wraps or pitas along with hummus or tzatziki.
  • As a snack: Serve them warm or cold for a healthy snack option.

In conclusion, mastering the art of garlic herb roasted vegetables opens a world of flavor and nutrition. With a few simple steps and fresh ingredients, you can create an impressive dish that brings warmth and joy to your table. Embrace your culinary creativity, and remember, every meal is an opportunity to connect and share. Happy cooking!

Garlic Herb Roasted Potatoes Carrots and Zucchini

Prep Time 10 minutes
Cook Time 40 minutes
Total Time 50 minutes
Servings 4 servings
Calories 250
A flavorful roasted vegetable medley featuring potatoes, carrots, zucchini, and aromatic herbs, perfect as a side dish.

Ingredients

Vegetables

  • 1.5 lbs baby potatoes (halved (quarter if large))
  • 1 lb carrots (peeled and cut into 1.5-inch chunks)
  • 1 large zucchini (approx 12 oz, cut into 1-inch half-moons)
  • 5-6 cloves garlic (peeled and smashed)
  • 3 tbsp olive oil (divided)
  • 1 tbsp fresh thyme leaves (chopped (or 1 tsp dried))
  • 1 tbsp fresh rosemary (chopped (or 1 tsp dried))
  • 1.5 tsp kosher salt (divided)
  • 0.5 tsp black pepper (freshly ground)

Instructions 

  • Preheat oven to 425°F (220°C).
  • Toss potatoes, carrots, and garlic with 2 tbsp olive oil, thyme, rosemary, 1 tsp salt, and pepper. Roast for 20 minutes.
  • Toss zucchini with remaining 1 tbsp olive oil and 0.5 tsp salt.
  • Remove pan, flip veggies, add zucchini, and roast for another 15-20 minutes until crisp and tender.
  • Adjust seasoning if needed and serve warm, optionally with lemon.

Notes

Use two pans if necessary to prevent crowding for crispier veggies.
Calories: 250kcal
Cost: $15
Course: Side Dish
Cuisine: American
Keyword: Vegetables

Discover the Joy of a Refreshing Shredded Beef Salad

If you’re searching for a way to elevate your lunch or light dinner, look no further! This Shredded Beef Salad is not only packed with flavor but also brimming with vibrant vegetables and a zesty dressing that will tantalize your taste buds. In this comprehensive guide, we’ll walk you through every step of making this delightful dish, ensuring you have all the tools and tips needed for a successful kitchen experience.

Why You’ll Love This Recipe

This salad isn’t just another meal; it’s a delightful combination of flavors and textures that refreshes and satisfies. Here are five specific benefits of making this Shredded Beef Salad:

  • Quick and Easy Preparation: Whip up this salad in under 30 minutes, making it perfect for busy weekdays.
  • Nutrient-Packed Ingredients: Featuring fresh vegetables like cucumber and tomato, this salad is loaded with vitamins and minerals.
  • Versatile Dish: Great as a standalone lunch or as a side for grilled meats, this salad fits any occasion.
  • Customizable: Easily adapt the recipe to fit your taste preferences or dietary needs.
  • Flavorful Dressing: A homemade dressing that enhances the natural flavors of the ingredients, adding zing to every bite.

Ingredient Breakdown

Let’s dive into the ingredients that make this Shredded Beef Salad a standout. Below is a detailed list along with potential substitutions to cater to your taste:


Meal Prep Containers

★ Recommended Kitchen Tool

Meal Prep Containers

Make this recipe even easier with a quality Meal Prep Containers — a must-have kitchen staple!


🛒 See Deals on Amazon →

As an Amazon Associate, we earn from qualifying purchases.
  • 1 Small Onion: Adds a crunch; substitute with green onions for a milder flavor.
  • 1 Cucumber: Freshness; use pickles if you prefer a tangy bite.
  • 1 Large Tomato: Juiciness; replace with cherry tomatoes for a sweeter flavor.
  • 1 Cup Lettuce Leaves (or Rucola): For a base; spinach is a great alternative.
  • 1 Cup Sweet Corn: Sweetness; use frozen corn for convenience.
  • 1 Cup Shredded Beef: Protein source; you can use shredded chicken or tofu for a different taste.
  • 1 Tablespoon Dijon Mustard: For tang; yellow mustard can be used instead.
  • 1 Tablespoon Vinegar: Acidity; balsamic vinegar provides a richer flavor.
  • 2 Tablespoon Oil: Olive oil is preferred, but avocado oil works well too.
  • Salt (to taste): Essential seasoning; consider sea salt for a gourmet touch.
  • ⅛ Teaspoon Black Pepper Ground: Adds warmth; freshly ground pepper provides the best flavor.
  • Chives (to garnish): For aesthetics; parsley can be used if chives aren’t available.

Step-by-Step Process Overview

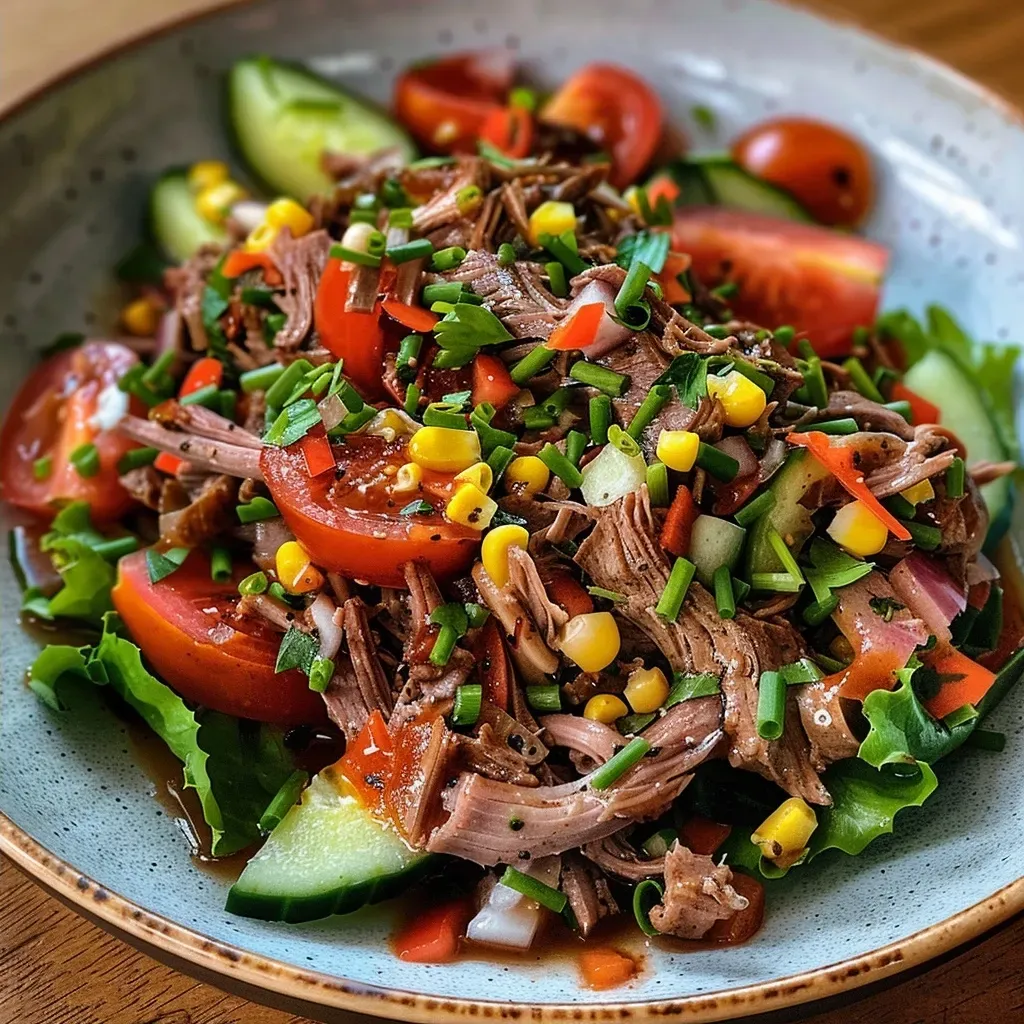
A vibrant shredded beef salad featuring lettuce, tomato, cucumber, and sweet corn.

Now, let’s break down the steps to create your stunning Shredded Beef Salad:

  1. Prepare the vegetables: Dice the onion, cucumber, and tomato. Shred or chop the lettuce or rucola leaves and set aside.
  2. Gather the remaining ingredients, ensuring the shredded beef is ready to go.
  3. In a large mixing bowl, combine the chopped onion, cucumber, tomato, lettuce/rucola leaves, corn, and shredded beef.
  4. Season the mixture with Dijon mustard, vinegar, oil, salt, and black pepper.
  5. Toss everything together, ensuring all the ingredients are well-coated with the dressing.
  6. Garnish with freshly chopped chives and serve either cooled or at room temperature.

Pro Tips for Perfection

To elevate your culinary skills and ensure the best results, consider these expert tips:

  • Pre-chill Ingredients: For an extra refreshing salad, chill your vegetables prior to mixing.
  • Balance Flavors: Adjust the dressing ingredients to suit your taste; add more vinegar for tang or oil for richness.
  • Season Gradually: Always taste as you go; this ensures a well-seasoned final product.
  • Fresh Ingredients: Use the freshest vegetables available for optimal flavor and texture.
  • Shred Your Beef: For a more tender texture, let the beef cool slightly before shredding.
  • Garnish Generously: Don’t skimp on the chives; they add a lovely pop of color and flavor.
  • Make Ahead: Prepare the salad a few hours in advance for the flavors to meld beautifully.
  • Experiment: Don’t hesitate to add your favorite ingredients like nuts or seeds for added crunch.

Common Mistakes and Troubleshooting

Even the best chefs face challenges, so here are some common mistakes when preparing your Shredded Beef Salad and how to avoid them:

  • Overdressing: Too much dressing can drown the salad; start with less and add more as needed.
  • Underseasoning: Always taste before serving; a pinch of salt can enhance all flavors.
  • Using Wilted Greens: Fresh greens are essential; discard any that are limp or discolored.
  • Skipping the Protein: Ensure sufficient shredded beef or your preferred protein to make the salad filling.

Variations to Explore

Want to mix things up? Here are several variations of the Shredded Beef Salad to try:

  • Spicy Beef Salad: Add diced jalapeños or a splash of hot sauce for a kick.
  • Asian-Inspired Salad: Incorporate sesame oil, shredded carrots, and sprinkle with sesame seeds.
  • Mexican Beef Salad: Toss in black beans, corn, and avocado for a hearty twist.
  • Mediterranean Style: Include feta cheese, olives, and a squeeze of lemon juice for bright flavors.

Storage and Make-Ahead Instructions

This Shredded Beef Salad is perfect for meal prep! Here’s how to store it:

  • Refrigerate: Store in an airtight container for up to 3 days; keep dressing separate until ready to serve.
  • Make Ahead: Prepare all ingredients in advance and mix just before serving to maintain freshness.

Comprehensive FAQ

Here are some frequently asked questions about this delicious salad:

  • Can I use canned beef? Yes, canned beef can be a quick substitute, but fresh is usually better in flavor and texture.
  • Is this salad gluten-free? Yes, as long as you use gluten-free mustard and vinegar.
  • How can I make this salad vegetarian? Replace the shredded beef with chickpeas or grilled tofu for protein.
  • Can I add fruits? Absolutely! Adding fruits like apples or mango can add a sweet twist.
  • What’s the best way to shred beef? Use two forks or a stand mixer for quick shredding.
  • Can I freeze this salad? It’s not recommended; freezing can alter the texture of the vegetables.
  • What other dressings work well? A yogurt-based dressing or vinaigrette are excellent alternatives.
  • How can I make this salad suitable for kids? Involve them in the preparation and let them choose their favorite veggies!

Nutrition Tips and Dietary Adaptations

This salad can easily fit various dietary needs:

  • Low-Carb Option: Skip the corn and focus on leafy greens and beef.
  • High-Protein Version: Add more shredded beef or chickpeas for an extra protein boost.
  • Dairy-Free: Opt for a vinegar-based dressing instead of creamy options.

Equipment Recommendations

To make your cooking process smoother, consider using the following tools:

  • Sharp Chef’s Knife: Essential for precise vegetable chopping.
  • Cutting Board: A sturdy surface for all your prep work.
  • Mixing Bowl: A large bowl for combining ingredients easily.
  • Measuring Spoons: For accurate dressing measurements.

Serving Suggestions

To best enjoy your Shredded Beef Salad, consider the following serving ideas:

  • Plated Warm: Serve immediately for a cozy meal.
  • As a Wrap: Use a tortilla to create a beef salad wrap for an on-the-go option.
  • With a Side of Bread: Pair it with crusty bread or pita for a heartier meal.

Conclusion

Now that you have everything you need to create an unforgettable Shredded Beef Salad, it’s time to gather your ingredients and get cooking! Remember, cooking is all about experimentation and enjoying the process. So, roll up your sleeves, and let’s whip up something delicious that brings joy to your table. Happy cooking!

Shredded Beef Salad Recipe

Prep Time 15 minutes
Cook Time 10 minutes
Total Time 25 minutes
Servings 4 servings
Calories 350
A fresh and hearty salad combining shredded beef with crisp vegetables and a tangy dressing, perfect for a quick lunch or light dinner.

Ingredients

Vegetables

  • 1 piece Small Onion
  • 1 piece Cucumber
  • 1 piece Large Tomato
  • 1 cup Lettuce Leaves (or Rucola)
  • 1 cup Sweet Corn

Main Ingredient

  • 1 cup Shredded Beef
  • 1 tablespoon Dijon Mustard
  • 1 tablespoon Vinegar
  • 2 tablespoon Oil
  • to taste Salt
  • teaspoon Black Pepper Ground

Garnish

  • to taste Chives

Instructions 

  • Dice the onion, cucumber, and tomato; chop lettuce or rucola; keep shredded beef ready.
  • Combine all vegetables, corn, and beef in a bowl.
  • Mix mustard, vinegar, oil, salt, and pepper; toss with the salad.
  • Garnish with chopped chives and serve chilled or at room temperature.

Notes

Use fresh ingredients for best flavor and serve immediately.
Calories: 350kcal
Cost: $15
Course: Salad
Cuisine: International
Keyword: Beef

Welcome to the delightful world of rice flour dosas, also known as savory Indian pancakes! These versatile and gluten-free creations are perfect for any meal of the day. In this comprehensive guide, I will walk you through everything you need to know about making the perfect rice flour dosa, from ingredients to cooking techniques, along with some expert tips and variations to elevate your culinary experience.

Why You’ll Love This Recipe

Rice flour dosas are not just delicious; they offer a range of benefits that make them an ideal choice for many home cooks:

  • Quick Preparation: Unlike traditional dosas that require fermentation, this recipe allows you to whip up dosas in no time, perfect for busy mornings or spontaneous meals.
  • Gluten-Free Delight: Made primarily from rice flour, these dosas cater to gluten-sensitive individuals, making them a great alternative for anyone needing gluten-free options.
  • Rich in Flavor: Infused with fresh ingredients like herbs and spices, these dosas are packed with flavor, making them a hit with both kids and adults alike.
  • Endless Customization: You can easily customize the batter by adding vegetables, spices, or even different types of flour for unique flavor profiles.
  • Healthy Eating: With the addition of coconut yogurt, these dosas not only taste good but also offer nutritional benefits, including probiotics and healthy fats.

Ingredient Breakdown

Understanding your ingredients is crucial for creating the perfect rice flour dosa. Here’s a detailed breakdown:


Professional Chef Knife Set

★ Recommended Kitchen Tool

Professional Chef Knife Set

Make this recipe even easier with a quality Professional Chef Knife Set — a must-have kitchen staple!


🛒 See Deals on Amazon →

As an Amazon Associate, we earn from qualifying purchases.
  • Rice Flour: The star of the show, rice flour gives the dosa its signature texture. You can use store-bought rice flour or grind your own from uncooked rice.
  • Coconut Yogurt: This adds a creamy texture and tanginess. If you’re looking for a non-dairy option, feel free to substitute with almond yogurt or leave it out for a simpler version.
  • Water: Helps achieve the right batter consistency. You can adjust the amount based on the thickness you prefer.
  • Green Chili: Adds a gentle kick. Feel free to adjust the amount based on your heat preference.
  • Red Onions: These provide a nice crunch and sweetness to the dosas. Substitute with shallots for a milder flavor.
  • Cilantro: Fresh herbs brighten up the dish. You can use other herbs like parsley or mint depending on your taste.
  • Salt: Essential for enhancing the flavors. Adjust according to your dietary needs.
  • Oil: Extra-virgin olive oil or coconut oil is recommended for cooking. Both impart a delightful flavor to the dosas.

Pro Tips for Perfect Rice Flour Dosas

To ensure your dosas turn out perfectly every time, consider these expert insights:

  • Resting the Batter: Allow the batter to rest for at least 2 hours for optimal flavor and texture.
  • Consistent Heat: Cook your dosas on a medium flame to achieve a crispy exterior without burning.
  • Use Non-Stick Cookware: A non-stick pan can help prevent sticking and makes flipping easier.
  • Check for Bubbles: Look for small bubbles forming on the surface before flipping – this indicates they are ready to turn.
  • Experiment with Flour: Mix rice flour with other flours like chickpea flour or millet flour for different textures and flavors.
  • Keep it Fresh: Make dosas fresh and eat immediately for the best taste and texture.
  • Adjust Consistency: If the batter is too thick, add a little more water. A thin batter creates a lacy texture.
  • Garnish with More: Top your dosas with fresh herbs, grated coconut, or even avocado for a modern twist.

Common Mistakes and Troubleshooting

A close-up view of crispy Rice Flour Dosas served on a plate.

Even the best chefs make mistakes! Here are some common pitfalls and how to avoid them:

  • Too Thick Batter: If your batter is too thick, the dosas will be dense. Add more water until you achieve a pourable consistency.
  • Burnt Dosas: Cooking on a high flame can lead to burnt outsides and raw insides. Always cook on medium heat.
  • Sticking: Ensure your pan is well-greased before pouring the batter to prevent sticking.
  • Flavorless Dosas: Don’t skip on salt or spices. They are essential for flavor.

Variations of Rice Flour Dosa

Add some excitement to your rice flour dosa with these delicious variations:

  • Vegetable Dosa: Incorporate finely chopped vegetables like carrots, spinach, or bell peppers into the batter for added nutrition and flavor.
  • Spiced Dosa: Add cumin seeds, black mustard seeds, or turmeric powder to the batter for a flavor boost.
  • Cheese Dosa: Sprinkle grated cheese into the batter just before flipping for a cheesy delight.
  • Herbed Dosa: Mix in fresh herbs like dill or basil for an aromatic twist.

Storage and Make-Ahead Instructions

Want to make your cooking process easier? Here’s how to store your ingredients and batter:

  • Storing the Batter: You can keep the batter in the refrigerator for up to 4 days. Just make sure it’s in an airtight container.
  • Freezing Dosas: Cooked dosas can be frozen. Layer them with parchment paper and store in an airtight container for up to a month.
  • Reheating Dosas: To reheat frozen dosas, place them in a preheated pan over medium heat until warmed through, adding a little oil for crispiness.

Frequently Asked Questions

Here are some common questions about rice flour dosas:

  • Can I use regular flour instead of rice flour? Yes, but the texture and taste will differ significantly.
  • How do I make the dosas more crispy? Ensure your pan is hot enough before pouring the batter and use sufficient oil.
  • Can I make the batter ahead of time? Yes, you can prepare the batter the night before and store it in the refrigerator.
  • What can I serve with dosas? Dosas pair wonderfully with chutneys, sambar, or even yogurt for dipping.
  • Are rice flour dosas vegan? Yes, as long as you use plant-based yogurt and a suitable oil.
  • Can I add spices to the batter? Absolutely! Feel free to experiment with different spices to suit your taste.
  • What is the best way to flip a dosa? Use a flat spatula and gently lift the edges before flipping to avoid breaking.
  • Is this recipe good for meal prepping? Yes! The batter can be stored in the fridge, and dosas can be cooked fresh as needed.

Nutrition Tips and Dietary Adaptations

Rice flour dosas can easily fit into various dietary needs:

  • Low-Carb Option: Substitute part of the rice flour with almond flour for a lower-carb version.
  • Vegan-Friendly: Ensure you use coconut yogurt and a plant-based oil for cooking.
  • High-Protein Boost: Mix in some chickpea flour to increase the protein content.

Equipment Recommendations

To make your dosa experience effortless, here are some essential tools:

  • Non-Stick Pan: Ideal for cooking dosas without sticking.
  • Whisk: A good whisk is essential for mixing the batter smoothly.
  • Spatula: A flat spatula helps in flipping the dosas easily.

Serving Suggestions

Rice flour dosas are incredibly versatile. Here are some serving ideas:

  • With Chutneys: Serve with coconut chutney, tomato chutney, or mint chutney for a refreshing contrast.
  • As a Wrap: Use dosas as a wrap for filling with your favorite veggies and protein.
  • With Sambar: Pair with a warm bowl of sambar for a hearty meal.

In conclusion, rice flour dosas are not only delicious but also incredibly versatile and easy to make. Whether you’re looking for a quick breakfast or a satisfying dinner, this recipe is sure to impress. With the tips and variations provided, you can create your own unique versions of this classic dish. So grab your ingredients and let’s get cooking!

Rice Flour Dosas (Savory Indian Pancakes)

Prep Time 15 minutes
Cook Time 10 minutes
Total Time 25 minutes
Servings 4 pancakes
Calories 150
Enjoy these crispy, savory Indian pancakes made with rice flour and fresh herbs, perfect for a quick breakfast or snack.

Ingredients

Dough

  • 0.25 cup full-fat coconut yogurt
  • 0.75 cup water
  • 0.5 cup rice flour (plus 2 tbsp)
  • 2 tbsp red onions (finely diced)
  • 1 green chili green chili (de-seeded and chopped finely)
  • 2 tbsp cilantro (finely chopped)
  • 0.5 tsp salt (adjust to taste)

Cooking Oil

  • 1-2 tbsp extra-virgin olive oil or coconut oil

Instructions 

  • Mix coconut yogurt and water until smooth.
  • Whisk rice flour and salt, then combine with yogurt mixture. Rest for 2 hours.
  • Add onions, chili, and cilantro to batter and mix.
  • Heat a pan with oil, pour batter, cook until golden, then flip and cook other side.
  • Repeat with remaining batter. Serve immediately.

Notes

Make sure to cook the dosas on medium heat for best results.
Calories: 150kcal
Cost: $10
Course: Breakfast, Snack
Cuisine: Indian
Keyword: Rice Flour, Savory Pancakes

Discover the Joy of Grilled Chicken Sandwiches

Welcome to the ultimate guide for making the best grilled chicken sandwich! If you’re looking to elevate your lunchtime experience, you’re in the right place. This sandwich is not just about the grilled chicken; it’s a beautiful combination of juicy chicken, fresh veggies, and creamy sauces all nestled in a perfectly toasted bun. In this article, we’ll explore everything you need to know, from ingredients and cooking tips to variations and common mistakes to avoid. Get ready to impress yourself and your loved ones with this delightful dish!

Why You’ll Love This Recipe

This grilled chicken sandwich is a versatile and satisfying meal that’s perfect for any occasion. Here are just a few reasons why you’ll fall in love with it:

  • Quick and Easy: Ready in 30 minutes, making it ideal for busy weeknights.
  • Customizable: Swap out ingredients to suit your taste or dietary needs.
  • Healthy Option: Packed with protein and fresh veggies, it’s a nutritious choice.
  • Great for Meal Prep: Make multiple sandwiches ahead of time for quick lunches.
  • Impressive Flavor: The combination of marinated chicken and fresh toppings creates a burst of flavor with every bite.

Ingredient Breakdown

Let’s dive into the ingredients you’ll need to create this mouthwatering grilled chicken sandwich, along with some helpful substitutions:


Digital Meat Thermometer

★ Recommended Kitchen Tool

Digital Meat Thermometer

Make this recipe even easier with a quality Digital Meat Thermometer — a must-have kitchen staple!


🛒 View on Amazon →

As an Amazon Associate, we earn from qualifying purchases.
  • Grilled Chicken: Use boneless, skinless chicken breasts for the best results. If desired, you can substitute with thighs for a richer flavor.
  • Lettuce: Crisp romaine or leafy greens add crunch. Feel free to use spinach for a different texture.
  • Tomato: Fresh slices or even roasted tomatoes can enhance the flavor.
  • Mayo: Traditional mayonnaise adds creaminess, but consider using Greek yogurt for a healthier twist.
  • Toasted Bun: A brioche or whole grain bun works wonderfully; gluten-free options are also available.

Pro Tips for Perfect Grilled Chicken Sandwiches

Juicy grilled chicken sandwich with lettuce and tomato on a toasted bun.

Here are some expert insights to ensure your grilled chicken sandwich comes out perfectly every time:

  • Marinate the Chicken: For at least 30 minutes in a mixture of olive oil, lemon juice, garlic, and herbs to infuse flavor.
  • Preheat Your Grill: Ensure your grill is hot before placing the chicken to achieve beautiful grill marks and prevent sticking.
  • Use a Meat Thermometer: To check for doneness, the internal temperature should reach 165°F (75°C).
  • Don’t Overcook: Chicken can dry out quickly; cook just until done.
  • Let it Rest: Allow the chicken to rest for a few minutes before slicing to retain juices.
  • Toast Your Buns: Lightly butter and toast your buns on the grill for added flavor and texture.
  • Layer Wisely: Start with mayo on the bottom to keep the bun from getting soggy.
  • Experiment with Sauces: Try honey mustard, BBQ sauce, or even a spicy aioli for added flavor.

Common Mistakes and Troubleshooting

Even the best chefs make mistakes! Here are some common pitfalls to watch out for:

  • Skipping the Marinade: This step is crucial for flavor and moisture; don’t skip it!
  • Using Cold Chicken: Make sure to allow your chicken to come to room temperature before grilling.
  • Not Preheating the Grill: This can lead to uneven cooking; always preheat!
  • Overcrowding the Grill: Cook in batches if necessary; give each piece enough space.

Variations to Try

The beauty of the grilled chicken sandwich lies in its versatility. Here are some delicious variations to try:

  • Buffalo Chicken Sandwich: Toss grilled chicken in buffalo sauce and top with blue cheese dressing and celery slaw.
  • Caprese Chicken Sandwich: Add fresh mozzarella, basil, and a drizzle of balsamic glaze for an Italian twist.
  • BBQ Chicken Sandwich: Slather with BBQ sauce and top with coleslaw for a Southern-style treat.
  • Avocado Chicken Sandwich: Creamy avocado spread replaces mayo, topped with sliced radishes for crunch.

Storage and Make-Ahead Instructions

If you love meal prepping, here’s how to store your grilled chicken sandwiches:

  • Refrigeration: Store assembled sandwiches in an airtight container for up to 3 days.
  • Freezing: For longer storage, freeze grilled chicken separately and reassemble sandwiches when ready to eat.
  • Make-Ahead Tips: Grill chicken and prep toppings in advance; simply toast the buns before serving.

Frequently Asked Questions

Here are some commonly asked questions about grilled chicken sandwiches:

  • Can I use frozen chicken? Yes, but thaw it completely before marinating and grilling for best results.
  • What’s the best way to grill chicken? Direct medium-high heat works best; use indirect heat if you need to cook longer without burning.
  • How can I make this sandwich gluten-free? Use gluten-free buns and ensure all sauces are gluten-free as well.
  • Can I use a different cooking method? Absolutely! You can bake or pan-sear the chicken if you don’t have access to a grill.
  • What toppings do you recommend? Consider adding bacon, pickles, or various cheeses for more flavor.
  • How do I know when the chicken is cooked? Use a meat thermometer; it should read 165°F (75°C).
  • Can I marinate the chicken overnight? Yes, marinating overnight can enhance flavor and tenderness.
  • Is this recipe kid-friendly? Definitely! The flavors are mild and customizable to suit picky eaters.

Nutrition Tips and Dietary Adaptations

This grilled chicken sandwich can fit into various dietary lifestyles:

  • Low-Carb: Serve the grilled chicken on lettuce wraps instead of buns.
  • High Protein: Increase the chicken portion or add an egg for extra protein.
  • Dairy-Free: Use avocado or hummus instead of mayo.
  • Vegetarian Option: Substitute chicken with grilled portobello mushrooms or a veggie burger.

Essential Equipment Recommendations

To make your grilling experience seamless, here’s a list of recommended equipment:

  • Grill: Gas or charcoal, based on your preference.
  • Meat Thermometer: Essential for checking doneness accurately.
  • Grilling Tongs: For flipping and removing chicken without losing juices.
  • Marinade Brush: Great for applying marinades evenly.

Serving Suggestions

Complete your meal with these serving suggestions:

  • Side Salads: A fresh garden salad or coleslaw balances the meal.
  • Chips or Fries: Classic sides that pair perfectly with sandwiches.
  • Refreshing Drinks: Serve with lemonade or iced tea for a refreshing touch.

Conclusion

Now that you have all the knowledge you need to create the ultimate grilled chicken sandwich, it’s time to get cooking! Whether you stick to the classic recipe or try one of the exciting variations, this sandwich is sure to be a hit at your table. Remember, great cooking is about enjoying the process and sharing delicious moments with those you love. Happy grilling!

Grilled Chicken Sandwiches

Prep Time 10 minutes
Cook Time 15 minutes
Total Time 25 minutes
Servings 4 servings
Calories 450
Enjoy a delicious and satisfying grilled chicken sandwich, perfect for a quick lunch or dinner.

Ingredients

Protein

  • 4 pieces Grilled chicken

Vegetables

  • 1 leaf Lettuce
  • 1 slice Tomato

Condiments

  • 2 tablespoons Mayo

Breads

  • 2 toasted buns Toasted bun

Instructions 

  • Grill the chicken until fully cooked.
  • Toast the buns.
  • Assemble the sandwich with chicken on the bun.
  • Add lettuce, tomato, and mayo.

Notes

Use fresh ingredients for best flavor.
Calories: 450kcal
Cost: $12
Course: Main Course
Cuisine: American
Keyword: Chicken