Author

Mike

Browsing

As a chef who has spent countless hours in kitchens, both professional and personal, there’s something profoundly comforting about a dish that brings simplicity and flavor together in perfect harmony. My One-Pot Mushroom Rice recipe is one of those dishes. It reminds me of the cozy family dinners from my childhood, where the aroma of mushrooms and spices filled the air, creating a sanctuary of warmth and togetherness. This dish is a tribute to those moments, a reminder that food is not just about taste but about creating connections that last a lifetime.

Why You’ll Absolutely Love This Recipe

  • It’s a breeze to make, offering a kitchen victory that even the busiest of us can achieve!
  • Combines rich, earthy mushroom flavors with the comforting texture of rice.
  • A perfect canvas for creativity—add your favorite herbs or spices to make it your own.
  • Ideal as a standalone meal or a versatile side dish.
  • Minimal cleanup with just one pot required, so more time to enjoy with loved ones!

Simple Ingredients for a Delicious Treat

There’s a certain magic in simplicity, and this recipe embodies that. I love using long-grain white rice for its fluffy texture, though basmati adds an aromatic touch if you’re feeling adventurous. The cremini or button mushrooms bring an earthy depth that’s simply irresistible, while a splash of soy sauce enhances the umami flavor, making this dish one of the Best Flavored Rice options you’ll try.

You’ll find the full ingredient list with exact measurements in the recipe card below!

Let’s Make Some Magic: Step-by-Step

Imagine me right there with you as you embark on this culinary journey. Let’s start by rinsing the rice under cold water. This little step ensures our rice stays fluffy, not sticky. Next, we’ll prep our ingredients—chopping onions, mincing garlic, and slicing mushrooms—so everything is ready to go.

Heat some olive oil in a large skillet. I always reach for my trusty cast iron; it never lets me down. Sauté the onions until they’re translucent, then introduce the garlic, letting its aroma spread through your kitchen. Add the mushrooms, allowing them to release their moisture and develop that beautiful golden hue.

Now it’s time to season. Sprinkle in thyme, paprika, salt, and pepper, coating everything evenly. Add the rice, giving it a gentle toast before introducing our broth. If you’re opting for soy sauce, now’s the time to add it. Let the mixture come to a gentle boil, then cover and reduce the heat. Patience is key here—give it 15-18 minutes without peeking!

Once done, let it rest for a few minutes before fluffing with a fork. Top with freshly chopped parsley, and voilà, a dish made with love and care.

A Few of My Favorite Tips

Here are some insider secrets to elevate your One-Pot Mushroom Rice to new heights:

  • For a richer flavor, try adding a splash of white wine before the broth.
  • Feel free to experiment with herbs—basil or oregano can add a delightful twist.
  • If you love a bit of heat, a pinch of red pepper flakes can do wonders.

How I Like to Serve This

This dish shines bright as a standalone meal, but it’s also a fantastic Side Dish Using Rice. Pair it with grilled chicken or a simple green salad for a balanced, flavorful dinner. It’s one of those Flavorful Dinner Ideas that never fails to impress.

Storing & Reheating (If There’s Any Left!)

If you happen to have leftovers, store them in an airtight container in the fridge for up to three days. Reheat gently on the stove or microwave, adding a splash of broth to bring back its just-cooked goodness. This dish is a wonderful candidate for meal prep, ensuring you have a delicious option ready at your fingertips.

One-Pot Mushroom Rice

Prep Time 10 minutes
Cook Time 20 minutes
Total Time 30 minutes
Servings 4 servings
Calories 350
A delicious and aromatic one-pot dish featuring mushrooms and rice, perfect for a quick weeknight meal.

Ingredients

Rice

  • 1 cup long-grain white rice ((or basmati for added aroma))

Vegetables

  • 2 tablespoons olive oil ((extra virgin))
  • 1 medium onion, finely chopped
  • 3 cloves garlic, minced
  • 2 cups cremini or button mushrooms, sliced
  • 2 cups vegetable broth ((or chicken broth if preferred))
  • 1 teaspoon soy sauce ((optional, for added umami))
  • 1/2 teaspoon dried thyme
  • 1/2 teaspoon paprika
  • salt and pepper (to taste)

Garnish

  • chopped parsley (for garnish)

Instructions 

  • Rinse the rice under cold water until clear to remove excess starch.
  • Chop onion, mince garlic, and slice mushrooms.
  • Heat olive oil in a skillet, sauté onion until translucent, then add garlic and mushrooms.
  • Add thyme, paprika, salt, and pepper, then mix in the rinsed rice.
  • Pour in broth, bring to a boil, then simmer covered for 15-18 minutes.
  • Fluff rice with a fork, garnish with parsley, and serve.

Notes

For extra flavor, consider adding a splash of white wine while cooking.
Calories: 350kcal
Cost: $10
Course: Main Course
Cuisine: global
Keyword: Mushroom

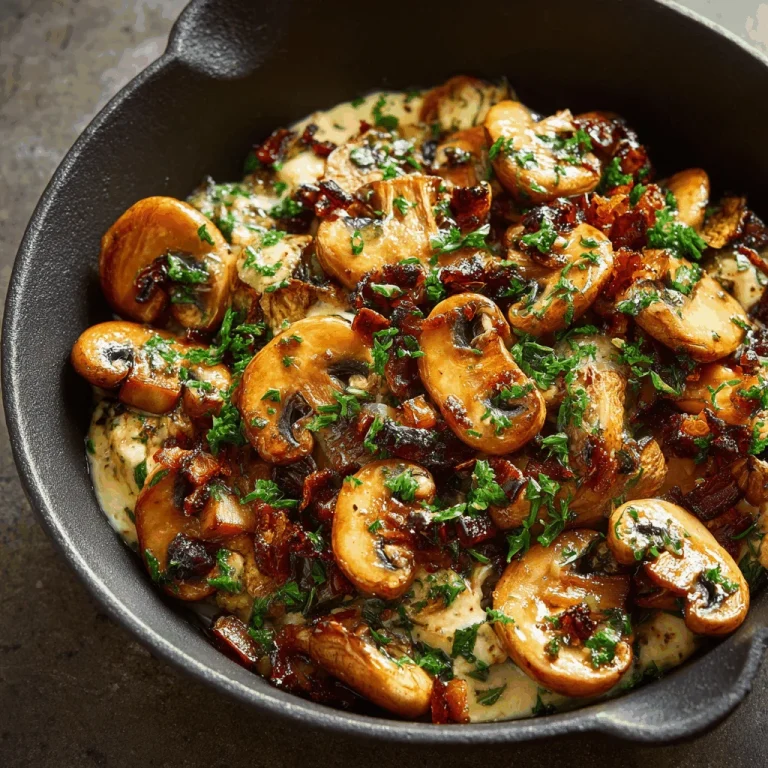
There’s something truly magical about the simplicity of sautéed mushrooms. For me, Mike Anderson, it’s a dish that brings back fond memories of my grandmother’s kitchen. I remember her standing by the stove, her hands moving deftly as she transformed humble ingredients into something extraordinary. She taught me that food is a bridge to the past, and every time I sauté mushrooms, I feel a connection to her warmth and love. Today, I’m excited to share this cherished recipe with you, hoping it brings the same joy and comfort to your table.

Why You’ll Absolutely Love This Recipe

  • It’s so easy, it feels like a little kitchen victory!
  • The aroma of garlic and thyme will fill your kitchen with warmth.
  • Versatile enough to accompany any main dish or stand alone as a delightful appetizer.
  • A perfect balance of earthy and savory flavors that will elevate any meal.
  • Quick to prepare, making it ideal for both weeknight dinners and special occasions.

Simple Ingredients for a Delicious Treat

Let’s talk about the stars of this dish. Baby bella mushrooms are my go-to for their rich, meaty texture and deep flavor. They’re like little sponges, soaking up all the deliciousness of butter, olive oil, and spices. The combination of olive oil and butter creates a wonderful base, while garlic and thyme add an aromatic depth. And let’s not forget the Worcestershire sauce—it adds a subtle, savory kick that ties everything together. These ingredients come together to create a dish that’s both simple and sophisticated.

You’ll find the full ingredient list with exact measurements in the recipe card below!

Let’s Make Some Magic: Step-by-Step

Imagine we’re cooking together in my kitchen studio, the heart of culinary creativity. Start by heating a medium skillet over medium heat, adding the olive oil and butter. Once the butter has melted, it’s time to introduce the sliced baby bella mushrooms. Sauté them for 8 to 10 minutes, just until they become soft and tender. You’ll see them transform, releasing their juices and becoming beautifully golden.

Next, add the minced garlic, fresh thyme, and Worcestershire sauce. Keep sautéing for another 1 to 2 minutes, letting the flavors meld together. Finally, taste the mushrooms and season with salt and freshly cracked pepper to your liking. Serve these beauties warm, garnished with fresh chopped parsley and thyme, and watch as they disappear from the plate.

A Few of My Favorite Tips

Here are a few secrets from my kitchen to yours. First, be patient with your mushrooms. Let them cook until they’re just right—soft, but not mushy. If you’re feeling adventurous, try adding a splash of white wine or balsamic vinegar for an extra layer of flavor. And remember, fresh herbs make a world of difference, so if you can, use fresh thyme over dried.

How I Like to Serve This

These sautéed mushrooms are a versatile delight. I love serving them alongside an Easy Baked Chicken Breast for a wholesome meal. They also pair beautifully with a juicy steak or tossed through a simple pasta for a quick, satisfying dinner. And if you’re looking for a healthy option, these mushrooms are a fantastic addition to a mixed salad or a hearty grain bowl.

Storing & Reheating (If There’s Any Left!)

If by some miracle you have leftovers, store them in an airtight container in the refrigerator for up to 3 days. To reheat, simply warm them in a skillet over low heat until they’re hot. You can also enjoy them cold as a topping for salads or sandwiches. Just remember, the key is to savor every bite, as these mushrooms have a way of disappearing quickly!

Sauteed Mushrooms

Prep Time 5 minutes
Cook Time 10 minutes
Total Time 15 minutes
Servings 4 servings
Calories 200
Deliciously sautéed baby bella mushrooms with garlic and thyme, perfect as a side dish or topping.

Ingredients

Ingredients

  • 1 tablespoon olive oil
  • 2 tablespoons butter
  • 16 oz sliced baby bella mushrooms
  • 1 tablespoon minced garlic
  • 1 teaspoon fresh thyme (or ½ teaspoon dried thyme)
  • 2 teaspoons Worcestershire sauce
  • salt and freshly cracked pepper (to taste)

Instructions 

  • Heat olive oil and butter in a skillet over medium heat.
  • Add mushrooms and sauté for 8-10 minutes until soft.
  • Stir in garlic, thyme, and Worcestershire sauce; sauté for 1-2 minutes.
  • Season with salt and pepper to taste. Serve warm.

Notes

For added flavor, garnish with fresh chopped parsley.
Calories: 200kcal
Cost: $8.00
Course: Side Dish
Cuisine: American
Keyword: Mushrooms

Growing up in the bustling city of Chicago, my fondest memories revolve around family gatherings where food was the unspoken language of love. My grandma, a spirited woman with a knack for transforming simple ingredients into mouthwatering dishes, often whipped up hearty meals that made every occasion special. Her cowboy mushroom side dishes were a staple at our holiday dinners, their earthy flavor and robust texture offering a comforting balance to the feast. Today, as a chef and a culinary storyteller, I’m thrilled to share a modern take on these delightful dishes that combine tradition with a sprinkle of innovation.

Why You’ll Absolutely Love This Recipe

  • It’s so simple, it feels like a kitchen victory every time!
  • These mushrooms pack a punch of flavor that’s unforgettable.
  • It’s versatile enough to pair with almost any main dish.
  • Perfect for both festive appetizer recipes and casual dinners.
  • A great option for appetizer recipes vegetarian enthusiasts.

Simple Ingredients for a Delicious Treat

The beauty of these cowboy mushroom side dishes lies in their simplicity. You’ll need fresh portobello mushrooms, a dash of olive oil, garlic, a hint of thyme, and a sprinkle of salt and pepper. Each ingredient plays a vital role, contributing to a dish that’s as comforting as it is delicious. I love using portobello mushrooms for their meaty texture and rich flavor, making them a star in impressive recipes that require little effort but deliver big on taste.

You’ll find the full ingredient list with exact measurements in the recipe card below!

Let’s Make Some Magic: Step-by-Step

Alright, let’s dive into the process. First, preheat your oven to 400°F (200°C). While it warms up, gently clean your mushrooms with a damp cloth to remove any dirt. Slice them into thick pieces, about half an inch thick. In a large bowl, toss the mushrooms with olive oil, minced garlic, fresh thyme, salt, and pepper until each piece is well-coated.

Spread the mushrooms on a baking sheet in a single layer, ensuring they have enough space to breathe. Roast them in the oven for about 15-20 minutes, or until they’re golden brown and tender. The aroma that fills your kitchen? That’s the magic of simple ingredients coming together beautifully.

A Few of My Favorite Tips

Here’s a little secret from my kitchen to yours: for an extra layer of flavor, add a splash of balsamic vinegar during the last few minutes of roasting. It adds a tangy sweetness that elevates the dish to new heights. Also, don’t be afraid to experiment with herbs—rosemary or sage can be delightful additions.

How I Like to Serve This

I love serving these cowboy mushrooms as a warm side dish alongside grilled meats or hearty stews. They also shine as part of a festive appetizer recipes spread, paired with crusty bread and a selection of cheeses. For a light, vegetarian twist, toss them into a fresh salad with arugula and goat cheese.

Storing & Reheating (If There’s Any Left!)

In the rare event you have leftovers, store them in an airtight container in the refrigerator for up to three days. To reheat, simply spread them out on a baking sheet and warm them in a preheated oven at 350°F (175°C) for about 10 minutes. They’ll taste just as delicious as when they first came out of the oven.

Easy Cowboy Mushroom Recipes: Perfect Side Dishes

Prep Time 15 minutes
Cook Time 20 minutes
Total Time 35 minutes
Servings 4 servings
Calories 150
Delight in these easy cowboy mushroom recipes that make perfect side dishes for any meal.

Ingredients

Mushrooms

  • 500 g Mushrooms (Sliced)
  • 2 tbsp Olive Oil
  • 1 tsp Garlic Powder
  • 1 tsp Salt
  • 1 tsp Black Pepper

Instructions 

  • Heat olive oil in a skillet over medium heat.
  • Add sliced mushrooms and sauté until golden brown.
  • Sprinkle garlic powder, salt, and black pepper over mushrooms.
  • Cook for an additional 5 minutes, stirring occasionally.
  • Remove from heat and serve warm.

Notes

For added flavor, consider adding fresh herbs like parsley or thyme.
Calories: 150kcal
Cost: $10.00
Course: Side Dish
Cuisine: American
Keyword: Mushroom

Picture this: a chilly evening in Chicago, the kind that makes you crave something comforting and warm. I’m in my kitchen studio, surrounded by the scents of garlic and herbs wafting through the air. It’s a moment like this that I think of my dad, who taught me that the simplest ingredients could create the most memorable meals. Today, I’m excited to share a recipe that not only fills your kitchen with warmth but also brings people together—the Irresistibly Buttery Cowboy Mushrooms. These mushrooms are the epitome of comfort food, a dish that marries rustic charm with a gourmet twist, perfect for any gathering or a quiet dinner at home.

Why You’ll Absolutely Love This Recipe

  • It’s so easy, it feels like a little kitchen victory!
  • The rich, buttery flavor combined with fresh herbs is a match made in heaven.
  • These mushrooms are versatile—perfect as a side dish or an appetizer.
  • They bring a touch of gourmet to your home-cooked meals without the fuss.

Simple Ingredients for a Delicious Treat

When it comes to these Mushroom Side Dishes, simplicity is key. Here’s what you’ll need:

  • White Button Mushrooms: Their tender texture and mild flavor make them the perfect canvas for that herb-infused butter.
  • Unsalted Butter: This allows you to control the seasoning, ensuring every bite is perfectly balanced.
  • Fresh Herbs: A mix of parsley, chives, and thyme brings a garden-fresh brightness to the dish.
  • Garlic Powder: While fresh garlic works too, the powder subtly infuses the butter without overpowering it.
  • Cayenne Pepper: A pinch adds a gentle warmth and depth to the mushrooms.
  • Lemon Juice: Just a squeeze is enough to lift the flavors, making each bite pop.

You’ll find the full ingredient list with exact measurements in the recipe card below!

Let’s Make Some Magic: Step-by-Step

Cooking these Garlic Butter Mushrooms is as rewarding as it is straightforward. Let’s dive in:

In a large skillet, melt the butter over medium heat, stirring occasionally until it becomes fully liquid and fragrant. The aroma is simply irresistible. Next, add the cleaned white button mushrooms, ensuring each is coated in the luscious butter. Cook them for about 20-22 minutes, stirring occasionally until they turn a beautiful golden-brown. Season with salt to taste, remove from heat, and serve warm. Whether as a side or an appetizer, these mushrooms shine in any role.

A Few of My Favorite Tips

Here are a few secrets from my kitchen to yours:

  • For a deeper flavor, try substituting some of the white button mushrooms with cremini or portobello.
  • Fresh herbs are key! They add a vibrant touch that dried herbs just can’t match.
  • For a bit of a twist, sprinkle some grated Parmesan over the mushrooms before serving.

How I Like to Serve This

These mushrooms are incredibly versatile. I love serving them alongside a Creamy Pasta dish or as a topping for grilled steaks. They also make a delightful addition to a charcuterie board, adding a touch of warmth and depth.

Storing & Reheating (If There’s Any Left!)

If you happen to have leftovers, store them in an airtight container in the refrigerator for up to three days. To reheat, simply warm them in a skillet over low heat until heated through. They maintain their buttery goodness and rich flavor, making them just as delicious the next day.

For more delightful recipes, you might want to explore **Why You’ll Love Making Funnel Cake Donuts at Home**, **Indulge in These Delightful Caramel Apple Dessert Cups**, or **This 4-Ingredient Lemon Cream Cheese Dump Cake Will Wow You**.

Irresistibly Buttery Cowboy Mushrooms for Your Next Feast

Prep Time 10 minutes
Cook Time 22 minutes
Total Time 32 minutes
Servings 4 servings
Calories 300
These buttery cowboy mushrooms are a delightful side dish that will elevate any meal with their rich flavor and tender texture.

Ingredients

Mushrooms

  • 1 pound white button mushrooms (substitute with cremini, portobello, or shiitake if desired.)
  • 1/2 cup butter (use unsalted for better seasoning control.)
  • 2 tablespoons fresh herbs (a mix of parsley, chives, and thyme.)
  • 1 teaspoon garlic powder (can use fresh minced garlic as an alternative.)
  • 1/4 teaspoon cayenne pepper (adjust based on heat preference.)
  • 1 teaspoon salt (use sparingly; the butter is already flavorful.)
  • 1 tablespoon lemon juice (a squeeze brightens the dish.)

extra herbs

Instructions 

  • In a large skillet, melt the butter over medium heat, stirring occasionally until fully liquid and fragrant.
  • Add the cleaned white button mushrooms to the skillet, stirring to coat each in the butter.
  • Cook the mushrooms for about 20-22 minutes, stirring occasionally until tender and golden-brown.
  • Season with salt to taste, remove from heat, and serve warm as a side or appetizer.

Notes

For an extra touch, sprinkle fresh herbs on top before serving.
Calories: 300kcal
Cost: $10.00
Course: Side Dish
Cuisine: American
Keyword: Mushrooms

There’s something about Indian snacks that takes me back to my grandmother’s kitchen. The aroma of spices, the sizzle of frying, and the warmth of family gathered around, eagerly awaiting a taste. As a chef, I’ve spent years perfecting and innovating dishes, but these snacks hold a special place in my heart and my taste buds. They remind me of joyful moments and the simple pleasure of sharing food with loved ones. Today, I’m excited to share with you why these 15 Indian snacks have me wrapped around their finger.

Why You’ll Absolutely Love This Recipe

  • It’s so easy, it feels like a little kitchen victory!
  • These snacks are a delightful blend of flavors and textures that are simply irresistible.
  • Perfect for any occasion—whether you’re hosting a party or just craving something delicious.
  • They offer a taste of India right in your own home, no passport required.
  • Many of these recipes can be made in an air fryer for a healthier twist without sacrificing flavor.

Simple Ingredients for a Delicious Treat

From the spicy and savory to the sweet and indulgent, these snacks feature a variety of ingredients that are both accessible and versatile. The magic of chicken tikka lies in its perfectly balanced spices, while bread omelette is a testament to how simple ingredients can create something truly satisfying. Air fryer sweet potato fries offer a guilt-free indulgence, and samosa chaat is a party of flavors and textures in every bite. Each ingredient tells a story, and together they create a symphony of taste that is uniquely Indian.

You’ll find the full ingredient list with exact measurements in the recipe card below!

Let’s Make Some Magic: Step-by-Step

Let’s dive into the process, shall we? If you’re after something that screams flavors and spices in every bite, Chicken Tikka knows how to play the game. Marinate your chicken with yogurt and spices, then grill to perfection. Nothing beats the rush of a tasty, filling snack when you’re short on time, and that’s where a good old Bread Omelette steps in. Simply whisk eggs with spices, pour over bread, and cook until golden. Let’s talk about some regret-free indulgence! Air Fryer Sweet Potato Fries are just what you need when you’re watching your caloric intake but still crave something scrumptious. Toss your sweet potatoes in olive oil and spices, then air fry until crispy.

A Few of My Favorite Tips

Here are some little secrets from my kitchen to yours. When making samosa chaat, don’t be shy with the chutneys; they add a burst of flavor that’s hard to resist. For dry fruits modak, a gentle hand when shaping ensures they remain delicate and inviting. When preparing air fryer pasta chips, try using different pasta shapes for fun textures. And remember, pav bhaji is all about the masala—make sure it’s fresh and fragrant for the best results.

How I Like to Serve This

These snacks are perfect for any gathering. I love serving fruit chaat at picnics—it’s refreshingly sweet and tangy. Potato buns are a hit at family brunches, while maddur vada is my go-to for movie nights. For a festive touch, serve sweet shankarpali with afternoon tea. And if you’re looking for something to pair with your favorite dip, vegan baked zucchini fries are a delightful choice.

Storing & Reheating (If There’s Any Left!)

If by some miracle you have leftovers, most of these snacks store beautifully. Keep them in an airtight container in the fridge for up to three days. To reheat, use an oven or air fryer to restore their crispiness. For snacks like corn chaat, fresh is best, but you can store the components separately and assemble them just before serving. Enjoy exploring the flavors and sharing these treats with those you love!

For more sweet indulgences, check out my article on Indulge in Sweetness with Air Fryer Churro Bites, or discover why You’ll Love Making Funnel Cake Donuts at Home. If you’re in the mood for a delightful dessert, don’t miss the Delightful Caramel Apple Dessert Cups.

15 Indian Snacks That Totally Have Me Wrapped Around Their Finger

Prep Time 30 minutes
Cook Time 1 hour
Total Time 1 hour 30 minutes
Servings 4 people
Calories 1200
Discover a delightful array of Indian snacks that are bursting with flavor and perfect for any occasion.

Ingredients

Indian Snacks

  • 500 g chicken tikka
  • 4 pieces bread omelette
  • 300 g sweet potato fries (air fryer)
  • 200 g samosa chaat
  • 150 g dry fruits modak
  • 200 g pasta chips (air fryer)
  • 400 g pav bhaji
  • 8 pieces samosa
  • 250 g singhara atta mathri (air fryer)
  • 300 g fruit chaat
  • 200 g potato buns
  • 200 g maddur vada
  • 150 g sweet shankarpali
  • 300 g zucchini fries (vegan, baked)
  • 250 g corn chaat

Instructions 

  • Prepare Chicken Tikka for a flavorful start.
  • Make a quick Bread Omelette for a filling snack.
  • Cook Air Fryer Sweet Potato Fries for a healthy option.
  • Assemble Samosa Chaat for a mix of textures.
  • Prepare Dry Fruits Modak for a nutritious sweet.
  • Serve with a variety of snacks for a delightful experience.

Notes

Pair these snacks with your favorite chutneys for added flavor!
Calories: 1200kcal
Cost: $30
Course: Snack
Cuisine: Indian
Keyword: snacks

There’s something truly magical about the way food can transport us to a different time and place. For me, this Baked Aloo Tikki recipe does just that. It conjures up memories of bustling family kitchens, where the air was filled with laughter and the aroma of spices. Growing up in Chicago, my family gatherings were a melting pot of flavors and traditions, and aloo tikki was always a crowd favorite. This recipe encapsulates that warmth and joy, while offering a modern, healthier twist by baking instead of frying. Let’s dive into this delightful snack that’s bound to become your new favorite!

Why You’ll Absolutely Love This Recipe

  • It’s so easy, it feels like a little kitchen victory!
  • A healthier take on a classic, with all the flavor and none of the guilt.
  • Perfectly crispy on the outside and wonderfully soft on the inside.
  • Adaptable for any palate—customize the spice level to your liking.
  • Great for gatherings or a comforting evening snack.

Simple Ingredients for a Delicious Treat

What I love most about this recipe is its simplicity. You don’t need a long list of exotic ingredients to create something extraordinary. Here, we’re using:

  • Russet potatoes: These are the foundation of our tikki, providing that fluffy, creamy texture we all love.
  • Peas, onions, and bell peppers: These add a burst of color and a delightful crunch.
  • A blend of spices: Chili powder, cumin, ginger, and garlic powder come together to create a symphony of flavors.
  • Flour: Helps bind everything together, ensuring our tikkis hold their shape.
  • A touch of oil: To give them that golden, crispy finish.

You’ll find the full ingredient list with exact measurements in the recipe card below!

Let’s Make Some Magic: Step-by-Step

Imagine me right there with you in your kitchen, guiding you through each step. First, in a large bowl, mash the cooked and cooled potatoes with a fork. Add your seasonings: chili powder, cumin, ginger, garlic powder, and a pinch of red chili pepper for that extra kick. Mix well and taste to ensure it’s seasoned just right.

Next, stir in the chopped onions, bell pepper, and peas. Mix until everything is well combined, then add the flour. Preheat your oven to 425 degrees F—this high heat will help achieve that perfect crispiness.

With dry, floured hands, shape the mixture into small balls and flatten them into patties about 1/2 inch thick. Brush both sides with oil and lay them on a baking tray lined with parchment paper. Bake for about 30 minutes, flipping them halfway through to ensure even cooking.

Once they’re done, let them cool for a few minutes to firm up. And there you have it—crispy, delicious aloo tikkis ready to be devoured!

A Few of My Favorite Tips

Here are some insider tips to make your cooking experience even better:

  • If the mixture feels too sticky, don’t hesitate to add more flour.
  • For an extra flavor boost, try adding a dash of garam masala.
  • Want them spicier? Increase the amount of red chili pepper.

How I Like to Serve This

Personally, I love serving these tikkis with a side of tangy tamarind chutney or a refreshing mint-yogurt dip. They pair beautifully with a cup of steaming chai, making for a perfect afternoon snack or appetizer at your next gathering.

Storing & Reheating (If There’s Any Left!)

These tikkis store beautifully. Place any leftovers in an airtight container and refrigerate for up to three days. To reheat, simply pop them in a preheated oven or a hot skillet to restore their crispiness.

With this Baked Aloo Tikki Recipe, you’re not just making a snack; you’re creating a moment to savor and share. I can’t wait for you to try it and experience the joy it brings. Happy cooking!

Easy Baked Aloo Tikki

Prep Time 15 minutes
Cook Time 30 minutes
Total Time 45 minutes
Servings 4 servings
Calories 200
A delicious and easy-to-make snack, these baked aloo tikkis are perfect for any occasion!

Ingredients

Vegetables

  • 2 medium russet potatoes (boiled/steamed/microwaved)
  • 1/3 cup peas
  • 1/3 cup onions (chopped)
  • 1/3 cup green bell pepper (chopped)
  • 1/3 cup flour
  • 1/2 teaspoon chili powder
  • 1/2 teaspoon ground cumin
  • 1/2 teaspoon ground ginger
  • 1 teaspoon garlic powder
  • salt (to taste)
  • pinch red chili pepper
  • oil

Instructions 

  • Mash the cooked potatoes and mix in seasonings.
  • Add chopped onions, bell pepper, and peas, then mix in flour.
  • Preheat oven to 425°F and shape mixture into patties.
  • Brush patties with oil and place on a baking tray.
  • Bake for 30 minutes, flipping halfway through.
  • Cool for 5 minutes before serving.

Notes

For extra crispiness, broil for a few minutes after baking.
Calories: 200kcal
Cost: $5.00
Course: Snack
Cuisine: Indian
Keyword: Potato

Every time I step into my kitchen studio, I feel like I’m embarking on a new culinary adventure. There’s something magical about blending traditional flavors with creative twists, much like how music blends notes to create a symphony. Today, I’m thrilled to share a collection of 40+ Indian Fusion Vegetarian Recipes that are not just about cooking but about creating a story on your plate. These recipes remind me of the warmth of family gatherings, where each dish is a conversation starter, and every flavor tells a tale. It’s about savoring the moment, one bite at a time.

Why You’ll Absolutely Love This Recipe

  • It’s like a culinary passport, transporting you to the vibrant streets of India with a modern twist.
  • These recipes are perfect for impressing guests or enjoying a cozy meal at home.
  • They offer a delightful balance of flavors, textures, and aromas that are simply irresistible.
  • Whether you’re a seasoned chef or a home-cooking enthusiast, these dishes are approachable and rewarding.

Simple Ingredients for a Delicious Treat

The beauty of these Indian Fusion recipes lies in their simplicity and the way they elevate humble ingredients into something spectacular. Picture this: fresh vegetables, aromatic spices, and a touch of creativity. That’s all you need to transform a simple meal into a culinary masterpiece. I love how these ingredients bring warmth and comfort, reminding me of my grandmother’s kitchen, where the aroma of spices was always in the air.

You’ll find the full ingredient list with exact measurements in the recipe card below!

Let’s Make Some Magic: Step-by-Step

Let’s dive into the kitchen together! I’ll guide you through each step with enthusiasm, like a friend cheering you on. First, gather your ingredients and set the stage for a cooking experience that’s both fun and fulfilling. Remember, cooking is about enjoying the process as much as the result. Take your time, savor each step, and let your creativity flow—after all, you’re creating moments that will linger long after the meal is over.

A Few of My Favorite Tips

Now, let me share a few secrets with you. When working with spices, toast them lightly before adding to your dish to unlock their full flavor potential. And don’t be afraid to experiment—fusion cooking is all about blending the old with the new. Try adding a pinch of unexpected spice or a squeeze of fresh lemon juice to brighten up your dish. Remember, every chef’s touch is unique, and these little tweaks can make it truly yours.

How I Like to Serve This

For me, serving these dishes is about creating an inviting atmosphere. I love setting the table with vibrant colors and textures that mirror the dishes themselves. Pair these recipes with a refreshing drink or a traditional Indian dessert like a homemade Kulfi. It’s all about creating a complete dining experience that delights all the senses.

Storing & Reheating (If There’s Any Left!)

If you have any leftovers—though that’s rare in my house—store them in an airtight container in the refrigerator. They usually keep well for up to three days. For reheating, I recommend using the stovetop to preserve the texture and flavors. Just add a dash of water or broth to revive the dish, and it’ll taste as delightful as when you first made it.

40+ Indian Fusion Recipes (Vegetarian)

Prep Time 30 minutes
Cook Time 1 hour
Total Time 1 hour 30 minutes
Servings 8 servings
Calories 300
A delightful collection of over 40 vegetarian recipes that blend traditional Indian flavors with modern culinary techniques.

Ingredients

Vegetables

  • 500 g Mixed Vegetables (Chopped)

Instructions 

  • Prepare all vegetables by chopping them into bite-sized pieces.
  • Heat oil in a pan and sauté the vegetables until tender.
  • Add spices and cook for an additional 5 minutes.
  • Serve hot with rice or bread.

Notes

Feel free to customize the vegetables based on seasonal availability.
Calories: 300kcal
Cost: $50
Course: Main Course
Cuisine: Indian
Keyword: Vegetarian

There’s something undeniably magical about the aroma of freshly baked cookies wafting through the kitchen. As a chef who has spent countless hours in both bustling restaurant kitchens and the comforting warmth of home, I find that some of the most delightful moments happen when tradition meets innovation. Today, I want to share with you a recipe that holds a special place in my heart—Nankhatai, the irresistible Indian cardamom cookies. These cookies remind me of the festive gatherings at my grandmother’s house, where the air was filled with laughter, stories, and the comforting scent of spices. Let’s dive into the joy of making these delightful treats together.

Why You’ll Absolutely Love This Recipe

  • It’s so easy, it feels like a little kitchen victory!
  • Perfect for any occasion, from festive Indian Christmas treats to a simple tea-time snack.
  • These cookies are a wonderful introduction to Indian baked goods, offering a taste of tradition with a modern twist.
  • The cardamom gives a warm, inviting flavor that is both unique and comforting.
  • A great way to explore Indian baking recipes with ingredients you likely already have at home.

Simple Ingredients for a Delicious Treat

One of the joys of cooking is how a few simple ingredients can come together to create something truly special. For our Nankhatai, we’re using:

  • All-purpose flour (maida): A staple in many kitchens, providing the perfect base for our cookies.
  • Ghee (clarified butter): Adds richness and a nutty aroma, making these cookies melt-in-your-mouth delicious.
  • Powdered sugar: For just the right amount of sweetness.
  • Cardamom powder (elaichi): The star of the show, offering a burst of aromatic flavor that defines these cookies.
  • Crushed pistachios: Optional, but they add a lovely texture and a touch of color.

You’ll find the full ingredient list with exact measurements in the recipe card below!

Let’s Make Some Magic: Step-by-Step

Cooking is an adventure, and I’m thrilled to guide you through this journey:

Step 1: Start by sieving together the flour, baking powder, baking soda, and salt. This helps in avoiding any lumps and ensures a smooth dough.

Step 2: In a mixing bowl, combine ghee, powdered sugar, and cardamom. Whisk them well until the mixture becomes fluffy and light in color, almost like a cloud of sweetness!

Step 3: Gradually add the sieved flour to the ghee-sugar mixture. Use your hands or a spatula to bring everything together into a smooth dough. Remember, there’s no need to knead—just gently combine.

Step 4: Preheat your oven to 180°C. While it’s warming up, divide the dough into 9 or 10 equal-sized portions, rolling them into smooth balls.

Step 5: Place the balls on a baking tray, leaving space between them. Make criss-cross marks on the tops with a knife and sprinkle a bit of crushed pistachio in the center for a touch of elegance.

Step 6: Bake at 180°C for the first 5 minutes, then reduce the temperature to 160°C and continue baking for 25 minutes. Keep an eye on them; the base should turn a lovely golden brown.

Step 7: Once out of the oven, let the cookies cool on the baking tray for 5-8 minutes before transferring them to a wire rack.

A Few of My Favorite Tips

Here are some secrets to make your Nankhatai experience even better:

  • For a healthier twist, try substituting half the flour with whole wheat flour without compromising on flavor.
  • Experiment with different nuts or even a sprinkle of saffron for extra richness.
  • If you love a stronger cardamom flavor, feel free to adjust the quantity to your taste.

How I Like to Serve This

Nankhatai is perfect with a cup of chai or coffee, making it a delightful companion for your afternoon break. I love serving them on a beautiful platter during gatherings, where they never fail to impress with their delicate texture and rich flavor.

Storing & Reheating (If There’s Any Left!)

These cookies can be stored in an airtight container for up to two weeks, making them a great make-ahead treat. They maintain their lovely texture and flavor, so you can enjoy a taste of homemade goodness whenever the mood strikes.

Nankhatai | Indian Cardamom Cookies

Prep Time 15 minutes
Cook Time 30 minutes
Total Time 45 minutes
Servings 10 cookies
Calories 150
Delight in these traditional Indian cardamom cookies, known as Nankhatai, that are rich, buttery, and perfect with a cup of tea.

Ingredients

Dry Ingredients

  • 1 cup all purpose flour (maida) (115 grams)
  • 1/3 cup ghee (clarified butter) (70 grams)
  • 1/2 cup powdered sugar (75 grams)
  • 1/4 tsp baking powder
  • 1/4 tsp baking soda
  • 1/4 to 1/2 tsp cardamom powder (elaichi)
  • a pinch salt
  • 2 tbsp crushed pistachios (optional)

Instructions 

  • Sift flour, baking powder, baking soda, and salt. Set aside.
  • In a bowl, whisk ghee, powdered sugar, and cardamom until fluffy.
  • Add the sifted flour to the mixture and combine to form a smooth dough.
  • Preheat oven to 180°C. Shape dough into 10 balls and place on a tray.
  • Bake at 180°C for 5 minutes, then at 160°C for 25 minutes until golden.
  • Cool on the tray for 5-8 minutes, then transfer to a wire rack.

Notes

For a richer flavor, let the cookies cool completely before serving.
Calories: 150kcal
Cost: 5.00
Course: Dessert
Cuisine: Indian
Keyword: cardamom

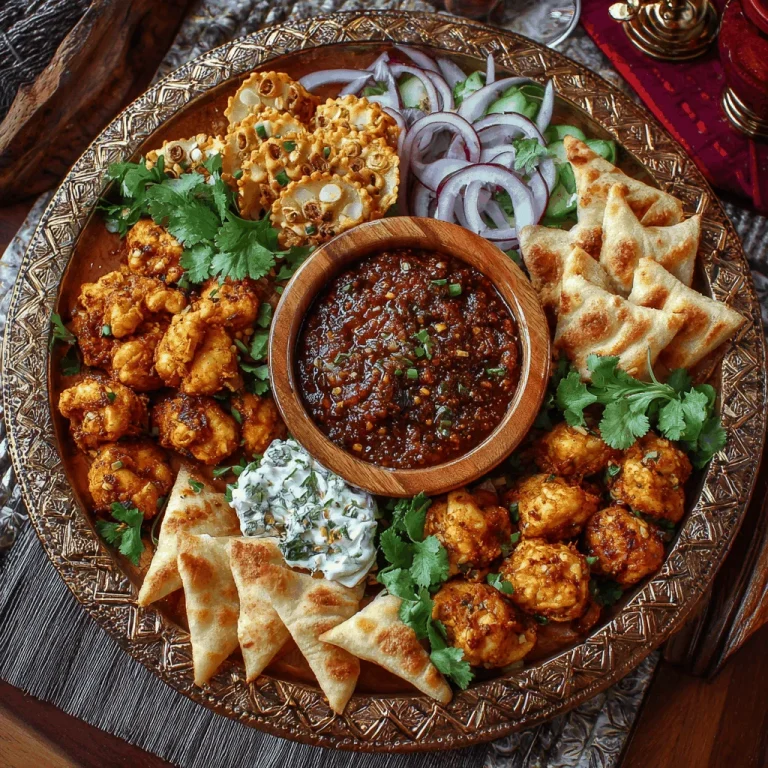
There’s something truly magical about an appetizer that can bring a room full of people together, sparking conversations and creating connections over shared bites. As a chef who thrives on the joy of communal dining, I’m thrilled to introduce you to a delightful Indian party appetizer that promises to elevate your gatherings. This recipe is not just a dish; it’s a gateway to a world of vibrant flavors and cherished memories. It reminds me of the bustling streets of Mumbai, where the aroma of spices fills the air and every corner offers a new culinary adventure. Let’s dive into this journey together and bring some joy to your table!

Why You’ll Absolutely Love This Recipe

  • It’s incredibly easy, making it a perfect choice for those who want to impress without stress—truly an easy vegetarian finger food for party.
  • The combination of spices will transport your taste buds, offering a delightful experience reminiscent of authentic South Indian appetizers for party.
  • It’s versatile enough to serve as snacks for party vegetarian or as part of a larger spread for a finger foods for dinner party.
  • Whether you’re a seasoned cook or a kitchen novice, this recipe is designed to be approachable and rewarding.

Simple Ingredients for a Delicious Treat

One of the joys of creating this appetizer is the simplicity of the ingredients, each bringing its own unique character to the dish. You’ll need a selection of spices, fresh herbs, and a few pantry staples. I love how these ingredients come together to create something greater than the sum of its parts. The spices, in particular, are the soul of this dish, infusing it with warmth and depth. You’ll find the full ingredient list with exact measurements in the recipe card below!

Let’s Make Some Magic: Step-by-Step

Now, let’s roll up our sleeves and get cooking! Imagine I’m right there beside you, guiding you through each step with enthusiasm and ease.

  1. Start by toasting your spices in a dry pan until they release their aroma. This step is key to unlocking their full flavor potential.
  2. Mix the spices with your base ingredients—whether it’s chickpea flour or mashed potatoes, the choice is yours!
  3. Form the mixture into bite-sized pieces, perfect for Pakistani finger food style eating.
  4. Fry them until golden brown, achieving that perfect crispy exterior that contrasts beautifully with the soft, flavorful interior.
  5. Serve hot, garnished with fresh herbs and a squeeze of lemon for a zesty finish.

A Few of My Favorite Tips

As someone who loves sharing knowledge, here are a few secrets to make this appetizer truly shine:

  • Don’t rush the spice toasting—patience here pays off in flavor dividends.
  • For an extra layer of flavor, try adding a hint of ginger or garlic to the mix.
  • If you like a bit of heat, a pinch of chili powder can add a delightful kick.

How I Like to Serve This

I love serving these appetizers with a variety of chutneys—mint, tamarind, or even a simple yogurt dip. They pair wonderfully with a chilled glass of mango lassi or a refreshing lemonade, making them a versatile choice for any gathering. Whether you’re hosting a casual get-together or a more formal affair, these appetizers are sure to be a hit!

Storing & Reheating (If There’s Any Left!)

Should you find yourself with leftovers—a rare occurrence, I assure you—store them in an airtight container in the fridge. They’re best reheated in the oven to maintain their crispiness. Simply pop them in at 350°F for about 10 minutes, and they’ll be as delightful as when they were freshly made.

Indian Party Appetizer

Prep Time 30 minutes
Cook Time 20 minutes
Total Time 50 minutes
Servings 6 people
Calories 250
A delightful assortment of Indian snacks perfect for any gathering.

Ingredients

Snacks

  • 200 g Paneer (cubed)
  • 100 g Potatoes (boiled and mashed)
  • 50 g Peas (cooked)

Instructions 

  • Mix paneer, potatoes, and peas in a bowl.
  • Form small balls from the mixture.
  • Coat the balls in breadcrumbs.
  • Fry the balls in hot oil until golden brown.
  • Drain on paper towels and serve hot.

Notes

Serve with mint chutney for an extra kick!
Calories: 250kcal
Cost: $15.00
Course: Appetizer
Cuisine: Indian
Keyword: snacks

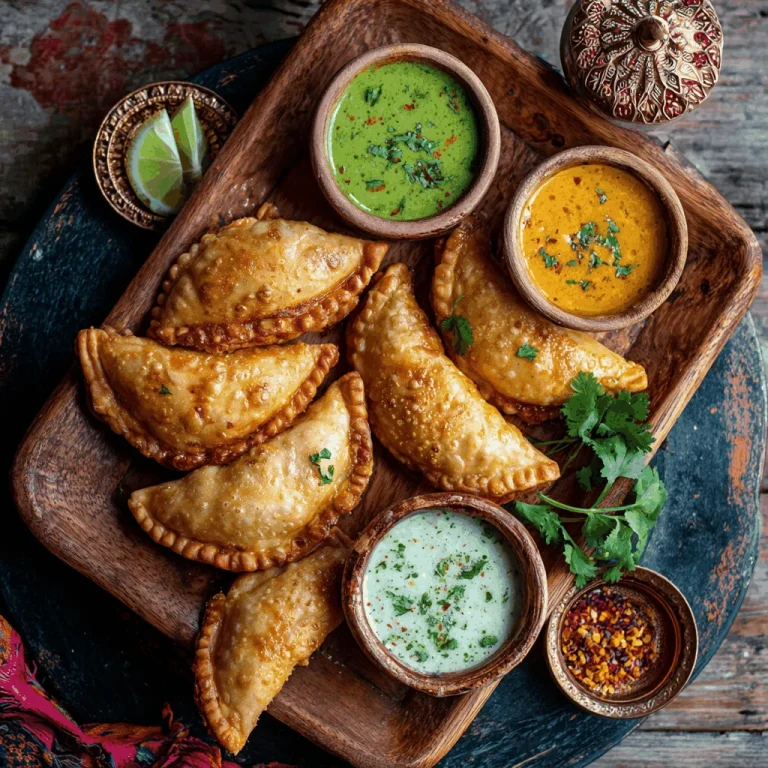
Picture this: a chilly evening in Chicago, the air crisp and inviting, as the city lights begin to twinkle against the evening sky. It’s moments like these that I find myself craving a warm, comforting snack that brings a bit of spice and joy into my home. That’s when I turn to one of my all-time favorites—traditional Indian samosas. They remind me of the times I spent in bustling kitchens, learning from seasoned chefs who infused their cooking with love and tradition. These samosas are more than just a snack; they’re an invitation to gather around the table, share stories, and create memories. Let’s dive into this delightful recipe that brings a taste of India to your kitchen.

Why You’ll Absolutely Love This Recipe

  • It’s so easy, it feels like a little kitchen victory!
  • The combination of spices like garam masala and coriander creates a symphony of flavors.
  • Perfect for evening snacks or impressing guests at a dinner party.
  • Uses simple ingredients that transform into something extraordinary.
  • Brings warmth and comfort with every bite.

Simple Ingredients for a Delicious Treat

One of the things I love about this recipe is how it turns humble ingredients into something truly special. We start with russet potatoes, which are perfect for their fluffy texture. The addition of green peas adds a pop of color and sweetness, while spices like garam masala and coriander bring depth and warmth. And let’s not forget the fresh cilantro and a squeeze of lemon juice, which add a refreshing finish.

You’ll find the full ingredient list with exact measurements in the recipe card below!

Let’s Make Some Magic: Step-by-Step

Ready to roll up your sleeves? Let’s make some magic happen in your kitchen. Start by preparing the dough. In a large bowl, mix the flour, salt, and oil until crumbly. Gradually add water and knead into a smooth, firm dough. Cover it and let it rest for 30 minutes—this is your moment to sip some tea and enjoy the process.

Next, let’s move to the filling. Boil your potatoes until they’re fork-tender, then drain and mash them. In a skillet, heat some oil and add cumin seeds and ginger, letting them sizzle for a minute. Add the peas, mashed potatoes, and all those wonderful spices. Stir well and let it cook for a few minutes. Finish with cilantro and lemon juice, and let it cool.

Now, the fun part—shaping the samosas. Divide your dough into small balls, roll each into a thin oval, and cut in half. Form a cone with each piece, seal the edges with water, and fill with the potato mixture. Seal them well and get ready to fry.

Heat oil in a deep pan to 350°F (175°C). Fry the samosas in batches until they’re golden and crisp. Drain them on paper towels and serve warm. There’s a certain joy in watching them turn into golden pockets of deliciousness!

A Few of My Favorite Tips

Here are a few tips to make your samosas truly shine. When kneading the dough, aim for a firm consistency to ensure the samosas hold their shape. When frying, maintain a consistent oil temperature to achieve that perfect, crispy exterior. And if you’re feeling adventurous, experiment with the spice levels to suit your taste—it’s your kitchen, after all!

How I Like to Serve This

I love serving these samosas with a side of tangy tamarind chutney or mint yogurt dip. They’re also fantastic with a cup of chai, making the perfect pairing for a cozy afternoon or a gathering with friends. Trust me, these samosas will be the star of your snack table.

Storing & Reheating (If There’s Any Left!)

If you happen to have leftovers, store them in an airtight container in the fridge for up to two days. To reheat, pop them in the oven at 350°F for about 10 minutes to regain that crispiness. But let’s be honest, they’re so delicious, there might not be any left to store!

Traditional Indian Samosas – Quick Evening Snacks Easy Recipes

Prep Time 30 minutes
Cook Time 20 minutes
Total Time 50 minutes
Servings 4 servings
Calories 300
Enjoy these crispy and flavorful traditional Indian samosas, perfect for an evening snack!

Ingredients

Dough Ingredients

  • 2 cups all-purpose flour
  • 1/4 cup vegetable oil or melted ghee
  • 1/2 teaspoon salt
  • 6 tablespoons water (more if needed)

Filling Ingredients

  • 2 large russet potatoes (peeled and diced)
  • 1/2 cup green peas (fresh or frozen)
  • 2 tablespoons oil
  • 1 teaspoon cumin seeds
  • 1 teaspoon grated ginger
  • 1 teaspoon garam masala
  • 1 teaspoon ground coriander
  • 1/2 teaspoon ground turmeric
  • 1/2 teaspoon chili powder
  • to taste salt
  • 2 tablespoons chopped cilantro
  • 1 tablespoon lemon juice
  • to fry amount vegetable oil (for deep frying)

Instructions 

  • Mix flour, salt, and oil until crumbly. Gradually add water and knead into a smooth dough. Let it rest for 30 minutes.
  • Boil potatoes until fork-tender, then drain and mash. Heat oil, add cumin seeds and ginger, sauté for 1 minute.
  • Add peas, potatoes, and spices. Stir well and cook for 3-4 minutes. Mix in cilantro and lemon juice, then let cool.
  • Divide dough, roll into ovals, cut in half. Form cones, fill with mixture, and seal edges.
  • Heat oil to 350°F (175°C). Fry samosas until golden and crisp. Drain on paper towels and serve warm.

Notes

Serve with chutney for an extra flavor boost!
Calories: 300kcal
Cost: $10
Course: Snack
Cuisine: Indian
Keyword: Potato