Author

Mike

Browsing

Welcome to the ultimate guide on making Chocolate Peanut Butter Squares, a treat that combines the rich, creamy goodness of peanut butter with the decadent allure of chocolate. If you’re looking for an easy no-bake dessert that will impress your family and friends, you’ve come to the right place! In this article, we’ll explore everything from the ingredients you need to tips for perfecting your squares, variations to try, and storage advice to keep your treats fresh and delicious.

Why You’ll Love This Recipe

This recipe is more than just a simple treat—it’s a delightful experience. Here’s why you’ll fall in love with these Chocolate Peanut Butter Squares:

  • Effortless Preparation: With no baking required, you can whip these up in under 30 minutes, making them perfect for last-minute gatherings.
  • Decadent Flavor: The harmonious blend of creamy peanut butter and rich chocolate creates a flavor explosion that’s hard to resist.
  • Customizable Treats: You can easily adapt this recipe with your favorite ingredients, whether it’s adding nuts, swapping chocolates, or experimenting with flavors.
  • Perfect Texture: These squares offer a satisfying contrast between the creamy peanut butter layer and the smooth chocolate topping.
  • Kid-Friendly Fun: Involve your kids in the kitchen! This recipe is simple enough for them to help out, making it a great bonding activity.

Ingredients

Before we dive into the preparation, let’s take a closer look at the ingredients you’ll need:

  • 1 cup creamy peanut butter: For a smoother texture, use creamy instead of crunchy. You can also substitute almond butter for a twist.
  • 1/2 cup unsalted butter: This adds richness. If you’re looking for a dairy-free option, coconut oil works well.
  • 2 cups powdered sugar: Sweetness is key, and powdered sugar helps achieve a smooth consistency.
  • 1 teaspoon vanilla extract: This enhances the overall flavor.
  • 1/4 teaspoon salt: Balances the sweetness and brings out the peanut butter flavor.
  • 1 1/4 cups semi-sweet chocolate chips: Chocolate is the star of the show! Dark chocolate or milk chocolate can also be used based on your preference.
  • 2 tablespoons unsalted butter (for chocolate topping): Adds a glossy finish to the chocolate layer.

How to Make Chocolate Peanut Butter Squares

Now, let’s roll up our sleeves and get started! Follow these easy steps:

  1. Line an 8-inch square baking pan with parchment paper, allowing some overhang for easy removal later.
  2. In a medium saucepan over low heat, combine peanut butter and butter. Stir continuously until melted and smooth.
  3. Remove from heat. Add powdered sugar, vanilla extract, and salt. Mix until fully combined and creamy texture is achieved.
  4. Spread the peanut butter mixture evenly into the prepared pan. Use a spatula to smooth the top for a uniform layer.
  5. In a microwave-safe bowl, combine chocolate chips and 2 tablespoons of butter. Microwave in 20-second intervals, stirring between each, until fully melted and smooth.
  6. Pour the melted chocolate over the peanut butter layer. Spread evenly to create a smooth top surface.
  7. Refrigerate for at least 2 hours, or until the fudge is completely firm and set.
  8. Lift the fudge from the pan using the parchment overhang. Cut into 16 squares. Serve chilled or at room temperature.

Pro Tips for Perfect Squares

A tempting slice of Chocolate Peanut Butter Squares with melted chocolate drizzling down the sides.

To ensure your Chocolate Peanut Butter Squares turn out perfectly every time, consider these expert insights:

  • Room Temperature Ingredients: Allow your butter and peanut butter to come to room temperature for easier mixing.
  • Mixing Method: Stir the mixture gently but thoroughly to avoid air bubbles.
  • Chill Time: For best results, let the squares chill overnight before cutting for cleaner edges.
  • Use Quality Chocolate: The better the chocolate, the richer the flavor of your squares. Don’t skimp on quality!
  • Experiment with Flavors: Consider adding a pinch of cinnamon or a splash of almond extract for a unique twist.
  • Grease the Parchment Paper: Lightly greasing the parchment can help in easier removal of the squares.
  • Cutting Technique: Use a sharp knife dipped in hot water to cut clean squares.
  • Storage Tips: Store in an airtight container to keep them fresh longer.

Common Mistakes and Troubleshooting

Even the best chefs can run into issues! Here are common mistakes and how to avoid them:

  • Too Sticky Mixture: If your peanut butter mixture is too sticky, it may be due to excessive powdered sugar. Adjust as needed.
  • Chocolate Not Melting: Ensure your chocolate is chopped finely for even melting, and avoid overheating in the microwave.
  • Squares Falling Apart: Ensure you allow sufficient chill time for the squares to set properly.
  • Inconsistent Sizing: Use a ruler to measure and cut equally sized squares for a professional finish.

Variations to Try

Want to switch things up? Here are a few variations that can elevate your Chocolate Peanut Butter Squares:

  • Nutty Crunch: Add chopped nuts like walnuts or almonds for a delightful crunch.
  • Minty Fresh: Incorporate mint extract into the peanut butter layer for a refreshing twist.
  • Cookie Dough Layer: Create an edible cookie dough layer beneath the chocolate topping for extra indulgence.
  • Fruit Fusion: Add dried fruits like cranberries or raisins into the peanut butter mixture for a fruity surprise.

Storage and Make-Ahead Instructions

These Chocolate Peanut Butter Squares can be made ahead of time and stored for later enjoyment:

  • In the Refrigerator: Keep them in an airtight container for up to 1 week.
  • In the Freezer: For longer storage, freeze the squares in a single layer, then transfer to a container or freezer bag. They’ll last up to 3 months!
  • Thawing: When ready to enjoy, thaw in the refrigerator or at room temperature before serving.

Frequently Asked Questions

Here are some common questions about Chocolate Peanut Butter Squares:

  • Can I use crunchy peanut butter? Yes, crunchy peanut butter can add texture, but be sure to adjust the sugar if needed.
  • Is there a vegan option? Absolutely! Replace butter with coconut oil and use dairy-free chocolate chips.
  • How do I know when they are set? They should feel firm to the touch and not stick when you gently press down.
  • Can I add protein powder? Yes, adding a scoop of protein powder can enhance nutritional value without compromising texture.
  • What if I don’t have a microwave? You can melt chocolate using a double boiler method on the stovetop.
  • How can I make them healthier? Use natural sweeteners like maple syrup and dark chocolate to reduce sugar content.
  • What’s the best way to cut them? Heat a knife in hot water, dry it, and use it to cut the squares for clean edges.
  • Can I use almond butter instead of peanut butter? Yes, almond butter works great and adds a different flavor profile!

Nutritional Tips and Dietary Adaptations

For those concerned about dietary restrictions, here are some tips:

  • Gluten-Free: This recipe is naturally gluten-free, making it a great option for those with gluten sensitivities.
  • Low-Sugar Option: Replace powdered sugar with a sugar substitute suitable for baking.
  • Protein Boost: Adding protein powder can enhance the nutritional profile, making it a more satisfying snack.
  • Nut-Free Version: Use sun butter instead of peanut butter for a nut-free alternative.

Equipment Recommendations

Here’s what you’ll need to make these delicious squares:

  • 8-inch Square Baking Pan: Essential for setting the squares.
  • Parchment Paper: Helps with easy removal and cleanup.
  • Medium Saucepan: For melting the peanut butter and butter.
  • Microwave-Safe Bowl: Necessary for melting the chocolate.
  • Spatula: For spreading the peanut butter mixture evenly.

Serving Suggestions

These squares are perfect on their own, but here are some fun serving ideas:

  • Drizzle with Caramel: Elevate the flavor by drizzling caramel sauce over the squares before serving.
  • Pair with Ice Cream: Serve alongside a scoop of vanilla ice cream for a delightful dessert.
  • Chocolate Dipping: Dip half of each square in melted chocolate for an extra touch of decadence.
  • Garnish with Sea Salt: A sprinkle of sea salt on top enhances the flavor contrast.

These Chocolate Peanut Butter Squares are sure to become a staple in your dessert repertoire. With their rich flavors and simple preparation, they’re perfect for any occasion. Enjoy creating them, and remember, great cooking is all about sharing joy and connecting with those around you!

Chocolate Peanut Butter Squares

Prep Time 15 minutes
Total Time 15 minutes
Servings 16 squares
Calories 250
Delightful no-bake treats combining creamy peanut butter and rich chocolate in a simple, quick recipe.

Ingredients

Main

  • 1 cup creamy peanut butter
  • 1/2 cup unsalted butter
  • 2 cups powdered sugar
  • 1 teaspoon vanilla extract
  • 1/4 teaspoon salt
  • 1 1/4 cups semi-sweet chocolate chips
  • 2 tablespoons unsalted butter

Instructions 

  • Line an 8-inch pan with parchment paper.
  • Heat peanut butter and butter until melted, then mix in powdered sugar, vanilla, and salt.
  • Spread mixture into pan and smooth the top.
  • Melt chocolate chips and butter until smooth, then pour over peanut butter layer.
  • Refrigerate for at least 2 hours until firm, then cut into squares.
Notes

Keep refrigerated for best texture and freshness.
Calories: 250kcal
Cost: $10
Course: Dessert
Keyword: chocolate, peanut butter

Welcome to a culinary delight that will transform your weeknight meals! This Lemon Butter Cod Skillet is not just a dish; it’s an experience that brings together the fresh flavors of the sea with the rich, creamy essence of butter. In just under 30 minutes, you can prepare a meal that is not only quick and easy but also bursting with flavor. Perfect for impressing family or guests, this recipe showcases how simple ingredients can create culinary magic.

Let’s dive into the reasons you’ll love this recipe, the ingredients, and how to make this delightful dish step by step!

Why You’ll Love This Recipe

  • Quick Preparation: With only 30 minutes needed, this dish is perfect for busy weeknights.
  • Fresh Ingredients: Utilizing fresh cod and bright lemon juice ensures the flavors are vibrant and lively.
  • Health-Conscious: Cod is a lean protein rich in omega-3 fatty acids, making this a healthy choice for dinner.
  • Versatile Pairings: This dish pairs wonderfully with various sides, from steamed asparagus to roasted potatoes.
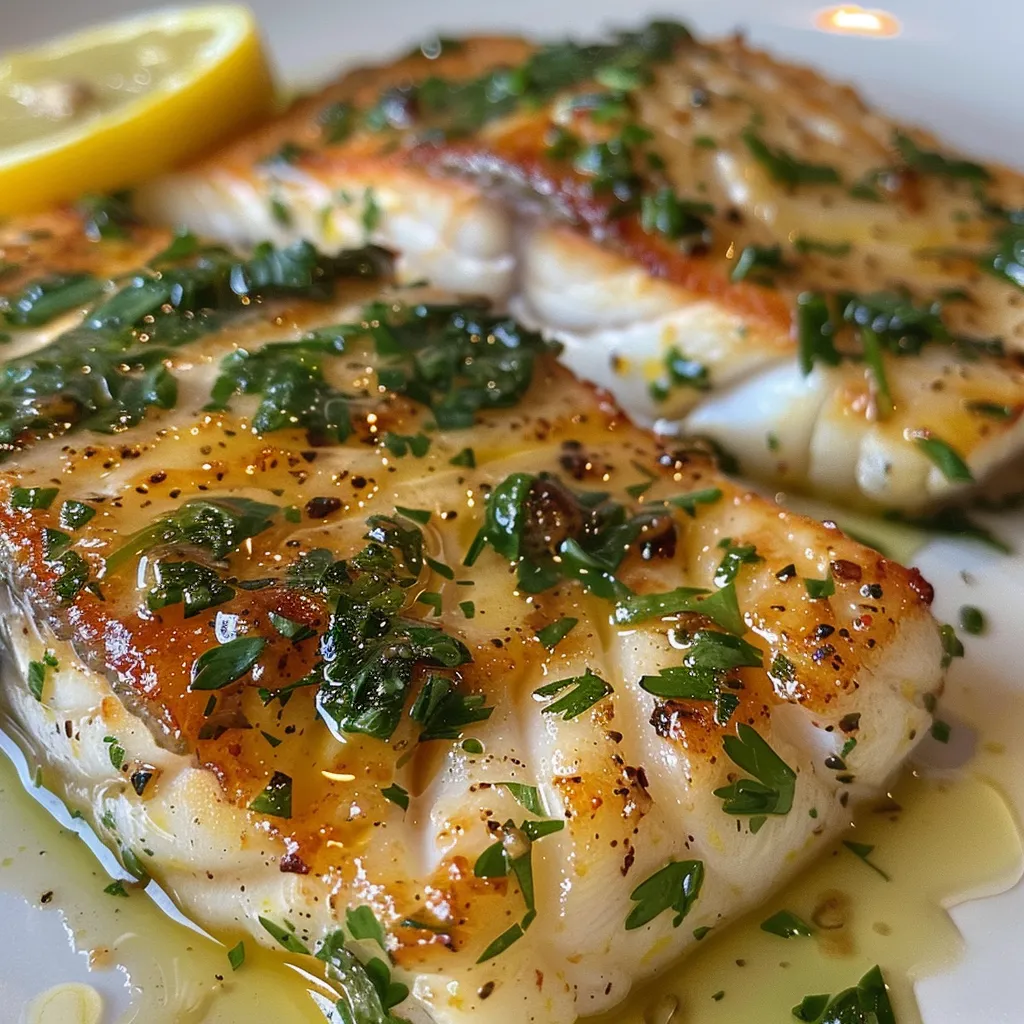
  • Impressive Presentation: The beautiful golden-brown cod garnished with lemon slices is visually appealing, making it perfect for entertaining.

Ingredients for Lemon Butter Cod Skillet

Here’s what you’ll need to create this flavorful dish:

  • 2 fillets Cod: Choose fresh or thawed cod for best results, ensuring a flaky texture.
  • 4 tablespoons Unsalted butter: Melt it slowly to create a rich, silky sauce that ties the dish together.
  • 2 tablespoons Fresh lemon juice: This adds a bright, zesty punch that enhances the buttery flavors.
  • 2 cloves Garlic: Minced, to infuse a fragrant aroma throughout the dish.
  • 1 teaspoon Salt: Enhances the overall flavor profile.
  • 1 teaspoon Black pepper: Adds a touch of heat and depth.
  • 2 tablespoons Fresh parsley: Chopped, for a fresh touch and vibrant color.
  • 1 Lemon: Sliced or zested for garnish, adding a beautiful finishing touch.
  • Optional sides: Consider serving with steamed asparagus, roasted potatoes, or fluffy rice for a complete meal.

How to Make Lemon Butter Cod Skillet

Follow these simple steps to create your Lemon Butter Cod Skillet:

  1. Prep the Cod: Pat the cod fillets dry with paper towels and season both sides with salt and black pepper.
  2. Heat the Skillet: In a large skillet, melt 2 tablespoons of butter over medium heat until bubbly.
  3. Sauté the Garlic: Add the minced garlic to the skillet and sauté for about 30 seconds until fragrant.
  4. Cook the Cod: Place the seasoned cod fillets in the skillet. Cook for about 3-4 minutes on each side, or until the fish flakes easily with a fork.
  5. Add Lemon Butter: Reduce heat and add the remaining butter and lemon juice to the skillet, letting it melt and combine with the garlic.
  6. Garnish: Sprinkle with chopped parsley and garnish with lemon slices before serving.

Expert Tips for Perfect Lemon Butter Cod

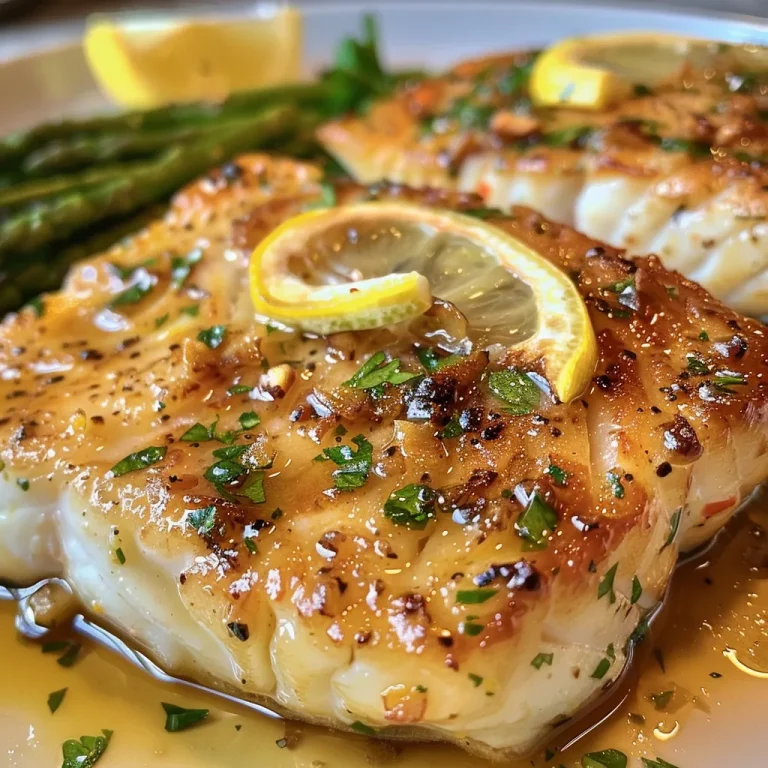
A vibrant dish of lemon butter cod, showcasing a rich sauce and colorful garnishes.
  • Choosing Cod: Look for fillets that are about 1-inch thick for even cooking. Fresh is ideal, but thawed frozen cod works well too.
  • Don’t Rush the Butter: Melt the butter slowly to prevent it from burning and to develop a rich flavor.
  • Check for Doneness: The cod is done when it flakes easily with a fork, usually around 3-4 minutes per side.
  • Seasoning Variations: Feel free to experiment with herbs like thyme or dill for a different flavor profile.
  • Temperature Control: Ensure your skillet is hot enough before adding the cod to achieve a nice sear.
  • Serve Immediately: For the best experience, serve the cod immediately while it’s hot and fresh.

Common Mistakes and Troubleshooting

Even the best chefs can run into a few hiccups. Here are some common mistakes to avoid:

  • Overcrowding the Pan: If you add too many fillets at once, they will steam instead of sear. Cook in batches if necessary.
  • Not Drying the Fish: Failing to pat the cod dry before seasoning can lead to a soggy texture.
  • Cooking at Too High Heat: High heat can easily burn the butter and garlic, resulting in a bitter taste.

Variations on Lemon Butter Cod Skillet

Get creative with these variations to suit your taste:

  • Spicy Cod: Add a pinch of red pepper flakes to the butter for a kick.
  • Herbed Cod: Incorporate fresh herbs like rosemary or thyme into the butter sauce for added flavor.
  • Capers: Add a tablespoon of capers to the skillet for a briny contrast to the buttery sauce.
  • Vegetable Boost: Toss in some asparagus or cherry tomatoes during the last few minutes of cooking for added color and nutrition.

Storage and Make-Ahead Instructions

To maximize the freshness of your Lemon Butter Cod Skillet:

  • Make-Ahead: You can prepare the lemon butter sauce in advance and store it in the fridge for up to 3 days.
  • Storage: Cooked cod can be stored in an airtight container in the refrigerator for up to 2 days. Reheat gently on the stovetop.
  • Freezing: While it’s best fresh, leftover cod can be frozen. Wrap tightly and consume within 3 months for the best quality.

Nutrition Tips and Dietary Adaptations

This dish is not only delicious but can be tailored to fit various dietary needs:

  • Low-Carb Option: Serve with steamed vegetables instead of high-carb sides for a keto-friendly meal.
  • Gluten-Free: This recipe is naturally gluten-free, making it ideal for gluten-sensitive diners.
  • Heart-Healthy: The omega-3 fatty acids in cod support heart health, and using unsalted butter helps control sodium intake.

Equipment Recommendations

To make your cooking process smoother, here are some recommended tools:

  • Non-Stick Skillet: Ensures easy cooking and cleanup.
  • Fish Turner: A fish spatula helps to flip the delicate cod without breaking it apart.
  • Measuring Cups and Spoons: For precise ingredient measurements, which are key to great cooking.

Serving Suggestions for Lemon Butter Cod

This dish pairs beautifully with:

  • Steamed Asparagus: For a vibrant, nutritious side that complements the cod.
  • Roasted Potatoes: Adds a hearty element to your meal.
  • Fluffy Rice: Absorbs the delicious lemon butter sauce perfectly.
  • Simple Green Salad: A light salad adds freshness and balances the richness of the cod.

Comprehensive FAQ

  • Can I use frozen cod? Yes, just make sure it’s fully thawed before cooking.
  • What can I substitute for cod? You can use other white fish like haddock or tilapia.
  • How do I know when the cod is cooked? It should flake easily with a fork and be opaque in color.
  • Can I make this recipe in the oven? Absolutely! Bake at 400°F (200°C) for 12-15 minutes.
  • What herbs pair well with this dish? Fresh dill, parsley, and thyme are excellent choices.
  • What if I don’t have fresh lemon juice? You can use bottled lemon juice, but fresh is preferred for best flavor.
  • Can I add vegetables to the skillet? Yes, vegetables like spinach or zucchini can be sautéed alongside the fish.
  • How should leftovers be reheated? Reheat gently in a skillet over low heat to prevent drying out.

With this Lemon Butter Cod Skillet, you’re not just cooking; you’re creating a moment of joy around the dinner table. Enjoy this recipe that’s easy to make, delightful to eat, and perfect for any occasion. Happy cooking, and may your meals always be filled with love and flavor!

Easy Lemon Butter Cod Skillet That Will Brighten Your Dinner

Prep Time 10 minutes
Cook Time 10 minutes
Total Time 20 minutes
Servings 2 servings
Calories 350
This quick and flavorful lemon butter cod skillet is perfect for a bright, satisfying dinner. It combines fresh ingredients with simple steps for a delicious meal.

Ingredients

Protein

  • 2 fillets Cod (Choose fresh or thawed for best results.)

Dairy

  • 4 tablespoons Unsalted butter (Melt slowly for a rich sauce.)

Produce

  • 2 tablespoons Fresh lemon juice
  • 2 cloves Garlic (Minced.)
  • 1 teaspoon Salt
  • 1 teaspoon Black pepper
  • 2 tablespoons Fresh parsley (Chopped.)
  • 1 lemon slices or zest (For garnish.)

Optional sides

Instructions 

  • Season the cod fillets with salt and pepper.
  • Melt butter in a skillet over medium heat and cook the cod until golden and cooked through, about 4-5 minutes per side.
  • Add garlic and cook for 1 minute, then stir in lemon juice and parsley.
  • Pour the lemon butter sauce over the fillets and garnish with lemon slices or zest.
  • Serve immediately with your choice of sides like steamed asparagus, roasted potatoes, or fluffy rice.

Notes

Use fresh lemon for the best flavor and adjust seasoning to taste.
Calories: 350kcal
Cost: $15
Course: Main Course
Cuisine: American
Keyword: butter, Cod, lemon

When the summer heat hits or you’re simply craving something cool and refreshing, frozen yogurt bark is the perfect solution. Not only is it easy to make, but it’s also a versatile treat that you can customize to your liking. Packed with nutritious ingredients like fresh fruit and granola, this frozen snack satisfies your sweet tooth without the guilt. In this guide, we’ll explore everything you need to know about creating your very own frozen yogurt bark, ensuring that you can whip up this delightful dessert any time!

Why You’ll Love This Recipe

Here are five reasons why this frozen yogurt bark will become your go-to sweet treat:

  • Healthy Indulgence: Using full-fat Greek yogurt makes this bark a protein-packed snack, perfect for keeping you satisfied.
  • Simple Preparation: With just a few steps, you can create a delicious treat that’s ready to enjoy after a few hours in the freezer.
  • Customizable Options: Choose your favorite fruits, nuts, or toppings to personalize your frozen yogurt bark.
  • Kid-Friendly Fun: This is a great recipe for involving kids in the kitchen. They can help with mixing and topping, making it a fun family activity.
  • Make Ahead: Prepare a batch in advance and store it in your freezer for a quick, healthy dessert whenever you need it!

Ingredients Breakdown

Let’s dive into the ingredients needed to make this delightful frozen yogurt bark:

  • 2 cups full-fat Greek yogurt: This is the base of your bark, providing creaminess and a good source of protein. You can use plain or flavored yogurt, depending on your taste.
  • 2 tablespoons maple syrup (or honey): This natural sweetener enhances the flavor of the yogurt without overpowering it.
  • 1 teaspoon vanilla extract: Adds a lovely aroma and flavor that complements the yogurt.
  • 1/2 cup sliced strawberries: Fresh fruit adds natural sweetness and vibrant color.
  • 1/2 cup blueberries: These berries are packed with antioxidants and provide a burst of flavor.
  • 1/4 cup granola: Adds a crunchy texture to your bark, making each bite satisfying.
  • 2-3 tablespoons unsweetened coconut flakes: Coconut adds a tropical twist and a chewy texture.
  • 1/4 cup chocolate chips: For a touch of decadence, chocolate chips are optional but highly recommended!

Pro Tips for Perfect Frozen Yogurt Bark

To ensure your frozen yogurt bark turns out perfectly every time, keep these expert insights in mind:

  • Choose high-quality yogurt: Opt for full-fat Greek yogurt for the best texture and flavor.
  • Mix well: Make sure to blend the yogurt with the sweeteners thoroughly to avoid clumps.
  • Spread evenly: Use a spatula to spread the yogurt mixture evenly in your baking dish for uniform freezing.
  • Press toppings gently: Lightly pressing the toppings into the yogurt helps them stick better once frozen.
  • Freeze overnight: For the best results, allow your bark to freeze overnight, ensuring it’s fully set.
  • Cut into pieces: After freezing, use a sharp knife to cut the bark into bite-sized pieces for easy serving.
  • Use parchment paper: Line your baking dish with parchment paper for easy removal of the bark.
  • Experiment with flavors: Don’t hesitate to try different yogurt flavors or toppings to create unique variations!

Common Mistakes and Troubleshooting

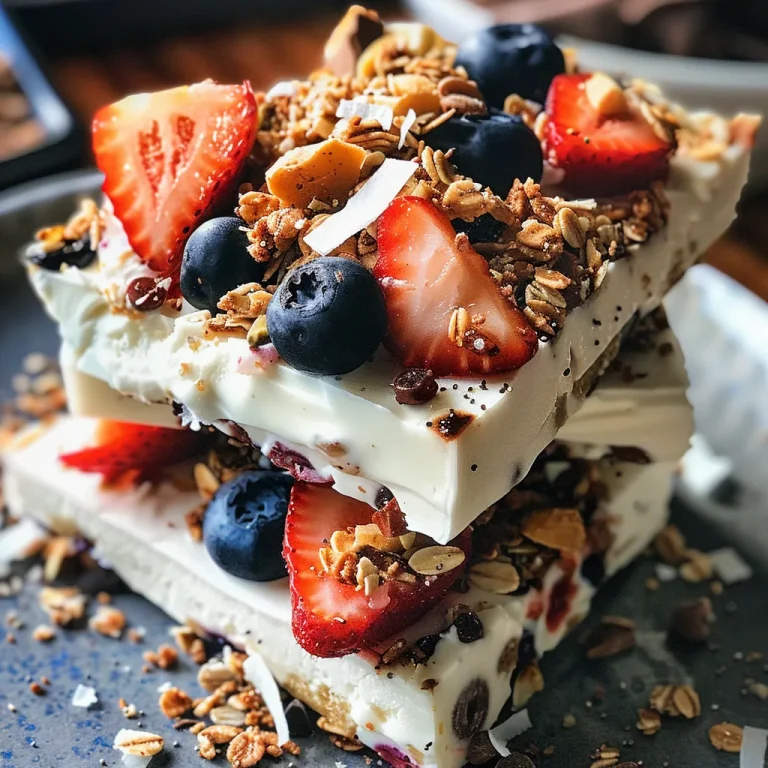
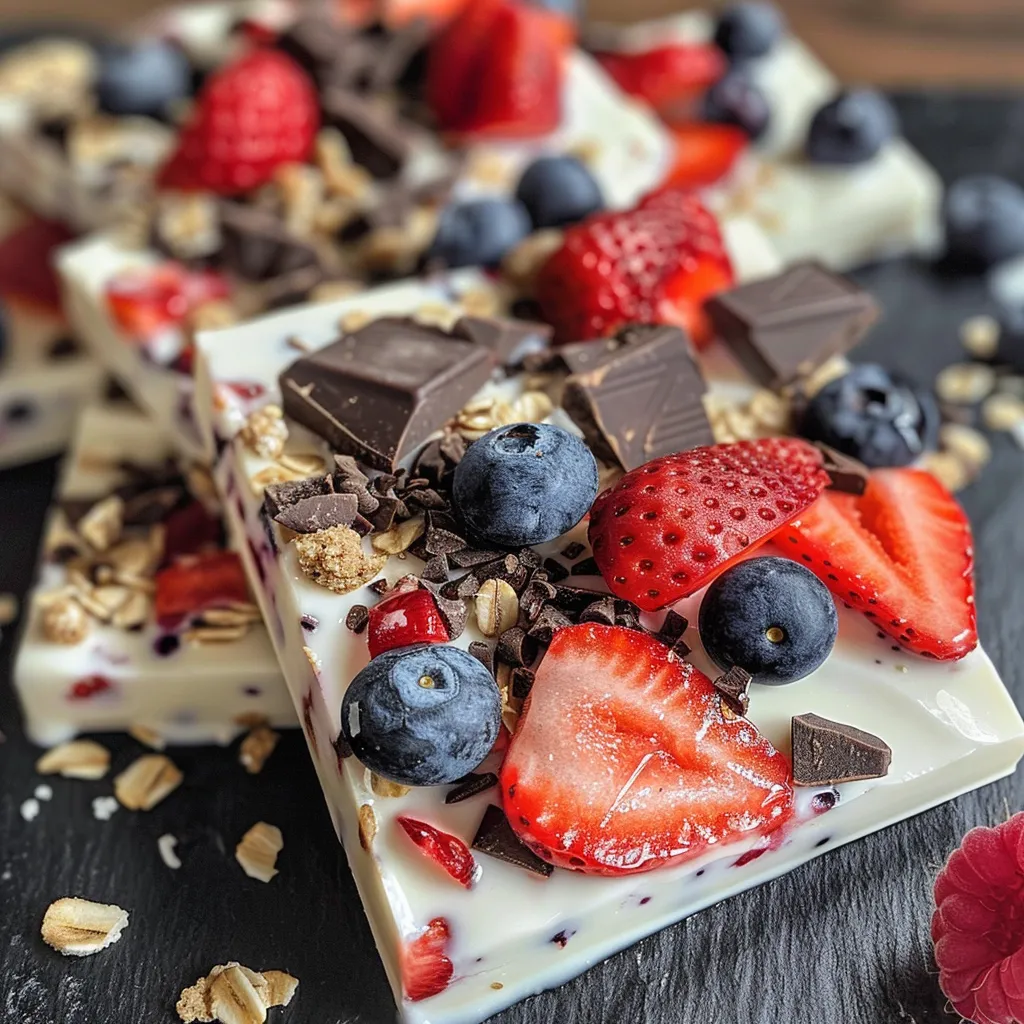
Vibrant Frozen Yogurt Bark with coconut flakes and fresh fruit slices.

Even the best chefs can encounter hiccups in the kitchen! Here are some common mistakes to avoid:

  • Not letting it freeze long enough: Ensure your bark is fully frozen before attempting to cut it; otherwise, it might fall apart.
  • Overloading on toppings: While it’s tempting to add lots of toppings, too many can result in an unstable bark that won’t freeze well.
  • Using low-fat yogurt: Low-fat versions can lead to a watery texture that doesn’t freeze properly.
  • Forgetting to line the pan: Skipping parchment paper can make removing your bark a challenge.

Variations of Frozen Yogurt Bark

One of the best parts of making frozen yogurt bark is the opportunity to get creative! Here are some popular variations:

  • Chocolate Peanut Butter Bark: Mix 1/4 cup of peanut butter into your yogurt for a rich, nutty flavor. Top with sliced bananas and chocolate chips.
  • Tropical Delight: Use coconut yogurt and top with pineapple chunks, mango slices, and a sprinkle of toasted coconut.
  • Berry Blast: Blend in mixed berries into the yogurt before spreading, then top with extra berries and granola.
  • Nutty Banana Crunch: Add chopped nuts and banana slices, drizzling with honey before freezing for a sweet twist.

Storage and Make-Ahead Instructions

Frozen yogurt bark is perfect for meal prep! Here’s how to store and prepare it:

  • Storing: Keep your frozen yogurt bark in an airtight container in the freezer. It can last up to 3 months—if it lasts that long!
  • Make Ahead: Prepare the bark a day or two in advance, ensuring you have a tasty treat ready at all times.

Frequently Asked Questions

Let’s address some common questions about making frozen yogurt bark:

  • Can I use non-dairy yogurt? Yes! Coconut or almond yogurt works well as a dairy-free alternative.
  • What’s the best yogurt for this recipe? Full-fat Greek yogurt offers the best texture and flavor, but you can use any yogurt you prefer.
  • How long does it take to freeze? Aim for at least 3 hours, but overnight is best for a fully set bark.
  • Can I add protein powder? Absolutely! Just mix a scoop into the yogurt for an extra protein boost.
  • Is this recipe gluten-free? Yes, as long as you use gluten-free granola, this bark is a great gluten-free treat!
  • How do I cut the bark? Use a sharp knife or simply break it into pieces with your hands for a rustic look.
  • Can I use frozen fruit? While fresh fruit is best for texture, you can use frozen fruit if needed, just ensure it’s thawed and drained.
  • What can I do if it’s too soft? If your bark isn’t freezing well, try adding more yogurt or adjusting the toppings for a firmer texture.

Nutritional Tips and Dietary Adaptations

This frozen yogurt bark can easily cater to various dietary needs:

  • Low-Sugar Option: Substitute maple syrup with a sugar-free sweetener to reduce sugar content.
  • Dairy-Free: Use coconut or almond yogurt to make a delicious dairy-free bark.
  • Protein Boost: Add a scoop of your favorite protein powder for a post-workout snack.
  • Vegan-Friendly: Opt for a plant-based yogurt and maple syrup for a vegan treat.

Equipment Recommendations

For this recipe, you’ll need a few key tools:

  • 9×13-inch baking dish: This is the perfect size for spreading your yogurt mixture.
  • Parchment paper: Essential for easy removal of the bark.
  • Mixing bowl: A medium-sized bowl for blending your yogurt and other ingredients.
  • Spatula: Useful for spreading the yogurt evenly in the baking dish.

Serving Suggestions

Your frozen yogurt bark is now ready to enjoy! Here are some serving ideas:

  • Snack Time: Enjoy it as an afternoon snack or a healthy dessert after dinner.
  • Party Treat: Cut into fun shapes for a kid’s party or family gathering.
  • On-the-Go Snack: Pack pieces in a cooler for a refreshing treat during a picnic or road trip.

In conclusion, making frozen yogurt bark is a fun and easy way to indulge in a sweet yet healthy treat. With the flexibility to customize and the ability to prepare it in advance, you’ll find it’s a delightful addition to your snack repertoire. So gather your ingredients, unleash your creativity, and enjoy this refreshing dessert with friends and family. Happy cooking!

Frozen Yogurt Bark

Prep Time 10 minutes
Cook Time 3 hours
Total Time 3 hours 10 minutes
Servings 8 pieces
Calories 250
A delicious and healthy frozen treat made with Greek yogurt, fresh fruit, and toppings, perfect for a quick snack or dessert.

Ingredients

Dairy

  • 2 cups full-fat Greek yogurt (plain or vanilla)
  • 2 tablespoons maple syrup (or honey)
  • 1 teaspoon vanilla extract

Toppings

  • 1/2 cup sliced strawberries
  • 1/2 cup blueberries
  • 1/4 cup granola
  • 2-3 tablespoons unsweetened coconut flakes
  • 1/4 cup chocolate chips

Instructions 

  • Line a 9x13-inch baking dish with parchment paper.
  • Mix Greek yogurt with maple syrup and vanilla until smooth.
  • Spread yogurt mixture evenly on the prepared dish to 1/4 inch thickness.
  • Sprinkle strawberries, blueberries, granola, coconut flakes, and chocolate chips on top and press gently.
  • Freeze for at least 3 hours until firm, then break into pieces and serve.

Notes

For best results, freeze overnight and enjoy immediately after breaking into pieces.
Calories: 250kcal
Cost: $10
Course: Dessert
Keyword: yogurt

Welcome to the vibrant world of fresh Avocado Corn Salsa! This delightful recipe combines the creamy goodness of ripe avocados with the sweetness of corn, all brought together with zesty lime juice. Perfect for gatherings, parties, or a quiet night in, this salsa is not just a dish; it’s a celebration of flavors and freshness. In this comprehensive guide, I’ll walk you through everything you need to know to create the ultimate Avocado Corn Salsa that will leave your taste buds dancing with joy!

Why You’ll Love This Recipe

  • Easy to Prepare: With minimal chopping and mixing, this salsa comes together in just 15 minutes, making it an ideal last-minute appetizer.
  • Fresh Ingredients: Using fresh produce enhances the flavor profile, making each bite a burst of freshness.
  • Customizable: Feel free to adjust ingredients based on your taste or dietary needs—add more heat with jalapeños or more crunch with bell peppers!
  • Perfect for Any Occasion: Whether it’s a summer BBQ, taco night, or game day, this salsa is a hit with everyone.
  • Health Benefits: Packed with vitamins and nutrients, this salsa is not only delicious but also a healthy addition to your meals.

Ingredients You’ll Need

Here’s what you’ll need to create your Avocado Corn Salsa:

  • 2 medium avocados: Peeled, pitted, and diced.
  • 2 cans (15.25 ounces) sweet corn: Drained. You can also use fresh corn if you prefer.
  • 1 medium Roma tomato: Diced (approximately ½ cup).
  • 1 medium red onion: Diced (about 1 cup).
  • 1 large jalapeño pepper: Seeded and diced for a spicy kick.
  • ½ cup fresh cilantro: Chopped to add a burst of flavor.
  • 1 green onion: Thinly sliced for an extra crunch.
  • 1 teaspoon garlic: Minced for aromatic flavor.
  • 1 teaspoon kosher salt: To enhance the flavors.
  • 1 medium lime: Juiced to add that zesty touch.

How to Make Corn Avocado Salsa

Follow these simple steps to whip up your salsa:

  1. In a large mixing bowl, combine the sweet corn, red onion, jalapeño, Roma tomato, green onion, garlic, and cilantro. Gently stir until everything is well mixed.
  2. Add the diced avocado and carefully fold it in, ensuring you don’t mash it.
  3. Drizzle the lime juice over the mixture and sprinkle with kosher salt. Stir gently to distribute the flavors evenly.
  4. Cover the bowl tightly with plastic wrap or transfer the salsa to an airtight container. Refrigerate for at least 15 minutes before serving to let the flavors meld together.
  5. Store leftovers in the refrigerator, covered, for up to 5 days. Note: The avocados may darken slightly, but the salsa will still taste fantastic!

Pro Tips for Perfect Avocado Corn Salsa

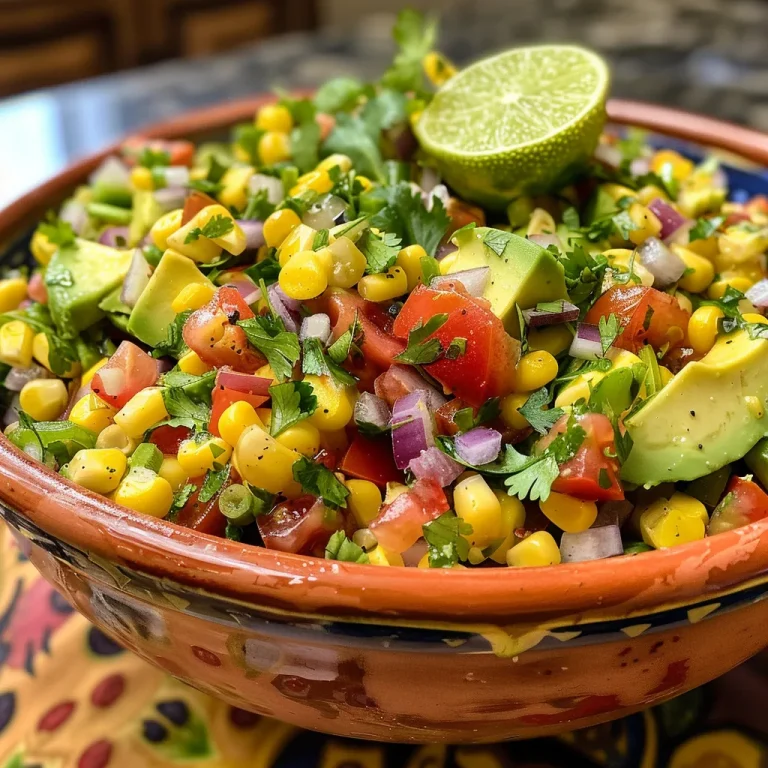
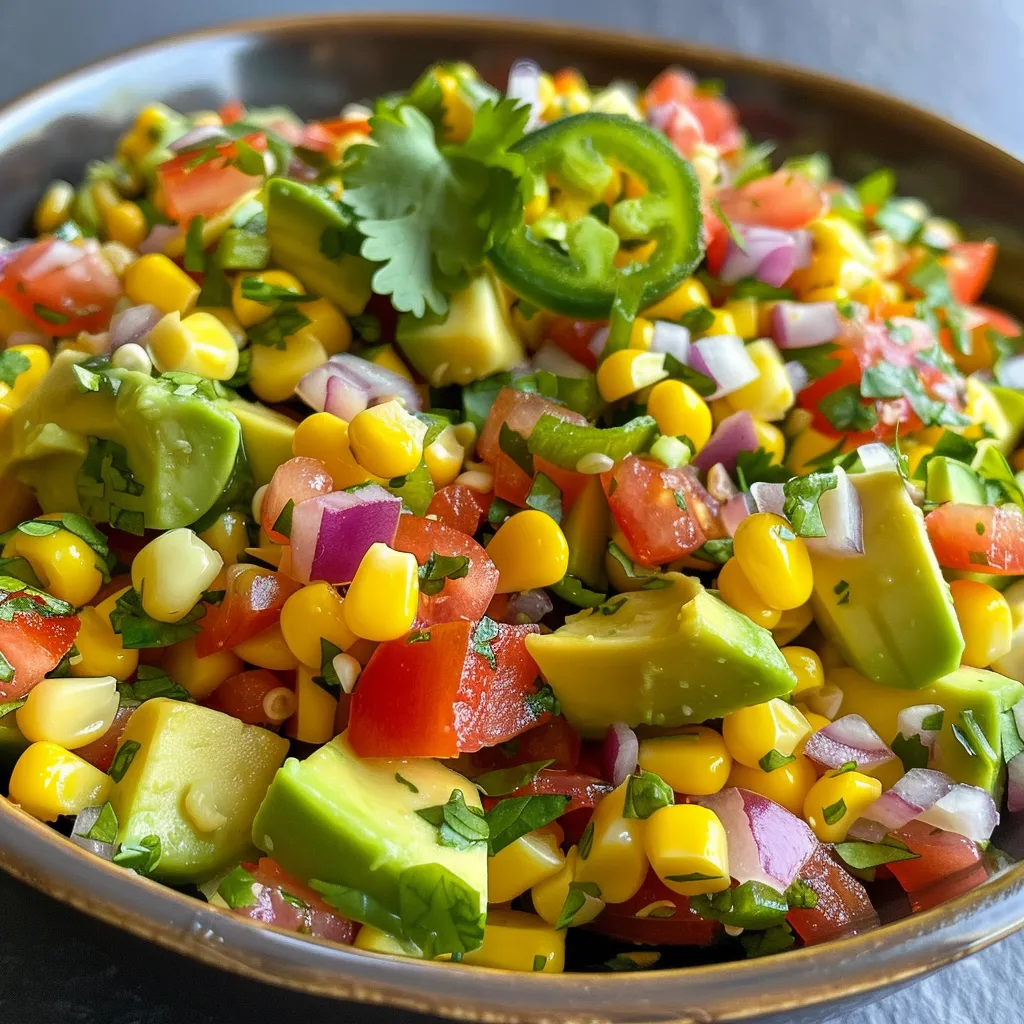
A close-up shot of fresh avocado corn salsa with diced ingredients arranged beautifully in a bowl.
  • Choose Ripe Avocados: Make sure your avocados are ripe but not overly mushy to maintain the best texture.
  • Fresh vs. Canned Corn: While canned corn works, fresh corn provides a sweeter, crunchier bite. If using fresh, grill it for added flavor!
  • Variations: Consider adding black beans for extra protein or mango for sweetness.
  • Don’t Skimp on Lime: Fresh lime juice not only brightens the flavors but also prevents the avocado from browning.
  • Adjust the Heat: If you prefer a milder salsa, remove the seeds from the jalapeño. For more heat, add a pinch of cayenne pepper.
  • Let it Chill: Chilling the salsa allows the flavors to meld, enhancing the overall taste.
  • Serving Style: Serve with tortilla chips, as a topping for tacos, or as a side to grilled meats.
  • Presentation: For an eye-catching presentation, serve in a colorful bowl and garnish with additional cilantro.

Common Mistakes and Troubleshooting

Even the best chefs make mistakes! Here’s how to avoid common pitfalls:

  • Overmixing: Be gentle when folding in the avocado to keep it intact and avoid a mushy salsa.
  • Too Much Salt: Start with less salt and adjust to taste to prevent overwhelming the dish.
  • Not Enough Lime Juice: Lime juice is key to balancing the flavors, so ensure you use enough for brightness.
  • Using Unripe Ingredients: Always check for ripeness, especially with avocados and tomatoes.

Variations to Try

Here are some fun twists on the classic Avocado Corn Salsa:

  • Mango Avocado Corn Salsa: Add diced mango for a tropical flair.
  • Black Bean Avocado Salsa: Mix in black beans for extra protein and fiber.
  • Spicy Avocado Corn Salsa: Include diced habanero peppers for a fiery kick.
  • Herbed Avocado Corn Salsa: Experiment with different herbs like basil or parsley for a unique taste.

Storage and Make-Ahead Instructions

If you want to prepare this salsa in advance, follow these tips:

  • Make Ahead: You can prepare the salsa a few hours before serving. Just be sure to add the avocado right before serving to keep it fresh.
  • Storing Leftovers: Keep the salsa in an airtight container in the fridge for up to 5 days. The flavor will continue to develop!
  • Freezing: While it’s not ideal to freeze due to the texture of the avocado, you can freeze the corn and other ingredients separately if you plan to use them later.

Frequently Asked Questions (FAQs)

Here are some common questions about Avocado Corn Salsa:

  • Can I use frozen corn? Yes! Thaw it before mixing it into your salsa.
  • What can I serve this salsa with? It pairs beautifully with tortilla chips, grilled fish, tacos, or even as a topping for salads.
  • How do I prevent the avocado from browning? Use fresh lime juice and cover the salsa tightly when storing.
  • Can I make this salsa spicy? Absolutely! Add more jalapeños or even some diced serrano peppers for heat.
  • What’s the best way to dice an avocado? Cut the avocado in half, remove the pit, score it with a knife, and scoop it out with a spoon.
  • Is this salsa gluten-free? Yes, all the ingredients are gluten-free, making it a safe option for those with gluten sensitivities.
  • Can I add cheese to this salsa? Yes, crumbled feta or cotija cheese can add a delicious salty flavor!
  • What’s the ideal serving temperature? It’s best served chilled to keep the ingredients fresh and crisp.

Nutrition Tips and Dietary Adaptations

This salsa is not only delicious but also packed with nutrients! Here are some dietary adaptations you can consider:

  • Vegan-Friendly: This recipe is naturally vegan, making it perfect for plant-based diets.
  • Low-Carb Option: Skip the corn for a low-carb version that still delivers on flavor.
  • Paleo-Friendly: Enjoy this salsa on a paleo diet by keeping it simple with fresh ingredients.
  • Nut-Free: This recipe is nut-free, making it suitable for those with nut allergies.

Equipment Recommendations

To prepare your Avocado Corn Salsa, you’ll need the following kitchen tools:

  • Cutting Board: A sturdy board for chopping your ingredients.
  • Chef’s Knife: A sharp knife will make dicing and chopping easier.
  • Mixing Bowl: A large bowl is essential for combining all your ingredients.
  • Airtight Container: To store leftovers and keep them fresh.

Serving Suggestions

Here are some delicious ways to enjoy your Avocado Corn Salsa:

  • Tortilla Chips: The classic pairing for dipping!
  • Grilled Fish: Top your favorite fish with this salsa for a fresh flavor boost.
  • Tacos: Use as a topping for your tacos to add creaminess and crunch.
  • Salads: Mix into salads for added texture and flavor.

In conclusion, creating a memorable Avocado Corn Salsa is all about using fresh ingredients and letting the flavors shine. With these tips and variations at your disposal, you can customize this recipe to suit any occasion and palate. Whether you’re hosting a party or just enjoying a quiet evening at home, this salsa will surely brighten your table and bring smiles to everyone who tastes it. Happy cooking!

Avocado Corn Salsa

Prep Time 15 minutes
Total Time 15 minutes
Servings 4 servings
Calories 150
A fresh and vibrant salsa combining creamy avocados with sweet corn and zesty lime, perfect for snacking or as a topping.

Ingredients

group

  • 2 medium avocados (peeled, pitted, and diced)
  • 2 cans (15.25 ounces) sweet corn (drained)
  • 1 medium Roma tomato (diced (about ½ cup))
  • 1 medium red onion (diced (about 1 cup))
  • 1 large jalapeño pepper (seeded and diced)
  • 0.5 cup fresh cilantro (chopped)
  • 1 green onion green onion (thinly sliced)
  • 1 teaspoon garlic (minced)
  • 1 teaspoon kosher salt
  • 1 medium lime (juiced)

Instructions 

  • Combine corn, red onion, jalapeño, tomato, green onion, garlic, and cilantro in a bowl.
  • Gently fold in the diced avocados.
  • Drizzle lime juice and sprinkle salt; gently stir to combine.
  • Cover and refrigerate for at least 15 minutes before serving.
  • Store leftovers covered in the refrigerator for up to 5 days.

Notes

For best flavor, let the salsa sit for a bit before serving.
Calories: 150kcal
Cost: $10
Course: Appetizer
Cuisine: Mexican
Keyword: Avocado

Discover the Joy of Creamy Pesto Gnocchi

Cooking can be an adventure filled with flavors, textures, and warmth. Creamy Pesto Gnocchi is a perfect representation of this journey, combining the comforting nature of pillowy gnocchi with the rich, herbaceous allure of basil pesto. Not only is this dish simple to make, but it also brings a sense of indulgence to your dining table. Whether you’re a seasoned chef or a home cook just starting out, this recipe will guide you through making a dish that’s sure to impress.

Why You’ll Love This Recipe

This Creamy Pesto Gnocchi recipe is more than just a meal; it’s an experience. Here are five reasons why you’ll adore it:

  • Quick and Easy: This dish can be prepared in under 30 minutes, making it perfect for busy weeknights or unexpected guests.
  • Comfort in Every Bite: The combination of creamy sauce and soft gnocchi creates a comforting dish that feels like a warm hug.
  • Customizable: You can easily modify the recipe to suit your taste, whether adding proteins or vegetables.
  • Flavor-Packed: The use of homemade or store-bought basil pesto enhances the flavors, making each bite deliciously aromatic.
  • Great for Meal Prep: This dish stores well, allowing you to enjoy leftovers or prepare it ahead of time.

Ingredients Breakdown

Here’s what you’ll need to create this delightful dish:

  • 1 package gnocchi (fresh or frozen): Opt for high-quality gnocchi for the best texture. You can find excellent options at your local grocery store.
  • 1 cup pesto sauce: Homemade basil pesto is ideal, but store-bought varieties work well too. Look for brands without preservatives for the best flavor.
  • 1 cup heavy cream: Full-fat cream ensures a rich and creamy sauce. You can substitute with half-and-half if you want a lighter version.
  • 1/2 cup grated Parmesan cheese: Freshly grated cheese will melt better and add a more robust flavor compared to pre-grated options.
  • 2 cloves garlic, minced: Fresh garlic adds a savory depth to the sauce.
  • Salt and pepper to taste: Seasoning is crucial for enhancing the flavors.
  • 2 tablespoons olive oil: Use high-quality extra virgin olive oil for sautéing the garlic.
  • Fresh basil for garnish: Adds a pop of color and fresh aroma to the finished dish.

Feel free to make substitutions based on what you have on hand. For instance, gluten-free gnocchi can be used for a gluten-free version, and different types of cheese such as Pecorino Romano can be tried for variety.

Step-by-Step Instructions

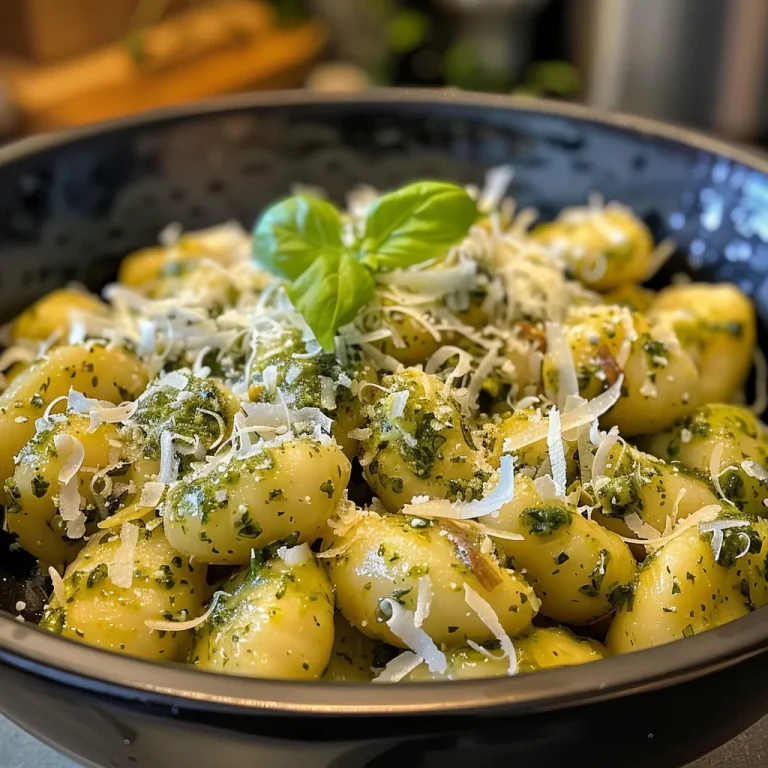
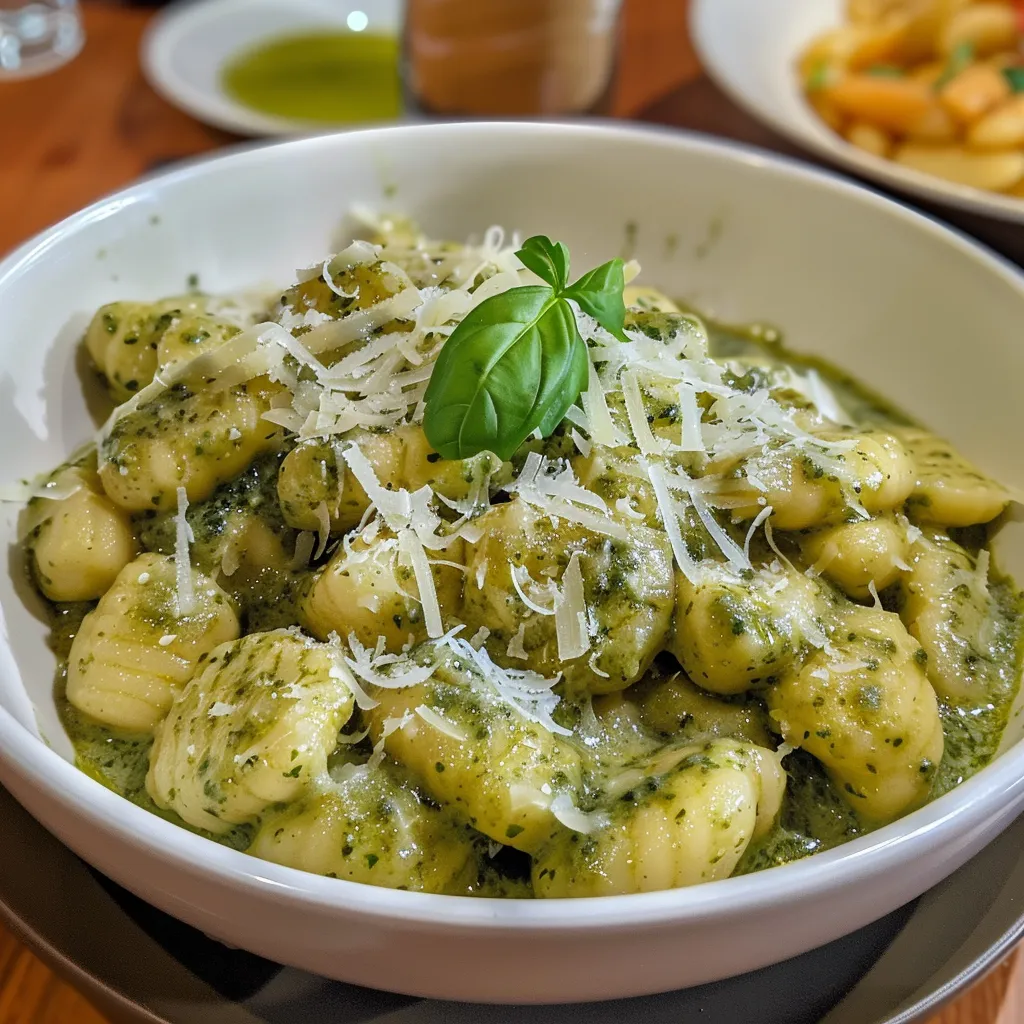
Tantalizing gnocchi dish drizzled with olive oil and topped with basil.

Follow these simple steps to create your Creamy Pesto Gnocchi:

  1. Heat the olive oil in a large skillet over medium heat for about 2-3 minutes until it shimmers.
  2. Add the minced garlic and sauté until fragrant, about 1 minute.
  3. Add the gnocchi to the skillet and cook until tender, approximately 3-5 minutes.
  4. Pour in the heavy cream and pesto, stirring to combine, and simmer for 3-4 minutes.
  5. Add in the grated Parmesan cheese, stirring until melted and creamy.
  6. Season with salt and pepper to taste, then serve warm, garnished with fresh basil.

Expert Cooking Tips

Here are some tips from my kitchen to ensure your dish comes out perfectly:

  • Perfect Texture: Ensure the gnocchi is cooked until they float in the water; this indicates they are done.
  • Room Temperature Ingredients: Use room temperature heavy cream for easier incorporation into the sauce.
  • Don’t Overcook: Keep an eye on the sauce to avoid over-reducing it, which can lead to a thicker consistency than desired.
  • Variations on Pesto: Experiment with different nuts in your pesto, such as walnuts or almonds, for unique flavors.
  • Make it a Meal: Consider adding grilled chicken, shrimp, or sautéed vegetables for a more filling dish.
  • Storage Tips: Store leftovers in an airtight container in the fridge for up to 3 days.
  • Reheating: When reheating, add a splash of cream or broth to loosen the sauce.
  • Season Smart: Taste as you go to ensure the flavors are balanced and adjust seasoning accordingly.

Common Mistakes and Troubleshooting

Even the best cooks encounter challenges. Here’s how to troubleshoot:

  • Too Thick Sauce: If your sauce becomes too thick, add a little more heavy cream or vegetable broth to loosen it.
  • Gnocchi Sticking Together: If using fresh gnocchi, dust them lightly with flour before cooking to prevent sticking.
  • Flavor Too Mild: If the dish lacks flavor, add more pesto or a squeeze of lemon juice for brightness.

Variations to Try

This recipe is wonderfully versatile. Here are some variations you might enjoy:

  • Protein Additions: Add grilled chicken, sautéed shrimp, or crispy bacon for a heartier meal.
  • Vegetable Variations: Incorporate sautéed spinach, sun-dried tomatoes, or roasted red peppers for additional flavor and nutrients.
  • Different Cooking Methods: Try baking the dish with a sprinkle of cheese on top for a delicious baked version.
  • Dairy-Free Option: Substitute heavy cream with coconut cream and use nutritional yeast instead of cheese for a dairy-free alternative.

Storage and Make-Ahead Instructions

This dish is great for meal prep. Here’s how to store and reheat:

  • Make Ahead: You can prepare the gnocchi and sauce separately, combining them just before serving.
  • Storage: Keep leftovers in an airtight container in the fridge for up to 3 days. If freezing, make sure to store without the cream, adding it when reheating.
  • Reheating: Gently reheat on the stovetop over low heat, stirring frequently. Add a splash of cream or broth to adjust the consistency.

Frequently Asked Questions (FAQ)

Here are some common questions about this Creamy Pesto Gnocchi:

  • Can I use store-bought pesto? Yes, store-bought pesto can save time and still taste great!
  • How can I make this dish vegan? Use a vegan pesto, coconut cream, and nutritional yeast instead of Parmesan cheese.
  • What can I serve with this gnocchi? A light salad or steamed vegetables make great side dishes.
  • Can I make this dish gluten-free? Absolutely! Look for gluten-free gnocchi at your local grocery store.
  • How do I make the sauce thicker? Simmer the sauce a little longer to reduce it to your desired thickness.
  • Can I add other herbs? Yes, feel free to experiment with other herbs like parsley or arugula for a different flavor profile.
  • Is gnocchi healthy? Gnocchi can be part of a balanced diet. Include vegetables and lean proteins for a healthier meal.
  • What’s the best way to store leftovers? Store in an airtight container in the fridge for up to 3 days; reheat gently.

Nutrition Tips and Dietary Adaptations

This dish can be adapted to fit various dietary needs:

  • Low-Carb: Try using cauliflower gnocchi instead for a lower-carb version of the dish.
  • High-Protein: Increase protein by adding grilled chicken or chickpeas to the dish.
  • Dairy-Free: Substitute cream and cheese with dairy-free alternatives.

Recommended Kitchen Equipment

To make your cooking experience smooth and enjoyable, here are some recommended kitchen tools:

  • Large Skillet: A non-stick skillet makes it easy to cook the gnocchi without sticking.
  • Wooden Spoon: Essential for stirring and combining your ingredients without scratching your cookware.
  • Measuring Cups and Spoons: For accurate ingredient measurements, ensuring perfect results every time.

Serving Suggestions

Elevate your dining experience with these serving suggestions:

  • Garnish with Fresh Herbs: Sprinkle additional fresh basil or parsley on top for a vibrant finish.
  • Serve with Crusty Bread: A side of garlic bread or a fresh baguette is perfect for soaking up the creamy sauce.
  • Pair with Wine: Consider a crisp white wine like Pinot Grigio to complement the flavors of the dish.

With this comprehensive guide, you’re well-equipped to make a delightful Creamy Pesto Gnocchi that’s sure to impress anyone at your table. Happy cooking!

Creamy Pesto Gnocchi

Prep Time 10 minutes
Cook Time 10 minutes
Total Time 20 minutes
Servings 4 servings
Calories 550
A quick and delicious dish combining tender gnocchi with a rich, flavorful pesto cream sauce, perfect for a comforting meal.

Ingredients

Gnocchi

  • 1 package gnocchi (fresh or frozen)
  • 1 cup pesto sauce
  • 1 cup heavy cream
  • 1/2 cup grated Parmesan cheese
  • 2 cloves garlic, minced
  • to taste Salt and pepper
  • 2 tablespoons olive oil
  • for garnish Fresh basil

Instructions 

  • Heat olive oil in a skillet over medium heat for 2-3 minutes.
  • Sauté minced garlic until fragrant, about 1 minute.
  • Add gnocchi and cook until tender, 3-5 minutes.
  • Stir in heavy cream and pesto, simmer for 3-4 minutes.
  • Add Parmesan cheese, stir until melted, season with salt and pepper.
  • Serve warm, garnished with fresh basil.

Notes

For extra flavor, sprinkle with additional Parmesan or fresh herbs.
Calories: 550kcal
Cost: $15
Course: Main Course
Cuisine: Italian
Keyword: Gnocchi

Elevate Your Weeknight Dinners with Turkey Spinach Quesadillas

When it comes to quick and satisfying meals, Turkey Spinach Quesadillas are a culinary delight that combines flavor, nutrition, and convenience. This recipe is perfect for busy weeknights when you need something wholesome without spending hours in the kitchen. Bursting with fresh ingredients and melted cheese, these quesadillas are sure to please even the pickiest eaters. Get ready to impress your family with this delicious dish that can be whipped up in under 30 minutes!

Why You’ll Love This Recipe

This recipe isn’t just about convenience; it’s about creating a meal that your family will love. Here are several reasons why these Turkey Spinach Quesadillas will become a staple in your kitchen:

  • Quick to Prepare: With a prep and cook time of just 30 minutes, you can have dinner on the table in no time!
  • Nutritious Ingredients: Packed with turkey and spinach, these quesadillas provide a healthy dose of protein and vitamins.
  • Customizable Fillings: Feel free to mix and match ingredients based on what you have in your pantry.
  • Kid-Friendly: The crispy tortilla and gooey cheese make this dish appealing to kids of all ages.
  • Perfect for Leftovers: Easy to store and reheat, these quesadillas make for a great lunch the next day!

Ingredients Breakdown

To make these delicious quesadillas, you’ll need the following ingredients:

  • 2 cups cooked turkey breast, diced: Use leftover turkey or deli meat for convenience.
  • 2 cups fresh baby spinach, chopped: Fresh spinach adds nutrition and flavor.
  • 1 cup shredded sharp cheddar cheese: This cheese melts beautifully and adds a rich flavor.
  • 1/4 cup red onion, finely chopped: The onion adds a slight sweetness and crunch.
  • 4 large flour tortillas: Choose whole wheat or gluten-free options if desired.
  • 2 tablespoons olive oil: For cooking the quesadillas to golden perfection.

Ingredient Substitutions

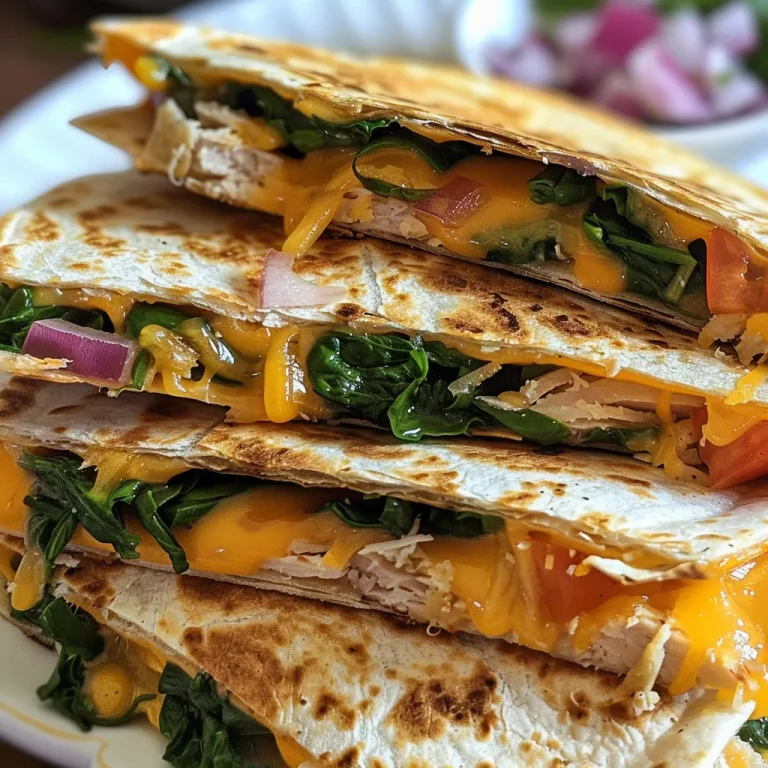
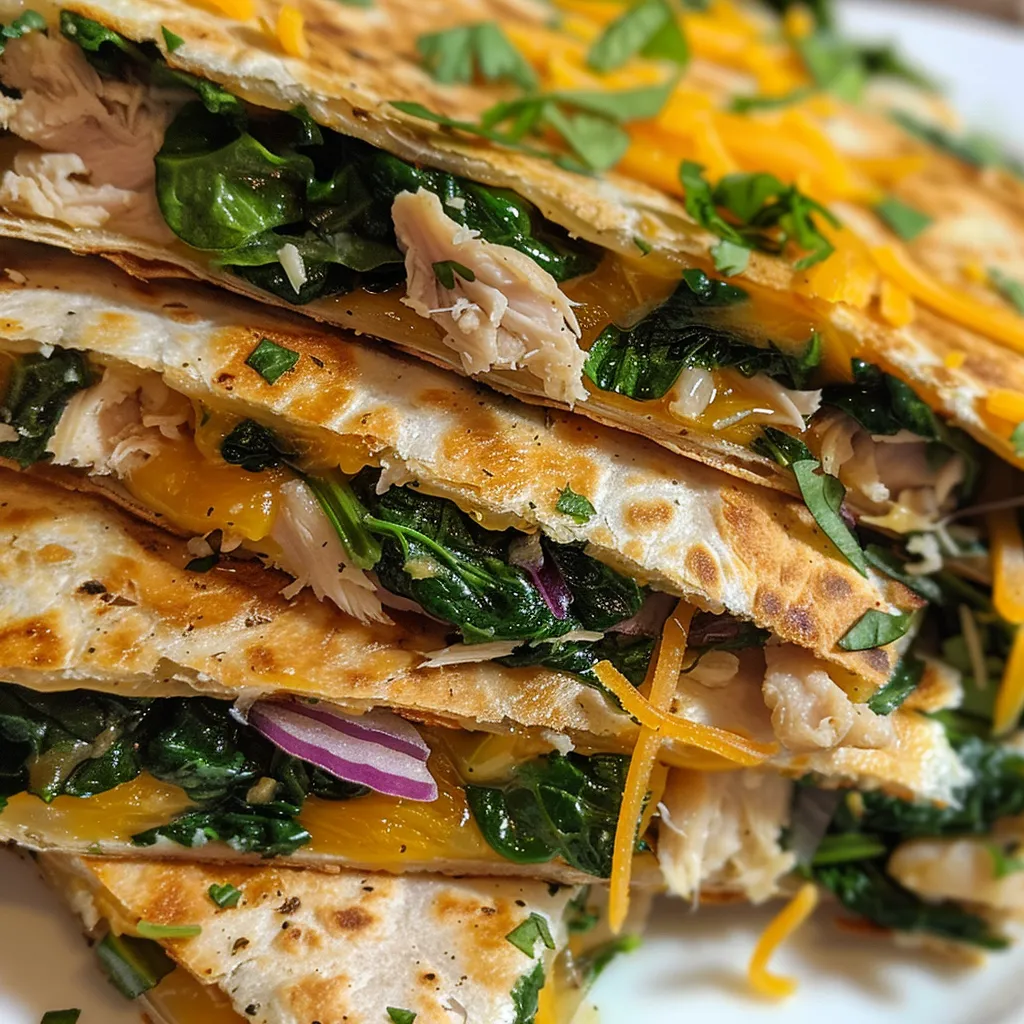
Cooked quesadilla cut into wedges, showcasing fresh spinach and turkey.

If you’re missing some ingredients or want to customize your quesadillas, consider these substitutions:

  • Turkey: Substitute with chicken, beef, or even black beans for a vegetarian version.
  • Spinach: Kale or Swiss chard can be used if you want to switch things up.
  • Cheese: Try pepper jack for a bit of heat, or use a dairy-free cheese for a vegan option.
  • Tortillas: Corn tortillas are a great gluten-free alternative.

Step-by-Step Instructions

Follow these simple steps to create your Turkey Spinach Quesadillas:

  1. In a large mixing bowl, combine diced turkey, chopped spinach, shredded cheddar cheese, and red onion until evenly blended.
  2. Warm a large non-stick skillet over medium heat and lightly brush with olive oil.
  3. Spread one fourth of the filling mixture evenly on half of a tortilla, then fold the tortilla over to enclose the filling.
  4. Place folded tortilla in the skillet and cook for 2-3 minutes per side, or until golden brown and the cheese has melted.
  5. Repeat with remaining tortillas and filling, adding more olive oil to the skillet as needed.
  6. Slice each quesadilla into wedges and serve warm.

Pro Tips for Perfect Quesadillas

To achieve the best flavor and texture, consider these expert tips:

  • Don’t Overfill: Less is more when it comes to the filling—keep it to one-fourth of the tortilla for easy flipping.
  • Use Fresh Ingredients: Fresh spinach and high-quality cheese elevate the dish significantly.
  • Adjust the Heat: If your quesadillas are browning too quickly, reduce the heat to medium-low.
  • Experiment with Spices: Add cumin, chili powder, or garlic powder to the filling for an extra flavor kick.
  • Use a Cast Iron Skillet: For an even crispier texture, a cast iron skillet retains heat better.
  • Let Rest Before Cutting: Allowing the quesadillas to rest for a minute makes them easier to cut.
  • Serve with Dips: Pair with salsa, sour cream, or guacamole for a delicious finish.
  • Make Ahead: Prep the filling in advance and store it in the refrigerator for quick assembly later.

Common Mistakes and Troubleshooting

Even seasoned cooks can face challenges. Here are some common pitfalls and how to avoid them:

  • Cheese Not Melting: Ensure the skillet is hot enough before adding the quesadilla.
  • Soggy Tortillas: Avoid overfilling and ensure you’re using enough heat to crisp the tortilla.
  • Filling Falling Out: Fold the tortilla carefully and press down while cooking to seal it better.

Variations to Try

Feel free to mix things up with these fun variations:

  • Buffalo Turkey Quesadilla: Add buffalo sauce to the filling for a spicy twist.
  • Vegetarian Quesadilla: Substitute turkey with mushrooms or zucchini and add more vegetables.
  • Southwestern Quesadilla: Incorporate black beans, corn, and jalapeños for a southwestern flair.
  • Breakfast Quesadilla: Add scrambled eggs and avocado for a delicious breakfast option.

Storage and Make-Ahead Instructions

These quesadillas are great for meal prep:

  • Refrigeration: Store in an airtight container in the refrigerator for up to 3 days.
  • Freezing: Freeze uncooked quesadillas layered with parchment paper in between for up to 2 months. Cook from frozen, adding a few extra minutes to the cooking time.
  • Reheating: Reheat in a skillet over medium heat until warmed through for the best texture.

Frequently Asked Questions

Here are some common questions to help you perfect your quesadillas:

  • Can I use other meats? Yes! Chicken, beef, or even beans can be used in place of turkey.
  • What type of cheese works best? Sharp cheddar is fantastic, but mozzarella or pepper jack are also great choices.
  • How do I make them gluten-free? Use corn tortillas and ensure all other ingredients are gluten-free.
  • Can I add more vegetables? Absolutely! Bell peppers, mushrooms, or zucchini can be great additions.
  • What can I serve with quesadillas? Salsa, sour cream, guacamole, or a fresh salad make excellent pairings.
  • How can I make them spicier? Add diced jalapeños or hot sauce to the filling for a kick.
  • Can these be made ahead of time? Yes! Prepare the filling in advance and assemble when ready to cook.
  • What’s the best way to keep them crispy? Avoid stacking them directly on top of each other after cooking to maintain their crispiness.

Nutrition Tips and Dietary Adaptations

Make these quesadillas fit your dietary needs:

  • Low-Carb: Use lettuce wraps instead of tortillas for a low-carb option.
  • High-Protein: Add more turkey or incorporate beans for extra protein.
  • Vegan: Replace turkey with tofu or tempeh and use vegan cheese.

Equipment Recommendations

Having the right tools makes cooking easier:

  • Non-Stick Skillet: Essential for cooking quesadillas without sticking.
  • Spatula: A wide spatula makes flipping quesadillas a breeze.
  • Mixing Bowl: For combining all your tasty filling ingredients.

Serving Suggestions

Serve these quesadillas hot with a few delicious accompaniments:

  • Fresh Salsa: A zesty salsa complements the cheesy quesadillas perfectly.
  • Guacamole: Creamy guacamole adds a rich texture and flavor contrast.
  • Sour Cream: A dollop of sour cream balances the flavors beautifully.
  • Simple Green Salad: A light salad adds freshness and crunch to the meal.

Conclusion

In just a few simple steps, you can create Turkey Spinach Quesadillas that are not only quick and easy but also packed with flavor and nutrition. Whether you’re making them for a family dinner or prepping them for a busy week ahead, these quesadillas are sure to become a go-to recipe in your kitchen. Enjoy the delightful combination of flavors and the satisfaction of a home-cooked meal!

Speedy Turkey Spinach Quesadillas

Prep Time 10 minutes
Cook Time 10 minutes
Total Time 20 minutes
Servings 4 pieces
Calories 430
A quick and delicious way to enjoy lean turkey and fresh spinach in cheesy quesadillas, perfect for a satisfying meal in minutes.

Ingredients

Main ingredients

  • 2 cups cooked turkey breast, diced
  • 2 cups fresh baby spinach, chopped
  • 1 cup shredded sharp cheddar cheese
  • 1/4 cup red onion, finely chopped
  • 4 large flour tortillas
  • 2 tablespoons olive oil

Instructions 

  • Mix turkey, spinach, cheese, and onion in a bowl.
  • Heat skillet with olive oil over medium heat.
  • Spread filling on half of each tortilla, fold in half.
  • Cook each folded tortilla 2-3 minutes per side until golden and cheese melts.
  • Repeat with remaining tortillas, adding more oil as needed.
  • Slice into wedges and serve warm.

Notes

Using a non-stick skillet helps prevent sticking and reduces the need for extra oil.
Calories: 430kcal
Cost: $10
Course: Main Course
Cuisine: American
Keyword: Quesadilla, Spinach, Turkey

Why You’ll Love These Healthy Turkey and Spinach Quesadillas

Welcome to a culinary adventure that perfectly balances health and flavor! Our Healthy Turkey and Spinach Quesadillas not only bring a nutritious twist to a classic dish, but they’re also incredibly easy to make. Let’s dive into why you’ll absolutely love this recipe.

  • Nutritious Ingredients: Packed with lean ground turkey and fresh spinach, these quesadillas deliver a wealth of vitamins and minerals.
  • Quick and Easy: Ready in under 30 minutes, these quesadillas are perfect for busy weeknights or a quick lunch.
  • Customizable: Tailor the fillings to your taste! Whether you prefer different veggies or a variety of cheeses, the possibilities are endless.
  • Family-Friendly: Kids will love the cheesy goodness, and you can sneak in those greens without them noticing!
  • Meal Prep Friendly: These quesadillas can be made ahead of time and stored for easy reheating, making them a fantastic option for meal prepping.

Mastering Your Ingredients

Let’s break down the ingredients you’ll need for these delicious quesadillas and explore some fantastic substitutions.

Ingredients

  • 1 tablespoon olive oil: For sautéing the turkey and adding flavor.
  • 8 ounces ground turkey: A lean protein source that keeps the filling light yet satisfying.
  • 1 clove garlic, minced: For that aromatic touch that elevates the flavor.
  • 2-3 cups fresh spinach: Packed with nutrients, it wilts down beautifully.
  • 1/4 teaspoon salt and pepper to taste: Essential for seasoning your filling.
  • 1/4 teaspoon dried oregano: Adds an Italian flair to the dish.
  • 2 large tortillas: Choose whole wheat or gluten-free for a healthier option.
  • 2 cups mozzarella cheese, shredded: The melty goodness that holds everything together.

Substitutions

  • Turkey: Swap with shredded chicken or black beans for a vegetarian option.
  • Spinach: Kale or Swiss chard can be great alternatives.
  • Cheese: Try cheddar, pepper jack, or a dairy-free cheese for different flavor profiles.
  • Tortillas: Corn tortillas work well for a gluten-free choice.

Step-by-Step Instructions

Follow these simple steps to create your Healthy Turkey and Spinach Quesadillas.

  1. In a large skillet over medium heat, add the olive oil. Once hot, add in the ground turkey. Crumble the meat as it cooks.
  2. Once the meat is browned and fully cooked, add in the minced garlic and fresh spinach. Cook for 1-2 minutes to wilt the spinach. Season with salt, pepper, and dried oregano. Remove from the pan.
  3. Sprinkle 1/4 of the mozzarella cheese over half of a tortilla. Take half of the turkey mixture and spread it over the cheese. Sprinkle another 1/4 of the cheese over the turkey mixture. Fold the tortilla in half and repeat with the remaining tortilla.
  4. Carefully transfer one quesadilla to a preheated skillet drizzled with olive oil and cook for 60-90 seconds. Lightly coat the top tortilla with oil (lightly spray or brush with oil) flip and cook for another 60-90 seconds until golden brown.
  5. Transfer to a cutting board and continue with the remaining quesadilla. Cut each quesadilla into 4 equal pieces. Enjoy!

Pro Tips for Perfect Quesadillas

Freshly cooked turkey and spinach quesadilla cut into wedges, showcasing its filling.
  • Don’t Overfill: Less is more! Too much filling can make it difficult to flip the quesadilla.
  • Use a Non-Stick Skillet: This helps prevent sticking and allows for an even cook.
  • Heat Matters: Ensure your skillet is hot enough to get that perfect golden brown finish.
  • Add Fresh Herbs: Consider adding fresh basil or cilantro for an extra flavor pop.
  • Experiment with Cheese: Mixing different cheeses can add depth to your quesadilla.
  • Cool Before Cutting: Let your quesadillas sit for a minute after cooking to help hold their shape when cutting.
  • Reheating: To maintain crispiness, reheat in a skillet rather than the microwave.
  • Pair with Dips: Serve with guacamole or salsa for a delicious contrast.

Common Mistakes and Troubleshooting

Even the best cooks can run into issues. Here are some common mistakes and how to avoid them.

  • Quesadilla Falls Apart: This usually happens from too much filling. Be sure to keep it balanced!
  • Uneven Cooking: Make sure your skillet is evenly heated, and flip the quesadilla carefully.
  • Cheese Doesn’t Melt: If using low-fat cheese, it may not melt as well. Try adding a bit of full-fat cheese for better results.

Delicious Variations to Try

Want to mix things up? Here are some creative variations for your quesadillas.

  • Mexican Street Corn Quesadilla: Add sweet corn and cotija cheese for a twist inspired by elote.
  • Buffalo Turkey Quesadilla: Mix in buffalo sauce with the turkey for a spicy kick!
  • Vegetable Medley Quesadilla: Incorporate bell peppers, mushrooms, and onions for a veggie-packed version.
  • Breakfast Quesadilla: Scramble some eggs and add them to the filling for a hearty breakfast option.

Storage and Make-Ahead Instructions

These quesadillas are perfect for meal prep! Here’s how to store and reheat them.

  • Refrigeration: Store leftover quesadillas in an airtight container in the fridge for up to 3 days.
  • Freezing: Once cooled, wrap each quesadilla in foil and freeze for up to 2 months. Reheat in a skillet or oven.
  • Make-Ahead: Prepare the filling ahead of time and store in the fridge. Assemble and cook the quesadillas when you’re ready to eat.

Frequently Asked Questions

Here are some common questions about making these quesadillas.

  • Can I make these quesadillas vegetarian? Yes! Substitute the turkey with black beans or lentils.
  • What can I serve with quesadillas? They pair excellently with salsa, guacamole, or a fresh salad.
  • Can I use whole wheat tortillas? Absolutely! Whole wheat or gluten-free tortillas work well for a healthier option.
  • How can I make these quesadillas spicier? Add jalapeños or a spicy cheese for an extra kick.
  • Can I use pre-cooked turkey? Yes, just add it to the skillet to heat through before folding into the quesadilla.
  • How do I prevent soggy quesadillas? Ensure your filling isn’t too wet and allow them to cook long enough for a crispy exterior.
  • Are quesadillas healthy? They can be, especially when using lean proteins and plenty of veggies!
  • What is the best way to reheat them? For the best texture, reheat in a skillet rather than a microwave.

Nutrition Tips and Dietary Adaptations

For those looking to make this recipe even healthier, consider the following:

  • Low Sodium: Use low-sodium turkey and limit added salt for heart health.
  • High Fiber: Add beans or serve with a side of fiber-rich veggies.
  • Gluten-Free: Use gluten-free tortillas to accommodate dietary restrictions.

Equipment Recommendations

Here’s what you’ll need to make these quesadillas:

  • Non-Stick Skillet: Essential for easy cooking and flipping.
  • Spatula: A sturdy spatula will help in flipping the quesadilla without breaking it.
  • Cutting Board: For easy slicing and serving.

Serving Suggestions

Make your meal complete with these serving ideas:

  • Fresh Salsa: A zesty salsa adds a refreshing touch to each bite.
  • Guacamole: Creamy avocado dip pairs perfectly with the flavors of the quesadilla.
  • Side Salad: A simple green salad can complement the meal and add more nutrients.

In conclusion, these Healthy Turkey and Spinach Quesadillas are a fantastic addition to your meal repertoire. Easy to make, packed with nutrients, and delightful to eat, they are sure to become a family favorite. Enjoy the joy of cooking and the satisfaction of sharing this nutritious dish with your loved ones!

Healthy Turkey and Spinach Quesadillas

Prep Time 10 minutes
Cook Time 10 minutes
Total Time 20 minutes
Servings 4 pieces
Calories 350
A nutritious and delicious quesadilla recipe featuring lean turkey and fresh spinach, perfect for a quick meal.

Ingredients

Main Ingredients

  • 1 tablespoon olive oil
  • 8 ounces ground turkey
  • 1 clove garlic (minced)
  • 2-3 cups fresh spinach
  • 1/4 teaspoon salt
  • To Taste pepper
  • 1/4 teaspoon dried oregano
  • 2 large tortillas
  • 2 cups mozzarella cheese (shredded)

Instructions 

  • Cook turkey in heated skillet with olive oil until browned.
  • Add garlic and spinach; cook until wilted. Season with salt, pepper, oregano.
  • Layer cheese and turkey mixture on tortillas, fold in half.
  • Cook each quesadilla in skillet until golden, flipping halfway.
  • Cut into 4 pieces and serve.

Notes

Use fresh spinach for best flavor and nutrition.
Calories: 350kcal
Cost: $12
Course: Main Course
Cuisine: American
Keyword: healthy, Quesadilla, Turkey

Welcome to the delightful world of chocolate-dipped mini éclairs! If you’re looking to impress your guests or simply indulge in a sweet treat, this recipe is your ticket to pastry perfection. These charming little desserts combine the classic techniques of making choux pastry with a luscious pastry cream filling and a rich chocolate glaze. In just a few simple steps, you’ll master the art of making these irresistible treats that are sure to become a favorite in your kitchen.

Why You’ll Love This Recipe

This recipe for chocolate-dipped mini éclairs is not only delicious but also incredibly versatile. Here’s why you’ll love making them:

  • Perfect for Any Occasion: Whether it’s a birthday party, holiday gathering, or an afternoon tea, these mini éclairs are an elegant addition to any dessert table.
  • Easy to Customize: You can fill your éclairs with different flavors of pastry cream, such as chocolate, coffee, or fruit-flavored fillings, to suit your taste.
  • Impressive Presentation: With their glossy chocolate glaze and light airy texture, these éclairs will wow your friends and family.
  • Satisfy Your Sweet Tooth: Each bite is a delightful combination of crisp pastry, creamy filling, and rich chocolate, making them incredibly satisfying.
  • Make-Ahead Friendly: You can prepare the choux pastry and filling in advance, making them easy to assemble when you’re ready to serve.

Ingredient Breakdown

Here’s what you’ll need to make these delectable mini éclairs, along with some substitution suggestions:

  • 1/2 cup (120ml) water: Essential for creating steam in the oven to puff the pastry.
  • 1/2 cup (120ml) whole milk: Adds richness to the choux pastry.
  • 8 tbsp (113g) unsalted butter: Provides flavor and moisture; can substitute with margarine if needed.
  • 1 tsp granulated sugar: Enhances the flavor; optional if you prefer less sweetness.
  • 1/4 tsp salt: Balances the sweetness; essential for flavor.
  • 1 cup (125g) all-purpose flour: The base of your choux pastry; you can use gluten-free flour if necessary.
  • 4 large eggs: Binds the ingredients and helps the pastry rise.
  • 2 cups (480ml) whole milk: For the pastry cream; can substitute with almond or soy milk.
  • 1 tsp vanilla bean paste: Adds a rich vanilla flavor; vanilla extract can be used as an alternative.
  • 4 large egg yolks: Enriches the pastry cream; egg substitutes may not yield the same results.
  • 2/3 cup (133g) granulated sugar: Sweetens the cream; adjust to taste.
  • 1/4 cup (32g) cornstarch: Thickens the pastry cream; could use arrowroot starch as a substitute.
  • Pinch of salt: Enhances flavor.
  • 2 tbsp (28g) unsalted butter: For a glossy finish in the pastry cream.
  • 4 oz (113g) semi-sweet chocolate, chopped: For the glaze; dark chocolate can be used for a richer taste.
  • 1 tbsp (14g) unsalted butter: Adds shine to the chocolate glaze.

How to Make Chocolate-Dipped Mini Éclairs

Follow these steps to create your very own mini éclairs:

  • Prepare the Choux Pastry: In a medium saucepan, combine the water, milk, butter, sugar, and salt over medium heat until the butter has melted. Bring the mixture to a boil. Remove from heat and stir in the flour, mixing vigorously until it forms a ball of dough. Let it cool slightly before adding eggs one by one, mixing until fully incorporated.
  • Pipe the Éclairs: Transfer the choux pastry dough to a piping bag fitted with a large round tip. Pipe 2-inch long strips onto a baking sheet lined with parchment paper, spacing them apart. Bake in a preheated oven at 400°F (200°C) for about 20-25 minutes, or until puffed and golden brown.
  • Make the Pastry Cream: In a saucepan, heat the milk and vanilla bean paste until just simmering. In a bowl, whisk egg yolks, sugar, cornstarch, and salt until smooth. Gradually whisk in the hot milk mixture, then return to the saucepan and cook over medium heat until thickened. Remove from heat and stir in butter. Cool completely.
  • Fill the Éclairs: Once the pastry shells are cooled, use a small knife to poke a hole in the side of each éclair. Fill a piping bag with the pastry cream and fill each éclair through the hole.
  • Prepare the Chocolate Glaze: Melt the chopped chocolate and butter together over a double boiler or in the microwave, stirring until smooth. Dip the top of each filled éclair into the glaze, allowing the excess to drip off.
  • Serve and Enjoy: Arrange the éclairs on a serving platter and enjoy them fresh! You can also chill them in the fridge for a few hours for a firmer filling.

Pro Tips for the Best Chocolate-Dipped Mini Éclairs

Close-up shot of perfectly crafted mini éclairs with a shiny chocolate glaze, revealing their delicious filling.
  • Perfect Texture: Ensure the choux pastry is well-mixed before baking to achieve a light, airy texture.
  • Don’t Open the Oven Door: Avoid opening the oven door while baking to prevent the pastry from collapsing.
  • Cool the Pastry Shells: Let the pastry shells cool completely before filling; otherwise, the cream may melt.
  • Temperature Matters: Use room temperature eggs to ensure they blend smoothly into the dough.
  • Pipe with Precision: When piping, keep a steady hand and maintain consistent pressure for uniform éclairs.
  • Chill the Cream: For a firmer pastry cream, chill it in the fridge after cooling it to room temperature.
  • Use Quality Ingredients: High-quality chocolate and butter enhance the flavor significantly.
  • Experiment with Flavors: Don’t hesitate to try different fillings like lemon curd or coffee-flavored cream for variety.

Common Mistakes and Troubleshooting

Every chef makes mistakes, but knowing how to troubleshoot can save your dessert:

  • Éclairs Collapse: This usually happens due to opening the oven too soon or not mixing the dough enough. Keep the oven closed and ensure your dough is well-prepared.
  • Pastry Cream is Watery: If your pastry cream is too thin, it likely didn’t cook long enough. Make sure to cook until it’s thick and coats the back of a spoon.
  • Choux Pastry is Too Dense: Overmixing or adding too many eggs can lead to a dense pastry. Follow the recipe closely for the best results.

Variations of Mini Éclairs You Can Try

Feel free to switch things up with these delightful variations:

  • Coffee Éclairs: Infuse your pastry cream with espresso for a coffee-flavored treat.
  • Fruit-Filled Éclairs: Substitute the vanilla pastry cream with your favorite fruit-flavored cream or curd.
  • Nutty Éclairs: Fold finely chopped nuts into the pastry cream for added texture and flavor.
  • Caramel Éclairs: Drizzle caramel sauce over the chocolate glaze for a sweet twist.

Storage and Make-Ahead Instructions

You can prepare components of this recipe in advance:

  • Choux Pastry: Can be made a day ahead and stored in an airtight container at room temperature.
  • Pastry Cream: Prepare the cream up to 2 days in advance. Store it covered in the fridge.
  • Assemble Before Serving: For the best texture, fill and glaze the éclairs just before serving.

Frequently Asked Questions About Chocolate-Dipped Mini Éclairs

  • What are éclairs filled with? Éclairs are traditionally filled with cream, such as pastry cream. You can also fill them with whipped cream or custard.
  • Can you freeze éclairs? While the pastry can be frozen, filled éclairs are best enjoyed fresh. If freezing, fill them after thawing.
  • How long do mini éclairs last? They are best eaten within 1-2 days, but can last up to a week in the refrigerator.
  • Can I use a different filling? Absolutely! Feel free to experiment with various fillings to suit your taste.
  • How do I avoid common mistakes with chocolate-dipped mini éclairs? Follow the instructions closely, and don’t rush the process. Patience is key!
  • Can I make these éclairs gluten-free? Yes, by substituting all-purpose flour with a gluten-free blend.
  • What’s the secret to perfect chocolate-dipped mini éclairs? The key is in the preparation of the choux pastry and pastry cream. Always ensure temperatures and measurements are accurate.
  • Can I make mini éclairs ahead of time? Yes, components can be prepared in advance, but assemble them just before serving for the best texture.

Nutritional Tips and Dietary Adaptations

For those watching their diets, consider these adaptations:

  • Lower Sugar Options: Reduce the sugar in the pastry cream or use a sugar substitute.
  • Non-Dairy Alternatives: Use almond or coconut milk and dairy-free butter for a vegan version.
  • Whole Grain Flour: Substitute all-purpose flour with whole wheat or spelt flour for added nutrients.
  • Portion Control: Make smaller éclairs to keep portion sizes in check while indulging.

Equipment Recommendations

To make your baking experience smoother, consider using:

  • Piping Bag with a Round Tip: Essential for shaping your éclairs perfectly.
  • Silicone Baking Mat: Provides a non-stick surface for easy removal of éclairs.
  • Medium Saucepan: For making both the choux pastry and pastry cream.
  • Whisk and Mixing Bowls: To ensure thorough mixing of ingredients for the pastry cream.

Serving Suggestions

Delight your guests by serving these mini éclairs with:

  • Fresh Berries: Strawberries or raspberries add a refreshing contrast to the sweetness.
  • Coffee or Tea: Pair your éclairs with a warm beverage for a complete experience.
  • Chocolate Sauce: Drizzle extra chocolate sauce on top for a decadent touch.

In conclusion, making chocolate-dipped mini éclairs at home is not just a baking task; it’s an adventure in creating delightful desserts that can be enjoyed by everyone. With practice and these expert tips, you’ll soon be whipping up these elegant treats like a pro. So gather your ingredients and start baking—your kitchen is about to become a haven for sweet indulgence!

How to Make Perfect Chocolate-Dipped Mini Éclairs

Prep Time 30 minutes
Cook Time 20 minutes
Total Time 50 minutes
Servings 12 pieces
Calories 250
Learn how to create delicate mini éclairs filled with creamy custard and dipped in rich chocolate for a delightful treat.

Ingredients

Dough

  • 1/2 cup water
  • 1/2 cup whole milk
  • 8 tbsp unsalted butter
  • 1 tsp granulated sugar
  • 1/4 tsp salt
  • 1 cup all-purpose flour
  • 4 large eggs
  • 2 cups whole milk
  • 1 tsp vanilla bean paste
  • 4 large egg yolks
  • 2/3 cup granulated sugar
  • 1/4 cup cornstarch
  • pinch salt
  • 2 tbsp unsalted butter
  • 4 oz semi-sweet chocolate chopped
  • 1 tbsp unsalted butter

Instructions 

  • Combine water, milk, butter, sugar, and salt; bring to a boil.
  • Stir in flour until dough forms, then cook briefly.
  • Transfer dough to a bowl, beat in eggs one at a time until smooth.
  • Pipe dough into mini éclairs and bake at 375°F (190°C) for 20 minutes.
  • Prepare custard with milk, egg yolks, sugar, cornstarch, and vanilla; cook until thickened.
  • Fill éclairs with custard, then dip in melted chocolate mixed with butter.

Notes

Ensure éclairs are fully cooled before filling and dipping to prevent melting.
Calories: 250kcal
Cost: $15
Course: Dessert
Cuisine: French
Keyword: chocolate

Discover the Joy of Mini Chocolate Eclairs

Welcome to a delightful journey of crafting the perfect Mini Chocolate Eclairs! These bite-sized treats are a fantastic way to indulge in a classic French dessert with a modern twist. Perfectly filled with creamy vanilla pudding and topped with luscious chocolate, they are sure to impress at gatherings or simply satisfy your sweet tooth. In this comprehensive guide, we’ll walk through every step to make these mini eclairs, ensuring you have all the tips and tricks to create a stunning dessert that everyone will love.

Why You’ll Love This Recipe

  • Easy to Follow: This recipe breaks down the process into simple steps, making it accessible for both novice bakers and seasoned chefs.
  • Deliciously Versatile: You can customize the filling and toppings to suit your taste, whether you prefer classic chocolate or fruity alternatives.
  • Perfect for Any Occasion: These mini eclairs are ideal for parties, celebrations, or even a quiet afternoon treat.
  • Make Ahead Option: Prepare the eclairs in advance and fill them just before serving for a fresh and delightful experience.
  • Impressive Presentation: Their elegant appearance will surely wow your guests and elevate any dessert table.

Ingredient Breakdown

Let’s explore the ingredients that bring these mini chocolate eclairs to life. Here’s what you’ll need:

  • 1/2 cup (1 stick) butter: Adds richness and flavor to the pastry.
  • 1 cup water: Essential for creating the right pastry consistency.
  • 1/8 tsp salt: Enhances the overall flavor of the eclairs.
  • 1 cup flour: The base for the pastry dough; use all-purpose flour for best results.
  • 4 medium eggs: Provides structure and moisture to the eclair shells.
  • 1 small box instant vanilla pudding: For a creamy, luscious filling.
  • 1 cup evaporated milk: Adds richness to the pudding.
  • 1/4 cup milk: To soften the chocolate ganache.
  • 1/2 cup milk chocolate chips and 1/2 cup semi-sweet chocolate chips: For a decadent topping.
  • 1 TBSP butter: To add sheen to the chocolate ganache.
  • 2 TBSP milk: Helps achieve a smooth chocolate glaze.

Step-by-Step Guide to Making Mini Eclairs

Delicious mini chocolate eclairs arranged neatly, showcasing their rich texture.

Follow these detailed steps to create your mini eclairs:

  1. In a medium pot, bring the butter, water, and salt to a boil over high heat.
  2. Stir in the flour all at once and continue stirring for about 30 seconds. Turn off the heat and keep stirring until the mixture is smooth.
  3. Transfer the pastry to a large mixing bowl and let it cool for about 5 minutes.
  4. Mix in the eggs one at a time, beating well after each addition.
  5. Preheat your oven to 425°F (220°C).
  6. Transfer the pastry to a large pastry bag (no tip needed) and pipe onto a parchment-lined baking sheet, about 3 inches long and 1 inch wide.
  7. If any points stick up, wet your fingers and gently tap them down.
  8. Bake for 15 minutes, then reduce the heat to 375°F (190°C) and continue baking for another 10-15 minutes until golden brown.
  9. Allow the eclairs to cool completely before filling.
  10. In a medium bowl, whisk together the pudding mix, evaporated milk, and milk until smooth.
  11. Transfer the cream to a pastry bag fitted with a medium round tip. Poke the tip into the side of each eclair and fill with cream.
  12. In a microwave-safe bowl, melt the chocolate chips, butter, and milk together for about 40 seconds. Stir every 10 seconds until smooth.
  13. Dip the top of each eclair into the melted chocolate and gently shake off any excess.

Expert Pro Tips

  • Use High-Quality Ingredients: For the best flavor, choose high-quality butter and chocolate.
  • Don’t Overmix: When adding eggs, mix just until incorporated to avoid tough pastry.
  • Cool Before Filling: Ensure the eclairs are completely cool before adding the filling to maintain their structure.
  • Experiment with Flavors: Consider adding flavored extracts like almond or hazelnut to the pastry for a unique twist.
  • Be Mindful of Oven Temperature: Accurate temperature is crucial for achieving the right puff in your eclairs.
  • Use a Pastry Bag: This allows for precise piping and uniform eclair size.
  • Try Different Fillings: Swap out the vanilla pudding for pastry cream or whipped cream for variety.
  • Store Wisely: Keep unfilled eclairs in an airtight container to maintain their crispness.

Common Mistakes and Troubleshooting

Even seasoned bakers can run into challenges. Here’s how to avoid some common pitfalls:

  • Flat Eclairs: Ensure the oven is fully preheated and avoid opening the door during baking.
  • Too Chewy: Overmixing the dough can lead to tough eclairs. Mix just until combined.
  • Wet Filling: If your filling is too runny, try using less liquid or chilling it before piping.

Variations to Explore

Get creative with these delicious variations:

  • Fruit-Filled Eclairs: Substitute the vanilla pudding with lemon curd or berry mousse for a fruity twist.
  • Chocolate Ganache Eclairs: Use a rich chocolate ganache as both filling and topping for chocoholics.
  • Coffee Eclairs: Add espresso powder to the filling for a mocha flavor.
  • Nutty Eclairs: Incorporate ground nuts into the pastry for added texture and flavor.

Storage and Make-Ahead Instructions

To enjoy your mini eclairs later, follow these tips:

  • Store unfilled eclairs in an airtight container at room temperature for up to 2 days.
  • Filled eclairs are best enjoyed fresh but can be stored in the fridge for up to 1 day. Just be aware that they may lose some crispness.
  • You can prepare the pastry dough a day in advance and refrigerate it. Just give it a quick stir before piping.

Frequently Asked Questions

Here are some common queries about making mini chocolate eclairs:

  • Can I freeze mini eclairs? Yes, you can freeze unfilled eclairs. Just wrap them tightly and store them in the freezer for up to 2 months.
  • What can I use instead of evaporated milk? You can substitute with whole milk or cream, though the texture may vary slightly.
  • Can I make eclairs without eggs? Yes, there are egg substitutes like aquafaba or commercial egg replacers for a vegan option.
  • How do I know when the eclairs are done baking? They should be golden brown and firm to the touch.
  • What is the best way to fill eclairs? Use a pastry bag fitted with a small round tip to ensure even filling.
  • Can I add flavors to the pastry dough? Absolutely! Adding a few drops of vanilla or almond extract will enhance the flavor.
  • Why did my eclairs deflate? This could be due to opening the oven too soon or not cooking them long enough initially.
  • What other toppings can I use? Consider whipped cream, caramel, or even fruit glazes for a creative touch.

Nutritional Tips and Dietary Adaptations

For those mindful of nutrition, here are some tips:

  • Lower Sugar Option: Use sugar-free pudding mix for a reduced-sugar version.
  • Dairy-Free Alternative: Substitute non-dairy milk and vegan butter for a dairy-free eclair.
  • Gluten-Free Option: Use a gluten-free flour blend to accommodate gluten sensitivities.

Essential Equipment for Success

Having the right tools can make a significant difference in your baking experience:

  • Pastry Bag: Essential for piping the pastry and filling.
  • Parchment Paper: Prevents sticking and ensures easy removal.
  • Mixing Bowls: Use various sizes for mixing dough and fillings.
  • Whisk: A good whisk is crucial for achieving a smooth filling.

Serving Suggestions

When it comes to serving your mini eclairs, presentation is key:

  • Arrange on a Platter: Serve them on a beautiful platter or tiered cake stand for an impressive display.
  • Garnish with Fresh Berries: A few berries can add color and freshness to your dessert.
  • Drizzle with Sauce: Consider drizzling some chocolate or caramel sauce for an extra touch of sweetness.

In conclusion, crafting Mini Chocolate Eclairs is not only rewarding but also a fantastic way to bring joy to your kitchen and share delicious moments with loved ones. With the right techniques and a little practice, you’ll be able to create these delightful treats that are sure to impress. So, roll up your sleeves, gather your ingredients, and let’s make some magic in the kitchen!

Mini Chocolate Eclairs

Prep Time 20 minutes
Cook Time 30 minutes
Total Time 50 minutes
Servings 12 pieces
Calories 250
Delight in these classic mini eclairs filled with vanilla pudding and topped with rich chocolate.

Ingredients

Dough

  • 1/2 cup butter
  • 1 cup water
  • 1/8 tsp salt
  • 1 cup flour
  • 4 medium eggs

Filling

  • 1 small box instant vanilla pudding
  • 1 cup evaporated milk
  • 1/4 cup milk

Chocolate Topping

  • 1/2 cup milk chocolate chips
  • 1/2 cup semi sweet chocolate chips
  • 1 Tbsp butter
  • 2 Tbsp milk

Instructions 

  • Bring butter, water, and salt to a boil. Stir in flour and cook until smooth.
  • Cool pastry, then beat in eggs one at a time. Pipe onto a baking sheet and bake at 425°F for 15 minutes, then reduce to 375°F and bake 10-15 minutes.
  • Whisk pudding with evaporated milk and additional milk. Fill cooled eclairs with pudding using a pastry bag.
  • Melt chocolate chips, butter, and milk; dip tops of eclairs in the chocolate. Cool before serving.

Notes

Ensure the pastry is fully cooled before filling to prevent melting the pudding.
Calories: 250kcal
Cost: $15
Course: Dessert
Cuisine: French
Keyword: chocolate

Unlock the Comfort of Homemade Chicken Alfredo Lasagna Roll Ups

If you’re looking for a dish that combines indulgence and comfort, look no further than **Chicken Alfredo Lasagna Roll Ups**. This delightful recipe marries tender lasagna noodles with creamy **Alfredo sauce** and shredded chicken, providing a cozy twist on a classic Italian favorite. Perfect for weeknight dinners, family gatherings, or even special occasions, these roll-ups are an impressive yet simple way to bring everyone together around the table. In this comprehensive guide, we’ll explore the ins and outs of making these scrumptious roll-ups, ensuring that your culinary experience is both enjoyable and rewarding.

Why You’ll Love This Recipe

  • Quick and Easy Preparation: With just a few simple steps, you can whip up a delicious meal that feels like a restaurant dish, making it perfect for busy weeknights.
  • Make-Ahead Friendly: Prepare these roll-ups ahead of time, freeze them, and bake when you’re ready. This is a lifesaver for meal prep enthusiasts!
  • Customizable Flavor: The filling can be easily modified to include your favorite ingredients, allowing you to personalize each roll-up to your family’s taste.
  • Impressive Presentation: These roll-ups not only taste amazing but also look stunning on the plate, making them perfect for entertaining guests.
  • Comfort Food at Its Best: The combination of creamy **Alfredo sauce**, tender chicken, and cheesy goodness creates a dish that feels like a warm hug on a plate.

Ingredients You’ll Need

Creating **Chicken Alfredo Lasagna Roll Ups** requires a few staple ingredients, many of which you might already have in your pantry. Here’s what you’ll need:

  • 9 lasagna noodles: Look for oven-ready noodles for ease, or regular ones cooked al dente.
  • 3 cups cooked chicken breast, shredded: Rotisserie chicken works well for a quick option.
  • 1 1/2 cups ricotta cheese: Adds creaminess and richness to the filling.
  • 1 cup shredded mozzarella cheese: A must for that gooey, cheesy topping.
  • 1/2 cup grated Parmesan cheese: Provides a savory kick and depth of flavor.
  • 2 cups Alfredo sauce: Store-bought or homemade, this is the star of the dish.
  • 1 teaspoon garlic powder: For added flavor.
  • 1/2 teaspoon salt: Essential for seasoning the filling.
  • 1/4 teaspoon black pepper: Adds a subtle spice.
  • 1 tablespoon chopped fresh parsley: For garnish and a touch of freshness.

Step-by-Step Instructions: Crafting Your Chicken Alfredo Lasagna Roll Ups

An appetizing side view of lasagna roll ups showcasing their creamy and cheesy filling.

Follow these detailed steps to create your Chicken Alfredo Lasagna Roll Ups:

  1. Preheat the Oven: Start by preheating your oven to 375°F (190°C). Spread 1/2 cup of **Alfredo sauce** in the bottom of a 9×13-inch baking dish.
  2. Cook the Lasagna Noodles: Prepare the lasagna noodles according to package directions until al dente. Drain and set aside.
  3. Prepare the Filling: In a mixing bowl, combine the shredded chicken, ricotta cheese, 1/2 cup of mozzarella, Parmesan, garlic powder, salt, and pepper. Mix until well combined.
  4. Spread the Filling: Lay out each lasagna noodle on a flat surface, then evenly spread the chicken and cheese filling over each noodle.
  5. Roll Up the Noodles: Carefully roll each noodle tightly, starting from one end and placing the seam-side down in the prepared baking dish.
  6. Top with Sauce: Spoon the remaining **Alfredo sauce** over the rolled noodles, ensuring they are well covered.
  7. Add Cheese: Sprinkle the remaining mozzarella cheese generously over the top.
  8. Bake: Place the baking dish in the preheated oven and bake for 25 to 30 minutes or until bubbly and golden brown.
  9. Garnish and Serve: Once baked, remove from the oven and garnish with chopped parsley before serving.

Pro Tips for Making the Recipe

  • Don’t Overcook the Noodles: Cook them just until al dente to prevent tearing when rolling.
  • Make it Gluten-Free: Substitute traditional lasagna noodles with gluten-free options for a delicious alternative.
  • Adjust the Cheese: Feel free to mix in different cheeses like cheddar or pepper jack for a flavor twist.
  • Spice it Up: Add some crushed red pepper flakes to the filling for an extra kick.
  • Include Veggies: Spinach or sautéed mushrooms can be added to the filling for added nutrition.
  • Cover While Baking: If the top browns too quickly, cover loosely with foil for the remaining baking time.
  • Let it Rest: Allow the roll-ups to sit for 5-10 minutes after baking to make slicing easier.
  • Freeze for Later: Assemble and freeze before baking for up to three months. Just increase the baking time if cooking from frozen.

Common Mistakes and Troubleshooting

Even the best home chefs can face challenges when preparing new dishes. Here are some common pitfalls and how to avoid them:

  • Filling Too Much: Avoid overstuffing the noodles, which can cause them to burst during baking.
  • Noodles Sticking Together: Make sure to separate the noodles with a little olive oil if they stick.
  • Runny Sauce: If your sauce is too watery, simmer it on low heat to thicken before using.
  • Dry Roll Ups: Ensure you cover the roll-ups with sufficient sauce to prevent them from drying out in the oven.

Variations to Try

Feel free to get creative with these variations of Chicken Alfredo Lasagna Roll Ups:

  • Spinach and Ricotta Roll Ups: Substitute chicken with sautéed spinach and ricotta for a vegetarian version.
  • Buffalo Chicken Alfredo Roll Ups: Mix shredded chicken with hot sauce and ranch dressing for a spicy twist.
  • Mediterranean Roll Ups: Incorporate feta cheese, olives, and sun-dried tomatoes into the filling for a Mediterranean flavor.
  • Mexican Chicken Alfredo Roll Ups: Add taco seasoning and black beans for a fusion dish that’s full of flavor.

Storage and Make-Ahead Instructions

To store your Chicken Alfredo Lasagna Roll Ups, follow these guidelines:

  • Refrigeration: Store leftover roll-ups in an airtight container in the refrigerator for up to three days.
  • Freezing: Assemble the roll-ups, cover tightly with foil, and freeze. When ready to bake, add an additional 10-15 minutes to the cooking time if baking from frozen.
  • Reheating: To reheat, cover with foil and bake at 350°F (175°C) until heated through, about 20 minutes.

Frequently Asked Questions (FAQ)

  • Can I use store-bought Alfredo sauce? Yes, store-bought **Alfredo sauce** is perfectly acceptable if you’re short on time!
  • Can I make this dish vegetarian? Absolutely! Simply omit the chicken and add extra vegetables or a mix of ricotta and spinach.
  • How do I know when the roll-ups are done? They are ready when the cheese is melted and bubbling, and the top is slightly golden.
  • Can I use whole wheat lasagna noodles? Yes, whole wheat noodles can be used for a healthier option.
  • What can I serve with these roll-ups? A fresh green salad or garlic bread pairs wonderfully with this dish.
  • Is this recipe kid-friendly? Yes! The flavors are mild and appealing, making it a hit with kids.
  • Can I add different cheeses? Yes! Feel free to experiment with your favorite cheeses for different flavors and textures.
  • How can I make it spicier? Add crushed red pepper flakes or diced jalapeños to the filling for an extra kick!

Nutritional Tips and Dietary Adaptations

This recipe can be adapted to suit various dietary needs:

  • Low-Carb Version: Substitute lasagna noodles with zucchini strips for a lighter dish.
  • Dairy-Free Option: Use dairy-free cheese and a plant-based **Alfredo sauce** for a dairy-free meal.
  • High-Protein Option: Increase the amount of chicken or add beans to enhance the protein content.

Equipment Recommendations

Here are some essential tools to make your cooking process smooth and efficient:

  • 9×13-inch Baking Dish: Ideal for baking and presenting your roll-ups.
  • Mixing Bowls: For combining ingredients easily.
  • Cooking Pot: To boil the lasagna noodles.
  • Measuring Cups and Spoons: To ensure accurate ingredient measurements.
  • Sharp Knife: For slicing the roll-ups after baking.

Serving Suggestions

To elevate your meal, consider these serving ideas:

  • Fresh Salad: A simple arugula salad with lemon vinaigrette complements the richness of the roll-ups.
  • Garlic Bread: Serve warm garlic bread for a classic pairing.
  • Wine Pairing: A crisp white wine like Pinot Grigio works beautifully with the creamy flavors.

Conclusion

Making **Chicken Alfredo Lasagna Roll Ups** is not only an enjoyable cooking experience but also results in a heartwarming dish that brings family and friends together. With the right ingredients, a few simple steps, and a bit of creativity, you can create a meal that is both comforting and impressive. Enjoy this delightful recipe, and remember, the kitchen is where memories are made—happy cooking!

Chicken Alfredo Lasagna Roll Ups

Prep Time 20 minutes
Cook Time 30 minutes
Total Time 50 minutes
Servings 6 servings
Calories 550
Delight in these creamy, cheesy chicken lasagna roll ups, perfect for a comforting dinner with a touch of elegance.

Ingredients

Noodles

  • 9 pieces lasagna noodles
  • 3 cups cooked chicken breast, shredded

Cheese

  • 1 1/2 cups ricotta cheese
  • 1 cup shredded mozzarella cheese
  • 1/2 cup grated Parmesan cheese

Sauce

  • 2 cups Alfredo sauce
  • 1 teaspoon garlic powder
  • 1/2 teaspoon salt
  • 1/4 teaspoon black pepper
  • 1 tablespoon chopped fresh parsley

Instructions 

  • Preheat oven to 375°F (190°C). Spread 1/2 cup Alfredo sauce in a baking dish.
  • Cook lasagna noodles until al dente, drain, then spread filling over each noodle and roll up.
  • Place rolls seam-side down, top with remaining Alfredo sauce and mozzarella, then bake for 25-30 minutes.
  • Garnish with parsley before serving.

Notes

For a lighter version, use part-skim cheese and reduce the Alfredo sauce.
Calories: 550kcal
Cost: $15
Course: Main Course
Cuisine: Italian
Keyword: Chicken, lasagna