Author

Mike

Browsing

Welcome to the Sunshine of Baking: Lemon Poppy Seed Loaf Cake

There’s something uniquely uplifting about a slice of lemon poppy seed loaf cake. The bright, zesty flavor of fresh lemons combined with the delightful crunch of poppy seeds makes this cake not just a dessert, but a moment of warmth and comfort. Today, I’m thrilled to share my tried-and-true recipe that’s been a staple in my kitchen for years. Whether you’re treating yourself or impressing guests, this cake embodies the essence of home-baked goodness.

Why You’ll Love This Recipe

There are countless reasons to fall in love with this lemon poppy seed loaf cake. Here are just a few:

  • Bright, Fresh Flavor: The combination of lemon juice and zest brings a refreshing brightness to each bite.
  • Moist and Tender Texture: Thanks to the yogurt and oil, this loaf cake remains moist, ensuring you savor every slice.
  • Easy to Make: With straightforward steps, even novice bakers can create this delightful dessert.
  • Versatile Serving Options: This cake is perfect for breakfast, dessert, or an afternoon tea snack.
  • Perfect for Any Occasion: Whether it’s a holiday gathering or a simple family dinner, this cake fits right in.

Ingredients Breakdown

Creating the perfect lemon poppy seed loaf cake starts with quality ingredients. Here’s what you’ll need:

  • 2 cups all-purpose flour: The foundation of your loaf. For a gluten-free option, substitute with almond flour or a gluten-free blend.
  • 1 cup granulated sugar: Sweetens the cake while balancing the tartness of the lemon.
  • 2 large eggs: Provides richness and helps bind the ingredients.
  • 1 cup plain yogurt: Adds moisture. You can use Greek yogurt for a thicker texture or substitute with applesauce for a dairy-free option.
  • ½ cup vegetable oil: Keeps the cake moist. You can use melted coconut oil for a hint of tropical flavor.
  • ¼ cup fresh lemon juice: The key to that vibrant lemon flavor.
  • 2 tablespoons lemon zest: Enhances the lemon flavor; be sure to zest before juicing!
  • 2 tablespoons poppy seeds: Adds a delightful crunch and characteristic look.
  • 1 teaspoon baking powder: Ensures the cake rises beautifully.
  • ½ teaspoon baking soda: Aids in leavening and gives the cake a light texture.
  • ½ teaspoon salt: Balances the sweetness.
  • 1 teaspoon vanilla extract: Adds depth of flavor.
  • 1 cup powdered sugar (for glaze): Optional but recommended for a sweet finish.

Step-by-Step Instructions
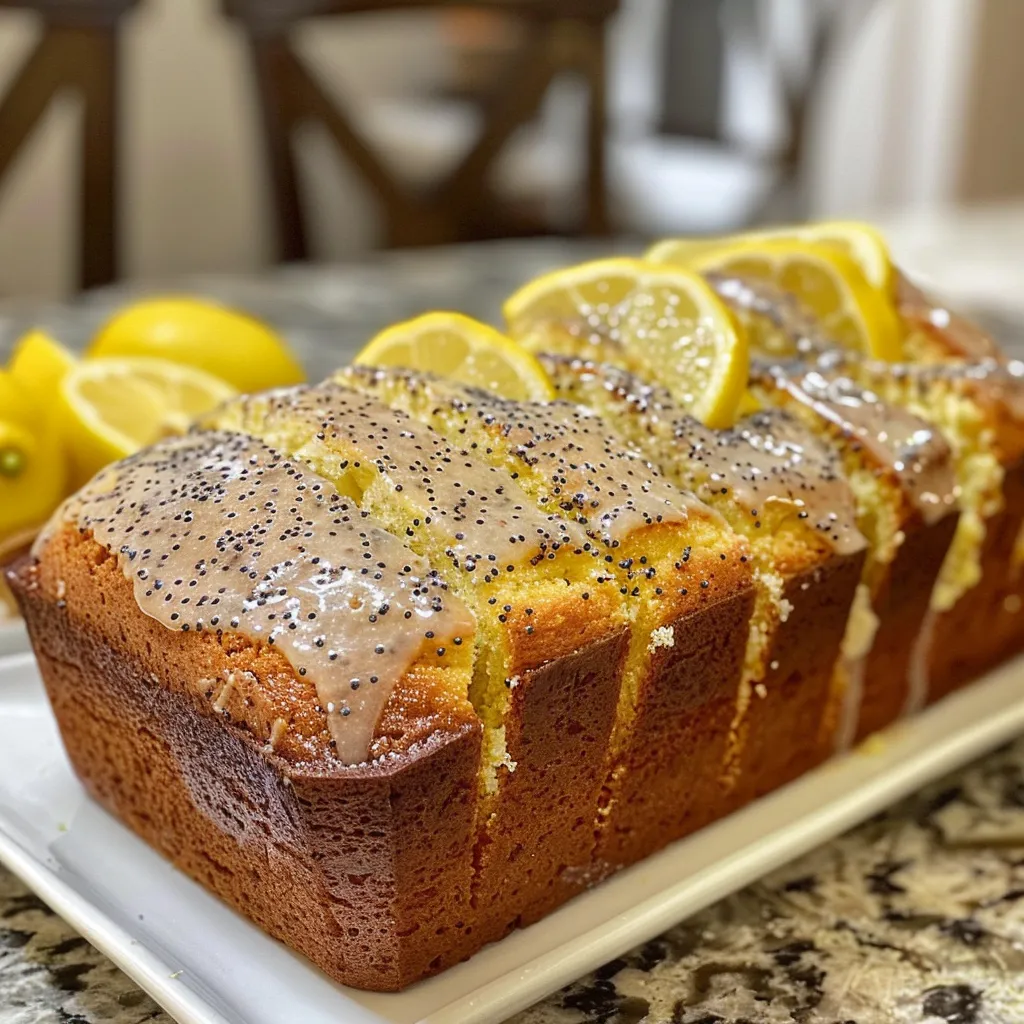
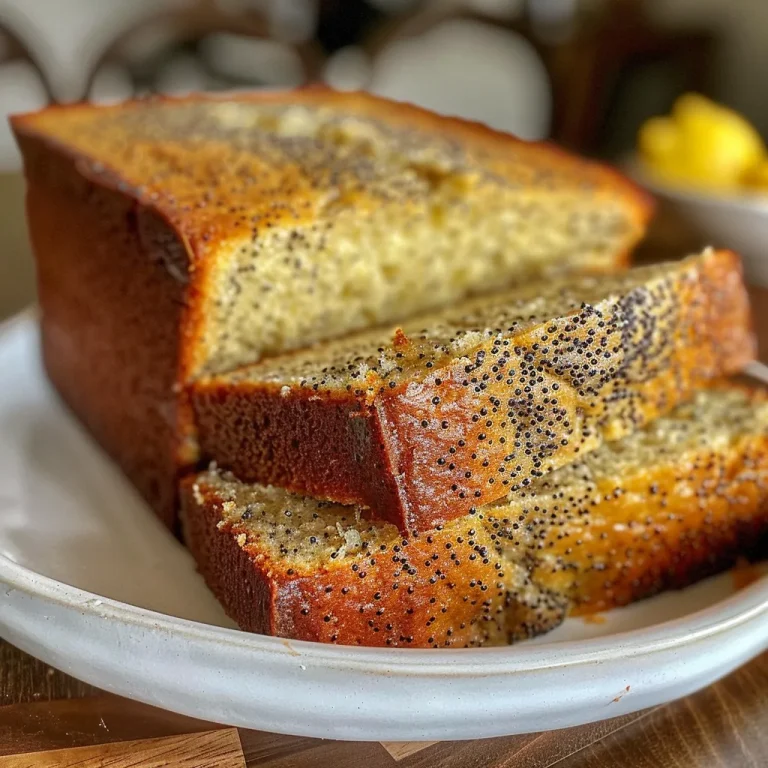
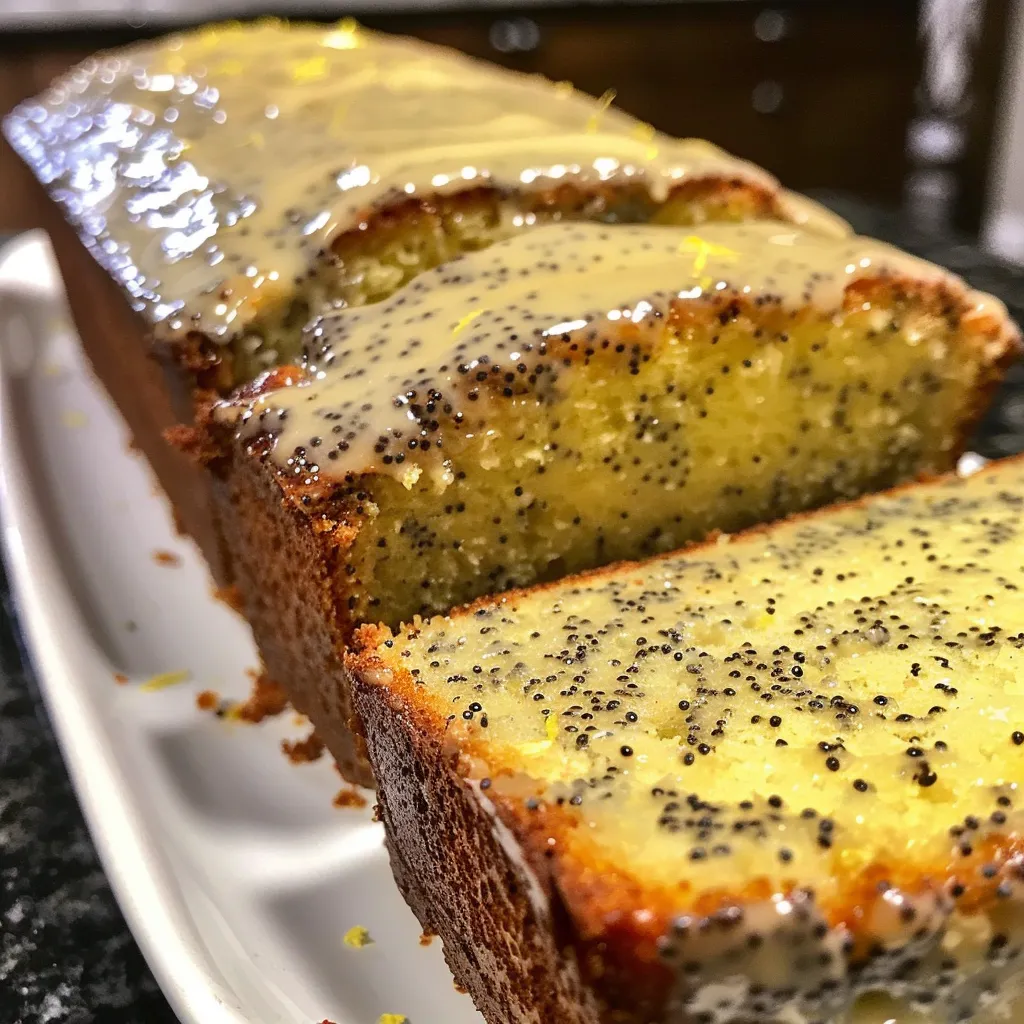
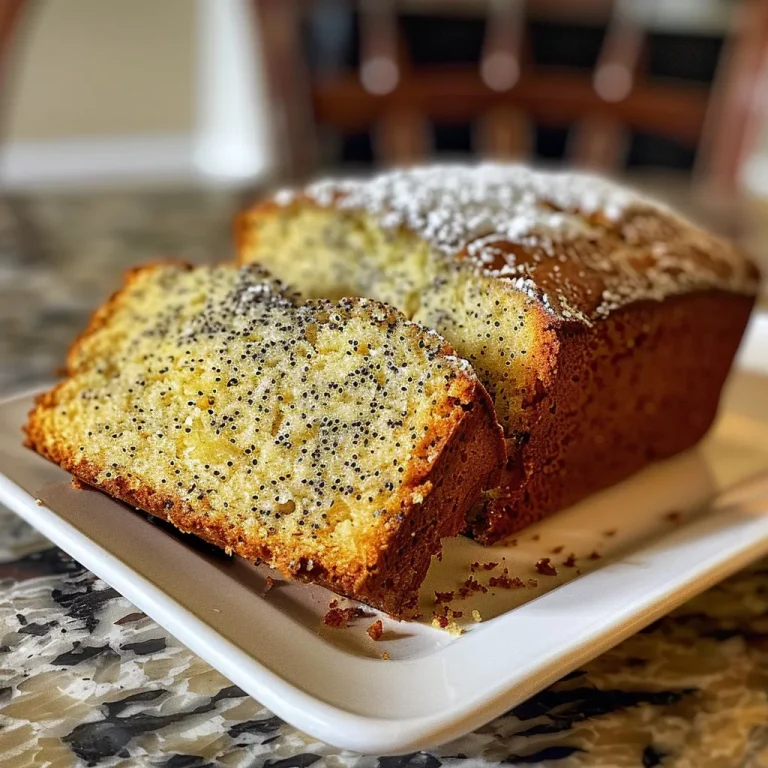
An appetizing slice of lemon poppy seed loaf cake featuring a soft texture and a drizzle of powdered sugar glaze.

Let’s get baking! Follow these simple steps to create a fabulous lemon poppy seed loaf cake:

  1. Preheat your oven to 350°F (175°C). Line a loaf pan with parchment paper for easy release.
  2. In a large bowl, whisk together the flour, baking powder, baking soda, salt, and poppy seeds.
  3. In another bowl, rub the lemon zest into the granulated sugar until fragrant; then add the eggs and whisk until smooth.
  4. Mix in the yogurt, vegetable oil, lemon juice, and vanilla extract until well blended.
  5. Gently fold the dry ingredients into the wet mixture until just combined, being careful not to overmix.
  6. Pour the batter into the prepared loaf pan and smooth the top.
  7. Bake for 50 minutes, or until a toothpick inserted into the center comes out clean.
  8. Allow the loaf to cool completely in the pan before transferring it to a wire rack.
  9. For a sweet glaze, mix powdered sugar with a little lemon juice until smooth and drizzle over the cooled cake.

Pro Tips for Success

Here are some expert insights to ensure your loaf cake turns out perfectly:

  • Use fresh lemons: For the best flavor, opt for fresh lemon juice and zest, not bottled.
  • Measure flour correctly: Spoon the flour into the measuring cup and level it off to avoid a dense loaf.
  • Don’t overmix the batter: Gently combine the ingredients to maintain a tender texture.
  • Cool completely before glazing: This prevents the glaze from melting into the cake.
  • Store properly: Keep the loaf in an airtight container at room temperature for up to 3 days.
  • Make it ahead: This loaf can be made in advance and freezes well. Wrap tightly in plastic wrap before freezing.

Common Mistakes and Troubleshooting

If you encounter any issues while baking, here are some common mistakes and how to avoid them:

  • Dense texture: This often happens due to overmixing or incorrect flour measurement. Be gentle when folding ingredients.
  • Dry cake: Ensure you’re not overbaking. Every oven is different, so check for doneness a few minutes early.
  • Flat loaf: Make sure your baking powder and baking soda are fresh; expired leavening agents can result in insufficient rise.
  • Too much glaze: Start with a small amount of lemon juice mixed with powdered sugar, adding more until you reach your desired consistency.

Variations to Try

Feel free to customize your lemon poppy seed loaf cake with these fun variations:

  • Blueberry Lemon Poppy Seed Loaf: Fold in 1 cup of fresh blueberries for a fruity twist.
  • Lemon Almond Poppy Seed Cake: Replace half of the all-purpose flour with almond flour for a nutty flavor.
  • Gluten-Free Lemon Poppy Seed Loaf: Use a 1:1 gluten-free baking flour blend for a gluten-free version.
  • Lemon Chia Seed Loaf: Substitute poppy seeds with chia seeds for a different texture and added nutrition.

Storage and Make-Ahead Instructions

To keep your lemon poppy seed loaf cake fresh:

  • Room Temperature: Store in an airtight container for up to 3 days.
  • Refrigeration: If you prefer it chilled, it can be kept in the fridge for up to a week.
  • Freezing: Wrap the cooled loaf tightly in plastic wrap and freeze for up to 3 months. Thaw at room temperature before serving.

FAQs About Lemon Poppy Seed Loaf Cake

Here are some frequently asked questions to guide you:

  • Can I use other citrus fruits? Yes! Try orange or lime instead for a different flavor profile.
  • Is this loaf cake suitable for vegan diets? To make it vegan, substitute eggs with flax eggs and use a plant-based yogurt.
  • How can I make it less sweet? Reduce the sugar in the batter and glaze to your preference.
  • Can I add nuts? Absolutely! Chopped walnuts or pecans add a great crunch.
  • What can I serve with this cake? Pair it with tea, coffee, or serve it with a dollop of whipped cream.
  • How do I know when it’s done? A toothpick inserted in the center should come out clean or with a few moist crumbs.
  • Can I double the recipe? Yes! Simply double the ingredients and use two loaf pans.
  • What’s the best way to glaze? Drizzle the glaze over the cake when it’s completely cool for a beautiful finish.

Nutritional Tips and Dietary Adaptations

This lemon poppy seed loaf cake can be adapted for various dietary needs:

  • Lower Sugar: Reduce the sugar in the batter and glaze or use a sugar substitute.
  • Gluten-Free: As mentioned, swap to a gluten-free flour blend.
  • Dairy-Free: Substitute yogurt with a plant-based yogurt or applesauce.

Essential Equipment for Baking Success

Here’s a quick list of tools that will help you create this loaf cake:

  • 9×5 Inch Loaf Pan: Ideal for even baking.
  • Mixing Bowls: A set of various sizes will help in ingredient preparation.
  • Whisk: Essential for combining wet ingredients smoothly.
  • Spatula: For folding and scraping the batter.
  • Parchment Paper: Ensures easy removal of the loaf from the pan.

Serving Suggestions

To enhance your lemon poppy seed loaf cake experience, consider these serving ideas:

  • Fresh Berries: Serve with a side of mixed berries for a refreshing contrast.
  • Whipped Cream: A dollop of whipped cream adds a luxurious touch.
  • Tea or Coffee: Pair your slice with a hot cup to complement the flavors.
  • Lemon Curd: Spread a layer of lemon curd on each slice for extra zing.

In conclusion, my lemon poppy seed loaf cake recipe is a testament to the joy of baking. With its vibrant flavors and inviting aroma, this cake is sure to brighten your day and those of your loved ones. I encourage you to try this recipe and make it your own, adding your personal touch and creating cherished memories around the table. Happy baking!

Lemon Poppy Seed Loaf Cake – A Soft, Sunny Slice of Home and Love

Prep Time 15 minutes
Cook Time 50 minutes
Total Time 1 hour 5 minutes
Servings 8 slices
Calories 350
A delightful lemon-infused loaf cake with poppy seeds, perfect for a sunny afternoon treat or a comforting homemade gift.

Ingredients

Dry ingredients

  • 2 cups all-purpose flour
  • 1 cup granulated sugar
  • 1 teaspoon baking powder
  • 0.5 teaspoon baking soda
  • 0.5 teaspoon salt
  • 2 tablespoons poppy seeds

Wet ingredients

  • 2 large eggs
  • 1 cup plain yogurt
  • 0.5 cup vegetable oil
  • 0.25 cup fresh lemon juice
  • 2 tablespoons lemon zest
  • 1 teaspoon vanilla extract

Glaze

  • 1 cup powdered sugar (for glaze)

Instructions 

  • Preheat oven to 350°F (175°C) and line a loaf pan with parchment paper.
  • Mix dry ingredients and poppy seeds in a bowl.
  • Rub lemon zest into sugar until fragrant, then add eggs and whisk until smooth.
  • Stir in yogurt, oil, lemon juice, and vanilla, then fold in dry ingredients gently.
  • Pour batter into pan and bake for 50 minutes. Cool and drizzle with lemon glaze.

Notes

Store in an airtight container for up to 3 days for best freshness.
Calories: 350kcal
Cost: $15
Course: Dessert
Cuisine: American
Keyword: lemon

Unlock the Delight of High-Protein Matcha Cookies

Welcome to the world of high-protein matcha cookies, where health meets indulgence! In this comprehensive guide, you’ll discover how to create cookies that not only satisfy your sweet tooth but also fuel your body. Packed with nutritious ingredients, these cookies are perfect for any time of the day—whether as a post-workout snack or a treat to enjoy with your afternoon tea. Let’s dive into the details of this delightful recipe that transforms simple ingredients into a culinary masterpiece.

Why You’ll Love This Recipe

Creating these high-protein matcha cookies is more than just baking; it’s a chance to embrace a healthier lifestyle while enjoying delicious treats. Here are several reasons why you’ll adore this recipe:

  • Protein-Packed: Each cookie is loaded with protein from sources like vanilla protein powder and almond flour, making it an ideal post-workout boost.
  • Antioxidant-Rich: The addition of matcha powder provides antioxidants that help fight free radicals in your body.
  • Customizable: You can easily tweak the recipe to suit your taste preferences, adding ingredients like nuts or dried fruits.
  • Quick to Make: With a total prep and bake time of around 20 minutes, you can whip up a batch in no time.
  • Healthier Sweet Treat: The recipe uses maple syrup or honey as natural sweeteners, keeping refined sugars at bay.

Ingredient Breakdown

Let’s take a closer look at the ingredients that make these cookies so special, along with some suggested substitutions:

  • Almond Flour: A gluten-free option that adds moisture and flavor. You can substitute it with oat flour if desired.
  • Vanilla Protein Powder: This provides the protein boost. Feel free to use plant-based or whey protein depending on your dietary preference.
  • Matcha Powder: Use high-quality ceremonial matcha for the best flavor; culinary-grade matcha works too.
  • Baking Powder: Essential for the cookie’s rise; if you’re out, you can use baking soda instead.
  • Sea Salt: Enhances the flavors; Kosher salt can be a good substitute.
  • Egg: Acts as a binder; for a vegan version, substitute with a flax egg (1 tbsp ground flaxseed with 2.5 tbsp water).
  • Coconut Oil or Grass-Fed Butter: Adds richness; olive oil could also work, though the flavor will change slightly.
  • Maple Syrup or Honey: Both are natural sweeteners that add moisture and sweetness; agave syrup is a suitable alternative.
  • Vanilla Extract: A must for flavor; almond extract can be an interesting twist!
  • Healthy White Chocolate Chunks: Use dark chocolate for a lower sugar option or skip it entirely for a cookie with less sweetness.

Step-by-Step Instructions

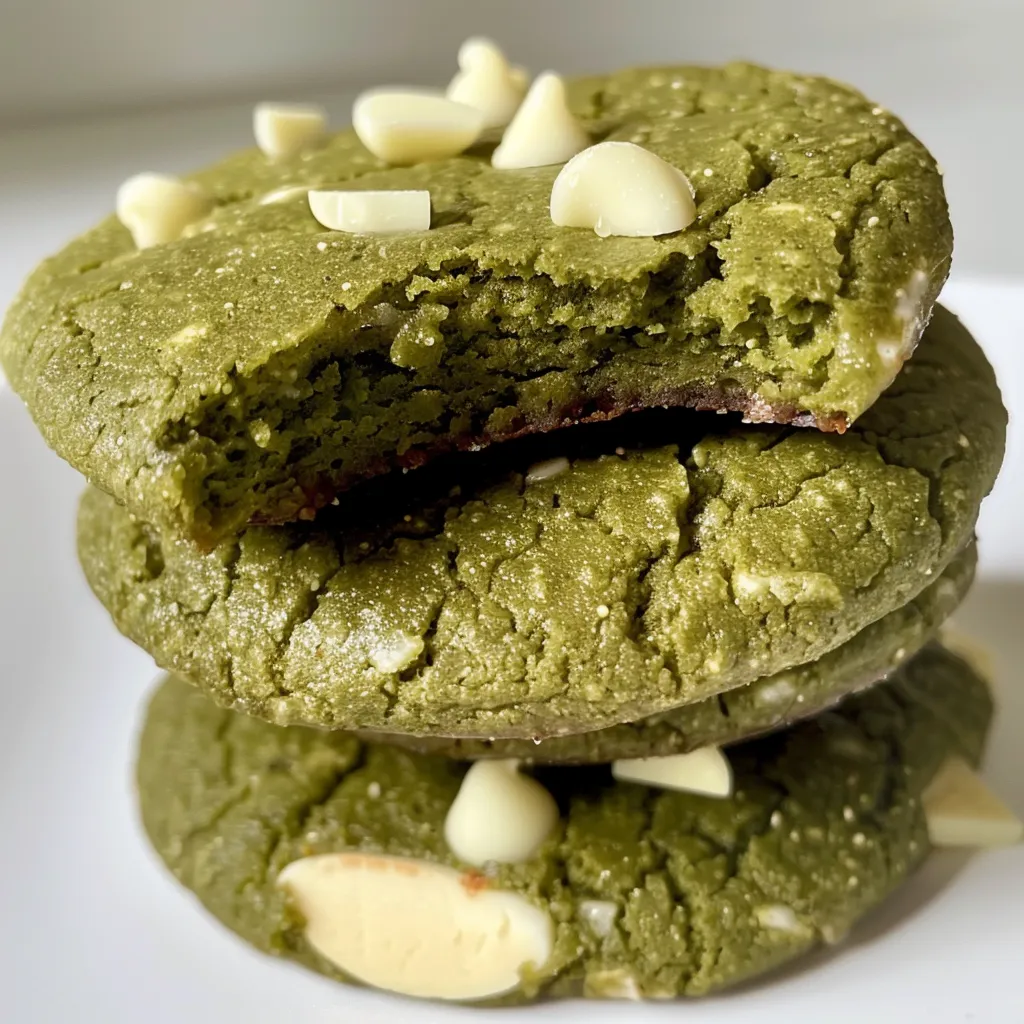
A side view of soft matcha cookies with white chocolate, highlighting their texture and color.

Now, let’s get into the fun part—baking these delicious cookies! Follow these easy steps for the perfect batch:

  1. Preheat your oven to 175°C (350°F) and line a baking sheet with parchment paper.
  2. In a large bowl, mix all the dry ingredients—almond flour, protein powder, matcha powder, baking powder, and sea salt.
  3. In a separate bowl, whisk the wet ingredients together: egg, melted coconut oil (or butter), maple syrup (or honey), and vanilla extract until smooth.
  4. Slowly combine the wet and dry mixtures, stirring gently until just blended.
  5. Fold in the healthy white chocolate chunks until evenly distributed throughout the dough.
  6. Using a cookie scoop, place dollops of dough onto the lined baking tray, gently flattening them.
  7. Bake for 10-12 minutes, or until the edges are set but the centers remain soft. Remember, they will firm up as they cool!
  8. Let them cool for a few minutes before transferring to a wire rack.

Pro Tips for Perfect Cookies

To ensure your cookies come out perfectly every time, consider these expert tips:

  • Room Temperature Ingredients: Make sure your egg and any other chilled ingredients are at room temperature for better mixing.
  • Don’t Overmix: Mix the dough just until combined to maintain a tender texture.
  • Chill the Dough: For thicker cookies, chill the dough for 30 minutes before baking.
  • Use Quality Matcha: Higher-grade matcha will provide a richer flavor and vibrant color.
  • Check Your Oven Temperature: Use an oven thermometer to ensure accuracy; ovens can be off by quite a bit!
  • Adjust Sweetness: Taste the dough before baking; you can always add a bit more sweetener if needed.
  • Keep an Eye on Baking Time: Every oven is different; start checking a couple of minutes before the recommended time.
  • Store Properly: Once cooled, store your cookies in an airtight container to maintain freshness.

Common Mistakes and Troubleshooting

Even the best bakers can run into challenges! Here are some common mistakes and how to fix them:

  • Cookies Spread Too Much: This can happen if the dough is too warm or if there’s too much liquid. Ensure your ingredients are at the right temperature.
  • Cookies are Too Dry: This usually indicates overbaking. Watch them closely and remove them from the oven once the edges are set.
  • Flavor Lacking: If the cookies taste bland, consider adding a pinch more salt or vanilla extract for enhanced flavor.
  • Texture Isn’t Right: Ensure you’re measuring your flour accurately—too much flour can lead to dry cookies.

Variations to Try

Feeling adventurous? Here are some fun variations to customize your high-protein matcha cookies:

  • Nuts and Seeds: Fold in chopped nuts like walnuts or almonds for added crunch and nutrition.
  • Chocolate Chip Matcha Cookies: Replace white chocolate chunks with dark chocolate chips for a richer flavor.
  • Matcha Cranberry Cookies: Add dried cranberries for a fruity twist that balances the earthy matcha.
  • Coconut Matcha Cookies: Incorporate unsweetened shredded coconut for a tropical flair.

Storage and Make-Ahead Instructions

Want to enjoy these cookies later? Here’s how to store them:

  • Room Temperature: Store cookies in an airtight container at room temperature for up to 5 days.
  • Refrigeration: For longer freshness, refrigerate cookies for up to 2 weeks.
  • Freezing: Freeze unbaked cookie dough balls for up to 3 months. Just bake them straight from the freezer, adding a couple of extra minutes to the baking time.

Frequently Asked Questions

Here are some common questions about high-protein matcha cookies:

  • Can I use a different type of protein powder? Yes! Any protein powder can be used, but the flavor and texture may vary.
  • Is matcha safe for everyone? Most people can enjoy matcha, but consult a doctor if you have caffeine sensitivities.
  • How can I make these cookies vegan? Substitute the egg with a flax egg and use plant-based protein powder.
  • What’s the best way to serve these cookies? Enjoy them warm with a cup of tea or coffee for a delightful treat!
  • Are these cookies gluten-free? Yes, as long as you use gluten-free protein powder and almond flour.
  • Can I make them nut-free? Substitute almond flour with sunflower seed flour.
  • What’s the nutritional content? The cookies are high in protein and healthy fats while being low in sugar.
  • How do I know when they’re done baking? The edges should be firm while the centers remain soft.

Nutritional Tips and Dietary Adaptations

When creating these high-protein matcha cookies, keep in mind these nutritional tips:

  • Protein Intake: Consider your daily protein needs; these cookies can help contribute to that goal.
  • Balanced Snacks: Pair these cookies with some fruit or yogurt for a balanced snack.
  • Low-Sugar Options: Adjust the sweeteners to fit your dietary needs; use stevia or erythritol for a lower-calorie treat.
  • Fiber Boost: Add flaxseeds or chia seeds for an extra fiber boost.

Essential Equipment for Baking

To make the baking process smooth and enjoyable, consider using the following tools:

  • Baking Sheet: A high-quality non-stick or parchment-lined baking sheet ensures even baking.
  • Mixing Bowls: Use medium-sized bowls for wet and dry ingredient mixing.
  • Whisk: A whisk is essential for blending wet ingredients smoothly.
  • Cookie Scoop: This tool helps portion the dough evenly for consistent cookie sizes.
  • Cooling Rack: A cooling rack allows the cookies to cool evenly without becoming soggy.

Serving Suggestions

Enjoy these delightful cookies in various ways:

  • With Tea or Coffee: Perfect for pairing with your favorite hot beverage.
  • As a Dessert: Serve with a scoop of ice cream for a deliciously indulgent treat.
  • For Breakfast: Pair with Greek yogurt and fresh fruit for a nourishing start to your day.

Conclusion

These high-protein matcha cookies are a fantastic addition to your recipe repertoire, combining health and indulgence in every bite. With their vibrant green color, rich flavor, and nutritious ingredients, they prove that sweet treats can be part of a balanced lifestyle. So preheat your oven, gather your ingredients, and let’s get baking—deliciousness awaits!

High-Protein Matcha Cookies (With Healthy White Chocolate)

Prep Time 10 minutes
Cook Time 12 minutes
Total Time 22 minutes
Servings 12 cookies
Calories 150
Enjoy these nutritious, protein-packed matcha cookies with a touch of healthy white chocolate for a delightful treat.

Ingredients

dry ingredients

  • 1 cup almond flour
  • ¼ cup vanilla protein powder (whey or plant-based)
  • 1 tbsp ceremonial or culinary-grade matcha
  • ½ tsp baking powder
  • Pinch sea salt

wet ingredients

  • 1 egg egg
  • 2 tbsp melted coconut oil or grass-fed butter
  • 2–3 tbsp maple syrup or honey
  • 1 tsp vanilla extract

add-ins

  • ½ cup healthy white chocolate chunks

Instructions 

  • Preheat oven to 175°C / 350°F.
  • Mix dry ingredients in a bowl.
  • Whisk wet ingredients separately, then combine gently.
  • Fold in white chocolate chunks and scoop onto a lined tray.
  • Bake for 10–12 minutes, then cool slightly.

Notes

For best results, use high-quality matcha and white chocolate chunks.
Calories: 150kcal
Cost: $15
Course: Dessert
Cuisine: fusion
Keyword: healthy, matcha, Protein

Welcome to a culinary adventure where we explore the delicious world of BBQ Cheddar Turkey Flatbread! This mouthwatering dish is not just a meal; it’s a celebration of flavors that can be enjoyed any day of the week. Whether you’re cooking for your family or planning a gathering with friends, this flatbread recipe provides a delightful experience that’s both satisfying and easy to prepare. In this comprehensive guide, you’ll learn everything you need to know to master this dish, including ingredient breakdowns, expert tips, and creative variations.

Why You’ll Love This Recipe

This BBQ Cheddar Turkey Flatbread is a fantastic choice for a multitude of reasons:

  • Quick and Easy: With just a few ingredients and minimal prep time, you can have this dish ready in under 30 minutes.
  • Flavorful Layers: The combination of BBQ sauce, tender turkey, and melty cheddar provides a burst of flavor in every bite.
  • Customizable: You can easily adapt this recipe to suit your taste or use up leftover turkey.
  • Family-Friendly: This dish is a hit with kids and adults alike, making it a great choice for family dinners.
  • Perfect for Gatherings: Serve it as an appetizer or main dish at parties, and watch it disappear!

Ingredient Breakdown

To create your BBQ Cheddar Turkey Flatbread, you will need the following ingredients:

  • 4 Naan (or your choice) Flatbread: Naan offers a soft and chewy base, but feel free to use pita or your favorite flatbread.
  • 2 cups turkey, chopped: Leftover turkey works perfectly here. You can also use ground turkey or shredded rotisserie chicken.
  • 1/2 cup BBQ sauce: Choose your favorite brand or make your own for a personal touch.
  • 1 cup shredded cheddar cheese: Consider sharp cheddar for a more robust flavor, or mix in different cheeses for variety.
  • Salt & pepper to taste: Essential for enhancing all the flavors.

Preparation Steps

Follow these simple steps to create your BBQ Cheddar Turkey Flatbread:

  1. Preheat your oven to 425°F (220°C).
  2. Spread the BBQ sauce evenly over each flatbread.
  3. Top with roughly chopped turkey and add a pinch of salt & pepper.
  4. Cover generously with shredded cheddar cheese.
  5. Bake for 12 minutes or until the cheese is melted and the edges of the flatbread are crispy.
  6. Cut into slices using a pizza cutter and serve hot.

Expert Tips for the Perfect Flatbread

Gourmet BBQ Cheddar Turkey Flatbread showcasing golden cheese and chopped turkey.

Here are some pro tips to elevate your BBQ Cheddar Turkey Flatbread:

  • Cheese Choices: Experiment with different cheeses like mozzarella, gouda, or pepper jack for a unique twist.
  • BBQ Sauce Variations: Try using spicy BBQ sauce or adding a drizzle of hot sauce for an extra kick.
  • Veggie Additions: Add sliced bell peppers, red onions, or jalapeños for additional flavor and texture.
  • Grill Option: For a smoky flavor, grill your flatbreads instead of baking them.
  • Make Ahead: Prepare the flatbreads in advance and just bake them before serving for easy entertaining.
  • Herb Garnish: Fresh cilantro or parsley can brighten up the flavor and presentation.
  • Serving Temperature: Allow the flatbread to cool for a minute after baking for easier slicing.
  • Pairing Suggestions: Serve with a side salad or coleslaw to balance the richness of the flatbread.

Common Mistakes and Troubleshooting

Here are some common pitfalls to avoid and tips to troubleshoot your BBQ Cheddar Turkey Flatbread:

  • Too Soggy: Ensure that the flatbread is not overloaded with toppings to prevent sogginess.
  • Burnt Edges: Keep an eye on the flatbreads while baking to avoid burning; every oven is different.
  • Cheese Not Melting: If your cheese isn’t melting properly, consider using a higher-fat cheese or increasing the baking time slightly.
  • Flavorless Base: Don’t skimp on seasoning the turkey and adding enough BBQ sauce for flavor.

Creative Variations

Why stick to one recipe when you can explore variations? Here are a few ideas:

  • Buffalo Chicken Flatbread: Swap out the turkey for shredded buffalo chicken and use blue cheese instead of cheddar.
  • Vegetarian Delight: Replace turkey with roasted vegetables and add feta cheese for a Mediterranean flair.
  • Breakfast Flatbread: Top with scrambled eggs, turkey bacon, and a sprinkle of cheddar for a hearty breakfast option.
  • Tex-Mex Style: Add black beans, corn, and jalapeños along with your turkey for a southwestern twist.

Storage and Make-Ahead Instructions

If you have leftovers or want to prepare in advance, here’s how to store and make ahead:

  • Refrigerate: Store leftover flatbread in an airtight container for up to 3 days.
  • Reheat: To reheat, place in the oven at 350°F (175°C) for about 10 minutes until heated through.
  • Make-Ahead: Assemble the flatbreads without baking and store them in the refrigerator for up to 24 hours. Bake before serving.

FAQs

Here are some frequently asked questions about BBQ Cheddar Turkey Flatbread:

  • Can I use a different type of flatbread? Yes, pita bread, tortillas, or even traditional pizza dough work well.
  • Is this recipe gluten-free? You can use gluten-free flatbreads to make this dish gluten-free.
  • How can I make this dish spicier? Add hot sauce to the BBQ sauce or use spicy cheese.
  • Can I freeze the flatbread? Yes, you can freeze the assembled flatbreads. Just bake them from frozen, adding a few minutes to the cooking time.
  • What side dishes pair well? A fresh garden salad or a creamy coleslaw complements the flatbread nicely.
  • How do I prevent the flatbread from getting soggy? Use less sauce and ensure that the toppings are not too wet.
  • Can I use ground turkey instead of chopped? Absolutely! Ground turkey will work just as well and may cook a bit faster.
  • What if I don’t have BBQ sauce? You can substitute with a mix of ketchup and Worcestershire sauce or your favorite condiment.

Nutrition Tips and Dietary Adaptations

If you’re mindful of nutrition, consider these tips:

  • Lower Calories: Use low-fat cheese and whole wheat flatbreads for a lighter option.
  • Boost Fiber: Add more vegetables to increase the fiber content.
  • Protein-Rich: Turkey is a great source of lean protein, making this dish filling and nutritious.
  • Adapt for Allergies: Ensure to substitute ingredients that cater to any dietary restrictions.

Equipment Recommendations

To successfully create your BBQ Cheddar Turkey Flatbread, consider having the following kitchen tools:

  • Baking Sheet: A standard baking sheet is perfect for baking your flatbreads.
  • Pizza Cutter: This tool makes slicing the flatbread quick and easy.
  • Measuring Cups: Accurate measurements ensure consistent results.
  • Spatula: A spatula helps in transferring the flatbread to and from the oven with ease.

Serving Suggestions

For a complete meal experience, consider these serving suggestions:

  • Pair with Dips: Serve with ranch or a creamy garlic dip on the side.
  • Garnish: Fresh herbs like cilantro or chives can add a burst of freshness.
  • Accompanying Salads: A light arugula or spinach salad goes wonderfully with the richness of the flatbread.
  • Beverage Pairing: Complement with a chilled iced tea or a light beer to balance the flavors.

In conclusion, this BBQ Cheddar Turkey Flatbread is not just a dish; it’s an opportunity to unleash your creativity in the kitchen. With its robust flavors and easy preparation, it’s bound to become a favorite in your household. So gather your ingredients, invite your loved ones, and enjoy the delightful experience of cooking and sharing this wonderful meal together. Happy cooking!

BBQ Cheddar Turkey Flatbread

Prep Time 10 minutes
Cook Time 12 minutes
Total Time 22 minutes
Servings 4 pieces
Calories 450
A quick and delicious flatbread recipe topped with BBQ sauce, turkey, and cheddar cheese, perfect for a satisfying meal.

Ingredients

Flatbread

  • 4 pieces Naan or your choice of flatbread
  • 2 cups chopped turkey
  • 1/2 cup BBQ sauce
  • 1 cup shredded cheddar cheese
  • to taste salt & pepper

Instructions 

  • Preheat oven to 425°F (220°C).
  • Spread BBQ sauce over each flatbread.
  • Top with chopped turkey and season with salt & pepper.
  • Cover with shredded cheddar cheese.
  • Bake for 12 minutes until cheese melts and edges are crispy.
  • Slice and serve hot.

Notes

You can customize toppings or add fresh herbs for extra flavor.
Calories: 450kcal
Cost: $12
Course: Main Course
Cuisine: American
Keyword: Turkey

Unleash the Tropical Flavor: Your Ultimate Guide to the Mango Pineapple Smoothie Bowl

Welcome to the vibrant world of Tropical Smoothie Bowls! If you’re craving a refreshing, nutritious breakfast or snack that bursts with flavor, you’ve come to the right place. This Mango Pineapple Smoothie Bowl is not just a treat for your taste buds; it’s also an easy way to pack in essential vitamins and minerals. Here, we will explore everything you need to know about this delightful dish, from the benefits of tropical fruits to tips for crafting the perfect bowl.

Why You’ll Love This Recipe

Before diving into the recipe, let’s explore the reasons why this tropical smoothie bowl will become a staple in your kitchen:

  • Quick and Easy: With just a few ingredients and a blender, you can whip this up in under 10 minutes!
  • Nutritious Powerhouse: Packed with vitamins, minerals, and antioxidants, this smoothie bowl offers a healthy start to your day.
  • Customizable: You can easily modify the ingredients to suit your taste or dietary needs.
  • Visually Stunning: The bright colors of the mango and pineapple make for a beautiful presentation that’s perfect for Instagram.
  • Deliciously Satisfying: Its thick consistency makes it more filling than a regular smoothie, keeping hunger at bay.

Ingredient Breakdown

Let’s take a closer look at what you need to make this smoothie bowl, along with some possible substitutions:

  • Frozen Pineapple: 1 cup. Substitute with frozen mango or peaches for a different flavor profile.
  • Frozen Mango: 1 cup. Alternatively, use frozen strawberries or mixed berries.
  • Banana: 1 ripe banana adds sweetness and creaminess. If allergic, consider avocado for a similar texture.
  • Almond Milk: 1/4 cup. You can use coconut milk for a richer flavor or any nut milk of your choice.
  • Granola: 1/4 cup for topping. Try a nut-free granola or oats if you prefer.
  • Toppings: Fresh mango chunks, pineapple chunks, sliced banana, shredded coconut, and chia seeds to add texture and extra nutrients.

How to Make Your Tropical Smoothie Bowl

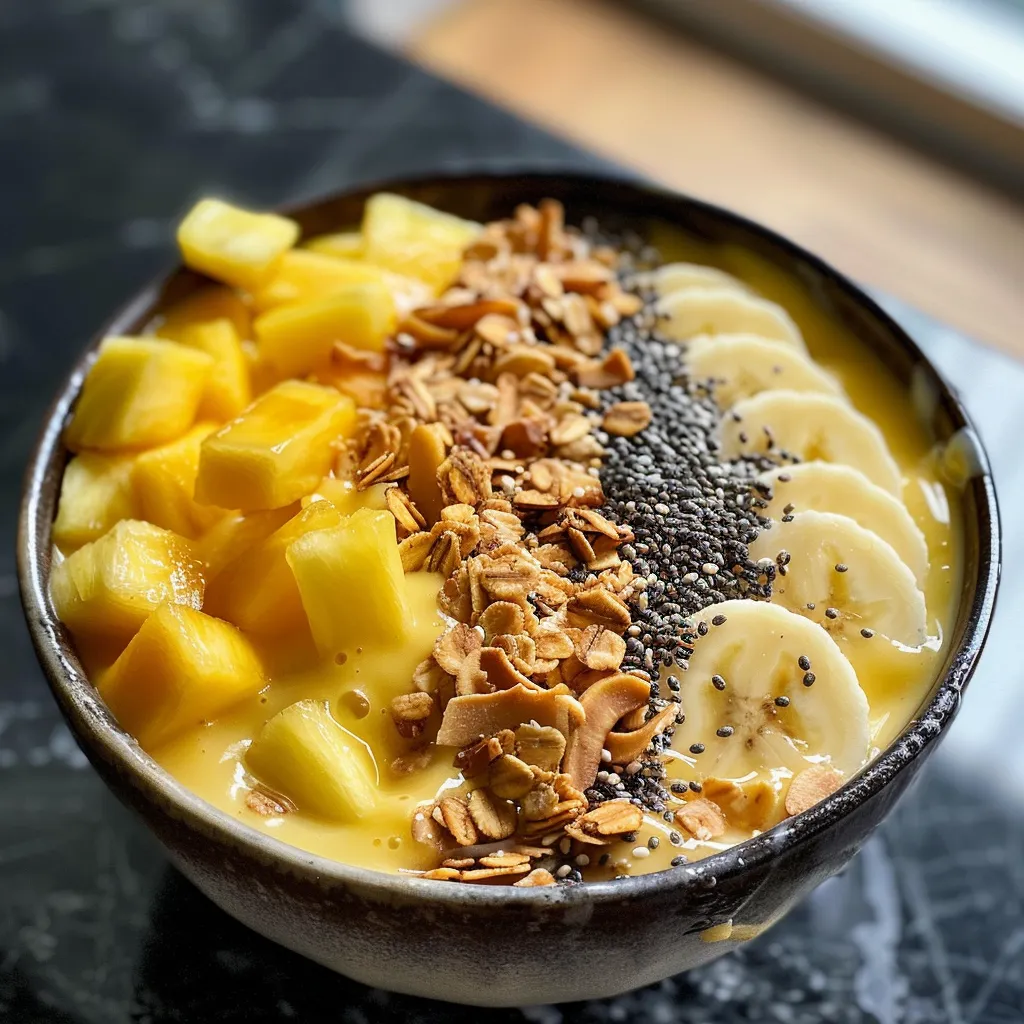
Side view of a smooth, creamy bowl filled with blended fruits, topped with granola, sliced banana, and chia seeds.

Follow these simple steps to create your Mango Pineapple Smoothie Bowl:

  1. Combine the frozen pineapple, frozen mango, banana, and almond milk in a blender.
  2. Blend until smooth. Remember, the mixture should be thick!
  3. Pour the smoothie into two shallow bowls.
  4. Top with your choice of toppings like granola, fresh fruit, coconut flakes, and chia seeds.
  5. Serve immediately and enjoy!

Pro Tips for the Perfect Smoothie Bowl

Here are some expert insights to ensure your smoothie bowl is nothing short of perfect:

  • Use Frozen Fruits: This helps achieve a thick, creamy texture essential for a smoothie bowl.
  • Adjust Consistency: If your smoothie is too thick, add a splash more almond milk until you reach your desired consistency.
  • Layer Your Toppings: Be creative with your toppings for a visually appealing bowl.
  • Chill Your Bowl: For an extra refreshing experience, chill your serving bowls in the freezer before filling them.
  • Prep Ahead: Pre-portion your smoothie ingredients in freezer bags for a quick blend in the morning.
  • Don’t Over-blend: Blend just until smooth. Over-blending can make it too runny.
  • Try Superfoods: Add a tablespoon of chia seeds or flaxseeds for added nutrition.
  • Experiment with Flavors: Don’t hesitate to add in spinach or kale for a green smoothie bowl.

Common Mistakes and Troubleshooting

Even the best chefs make mistakes! Here are some common pitfalls and how to avoid them:

  • Too Runny: If your smoothie bowl is too thin, add more frozen fruit and blend again.
  • Not Enough Sweetness: If it’s not sweet enough for your taste, try adding a bit of honey, agave, or maple syrup.
  • Wrong Texture: If it’s grainy, ensure your blender is powerful enough to fully blend the fruit.

Variations of the Tropical Smoothie Bowl

Feeling adventurous? Here are some variations to try:

  • Mango Coconut Delight: Substitute almond milk with coconut milk and top with toasted coconut flakes.
  • Berry Tropical Fusion: Add mixed berries alongside the mango and pineapple for a berry twist.
  • Green Smoothie Bowl: Incorporate a handful of spinach or kale for extra greens without compromising flavor.
  • Protein-Packed Bowl: Add a scoop of your favorite protein powder for an extra boost.

Storage and Make-Ahead Instructions

Want to enjoy your smoothie bowl later? Here’s how to store it:

  • Refrigeration: Store your smoothie mixture in an airtight container for up to 24 hours in the fridge.
  • Freezing: Freeze the blended smoothie in ice cube trays for easy, future use. Just blend again with a splash of milk when ready to eat!

Frequently Asked Questions

Here are answers to some common questions you might have:

  • Can I use fresh fruit instead of frozen? Fresh fruit can be used, but the texture will be less thick. Consider adding ice to compensate.
  • Is this smoothie bowl healthy? Absolutely! It’s loaded with vitamins from the fruits and healthy fats from toppings.
  • What can I use instead of granola? Nuts or seeds can be great alternatives if you’re looking for a gluten-free option.
  • How can I make it vegan? All ingredients in this recipe are already vegan, but always double-check your granola.
  • Can I add greens? Yes! Adding spinach or kale can boost the nutritional value without altering the taste.
  • How do I garnish it? Be creative! Use fresh fruits, nuts, seeds, or even edible flowers.
  • Is it suitable for kids? Yes! This smoothie bowl is a fun and nutritious way to get kids involved in healthy eating.
  • How long does it keep? Best enjoyed fresh, but can be stored in the fridge for up to a day.

Nutrition Tips and Dietary Adaptations

This smoothie bowl can easily be tailored to fit various dietary needs:

  • Low-Sugar Option: Use unsweetened almond milk and limit the amount of banana.
  • Gluten-Free: Ensure your granola is gluten-free or opt for seeds and nuts.
  • High-Protein: Incorporate Greek yogurt or protein powder for an extra boost.

Recommended Equipment

To make this smoothie bowl, you’ll need:

  • High-Powered Blender: Essential for achieving a smooth, creamy consistency.
  • Measuring Cups: For accurate ingredient measurements.
  • Serving Bowls: Shallow bowls work best for presentation.

Serving Suggestions

Serve your smoothie bowl immediately for the best taste and texture. Consider pairing it with:

  • Whole Grain Toast: Top with avocado or nut butter for a filling breakfast.
  • Herbal Tea: A nice contrast to the fruity flavors.
  • Energy Bites: Keep some homemade energy bites nearby for a quick snack.

In conclusion, this Mango Pineapple Tropical Smoothie Bowl is not just a meal; it’s an experience. Whether you’re enjoying it solo or sharing with friends, this recipe brings the taste of the tropics into your kitchen. Remember, cooking is about experimentation and joy, so feel free to make this recipe your own. Happy blending!

Mango Pineapple Tropical Smoothie Bowl

Prep Time 10 minutes
Total Time 10 minutes
Servings 2 bowl
Calories 350
Enjoy a refreshing and vibrant smoothie bowl packed with tropical flavors and nutritious toppings.

Ingredients

Fruits

  • 1 cup pineapple, frozen
  • 1 cup mango, frozen
  • 1 piece banana (sliced)

Liquid

  • 1/4 cup almond milk

Toppings

  • 1/4 cup granola
  • mango chunks and/or pineapple chunks mango chunks and/or pineapple chunks
  • banana, sliced banana, sliced
  • shredded coconut, shredded
  • chia seeds chia seeds

Instructions 

  • Combine pineapple, mango, banana and almond milk in a blender. Blend until smooth.
  • Pour into bowls and top with granola, fruit chunks, shredded coconut, and chia seeds. Serve immediately.

Notes

Use fresh or frozen fruit for best flavor and texture.
Calories: 350kcal
Cost: $12
Course: Breakfast, Snack
Cuisine: Tropical
Keyword: Mango, pineapple, Smoothie

Welcome to Your Tropical Getaway with a Mango Pineapple Smoothie Bowl

If you’re looking for a refreshing and nutritious way to start your day or enjoy a snack, look no further than the Mango Pineapple Smoothie Bowl. This delightful dish combines the tropical flavors of mango and pineapple, creating a smoothie bowl that is not only delicious but also packed with vitamins and minerals. Made with frozen fruits and creamy coconut milk, it’s a versatile recipe that can be tailored to your taste and dietary needs. In this ultimate guide, we’ll explore everything from ingredient breakdowns to tips for perfecting your smoothie bowl experience.

Why You’ll Love This Recipe

This Mango Pineapple Smoothie Bowl offers a plethora of benefits that make it a must-try:

  • Refreshing Flavor: The sweet and tangy combination of mango and pineapple is like a tropical vacation in a bowl.
  • Nutrient-Rich: Packed with vitamins A and C, fiber, and antioxidants, this bowl is a healthy choice.
  • Customizable: You can easily adjust the ingredients and toppings to suit your dietary preferences.
  • Quick and Easy: Perfect for busy mornings, this recipe takes just minutes to prepare.
  • Great for Meal Prep: Make it ahead of time for a convenient breakfast or snack option throughout the week.

Ingredients You’ll Need

Here’s a detailed breakdown of the ingredients needed for this Mango Pineapple Smoothie Bowl:

  • 1 cup frozen mango chunks: Provides natural sweetness and a creamy texture.
  • 1 cup frozen pineapple chunks: Adds a tropical tang and vibrant color.
  • ½ frozen banana: Enhances creaminess; for best results, use a ripe banana.
  • ¼–½ cup coconut milk or almond milk: Adjust based on desired consistency.
  • Juice of ½ lime (optional): Adds a zesty kick and balances sweetness.
  • ¼ cup fresh mango, diced: For topping and added freshness.
  • 2–3 tablespoons granola: Adds crunch and texture.
  • 1 teaspoon chia seeds: Provides omega-3 fatty acids and fiber.
  • Coconut flakes, hemp seeds, or a drizzle of honey (optional): For extra flavor and nutrition.

Step-by-Step Instructions

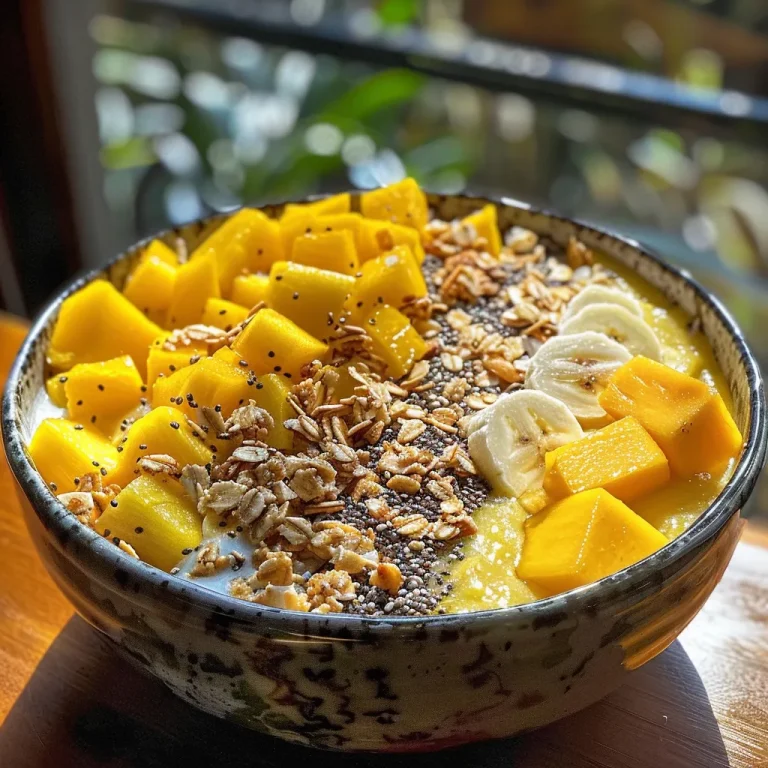
Refreshing smoothie bowl filled with mango and pineapple, decorated with diced fresh fruit and roasted granola.

Follow these simple steps to create your Mango Pineapple Smoothie Bowl:

  1. Begin by placing the frozen mango, pineapple, and banana pieces into a high-speed blender.
  2. Pour in the coconut or almond milk and blend until smooth and creamy. Adjust the amount of milk based on your desired thickness.
  3. Once blended, spoon the vibrant smoothie into a bowl and smooth the surface.
  4. Now comes the fun part! Top your smoothie with diced fresh mango, crunchy granola, and chia seeds.
  5. For an extra touch, garnish with coconut flakes or fresh mint leaves, if desired.

Pro Tips for the Perfect Smoothie Bowl

Maximize your smoothie bowl experience with these expert tips:

  • Use Frozen Fruits: For a thick texture, always opt for frozen fruits. They help create a creamy consistency that’s hard to beat.
  • Layer Your Ingredients: Start with liquids first in the blender, followed by frozen fruits. This ensures a smoother blend.
  • Adjust Sweetness: Taste your smoothie before serving. If it’s not sweet enough, add a bit of honey or maple syrup.
  • Explore Toppings: Get creative with toppings like nuts, seeds, or even nut butter for added flavor and nutrition.
  • Make-Ahead Option: Blend your smoothie and store it in the fridge for up to two days. Just give it a good stir before serving.
  • Don’t Skip the Lime: The lime juice not only brightens the flavor but also enhances the tropical vibe of your bowl.
  • Experiment with Base Liquids: Try using different liquids like yogurt or oat milk for unique flavors.
  • Keep It Cold: For the best texture, keep your ingredients chilled before blending.

Common Mistakes and Troubleshooting

Avoid these common pitfalls to ensure your Mango Pineapple Smoothie Bowl turns out perfect every time:

  • Too Thin: If your smoothie is too runny, add more frozen fruit to thicken it up.
  • Not Sweet Enough: If it lacks sweetness, consider adding a bit of honey, agave syrup, or a ripe banana.
  • Not Blending Smoothly: Ensure your blender is powerful enough and that you’re layering ingredients correctly.
  • Overblending: Blend just until smooth to avoid a watery consistency.
  • Skipping the Toppings: Toppings are essential for flavor and texture; don’t skip this step!

Variations to Try

Customize your smoothie bowl with these variations:

  • Mango Berry Bliss: Add a cup of mixed berries for a mixed fruit flavor.
  • Green Tropical Bowl: Incorporate a handful of spinach or kale for added nutrients.
  • Nutty Delight: Blend in a tablespoon of almond or peanut butter for a protein boost.
  • Chocolate Lover’s Bowl: Add a tablespoon of cocoa powder for a chocolaty twist.

Storage and Make-Ahead Instructions

To maximize freshness and convenience:

  • Refrigeration: Store leftover smoothie in an airtight container in the fridge for up to two days. Stir before serving.
  • Freezing: You can also freeze leftover smoothie in ice cube trays and blend later for a quick treat.
  • Pre-Made Packs: Prepare smoothie packs by portioning fruits into bags and freezing them for easy blending.

Frequently Asked Questions

Here are some common questions about the Mango Pineapple Smoothie Bowl:

  • Can I use fresh fruit instead of frozen? Yes, but the texture will be thinner; consider adding ice for a thicker consistency.
  • Is this smoothie bowl suitable for vegans? Absolutely! Just ensure you use plant-based milk and toppings.
  • How can I make it more filling? Add protein powder or Greek yogurt for a more substantial meal.
  • Can I substitute coconut milk? Yes, almond milk or soy milk can be used as alternatives.
  • What toppings do you recommend? Fresh fruits, nuts, seeds, and granola work wonderfully!
  • How do I make it less sweet? Reduce the amount of banana or use unsweetened milk.
  • Can I meal prep this recipe? Yes, blend and store in the fridge or freeze for future use.
  • How long does it stay fresh? Stored in the fridge, it’s best consumed within 48 hours.

Nutritional Tips and Dietary Adaptations

This smoothie bowl is naturally rich in vitamins, but you can enhance its nutritional profile further:

  • Boost Fiber: Add flaxseeds or oats for extra fiber content.
  • Protein Punch: Incorporate protein powder or Greek yogurt for muscle recovery.
  • Healthy Fats: Include avocado or nut butter for heart-healthy fats.

Essential Equipment

Make sure you have these tools ready:

  • High-Speed Blender: Essential for achieving the perfect creamy texture.
  • Measuring Cups and Spoons: For accurate ingredient portions.
  • Bowl and Spoon: To serve and enjoy your smoothie bowl.

Serving Suggestions

Enhance your smoothie bowl experience with these serving ideas:

  • Pair with a Side: Enjoy with a slice of whole-grain toast or a protein bar for a balanced meal.
  • Share with Friends: Serve in small bowls for a fun, shareable breakfast or snack.
  • Garnish Creatively: Use edible flowers or colorful fruits to make it visually appealing.

Conclusion: Enjoy Your Tropical Treat!

Now that you’re armed with all the knowledge you need, it’s time to whip up your very own Mango Pineapple Smoothie Bowl. Whether you enjoy it as a quick breakfast, a post-workout snack, or a refreshing dessert, this recipe is sure to satisfy your taste buds and nourish your body. Remember, cooking is all about creativity, so feel free to experiment with ingredients and make it your own. Happy blending!

Mango-Ananas-Smoothie-Schüssel

Prep Time 10 minutes
Total Time 10 minutes
Servings 2 bowl
Calories 250
Genieße eine erfrischende und gesunde Smoothie-Bowl mit tropischen Früchten und knusprigen Toppings.

Ingredients

Fruits

  • 1 cup gefrorene Mangowürfel
  • 1 cup gefrorene Ananasstücke
  • ½ frozen banana gefrorene Banane
  • ¼–½ cup Kokosmilch oder Mandelmilch (je nach gewünschter Konsistenz)
  • ½ limette Saft von ½ Limette (optional)
  • ¼ cup frische Mango, gewürfelt
  • 2–3 tablespoons geröstetes Müsli
  • 1 teaspoon Chiasamen
  • optional Kokosraspeln, Hanfsamen oder Honig (nach Geschmack)

Instructions 

  • Gib die gefrorenen Früchte in den Mixer und füge die Milch hinzu.
  • Püriere alles, bis die Mischung cremig ist, und passe die Milchmenge an.
  • Löffle die Smoothie-Mischung in eine Schüssel und glätte die Oberfläche.
  • Füge Toppings wie frische Mango, Müsli und Chiasamen hinzu.
  • Garniere nach Wunsch mit Kokosraspeln oder Minze.

Notes

Für eine cremigere Konsistenz kannst du mehr Milch verwenden.
Calories: 250kcal
Cost: $12
Course: Breakfast, Snack
Cuisine: Tropical
Keyword: Ananas, Mango, Smoothie

Discover the Art of Air Fryer Garlic Butter Steak Bites

Are you ready to elevate your cooking game with a dish that’s packed with flavor and is incredibly easy to prepare? Air Fryer Garlic Butter Steak Bites are not just another recipe; they are a culinary delight that combines tender steak with the rich flavors of garlic and butter. In just a matter of minutes, you can create a dish that’s perfect for any occasion, whether it’s a family dinner or a gathering with friends. This article will guide you through every step of the process, ensuring you master this recipe and impress everyone at your table.

Why You’ll Love This Recipe

  • Quick to Prepare: With cooking times as short as 7-9 minutes, these garlic butter steak bites are perfect for busy weeknight dinners.
  • Flavor Explosion: The combination of garlic, butter, and perfectly cooked steak creates a rich, savory profile that’s hard to resist.
  • Versatile Serving Options: Serve these steak bites with mashed potatoes, a fresh salad, or even on skewers for a fun appetizer.
  • Low Carb Delight: This recipe is ideal for those following a low-carb diet, allowing you to enjoy a satisfying meal without the extra carbs.
  • Family-Friendly: Kids and adults alike will love the taste and texture of these tender steak bites, making them a hit at the dinner table.

Ingredients You’ll Need

Before diving into the cooking process, let’s gather all the ingredients needed for this mouthwatering dish. Here’s what you’ll need:

  • 1 lb sirloin or ribeye steak: Cut into 1-inch cubes for even cooking.
  • 2 tbsp olive oil: Helps in achieving that perfect sear.
  • 4 tbsp unsalted butter: Adds richness and flavor.
  • 4 cloves garlic (minced): Infuses the dish with its aromatic goodness.
  • 1 tsp salt: Enhances the natural flavors of the steak.
  • 0.5 tsp black pepper: Adds a hint of spice.
  • 1 tsp smoked paprika (optional): For a touch of smokiness.
  • 2 tbsp fresh parsley (chopped): For garnish and freshness.

Cooking Equipment

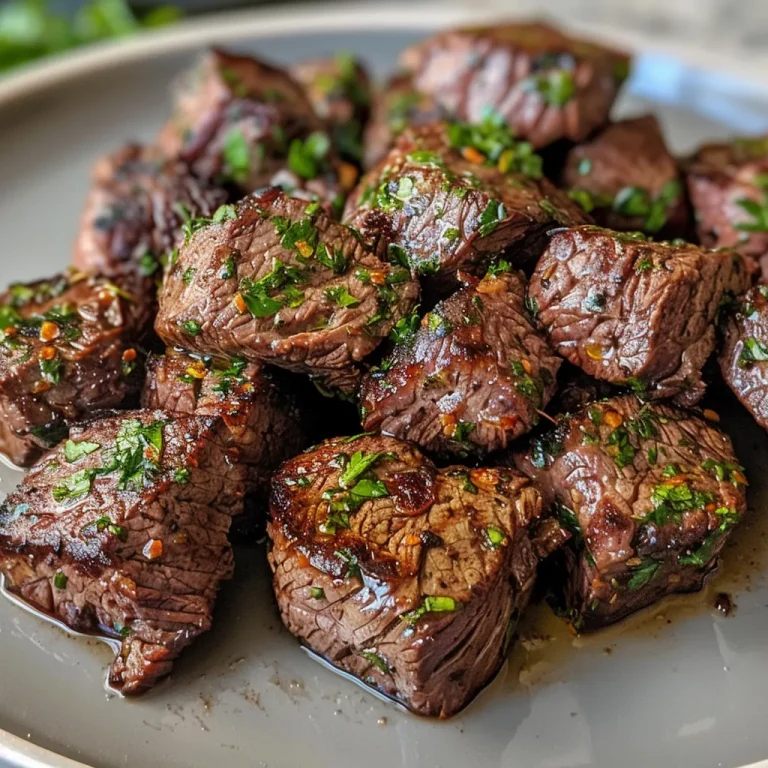
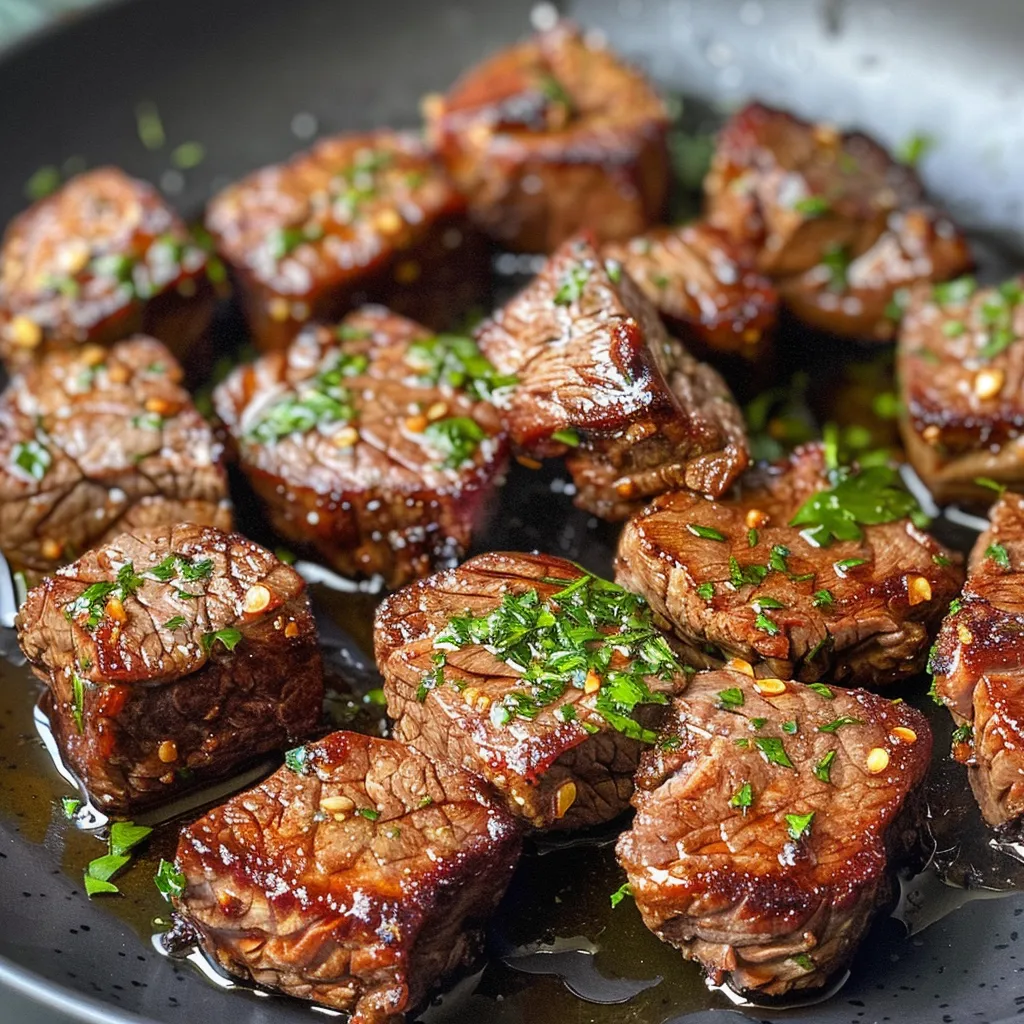
Side view of succulent air-fried steak bites, garnished with fresh parsley and aromatic garlic.

To make these delicious steak bites, you’ll need:

  • Air Fryer: The star of the show, ensuring crispy and evenly cooked steak bites.
  • Mixing Bowl: For combining the ingredients.
  • Measuring Cups and Spoons: To ensure accurate ingredient measurements.
  • Cooking Tongs: For flipping the steak bites midway through cooking.

Step-by-Step Instructions

Now that we have everything ready, let’s walk through the cooking process:

  1. Pat the steak cubes dry with a paper towel and season them evenly with salt, black pepper, and smoked paprika.
  2. Preheat your air fryer to 400°F (200°C) for about 3-5 minutes.
  3. Toss the seasoned steak cubes with olive oil until they are well coated.
  4. Place the steak bites in the air fryer basket in a single layer, making sure not to overcrowd them for optimal cooking.
  5. Air fry the steak bites for 7-9 minutes, shaking the basket halfway through to ensure even cooking.
  6. While the steak is cooking, melt the butter in a small pan over medium heat, then add the minced garlic and sauté until fragrant (about 1-2 minutes).
  7. Once the steak bites are cooked to your desired doneness, toss them in the garlic butter sauce and sprinkle with chopped parsley.
  8. Serve immediately, adding optional chili flakes for a spicy kick!

Pro Tips for Perfect Steak Bites

  • Cut Uniformly: Ensure all steak cubes are the same size (1-inch) for even cooking.
  • Resting Time: Let the steak rest for a few minutes after cooking to lock in the juices.
  • Use High-Quality Meat: Choose well-marbled cuts like ribeye for the best flavor and tenderness.
  • Don’t Overcrowd: Cooking in batches in the air fryer allows for better airflow and crispiness.
  • Experiment with Seasonings: Don’t hesitate to add your favorite herbs and spices to customize the flavor.
  • Use Fresh Herbs: Fresh parsley or chives not only add color but also enhance the taste.
  • Check Doneness: Use a meat thermometer to ensure your steak reaches the desired internal temperature (medium-rare is 135°F, medium is 145°F).
  • Serve Immediately: For the best texture and flavor, serve these steak bites hot out of the air fryer.

Common Mistakes and Troubleshooting

Even the best chefs can make mistakes! Here are some common pitfalls to avoid:

  • Overcooking the Steak: Keep a close eye on the cooking time to avoid tough steak bites. Aim for a medium-rare finish unless preferred otherwise.
  • Inadequate Seasoning: Don’t skimp on seasoning; it’s essential for flavor. Taste a small piece of steak before serving to adjust seasoning if necessary.
  • Underestimating the Garlic: If you love garlic, feel free to add more than the recipe calls for for an extra punch.

Delicious Variations

Want to switch things up? Here are some tasty variations:

  • Garlic Parmesan Steak Bites: Toss cooked steak bites with grated Parmesan cheese along with the garlic butter.
  • Spicy Sriracha Steak Bites: Add a teaspoon of sriracha sauce to the garlic butter for a spicy kick.
  • Herb-Infused Steak Bites: Mix in fresh rosemary or thyme with the garlic for an aromatic touch.
  • Honey Garlic Steak Bites: Add a tablespoon of honey to the butter and garlic mixture for a sweet glaze.

Storage and Make-Ahead Instructions

Want to prepare in advance? Here’s how to store and reheat your steak bites:

  • Storage: Store any leftovers in an airtight container in the refrigerator for up to 3 days.
  • Freezing: These steak bites can be frozen for up to 2 months. Ensure they are in a freezer-safe container.
  • Reheating: Reheat in the air fryer at 350°F for 5-7 minutes to maintain their crispy texture.

Frequently Asked Questions (FAQ)

  • Can I use a different cut of steak? Yes, cuts like flank or tenderloin also work well, but adjust cooking times accordingly.
  • Is this recipe suitable for meal prep? Absolutely! These steak bites are great for meal prep and can be paired with various sides.
  • How can I make these steak bites spicier? Add more black pepper, chili flakes, or a dash of hot sauce to the garlic butter.
  • What can I serve with steak bites? Pair with mashed potatoes, rice, or a fresh salad for a complete meal.
  • Can I cook these in the oven instead? Yes, bake at 400°F for about 10-15 minutes, flipping halfway through.
  • How do I know when the steak is done? Use a meat thermometer; 135°F for medium-rare, 145°F for medium.
  • Can I make these steak bites ahead of time? You can prepare the steak bites and season them ahead of time, but cook them fresh for the best results.
  • What should I do if the steak bites are tough? Ensure you’re using a tender cut of steak and avoid overcooking.

Nutritional Tips and Dietary Adaptations

This recipe can be adapted for various dietary needs:

  • Low Carb: Perfect as is, especially when served with low-carb sides.
  • Gluten-Free: Naturally gluten-free, ensuring it accommodates a variety of dietary restrictions.
  • High Protein: An excellent source of protein, ideal for those looking to increase muscle mass.

Conclusion

There you have it! Air Fryer Garlic Butter Steak Bites are not only delicious but also quick and easy to make. Whether you’re cooking for yourself or entertaining guests, this dish is sure to impress. Enjoy the rich flavors, the delightful textures, and the smiles around the table as you serve this culinary masterpiece. Happy cooking!

Air Fryer Garlic Butter Steak Bites

Prep Time 5 minutes
Cook Time 8 minutes
Total Time 13 minutes
Servings 4 servings
Calories 350
Juicy, tender steak bites cooked quickly in the air fryer, then coated in flavorful garlic butter and fresh parsley.

Ingredients

Meat

  • 1 lb sirloin or ribeye steak (cut into 1-inch cubes)
  • 2 tbsp olive oil
  • 4 tbsp unsalted butter
  • 4 cloves garlic (minced)
  • 1 tsp salt
  • 0.5 tsp black pepper
  • 1 tsp smoked paprika (optional)
  • 2 tbsp fresh parsley (chopped)

Instructions 

  • Pat steak cubes dry and season with salt, pepper, and smoked paprika.
  • Preheat air fryer to 400°F (200°C) for 3–5 minutes.
  • Toss steak with olive oil and air fry 7–9 minutes, shaking halfway.
  • Melt butter with garlic until fragrant.
  • Toss cooked steak in garlic butter and sprinkle with parsley.
  • Serve immediately, optionally add chili flakes for heat.

Notes

Ensure not to overcrowd the air fryer for even cooking.
Calories: 350kcal
Cost: $15
Course: Main Course
Cuisine: American
Keyword: Steak

Unlock the Joy of Baking with Biscoff Stuffed White Chocolate Chip Cookies

Welcome to a culinary adventure where we dive into the world of baking with our delicious Biscoff Stuffed White Chocolate Chip Cookies! If you’re looking to elevate your cookie game, you’ve come to the right place. These cookies are not just a treat; they’re an experience brimming with rich flavors and delightful textures. Using creamy Biscoff spread and luscious white chocolate, this recipe creates cookies that are perfect for any occasion—whether you’re sharing with friends or indulging in a cozy night at home.

Why You’ll Love This Recipe

These Biscoff Stuffed Cookies offer an array of irresistible qualities that make them a must-try:

  • Unique Flavor Combination: The fusion of Biscoff spread and white chocolate creates a mouthwatering contrast that’s simply unforgettable.
  • Perfect Texture: Expect a delightful balance between crispy edges and a soft, chewy center, making each bite a heavenly experience.
  • Easy to Follow: With straightforward instructions, even novice bakers will find success with this recipe.
  • Customizable: Adapt the fillings to your taste—try adding nuts or different types of chocolate for a twist!
  • Impressive Presentation: These cookies look as fantastic as they taste, making them great for parties, gifts, or just a special treat for yourself.

Ingredient Breakdown

To create these delightful cookies, you’ll need the following ingredients:

  • 200 g Cold Unsalted Butter: Ensure it’s softened for easier mixing—take it out of the fridge 30 minutes before you start.
  • 180 g Light Brown Sugar: This gives the cookies a rich, caramel-like flavor.
  • 80 g White Caster Sugar: Balances the sweetness and adds a light texture.
  • 2 Large Eggs: At room temperature, these help bind the ingredients together.
  • 250 g Self-Raising Flour: Provides the necessary lift for fluffy cookies.
  • 150 g Plain Flour: Combines with self-raising flour for the perfect dough consistency.
  • 0.5 tsp Salt: Enhances the flavors of the other ingredients.
  • 1 tsp Baking Powder: Ensures your cookies rise beautifully.
  • 1 tsp Ground Cinnamon: Adds warmth and depth to the flavor profile.
  • 300 g White Chocolate Chips: For a sweet, creamy burst in every bite.
  • 10 Heaped tsp Biscoff Spread: The star ingredient—smooth or crunchy, it’s your choice!

If you need substitutions, here are some ideas:

  • Butter: You can use margarine or coconut oil for a different flavor.
  • Flours: A gluten-free flour mix can replace regular flour for a gluten-free version.
  • Sugars: Coconut sugar can be an excellent alternative for a healthier option.
  • Chocolate Chips: Feel free to mix in dark or milk chocolate for varied flavors.

Step-by-Step Instructions

An appetizing side view of a cookie bursting with creamy Biscoff and white chocolate chips.

Let’s get baking! Follow these steps to create your Biscoff stuffed cookies:

  1. Preheat the Oven: Preheat your oven to 180°C (350°F) and line a baking tray with parchment paper.
  2. Cream the Butter and Sugars: In a large mixing bowl, cream together the cold unsalted butter, light brown sugar, and white caster sugar until light and fluffy.
  3. Add the Eggs: Beat in the eggs, one at a time, ensuring they’re fully incorporated before adding the next.
  4. Combine the Dry Ingredients: In another bowl, whisk together the self-raising flour, plain flour, salt, baking powder, and ground cinnamon.
  5. Mix Together: Gradually add the dry ingredients to the wet mixture, mixing until just combined. Be careful not to overmix; you want soft dough!
  6. Fold in the White Chocolate Chips: Gently fold in the white chocolate chips until evenly distributed.
  7. Prepare the Biscoff Filling: Using a spoon, scoop out 10 heaped teaspoons of Biscoff spread and freeze them for about 30 minutes. This will help keep the filling intact while baking.
  8. Form the Cookies: Take a tablespoon of dough, flatten it in your palm, place a frozen Biscoff scoop in the center, and wrap the dough around it. Roll into a ball and place on the prepared baking tray.
  9. Bake: Bake in the preheated oven for 12-15 minutes, or until the edges are golden brown. The centers will look slightly underbaked; this is perfect for a soft cookie!
  10. Cool and Enjoy: Allow the cookies to cool on the tray for 5 minutes before transferring them to a wire rack to cool completely.

Pro Tips for Perfect Cookies

To ensure your Biscoff stuffed cookies turn out perfectly, consider these expert insights:

  • Chill the Dough: If the dough feels too sticky, refrigerate it for 30 minutes before baking.
  • Watch Your Baking Time: Every oven is different, so keep an eye on your cookies towards the end of baking.
  • Don’t Overmix: Gently mix the dough to keep your cookies tender.
  • Use Quality Ingredients: High-quality chocolate and butter make a significant difference in flavor.
  • Experiment with Mix-ins: Try adding nuts or dried fruit for added texture.
  • Store Properly: Keep these cookies in an airtight container to maintain their freshness.
  • Try Different Fillings: Mix it up by using various spreads like Nutella or peanut butter.
  • Serve Warm: These cookies are best enjoyed fresh out of the oven, but they also reheat beautifully!

Common Mistakes and Troubleshooting

Even the best bakers can make mistakes. Here’s how to troubleshoot common issues:

  • Too Dry Cookies: If the cookies turn out dry, you may have overbaked them or added too much flour. Make sure to measure accurately!
  • Flat Cookies: If your cookies spread too much, try chilling the dough before baking.
  • Burnt Bottoms: Use parchment paper to prevent sticking and burning, and always keep an eye on baking time.
  • Uneven Baking: Ensure your baking tray isn’t overcrowded, which can prevent even airflow.

Delicious Variations to Try

Don’t be afraid to get creative! Here are some delicious variations to consider:

  • Nutty Biscoff Cookies: Add chopped walnuts or pecans for a crunchy texture.
  • Double Chocolate Biscoff Cookies: Use half cocoa powder in the flour mixture for a chocolatey twist.
  • Seasonal Spices: Experiment with pumpkin spice or gingerbread spice for a seasonal flair.
  • Biscoff-Stuffed Brownies: Swap cookie dough for brownie batter and fill with Biscoff spread for a decadent treat.

Storage and Make-Ahead Instructions

To keep your cookies fresh and delicious:

  • Storing: Place cookies in an airtight container at room temperature for up to five days.
  • Freezing: Freeze unbaked cookie dough balls for up to three months. When ready to bake, simply pop them in the oven without thawing.
  • Reheating: Warm cookies in the microwave for 10-15 seconds to enjoy that fresh-out-of-the-oven experience.

Frequently Asked Questions

Got questions? Here are some common queries answered:

  • Can I use a different type of chocolate? Yes, feel free to experiment with dark or milk chocolate chips!
  • Is this recipe suitable for gluten-free diets? Yes, use a gluten-free flour blend in place of regular flour.
  • How do I know when the cookies are done? The edges should be golden, and the centers should look slightly underbaked.
  • Can I make these cookies without eggs? Yes, you can substitute with flax eggs or applesauce for a vegan version.
  • What’s the best way to serve these cookies? Serve warm with a glass of milk or a cup of coffee for a delightful pairing!
  • Can I add more Biscoff spread? Absolutely! Just remember it may affect the cookie’s structure.
  • How many cookies does this recipe make? This recipe yields about 20 cookies, depending on the size.
  • Can I make the dough ahead of time? Yes, you can prepare the dough and refrigerate it for up to 48 hours before baking.

Nutritional Information and Dietary Adaptations

For those mindful of their dietary choices, here’s how to adapt this recipe:

  • Lower Sugar Option: Substitute half of the sugars with a sugar alternative like Stevia.
  • Dairy-Free Option: Use dairy-free butter and chocolate chips for a dairy-free treat.
  • Nut-Free Option: Ensure any added mix-ins are nut-free.

Essential Equipment Recommendations

To make your baking experience smooth and enjoyable, here are some tools you might need:

  • Mixing Bowls: A set of varying sizes for easy mixing and measuring.
  • Electric Mixer: Makes creaming butter and sugars a breeze.
  • Baking Trays: Use non-stick trays or line them with parchment paper.
  • Cookie Scoop: For equal-sized cookies every time.
  • Cooling Rack: Allows cookies to cool evenly and prevents sogginess.

Serving Suggestions

Here are some delightful ways to serve your Biscoff stuffed cookies:

  • With Ice Cream: Serve warm cookies à la mode with a scoop of vanilla ice cream.
  • Cookie Sandwiches: Create a sandwich with two cookies and a layer of Biscoff spread or frosting.
  • Gift Packaging: Package them in a cute box or tin as a thoughtful homemade gift.
  • Pair with Coffee: Enjoy with a rich cup of coffee or tea to complement the flavors.

Now that you have this comprehensive guide, you’re ready to create your own batch of Biscoff Stuffed White Chocolate Chip Cookies! Remember, baking is about joy, experimentation, and connection—so invite your loved ones to join you, share some stories, and enjoy these delicious cookies together. Happy baking!

Biscoff Stuffed White Chocolate Chip Cookies

Prep Time 15 minutes
Cook Time 10 minutes
Total Time 25 minutes
Servings 12 cookies
Calories 220
Delight in these soft, chewy cookies filled with creamy Biscoff spread and studded with white chocolate chips for a perfect treat.

Ingredients

Dough

  • 200 g Cold unsalted butter (Take out 30 minutes before baking)
  • 180 g Light brown sugar
  • 80 g White caster sugar
  • 2 large Eggs (at room temperature)
  • 250 g Self-raising flour
  • 150 g Plain flour
  • 0.5 tsp Salt
  • 1 tsp Baking powder
  • 1 tsp Ground cinnamon
  • 300 g White chocolate chips
  • 10 heaped tsps Biscoff spread (roughly 3/4 of a jar)

Instructions 

  • Cream together the butter and sugars until light and fluffy.
  • Add eggs one at a time, mixing well after each addition.
  • Mix in flour, baking powder, cinnamon, and salt until combined.
  • Fold in white chocolate chips and dollop Biscoff spread into the dough.
  • Form into cookie balls and bake at 180°C (350°F) for 10 minutes.

Notes

Chill the dough for better shaping if desired.
Calories: 220kcal
Cost: $15
Course: Dessert
Cuisine: American
Keyword: cookies

Discover the Joy of Cooking Tuscan Chicken Pasta

Welcome to the vibrant world of Tuscan Chicken Pasta, a dish that brings the flavors of Italy right to your kitchen! This indulgent yet simple recipe combines tender chicken, sun-dried tomatoes, and fresh spinach, all enveloped in a rich creamy sauce. Perfect for impressing family and friends, this dish is a fantastic way to elevate your dinner game. In this article, we’ll explore not just the recipe, but also the ins and outs of creating a truly memorable meal.

Why You’ll Love This Recipe

This Tuscan Chicken Pasta isn’t just delicious; it’s packed with benefits that make it a must-try:

  • Quick and Easy: You can whip this dish up in under 30 minutes, making it ideal for busy weeknights.
  • Versatile Ingredients: The ingredients are easily customizable based on what you have on hand or your dietary preferences.
  • Flavor Explosion: The combination of sun-dried tomatoes and creamy sauce creates a rich flavor profile that will tantalize your taste buds.
  • Nutrition Boost: Adding fresh spinach not only enhances the flavor but also packs in nutrients and vitamins.
  • Impressive Presentation: This dish looks as good as it tastes, making it perfect for entertaining guests.

Detailed Ingredient Breakdown

Let’s delve into the essential ingredients for this delightful recipe, along with some helpful substitutions:

  • 12 ounces penne pasta: You can substitute with any pasta of your choice, such as fusilli or spaghetti.
  • 1 pound chicken breast (diced): For a vegetarian option, try using mushrooms or tofu instead.
  • 1 tablespoon olive oil: Feel free to use avocado oil for a different flavor profile.
  • 3 cloves garlic (minced): Fresh garlic is preferred, but jarred minced garlic works in a pinch.
  • 1/2 cup sun-dried tomatoes (chopped): You can use fresh tomatoes if you prefer a lighter sauce.
  • 2 cups fresh spinach: Kale or Swiss chard can be great substitutes.
  • 1 cup heavy cream: For a lighter option, you can use half-and-half or a plant-based cream.
  • 1/2 cup grated Parmesan cheese: Nutritional yeast can be a good dairy-free alternative.
  • 1 teaspoon dried Italian herbs: A mix of oregano, basil, and thyme works well.
  • Salt and pepper to taste: Always adjust to your preference for the best flavor.

Step-by-Step Instructions

A vibrant bowl of Tuscan chicken pasta featuring sun-dried tomatoes and garlic.

Now, let’s get to the heart of the matter: how to prepare this delicious Tuscan Chicken Pasta.

  • Cook the pasta according to package instructions until al dente.
  • In a large skillet, heat olive oil over medium heat.
  • Add the diced chicken and sauté until browned, ensuring it is cooked through.
  • Stir in the minced garlic and chopped sun-dried tomatoes, cooking until fragrant.
  • Add the fresh spinach to the skillet and allow it to wilt slightly.
  • Pour in the heavy cream, stirring to combine and create a creamy sauce.
  • Stir in the grated Parmesan cheese and dried Italian herbs until melted and well incorporated.
  • Season with salt and pepper to taste, adjusting as necessary.
  • Combine the cooked penne pasta with the sauce, mixing well to coat.
  • Serve hot, garnished with extra Parmesan on top for added flavor.

Pro Tips for Perfect Tuscan Chicken Pasta

Here are some expert insights to ensure your dish turns out perfectly every time:

  • Choose Quality Ingredients: Using high-quality sun-dried tomatoes and fresh herbs makes a noticeable difference in flavor.
  • Don’t Overcook the Pasta: Aim for al dente to prevent mushy pasta that won’t hold up in the sauce.
  • Adjust the Creaminess: Feel free to add more or less cream based on your preference for richness.
  • Experiment with Proteins: Try substituting the chicken with shrimp or sausage for a different taste.
  • Add Fresh Herbs: Toss in fresh basil or parsley just before serving for an aromatic touch.
  • Balance the Flavors: Taste as you go, adjusting salt and pepper along with the cream to achieve the perfect balance.
  • Leftover Sauce: If you have sauce left over, it can be used as a delicious dip or spread for sandwiches.
  • Keep it Warm: If serving for a gathering, keep the pasta warm in a low oven until ready to serve.

Common Mistakes and Troubleshooting

Even seasoned cooks can run into issues. Here are some common mistakes and how to fix them:

  • Overcooked Chicken: Cook chicken just until browned and no longer pink inside. Use a meat thermometer to check for doneness.
  • Dry Sauce: If the sauce seems too thick, add a splash of pasta water or more cream to loosen it.
  • Unbalanced Flavors: If too salty, add a pinch of sugar. If bland, increase the seasoning gradually.
  • Pasta Overcooked: If you’ve cooked the pasta too long, consider tossing it in the sauce quickly to meld flavors before serving.

Delicious Variations

Customize your Tuscan Chicken Pasta with these creative variations:

  • Vegetarian Delight: Omit the chicken and add roasted vegetables like zucchini and bell peppers.
  • Spicy Kick: Incorporate red pepper flakes for a bit of heat that elevates the dish.
  • Seafood Twist: Substitute chicken with shrimp or scallops for a coastal flavor.
  • Vegan Option: Use plant-based cream, nutritional yeast, and tofu for a creamy, satisfying dish without animal products.

Storage and Make-Ahead Instructions

This Tuscan Chicken Pasta is a great make-ahead meal! Here’s how to store and reheat:

  • Refrigeration: Store leftovers in an airtight container in the fridge for up to 3 days.
  • Freezing: This dish can be frozen, though the cream may change texture. Freeze in a freezer-safe container for up to 2 months.
  • Reheating: Reheat in a skillet over low heat, adding a splash of milk or cream to restore creaminess.

Frequently Asked Questions

Here are some common questions about this recipe:

  • Can I use different types of pasta? Absolutely! Any pasta shape works well with this creamy sauce.
  • Is there a gluten-free version? Yes, you can use gluten-free pasta for a satisfying alternative.
  • Can I prepare this dish in advance? Yes! You can make the sauce ahead of time and combine it with pasta before serving.
  • How can I make it dairy-free? Use coconut milk or a plant-based cream and nutritional yeast instead of Parmesan.
  • What can I serve with Tuscan Chicken Pasta? This dish pairs wonderfully with a fresh salad or garlic bread.
  • Can I add more vegetables? Definitely! Broccoli, asparagus, or bell peppers make excellent additions.
  • How can I make it spicier? Add crushed red pepper flakes or diced jalapeños to the sauce.
  • What’s the best way to reheat leftovers? Reheat gently on the stove with a little added cream to maintain the sauce’s texture.

Nutritional Tips and Dietary Adaptations

Consider these tips for a healthier version of Tuscan Chicken Pasta:

  • Reduce Calories: Use less cream and substitute with Greek yogurt for a creamy texture.
  • Increase Fiber: Add more vegetables to boost fiber content and nutritional value.
  • Low-Carb Option: Substitute pasta with zucchini noodles or spaghetti squash for a low-carb alternative.

Equipment Recommendations

To make your cooking process smoother, consider using the following equipment:

  • Large Skillet: A high-quality non-stick skillet is ideal for sautéing.
  • Pasta Pot: A large pot for boiling pasta will help ensure even cooking.
  • Measuring Cups and Spoons: Accurate measurements are key for a balanced dish.
  • Wooden Spoon: Great for mixing and ensuring even distribution of ingredients.

Serving Suggestions

To enhance your dining experience, try these serving suggestions:

  • Garnish with Fresh Herbs: Fresh parsley or basil adds a lovely touch and flavor.
  • Pair with Wine: A crisp white wine complements the creamy sauce beautifully.
  • Include a Side Salad: A green salad with a light vinaigrette balances the richness of the dish.

Your Culinary Adventure Begins!

Now that you have all the tools and tips needed to create the perfect Tuscan Chicken Pasta, it’s time to get cooking! This delightful dish is about more than just the ingredients; it’s about bringing people together and creating memorable moments. So, don your apron, gather your loved ones, and enjoy the rich flavors of Italy right at your dining table. Happy cooking!

Flavorful Tuscan Chicken Pasta for Home Cooks

Prep Time 10 minutes
Cook Time 15 minutes
Total Time 25 minutes
Servings 4 servings
Calories 650
A delicious and creamy Tuscan chicken pasta that's easy to make at home, packed with flavor and wholesome ingredients.

Ingredients

Pasta

  • 12 ounces penne pasta
  • 1 pound chicken breast (diced)
  • 1 tablespoon olive oil
  • 3 cloves garlic (minced)
  • 1/2 cup sun-dried tomatoes (chopped)
  • 2 cups fresh spinach
  • 1 cup heavy cream
  • 1/2 cup grated Parmesan cheese
  • 1 teaspoon dried Italian herbs
  • to taste Salt and pepper

Instructions 

  • Cook the penne pasta according to package instructions.
  • Heat olive oil in a skillet, cook diced chicken until browned.
  • Add garlic and sun-dried tomatoes; cook briefly.
  • Stir in spinach, then pour in heavy cream and add Parmesan and herbs.
  • Combine with cooked pasta, season with salt and pepper, then serve.

Notes

For a lighter version, use half-and-half instead of heavy cream.
Calories: 650kcal
Cost: $15
Course: Main Course
Cuisine: Italian
Keyword: Chicken, Cream, Pasta

Discover the Joy of Baking a Lemon Poppy Seed Loaf

When it comes to delightful baked treats, few can compete with the vibrant flavors of a lemon poppy seed loaf. This recipe embodies the essence of home baking—simple yet elegant, and bursting with the zest of fresh lemons and the delightful crunch of poppy seeds. Whether you’re looking to impress guests at a brunch or simply want a comforting treat to enjoy with your afternoon tea, this loaf is sure to become a staple in your kitchen.

In this comprehensive guide, we’ll explore everything you need to know about crafting the perfect lemon poppyseed loaf, from ingredient breakdowns to expert tips, ensuring your baking experience is enjoyable and successful.

Why You’ll Love This Recipe

  • Bright and Flavorful: Bursting with fresh lemon juice and zest, this loaf is a refreshing treat that awakens your taste buds.
  • Perfect Texture: The combination of whole milk and melted butter creates a moist texture that stays fresh for days.
  • Simple Ingredients: Made with pantry staples, you probably have everything you need on hand to whip this up.
  • Versatile Treat: Enjoy it for breakfast, as a snack, or as a dessert—it’s perfect for any time of day.
  • Easy to Make: With straightforward steps, even novice bakers will find success with this recipe.

Ingredient Breakdown

Understanding each ingredient is crucial for ensuring your lemon poppy seed loaf turns out perfectly every time. Here’s a detailed look at what you’ll need:

  • All-Purpose Flour (2 cups): The foundation of your loaf, providing structure. For gluten-free alternatives, consider almond flour or a gluten-free blend.
  • Baking Powder (1 1/2 tsp): This leavening agent helps the loaf rise, creating a light texture.
  • Baking Soda (1/2 tsp): Works in conjunction with the acidic lemon juice to promote rising.
  • Salt (1/4 tsp): Enhances the flavors of the other ingredients.
  • Poppy Seeds (2 tbsp): Adds a delightful crunch and unique flavor; look for fresh seeds for the best taste.
  • Granulated Sugar (1 cup): Sweetens the loaf and contributes to a golden crust.
  • Large Eggs (2, room temperature): Essential for binding ingredients together; room temperature eggs mix better.
  • Whole Milk (1/2 cup, room temperature): Adds moisture and richness; substitute with Greek yogurt for a tangy flavor.
  • Unsalted Butter (1/2 cup, melted and cooled): Provides a rich flavor and tender crumb.
  • Fresh Lemon Juice (1/4 cup, from 2 lemons): The star ingredient that infuses the loaf with zesty brightness.
  • Lemon Zest (2 tbsp, from 2 lemons): Enhances the lemon flavor without the acidity.
  • Vanilla Extract (1 tsp): Adds depth to the overall flavor.
  • Powdered Sugar (1 cup) and Fresh Lemon Juice (2-3 tbsp): For the glaze that adds a sweet, tangy finish.

How to Make Lemon Poppy Seed Loaf

Detailed image capturing the fluffy interior and crumb of a Lemon Poppy Seed Loaf.

Follow these simple steps to create your own delicious loaf:

  1. Preheat the oven to 350°F (175°C). Grease a 9×5-inch loaf pan and line it with parchment paper for easy removal.
  2. In a medium bowl, whisk together the flour, baking powder, baking soda, salt, and poppy seeds until well blended.
  3. In a large bowl, whisk the sugar and eggs until thick and pale (about 2 minutes). Add the milk, melted butter, lemon juice, lemon zest, and vanilla extract; whisk until smooth.
  4. Gently fold the dry ingredients into the wet mixture using a rubber spatula until just combined. Be careful not to overmix.
  5. Pour the batter into the prepared loaf pan, smoothing the top with an offset spatula.
  6. Bake for 45-55 minutes, or until a toothpick inserted into the center comes out clean and the top is golden brown.
  7. Allow the loaf to cool in the pan for 10 minutes, then transfer it to a wire rack to cool completely before glazing.
  8. For the glaze, whisk together the powdered sugar and enough lemon juice to create a thick, pourable consistency. Adjust as needed.
  9. Drizzle the glaze over the cooled loaf and let it set for 15-20 minutes before slicing and serving.

Pro Tips for Success

  • Use Room Temperature Ingredients: This helps to create a smooth batter and improves the texture of the loaf.
  • Don’t Overmix: Gently fold the batter to avoid a dense loaf; a few lumps are okay.
  • Check for Doneness: Ovens can vary, so start checking at 45 minutes and adjust baking time as needed.
  • Cool Completely: Allow the loaf to cool completely before glazing to ensure the glaze sets properly.
  • Storage Tips: Keep the loaf in an airtight container at room temperature for up to 4 days or freeze for longer storage.
  • Flavor Variations: Try adding nuts, dried fruit, or a touch of almond extract for a unique twist.
  • Glazing Options: For a richer glaze, consider adding cream cheese to the powdered sugar mixture.
  • Pairing Suggestions: Serve with fresh berries or a dollop of whipped cream for an indulgent treat.

Common Mistakes and Troubleshooting

Even the best bakers can encounter issues. Here are some common problems and how to troubleshoot them:

  • Loaf Falls Flat: Ensure your baking powder and soda are fresh. Check expiration dates!
  • Dry Loaf: Avoid overbaking and ensure you’re using enough liquid ingredients.
  • Lemon Flavor Too Mild: Use fresh juice and zest for maximum flavor, and consider increasing the amount if desired.
  • Dense Texture: This could be due to overmixing; always fold gently.

Variations of Lemon Poppy Seed Loaf

Feel free to get creative with your loaf! Here are some fun variations:

  • Blueberry Lemon Poppy Seed Loaf: Add a cup of fresh blueberries for a fruity twist.
  • Coconut Lemon Poppy Seed Loaf: Incorporate shredded coconut for a tropical flavor.
  • Almond Lemon Poppy Seed Loaf: Substitute almond extract for vanilla to enhance the nutty flavor.
  • Gluten-Free Lemon Poppy Seed Loaf: Use a gluten-free flour blend for a delicious alternative.

Storage and Make-Ahead Instructions

This loaf can be made ahead of time and stored for later enjoyment:

  • Room Temperature: Store the loaf in an airtight container for up to 4 days.
  • Refrigerator: If you live in a humid climate, store it in the fridge to keep it fresh longer, but it may dry out slightly.
  • Freezer: Wrap the loaf tightly in plastic wrap and aluminum foil; it can be frozen for up to 3 months. Thaw at room temperature before serving.

Frequently Asked Questions

  • Can I use other types of flour? Yes, you can experiment with whole wheat or gluten-free flours, but the texture may vary.
  • What can I substitute for eggs? Flax eggs or unsweetened applesauce can work as egg substitutes in this recipe.
  • How can I make this recipe dairy-free? Substitute milk with almond milk and use coconut oil instead of butter.
  • Can I add other flavors? Absolutely! Adding spices like cinnamon or nutmeg can create a unique flavor profile.
  • Is it safe to eat raw batter? Due to the presence of eggs, it’s best to avoid eating raw batter to minimize food safety risks.
  • Can I make mini loaves? Yes, adjust baking time to about 25-30 minutes for mini loaf pans.
  • How do I know when the loaf is done? Use a toothpick; it should come out clean when inserted into the center.
  • What toppings can I add? Fresh fruit, nuts, or a sprinkle of powdered sugar can enhance the presentation and flavor.

Nutrition Tips and Dietary Adaptations

For a healthier version of this delightful loaf, consider the following adaptations:

  • Reduce Sugar: You can cut down the sugar by 1/4 cup without significantly affecting the taste.
  • Add Whole Grains: Use whole wheat flour to increase fiber content.
  • Incorporate Fruits: Adding fruits like mashed bananas or applesauce can enhance moisture and add natural sweetness.

Equipment Recommendations

To achieve the best results, here are some kitchen tools that will make your baking experience seamless:

  • 9×5-inch Loaf Pan: A sturdy, non-stick pan ensures even baking and easy release.
  • Mixing Bowls: A set of various sizes for mixing dry and wet ingredients.
  • Whisk: Essential for combining ingredients smoothly.
  • Rubber Spatula: Perfect for folding ingredients without overmixing.
  • Cooling Rack: Allows air to circulate around the loaf for even cooling.

Serving Suggestions

To elevate your lemon poppy seed loaf, consider these serving ideas:

  • Pair with Tea: A slice of this loaf alongside a cup of herbal tea makes for a delightful afternoon break.
  • Top with Berries: Fresh strawberries or raspberries add a burst of color and flavor.
  • Add Whipped Cream: A dollop of whipped cream on top can enhance the sweetness and creaminess.
  • Serve Warm: Lightly warm slices in the microwave for a cozy treat.

With the right ingredients, tips, and a bit of love, creating a perfect lemon poppy seed loaf is not only achievable but enjoyable. So roll up your sleeves, gather your ingredients, and let’s bake something special that will bring joy to your table. Happy baking!

Lemon Poppy Seed Loaf

Prep Time 15 minutes
Cook Time 50 minutes
Total Time 1 hour 5 minutes
Servings 8 slices
Calories 350
A moist and zesty lemon loaf with crunchy poppy seeds, perfect for a bright breakfast or snack.

Ingredients

Dry ingredients

  • 2 cups all-purpose flour
  • 1.5 tsp baking powder
  • 0.5 tsp baking soda
  • 0.25 tsp salt
  • 2 tbsp poppy seeds

Wet ingredients

  • 1 cup granulated sugar
  • 2 large eggs (room temperature)
  • 0.5 cup whole milk (room temperature)
  • 0.5 cup unsalted butter (melted and cooled)
  • 0.25 cup fresh lemon juice (from 2 lemons)
  • 2 tbsp lemon zest (from 2 lemons)
  • 1 tsp vanilla extract

Glaze

  • 1 cup powdered sugar
  • 2-3 tbsp fresh lemon juice (for glaze)

Instructions 

  • Preheat oven to 350°F (175°C). Grease a loaf pan and line with parchment.
  • Mix dry ingredients and poppy seeds in a bowl.
  • Whisk sugar and eggs until thick, then add milk, butter, lemon juice, zest, and vanilla; mix well.
  • Fold dry ingredients into wet until just combined. Pour into pan and smooth top.
  • Bake for 45-55 minutes until golden and a toothpick comes out clean. Cool in pan 10 minutes, then transfer to wire rack.
  • Mix powdered sugar with lemon juice to make glaze. Drizzle over cooled loaf and let set before slicing.

Notes

Ensure not to overmix the batter for a tender crumb.
Calories: 350kcal
Cost: $15
Course: Breakfast, Snack
Cuisine: American
Keyword: lemon, loaf, poppy seed

Unleash the Flavor: Discovering the Joy of Carrot Cake Bites

If you’re searching for a delightful treat that combines **fun** with **flavor**, look no further than these *Deliciously Easy Carrot Cake Bites*. Not only are they irresistibly tasty, but they are also simple to make, making them a perfect choice for any occasion. Whether you’re a novice baker or a seasoned pro, this recipe will guide you through each step with ease.

In this article, we will explore the wonderful world of carrot cake bites, providing you with everything from ingredient breakdowns to expert tips. You’ll learn how to make these bites that are perfect for sharing with friends and family, all while keeping your kitchen effortlessly organized.

Why You’ll Love This Recipe

These carrot cake bites are not just another dessert; they’re a delightful experience! Here’s why you will love them:

  • Easy to Make: With straightforward steps, this recipe is suitable for bakers of all skill levels.
  • Perfect for Any Occasion: Whether it’s a birthday party, holiday gathering, or a simple family dessert, these bites fit right in.
  • Flavor Packed: Each bite is bursting with the rich flavors of carrot, spices, and a hint of sweetness from the pineapple.
  • Nutritious Ingredients: Packed with finely grated carrots and nuts, these bites offer a nutritious twist to your dessert table.
  • Versatile Options: Customize your bites with various mix-ins and toppings for a personal touch.

Ingredient Breakdown

Let’s dive into the ingredients that make these carrot cake bites truly special.

  • Finely Grated Carrots: The star of the recipe, carrots add moisture and sweetness. You can use pre-packaged grated carrots or grate them fresh for the best flavor.
  • All-Purpose Flour: This is the base for your bites. For a gluten-free option, consider using almond flour or a gluten-free baking blend.
  • Brown Sugar and Granulated Sugar: Both sugars contribute to the sweetness and texture. You can substitute with coconut sugar for a healthier alternative.
  • Baking Soda and Baking Powder: These leavening agents ensure your bites rise beautifully. Make sure they are fresh for the best results.
  • Spices: Ground cinnamon and nutmeg add warmth and depth to the flavor profile. Feel free to add a pinch of ginger or allspice for an extra kick.
  • Salt: A crucial ingredient that enhances the overall flavor.
  • Vegetable Oil: This keeps the bites moist. You can substitute with melted coconut oil or unsweetened applesauce for a healthier option.
  • Eggs: They act as a binder and provide structure. For a vegan version, substitute with flax eggs or applesauce.
  • Vanilla Extract: Adds a lovely background flavor.
  • Nuts (Walnuts or Pecans): These add crunch and richness. You can omit them if you prefer a nut-free recipe.
  • Crushed Pineapple: This ingredient adds moisture and a subtle sweetness. Make sure to drain it well before adding to the mixture.
  • Shredded Coconut (Optional): For a tropical twist, include shredded coconut in your batter.

How to Make It: Step-by-Step Instructions

Detailed side angle of carrot cake bites, emphasizing the soft interior filled with spices and pineapple.

Ready to whip up these delicious bites? Follow these easy steps:

  1. Preheat your oven to 350°F (175°C) and line a mini muffin pan with parchment paper or silicone liners.
  2. In a large mixing bowl, whisk together the flour, brown sugar, granulated sugar, baking soda, baking powder, cinnamon, nutmeg, and salt.
  3. In another bowl, beat the eggs with vegetable oil and vanilla extract until combined.
  4. Add the wet ingredients to the dry ingredients and stir gently until just combined.
  5. Fold in the grated carrots, chopped nuts, crushed pineapple, and shredded coconut if using.
  6. Spoon the batter evenly into the prepared muffin pan, filling each about 3/4 full.
  7. Bake for 18-20 minutes or until a toothpick inserted into the center comes out clean.
  8. Allow the bites to cool in the pan for 5 minutes before transferring to a wire rack to cool completely.

Pro Tips for Perfect Carrot Cake Bites

To ensure your carrot cake bites turn out perfectly, keep these expert tips in mind:

  • Measure Ingredients Accurately: Use standard measuring cups for accuracy, especially when it comes to flour, as too much can lead to dense bites.
  • Don’t Overmix the Batter: Mix just until combined to avoid tough bites. A few lumps are okay!
  • Let the Carrots Shine: Use finely grated carrots to ensure they distribute evenly and provide moisture without overwhelming the texture.
  • Cool Completely Before Storing: Allow the bites to cool completely before storing to prevent sogginess.
  • Experiment with Add-ins: Try adding raisins, chocolate chips, or different nuts for variations.
  • Adjust Sweetness to Taste: If you prefer a less sweet bite, reduce the sugar slightly.
  • Use Fresh Spices: Freshly ground spices can elevate the flavor significantly.
  • Check Oven Temperature: Ovens can vary, so consider using an oven thermometer to ensure accurate baking temperatures.

Common Mistakes and Troubleshooting

Even the best of us can run into issues while baking. Here are some common mistakes and how to avoid them:

  • Dense Bites: This could be due to overmixing or using too much flour. Be sure to spoon flour into your measuring cup rather than scooping.
  • Dry Bites: Overbaking is often the culprit. Keep a close eye on the timer and perform the toothpick test early.
  • Uneven Cooking: Make sure your oven is preheated properly, and rotate the pan halfway through the baking time for even cooking.
  • Too Sweet: If your bites turn out sweeter than you like, reduce the sugar in the next batch.

Delicious Variations

Want to mix things up? Here are some delightful variations on the classic carrot cake bites:

  • Spiced Banana Carrot Bites: Substitute half of the carrots for mashed bananas for a tropical twist.
  • Coconut Lime Carrot Bites: Add lime zest and replace half the sugar with shredded coconut for a zesty flavor.
  • Chocolate Chip Carrot Bites: Stir in semi-sweet chocolate chips for a sweeter version that chocolate lovers will adore.
  • Nut-Free Version: Omit the nuts altogether or substitute with sunflower seeds for a similar crunch.

Storage and Make-Ahead Instructions

These carrot cake bites can be made ahead of time and stored for later enjoyment:

  • Room Temperature: Store in an airtight container for up to 3 days.
  • Refrigerator: For longer shelf life, keep them in the fridge for up to 1 week.
  • Freezing: Freeze the bites in a single layer on a baking sheet, then transfer to a freezer bag. They can last up to 3 months.

Comprehensive FAQ

Here are some frequently asked questions about making carrot cake bites:

  • Can I use whole wheat flour? Yes, whole wheat flour can be used, but it may make the bites denser.
  • Can I make these bites vegan? Absolutely! Substitute eggs with flax eggs and use plant-based oil.
  • How do I know when they are done baking? A toothpick inserted into the center should come out clean or with a few moist crumbs.
  • Can I add fruits like raisins? Yes, raisins or dried fruits can be added for extra sweetness and texture.
  • What can I serve with carrot cake bites? Pair them with a cup of tea or coffee for a delightful afternoon snack.
  • What is the best way to store them? Store them in an airtight container at room temperature or refrigerate for freshness.
  • Can I double the recipe? Yes, feel free to double the recipe for larger gatherings.
  • What toppings can I use? Cream cheese frosting or a simple glaze can be drizzled on top for added sweetness.

Nutrition Tips and Dietary Adaptations

For healthier adaptations of this recipe, consider the following:

  • Reduce Sugar: Cut back on sugar or use natural sweeteners like honey or maple syrup.
  • Use Whole Ingredients: Incorporate whole grain flour and organic ingredients for a more nutritious bite.
  • Increase Fiber: Add ground flaxseeds or chia seeds to boost fiber content.
  • Control Portions: Use mini muffin tins to keep portion sizes in check while indulging.

Essential Equipment Recommendations

To make your baking experience seamless, here are a few essential tools:

  • Mixing Bowls: A set of various sized mixing bowls for easy mixing and preparation.
  • Mini Muffin Pan: For perfectly sized bites, a quality mini muffin pan is crucial.
  • Measuring Cups and Spoons: Accurate measurements will ensure your bites turn out just right.
  • Whisk and Spatula: A whisk for mixing dry ingredients and a spatula for folding in the carrots and nuts.

Serving Suggestions

Finally, here are some ideas for serving your carrot cake bites:

  • With Cream Cheese Frosting: Drizzle or dip in cream cheese frosting for a deliciously rich pairing.
  • On a Dessert Platter: Serve alongside other desserts for a colorful and inviting display.
  • With Fresh Fruit: Pair with slices of fresh fruit like oranges or strawberries for added freshness.
  • As Party Favors: Package them in cute boxes for take-home treats at gatherings.

In conclusion, these *Deliciously Easy Carrot Cake Bites* are not just a recipe; they are a celebration of flavors that everyone can enjoy. With easy steps, customization options, and a variety of serving suggestions, they are the perfect addition to any dessert table. So, what are you waiting for? Gather your ingredients and create these delightful bites that are sure to impress!

Carrot Cake Bites Recipe

Prep Time 10 minutes
Cook Time 20 minutes
Total Time 30 minutes
Servings 12 pieces
Calories 150
Delightful mini carrot cake bites that are perfect for a quick snack or dessert, combining fresh carrots, nuts, and spices in a moist, flavorful treat.

Ingredients

dry ingredients

  • 1 1/2 cups finely grated carrots
  • 1 cup all-purpose flour
  • 1/2 cup brown sugar
  • 1/4 cup granulated sugar
  • 1/2 teaspoon baking soda
  • 1/2 teaspoon baking powder
  • 1/2 teaspoon ground cinnamon
  • 1/4 teaspoon ground nutmeg
  • 1/4 teaspoon salt
  • 1/3 cup vegetable oil
  • 2 large eggs
  • 1 teaspoon vanilla extract
  • 1/2 cup chopped walnuts or pecans
  • 1/4 cup crushed pineapple, drained
  • 1/4 cup shredded coconut (if using)

Instructions 

  • Preheat oven to 350°F (175°C) and line a mini muffin pan.
  • Mix dry ingredients in a bowl; beat eggs with oil and vanilla.
  • Combine wet and dry; fold in carrots, nuts, pineapple, and coconut.
  • Spoon batter into pan; bake 18-20 minutes until a toothpick comes out clean.
  • Cool for 5 minutes in pan, then transfer to wire rack to cool completely.

Notes

For best results, use fresh grated carrots and drained pineapple.
Calories: 150kcal
Cost: $12
Course: Dessert
Cuisine: American
Keyword: bite, carrot, Snack