Author

Mike

Browsing

Breakfast is often referred to as the most important meal of the day, and what better way to kickstart your morning than with a delicious and nutritious Avocado Egg Salad Toast? This delightful dish combines creamy avocado with perfectly boiled eggs, enhanced by the smoky flavor of paprika and fresh herbs. In this article, we’ll dive deep into every aspect of making this dish, from choosing the right ingredients to troubleshooting common mistakes. Whether you’re a culinary novice or a seasoned chef, you’ll find tips and tricks that make this recipe a must-try!

Why You’ll Love This Recipe

This Avocado Egg Salad Toast is not just a feast for your taste buds; it offers a variety of benefits that make it a fantastic addition to your breakfast repertoire.

  • Nutritious Start: Packed with protein, healthy fats, and vitamins, this dish fuels your body for the day ahead.
  • Quick to Prepare: With a total time of just 20 minutes, you can whip this up even on the busiest mornings.
  • Versatile Ingredients: Customize your toast with various toppings or herbs to suit your taste and dietary needs.
  • Meal Prep Friendly: This dish can be made ahead of time and stored for those hectic mornings.
  • Deliciously Satisfying: The combination of creamy avocado and eggs creates a filling meal that keeps you satisfied.

Ingredients You’ll Need

Gathering the right ingredients is crucial for the perfect Avocado Egg Salad Toast. Here’s a detailed breakdown, including some substitutions if you’re missing an item.

  • 4 large eggs: The foundation of your salad. You can use hard-boiled eggs for the best texture.
  • 2 ripe avocados: Look for avocados that yield slightly to pressure. You can substitute with guacamole if you’re in a pinch.
  • 2 tablespoons Greek yogurt or mayonnaise: Adds creaminess. Use vegan mayo for a plant-based option.
  • 1 teaspoon fresh lemon juice: For brightness. Lime juice works well too.
  • 1/2 teaspoon kosher salt: Essential for flavor enhancement.
  • 1/4 teaspoon black pepper: For a hint of spice.
  • 1/2 teaspoon smoked paprika: Gives a smoky flavor; feel free to adjust to your taste.
  • 1/4 cup finely diced red onion: Adds crunch and sweetness. You can substitute spring onion if desired.
  • 2 tablespoons chopped fresh chives or parsley: For a touch of freshness.
  • 4 slices whole-grain or sourdough bread: Provides a hearty base; gluten-free bread can be used for a gluten-free option.

Step-by-Step Instructions

Follow these detailed steps to create your Avocado Egg Salad Toast:

  1. Boil the eggs: Place eggs in a pot, cover with water, and bring to a boil. Once boiling, cover and remove from heat. Let them sit for about 10 minutes. Afterward, cool under running cold water, peel, and chop.
  2. Prepare the avocado mixture: In a mixing bowl, mash the avocados with Greek yogurt or mayonnaise, lemon juice, salt, pepper, and smoked paprika until smooth.
  3. Combine ingredients: Gently fold in the chopped eggs, red onion, and herbs until well mixed.
  4. Toast the bread: Toast your bread slices to your liking, then pile on the avocado egg salad mixture.
  5. Serve and enjoy: Sprinkle with extra smoked paprika before serving for a finishing touch.

Pro Tips for Perfect Avocado Egg Salad Toast

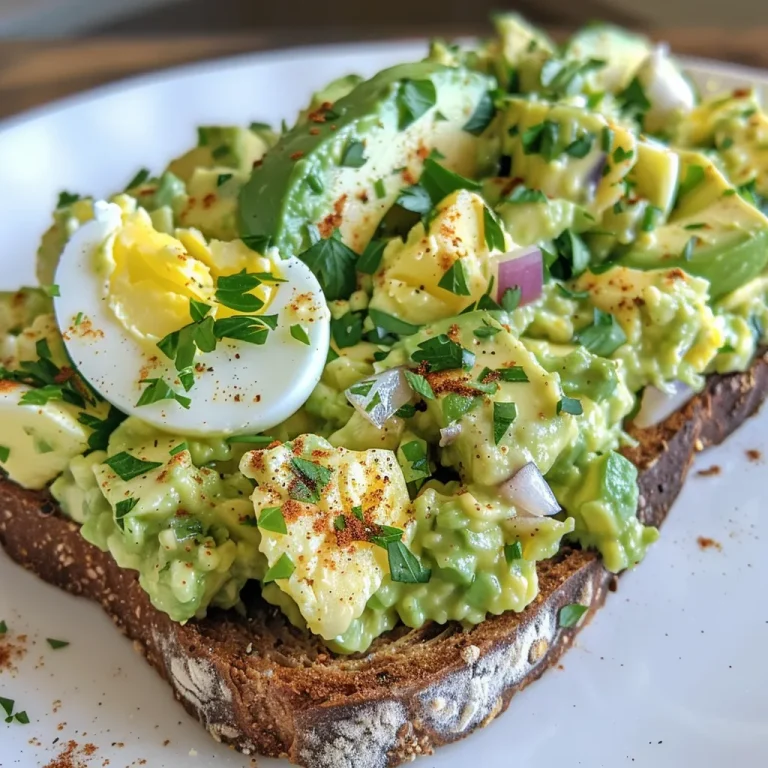
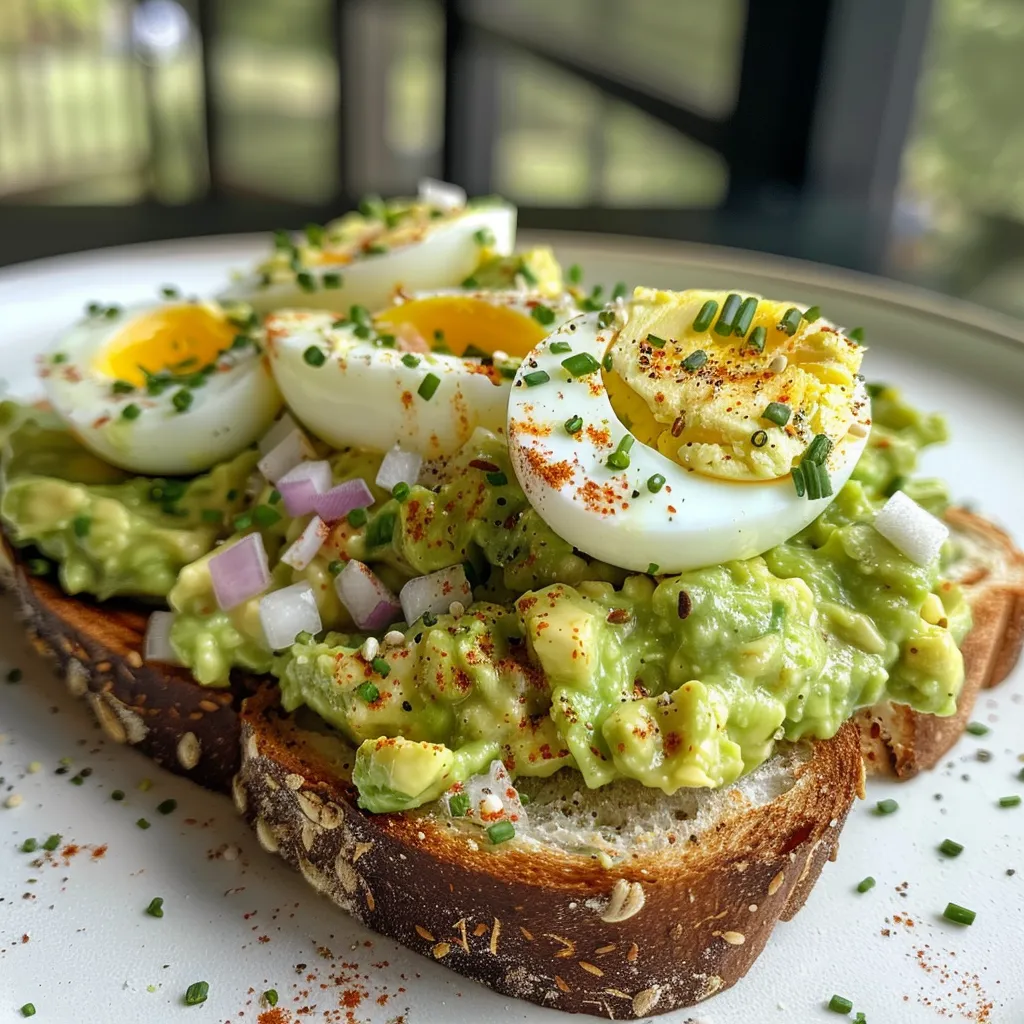
Delicious avocado egg salad toast, featuring a combination of greens and eggs, with a paprika finish.

Enhance your cooking experience with these expert insights:

  • Choose ripe avocados: Ensure your avocados are perfectly ripe for the best flavor and creaminess.
  • Don’t overmix: Gently fold the ingredients to maintain the texture of the eggs and avocados.
  • Experiment with spices: Try adding cayenne pepper or garlic powder for an extra kick.
  • Use fresh herbs: Fresh herbs elevate the taste significantly. Consider adding dill or cilantro.
  • Toast variations: Experiment with different types of bread; try rye or bagels for a twist.
  • Garnish with flair: Top with microgreens or a drizzle of olive oil for a gourmet touch.
  • Keep the skins: If you’re not a fan of peeling avocados, consider leaving the skins on for added fiber.
  • Season to taste: Adjust salt and pepper according to your palate.
  • Storage tips: Store leftover salad in an airtight container in the fridge for up to two days, but eat the toast fresh for the best texture!

Common Mistakes and Troubleshooting

Here are some common pitfalls and how to avoid them:

  • Overcooked eggs: Boil eggs for too long, and they’ll become rubbery. Stick to the 10-minute rule!
  • Brown avocados: To prevent avocados from browning, add more lemon juice and cover tightly when storing.
  • Too much seasoning: Start with less salt and pepper; you can always add more, but it’s hard to take it out.
  • Dry toast: If your toast is too dry, consider adding more Greek yogurt or mayonnaise to the mixture.

Variations to Try

One of the best parts of cooking is experimenting! Here are several variations of this classic recipe:

  • Spicy Avocado Egg Salad: Add diced jalapeños or a splash of hot sauce for a kick.
  • Tex-Mex Twist: Incorporate black beans, corn, and cilantro for a south-of-the-border flair.
  • Italian Style: Mix in sun-dried tomatoes and basil for a Mediterranean twist.
  • Smoked Salmon Addition: Fold in pieces of smoked salmon for a luxurious breakfast option.

Storage and Make-Ahead Instructions

Make-Ahead: You can prepare the egg salad up to 2 days in advance. Store it in an airtight container in the fridge. To maintain freshness, press plastic wrap directly onto the surface of the mixture before sealing the container. This will help prevent browning.

Comprehensive FAQ

Here are some frequently asked questions that can clarify any doubts:

  • Can I use different types of bread? Yes! Whole grain, sourdough, gluten-free, or even bagels work well.
  • How long does the avocado egg salad last? It can be stored in the fridge for up to 2 days.
  • Can I freeze this dish? It’s not recommended to freeze as the texture of eggs and avocado may change.
  • What can I serve on the side? Fresh fruit, a light salad, or yogurt complements this dish beautifully.
  • Is this recipe suitable for meal prep? Absolutely! It’s perfect for make-ahead breakfasts or lunches.
  • Can I make this egg salad vegan? Yes, use tofu or chickpeas instead of eggs and vegan mayo.
  • What if I don’t have smoked paprika? Regular paprika or cayenne can be used as a substitute.
  • How do I know when my avocados are ripe? Press gently on the skin; if it gives slightly, it’s ripe and ready to use.

Nutrition Tips and Dietary Adaptations

This dish is naturally rich in nutrients, but here are some tips for different dietary needs:

  • Low-Carb Option: Serve the salad in lettuce wraps instead of on bread.
  • Vegan Option: Substitute eggs with chickpeas or silken tofu and use vegan mayonnaise.
  • Heart-Healthy Option: Use less mayonnaise or replace it with avocado to reduce saturated fat.
  • Gluten-Free Option: Choose gluten-free bread or enjoy the salad on its own.

Equipment Recommendations

Having the right tools makes the cooking process smoother:

  • Pot for boiling: A medium-sized pot is ideal for boiling eggs.
  • Mixing bowl: Use a large bowl for mixing the salad ingredients.
  • Fork or potato masher: For mashing the avocados effectively.
  • Toaster: Ensure you have a reliable toaster for perfectly golden-brown bread.

Serving Suggestions

Make your presentation pop with these serving ideas:

  • Garnish: Top with additional herbs, a sprinkle of paprika, or microgreens.
  • Pair with sides: Serve with fresh fruit, a light salad, or a smoothie for a balanced meal.
  • Toast Variations: Try different breads or add layers of greens beneath the avocado egg salad.

Conclusion

In conclusion, Avocado Egg Salad Toast is more than just a breakfast item; it’s a versatile, nutritious, and delicious way to start your day. With endless variations, you can easily customize this dish to suit your preferences and dietary needs. Whether you’re enjoying it at home or preparing it for a weekend brunch with friends, this recipe will surely impress. So gather your ingredients, follow the steps, and savor every bite of this delightful dish!

Avocado Egg Salad Toast Paprika

Prep Time 10 minutes
Cook Time 10 minutes
Total Time 20 minutes
Servings 4 slices
Calories 350
A delicious and nutritious avocado egg salad served on toasted bread, topped with smoked paprika for a smoky flavor.

Ingredients

Eggs

  • 4 large eggs

Avocados

  • 2 ripe avocados (peeled and pitted)

Dairy or Mayonnaise

  • 2 tablespoons Greek yogurt or mayonnaise

Lemon Juice

  • 1 teaspoon fresh lemon juice

Salt and Pepper

  • 0.5 teaspoon kosher salt
  • 0.25 teaspoon black pepper

Smoked Paprika

  • 0.5 teaspoon smoked paprika (plus extra for garnish)

Red Onion

  • 0.25 cup finely diced red onion

Herbs

  • 2 tablespoons chopped fresh chives or parsley

Bread

  • 4 slices whole-grain or sourdough bread

Instructions 

  • Boil eggs for 10 minutes, then cool, peel, and chop.
  • Mash avocados and mix with yogurt, lemon juice, salt, pepper, and smoked paprika.
  • Add chopped eggs, red onion, and herbs; stir gently.
  • Toast bread slices and top with avocado egg salad; garnish with extra paprika.
Notes

For extra flavor, sprinkle additional smoked paprika on top before serving.
Calories: 350kcal
Cost: $12
Course: Breakfast, Brunch
Cuisine: American
Keyword: Avocado, Egg, Toast

Discover the Delight of Caprese Stuffed Avocado

If you’re looking to elevate your appetizer game, look no further than this Caprese Stuffed Avocado recipe. Combining the creamy texture of ripe avocados with the vibrant flavors of juicy tomatoes and fresh mozzarella, this dish is as beautiful as it is delicious. Whether for a summer gathering or a cozy evening at home, this recipe is perfect for sharing and is sure to impress your guests. Let’s dive into why you’ll love this dish and how to make it shine in your kitchen!

Why You’ll Love This Recipe

  • Fresh Ingredients: This recipe uses ripe avocados, juicy tomatoes, and creamy mozzarella, making it a light yet satisfying option.
  • Quick Preparation: With minimal cooking required, you can whip up this dish in just a few minutes, ideal for last-minute gatherings.
  • Customizable: The basic recipe allows for numerous variations, so you can tailor it to suit your taste preferences or dietary needs.
  • Perfect for Any Occasion: Whether it’s a casual snack or a fancy dinner party, these stuffed avocados are versatile and appealing.
  • Healthy and Nutritious: Packed with healthy fats from avocados and antioxidants from tomatoes, this dish is a guilt-free indulgence.

Ingredient Breakdown

Understanding the ingredients is crucial for perfecting this stuffed avocado recipe. Here’s what you’ll need:

  • 1/2 cup grape or cherry tomatoes: Halved for easy stuffing, these tomatoes offer sweetness and color.
  • 4 oz (120g) baby mozzarella balls (bocconcini): These add creaminess; you can substitute with shredded mozzarella if needed.
  • 2 tablespoons basil pesto: Homemade or store-bought, this is essential for that classic Caprese flavor.
  • 1 teaspoon minced garlic: Provides a subtle kick; feel free to adjust based on your preference.
  • 1/4 cup olive oil: A drizzle enhances the flavor; opt for extra virgin for the best taste.
  • Salt and pepper: Essential seasonings that bring all the flavors together.
  • 2 ripe avocados: Choose avocados that yield slightly to pressure; they’ll be creamy yet hold their shape.
  • Fresh basil leaves (optional): For garnish, these add a pop of color and freshness.
  • 2 tablespoons balsamic glaze: A drizzle over the top adds a sweet and tangy finish.
  • 2 tablespoons fresh basil (chopped): Adds flavor and texture; can be substituted with parsley if desired.

How to Make Caprese Stuffed Avocado

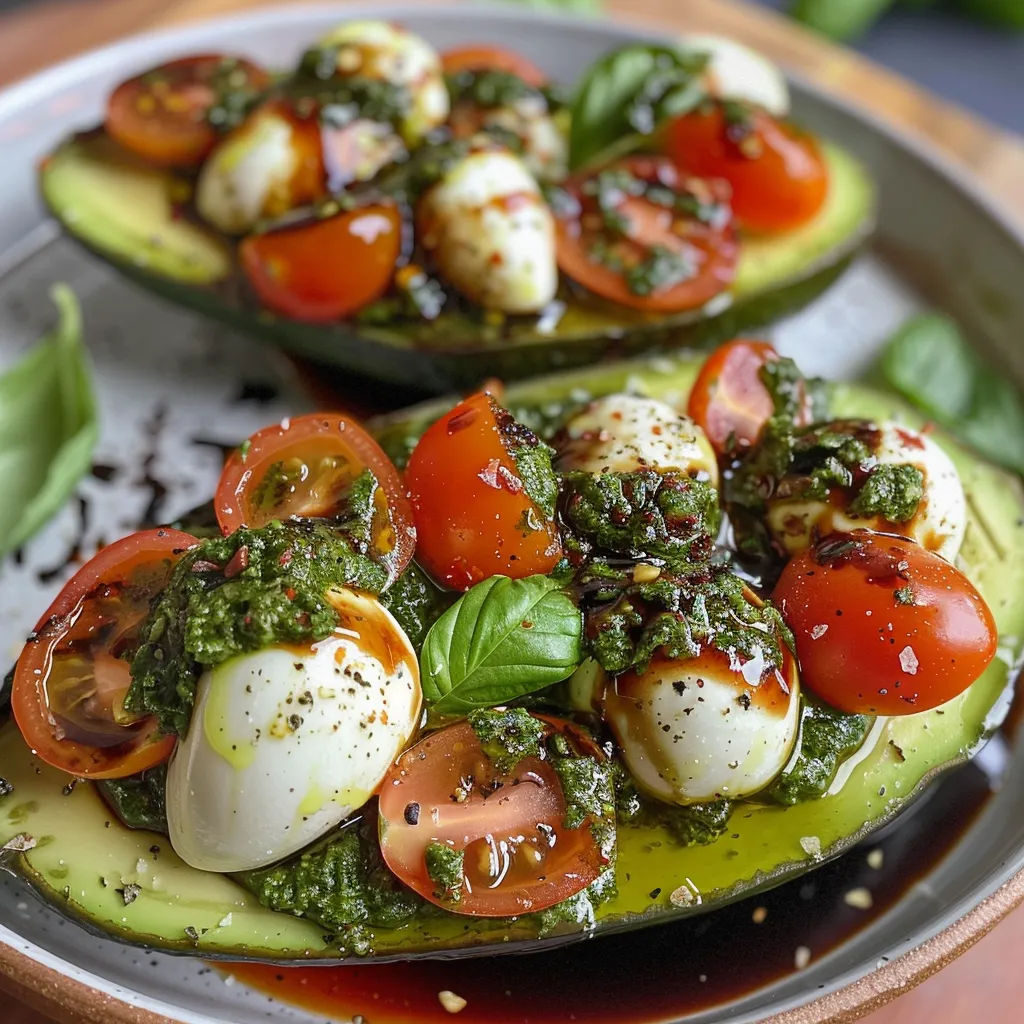
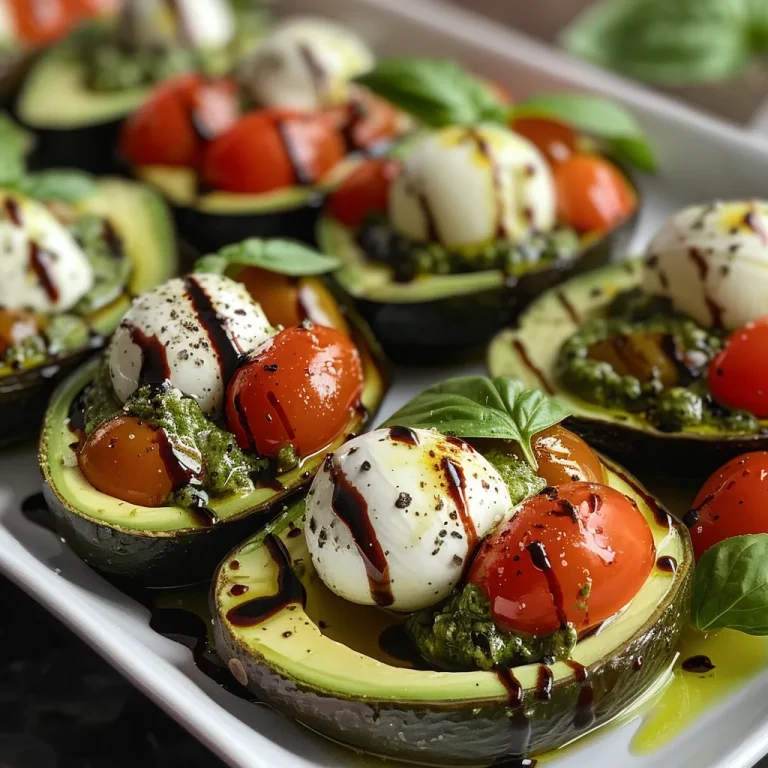
Colorful Caprese salad ingredients displayed in ripe avocado halves.

Follow these steps for a deliciously easy appetizer:

  1. Combine tomatoes, mozzarella balls, pesto, minced garlic, olive oil, salt, and pepper in a bowl. Toss well to ensure the flavors meld.
  2. Arrange the avocado halves on a serving plate, garnished with fresh basil leaves if desired.
  3. Spoon the Caprese filling into each avocado half, ensuring they are generously stuffed.
  4. Drizzle with balsamic glaze and sprinkle with chopped fresh basil. Serve immediately for the best flavor.

Pro Tips for Perfect Caprese Stuffed Avocados

  • Choose the Right Avocados: Look for avocados that are slightly soft but not mushy. This ensures a creamy texture when you scoop them.
  • Balance Flavors: Taste your filling before stuffing the avocados. Adjust the seasoning if necessary to achieve the perfect flavor.
  • Make Ahead: You can prepare the filling ahead of time, but stuff the avocados just before serving to avoid browning.
  • Experiment with Cheese: Try using burrata for an even creamier filling or feta for a tangy twist.
  • Fresh Herbs: Use fresh herbs like chives, parsley, or oregano for an added flavor boost.
  • Drizzle with Lemon Juice: A splash of lemon can brighten the dish and help prevent the avocados from browning.
  • Presentation Matters: Serve on a beautiful platter and garnish with extra basil for a restaurant-quality look.
  • Customize Your Dressing: Instead of balsamic glaze, try a citrus vinaigrette for a refreshing change.

Common Mistakes and Troubleshooting

Here are some common pitfalls to avoid:

  • Overripe Avocados: Ensure your avocados are just ripe enough to scoop; overly soft avocados can become mushy.
  • Too Much Liquid: If the filling is too watery, drain excess liquid from the mozzarella and tomatoes.
  • Unseasoned Filling: Don’t skip the seasoning; bland filling can ruin the overall taste.

Variations to Try

Mix things up with these delicious variations:

  • Italian Style: Add diced prosciutto or salami for a meaty option.
  • Mexican Twist: Substitute the mozzarella with queso fresco and add diced jalapeños for a spicy kick.
  • Greek Influence: Use feta cheese and kalamata olives for a Mediterranean flair.
  • Vegan Version: Replace mozzarella with a plant-based cheese and use cashew cream for a creamy texture.

Storage and Make-Ahead Instructions

To keep your Caprese stuffed avocados fresh:

  • Refrigeration: Store the filling in an airtight container for up to 2 days. Avoid stuffing the avocados until just before serving.
  • Freezing: It’s not recommended to freeze stuffed avocados, as the texture will suffer.
  • Make-Ahead: Prepare the filling a day in advance and keep it in the fridge to save time on the day of serving.

Comprehensive FAQ

  • Can I make these stuffed avocados ahead of time? Yes, prepare the filling a day before and stuff the avocados just before serving.
  • Are stuffed avocados healthy? Absolutely! They are rich in healthy fats, vitamins, and antioxidants.
  • Can I use a different cheese? Yes, feel free to substitute mozzarella with your preferred cheese.
  • What can I serve with stuffed avocados? These pair well with crusty bread, a light salad, or as part of a charcuterie board.
  • How do I store leftovers? Keep the filling in an airtight container in the fridge for up to 2 days.
  • Can I add more ingredients? Certainly! Ingredients like olives, nuts, or other vegetables can enhance the flavor.
  • Are these suitable for vegetarians? Yes, this recipe is vegetarian-friendly.
  • What’s the best way to serve them? Serve immediately after stuffing for the best taste and texture.

Nutritional Tips and Dietary Adaptations

This dish is naturally gluten-free and can be made vegan by substituting certain ingredients. Here are some additional tips:

  • Low-Carb Option: Pair with leafy greens instead of bread for a low-carb meal.
  • Nut-Free: Ensure any added ingredients are free from nuts if you have allergies.
  • Low-Fat Option: Use part-skim mozzarella to reduce fat content while maintaining flavor.

Equipment Recommendations

For this recipe, you will need:

  • Sharp Knife: For cutting and halving the avocados and chopping ingredients.
  • Mixing Bowl: For combining the filling ingredients.
  • Serving Platter: To present your stunning stuffed avocados.

Serving Suggestions

Present your Caprese Stuffed Avocado on a beautiful platter, garnished with extra basil leaves and a drizzle of balsamic glaze. Pair it with a chilled glass of white wine or a refreshing sparkling water for a delightful dining experience. This dish can also be a fantastic starter for a multi-course meal or a light lunch option.

Conclusion

Creating a beautiful and delicious Caprese Stuffed Avocado is not just about the flavors, but also about the joy of sharing a meal with loved ones. With its vibrant colors and fresh ingredients, this dish embodies the spirit of good food and great company. I hope you enjoy making this recipe as much as I do, and remember, cooking is all about having fun and connecting with those around you. Happy cooking!

Caprese Stuffed Avocado

Prep Time 10 minutes
Total Time 10 minutes
Servings 2 servings
Calories 250
A fresh and flavorful appetizer combining creamy avocados with a classic Caprese filling, drizzled with balsamic glaze.

Ingredients

Filling

  • 1/2 cup grape or cherry tomatoes, (halved)
  • 4 oz baby mozzarella balls (bocconcini)
  • 2 tablespoons basil pesto homemade or store bought
  • 1 teaspoon minced garlic
  • 1/4 cup olive oil
  • to taste Salt and pepper (to season)
  • 2 ripe avocados (peeled, seeded and halved)
  • to serve Fresh basil leaves (optional)
  • 2 tablespoons balsamic glaze (reduction to drizzle)
  • 2 tablespoons fresh basil (chopped)

Instructions 

  • Combine tomatoes, mozzarella, pesto, garlic, olive oil, salt, and pepper in a bowl. Toss to combine.
  • Arrange avocado halves on a plate with basil leaves.
  • Spoon the filling into each avocado half and drizzle with balsamic glaze. Garnish with chopped basil. Serve immediately.

Notes

Use ripe avocados for best flavor and texture.
Calories: 250kcal
Cost: $12
Course: Appetizer
Cuisine: Italian
Keyword: Avocado, Mozzarella, Tomato

Elevate Your Cooking with Irresistibly Spicy Sriracha Noodles

Welcome to your next culinary adventure! If you’re craving a dish that balances heat, flavor, and simplicity, then spicy Sriracha noodles are your answer. This recipe is not only quick to prepare but also allows you to customize it to your taste. Whether you’re a seasoned chef or a home cook just starting out, you’ll find joy in creating this delightful meal. Let’s dive into the world of flavors and discover how to make these delicious noodles that are sure to impress!

Why You’ll Love This Recipe

Here are just a few reasons why this spicy Sriracha noodles recipe is a must-try:

  • Quick Preparation: Ready in under 30 minutes, making it perfect for busy weeknights.
  • Budget-Friendly: Utilizing simple ingredients, you can whip up this meal for about $1.50 per serving.
  • Customizable Heat Level: Adjust the Sriracha to suit your spice tolerance—whether you like it mild or fiery!
  • Balanced Flavors: The combination of Sriracha, soy sauce, and brown sugar creates a deliciously complex taste.
  • Healthy Ingredients: Packed with protein from eggs and the option to add fresh vegetables, this dish can be nutritious too.

Ingredients Breakdown

To create these flavorful spicy Sriracha noodles, you’ll need the following ingredients:

  • 4 oz. lo mein noodles ($1.30): The foundation of the dish, these noodles are chewy and absorb flavors beautifully.
  • 2 Tbsp butter ($0.20): Adds richness and helps in cooking the eggs.
  • 1/4 tsp crushed red pepper ($0.02): For an extra kick, adjust based on your heat preference.
  • 2 large eggs ($0.42): Provides protein and a creamy texture.
  • 1 Tbsp brown sugar ($0.08): Balances out the heat from the Sriracha.
  • 1 Tbsp soy sauce ($0.06): Adds depth and umami flavor.
  • 2 Tbsp Sriracha ($0.22): The star of the show—adjust to taste.
  • 1 handful fresh cilantro (optional) ($0.10): For garnish and freshness.
  • 1 green onion, sliced ($0.10): Adds crunch and color.

Feel free to substitute lo mein noodles with rice noodles or spaghetti if you prefer. You can also replace Sriracha with another chili sauce if you want a different flavor profile.

Step-by-Step Instructions

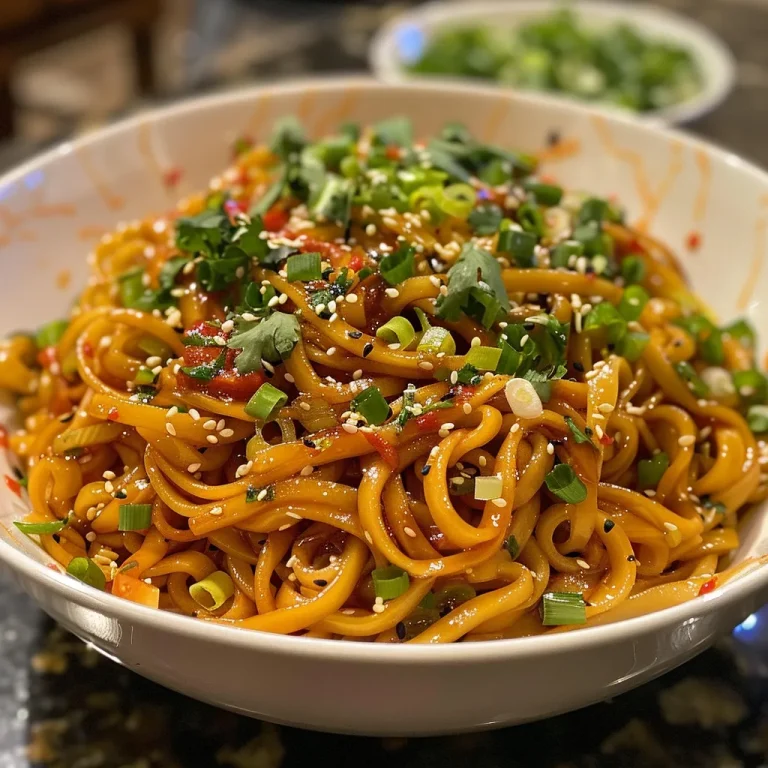
Colorful plate of spicy noodles showcasing red sauce and toppings.

Follow these simple steps to create your spicy Sriracha noodles:

  1. Prepare the sauce: In a small bowl, combine the brown sugar, soy sauce, and Sriracha. Mix well and set aside.
  2. Cook the noodles: Bring a pot of water to a boil. Add the lo mein noodles and cook until tender, usually about 3-5 minutes. Drain and set aside.
  3. Scramble the eggs: While the noodles are cooking, crack the eggs into a bowl and whisk lightly. Heat the butter in a skillet over medium heat, then add the eggs and crushed red pepper. Scramble gently, avoiding overcooking.
  4. Combine: Once the noodles are drained, add them to the skillet with the scrambled eggs. Drizzle the sauce over the top and toss everything to coat evenly.
  5. Garnish and serve: Top the noodles with fresh cilantro and sliced green onion before serving.

Pro Tips for Perfect Spicy Sriracha Noodles

Want to elevate your dish even further? Here are some expert tips:

  • Don’t overcook the eggs: They should be soft and creamy, not rubbery. Cook them just until set.
  • Adjust the sauce: Taste the sauce before adding it to the noodles; you can always add more Sriracha or sugar based on your preference.
  • Mix in vegetables: Bell peppers, broccoli, or snap peas can add color and nutrients to your meal. Stir-fry them with the eggs.
  • Use a non-stick skillet: This keeps the noodles from sticking together and makes clean-up easier.
  • Make it a meal prep option: These noodles store well in the fridge, so consider making a double batch for easy lunches during the week.

Common Mistakes and Troubleshooting

Even the best chefs can encounter issues! Here’s how to avoid common pitfalls:

  • Noodles sticking together: Make sure to rinse the noodles under cold water after boiling to stop the cooking process and remove excess starch.
  • Too spicy?: If the dish ends up too spicy, add a little more brown sugar or even a splash of coconut milk to balance the heat.
  • Eggs overcooked?: Keep an eye on the eggs as they cook; they should be scrambled gently and remain slightly soft.

Variations to Try

Feel free to experiment with these tasty variations:

  • Veggie-Loaded Sriracha Noodles: Add bell peppers, carrots, and broccoli for extra nutrition.
  • Protein-Packed Version: Include chicken, shrimp, or tofu for a heartier meal.
  • Creamy Sriracha Noodles: Stir in a splash of coconut milk or cream for a rich and creamy texture.
  • Cold Sriracha Noodle Salad: Let the dish cool and serve it cold as a refreshing salad.

Storage and Make-Ahead Instructions

These noodles can be made ahead and stored for later enjoyment:

  • Refrigerate: Store leftovers in an airtight container in the refrigerator for up to 3 days.
  • Reheat: Warm up in a skillet over medium heat, adding a splash of water or broth to loosen the noodles.
  • Make-ahead: Prepare the sauce and chop vegetables in advance, then just cook the noodles and eggs when you’re ready to eat.

Frequently Asked Questions

Here are some common queries about spicy Sriracha noodles:

  • Can I use other types of noodles? Absolutely! Rice noodles or even whole wheat spaghetti work well.
  • What can I add to enhance the flavor? Consider garlic, ginger, or sesame oil for an extra flavor boost.
  • Is this recipe gluten-free? Use gluten-free noodles and tamari instead of soy sauce.
  • How can I make this dish vegetarian? Simply omit any meat and add more veggies or tofu.
  • Can I freeze these noodles? While it’s best fresh, they can be frozen; just be aware that the texture may change upon thawing.
  • What’s a good side dish? Pair these noodles with a light salad or steamed vegetables for a complete meal.
  • How can I make this dish less spicy? Reduce the amount of Sriracha and add more brown sugar for balance.
  • What’s the best way to serve these noodles? Serve immediately for the best texture, garnished with fresh herbs and veggies.

Nutrition Tips and Dietary Adaptations

This recipe can be easily adapted to fit various dietary needs:

  • Low-Carb Option: Swap noodles for spiralized zucchini or shirataki noodles.
  • Vegan Version: Replace eggs with tofu scramble or chickpea flour mixture.
  • High-Protein Option: Add edamame or grilled chicken for an extra protein boost.

Essential Kitchen Equipment

To whip up these spicy Sriracha noodles, make sure you have the following tools:

  • Large pot: For boiling the noodles.
  • Non-stick skillet: Ideal for cooking the eggs and tossing the noodles.
  • Measuring spoons: For accurate ingredient amounts.

Serving Suggestions

Enhance your meal with these serving ideas:

  • Garnish with fresh herbs: Cilantro and green onions add a burst of freshness.
  • Serve with lime wedges: A squeeze of lime brightens the flavors beautifully.
  • Pair with protein: Consider grilled chicken or shrimp on the side for added heartiness.

In conclusion, spicy Sriracha noodles are not just a meal; they’re an experience. With their vibrant flavors and endless customization options, you can make this dish your own. Whether you’re enjoying a cozy night in, impressing friends at dinner, or meal prepping for the week, these noodles are sure to become a staple in your kitchen. Happy cooking!

Spicy Sriracha Noodles

Prep Time 5 minutes
Cook Time 10 minutes
Total Time 15 minutes
Servings 2 servings
Calories 350
A quick and flavorful noodle dish with a spicy sriracha sauce, perfect for a satisfying meal.

Ingredients

Noodles

  • 4 oz lo mein noodles (Cooked and drained)
  • 2 Tbsp butter
  • 1/4 tsp crushed red pepper
  • 2 large eggs (Beaten lightly)
  • 1 Tbsp brown sugar
  • 1 Tbsp soy sauce
  • 2 Tbsp sriracha
  • 1 handful fresh cilantro (Optional)
  • 1 green onion sliced green onion

Instructions 

  • Mix brown sugar, soy sauce, and sriracha to make the sauce.
  • Cook noodles until tender, then drain.
  • Whisk eggs in a bowl.
  • Scramble eggs in butter with red pepper, then add noodles and sauce, tossing to coat.
  • Garnish with cilantro and green onion, then serve.

Notes

Adjust spice level by adding more or less red pepper.
Calories: 350kcal
Cost: $4.50
Course: Main Course
Cuisine: Asian
Keyword: Noodles

Elevate Your Breakfast with Avocado Egg Salad Toast

If you’re looking for a delicious and nutritious breakfast option, look no further than Avocado Egg Salad Toast! This dish combines the creamy goodness of ripe avocados with the protein-packed power of hard-boiled eggs. Together, they create a satisfying and flavorful meal that’s perfect for any time of day. With a hint of spice from paprika and the option to customize it to your liking, this recipe is a winner for both quick breakfasts and leisurely brunches. Let’s dive into the details of this incredible dish and discover why you’ll love making it!

Why You’ll Love This Recipe

This recipe isn’t just about great taste; it also offers several benefits that make it a standout choice in your culinary repertoire:

  • Quick and Easy: With a preparation time of just 15 minutes, it’s perfect for busy mornings or unexpected guests.
  • Nutrient-Dense: Packed with healthy fats from avocados and protein from hard-boiled eggs, it’s a meal that nourishes your body.
  • Customizable: Whether you prefer a classic flavor profile or want to add your twist, this recipe allows for plenty of variations.
  • Visual Appeal: The vibrant green of the avocado and the golden yellow of the eggs create an eye-catching dish that’s sure to impress.
  • Perfect for Meal Prep: Make a big batch in advance for quick, healthy meals throughout the week.

Ingredients Breakdown

Here’s what you’ll need to create your own Avocado Egg Salad Toast:

  • 2 ripe avocados: Look for avocados that yield slightly to pressure, indicating ripeness.
  • 4 hard-boiled eggs: Perfectly boiled eggs add protein and texture. (Tip: Use eggs that are 7-10 days old for easier peeling!)
  • 1 tablespoon mayonnaise (optional): This adds extra creaminess; feel free to skip it for a lighter version.
  • 1 teaspoon Dijon mustard: A touch of tang that enhances the overall flavor.
  • Salt and black pepper, to taste: Essential for seasoning, adjust according to your preference.
  • 1 teaspoon paprika (plus extra for garnish): Adds a subtle kick and a beautiful color.
  • 4 slices of whole-grain bread: Choose your favorite bread for toasting; whole grain is a nutritious option.
  • Fresh herbs (e.g., chives or cilantro, optional): Fresh herbs enhance flavor and add a burst of color.

Step-by-Step Instructions

A mouthwatering slice of egg salad toast featuring ripe avocados and herbs.

Creating Avocado Egg Salad Toast is a breeze when you follow these simple steps:

  • Boil the Eggs: Place eggs in a pot of cold water. Bring to a boil, then cover and remove from heat. Let them sit for about 10-12 minutes. Transfer to cold water to cool, then peel.
  • Prepare the Avocados: Cut the avocados in half and remove the pit. Scoop the flesh into a bowl and mash with a fork until creamy.
  • Chop the Eggs: Dice the hard-boiled eggs and add them to the bowl with the mashed avocado.
  • Mix Ingredients: Add mayonnaise (if using), Dijon mustard, salt, black pepper, and paprika to the bowl. Mix until well combined.
  • Toast the Bread: While mixing, toast the slices of whole-grain bread until golden brown.
  • Assemble the Toast: Spread the avocado egg salad generously over each slice of toasted bread.
  • Garnish: Sprinkle additional paprika on top and add fresh herbs if desired.
  • Serve: Enjoy immediately while the toast is still warm!

Pro Tips for Perfect Avocado Egg Salad Toast

To ensure your Avocado Egg Salad Toast turns out perfectly every time, consider these expert tips:

  • Choose Ripe Avocados: Underripe avocados can be hard to mash and lack flavor. Look for avocados that give slightly when pressed.
  • Don’t Overmix: For a chunkier texture, mix the ingredients just enough to combine, leaving some egg pieces intact.
  • Add a Twist: Experiment with spices like cayenne for heat or garlic powder for additional flavor.
  • Use Fresh Ingredients: Fresh herbs and spices elevate the taste; consider adding lemon juice for brightness.
  • Toast Freshly: Toast bread just before serving to maintain a crunchy texture that contrasts beautifully with the creamy salad.
  • Store Ingredients Separately: If making ahead, store the salad and bread separately to avoid sogginess.
  • Use Quality Mustard: A good-quality Dijon mustard will enhance the flavor profile significantly.
  • Make It Vegan: Substitute eggs with chickpeas or tofu for a delicious vegan version.

Common Mistakes and Troubleshooting

Even the best chefs make mistakes! Here are some common issues and how to avoid them:

  • Eggs Cracking: To prevent cracking, start with cold water and bring it to a boil gradually.
  • Overripe Avocados: If your avocado is too soft, it can turn brown quickly. Use lemon juice to slow down oxidation.
  • Too Salty: If your mix ends up too salty, adding additional avocado can balance the flavor.
  • Bread Sogginess: If making ahead, toast the bread just before serving to keep it crispy.

Variations to Try

Feel free to get creative! Here are some delicious variations of the classic Avocado Egg Salad Toast:

  • Spicy Avocado Egg Salad: Add diced jalapeños or a splash of hot sauce for a kick.
  • Herbed Avocado Egg Salad: Mix in fresh dill or parsley for a garden-fresh flavor.
  • Crunchy Avocado Egg Salad: Incorporate diced celery or chopped pickles for added crunch.
  • Smoked Salmon Avocado Toast: Top with smoked salmon for an upscale twist.

Storage and Make-Ahead Instructions

Want to save time? Here’s how to store your ingredients and make them ahead:

  • Avocado Egg Salad: Store in an airtight container in the refrigerator for up to 2 days. Add a squeeze of lemon to prevent browning.
  • Toasted Bread: Toast the bread just before serving to maintain its crispness.
  • Meal Prep: Prepare the egg salad in advance and store it separately from the bread for quick assembly.

Frequently Asked Questions

Here are some common questions about Avocado Egg Salad Toast:

  • Can I use scrambled eggs instead? Yes! Scrambled eggs can be a delicious alternative to hard-boiled eggs.
  • How can I make this recipe lower in calories? Use less mayonnaise or skip it altogether and add Greek yogurt instead.
  • Can I freeze the egg salad? It’s best not to freeze avocado egg salad as the texture of the avocado changes when frozen.
  • What can I serve with this dish? Pair it with fresh fruit, a green salad, or a bowl of soup for a complete meal.
  • Is this recipe vegan-friendly? To make it vegan, substitute the eggs with mashed chickpeas or tofu.
  • What bread is best for toasting? Whole grain, sourdough, or gluten-free bread all work well!
  • How do I prevent my avocados from browning? Add a splash of lemon or lime juice to keep them fresh longer.
  • Can I prepare this the night before? Yes! You can prepare the egg salad in advance, but toast the bread right before serving.

Nutrition Tips and Dietary Adaptations

This dish can be adapted to meet various dietary needs:

  • Gluten-Free: Use gluten-free bread to make this recipe suitable for those with gluten intolerance.
  • Low-Carb: Serve the avocado egg salad in lettuce wraps instead of on bread for a low-carb option.
  • Dairy-Free: This recipe is naturally dairy-free, but ensure any substitutions like yogurt are also dairy-free.
  • High-Protein: Add additional eggs or even some cooked chicken for an extra protein boost.

Equipment Recommendations

Here are some tools that can make preparing this recipe even easier:

  • Egg Timer: Ensures perfectly boiled eggs every time.
  • Avocado Slicer: Helps to easily cut and remove the pit from avocados.
  • Mixing Bowl: A sturdy mixing bowl is essential for mashing and combining ingredients.
  • Toaster or Toaster Oven: For perfectly crispy toast.

Serving Suggestions

Here are some ideas on how to serve your Avocado Egg Salad Toast:

  • Garnish: Top with additional fresh herbs or a sprinkle of sesame seeds for added flavor.
  • Pair with Beverages: Serve with fresh juice, herbal tea, or coffee for a complete breakfast experience.
  • Accompaniments: Serve alongside a side of mixed greens or roasted vegetables for a balanced meal.

In conclusion, Avocado Egg Salad Toast is not just a recipe; it’s an experience that brings joy and nourishment to your table. With its delightful flavors, nutritional benefits, and endless variations, this dish is bound to become a favorite in your kitchen. So gather your ingredients, get cooking, and enjoy a warm slice of this delicious toast with friends and family!

Avocado Egg Salad Toast with Paprika: An Incredible Ultimate Recipe

Prep Time 10 minutes
Cook Time 15 minutes
Total Time 25 minutes
Servings 4 slices
Calories 250
This delicious avocado egg salad toast combines creamy mashed avocados, chopped hard-boiled eggs, and a sprinkle of paprika for a flavorful and nutritious meal.

Ingredients

Main

  • 2 pieces ripe avocados
  • 4 pieces hard-boiled eggs
  • 1 tablespoon mayonnaise (optional)
  • 1 teaspoon Dijon mustard
  • Salt Salt, to taste
  • Black pepper Black pepper, to taste
  • 1 teaspoon paprika (plus extra for garnish)
  • 4 slices whole-grain bread
  • Fresh herbs (e.g., chives or cilantro, optional) Fresh herbs (optional)

Instructions 

  • Boil eggs for 10-12 minutes, then peel and dice.
  • Cut avocados in half, remove pits, and mash the flesh in a bowl.
  • Add chopped eggs, mayonnaise, Dijon mustard, salt, black pepper, and paprika to the mashed avocado. Mix well.
  • Toast the bread slices until golden brown.
  • Spread the avocado egg salad over the toasted bread, garnish with extra paprika and herbs if desired, and serve immediately.

Notes

For extra flavor, add fresh herbs or a squeeze of lemon juice.
Calories: 250kcal
Cost: $10
Course: Breakfast, Brunch
Cuisine: American
Keyword: Avocado, Egg, Toast

Stuffed shells are a comforting classic that never fails to impress, whether you’re cooking for family, friends, or a special occasion. These stuffed shells, filled with creamy ricotta, fresh spinach, and a medley of cheeses, are an easy yet elegant dish that brings warmth and joy to the dinner table. In this comprehensive guide, I’ll share everything you need to know to prepare these delicious shells perfectly, along with tips, variations, and common pitfalls to avoid.

Why You’ll Adore This Recipe

This stuffed shells recipe isn’t just about taste; it’s about creating delightful experiences. Here’s why you’ll fall in love with it:

  • Comfort Food Appeal: These stuffed shells remind us of family dinners and cozy evenings, making them the perfect comfort food.
  • Make-Ahead Meal: You can prepare the shells in advance, allowing for hassle-free mealtime on busy nights.
  • Customizable Filling: The filling can be adjusted to suit your taste, offering a world of possibilities from classic ricotta to meaty blends.
  • Impressive Presentation: The vibrant colors of the marinara sauce and cheese topping create an eye-catching dish that will wow your guests.
  • Perfect for Leftovers: These stuffed shells store well, making them an excellent option for meal prep or easy lunches the next day.

Essential Ingredients for Stuffed Shells

To make your stuffed shells, you’ll need the following ingredients, along with some recommended substitutions:

  • 18-20 jumbo pasta shells: Boil a few extra in case some break.
  • 1-2 tablespoons olive oil: For sautéing the garlic and spinach.
  • 3 cloves garlic (minced): Adds aromatic flavor.
  • 4 cups spinach: Fresh spinach is best, but you can use frozen; just ensure it’s well drained.
  • 15 oz. ricotta: Creamy and rich, it’s the heart of your filling.
  • ½ cup Parmesan cheese (grated): Enhances the flavor profile.
  • 3 cups mozzarella cheese (shredded and divided): An essential for that gooey finish.
  • 2 tablespoons cream cheese: Makes the filling extra creamy.
  • 1 egg: Helps bind the filling together.
  • 24 ounces marinara sauce: Use your favorite store-bought or homemade version.
  • Fresh parsley (to garnish): For a touch of color and freshness.
  • ½ tsp salt, ¼ tsp pepper: For seasoning.
  • ½ teaspoon dried basil, parsley, and oregano: For added flavor depth.

How to Make Stuffed Shells

Now that we have our ingredients, let’s dive into the step-by-step process:

  • Preheat your oven: Set it to 375 degrees Fahrenheit.
  • Boil the pasta shells: Cook them in salted water for 1 minute less than al dente (around 13 minutes). Set a timer to avoid overcooking. Drain and rinse with cold water until cool.
  • Sauté the garlic and spinach: Heat olive oil in a large skillet over medium heat. Add the garlic and cook for 1 minute, then add the spinach and toss to coat until wilted (about 3 minutes). Set aside to cool.
  • Prepare the filling: In a large bowl, combine ricotta, seasonings, half of the mozzarella, most of the Parmesan, cream cheese, and the egg. Stir to combine, then fold in the cooled spinach and garlic.
  • Assemble the shells: Spread half of the marinara sauce in a 9×13-inch casserole dish. Fill each pasta shell with the cheese mixture and place it in the dish. Pour the remaining marinara sauce over the top, then sprinkle with the remaining mozzarella and Parmesan.
  • Bake: Cover the dish with foil and bake for 20 minutes. Remove the foil and bake for an additional 10 minutes until the cheese is bubbly and golden. Garnish with fresh parsley before serving.

Pro Tips for the Best Stuffed Shells

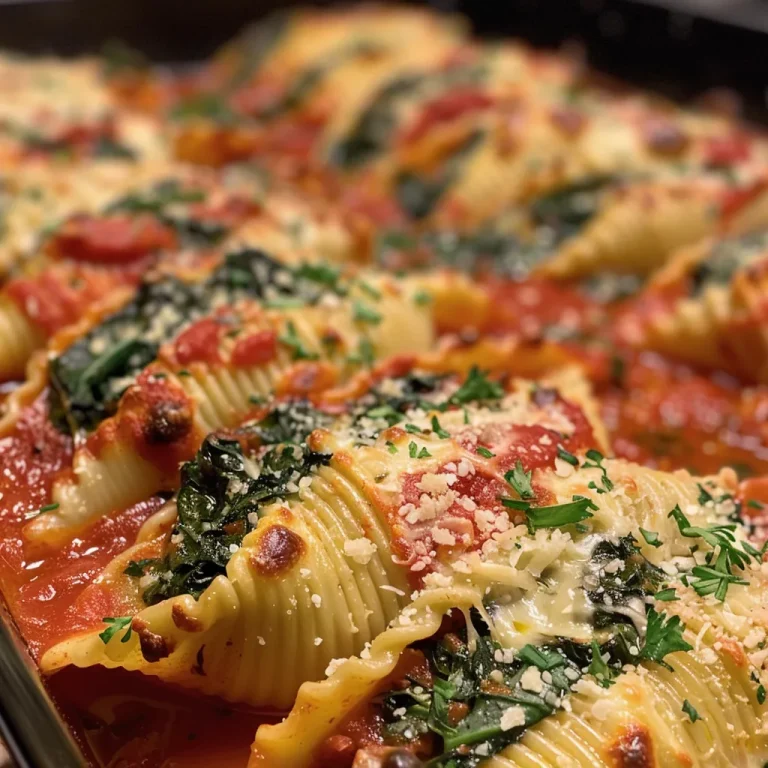
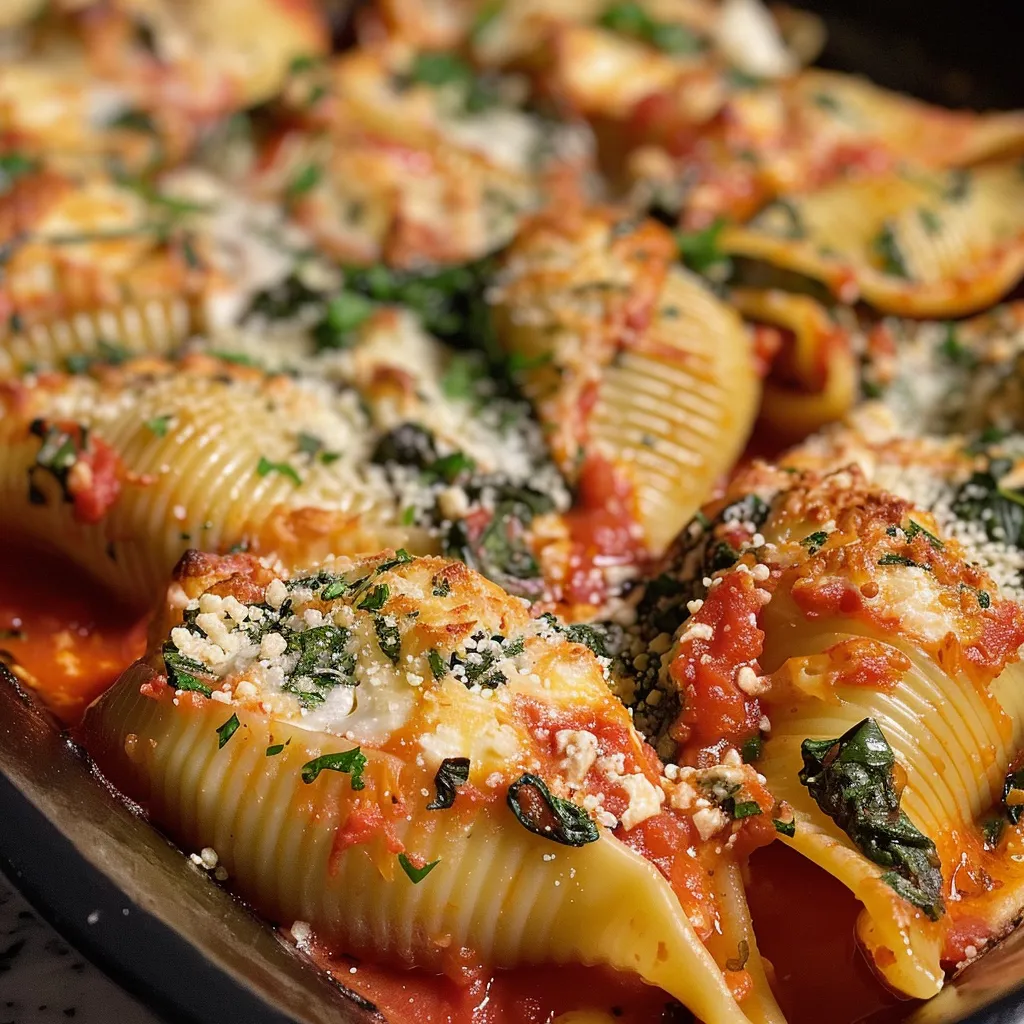
Close-up of baked stuffed pasta shells in marinara sauce, showcasing the cheese.

Here are some expert insights to elevate your stuffed shells:

  • Choose quality pasta: Use high-quality jumbo shells to prevent breakage and ensure even cooking.
  • Don’t overcook the shells: Remember, they will continue to cook in the oven, so undercook them slightly.
  • Let the filling cool: Cooling the spinach and garlic mixture before combining it with ricotta helps maintain a creamy texture.
  • Use a piping bag: For easy filling, use a piping bag or a zip-top bag with the corner cut off to fill the shells neatly.
  • Experiment with flavors: Try adding different herbs or spices to the filling for a unique twist.
  • Top with extra cheese: Don’t hold back on the cheese topping; it adds that irresistible gooeyness.
  • Consider a layer of béchamel: For a richer taste, add a layer of béchamel sauce beneath the marinara.
  • Cover while baking: Covering the dish initially helps keep the shells moist.

Common Mistakes and Troubleshooting

Even seasoned cooks can make mistakes. Here are some common pitfalls to avoid:

  • Overcooking the shells: This can lead to a mushy texture. Always follow the package instructions closely.
  • Not enough filling: Ensure each shell is generously filled for maximum flavor.
  • Skipping the cooling step: Filling the shells with hot filling can make them fall apart.
  • Ignoring seasoning: Don’t forget to season your ricotta filling adequately; bland filling leads to bland shells.

Variations to Try

Want to switch things up? Here are some delicious variations of your stuffed shells:

  • Meat Lovers’ Stuffed Shells: Add cooked ground beef, sausage, or turkey to the ricotta filling for a protein-packed dish.
  • Vegetarian Delight: Incorporate sautéed mushrooms, zucchini, or bell peppers into the filling for a hearty vegetarian option.
  • Pesto Spinach Stuffed Shells: Replace some of the ricotta with basil pesto for a flavorful twist.
  • Cheesy Alfredo Stuffed Shells: Use Alfredo sauce in place of marinara for a creamy, indulgent version.

Storage and Make-Ahead Instructions

These stuffed shells are excellent for making ahead of time. Here’s how to store and prepare them:

  • Refrigeration: Assemble the shells, cover tightly with foil, and refrigerate for up to 24 hours before baking.
  • Freezing: Assemble the shells and freeze them unbaked. When ready to cook, bake directly from the freezer, adding 10-15 minutes to the cooking time.
  • Leftovers: Store leftovers in an airtight container in the fridge for up to 3 days. Reheat in the oven or microwave before serving.

FAQ About Stuffed Shells

Here are some frequently asked questions that might help clarify your stuffed shells journey:

  • Can I use a different type of cheese? Absolutely! Feel free to experiment with different cheeses like goat cheese or feta.
  • What can I serve with stuffed shells? Garlic bread, a fresh salad, or steamed veggies make great side dishes.
  • Can I make stuffed shells gluten-free? Yes, use gluten-free jumbo pasta shells to accommodate dietary restrictions.
  • How do I know when they are done? The cheese should be melted and bubbly, and the edges of the shells should be slightly crispy.
  • Is there a way to make this dish lighter? You can use low-fat cheeses and reduce the amount of oil used.
  • Can I add meat to the filling? Yes, cooked ground meat can be added for more protein and flavor.
  • Can I use homemade marinara? Absolutely! Using homemade marinara sauce can elevate the flavor even more.
  • What’s the best way to reheat leftovers? Reheat in the oven for best results, covering with foil to prevent drying out.

Nutrition Tips and Dietary Adaptations

If you’re mindful of nutrition, here are some helpful tips:

  • Reduce cheese content: Use less cheese or substitute with lower-fat versions for a healthier option.
  • Add more veggies: Consider adding additional vegetables to the filling to boost fiber and nutrients.
  • Whole grain pasta: Swap out regular shells for whole grain or high-protein pasta shells for added health benefits.

Equipment Recommendations

Here’s what you’ll need to make your stuffed shells:

  • 9×13-inch baking dish: Essential for baking your stuffed shells evenly.
  • Large skillet: For sautéing garlic and spinach.
  • Mixing bowls: At least one large bowl for the filling.
  • Measuring cups and spoons: To ensure accurate ingredient amounts.
  • Piping bag or zip-top bag: For easy filling of the shells.

Serving Suggestions

To complete your meal, consider pairing your stuffed shells with:

  • Garlic bread: Perfect for mopping up any leftover sauce.
  • Mixed greens salad: A light salad with a vinaigrette adds a refreshing contrast.
  • Roasted vegetables: Seasoned roasted veggies complement the richness of the stuffed shells.

In conclusion, stuffed shells are not just a dish; they’re an experience filled with flavor, warmth, and love. Whether you’re making them for a family gathering or just a quiet night at home, this recipe is sure to become a favorite. So roll up your sleeves, gather your ingredients, and let’s create something special together! Happy cooking!

Stuffed Shells

Prep Time 15 minutes
Cook Time 30 minutes
Total Time 45 minutes
Servings 6 servings
Calories 550
A delicious baked pasta dish featuring jumbo shells filled with a cheesy spinach mixture, topped with marinara and melted cheese.

Ingredients

Pasta

  • 18-20 pieces jumbo pasta shells (boiled extra in case some break)
  • 1-2 tablespoons olive oil
  • 3 cloves garlic (minced)
  • 4 cups spinach
  • 15 oz. Ricotta
  • ½ cup Parmesan cheese (grated)
  • 3 cups mozzarella cheese (shredded and divided)
  • 2 Tablespoons cream cheese
  • 1 egg egg
  • 24 ounces marinara sauce
  • ½ tsp Salt
  • ¼ tsp pepper
  • ½ teaspoon dried basil
  • ½ teaspoon dried parsley
  • ½ teaspoon dried oregano

Instructions 

  • Preheat oven to 375°F (190°C). Boil shells until just tender, then drain and rinse with cold water.
  • Sauté garlic in olive oil for 1 minute, add spinach and cook until wilted. Cool.
  • Mix ricotta, seasonings, half of mozzarella, Parmesan, cream cheese, egg, and cooled spinach.
  • Fill shells with cheese mixture, place in baking dish, top with remaining marinara and cheese.
  • Cover and bake at 375°F for 20 minutes, then uncover and bake 10 more minutes. Garnish and serve.

Notes

Use extra shells and cheese for a richer dish. Serve with garlic bread for a complete meal.
Calories: 550kcal
Cost: $15
Course: Main Course
Cuisine: Italian
Keyword: Pasta

Unveiling the Delight of Mini Oreo Cheesecake Bites

Welcome to the delicious world of Mini Oreo Cheesecake Bites! These delightful treats combine the rich and creamy flavor of cheesecake with the beloved crunch of Oreo cookies, resulting in a dessert that’s perfect for any occasion. Whether you’re celebrating a birthday, hosting a dinner party, or simply indulging your sweet tooth, these cheesecake bites are sure to impress your family and friends. In this comprehensive guide, we’ll walk you through everything you need to know about creating these mini desserts that not only taste amazing but are also visually appealing.

Why You’ll Love This Recipe

Here are five compelling reasons to try making Mini Oreo Cheesecake Bites:

  • Effortless Preparation: With simple steps and minimal ingredients, you can whip up these bites in no time.
  • Perfect for Any Occasion: These treats are ideal for parties, potlucks, or just a sweet ending to your meal.
  • Individual Servings: No need for messy slicing—each bite is a perfectly portioned dessert.
  • Make-Ahead Option: Prepare them a day in advance and let them chill in the refrigerator until you’re ready to serve.
  • Endless Customization: From toppings to flavors, these bites can be tailored to fit any palate.

Ingredients Breakdown

To create these delightful cheesecake bites, you’ll need the following ingredients:

  • 8 ounces cream cheese: Ensure it’s softened to room temperature for a smooth texture.
  • 1/3 cup granulated sugar: This adds the right amount of sweetness to balance the cream cheese.
  • 1 cup heavy whipping cream: Whipped to stiff peaks, this makes the cheesecake light and airy.
  • 1 teaspoon pure vanilla extract: For that delicious hint of flavor.
  • 24 Oreos: 12 crushed for the crust and 12 whole for topping—classic and delightful!
  • 4 tablespoons unsalted butter: Melted, to bind your crust together perfectly.

Pro Tips for Perfect Mini Oreo Cheesecake Bites

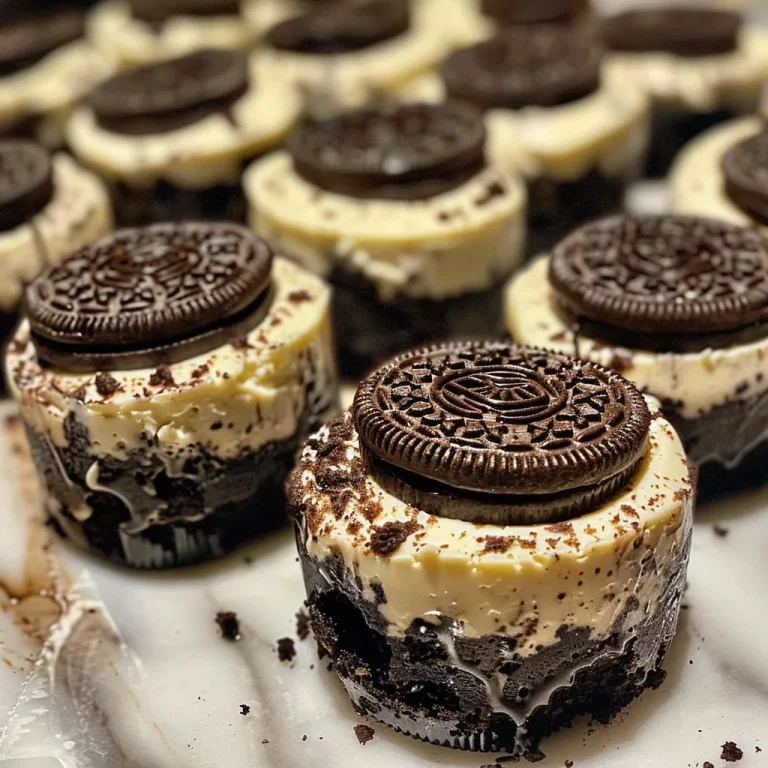
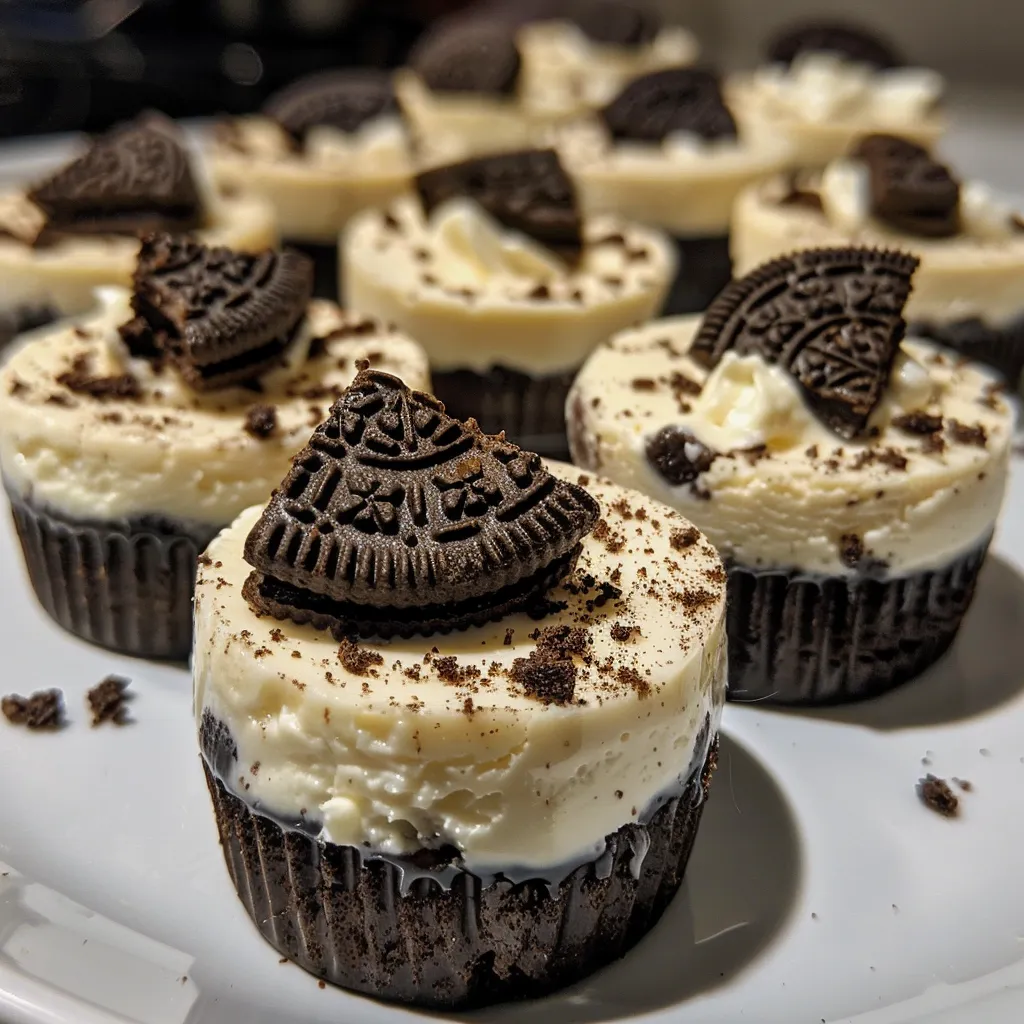
Image of delicious Mini Oreo Cheesecake Bites, featuring a creamy center and a crunchy Oreo crust.

Use these expert insights to take your cheesecake bites to the next level:

  • Room Temperature Ingredients: Always use cream cheese and eggs at room temperature for a smoother batter.
  • Whip Cream Properly: Whip the heavy cream until stiff peaks form, ensuring your bites are light and fluffy.
  • Even Crust Distribution: When pressing the crust into the cupcake liners, make sure it’s evenly distributed for consistency.
  • Chill Time Matters: Allowing the cheesecake bites to chill overnight enhances the flavors and texture.
  • Creative Toppings: Experiment with different toppings like chocolate sauce, fruit, or crushed nuts for added flavor.
  • Use Quality Oreos: The flavor of your cheesecake will largely depend on the quality of your Oreo cookies.
  • Don’t Overbake: These bites are meant to be creamy, so keep an eye on them to prevent overcooking.
  • Try Different Cookie Varieties: Consider using gluten-free Oreos for a dietary-friendly option.

Common Mistakes and Troubleshooting

Even the best chefs can encounter issues in the kitchen. Here’s how to avoid common pitfalls:

  • Grainy Texture: If your cheesecake filling is grainy, make sure your cream cheese is softened properly before mixing.
  • Filling Overflows: Don’t overfill your cupcake liners; leave a little space for the cheesecake to expand.
  • Crust Too Crumbly: If your crust doesn’t hold together, add a bit more melted butter to bind the crumbs.
  • Too Sweet or Not Sweet Enough: Adjust the sugar based on your taste preferences; you can always start with less.

Variations for Mini Oreo Cheesecake Bites

Feel free to get creative with these variations:

  • Mint Oreo Cheesecake Bites: Use Mint Oreos for a fresh twist on the classic flavor.
  • Peanut Butter Swirl: Add a swirl of peanut butter into the cheesecake filling for a nutty flavor.
  • Chocolate Drizzle: Drizzle melted chocolate over the top before serving for extra indulgence.
  • Fruit-Topped Bites: Top with fresh berries or fruit compote for a refreshing contrast.

Storage and Make-Ahead Instructions

Want to prepare your cheesecake bites ahead of time? Here’s how to store them:

  • Refrigeration: Keep the cheesecake bites in an airtight container in the refrigerator for up to 5 days.
  • Freezing: You can freeze the bites for up to 2 months. Just make sure to wrap them well to prevent freezer burn.

Frequently Asked Questions

Here are some common questions about Mini Oreo Cheesecake Bites:

  • Can I use low-fat cream cheese? Yes, but the texture may be slightly different.
  • How long do they need to chill? Chill for at least 4 hours, but overnight is best for flavor development.
  • Can I make these gluten-free? Absolutely! Just substitute regular Oreos with gluten-free Oreos.
  • What should I do if I can’t find mini cupcake liners? You can use regular cupcake liners, but adjust the filling quantity accordingly.
  • Can I skip the baking step? Yes, these bites can be made without baking if you prefer a no-bake version!
  • What’s the best way to serve them? Serve chilled, and consider garnishing with whipped cream or chocolate shavings.
  • How can I ensure the cheesecake bites come out easily? Let them cool completely before removing from the liners.
  • Can I use different flavored Oreos? Certainly! Feel free to experiment with different flavors to suit your taste.

Nutritional Tips and Dietary Adaptations

For those mindful of dietary preferences:

  • Low-Sugar Option: Substitute granulated sugar with a sugar alternative to reduce calories.
  • Dairy-Free Version: Use dairy-free cream cheese and coconut cream for the whipped topping.
  • Vegan-Friendly: Replace Oreos with a vegan cookie and use a plant-based whipped cream.

Essential Equipment Recommendations

Before you start, make sure you have the right tools:

  • Mixing Bowls: A set of various-sized mixing bowls will help with ingredient preparation.
  • Hand Mixer: For easy whipping of the cream and mixing the cheesecake filling.
  • Measuring Cups and Spoons: Accurate measurements are key to successful baking.
  • Mini Cupcake Pan: Essential for shaping your cheesecake bites perfectly.

Serving Suggestions

Finding the right way to present your treats can enhance the experience:

  • Plate Presentation: Arrange the bites on a beautiful serving platter with fresh mint leaves.
  • Garnish: Top with whipped cream and a sprinkle of crushed Oreos for added flair.
  • Pair with Drinks: Serve alongside coffee, tea, or dessert wines for a complete experience.

In conclusion, Mini Oreo Cheesecake Bites are not just easy to make; they’re also a delightful way to enjoy the classic flavors of cheesecake and Oreos in a fun, bite-sized form. With this comprehensive guide, you’re equipped with everything you need to create these treats confidently. So, gather your ingredients, unleash your inner chef, and enjoy the sweet symphony of flavors that these bites have to offer. Happy baking!

Mini Oreo Cheesecake Bites Recipe - Deliciously Easy Treats

Prep Time 20 minutes
Total Time 20 minutes
Servings 12 pieces
Calories 250
These mini Oreo cheesecake bites are a quick and delightful treat, perfect for satisfying your sweet tooth with minimal effort.

Ingredients

Crust

  • 12 pieces Oreos (for crust)
  • 4 tablespoons unsalted butter (melted)

Filling

  • 8 ounces cream cheese (softened)
  • 1/3 cup granulated sugar
  • 1 cup heavy whipping cream
  • 1 teaspoon pure vanilla extract

Topping

  • 12 whole Oreos (for topping)

Instructions 

  • Crush 12 Oreos and mix with melted butter; press into cupcake liners to form crust.
  • Beat softened cream cheese and sugar until smooth; add vanilla and heavy cream, mixing until stiff peaks form.
  • Gently fold in half of the crushed Oreos into the cheesecake mixture.
  • Spoon filling over crusts, top with remaining crushed Oreos.
  • Refrigerate for at least 4 hours before serving.

Notes

Chill thoroughly for best results.
Calories: 250kcal
Cost: $10
Course: Dessert
Cuisine: American
Keyword: bite, cheesecake, Oreo

If you’re looking to impress friends and family with a delightful treat, you’ve come to the right place! These homemade pistachio donuts are not only fluffy and flavorful, but they also come packed with the magical essence of pistachio cream. In this comprehensive guide, we’ll walk you through everything you need to create these delicious donuts, ensuring that even novice bakers can achieve bakery-quality results right from their home kitchens.

Why You’ll Love This Recipe

  • Fluffy Texture: These donuts are soft and fluffy, thanks to the perfect dough preparation and frying technique.
  • Flavor Explosion: The combination of pistachio cream and lemon zest creates a unique flavor that tantalizes your taste buds.
  • Easy to Follow: This step-by-step guide makes it simple for anyone to create delicious donuts, no matter your skill level.
  • Versatile: You can customize these donuts with different fillings, glazes, and toppings to suit your preferences.
  • Perfect for Any Occasion: These donuts are ideal for weekend brunches, special celebrations, or even just a treat for yourself!

Ingredients You’ll Need for Pistachio Donuts

Before you get started, let’s gather all the ingredients you’ll need. Each ingredient plays a critical role in achieving the best pistachio donuts.

  • ¾ cup (177 ml) whole milk: Heated to 105°F–115°F to activate the yeast.
  • 2 ¼ teaspoons (7 g) active dry yeast: Essential for leavening the donuts and achieving that perfect fluffiness.
  • 3 tablespoons (36 g) granulated sugar: A touch of sweetness that helps activate the yeast.
  • 3 ¼ cups (406 g) all-purpose flour or bread flour: Provides structure to the dough.
  • 1 teaspoon salt: Enhances the flavor.
  • 2 large eggs: Must be at room temperature to ensure a smooth batter.
  • ½ cup (113 g) unsalted butter: Room temperature and sliced for easy blending.
  • 6 cups vegetable oil or canola oil: For frying, providing that crispy outer layer.
  • ¾ cup (150 g) granulated sugar: For the sugar coating; you can also add lemon zest for an extra zing!
  • 1 tablespoon lemon zest (optional): Adds a refreshing citrus note.
  • ¾ to 1 cup pistachio paste or pistachio cream: For filling the donuts; this is the star of the show!

How to Make the Fluffy Donut Dough

Now that you have your ingredients ready, let’s dive into the process of making the dough.

  • Activate the Yeast: In a small bowl, combine warm milk, yeast, and 1 tablespoon of sugar. Let it sit for about 5 minutes until foamy.
  • Mix the Dry Ingredients: In a stand mixer bowl fitted with a dough hook, add flour, salt, and remaining sugar.
  • Add Wet Ingredients: Pour in the yeast mixture, eggs, and butter. Mix on low until a soft dough forms.
  • Knead the Dough: Increase the speed and knead for 10–15 minutes until the dough is smooth and elastic. Perform the windowpane test to check if it’s ready.
  • First Rise: Transfer the dough to a lightly greased bowl, cover, and let it rise for 1 to 1½ hours until doubled in size.

Shaping and Frying the Donuts

A beautifully fried pistachio donut, featuring a light golden brown exterior.

Once the dough has risen, it’s time to shape and fry the donuts.

  • Punch Down the Dough: After the first rise, punch down the dough to release excess air.
  • Roll and Cut: Roll the dough to ½-inch thickness on a floured surface. Cut into 3-inch rounds.
  • Second Rise: Place the rounds on parchment squares, cover loosely, and let rise for another 30 minutes until slightly puffed.
  • Fry the Donuts: Heat oil in a heavy pot to 350°F–355°F. Fry 2–3 donuts at a time for 1 to 1½ minutes per side until golden brown, then drain on paper towels.
  • Coat in Sugar: While warm, roll the donuts in granulated sugar or lemon sugar for an extra touch of sweetness.

Pistachio Cream Filling – Silky and Dreamy

To make these donuts truly irresistible, let’s talk about the filling. The pistachio cream adds a rich and nutty flavor that pairs perfectly with the fluffy donut.

  • Prepare the Filling: Use a piping bag to fill each donut with 1–2 tablespoons of pistachio cream. Creating a cavity in the side of each donut helps with even filling.
  • Serve Fresh: For the best texture and flavor, serve the donuts fresh. They’re delightful when enjoyed warm!

Common Mistakes and Troubleshooting

Even seasoned bakers can make mistakes, so here are some tips to help you troubleshoot:

  • Donuts Not Rising: Ensure your yeast is fresh. If it doesn’t foam, it might be dead.
  • Greasy Donuts: Make sure the oil temperature is correct. Too low, and they absorb oil; too high, and they cook too quickly.
  • Dough Too Sticky: If the dough is too sticky, add flour gradually while kneading until it reaches the right consistency.
  • Filling Too Runny: Ensure your pistachio cream is thick enough. If it’s too runny, consider adding a thickener or letting it cool before filling.

Variations and Customizations

Once you’ve mastered the basic recipe, feel free to experiment with these variations:

  • Chocolate Glaze: Dip the donuts in a rich chocolate glaze for a decadent twist.
  • Maple Syrup Drizzle: A maple syrup glaze adds a sweet and earthy flavor.
  • Pistachio Crumble: Top with crushed pistachios for an extra crunch.
  • Fruit Filling: Try filling with raspberry or strawberry jam for a fruity surprise.

Storage and Make-Ahead Instructions

To keep your donuts fresh and delicious, follow these storage tips:

  • Room Temperature: Store in an airtight container at room temperature for up to 2 days.
  • Refrigeration: For longer storage, keep in the fridge for up to a week, but they may lose some freshness.
  • Freezing: Freeze unfilled donuts in an airtight container for up to 3 months. Thaw at room temperature before filling and serving.

Nutrition Tips and Dietary Adaptations

If you’re looking to make these donuts a bit healthier, consider the following adaptations:

  • Gluten-Free Option: Use a gluten-free flour blend to make the donuts gluten-free.
  • Reduced Sugar: Reduce the sugar in the dough and coating for a lighter treat.
  • Dairy-Free Adaptation: Substitute almond or oat milk and use vegan butter for a dairy-free version.

Equipment Recommendations

Here’s a quick list of essential equipment for making your pistachio donuts:

  • Stand Mixer: Essential for kneading the dough efficiently.
  • Heavy Pot: For frying; a cast iron pot retains heat well.
  • Thermometer: To ensure the oil is at the perfect frying temperature.
  • Piping Bag: For filling the donuts with pistachio cream.

Serving Suggestions

To make your presentation even more delightful, consider these serving ideas:

  • With Coffee: Serve alongside a fresh cup of coffee or tea for a perfect pairing.
  • On a Dessert Platter: Arrange on a beautiful platter with other sweets for a dessert table.
  • As Party Favors: Package them in cute boxes as gifts for guests.

Frequently Asked Questions (FAQ)

Here are some common questions about making pistachio donuts:

  • Can I use instant yeast instead of active dry yeast? Yes, you can add instant yeast directly to the dry ingredients without proofing.
  • What is the ideal oil temperature for frying? Maintaining the oil temperature between 350°F and 355°F is crucial for perfectly cooked donuts.
  • Can I bake these instead of frying? Yes, but they will have a different texture and flavor.
  • Why didn’t my donuts rise properly? This could be due to inactive yeast or incorrect rising temperatures.
  • What can I use instead of pistachio cream? Almond cream or other nut pastes can be used as a substitute.
  • How long will these donuts stay fresh? They are best enjoyed fresh but can be stored for up to 2 days at room temperature.
  • Can I make the dough ahead of time? Yes, prepare the dough and refrigerate it overnight before the first rise.
  • What’s the best way to reheat leftover donuts? Warm them in the oven at a low temperature to refresh their texture.

With this guide, you’re now fully equipped to create delicious and fluffy pistachio donuts that will surely impress anyone. So roll up your sleeves, gather your ingredients, and get ready to enjoy a delightful baking adventure. Happy cooking!

Pistachio Donuts

Prep Time 30 minutes
Cook Time 15 minutes
Total Time 45 minutes
Servings 12 pieces
Calories 250
Delicious homemade donuts filled with pistachio cream, perfect for a sweet treat.

Ingredients

Dough

  • 177 ml whole milk, heated to 105°F–115°F
  • 7 g active dry yeast
  • 36 g granulated sugar, divided
  • 406 g all-purpose flour or bread flour
  • 1 tsp salt
  • 2 large eggs, room temperature
  • 113 g unsalted butter, sliced (room temperature)
  • 6 cups vegetable or canola oil for frying
  • 150 g granulated sugar for coating
  • 1 tbsp lemon zest (optional)
  • 0.75 to 1 cup pistachio paste or cream for filling

Instructions 

  • Combine warm milk, yeast, and 1 tbsp sugar; let sit 5 min until foamy.
  • Mix flour, salt, butter, eggs, and remaining sugar; add yeast mixture and knead until smooth (10–15 min).
  • Let dough rise in a greased bowl for 1–1.5 hours until doubled.
  • Roll dough to ½-inch thickness, cut into 3-inch rounds, and let rise 30 min.
  • Fry donuts in oil at 350°F–355°F for 1–1.5 min per side until golden; drain and coat with sugar.
  • Cool donuts, fill with pistachio cream, and serve fresh.

Notes

Ensure oil temperature is maintained for perfect frying.
Calories: 250kcal
Cost: $15
Course: Dessert
Cuisine: American
Keyword: pistachio

Delight in Every Bite: A Guide to Creative Pancake Skewers

Pancake skewers are not just a trendy twist on a classic breakfast; they are a delightful way to bring family and friends together around the table. Imagine fluffy mini pancakes stacked alongside vibrant fruits and drizzled with rich chocolate. This recipe is perfect for any occasion—whether it’s a cozy breakfast at home, a festive brunch with friends, or a fun twist for pancake day. In this comprehensive guide, we’ll walk you through how to create the most delicious pancake skewers that will impress everyone.

In the following sections, we will explore the key benefits of this recipe, provide a detailed ingredient breakdown, share expert tips, and even answer some frequently asked questions. Let’s dive in!

Why You’ll Love This Recipe

  • Fun Presentation: Pancake skewers are visually appealing and create a festive atmosphere, making them perfect for special occasions or family gatherings.
  • Customizable: You can easily adjust the ingredients based on personal preferences or seasonal availability, ensuring a fresh taste every time.
  • Quick to Prepare: With simple ingredients and straightforward steps, you can whip up these skewers in no time, perfect for busy mornings.
  • Healthy Options: Incorporating fruits into your pancake skewers provides vitamins and nutrients, making them a deliciously healthy breakfast choice.
  • Interactive Eating: Skewers encourage a hands-on dining experience, letting everyone create their own perfect bite.

Ingredients Overview

Here’s what you’ll need to create your pancake skewers:

  • 170 g self-raising flour (1 1/4 cup): This forms the base of your pancakes, giving them a light and fluffy texture.
  • 170 ml milk (2/3 cup): Whole milk adds richness, but feel free to use almond milk or any non-dairy option for a lighter variation.
  • 3 large eggs: Essential for binding the ingredients and creating a fluffy texture.
  • 1 tsp baking powder: This extra leavening agent ensures your pancakes rise perfectly.
  • 2 bananas: Sliced bananas add natural sweetness and creaminess to your skewers.
  • 250 g strawberries (2 cups): Fresh strawberries provide a burst of flavor and color.
  • 100 g melted milk chocolate (3 oz): A drizzle of chocolate elevates the skewers from simple to sensational.

Step-by-Step Instructions

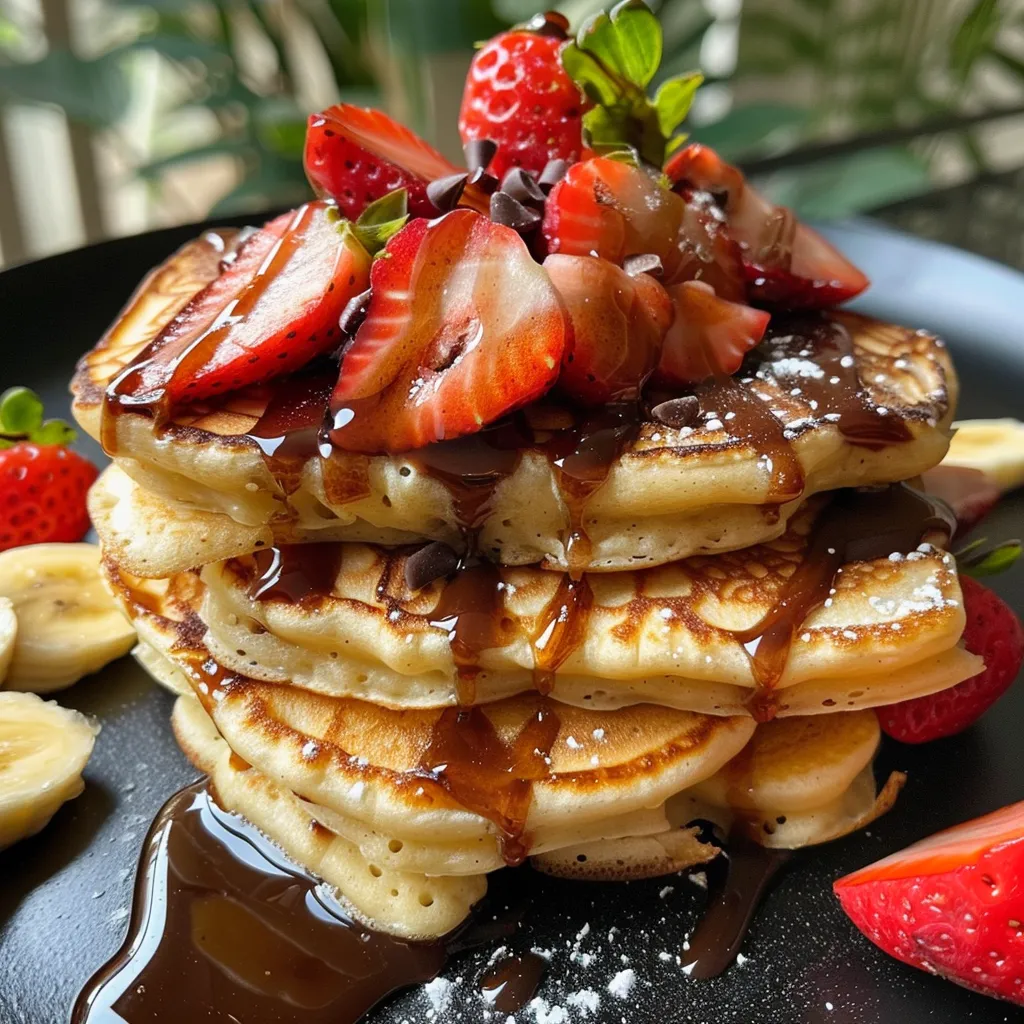
Tantalizing skewers of pancakes topped with bananas and strawberries.

Follow these easy steps to create your pancake skewers:

  1. Separate the egg whites from the egg yolks in two bowls.
  2. Add the milk to the egg yolks and whisk until combined.
  3. Sift in the flour and baking powder, then mix with a spatula until you achieve a thick batter.
  4. In a separate bowl, beat the egg whites until they hold soft peaks, creating a light texture.
  5. Gently fold the beaten egg whites into the batter using a spatula.
  6. Heat a non-stick griddle pan over medium heat, lightly greasing it with cooking spray.
  7. Add a tablespoon of batter for each mini pancake and cook until bubbles form on the surface.
  8. Flip the pancakes and cook for an additional minute until golden brown.
  9. Remove the pancakes and repeat the process until all batter is used.
  10. Assemble the skewers: thread two mini pancakes, a slice of banana, and a strawberry onto wooden skewers, alternating as desired.
  11. Drizzle melted chocolate over the assembled skewers.
  12. Serve warm and enjoy!

Pro Tips for Perfect Pancake Skewers

  • Don’t Overmix: Mix the batter just until combined to maintain a light and fluffy texture.
  • Use Fresh Ingredients: Fresh fruits not only taste better but also enhance the presentation of your skewers.
  • Experiment with Flavors: Try adding a pinch of vanilla extract or cinnamon to the batter for an extra flavor boost.
  • Keep Pancakes Warm: If making in batches, keep cooked pancakes warm in a low oven (200°F) until ready to serve.
  • Customize Toppings: Don’t hesitate to get creative! Use different fruits like blueberries, raspberries, or even whipped cream on top.
  • Make Mini Versions: For a fun twist, make smaller pancakes and use shorter skewers for bite-sized treats.
  • Pair with Dips: Serve with yogurt or maple syrup for dipping to enhance the flavor experience.
  • Practice Skewering: Experiment with different arrangements to find the most visually appealing presentation.

Common Mistakes and Troubleshooting

Even the best chefs can run into trouble! Here are some common issues and how to fix them:

  • Pancakes are Too Dense: This can happen if the batter is overmixed. Always mix until just combined.
  • Pancakes Stick to the Pan: Ensure the pan is adequately greased and at the right temperature before cooking.
  • Uneven Cooking: Keep the heat on medium and avoid overcrowding the pan to ensure even cooking.
  • Burnt Edges: If pancakes are burning on the edges, lower the heat and allow more time for cooking.

Variations to Try

Get creative with your pancake skewers by trying these fun variations:

  • Chocolate Chip Pancakes: Add chocolate chips to the batter for a sweet twist.
  • Savory Skewers: Replace fruits with cooked bacon and cheese for a savory option.
  • Nut-Butter Drizzle: Swap out the chocolate for almond or peanut butter for a different flavor profile.
  • Fruit-Only Skewers: For a lighter option, use only fruits without pancakes, perfect for a sweet snack.

Storage and Make-Ahead Instructions

These pancake skewers are best enjoyed fresh, but you can prepare components in advance:

  • Make-Ahead Pancakes: Cook pancakes a day before, store in an airtight container, and reheat when ready to assemble.
  • Fruit Preparation: Wash and slice fruits a few hours prior and keep refrigerated until assembly.
  • Storage: Leftover skewers can be stored in the fridge for up to 2 days; simply reheat before serving.

Frequently Asked Questions

  • Can I use whole wheat flour? Yes! Whole wheat flour can be substituted for self-raising flour for a healthier option.
  • What fruits are best for skewers? Strawberries, bananas, blueberries, and kiwi all work wonderfully!
  • Can I freeze pancake skewers? Yes, you can freeze the pancakes individually and reheat them directly from frozen.
  • How do I make the pancakes fluffier? Ensure you separate the egg whites and whip them before folding them into the batter.
  • Are pancake skewers gluten-free? Substitute the flour with a gluten-free blend for a gluten-free version.
  • Can I make mini pancake skewers? Absolutely! Just use a smaller portion of batter for mini pancakes.
  • What can I serve with pancake skewers? Serve with syrup, yogurt, or whipped cream for added flavor.
  • How long do pancake skewers last? They are best eaten fresh but can last in the fridge for up to 2 days.

Nutritional Tips and Dietary Adaptations

To make your pancake skewers healthier, consider these tips:

  • Use Whole Ingredients: Opt for whole milk and whole wheat flour to increase fiber content.
  • Reduce Sugar: You can decrease the amount of sugar or use natural sweeteners like honey or maple syrup.
  • Add Superfoods: Incorporate chia seeds or flaxseeds into the batter for added nutritional value.
  • Dietary Restrictions: This recipe can easily be adapted for vegan diets by using egg substitutes and plant-based milk.

Recommended Equipment

To ensure your pancake skewers come out perfectly, consider using the following kitchen tools:

  • Non-Stick Griddle: A good-quality non-stick griddle ensures even cooking and easy flipping.
  • Mixing Bowls: Have a set of mixing bowls in various sizes for easy preparation.
  • Whisk: A whisk is essential for mixing the batter smoothly.
  • Wooden Skewers: Use sturdy wooden skewers for assembling your pancakes and fruits.

Serving Suggestions

For a complete breakfast experience, serve your pancake skewers with:

  • Fresh Juice: A glass of freshly squeezed orange juice or a smoothie pairs perfectly.
  • Yogurt Parfait: Layer yogurt with granola and fruit for a satisfying side.
  • Maple Syrup: Offer maple syrup or flavored syrups on the side for dipping.

Now you’re ready to create pancake skewers that are not only delicious but will be the highlight of any breakfast or brunch! Remember, the joy of cooking lies in experimenting and bringing your personal touch to each dish. Enjoy the process and make wonderful memories around the table!

Happy cooking!

Pancake Skewers

Prep Time 10 minutes
Cook Time 10 minutes
Total Time 20 minutes
Servings 4 servings
Calories 350
Enjoy fun and delicious pancake skewers topped with fresh fruit and melted chocolate, perfect for a quick breakfast or snack.

Ingredients

Dough

  • 170 g self-raising flour
  • 170 ml milk
  • 3 large eggs
  • 1 tsp baking powder

Fruits

  • 2 bananas bananas (sliced)
  • 250 g strawberries (sliced)
  • 100 g melted milk chocolate

Instructions 

  • Mix egg yolks with milk, then add flour and baking powder to form a batter.
  • Beat egg whites until soft peaks, then fold into the batter gently.
  • Cook small pancakes on a medium heat until bubbles form, then flip and cook for another minute.
  • Thread two mini pancakes onto skewers, alternating with banana and strawberry slices.
  • Drizzle melted chocolate over the skewers and serve immediately.

Notes

Use ripe bananas and fresh strawberries for best flavor.
Calories: 350kcal
Cost: $12
Course: Breakfast
Cuisine: American
Keyword: Pancakes

Start Your Day Right with Strawberries and Cream Baked Oatmeal

Welcome to your new favorite breakfast! Our Strawberries and Cream Baked Oatmeal is the perfect way to kick off your morning with a deliciously creamy and fruity dish. This recipe combines the wholesome goodness of oats with the fresh, sweet flavor of strawberries, creating a heartwarming meal that is both satisfying and nutritious. Whether you’re preparing for a busy day or looking to indulge over a leisurely weekend brunch, this baked oatmeal is easy to make and sure to please.

In this comprehensive guide, we’ll explore everything you need to know to make this delightful breakfast, including ingredient breakdowns, expert tips, variations to try, and answers to your most pressing questions. Let’s dive in!

Why You’ll Love This Recipe

  • Simple Preparation: With just a few ingredients, you can mix everything in one bowl and bake it—ideal for quick morning prep or overnight setups.
  • Wholesome Ingredients: Made with old-fashioned oats and fresh strawberries, this recipe is packed with fiber and nutrients to energize your day.
  • Family-Friendly: Loved by both kids and adults, this dish makes breakfast fun and encourages seconds!
  • Versatile Options: Easily adapt the recipe with different fruits, nuts, or toppings to suit your family’s tastes.
  • Make-Ahead Friendly: Prepare it the night before and simply reheat in the morning for a hassle-free breakfast.

Ingredients You’ll Need

Here’s everything you’ll need to whip up this delicious Strawberries and Cream Baked Oatmeal:

  • 2 cups half and half (for a richer flavor, you can substitute with whole milk or almond milk)
  • 1 large egg (for binding; you can use a flax egg for a vegan option)
  • 1/2 tablespoon vanilla extract (for aroma; feel free to use pure vanilla)
  • 1/4 cup granulated sugar (adjust to taste; maple syrup can also be a natural sweetener)
  • 1 cup old-fashioned oats (for the best texture; avoid instant oats)
  • 1 cup diced strawberries (approximately 8 whole strawberries, cleaned and diced)
  • Cooking spray (to grease the baking dish)
  • Confectioners sugar (optional garnish for serving)

How to Make Strawberries and Cream Baked Oatmeal

A serving of strawberries and cream baked oatmeal with a golden top.

Now, let’s get started with the step-by-step instructions to create your oatmeal masterpiece:

  • Preheat your oven: Start by preheating your oven to 375 degrees F. Grease a baking dish with cooking spray to prevent any sticking.
  • Mix the wet ingredients: In a medium bowl, combine the half and half, egg, sugar, and vanilla extract. Whisk until well blended.
  • Add the oats and strawberries: Stir in the old-fashioned oats and diced strawberries, gently mixing until everything is evenly coated.
  • Transfer to baking dish: Pour the mixture into your prepared baking dish, spreading it out evenly.
  • Bake to perfection: Place in the oven and bake for 40-50 minutes, or until the oatmeal is firm to the touch and there is no visible liquid.
  • Serve with a flourish: Once baked, remove from the oven and sprinkle with confectioners sugar if desired. Serve warm with extra strawberries and a drizzle of cream.

Pro Tips for Making the Best Baked Oatmeal

Here are some expert insights to elevate your baking game:

  • Check for doneness: Ovens can vary, so check the oatmeal at the 35-minute mark. It should be set but still moist.
  • Customize flavors: Enhance the recipe by adding spices like cinnamon or nutmeg for a warm, cozy flavor.
  • Fresh or frozen strawberries: While fresh strawberries yield the best flavor, you can use frozen ones—just thaw and drain excess liquid before adding.
  • Experiment with toppings: Top with nuts, seeds, or a dollop of yogurt for added texture and flavor.
  • Cool before serving: Allow the baked oatmeal to cool slightly before serving to enhance its texture.
  • Reheat leftovers gently: Warm up any leftovers in the microwave with a splash of milk for a creamy consistency.
  • Substitute the egg: For a vegan option, replace the egg with a mashed banana or unsweetened applesauce.
  • Batch cooking: Double the recipe to have leftovers for busy mornings throughout the week.

Common Mistakes and Troubleshooting

Here are some pitfalls to avoid when making your baked oatmeal:

  • Overmixing the batter: Gently fold the ingredients together to avoid a dense texture.
  • Not greasing the dish: Failing to grease the baking dish can lead to sticking and make serving difficult.
  • Using the wrong oats: Stick to old-fashioned oats for the best texture; quick oats may become mushy.
  • Ignoring cooking times: Keep an eye on the baking process; the oatmeal is done when it’s firm, not liquidy.
  • Skipping the cooling time: Allow it to cool for a few minutes before cutting to ensure clean slices.

Delicious Variations to Try

Feel free to mix things up with these fun variations:

  • Berry Medley: Substitute strawberries with a mix of blueberries, raspberries, or blackberries for a berry blast.
  • Nutty Banana: Add sliced bananas and chopped walnuts for a delightful banana nut twist.
  • Chocolate Lovers: Stir in some chocolate chips for a decadent treat that kids will love.
  • Cinnamon Apple: Replace strawberries with diced apples and add cinnamon for a warm, fall-inspired flavor.

Storage and Make-Ahead Instructions

To keep your baked oatmeal fresh and tasty:

  • Storing leftovers: Store any leftovers in an airtight container in the fridge for up to 4 days.
  • Freezing: You can freeze baked oatmeal for up to 3 months. Cut into portions, wrap tightly, and store in a freezer-safe container.
  • Reheating: Reheat individual portions in the microwave for about 1-2 minutes, adding a splash of milk for creaminess.
  • Make-ahead option: Prepare the mixture the night before, cover, and refrigerate. Bake in the morning without any changes to the cooking time.

Frequently Asked Questions

Here are answers to some common questions about this recipe:

  • Can I use steel-cut oats instead of rolled oats? Steel-cut oats will require a longer baking time and more liquid to become tender.
  • Is this recipe gluten-free? To make it gluten-free, ensure that your oats are certified gluten-free.
  • Can I sweeten this recipe with honey? Yes, honey or maple syrup can be used instead of granulated sugar; adjust to taste.
  • How do I know when the oatmeal is done baking? The oatmeal should be firm to touch and not liquidy. You can insert a knife to check for doneness.
  • What’s the best way to serve this dish? Serve warm, topped with extra strawberries, a drizzle of cream, or a sprinkle of nuts.
  • Can I make this vegan? Yes! Substitute the egg with a flax egg and use non-dairy milk.
  • What other fruits work well? Besides strawberries, you can use peaches, cherries, or even tropical fruits like mango.
  • Can I add protein to this recipe? Consider stirring in some protein powder or Greek yogurt for a protein boost.

Nutritional Tips and Dietary Adaptations

This Strawberries and Cream Baked Oatmeal can be modified to fit various dietary needs:

  • For a lower sugar option: Reduce the amount of sugar or use natural sweeteners like stevia or monk fruit.
  • High-protein variation: Substitute half the oats with quinoa or add a scoop of protein powder.
  • Dairy-free version: Use almond milk or coconut milk in place of half and half.

Equipment Recommendations

To successfully prepare your baked oatmeal, consider the following kitchen tools:

  • Mixing bowls: A set of mixing bowls in various sizes for all your preparation.
  • Whisk: Essential for thoroughly mixing the wet ingredients.
  • Baking dish: A 9×9 inch or similar-sized baking dish works best for even baking.
  • Measuring cups and spoons: Accurate measurements ensure the right balance of ingredients.
  • Spatula: For easily mixing and scraping the bowl clean.

Serving Suggestions

Make your breakfast even more delightful with these serving ideas:

  • Top with yogurt: A dollop of Greek yogurt adds creaminess and protein.
  • Fresh fruit topping: Add additional sliced strawberries or your favorite fruits on top.
  • Drizzle with honey: A light drizzle of honey or maple syrup enhances the sweetness.
  • Pair with coffee or tea: A warm beverage complements the sweet flavors perfectly.

Conclusion

Our Strawberries and Cream Baked Oatmeal is not just a breakfast dish; it’s a way to start your day with joy and nourishment. With its rich flavors and comforting texture, it’s bound to become a cherished recipe in your household. Whether you’re enjoying it solo or sharing it with family and friends, this dish is all about creating memorable moments around the table. So gather your ingredients, preheat that oven, and let the baking begin!

Strawberries and Cream Baked Oatmeal

Prep Time 10 minutes
Cook Time 45 minutes
Total Time 55 minutes
Servings 4 servings
Calories 250
A delicious and wholesome baked oatmeal featuring fresh strawberries and a creamy vanilla flavor, perfect for a comforting breakfast or brunch.

Ingredients

Dairy

  • 2 cups half and half
  • 1 large egg
  • 1/2 tablespoon vanilla extract
  • 1/4 cup granulated sugar

Dry ingredients

  • 1 cup old fashioned oats

Fruits

  • 1 cup diced strawberries (approx. 8 whole strawberries, cleaned and diced)

Other

  • cooking spray
  • confectioners sugar (optional garnish)

Instructions 

  • Preheat oven to 375°F (190°C) and grease a baking dish with cooking spray.
  • Whisk half and half, egg, sugar, and vanilla until blended. Mix in oats and strawberries.
  • Pour mixture into the baking dish and bake for 40-50 minutes until firm.
  • Remove from oven, sprinkle with confectioners sugar if desired, and serve.

Notes

For extra flavor, add a splash of vanilla or a handful of chopped nuts on top before baking.
Calories: 250kcal
Cost: $15
Course: Breakfast
Keyword: Breakfast, oats, Strawberries

Brighten Your Day with Orange Almond Olive Oil Cake

Welcome to a delightful exploration of the Orange Almond Olive Oil Cake, a moist and flavorful treat that captures the essence of spring in every slice. Infused with zesty orange and warm almond notes, this cake is not just a dessert; it’s a celebration of flavors that is perfect for any occasion. Whether you’re hosting a gathering or enjoying a quiet afternoon, this easy recipe will quickly become a staple in your kitchen. Let’s dive into why you’ll love this cake and how to master it!

Why You’ll Love This Recipe

  • Moist and Flavorful: The combination of olive oil and fresh orange juice creates a cake that is incredibly moist, ensuring each bite is packed with flavor.
  • Simple Ingredients: Made with pantry staples, including almond extract and soy milk, this cake is accessible and easy to whip up anytime.
  • Plant-Based Option: This recipe is fully vegan, thanks to the use of a flax egg, making it a great choice for those following a plant-based diet.
  • Versatile and Adaptable: You can easily customize this cake with various toppings and glazes to fit your taste preferences or seasonal ingredients.
  • Perfect for Sharing: Ideal for celebrations or casual get-togethers, this cake is sure to impress friends and family alike.

Ingredients Breakdown

To make the Orange Almond Olive Oil Cake, you’ll need the following ingredients:

  • 2 tablespoons ground flax: This acts as a binding agent, perfect for a vegan recipe.
  • 3 tablespoons water: Combined with flax to create a vegan “egg”.
  • 2 tablespoons orange zest: Adds a burst of citrus flavor that brightens the cake.
  • ¾ cup sugar: Sweetens the cake; you can use coconut sugar for a healthier option.
  • ½ cup olive oil: Keeps the cake moist and adds a subtle richness.
  • 1 teaspoon almond extract: Enhances the nutty flavor, making it irresistibly fragrant.
  • 3 tablespoons orange juice: Adds moisture and intensifies the orange flavor.
  • ⅔ cup soy milk: A plant-based milk that works beautifully in this recipe.
  • 1 ¾ cup all-purpose flour: The base of the cake, providing structure.
  • 1 ½ teaspoon baking powder: Helps the cake rise.
  • ½ teaspoon baking soda: Works in tandem with baking powder for fluffiness.
  • 1 cup powdered sugar (for glaze): Sweetens and adds a finishing touch to the cake.
  • ½ teaspoon almond extract (for glaze): Reinforces the almond flavor in the glaze.
  • 3 tablespoons orange juice (for glaze): Adds brightness and helps achieve a pourable consistency.
  • Orange slices or zest (optional): For garnish, these add a beautiful presentation.
  • Slivered almonds, toasted (optional): Provides a crunchy topping that contrasts nicely with the soft cake.

Pro Tips for Perfecting Your Cake

A slice of orange almond olive oil cake with a rich glaze and garnished with orange zest.
  • Use fresh ingredients: Fresh orange juice and zest will elevate the flavor profile significantly.
  • Don’t overmix: When combining wet and dry ingredients, mix until just combined to keep the cake light and airy.
  • Check for doneness: Use a toothpick inserted in the center; it should come out clean or with a few moist crumbs.
  • Let it cool: Allow the cake to cool in the pan before transferring to a wire rack to prevent it from breaking.
  • Experiment with glazes: Try different citrus juices or flavored extracts in your glaze for a unique twist.
  • Store properly: Keep the cake in an airtight container at room temperature to maintain its moisture.
  • Make ahead: This cake can be made a day in advance and stored, allowing the flavors to meld beautifully.
  • Use quality olive oil: A high-quality olive oil will not only enhance the flavor but will also add nutritional benefits.

Common Mistakes and Troubleshooting

Even the best of us can make mistakes in the kitchen. Here are some common pitfalls and how to avoid them:

  • Overbaking: Keep a close eye on your cake, as ovens can vary. Start checking for doneness a few minutes early.
  • Not measuring ingredients accurately: Use measuring cups and spoons for precision, especially for dry ingredients.
  • Using stale baking powder or soda: Always check the expiration dates to ensure they’re effective.
  • Skipping the zest: The zest is crucial for flavor; don’t skip this step!

Variations to Try

Feel free to get creative with your Orange Almond Olive Oil Cake! Here are some variations to consider:

  • Chocolate Orange Cake: Add cocoa powder to the dry ingredients for a decadent twist.
  • Nut-Free Version: Omit the almond extract and use vanilla extract instead for a more neutral flavor.
  • Blueberry Infusion: Stir in fresh or frozen blueberries before baking for a fruity addition.
  • Citrus Medley: Substitute some of the orange juice with lemon or lime juice for a zesty blend.

Storage and Make-Ahead Instructions

This cake is perfect for making ahead of time. Here’s how to store it:

  • At Room Temperature: Keep in an airtight container for up to 3 days.
  • In the Refrigerator: Store in an airtight container for up to a week. Bring to room temperature before serving.
  • Freezing: Wrap slices tightly in plastic wrap and foil, then freeze for up to 3 months. Thaw at room temperature when ready to enjoy.

FAQs

  • Can I use a different type of flour? Yes, you can experiment with almond flour or whole wheat flour, but this may affect the texture.
  • How do I make the cake gluten-free? Substitute with a gluten-free all-purpose flour blend.
  • What’s the best way to serve this cake? It’s delicious on its own, but you can serve it with whipped cream or a scoop of vanilla ice cream.
  • Can I replace olive oil with another oil? Yes, you can use vegetable oil, but olive oil adds a unique flavor that complements the cake.
  • How can I make this cake sweeter? Increase the sugar by a couple of tablespoons if you prefer a sweeter cake.
  • Is this cake vegan? Absolutely! The use of flax eggs and soy milk makes it entirely plant-based.
  • What can I use instead of soy milk? Almond milk or oat milk are excellent substitutes that will also work well.
  • How can I enhance the orange flavor? Consider using orange extract in addition to the zest and juice for an extra citrus punch.

Nutritional Tips and Dietary Adaptations

This Orange Almond Olive Oil Cake is not only delicious but can also fit into a variety of dietary needs:

  • Low-Calorie Option: Reduce the sugar and use a sugar substitute to lower the calorie count.
  • Heart-Healthy: Olive oil is a great source of healthy fats, making this cake a heart-healthy choice.
  • High-Protein Suggestion: Serve with Greek yogurt to boost the protein content of your dessert.

Equipment Recommendations

Here’s what you need to make this cake:

  • 9” Cake Pan: A good quality, non-stick pan will help the cake release easily.
  • Mixing Bowls: A set of mixing bowls in various sizes will be helpful for combining ingredients.
  • Whisk: Essential for mixing your wet ingredients and ensuring they are well combined.
  • Spatula: Use a rubber spatula for folding in dry ingredients gently without overmixing.
  • Measuring Cups and Spoons: Accurate measurements are key to a successful cake.

Serving Suggestions

To elevate your Orange Almond Olive Oil Cake experience, consider these serving ideas:

  • Dust with powdered sugar: A light dusting adds a touch of elegance and sweetness.
  • Top with fresh fruit: Slices of fresh oranges or berries add color and freshness.
  • Pair with tea or coffee: This cake is a perfect companion for your afternoon beverage.
  • Serve with a scoop of ice cream: A scoop of vanilla or citrus sorbet will complement the flavors beautifully.

In conclusion, the Orange Almond Olive Oil Cake is not just a dessert; it’s a canvas for creativity, a celebration of flavors, and a perfect addition to your baking repertoire. With its vibrant orange flavor, moist texture, and plant-based goodness, it invites everyone to enjoy a slice of joy. Whether you’re baking for yourself or to share, this cake is sure to brighten your day and create cherished moments around the table. Happy baking!

Orange Almond Olive Oil Cake

Prep Time 15 minutes
Cook Time 30 minutes
Total Time 45 minutes
Servings 8 slices
Calories 350
A moist and flavorful cake infused with orange zest and almond extract, topped with a sweet glaze and toasted almonds.

Ingredients

Wet ingredients

  • 2 tablespoons ground flax
  • 3 tablespoons water (for flax egg)
  • 2 tablespoons orange zest
  • ¾ cup sugar
  • ½ cup olive oil
  • 1 teaspoon almond extract
  • 3 tablespoons orange juice
  • cup soy milk

Dry ingredients

  • 1 ¾ cups AP flour
  • 1 ½ teaspoons baking powder
  • ½ teaspoon baking soda

Glaze

  • 1 cup powdered sugar (for glaze)
  • ½ teaspoon almond extract (for glaze)
  • 3 tablespoons orange juice (for glaze)

Optional Garnish

  • as desired orange slices or zest (optional)
  • as desired slivered toasted almonds (optional)

Instructions 

  • Preheat oven to 350°F (175°C). Grease pan and line with parchment.
  • Make flax egg by combining ground flax and water; let sit.
  • Mix orange zest and sugar until fragrant. Add olive oil, almond extract, orange juice, soy milk, and flax egg; combine.
  • Sift dry ingredients and fold into wet mixture until just combined.
  • Pour batter into pan and bake for 25-35 minutes. Cool before glazing.
  • Whisk glaze ingredients and drizzle over cooled cake. Garnish with optional orange slices or almonds.

Notes

Ensure not to overmix the batter to keep the cake light and fluffy.
Calories: 350kcal
Cost: $15
Course: Dessert
Cuisine: fusion
Keyword: almond, cake, orange