Author

Mike

Browsing

Welcome to the world of culinary delight! Today, we’re diving into the savory realm of Black Pepper Beef, a dish that marries flavor and simplicity. This recipe is not just a meal; it’s an experience that brings the warmth of a home-cooked dinner to your table. With tender slices of beef, aromatic spices, and a delectable sauce, you’ll be amazed at how easy it is to create this restaurant-quality dish right in your own kitchen. Let’s embark on this flavorful journey together!

Why You’ll Love This Recipe

  • Quick and Easy: Prepare this delicious dish in under 30 minutes, making it perfect for busy weeknights or spontaneous gatherings.
  • Bold Flavors: The combination of freshly ground black pepper, soy sauce, and oyster sauce creates a rich, savory profile that will delight your taste buds.
  • Customizable: Easily adjust the spice level and ingredients to suit your taste preferences or dietary needs.
  • Healthy Options: Using lean beef and fresh vegetables means you can enjoy a flavorful meal without compromising your health.
  • Perfect Pairing: Serve with steamed rice or noodles to soak up the delicious sauce, making it a satisfying and fulfilling dish.

Ingredients You’ll Need

Here’s a detailed breakdown of the ingredients for Black Pepper Beef. Feel free to explore some substitutions to suit your pantry:

  • Beef Sirloin: 1 lb (450 g) thinly sliced. For a leaner option, consider using flank steak or tenderloin.
  • Vegetable Oil: 2 tbsp for frying. You can substitute with sesame oil for added flavor.
  • Onion: 1 medium, thinly sliced. Yellow or red onions work beautifully.
  • Garlic: 2 cloves, minced. Fresh garlic enhances the dish’s aroma; garlic powder can be used in a pinch.
  • Fresh Ginger: 1 tbsp, minced. Ginger adds a wonderful zing; ground ginger can be used if fresh isn’t available.
  • Black Pepper: 2 tbsp, freshly ground for best flavor. Adjust the amount to suit your spice tolerance.
  • Soy Sauce: 1/4 cup. Low-sodium soy sauce is a great alternative for a healthier option.
  • Beef Broth: 1/4 cup for depth of flavor. Vegetable broth can be used as a substitute.
  • Oyster Sauce: 1 tbsp for richness. If vegetarian, use mushroom sauce instead.
  • Cornstarch: 1 tbsp mixed with 2 tbsp water for thickening. Arrowroot powder is a good alternative.
  • Green Onions: 1/4 cup, chopped for garnish. Chives can be used for a milder flavor.
  • Salt: to taste. Remember that soy sauce is already salty, so adjust accordingly.

How to Make Black Pepper Beef

Follow these simple steps to create your own Black Pepper Beef masterpiece:

  1. Heat the Oil: In a large skillet or wok, heat 2 tbsp of vegetable oil over high heat. Ensure the oil is hot before adding the beef.
  2. Cook the Beef: Add the thinly sliced beef sirloin in a single layer. Stir-fry for 3-4 minutes until browned and cooked through. Remove the beef and set aside.
  3. Cook the Aromatics: In the same skillet, add the sliced onion, minced garlic, and minced ginger. Stir-fry for about 2 minutes until the onion is softened and fragrant.
  4. Add Black Pepper: Sprinkle 2 tbsp of freshly ground black pepper into the skillet. Stir-fry for another minute to release its flavor.
  5. Make the Sauce: Pour in 1/4 cup soy sauce, 1/4 cup beef broth, and 1 tbsp oyster sauce. Stir well and bring the sauce to a simmer.
  6. Combine: Return the cooked beef to the skillet, stirring to coat it in the sauce. Mix 1 tbsp of cornstarch with 2 tbsp of water to create a slurry, then pour it into the skillet.
  7. Thicken the Sauce: Stir well and cook for another 2-3 minutes until the sauce has thickened and the beef is heated through.
  8. Garnish and Serve: Once thickened, sprinkle 1/4 cup of chopped green onions over the beef. Serve hot with steamed rice or noodles.

Pro Tips for Perfect Black Pepper Beef
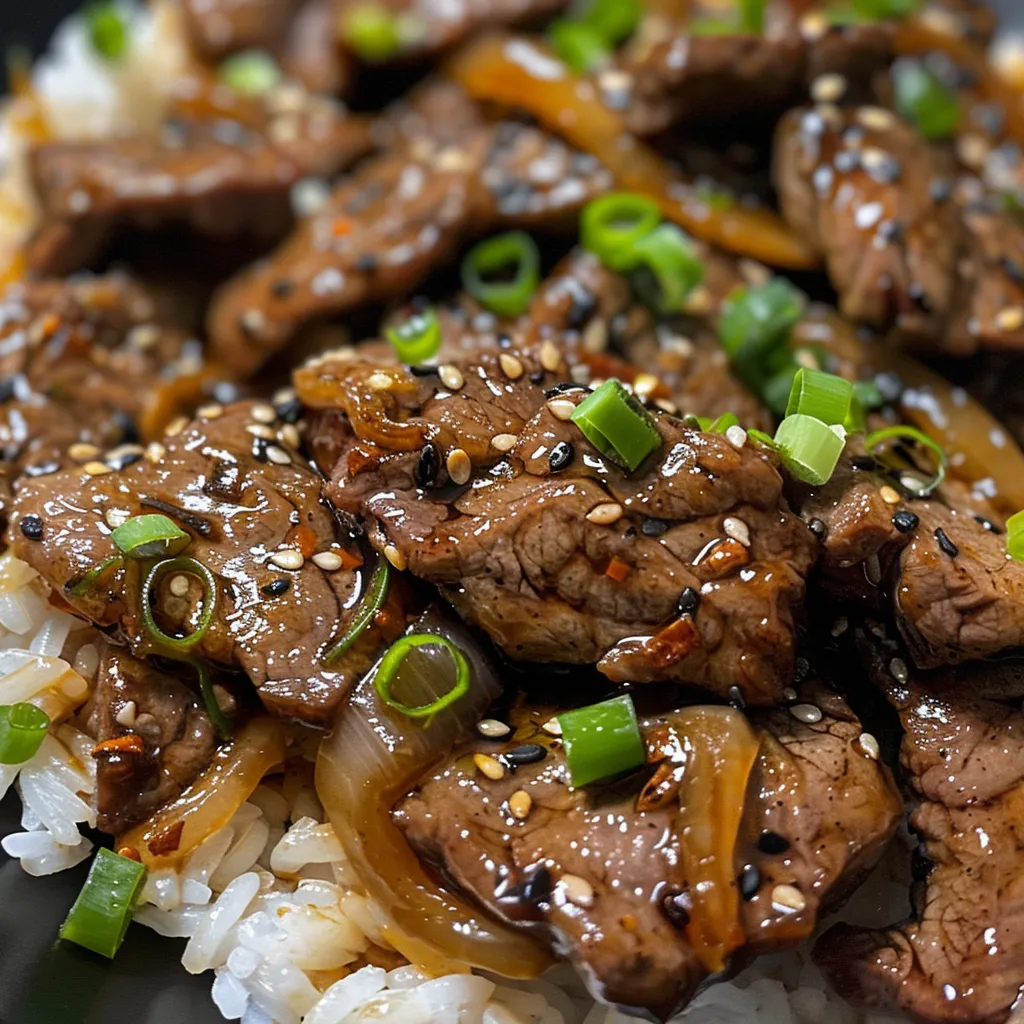
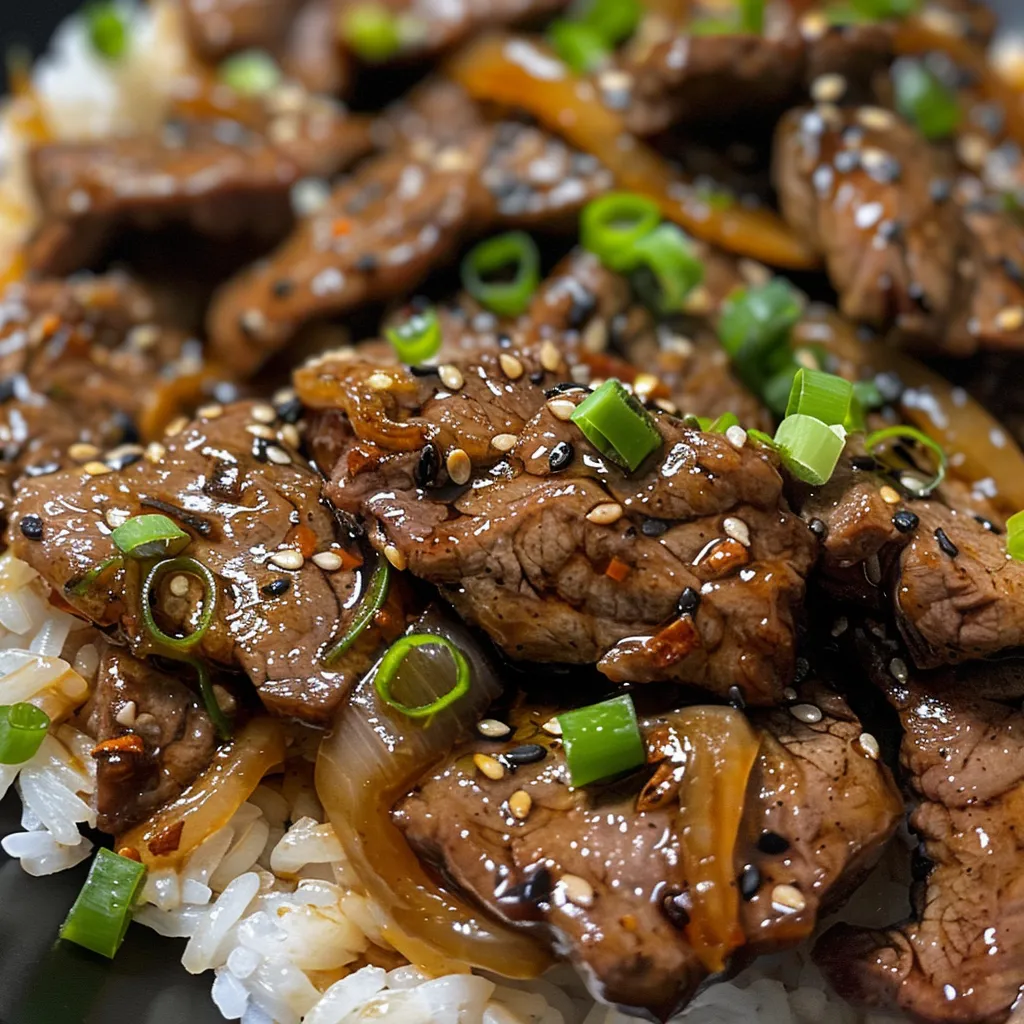
A mouthwatering close-up of black pepper beef, highlighting the tender meat and garnishes.
  • High Heat: Cooking on high heat is essential for achieving a good sear on the beef. Don’t overcrowd the pan!
  • Fresh Ingredients: Use fresh spices and herbs for the best flavor. Fresh ginger and garlic make a significant difference.
  • Correct Cutting: Slice the beef against the grain for tender pieces. This will ensure a better texture.
  • Marinating: Consider marinating the beef in soy sauce and a bit of cornstarch for 30 minutes before cooking for extra tenderness.
  • Thickening Sauce: If the sauce is too thin, add more cornstarch slurry. For a thicker sauce, let it simmer longer.
  • Adjust Spice: If you prefer less heat, reduce the amount of black pepper. You can always add more at the end if needed.
  • Storage: Leftovers can be stored in the fridge for up to 3 days. Reheat gently on low heat.
  • Boost Flavor: Add vegetables like bell peppers or snap peas for added nutrition and color. They can be stir-fried with the aromatics.

Common Mistakes and Troubleshooting

Even the best chefs can face challenges when cooking. Here are common pitfalls and how to avoid them:

  • Overcooking the Beef: Overcooked beef becomes tough. Aim for a quick stir-fry and remove it from heat as soon as it’s no longer pink.
  • Sauce Too Salty: If the sauce is too salty, counteract with a bit of sugar or honey.
  • Uneven Cooking: Ensure your skillet or wok is hot enough before adding the beef. A cold pan leads to steaming rather than searing.
  • Too Much Pepper: If the dish becomes too peppery, balance it with a splash of additional soy sauce or a bit more broth.

Variations of Black Pepper Beef

Explore these variations to keep your Black Pepper Beef exciting:

  • Vegetable Black Pepper Stir-Fry: Substitute beef with tofu or tempeh and add a mix of your favorite vegetables.
  • Spicy Black Pepper Beef: Add red pepper flakes or sliced jalapeños to bring heat to the dish.
  • Curry Black Pepper Beef: Incorporate curry powder into the sauce for an aromatic twist.
  • Black Pepper Beef with Noodles: Serve the beef over cooked noodles instead of rice for a delightful variation.

Storage and Make-Ahead Instructions

To enjoy this delicious dish later, follow these storage tips:

  • Refrigeration: Store leftovers in an airtight container in the fridge for up to 3 days.
  • Freezing: You can freeze the cooked beef for up to a month. Thaw in the fridge before reheating.
  • Make-Ahead: Prepare the sauce ahead of time and store it separately. Just stir-fry the beef and vegetables when ready to serve.

Frequently Asked Questions

Here are some common questions about Black Pepper Beef:

  • Can I use other cuts of beef? Yes, flank steak or ribeye are great alternatives for this recipe.
  • Is this recipe gluten-free? Use gluten-free soy sauce to make this dish gluten-free.
  • How do I store leftovers? Store in an airtight container in the fridge for up to 3 days.
  • Can I make this dish vegetarian? Absolutely! Substitute beef with tofu or seitan and use vegetable broth.
  • What vegetables can I add? Bell peppers, broccoli, or snap peas work well in this recipe.
  • How spicy is this dish? The heat level can be adjusted by varying the amount of black pepper used.
  • What can I serve with Black Pepper Beef? It pairs perfectly with steamed rice, noodles, or a fresh salad.
  • How can I make the dish less oily? Use less oil when cooking, or opt for a non-stick pan to reduce the amount needed.

Nutrition Tips and Dietary Adaptations

Black Pepper Beef can be tailored to meet various dietary needs:

  • Low-Carb: Serve with steamed vegetables instead of rice or noodles.
  • High-Protein: Increase the beef portion or add extra tofu for additional protein.
  • Low-Fat: Use lean cuts of beef and limit the amount of oil used for cooking.

Equipment Recommendations

Here’s what you’ll need to create the perfect Black Pepper Beef:

  • Wok or Large Skillet: Essential for stir-frying over high heat.
  • Sharp Knife: For slicing the beef thinly against the grain.
  • Cutting Board: A sturdy board is crucial for safe and efficient chopping.
  • Measuring Cups and Spoons: To ensure accurate measurements for ingredients.

Serving Suggestions

To elevate your dining experience, consider these serving suggestions:

  • Garnish: Fresh cilantro or sesame seeds add a delightful touch.
  • Side Dishes: Serve with a refreshing cucumber salad or steamed broccoli.
  • Drinks: Pair with a chilled lager or a light white wine to complement the flavors.

Now that you have all the tools and tips needed to create an unforgettable Black Pepper Beef, it’s time to get cooking! Remember, the joy of cooking comes from experimenting and making the dish your own. Enjoy every moment at the stove, and let the flavors come alive on your plate. Bon appétit!

Black Pepper Beef

Prep Time 10 minutes
Cook Time 10 minutes
Total Time 20 minutes
Servings 4 servings
Calories 350
A flavorful stir-fry featuring tender beef slices coated in a spicy black pepper sauce, perfect for a quick and satisfying meal.

Ingredients

Meat

  • 1 lb beef sirloin, thinly sliced
  • 2 tbsp vegetable oil
  • 1 onion, thinly sliced
  • 2 cloves garlic, minced
  • 1 tbsp fresh ginger, minced
  • 2 tbsp black pepper, freshly ground
  • 0.25 cup soy sauce
  • 0.25 cup beef broth
  • 1 tbsp oyster sauce
  • 1 tbsp cornstarch (mixed with 2 tbsp water for thickening)
  • 0.25 cup chopped green onions (for garnish)
  • to taste salt

Instructions 

  • Heat 2 tbsp vegetable oil in a large skillet over high heat. Add beef and stir-fry 3-4 minutes until browned. Remove and set aside.
  • Add sliced onion, minced garlic, and ginger to the skillet. Stir-fry 2 minutes until fragrant and softened.
  • Sprinkle black pepper into the skillet. Stir-fry for 1 minute to release flavors.
  • Pour in soy sauce, beef broth, and oyster sauce. Bring to a simmer.
  • Return beef to skillet, stir to coat, then add cornstarch slurry. Cook 2-3 minutes until thickened.
  • Sprinkle chopped green onions over the beef. Serve hot with rice or noodles.
Notes

Adjust black pepper to taste for spiciness.
Calories: 350kcal
Cost: $15
Course: Main Course
Cuisine: Asian
Keyword: Beef

Welcome to the Ultimate Carrot Cake Experience!

There’s nothing quite like a homemade carrot cake with cream cheese frosting to bring joy and warmth to any occasion. This delightful dessert combines the natural sweetness of carrots with the rich, tangy flavor of cream cheese frosting, creating a perfect balance that is hard to resist. Whether you’re celebrating a birthday, a holiday, or simply treating yourself, this easy-to-follow recipe will guide you through every step of the process. Let’s dive in and master the art of carrot cake together!

Why You’ll Love This Recipe

  • Moist and Flavorful: This carrot cake is made with fresh grated carrots, ensuring a moist texture that complements the sweetness of the cake.
  • Perfectly Balanced Frosting: The cream cheese frosting adds a rich tang that perfectly offsets the sweetness, making each bite delightful.
  • Easy to Customize: With a few simple substitutions, you can tailor this recipe to your taste or dietary needs.
  • Great for Any Occasion: Whether it’s a casual family gathering or a formal celebration, this cake fits right in.
  • Visual Appeal: Decorate with nuts or decorative candies for a stunning presentation that will impress your guests.

Ingredients Breakdown

Here’s what you’ll need to create this extraordinary carrot cake, along with some helpful substitutions:

  • 200g (1 cup) white sugar: For sweetness; can be replaced with coconut sugar for a lower glycemic index.
  • 100g (1/2 cup) brown sugar: Adds depth and moisture; feel free to use brown sugar alternatives.
  • 3 large eggs: Essential for binding; use flax eggs for a vegan option.
  • 170ml (3/4 cup) vegetable oil: Keeps the cake moist; can substitute with applesauce for a lighter version.
  • 280g (2 cups) all-purpose flour: The base of the cake; whole wheat flour can add a nutty flavor.
  • 2 tsp baking powder: Helps the cake rise; ensure it’s fresh for best results.
  • 1 tsp baking soda: Works in tandem with the baking powder for a fluffy texture.
  • 1/2 tsp salt: Enhances flavors; a must-have in any baked good.
  • 2 tsp cinnamon: The warm spice that brings out the flavors of the carrots.
  • 2 tsp vanilla: Adds a sweet aroma; vanilla extract is preferable.
  • 5-3 cups shredded carrots: Fresh is best for moisture and flavor; look for medium-sized carrots for easy shredding.

Pro Tips for Perfect Carrot Cake

  • Grate Fresh Carrots: Use a box grater or food processor for uniform shreds that maximize moisture.
  • Room Temperature Ingredients: Ensure eggs and other ingredients are at room temperature for even mixing.
  • Don’t Overmix: Mix just until combined to keep the cake tender. Overmixing can lead to a dense texture.
  • Check for Doneness: Insert a toothpick in the center; it should come out clean or with a few moist crumbs.
  • Cooling Time: Allow cakes to cool in the pans for at least 30 minutes before transferring to a wire rack to cool completely.
  • Whip Cream Separately: For the cream cheese frosting, whip the heavy cream separately before folding it into the cream cheese to create a light and fluffy texture.
  • Use Quality Ingredients: The best flavors come from fresh, high-quality ingredients, especially the spices and cream cheese.
  • Don’t Rush the Frosting: Take your time to frost the cake for a smooth, professional finish.

Common Mistakes and Troubleshooting

Even the best chefs make mistakes! Here are some common pitfalls and how to avoid them:

  • Too Dry Cake: This can happen if you overbake or use too much flour. Always measure flour correctly and check for doneness a few minutes before the suggested baking time.
  • Dense Texture: Overmixing can lead to a dense cake. Mix just until combined.
  • Frosting Too Runny: If your frosting is runny, ensure your cream cheese is well-chilled and whip until stiff peaks form.
  • Carrots Sinking: If your shredded carrots sink to the bottom, toss them in a bit of flour before adding them to the batter.

Variations to Try

Feel free to experiment with these variations to make the recipe your own:

  • Add Nuts: Fold in chopped walnuts or pecans for a delightful crunch.
  • Spice it Up: Add nutmeg or ginger for additional flavor complexity.
  • Fruit Additions: Incorporate crushed pineapple for added moisture and sweetness.
  • Chocolate Lovers: Add chocolate chips for a rich twist on the classic recipe.

Storage and Make-Ahead Instructions

This carrot cake can be made ahead of time and stored easily:

  • Refrigeration: Store the cake in an airtight container in the refrigerator for up to 5 days.
  • Freezing: Wrap the cooled cake layers tightly in plastic wrap and freeze for up to 3 months. Thaw overnight in the refrigerator before frosting.
  • Frosting Storage: Cream cheese frosting can be made ahead and stored in the fridge for up to a week.

Frequently Asked Questions

Here are some common queries about carrot cake:

  • Can I use whole wheat flour? Yes, but be prepared for a denser cake.
  • How long does carrot cake last? When stored properly, it can last up to 5 days in the fridge.
  • Can I make this cake gluten-free? Absolutely! Use a gluten-free flour blend for the cake.
  • What can I substitute for eggs? Use flax eggs or applesauce as an alternative.
  • What’s the best way to frost the cake? Use an offset spatula to spread the frosting evenly for a professional finish.
  • Can I use less sugar? Yes, but keep in mind that reducing sugar may affect the cake’s sweetness and texture.
  • What type of nuts should I use? Walnuts and pecans are classic choices that add a wonderful crunch.
  • Can I add raisins? Yes, they add sweetness and texture, but be sure to chop them for even distribution.

Nutritional Tips and Dietary Adaptations

This carrot cake can fit various dietary needs:

  • Lower Sugar: Substitute with stevia or erythritol to reduce calorie count.
  • Vegan Option: Replace eggs with flax eggs and use coconut oil instead of vegetable oil.
  • Dairy-Free Frosting: Use coconut cream in place of cream cheese for a dairy-free frosting option.

Equipment Recommendations

Using the right tools can make a big difference:

  • Electric Mixer: A stand mixer or hand mixer will save time and effort in mixing the batter and frosting.
  • 8-inch Cake Pans: Heavy-duty, non-stick pans are best for even baking.
  • Offset Spatula: Ideal for spreading frosting smoothly.

Serving Suggestions

Make your carrot cake even more enjoyable with these serving ideas:

  • Pair with Tea: A slice of carrot cake pairs beautifully with a cup of chai or Earl Grey.
  • Add Fresh Fruit: Serve with fresh berries or a fruit compote for a refreshing contrast.
  • Top with Whipped Cream: For an extra indulgent treat, add a dollop of whipped cream on the side.

In Conclusion

Mastering the art of carrot cake with cream cheese frosting is easier than you think! With this comprehensive guide, you have all the tools you need to create a delicious, moist cake that will delight your family and friends. Remember, the joy of cooking comes not just from the end result but from the experience of creating something special in the kitchen. So roll up your sleeves, gather your ingredients, and let’s get baking! Enjoy every slice, and happy cooking!

Carrot Cake with Cream Cheese Frosting

Prep Time 20 minutes
Cook Time 35 minutes
Total Time 55 minutes
Servings 10 slices
Calories 450
A moist and flavorful carrot cake layered with rich cream cheese frosting, perfect for celebrations or a special treat.

Ingredients

Cake Batter

  • 200 g white sugar
  • 100 g brown sugar
  • 3 large eggs
  • 170 ml vegetable oil
  • 280 g all purpose plain flour
  • 2 tsp baking powder
  • 1 tsp baking soda
  • 0.5 tsp salt
  • 2 tsp cinnamon
  • 2 tsp vanilla
  • 5.33 cups shredded carrots (medium carrots)

Cream Cheese Frosting

  • 400 g full fat cream cheese
  • 300 ml double heavy whipping cream (36% fat)
  • 65 g icing sugar (powdered sugar)
  • 2 tsp vanilla
  • 55 g toasted and chopped walnuts or pecans (for decoration)

Decorative Carrots

  • 8 pieces ready made candy or white chocolate decorative carrots

Instructions 

  • Preheat oven to 180°C (350°F). Grease two 8-inch pans and dust with flour.
  • Beat sugars, eggs, and oil until combined. Mix in flour, cinnamon, baking soda, baking powder, vanilla, and salt. Fold in carrots.
  • Divide batter between pans and bake for 30-35 minutes. Cool in pans, then turn out and cool completely.
  • Toast nuts until fragrant, chop roughly, and set aside.
  • Whip cream cheese, cream, icing sugar, and vanilla until stiff. Fold in whipped cream. Frost cooled cakes, decorate with nuts, candies, and optional rosettes.

Notes

Ensure cream cheese is at room temperature for best frosting consistency.
Calories: 450kcal
Cost: $15
Course: Dessert
Cuisine: American
Keyword: cake, carrot, frosting

Crafting the Perfect Iced Honey Cinnamon Latte at Home

Welcome to a delightful journey of flavor as we explore how to make an Iced Honey Cinnamon Latte that’s as comforting as it is refreshing. This recipe combines the rich aroma of coffee, the natural sweetness of honey, and the warm spice of cinnamon, creating a drink that can invigorate your mornings or provide a cozy afternoon pick-me-up. Whether you’re a seasoned barista or a novice in the kitchen, this guide will walk you through every step of making this creamy, dreamy latte.

Why You’ll Love This Recipe

There are countless reasons why this Iced Honey Cinnamon Latte will become a staple in your home. Here are just a few:

  • Quick to prepare: With just a few simple ingredients and minimal time, you can whip up this delightful latte in minutes.
  • Customizable flavors: Adjust the sweetness or spice level to suit your taste, making it a versatile drink for everyone.
  • Healthier alternative: Using honey instead of refined sugar adds natural sweetness and beneficial properties.
  • Perfect for any season: Enjoy it iced for a refreshing summer treat or warm it up for a cozy winter beverage.
  • Impressive presentation: The layered effect of the latte makes it visually appealing, perfect for entertaining guests.

Ingredients You’ll Need

To create your Iced Honey Cinnamon Latte, gather the following ingredients:

  • 1 ½ cups strong brewed coffee or espresso: Ensure it’s chilled for the best experience.
  • 1 cup milk: Choose between dairy or non-dairy options like almond or oat milk for a hint of flavor.
  • 1 tablespoon honey: Adjust this to taste, depending on your desired sweetness.
  • ¼ teaspoon ground cinnamon: Plus a pinch for garnish, adding warmth and spice.
  • Ice cubes: Essential for that refreshing chill.
  • Optional whipped cream: Elevate your latte with a creamy topping.

How to Make an Iced Honey Cinnamon Latte

Profile view of a creamy iced honey cinnamon latte topped with a sprinkle of cinnamon.

Follow these straightforward steps to craft your perfect iced latte:

  1. Prepare Honey Cinnamon Milk: In a small bowl, whisk together the milk, honey, and ground cinnamon until the honey dissolves completely and the cinnamon is evenly mixed in.
  2. Fill the Glass: Take a tall glass and fill it with ice cubes to keep your drink refreshingly cool.
  3. Add Coffee: Pour the chilled brewed coffee or espresso over the ice, filling the glass about halfway.
  4. Combine: Slowly pour the prepared honey cinnamon milk into the glass with coffee, allowing the layers to merge naturally for a beautiful visual effect.
  5. Garnish: For extra indulgence, top with whipped cream and sprinkle a pinch of cinnamon on top.
  6. Stir and Enjoy: Gently mix the drink to combine all flavors before sipping and savoring this spiced iced beverage.

Pro Tips for the Best Iced Honey Cinnamon Latte

To ensure your latte turns out perfectly every time, consider these expert insights:

  • Use freshly brewed coffee: Opt for strong brewed coffee or espresso for a rich flavor that stands up to the milk and honey.
  • Experiment with milk types: Different types of milk can enhance the flavor; try whole milk for creaminess or almond milk for a nutty twist.
  • Chill your coffee: Make sure your coffee is well-chilled to prevent the ice from melting quickly and diluting the drink.
  • Whisk thoroughly: Ensure the honey and cinnamon are well incorporated into the milk for a uniform flavor throughout.
  • Adjust sweetness to preference: Start with a tablespoon of honey, then taste and add more if desired.
  • Layer it beautifully: Pour the milk slowly to create a visually stunning layered effect in the glass.
  • Use a milk frother: For a frothier texture, consider using a milk frother to aerate the milk before adding it to your latte.
  • Chill your glass: For an extra cold experience, chill your glass in the freezer for a few minutes before serving.

Common Mistakes and Troubleshooting

Even the best of us make mistakes in the kitchen. Here’s how to avoid common pitfalls:

  • Too sweet? If the latte is too sweet, add more milk to balance the flavors.
  • Weak coffee flavor? Use a stronger brew or add more espresso to enhance the coffee taste.
  • Too thin? If the latte is too watery, reduce the amount of milk or ice.
  • Cinnamon settling? Make sure to whisk the cinnamon thoroughly into the milk to keep it from settling.

Variations on the Iced Honey Cinnamon Latte

Get creative with these fun variations to customize your drink:

  • Vanilla Honey Cinnamon Latte: Add a splash of vanilla extract for a sweet and aromatic twist.
  • Chocolate Honey Cinnamon Latte: Mix in some cocoa powder or chocolate syrup for a mocha-style latte.
  • Nutty Iced Latte: Use hazelnut or cashew milk for a rich, nutty flavor that pairs perfectly with honey and cinnamon.
  • Spiced Honey Latte: Enhance the spice by adding a pinch of nutmeg or cloves along with the cinnamon.

Storage and Make-Ahead Instructions

If you want to prepare in advance, follow these tips:

  • Make the syrup ahead: Prepare the honey cinnamon milk in advance and store it in the refrigerator for up to 3 days.
  • Chill the coffee: Brew and chill your coffee ahead of time for quick assembly.
  • Ice cubes: Freeze coffee in ice cube trays to keep your latte from getting watered down.

Comprehensive FAQ

Here are some frequently asked questions to help you master your Iced Honey Cinnamon Latte:

  • Can I use instant coffee? Yes, instant coffee can be used, but for the best flavor, brewed coffee or espresso is recommended.
  • What if I don’t have honey? You can substitute maple syrup or agave nectar for a different sweetener option.
  • Can I make this drink warm? Absolutely! Simply heat the milk and coffee instead of serving over ice.
  • How do I make it vegan? Use non-dairy milk and a plant-based sweetener like maple syrup.
  • Is this latte gluten-free? Yes, all ingredients are gluten-free; just ensure any added syrups or flavors are also gluten-free.
  • How can I make it lower in calories? Use unsweetened almond milk and reduce the amount of honey.
  • What’s the best way to store leftover coffee? Store brewed coffee in an airtight container in the fridge for up to 3 days.
  • Can I use flavored coffee? Yes! Flavored coffee can add an extra layer of deliciousness.

Nutrition Tips and Dietary Adaptations

For those mindful of their dietary needs, here are some tips:

  • Lower sugar option: Opt for stevia or monk fruit sweetener as a low-calorie alternative to honey.
  • Dairy-free: Use non-dairy milk options like coconut, soy, or cashew milk for a completely dairy-free drink.
  • Protein boost: Add a scoop of protein powder to your latte for an extra nutritional kick.

Equipment Recommendations

Here’s what you’ll need to make your latte:

  • Coffee maker or espresso machine: Essential for brewing your coffee.
  • Milk frother: For creating a creamy texture in your milk.
  • Whisk or small bowl: To mix the honey and cinnamon into the milk.
  • Tall glass: Ideal for serving your gorgeous iced latte.

Serving Suggestions

To enhance your iced honey cinnamon latte experience, consider these serving suggestions:

  • Pair with pastries: Enjoy with cinnamon rolls or scones for a delightful brunch.
  • Garnish creatively: Add a cinnamon stick or a drizzle of honey on top for an elegant touch.
  • Serve alongside a snack: Complement your latte with a light snack like a granola bar or fruit for a balanced treat.

Conclusion

Making your own Iced Honey Cinnamon Latte at home is not only rewarding but also incredibly easy. With this guide, you can craft a deliciously balanced drink that’s perfect for any occasion. So gather your ingredients, get your coffee brewing, and enjoy a moment of bliss with each sip of your homemade latte. Remember, great cooking is all about experimentation and finding what brings you joy. Cheers to your delicious journey!

Iced Honey Cinnamon Latte Recipe

Prep Time 5 minutes
Total Time 5 minutes
Servings 1 cup
Calories 180
A refreshing and spiced iced latte combining rich coffee, sweet honey, and warm cinnamon, perfect for a cool treat.

Ingredients

Brewed Coffee

  • 0.5 cup strong brewed coffee or espresso, chilled

Milk

  • 1 cup milk (dairy or non-dairy like almond or oat milk)

Sweetener

  • 1 tablespoon honey (adjust to taste)

Spice

  • 0.25 teaspoon ground cinnamon (plus a pinch for garnish)

Ice

  • as needed Ice cubes

Topping

  • optional whipped cream for topping

Instructions 

  • Whisk milk, honey, and cinnamon until well combined.
  • Fill a glass with ice cubes and pour the chilled coffee over it.
  • Pour the honey cinnamon milk into the glass, allowing layers to merge naturally.
  • Top with whipped cream and a pinch of cinnamon if desired.
  • Gently stir before drinking to blend flavors.

Notes

Adjust honey and cinnamon to taste for a sweeter or more spiced flavor.
Calories: 180kcal
Cost: $10
Course: Beverage
Keyword: cinnamon, Honey, iced latte

Unlock the Joy of Cooking with Easy Chicken Quesadillas

Welcome to the world of delicious, homemade chicken quesadillas! If you’re looking for a quick and satisfying meal that packs a flavor punch, you’ve landed in the right place. This easy chicken quesadilla recipe combines tender chicken, colorful veggies, and gooey cheese, making it a family favorite that everyone will love. In just a matter of minutes, you can whip up a dish that’s perfect for busy weeknights or casual gatherings. Let’s dive into why this recipe is a must-try!

Why You’ll Love This Recipe

  • Quick and Easy: This recipe can be prepared in under 30 minutes, making it ideal for weeknight dinners.
  • Customizable: You can easily swap ingredients based on your preferences or what you have on hand.
  • Family-Friendly: A favorite among kids and adults alike, these quesadillas are sure to be a hit.
  • Flavor-Packed: The combination of tender chicken, sautéed veggies, and melted cheese creates a delightful taste experience.
  • Perfect for Leftovers: Any leftover filling can be used in wraps, salads, or even as a topping for nachos!

Ingredients You’ll Need

To create these scrumptious chicken quesadillas, gather the following ingredients:

  • 1 tbsp oil: For sautéing the chicken.
  • 1 lb chicken breast: Cut into small pieces for quick cooking.
  • 1 tbsp taco seasoning: Adds a burst of Mexican flavor.
  • 1-2 large bell peppers: Diced, any color you prefer for added sweetness and crunch.
  • 1/2 yellow onion: Diced for additional flavor.
  • 2 tbsp unsalted butter: For cooking the quesadillas to a golden brown.
  • 6 flour tortillas: The base for your quesadillas.
  • 2 cups Mexican cheese: For that gooey, melty goodness.

How to Make Easy Chicken Quesadillas

Follow these straightforward steps to create your delicious chicken quesadillas:

Step 1: Cook the Chicken and Veggies

Preheat a skillet with 1 tablespoon of oil over medium heat. Add the small pieces of chicken breast along with 1 tablespoon of taco seasoning. Cook the chicken for about 4 minutes, stirring occasionally to ensure even cooking.

Step 2: Add the Vegetables

Add the diced bell pepper and yellow onion to the skillet with the chicken. Cook for another 5 minutes or until the chicken is fully cooked and the vegetables are slightly caramelized, developing color and softness. Remove the mixture from the heat and set aside.

Step 3: Assemble the Quesadillas

On a clean skillet, melt a small amount of butter or add a bit of oil over medium heat. Place one flour tortilla on the skillet. Sprinkle a layer of Mexican cheese on one half of the tortilla, then add a portion of the chicken and vegetable mixture on top. Add more cheese over the chicken mixture for extra meltiness, then fold the tortilla over to cover the filling.

Step 4: Cook Until Golden and Melty

Cook the folded tortilla for a few minutes until the bottom side turns golden brown. Flip carefully and cook the other side until golden brown and the cheese is melted inside. Adjust heat as needed to prevent burning. Repeat the assembly and cooking process with the remaining tortillas and filling.

Pro Tips for Making Easy Chicken Quesadillas

  • Use Rotisserie Chicken: Save time by using pre-cooked rotisserie chicken. It adds flavor and reduces prep time.
  • Experiment with Cheese: Try different types of cheese like Monterey Jack or pepper jack for a spicy kick.
  • Don’t Overfill: Avoid overloading the quesadilla to prevent tearing and ensure even cooking.
  • Cook on Medium Heat: Cooking over medium heat allows the cheese to melt thoroughly without burning the tortillas.
  • Use Fresh Herbs: Add chopped cilantro or green onions for an extra layer of flavor.
  • Serve with Dips: Pair your quesadillas with guacamole, sour cream, or salsa for a complete meal.
  • Make It Vegetarian: Substitute chicken with beans or extra veggies for a delicious vegetarian option.
  • Use a Panini Press: If you have one, a panini press can give you perfectly crispy quesadillas.

Common Mistakes and Troubleshooting

Even the best chefs can encounter a few hiccups in the kitchen. Here’s how to avoid common mistakes when making chicken quesadillas:

  • Burnt Tortillas: If your tortillas are burning, lower the heat and cook them more slowly.
  • Dry Filling: Ensure your chicken and veggies are cooked just right; overcooking can lead to dryness.
  • Too Much Oil: Use just enough oil to prevent sticking; excess oil can make the quesadillas greasy.
  • Cheese Not Melting: Make sure your skillet is hot enough before adding the quesadillas to ensure the cheese melts.

Variations of Chicken Quesadillas

Feel free to get creative! Here are a few variations to try:

  • Tex-Mex Quesadillas: Add jalapeños and black beans for a spicy twist.
  • BBQ Chicken Quesadillas: Use shredded BBQ chicken and add corn for a smoky flavor.
  • Vegetarian Quesadillas: Swap the chicken for sautéed mushrooms, zucchini, and spinach.
  • Breakfast Quesadillas: Use scrambled eggs, cheese, and bell peppers for a hearty breakfast option.

Storage and Make-Ahead Instructions

You can prepare chicken quesadillas in advance for a quick meal later:

  • Make-Ahead: Prepare the filling ahead of time and store it in an airtight container in the fridge for up to 3 days.
  • Freezing: You can freeze cooked quesadillas by wrapping them tightly in foil or plastic wrap. They can last up to 3 months in the freezer. Reheat in a skillet or oven until heated through.
  • Refrigeration: Store leftover quesadillas in the fridge for up to 2 days. Reheat in a skillet or microwave.

Comprehensive FAQ

  • Can I use corn tortillas instead of flour? Yes, corn tortillas work well, but they may be more fragile.
  • How do I keep the quesadillas from sticking to the pan? Use a non-stick skillet or ensure your skillet is well-oiled before cooking.
  • Can I make these quesadillas in the oven? Absolutely! Bake them at 400°F for 10-15 minutes or until golden brown.
  • What type of cheese is best for quesadillas? Mexican cheese blends or Monterey Jack are excellent choices for melting.
  • How do I make these gluten-free? Use gluten-free tortillas and ensure all other ingredients are gluten-free.
  • What can I use instead of chicken? Try cooked shrimp, beef, or a variety of vegetables for a different flavor.
  • Can I prepare the filling and store it? Yes, you can prepare the filling a day in advance and store it in the refrigerator.
  • What dips pair well with chicken quesadillas? Guacamole, salsa, and sour cream are popular choices!

Nutrition Tips and Dietary Adaptations

For a healthier twist, consider the following:

  • Use Whole Wheat Tortillas: They add fiber and nutrients compared to regular flour tortillas.
  • Increase Veggies: Add more vegetables to your filling for extra vitamins and minerals.
  • Lower Calorie Cheese: Opt for lower-fat cheese options to reduce calories without sacrificing flavor.

Equipment Recommendations

Here’s a list of equipment that will make your cooking experience easier:

  • Non-Stick Skillet: Essential for cooking quesadillas without sticking.
  • Spatula: A good spatula helps flip quesadillas without breaking them.
  • Cutting Board: For chopping your veggies and chicken easily.
  • Knife: A sharp knife is crucial for precise cutting of meat and vegetables.

Serving Suggestions

Serve your chicken quesadillas with:

  • Fresh Salsa: A great way to add freshness and flavor.
  • Guacamole: Creamy and delicious, it complements the quesadillas perfectly.
  • Sour Cream: Adds a cool, creamy texture that balances the heat.
  • Side Salad: A light salad can provide a refreshing contrast to the rich quesadillas.

With this easy chicken quesadilla recipe, you’re ready to impress your family and friends with delicious flavors and quick prep time. Cooking can be a joyful experience when you have the right recipes and techniques! So, gather your ingredients, unleash your inner chef, and enjoy every bite of your homemade chicken quesadillas. Happy cooking!

Easy Chicken Quesadillas Recipe

Prep Time 10 minutes
Cook Time 15 minutes
Total Time 25 minutes
Servings 4 servings
Calories 550
Delicious and cheesy chicken quesadillas perfect for a quick meal. Packed with flavorful chicken and vegetables, they are easy to make and sure to satisfy.

Ingredients

Oil

  • 1 tbsp oil

Chicken breast

  • 1 lb chicken breast (cut into small pieces)

Taco seasoning

  • 1 tbsp taco seasoning

Bell pepper

  • 2 large bell pepper (any color, diced)

Yellow onion

  • 2 large yellow onion (diced)

Butter

  • 2 tbsp unsalted butter

Flour tortillas

  • 6 pieces flour tortillas

Mexican cheese

  • 2 cups Mexican cheese

Instructions 

  • Preheat a skillet with 1 tablespoon of oil over medium heat. Add chicken with taco seasoning and cook for 4 minutes, stirring occasionally.
  • Add diced bell pepper and onion; cook for 5 minutes until chicken is cooked and vegetables are slightly caramelized. Remove from heat.
  • Melt butter in a clean skillet over medium heat. Place a tortilla, sprinkle cheese, add chicken and vegetables, then top with more cheese and fold.
  • Cook until bottom is golden brown, flip, and cook until cheese melts inside. Repeat with remaining tortillas.
  • Serve warm for best flavor and texture.

Notes

For extra flavor, add a squeeze of lime or fresh cilantro before serving.
Calories: 550kcal
Cost: $10
Course: Main Course
Cuisine: Mexican
Keyword: Chicken

Discover the Joy of High-Protein Chicken Burrito Bowls

Welcome to a culinary adventure that will transform your meal prep routine! These high-protein chicken burrito bowls are not only delicious but also a powerhouse of nutrition, making them perfect for fueling your busy weekdays. Packed with lean protein, complex carbs, and healthy fats, they embody the perfect balance of flavor and nourishment. Whether you’re a seasoned chef or a kitchen novice, trust me, this recipe is incredibly easy to follow and delightful to enjoy.

Why You’ll Love This Recipe

This chicken burrito bowl recipe isn’t just about satisfying your hunger; it’s about convenience, versatility, and flavor. Here are five compelling reasons to make these bowls a staple in your meal prep:

  • Quick to Prepare: With just 35 minutes of total cooking time, you can whip up a week’s worth of meals in no time!
  • Customizable Ingredients: Adjust the ingredients to suit your taste and dietary needs—whether you prefer quinoa over rice, or want to add extra veggies.
  • Perfect for Meal Prep: These bowls store well in the fridge, making them ideal for quick lunches or dinners throughout the week.
  • Packed with Nutrients: Each bowl is loaded with lean protein, fiber, and essential vitamins, providing a balanced meal that fuels your day.
  • Family-Friendly: Everyone can create their own bowl according to their preferences, making dinner a fun and interactive experience.

Ingredient Breakdown and Substitutions

Let’s dive into what makes this recipe so fantastic. Here’s a breakdown of the ingredients, including some great substitution options:

  • Chicken Base: 1 lb boneless skinless chicken breast, cubed. You can substitute with tofu for a vegetarian option or use turkey for a leaner protein.
  • Cooking Oil: 1 tbsp olive oil. Feel free to use avocado oil or coconut oil for a different flavor profile.
  • Grain Base: 1 cup cooked brown rice or quinoa. For a lower-carb option, consider cauliflower rice.
  • Beans: ½ cup black beans, rinsed and drained. Chickpeas or pinto beans can also work wonderfully.
  • Corn: ½ cup corn kernels (fresh or frozen). You can skip this for a lower-carb bowl or substitute with diced bell peppers.
  • Diced Tomatoes: ½ cup diced tomatoes. Canned tomatoes or salsa can be a quick alternative.
  • Red Onion: ¼ cup finely chopped. Green onions or shallots can provide a milder flavor.
  • Avocado: ½ avocado sliced. Guacamole is a great alternative if you prefer more creaminess.
  • Lime Juice: Juice of ½ lime. Lemon juice can be used as a substitute.

Step-by-Step Instructions

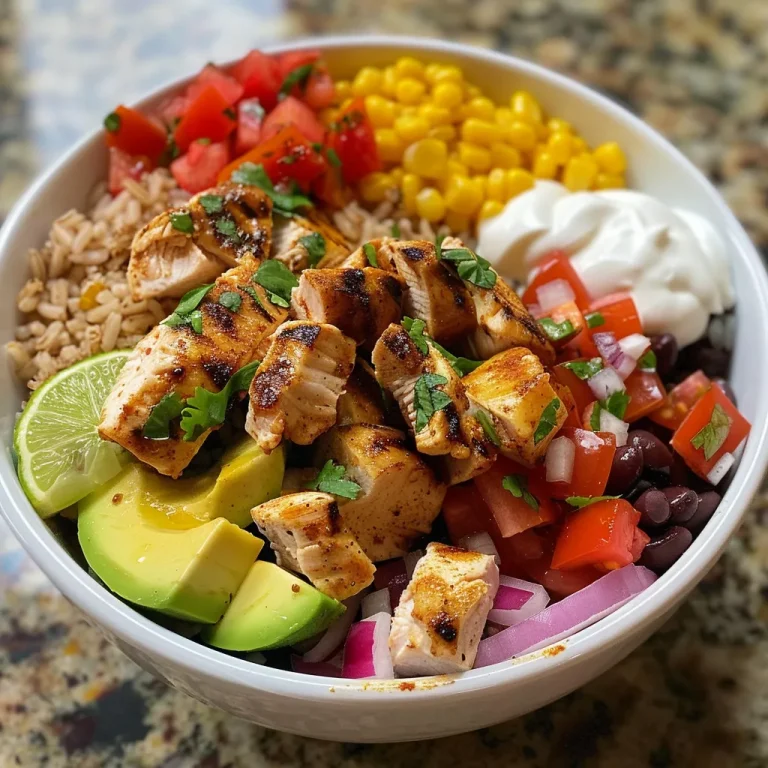
Side view of a nutritious chicken burrito bowl with fresh toppings and ingredients.

Now that we’ve got our ingredients ready, let’s get cooking! Follow these simple steps to create your high-protein chicken burrito bowls:

  • Cook the Chicken: Heat olive oil in a skillet over medium heat. Add cubed chicken and season with cumin, chili powder, smoked paprika, garlic powder, salt, and pepper. Sauté for 6-8 minutes until golden brown and cooked through.
  • Prepare the Base: In separate bowls or meal prep containers, layer the cooked brown rice (or quinoa), black beans, corn, and diced tomatoes.
  • Assemble the Bowls: Add the cooked chicken on top of your base. Garnish with sliced avocado, red onion, and a drizzle of lime juice.
  • Add Toppings: Finish with a spoonful of Greek yogurt or salsa for creaminess and extra flavor.
  • Store for Meal Prep: Divide into 4 airtight glass containers. Store in the refrigerator for up to 4 days. Enjoy cold or reheat before serving.

Pro Tips for Perfect Bowls

To take your chicken burrito bowls to the next level, consider these expert insights:

  • Marinate the Chicken: For enhanced flavor, marinate the chicken in lime juice and spices for at least 30 minutes before cooking.
  • Layer with Care: Layer ingredients from heaviest to lightest to prevent sogginess. Start with grains, then beans, and finish with fresh toppings.
  • Make it Spicy: Add jalapeños or a dash of hot sauce if you like a kick in your burrito bowl.
  • Use Fresh Herbs: Garnish with fresh cilantro or parsley for a burst of flavor and color.
  • Keep It Cool: Let the chicken cool before assembling bowls to avoid wilting the greens or other delicate ingredients.
  • Meal Prep Efficiently: Cook all components simultaneously to save time, and consider using pre-cooked ingredients for even quicker prep.
  • Experiment with Textures: Incorporate crunchy toppings like tortilla strips or nuts for added texture.
  • Portion Control: Use measuring cups to portion out ingredients, ensuring a balanced meal every time.

Common Mistakes and Troubleshooting

Even the best chefs make mistakes! Here are some common pitfalls and how to avoid them:

  • Overcooking the Chicken: Watch your chicken closely to prevent it from drying out. It should be tender and juicy.
  • Skipping Seasoning: Don’t forget to season your chicken well! It makes all the difference in flavor.
  • Using Soggy Ingredients: Make sure any vegetables you add are fresh. Avoid adding them until just before serving to maintain their texture.
  • Not Storing Properly: Use airtight containers to keep your meal prep fresh throughout the week.

Variations to Keep It Interesting

Here are some creative variations to keep your high-protein chicken burrito bowls exciting:

  • Mexican Fiesta Bowl: Add black olives, jalapeños, and a dollop of guacamole.
  • Southwestern Bowl: Incorporate grilled corn, avocado, and chipotle sauce for a smoky twist.
  • Asian-Inspired Bowl: Swap the rice for sushi rice, add edamame, and drizzle with teriyaki sauce.
  • Greek Chicken Bowl: Use quinoa, add feta cheese, olives, and a tzatziki sauce for a Mediterranean flair.

Storage and Make-Ahead Instructions

These high-protein chicken burrito bowls are perfect for meal prep! Here’s how to store and reheat them:

  • Refrigeration: Store assembled bowls in airtight containers in the fridge for up to 4 days.
  • Freezing: If you want to freeze, store chicken and rice separately from fresh ingredients like avocado and salsa. They can last up to 3 months in the freezer.
  • Reheating: Reheat bowls in the microwave for 1-2 minutes or until warmed through. If you’ve added fresh ingredients, add them after reheating.

Frequently Asked Questions

Here are some common questions about high-protein chicken burrito bowls:

  • Can I use frozen chicken? Yes, just ensure it’s fully thawed before cooking for even results.
  • What can I substitute for rice? Quinoa, cauliflower rice, or even leafy greens are excellent alternatives.
  • How long do these bowls last? They can be stored in the fridge for up to 4 days.
  • Can I make this vegetarian? Absolutely! Substitute chicken with tofu or tempeh and use veggie broth for cooking.
  • What toppings do you recommend? Consider salsa, Greek yogurt, guacamole, or fresh herbs for added flavor.
  • Is this recipe gluten-free? Yes, all ingredients are naturally gluten-free, but check labels for processed items.
  • Can I make this ahead of time? Yes, you can prepare all components and assemble just before serving.
  • What’s the best way to reheat? Microwave or stovetop are both effective. Just ensure even heating.

Nutrition Tips and Dietary Adaptations

To make these chicken burrito bowls even healthier, consider these tips:

  • Go Lean: Choose skinless chicken breast or turkey to reduce fat content.
  • Add More Veggies: Incorporate a variety of vegetables for added fiber and nutrients.
  • Healthy Fats: Use avocado for healthy fats instead of cheese or sour cream.
  • Control Portions: Use measuring tools to ensure balanced portions of protein, carbs, and fats.

Essential Equipment

Here’s a quick list of equipment that will make your cooking process smoother:

  • Skillet: For cooking the chicken evenly.
  • Measuring Cups and Spoons: To ensure accurate ingredient amounts.
  • Meal Prep Containers: For storing your delicious burrito bowls.
  • Cutting Board and Knife: Essential for chopping your fresh ingredients.

Serving Suggestions

When it comes to serving your high-protein chicken burrito bowls, consider these ideas:

  • Garnish: Top with fresh cilantro, lime wedges, or a sprinkle of cheese for extra flavor.
  • Pair with a Side: Serve with a side of grilled veggies or a fresh salad for a complete meal.
  • Make It a Fiesta: Create a build-your-own bowl night with friends or family, encouraging everyone to customize their creation!

Conclusion

Elevate your meal prep game with these high-protein chicken burrito bowls that are as nutritious as they are delicious. With endless variations and easy steps, you can create a meal that not only satisfies your hunger but also brings joy to your table. Remember, cooking at home is an opportunity to connect with yourself and your loved ones, and these bowls are a perfect vehicle for that connection. So roll up your sleeves and get ready to enjoy a week of tasty, healthy meals!

High-Protein Chicken Burrito Bowls Healthy Meal Prep Lunch

Prep Time 10 minutes
Cook Time 15 minutes
Total Time 25 minutes
Servings 4 servings
Calories 450
Enjoy a nutritious and flavorful chicken burrito bowl that's perfect for meal prep and packed with protein and fresh ingredients.

Ingredients

For the Chicken Base

  • 1 lb boneless skinless chicken breast, cubed
  • 1 tbsp olive oil
  • 1 cup cooked brown rice or quinoa
  • 0.5 cup black beans, rinsed and drained
  • 0.5 cup corn kernels (fresh or frozen)
  • 0.5 cup diced tomatoes
  • 0.25 cup red onion, finely chopped
  • 0.5 avocado sliced
  • 0.5 lime juice of lime

For Seasoning

  • 0.5 tsp cumin
  • 0.5 tsp chili powder
  • 0.5 tsp smoked paprika
  • 0.25 tsp garlic powder

Optional Toppings

  • to taste Salt and black pepper
  • to taste Greek yogurt or light sour cream
  • to taste Salsa or pico de gallo
  • to taste Fresh cilantro

Instructions 

  • Heat olive oil in a skillet and cook seasoned chicken for 6-8 minutes until golden and cooked through.
  • Layer cooked rice, black beans, corn, and diced tomatoes in bowls or containers.
  • Add cooked chicken on top, garnish with avocado slices, red onion, and lime juice.
  • Finish with toppings like Greek yogurt or salsa. Divide into 4 containers for meal prep.

Notes

Store in airtight containers for up to 4 days. Reheat or enjoy cold.
Calories: 450kcal
Cost: $15
Course: Lunch
Cuisine: Mexican
Keyword: Chicken, healthy, Meal Prep

Are you ready to transform your weeknight dinners into something extraordinary? This Blackstone Veggie Fried Rice recipe is your ticket to creating a delicious, satisfying meal that combines the savory taste of stir-fry with the wholesome goodness of fresh vegetables. With a simple ingredient list and straightforward steps, you can whip up a delightful dish that your entire family will love. Let’s dive into the art of making perfectly balanced fried rice that not only tastes great but also nourishes the soul.

Why You’ll Love This Recipe

  • Quick and Easy: This recipe is designed for busy weeknights, taking just around 30 minutes from start to finish.
  • Versatile Ingredients: Use whatever veggies you have on hand, making it a perfect way to clean out your fridge.
  • Family-Friendly: Even picky eaters will enjoy this dish, as it’s packed with flavor yet adaptable to different tastes.
  • Make-Ahead Friendly: Prepare your ingredients in advance, reducing mealtime stress.
  • Healthy and Nutritious: Incorporating a variety of vegetables ensures you’re getting a colorful mix of nutrients.

Ingredients Breakdown

To create the best vegetable fried rice, quality ingredients are key. Here’s what you’ll need:

  • Oil: Use canola or vegetable oil for greasing the Blackstone griddle, providing a high smoke point that’s perfect for frying.
  • Vegetables: 1 medium yellow onion, chopped into 1/2 inch squares, and a 10 oz bag of frozen peas and carrots make for a great base.
  • Garlic: 1 tablespoon minced garlic enhances the flavor profile.
  • Rice: 4 cups of packed cooked white rice (day-old strongly preferred) gives the best texture and prevents sogginess.
  • Soy Sauce: 2 tablespoons of low-sodium soy sauce for seasoning, with an additional 1/4 cup for the stir fry sauce.
  • Green Onions: 4 green onions, thinly sliced, add freshness and crunch.
  • Seasonings: Ground black pepper, red pepper flakes (optional), and a few teaspoons of chili garlic sauce and rice vinegar for added zing.
  • Ginger: Fresh ginger, either grated or crushed, brings warmth and depth to the dish.
  • Sesame Oil: A drizzle of sesame oil at the end adds a nutty finish.

Pro Tips for Success

To ensure your fried rice comes out perfect every time, consider these expert insights:

  • Use Day-Old Rice: If you want to achieve the best texture, use rice that’s been cooked and refrigerated for at least a day. This helps it dry out and prevents clumping.
  • Keep Ingredients Ready: Prep all your ingredients ahead of time. This makes the cooking process smoother and faster.
  • High Heat is Key: Use a high heat setting on your griddle to get that desired crispy texture on the rice.
  • Don’t Overcrowd the Pan: If you’re making a large batch, consider cooking in batches to avoid steaming the ingredients.
  • Scramble Eggs Separately: For a fluffier texture, scramble the eggs in a separate bowl before adding them to the rice.
  • Experiment with Sauces: Feel free to mix up the sauces; teriyaki or oyster sauce can add a unique twist!
  • Go for Color: The more colorful your veggies, the more nutritious and visually appealing your dish will be.
  • Adjust the Spice: Tailor the heat level by adding more or less chili garlic sauce according to your taste.

Common Mistakes and Troubleshooting

Even the best chefs can make mistakes. Here are some common pitfalls and how to avoid them:

  • Soggy Rice: This often happens if you use freshly cooked rice. Always opt for day-old rice for the best results.
  • Burned Garlic: Garlic burns quickly; add it towards the end of cooking to keep it fragrant.
  • Underseasoned Dish: Taste as you go! Adjust the soy sauce and other seasonings to ensure balanced flavor.
  • Overcooked Vegetables: Stir-fry your veggies just until tender; they should maintain some crunch.
  • Too Much Oil: While oil is necessary, too much can make the dish greasy. Start with a small amount and add more as needed.

Recipe Variations

This Blackstone Veggie Fried Rice is incredibly versatile. Here are some variations to try:

  • Protein-Packed: Add cooked chicken, shrimp, or tofu to make it a heartier meal.
  • Different Veggies: Use bell peppers, broccoli, or snap peas for a change of flavor and texture.
  • Asian-Inspired: Incorporate hoisin sauce or sriracha for a different flavor profile.
  • Baked Fried Rice: For a unique twist, bake your fried rice in the oven with cheese on top for a melty finish.

Storage and Make-Ahead Instructions

Want to save some for later? Here’s how to store and reheat your fried rice:

  • Refrigerator: Store leftovers in an airtight container in the fridge for up to 4 days.
  • Freezer: You can freeze fried rice for up to 3 months. Just ensure it’s cooled completely before transferring to freezer bags.
  • Reheating: Reheat in a skillet over medium heat, adding a splash of water to help steam it back to life.

FAQs About Blackstone Veggie Fried Rice

Here are some frequently asked questions about making the perfect fried rice:

  • Can I use brown rice instead of white? Yes, but keep in mind that brown rice may require longer cooking time and can change the texture.
  • Is this recipe gluten-free? Use gluten-free soy sauce to make this dish gluten-free.
  • Can I make this vegetarian? Absolutely! This recipe is already vegetarian-friendly; just skip the eggs if you prefer vegan.
  • What’s the best way to reheat fried rice? The best method is to use a skillet or wok over medium-high heat. Add a bit of oil for best results.
  • How can I make it spicier? Increase the amount of chili garlic sauce or add sliced fresh chilies to the mix.
  • What other sauces can I use? You can experiment with teriyaki sauce, oyster sauce, or even sweet and sour sauce for a different flavor.
  • What can I serve with fried rice? It pairs well with spring rolls, dumplings, or a simple salad for a complete meal.
  • Can I use frozen vegetables? Yes, a bag of frozen mixed vegetables works perfectly and saves prep time!

Nutrition Tips and Dietary Adaptations

Making this fried rice even more nutritious is easy! Consider these adaptations:

  • Increase Fiber: Add more vegetables or swap in brown rice for added fiber.
  • Lower Sodium: Use low-sodium soy sauce and limit added salt to keep the dish healthier.
  • Low-Carb Option: Substitute cauliflower rice for a lower-carb version.
  • Vegan Adaptation: Simply omit the eggs or replace them with tofu to keep the protein content.

Equipment Recommendations

To make your cooking process smoother, here’s what I recommend:

  • Blackstone Griddle: A spacious surface for even cooking and great results.
  • Spatula: A wide, sturdy spatula is essential for flipping and mixing.
  • Mason Jar: Perfect for shaking up your stir fry sauce ingredients.
  • Cutting Board and Knife: Essential for prepping your vegetables efficiently.

Serving Suggestions

Serve your Blackstone Veggie Fried Rice hot, garnished with the remaining green onions and a side of red pepper flakes for those who enjoy a kick. It makes a fantastic main course or a delightful side dish alongside grilled meats or tofu.

In conclusion, this Blackstone Veggie Fried Rice is more than just a meal; it’s an experience that brings family and friends together. With its vibrant flavors, easy preparation, and endless possibilities for customization, it’s sure to become a staple in your culinary repertoire. So, gather your ingredients, fire up your griddle, and enjoy the satisfaction of creating a dish that’s both delicious and nourishing. Happy cooking!

Blackstone Veggie Fried Rice with Stir Fry Sauce

Prep Time 10 minutes
Cook Time 15 minutes
Total Time 25 minutes
Servings 4 servings
Calories 450
A flavorful and easy-to-make veggie fried rice cooked on a Blackstone griddle, topped with a savory stir fry sauce and fresh green onions.

Ingredients

Oil

  • 2 tablespoons Canola Oil or Vegetable Oil (for greasing Blackstone griddle)

Vegetables

  • 1 medium yellow onion (chopped into 1/2 inch squares)
  • 10 oz frozen peas and carrots

Aromatics

  • 1 tablespoon minced garlic

Rice

  • 4 cups cooked white rice (day old, strongly preferred)

Sauces and Seasonings

  • 2 tablespoons low sodium soy sauce
  • 2 teaspoons chili garlic sauce
  • 2 teaspoons rice vinegar
  • 1/2 teaspoon sesame oil
  • 4 green onions green onions (thinly sliced and divided)
  • to taste Ground Black Pepper
  • optional Red Pepper Flakes

Instructions 

  • Mix stir fry sauce ingredients in a bowl and set aside.
  • Preheat griddle to medium-high, add 1-2 tbsp oil, and cook onion until soft and browned, about 2-3 minutes.
  • Add frozen peas and carrots, cook for 2 minutes, then add garlic and cook 30 seconds to 1 minute until fragrant.
  • Push veggies aside, scramble eggs in the cleared space, then combine with veggies. Add rice, stir to warm and brown slightly, then add soy sauce.
  • Toss in stir fry sauce and half of the green onions, stir to combine. Serve topped with remaining green onions and optional red pepper flakes.

Notes

Use day-old rice for best texture and flavor. Adjust spice level with red pepper flakes as desired.
Calories: 450kcal
Cost: $15
Course: Main Course
Cuisine: American
Keyword: Fried Rice, Vegetables

Welcome to your next culinary adventure! Today, we’re diving into the delicious world of mini chicken burgers. These delightful little bites are not just perfect for gatherings but also for family meals, providing comfort and joy in every bite. With juicy chicken, fresh toppings, and melty cheddar, this recipe is bound to become a favorite in your kitchen. Let’s explore how to make these mini chicken burgers that are sure to impress!

Why You’ll Love This Recipe

  • Quick and Easy: You can whip up a batch of these mini chicken burgers in under 30 minutes, making them ideal for those busy weeknights or last-minute gatherings.
  • Customizable: This recipe allows you to personalize your burgers with different toppings and sauces, ensuring everyone at your table gets to enjoy their favorites.
  • Perfect for All Occasions: Whether you’re hosting a party, preparing a family dinner, or planning a picnic, these mini burgers are versatile enough to shine in any setting.
  • Healthier Alternative: Using lean chicken breast, these burgers provide a nutritious option without sacrificing flavor, making them a guilt-free indulgence.
  • Fun to Assemble: Kids and adults alike can get involved in assembling their own burgers, making it a fun and interactive meal experience!

Ingredient Breakdown

Let’s look at the essential ingredients you’ll need to create these fantastic mini chicken burgers, along with some great substitutions:

  • Chicken: Use ground chicken for the patties. If you prefer, you can substitute with ground turkey or even plant-based alternatives for a vegetarian option.
  • Burger Buns: Soft mini burger buns work best. Feel free to use whole wheat or gluten-free buns to meet dietary needs.
  • Cheddar Cheese: While cheddar adds a rich flavor, you can swap it for mozzarella, pepper jack, or vegan cheese for a different taste.
  • Curly Lettuce: This adds a nice crunch. If you’re looking for alternatives, consider romaine or spinach for a different texture.
  • Tomato: Fresh slices of tomato bring juiciness; however, you can also use roasted tomatoes or sun-dried tomatoes for a unique twist.
  • Seasonings: Don’t forget to season with salt and pepper! You can also experiment with garlic powder, paprika, or herbs for an extra flavor kick.

How to Make Mini Chicken Burgers

Here’s a step-by-step guide on how to make your mini chicken burgers:

Preparing the Patties

1. In a large bowl, combine the ground chicken, salt, pepper, and any additional seasonings you prefer. Mix until well blended but do not overwork the meat.

2. Form the mixture into small patties, about the size of your mini buns.

Cooking the Patties

1. Heat a skillet or grill over medium heat. Lightly grease with cooking spray or a drizzle of oil.

2. Cook the patties for about 5-7 minutes on each side, or until they reach an internal temperature of 165°F (75°C) and are golden brown.

Assembling the Mini Burgers

1. Toast the mini burger buns lightly on the grill or in a toaster.

2. Start with the bottom bun, add a layer of curly lettuce, place the chicken patty, top with a slice of cheddar, and finish with a slice of tomato.

3. Cap it off with the top bun, and your mini chicken burger is ready to enjoy!

Pro Tips for Perfect Mini Chicken Burgers

A mini chicken burger stacked with cheddar cheese, tomato, and curly lettuce.
  • Use Fresh Ingredients: Opt for fresh ground chicken and crisp vegetables to elevate the flavor profile of your burgers.
  • Don’t Overmix: When forming the patties, mix just enough to combine the ingredients. Overmixing can lead to tough burgers.
  • Rest Before Cooking: Allow the patties to rest for about 10 minutes before cooking to help them retain moisture.
  • Monitor Cooking Time: Keep an eye on the patties while cooking; they can cook quickly, especially on a hot grill.
  • Experiment with Toppings: Don’t hesitate to get creative! Avocado, pickles, or different sauces can give your burgers a unique twist.
  • Make Ahead: You can prepare the patties ahead of time and refrigerate them for up to 24 hours or freeze them for longer storage.
  • Use a Meat Thermometer: This ensures your patties are perfectly cooked without being dry.
  • Try Different Buns: From mini pretzel buns to pita pockets, experimenting with different types of buns can add a new dimension to your burgers.

Common Mistakes and Troubleshooting

Even the best of us can have a little hiccup in the kitchen. Here are some common mistakes and how to avoid them:

  • Dry Patties: If your patties turn out dry, it may be due to overcooking. Always use a meat thermometer to check for doneness.
  • Sticking to the Pan: Ensure your cooking surface is well-oiled to prevent sticking. Non-stick pans can also be a great alternative.
  • Flavorless Burgers: Don’t skimp on seasoning! Adding herbs and spices will enhance the flavor.
  • Uneven Cooking: Make sure your patties are of uniform size for even cooking. Use a kitchen scale if necessary.

Variations to Try

Feel free to mix things up! Here are some delicious variations of mini chicken burgers:

  • BBQ Chicken Burgers: Mix BBQ sauce into the chicken mixture for a smoky flavor.
  • Spicy Jalapeño Chicken Burgers: Add diced jalapeños and pepper jack cheese for a spicy kick.
  • Herbed Chicken Burgers: Incorporate fresh herbs like basil or cilantro into the chicken mixture for a fragrant twist.
  • Buffalo Chicken Burgers: Add hot sauce to the chicken mixture and serve with blue cheese dressing and celery slaw.

Storage and Make-Ahead Instructions

To keep your mini chicken burgers fresh:

  • Refrigeration: Store cooked burgers in an airtight container in the fridge for up to 3 days.
  • Freezing: Freeze uncooked patties between layers of parchment paper in an airtight container for up to 3 months. Thaw in the fridge before cooking.
  • Reheating: Reheat cooked burgers in a skillet over medium heat or in the microwave until warmed through.

FAQs About Mini Chicken Burgers

  • Can I use a different meat? Yes! Ground turkey or even a vegetarian option can be used.
  • How do I know when the chicken is cooked? Use a meat thermometer; the internal temperature should be 165°F (75°C).
  • Can I make these burgers spicy? Absolutely! Add hot sauce or spicy seasonings to the chicken mixture.
  • What sides go well with mini chicken burgers? Serve with sweet potato fries, a side salad, or veggie sticks for a complete meal.
  • Can I grill these burgers? Yes! Grilling gives a nice smoky flavor and crispy texture.
  • What is the best way to store leftovers? Store in an airtight container in the fridge; they should last up to 3 days.
  • Can I prepare the patties in advance? Yes! You can make the patties ahead of time and refrigerate or freeze them.
  • Are mini chicken burgers suitable for kids? Definitely! They’re a fun, bite-sized option that kids usually love.

Nutritional Tips and Dietary Adaptations

For those watching their diet, here are some tips:

  • Low-Carb Version: Skip the bun and serve the patties on lettuce wraps.
  • Gluten-Free Option: Use gluten-free buns or skip the bun entirely.
  • Higher Protein: Add extra chicken or include beans in the mixture for added protein.

Equipment Recommendations

Here are some tools that can enhance your burger-making experience:

  • Non-Stick Skillet: Ideal for cooking the patties without sticking.
  • Meat Thermometer: Ensures your chicken is perfectly cooked.
  • Mixing Bowl: A large bowl is essential for mixing ingredients.
  • Burger Press: Helps create evenly shaped patties.

Serving Suggestions

These mini chicken burgers can be served in various delightful ways:

  • Condiments: Offer a selection of sauces like ketchup, mustard, mayonnaise, and BBQ sauce.
  • Topping Bar: Set up a topping bar with options like pickles, onions, and avocado.
  • Pair with Sides: Complement with sides like sweet potato fries, coleslaw, or a fresh garden salad.

So there you have it! A comprehensive guide to crafting the ultimate mini chicken burger. With these steps, tips, and variations, you’re well on your way to becoming a mini burger master. Enjoy the process and the delicious results!

Mini Chicken Burger

Prep Time 10 minutes
Cook Time 10 minutes
Total Time 20 minutes
Servings 4 pieces
Calories 350
Enjoy these delicious and easy-to-make mini chicken burgers perfect for a quick snack or meal.

Ingredients

Buns

  • 4 pieces Burger Bun

Meat

  • 300 grams Chicken (Ground or chopped)

Seasonings

  • 1 tsp Black Pepper
  • 0.5 tsp Salt

Vegetables

  • 1 slice Tomato

Lettuce

  • 2 leaves Curly Lettuce

Cheese

  • 2 slices Cheddar Cheese

Instructions 

  • Season the chicken with salt and black pepper, then shape into small patties.
  • Cook the chicken patties in a skillet over medium heat until fully cooked, about 5-7 minutes per side.
  • Toast the burger buns lightly if desired.
  • Assemble the burgers by placing a chicken patty on the bun, then add cheese, lettuce, and tomato, and top with the other bun.
  • Serve immediately and enjoy!

Notes

You can add your favorite sauces for extra flavor.
Calories: 350kcal
Cost: $8
Course: Snack
Cuisine: American
Keyword: Chicken

Discover the Ultimate Tuna Wrap Recipe

Welcome to an exciting culinary journey where we elevate the classic tuna wrap! This easy tuna wrap recipe combines the rich flavors of tuna salad with fresh veggies, all wrapped in a soft tortilla or crisp lettuce leaves. Whether you need a quick lunch option or a satisfying snack, this tuna wrap is here to deliver both flavor and nutrition. Let’s dive into why you’ll love this recipe and how to make it your own!

Why You’ll Love This Recipe

  • Quick and Easy: This tuna wrap can be prepared in just 10 minutes, making it a perfect choice for busy days.
  • Healthy Ingredients: Packed with protein and nutrients, this wrap is a guilt-free meal option that keeps you satisfied.
  • Customizable: You can easily tweak the ingredients based on your preferences or what you have at home.
  • Perfect for Meal Prep: Make several wraps in advance, and you’ll have lunches ready for the week!
  • Kid-Friendly: This recipe is loved by both adults and children, making it a great addition to family meals.

Ingredients for the Perfect Tuna Wrap

Let’s take a closer look at the ingredients you’ll need, along with some delicious substitutions:

  • Tuna: 1 can (5 oz) of tuna, drained. For a different flavor, you can use canned salmon or even shredded chicken.
  • Mayonnaise: 2 tablespoons. For a lighter option, try Greek yogurt or avocado.
  • Dijon Mustard: 1 tablespoon adds a zesty kick. You can substitute with yellow mustard if preferred.
  • Celery: 1/4 cup diced for crunch. Feel free to swap it with diced bell peppers or cucumbers.
  • Red Onion: 1/4 cup diced for flavor. Green onions can be a milder alternative.
  • Fresh Dill: 1 tablespoon chopped. If you don’t have dill, parsley or cilantro works well too!
  • Seasoning: Salt and pepper to taste.
  • Tortilla or Lettuce Leaves: Use a large tortilla for a classic wrap, or opt for lettuce for a low-carb option.

How to Make a Tuna Wrap

Now that we have our ingredients, let’s prepare this delicious tuna wrap:

  1. In a mixing bowl, combine the drained tuna, mayonnaise, Dijon mustard, diced celery, red onion, and fresh dill.
  2. Season the mixture with salt and pepper to taste, ensuring all ingredients are well incorporated.
  3. Spread the tuna mixture evenly on your tortilla or lettuce leaves.
  4. Roll the tortilla tightly or fold the lettuce leaves around the filling. Slice in half for easy eating.

Pro Tips for the Best Tuna Wrap

  • Chill the Tuna Salad: Allow the tuna salad to chill in the fridge for about 30 minutes before assembling the wrap. This enhances the flavors!
  • Use Fresh Ingredients: Whenever possible, use fresh vegetables to elevate the taste and nutritional value.
  • Experiment with Spices: Add a pinch of paprika or cayenne for a spicy twist.
  • Don’t Overfill: Be mindful not to overstuff your wrap, or it may fall apart when you try to eat it.
  • Wrap it Right: Practice the art of rolling tightly to keep the filling secure and prevent spillage.
  • Make it a Meal: Serve your tuna wrap with a side of fresh fruit or a simple salad for a complete meal.
  • Keep it Fresh: If making ahead, store the wraps wrapped in foil or parchment paper to maintain freshness.
  • Try Different Tortillas: Experiment with whole wheat, spinach, or herb-flavored tortillas for added flavor.

Common Mistakes and Troubleshooting

Even the best of us can encounter some hiccups in the kitchen. Here are some common mistakes to avoid:

  • Not Draining Tuna Properly: Make sure to drain the tuna well. Excess moisture can make the wrap soggy.
  • Skipping Seasoning: Don’t forget to season the tuna salad! A lack of seasoning can lead to bland flavors.
  • Using Old Ingredients: Fresh ingredients are key! Check the freshness of your vegetables and herbs before use.
  • Overcomplicating the Recipe: Keep it simple! The beauty of a tuna wrap lies in its straightforwardness.

Tuna Wrap Variations

Feeling adventurous? Here are some creative variations to try:

  • Tuna Melt Wrap: Add a slice of cheese, and briefly grill the wrapped tuna for a gooey, melty delight.
  • Spicy Tuna Wrap: Mix in diced jalapeños or a splash of hot sauce for an extra kick.
  • Asian-Inspired Wrap: Incorporate shredded carrots, avocado, and a drizzle of soy sauce or sesame dressing.
  • Mediterranean Tuna Wrap: Add olives, feta cheese, and sun-dried tomatoes for a flavorful twist.

Storage and Make-Ahead Instructions

Want to prepare your tuna wraps in advance? Here’s how:

  • Refrigeration: Store assembled tuna wraps in an airtight container in the refrigerator for up to 2 days.
  • Make-Ahead Ingredients: You can prepare the tuna salad a day in advance and store it separately. Assemble the wraps just before serving to keep the tortilla fresh.
  • Freezing: While it’s best to enjoy tuna wraps fresh, you can freeze the tuna salad mixture in an airtight container for up to 3 months. Thaw in the fridge before using.

Comprehensive FAQ

Here are some frequently asked questions about tuna wraps:

  • Can I use fresh tuna instead of canned? Yes, fresh tuna can be grilled or seared and used in place of canned tuna for a gourmet touch.
  • How can I make my tuna salad creamier? Add more mayonnaise or a splash of sour cream to achieve your desired creaminess.
  • What can I use instead of mayonnaise? Greek yogurt, mashed avocado, or even hummus are great alternatives.
  • Can I make this recipe gluten-free? Absolutely! Use gluten-free tortillas or lettuce leaves instead of regular wraps.
  • Is this recipe suitable for meal prep? Yes, it’s perfect for meal prep! Just store the ingredients separately until you’re ready to assemble.
  • What are some good side dishes to serve with tuna wraps? Consider pairing with a fresh salad, veggie sticks, or fruit for a well-rounded meal.
  • How long do tuna wraps last in the fridge? Tuna wraps can last up to 2 days in the refrigerator when stored properly.
  • Can I add fruits to my tuna wrap? Yes! Apples or grapes can add a sweet crunch to your tuna salad.

Nutrition Tips and Dietary Adaptations

This tuna wrap is not only delicious but can also fit various dietary needs:

  • Low-Carb: Use lettuce leaves instead of tortillas for a low-carb option.
  • High-Protein: Increase protein by adding hard-boiled eggs or chickpeas to the tuna salad.
  • Vegetarian: Swap tuna for chickpeas or black beans for a hearty vegetarian version.
  • Low-Fat: Use Greek yogurt instead of mayonnaise to reduce fat content while keeping it creamy.

Equipment Recommendations

Here’s what you’ll need to make this recipe:

  • Mixing Bowl: A medium-sized bowl for mixing your tuna salad.
  • Measuring Cups and Spoons: To ensure you get the right amounts of each ingredient.
  • Cutting Board and Knife: For chopping your veggies and prepping the ingredients.
  • Wrap or Grill Pan: If you plan to grill your wraps, a non-stick pan will work best.

Serving Suggestions

Here are some ideas to enhance your tuna wrap experience:

  • Fresh Salads: Serve with a side salad of mixed greens dressed lightly for a refreshing contrast.
  • Chips or Crackers: Pair your wrap with whole-grain chips or crackers for a satisfying crunch.
  • Smoothies: A fruit smoothie can complement the wrap nicely, providing additional nutrition.
  • Pickles: A side of dill pickles adds a tangy crunch that pairs well with the tuna salad.

In conclusion, this tuna wrap recipe is not just a meal – it’s an opportunity to create something delicious and nourishing that fits your lifestyle. With endless possibilities for customization, you can enjoy this wrap however you like. So gather your ingredients, unleash your creativity, and savor every bite of this delightful dish!

Tuna Wrap

Prep Time 10 minutes
Total Time 10 minutes
Servings 2 servings
Calories 250
A quick and delicious tuna wrap perfect for a light lunch or snack, combining creamy tuna with fresh vegetables in a soft tortilla or lettuce leaves.

Ingredients

Canned Tuna

  • 1 can 5 oz tuna, drained
  • 2 tbsp mayonnaise
  • 1 tbsp Dijon mustard
  • 0.25 cup diced celery
  • 0.25 cup diced red onion
  • 1 tbsp chopped fresh dill
  • to taste Salt and pepper
  • 1 large tortilla or lettuce leaves (for wrapping)

Instructions 

  • Mix tuna, mayonnaise, mustard, celery, red onion, and dill in a bowl.
  • Season with salt and pepper.
  • Spread the mixture on the tortilla or lettuce leaves.
  • Roll tightly and slice in half.

Notes

Use fresh dill for best flavor and adjust salt and pepper to taste.
Calories: 250kcal
Cost: $5
Course: Lunch
Keyword: Tuna

Start Your Day Right with Berry Protein Overnight Oats

In a world where mornings can be hectic, finding a nutritious breakfast that is both delicious and easy to prepare can be a challenge. That’s where Berry Protein Overnight Oats come in. This recipe not only delivers on taste but also packs a punch in terms of nutrition, making it the perfect start to your day. With simple ingredients like rolled oats, chia seeds, Greek yogurt, and fresh berries, this overnight oats recipe is designed for anyone looking for a quick yet satisfying meal. Let’s dive deeper into why this recipe should be your go-to breakfast choice!

Why You’ll Love This Recipe

Here are five compelling reasons to love these Berry Protein Overnight Oats:

  • Convenient Meal Prep: Prepare these oats the night before to enjoy a hassle-free breakfast in the morning.
  • High in Protein: Each serving is loaded with protein from Greek yogurt and protein powder, helping you stay full longer.
  • Rich in Antioxidants: The addition of berries provides antioxidants, which are great for your health and support your immune system.
  • Customizable: You can easily modify this recipe to suit your taste preferences or dietary needs.
  • Perfectly Balanced: This meal combines carbohydrates, protein, and healthy fats, making it a balanced breakfast option.

Ingredients Breakdown

Here’s what you’ll need to make these delicious Berry Protein Overnight Oats, along with some helpful substitutions:

  • Rolled Oats (1/2 cup): The base of your recipe. Use old-fashioned rolled oats for the best texture. Substitute with gluten-free oats if needed.
  • Chia Seeds (1 tbsp): These tiny seeds add fiber and omega-3 fatty acids. You can replace them with flaxseeds for a different nutritional profile.
  • Protein Powder (1 tbsp): Choose a flavor that complements your oats. Vanilla or berry-flavored protein powder works well. For a dairy-free option, use plant-based protein powder.
  • Plain Greek Yogurt (1/3 cup): Adds creaminess and protein. Substitute with dairy-free yogurt if desired.
  • Almond Milk (1/2 cup): This keeps the oats moist. Any milk, including cow’s milk, soy milk, or oat milk, can be used.
  • Pure Maple Syrup (1 tbsp): For natural sweetness. Honey or agave syrup can be used as alternatives.
  • Pinch of Salt: Enhances the flavors of the other ingredients.
  • Raspberries (1/4 cup) and Blueberries (1/4 cup): Fresh or frozen berries add flavor and nutrients. You can mix in other berries like strawberries or blackberries.

How to Make Berry Protein Overnight Oats

A detailed image of Berry Protein Overnight Oats featuring vibrant raspberries and blueberries, set against a wooden background.

Follow these simple steps to prepare your Berry Protein Overnight Oats:

  1. In a mixing bowl, combine all the ingredients except for the berries. Stir well to ensure everything is mixed evenly.
  2. Transfer the mixture into a glass jar or food container. This makes for easy storage and serving.
  3. Top with the fresh berries, then seal the jar or container tightly.
  4. Place in the fridge and let it sit for at least 8 hours or overnight to allow the oats to soak up the liquid.
  5. Before serving, stir the mixture well to combine the ingredients again and enjoy!

Pro Tips for Perfect Overnight Oats

To elevate your overnight oats game, consider the following expert tips:

  • Adjust the Consistency: If you prefer creamier oats, add more almond milk. For thicker oats, reduce the milk slightly.
  • Use Mason Jars: They’re perfect for individual servings and make for a great on-the-go breakfast option.
  • Mix Up Your Flavors: Experiment with different protein powders or flavorings like vanilla extract or cocoa powder.
  • Batch Prep: Make several jars at once to have breakfast ready for the week.
  • Incorporate Nut Butter: Adding a tablespoon of almond or peanut butter can boost flavor and nutrition.
  • Season with Cinnamon: A sprinkle of cinnamon can enhance sweetness without added sugar.
  • Freeze Your Berries: If using frozen berries, they can chill your oats while adding flavor.
  • Layer Your Ingredients: For visual appeal, layer oats and toppings in your jar.

Common Mistakes & Troubleshooting

Even the simplest recipes can go awry. Here are some common pitfalls and how to avoid them:

  • Too Runny: If your oats are too watery, reduce the amount of milk or increase the oats in your next batch.
  • Too Thick: If the oats are too thick, add a splash of milk before serving to loosen the texture.
  • Flavorless Oats: Ensure you’re using enough seasoning and flavoring, such as maple syrup or vanilla extract.
  • Unbalanced Ingredients: Measure carefully to maintain the right ratios for texture and flavor.

Variations to Try

Feel free to customize your Berry Protein Overnight Oats with these delicious variations:

  • Chocolate Berry Delight: Add cocoa powder and swap the vanilla protein powder for chocolate flavor.
  • Tropical Twist: Use coconut milk, top with pineapple, and mix in shredded coconut for a tropical vibe.
  • Nutty Banana Bliss: Add sliced banana and a tablespoon of almond butter for a nutty flavor.
  • Spiced Apple Cinnamon: Substitute berries with diced apples and add cinnamon for a fall-inspired version.

Storage and Make-Ahead Instructions

These Berry Protein Overnight Oats are perfect for make-ahead breakfasts. Here’s how to store them:

  • Refrigeration: Store in the fridge for up to 5 days. Ensure the jar is tightly sealed to maintain freshness.
  • Freezing: While not ideal for texture, you can freeze the mixture for up to 3 months. Thaw overnight in the fridge before consuming.

Comprehensive FAQ

Here are some frequently asked questions about Berry Protein Overnight Oats:

  • Can I use instant oats? No, old-fashioned rolled oats provide the best texture.
  • How long do these oats last in the fridge? Up to 5 days, but they’re best enjoyed within 3 days.
  • Can I make this vegan? Yes, use plant-based yogurt and protein powder, and substitute honey with maple syrup.
  • What can I add for extra crunch? Top with nuts, granola, or seeds before serving for added texture.
  • Are these oats gluten-free? Use certified gluten-free oats to ensure they are safe for those with gluten sensitivities.
  • Can I eat them warm? Yes, you can microwave the oats for a minute if you prefer them warm.
  • How can I sweeten my oats? Adjust the sweetness with maple syrup, honey, or a sweetener of your choice.
  • Can I substitute the berries? Absolutely! Any fruit you enjoy can be added, such as peaches, mangoes, or strawberries.

Nutrition Tips and Dietary Adaptations

For those watching their diets, here are some nutritional tips:

  • Low-Carb Option: Use fewer oats and increase chia seeds for a lower carb content.
  • High-Fiber Boost: Add flaxseeds or extra chia seeds to increase the fiber content.
  • Protein Boost: Increase the amount of protein powder or add cottage cheese for additional protein.

Equipment Recommendations

To make your Berry Protein Overnight Oats preparation a breeze, consider these kitchen essentials:

  • Mason Jars: Ideal for storage and portion control.
  • Mixing Bowls: A good set ensures easy mixing and storage.
  • Spoons and Measuring Cups: Accurate measuring helps achieve the perfect balance of ingredients.

Serving Suggestions

Here’s how to enjoy your Berry Protein Overnight Oats:

  • Top with Fresh Fruit: Add an extra handful of berries or banana slices just before serving.
  • Drizzle with Nut Butter: A swirl of almond or peanut butter can enhance flavor and add creaminess.
  • Sprinkle with Nuts or Seeds: Add a crunch factor with chopped nuts or seeds.

In conclusion, Berry Protein Overnight Oats are a fantastic way to kickstart your day with nutrition and flavor. They are customizable, easy to prepare, and perfect for any busy lifestyle. So why not give this recipe a try and transform your mornings? Enjoy your culinary journey, and remember, great cooking is all about making connections and enjoying the process!

Berry Protein Overnight Oats

Prep Time 10 minutes
Total Time 10 minutes
Servings 2 servings
Calories 250
A quick and nutritious breakfast that combines oats, berries, and protein for a delicious start to your day.

Ingredients

Oats

  • 0.5 cup rolled oats

Chia Seeds

  • 1 tbsp chia seeds

Protein Powder

  • 1 tbsp vanilla protein powder

Greek Yogurt

  • 0.75 cup plain Greek yogurt

Almond Milk

  • 0.5 cup almond milk

Maple Syrup

  • 1 tbsp pure maple syrup

Salt

  • Pinch salt

Raspberries

  • 0.25 cup raspberries

Blueberries

  • 0.25 cup blueberries

Instructions 

  • Mix oats, chia seeds, protein powder, yogurt, almond milk, maple syrup, and salt.
  • Pour mixture into a jar or container.
  • Add berries on top and refrigerate for at least 8 hours.
  • Stir before serving.

Notes

Feel free to customize with your favorite berries or toppings.
Calories: 250kcal
Cost: $5
Course: Breakfast
Keyword: Berries, oats, Protein

Welcome to the World of Homemade Vanilla Cinnamon Milk Tea

Are you searching for a comforting drink that wraps you in warmth with every sip? Look no further than Homemade Vanilla Cinnamon Milk Tea. This delightful concoction combines the aromatic flavors of cinnamon and vanilla with the soothing essence of black tea, creating a beverage that’s not just delicious but also nourishing. Whether you’re looking to unwind after a long day or impress guests with a cozy drink, this recipe is your answer. In this guide, we’ll explore everything from ingredients to variations, ensuring you can master this wonderful drink with ease.

Let’s dive into the reasons why you’ll adore this recipe, the ingredients needed, and how to make it step by step.

Why You’ll Love This Recipe

  • Quick and Easy: This recipe can be made in just 10 minutes, making it perfect for busy mornings or afternoon breaks.
  • Customizable: Adjust sweetness and creaminess to suit your preference, ensuring each cup is just right for you.
  • Health Benefits: Cinnamon is known for its anti-inflammatory properties, while vanilla can uplift your mood—a double win!
  • Perfect for Any Occasion: Whether served hot or iced, this drink fits seamlessly into any gathering or quiet evening.
  • Wholesome Ingredients: Made with simple pantry staples, you can enjoy this drink without any artificial additives.

Ingredients You Need

Before you start brewing, let’s gather our ingredients. Here’s what you’ll need for a delightful cup of vanilla cinnamon milk tea:

  • 1 cup water: The base for brewing your tea.
  • 1 tea bag: Use black tea or chai for a robust flavor.
  • ½ cup milk: Choose your favorite—dairy, almond, oat, or coconut milk all work beautifully.
  • ½ teaspoon cinnamon: Ground cinnamon for that warm spice kick.
  • ½ teaspoon vanilla extract: Pure vanilla will elevate the flavor profile.
  • Sweetener (optional): Honey, sugar, or any sweetener you prefer.

How to Make Vanilla Cinnamon Milk Tea

Now that you have your ingredients, let’s jump into the step-by-step process:

  • Step 1: Boil 1 cup of water in a saucepan.
  • Step 2: Add the tea bag to the boiling water and steep for 3-5 minutes, depending on your preferred strength.
  • Step 3: Stir in the ground cinnamon while the tea is steeping to infuse the flavors.
  • Step 4: Pour in the milk and heat gently without boiling to maintain the creaminess.
  • Step 5: Add the vanilla extract and sweetener, stirring well to combine.
  • Step 6: Strain the tea into your favorite mug and enjoy it warm.

Variations and Customizations

Feeling adventurous? Here are some fun variations you can try:

  • Chai Cinnamon Milk Tea: Use chai tea bags for a spicier, more aromatic version.
  • Vanilla Almond Milk Tea: Substitute regular milk with almond milk for a nutty twist.
  • Iced Vanilla Cinnamon Milk Tea: Brew the tea, cool it down, and serve over ice for a refreshing drink.
  • Coconut Cinnamon Milk Tea: Use coconut milk for a tropical flavor that pairs wonderfully with cinnamon.

Storage and Make-Ahead Instructions

You can easily make this drink ahead of time:

  • Refrigerate: Brew the tea and allow it to cool. Store in the refrigerator for up to 3 days. Reheat before serving.
  • Make-ahead milk mixture: Combine milk, cinnamon, and vanilla and store in the fridge. Simply heat with brewed tea when ready to serve.

Common Mistakes and Troubleshooting

Even the best chefs can make mistakes! Here are some common pitfalls to avoid:

  • Over-steeping the tea: This can result in a bitter taste; stick to 3-5 minutes.
  • Boiling the milk: Always heat milk gently to avoid curdling.
  • Not adjusting sweetness: Taste as you go! You can always add more sweetener later.

Expert Tips for the Perfect Cup

To ensure your vanilla cinnamon milk tea is always outstanding, consider these expert insights:

  • Use fresh spices: Freshly ground cinnamon enhances flavor significantly.
  • Experiment with sweeteners: Try different sweeteners like maple syrup or agave for unique tastes.
  • Garnish with a cinnamon stick: Not only does it look beautiful, but it also adds extra flavor.
  • Try different teas: Green or herbal teas can provide new flavor experiences.
  • Adjust spice levels: Feel free to increase or decrease the amount of cinnamon based on your preference.
  • Pair with snacks: Serve alongside cookies or pastries for a delightful treat.
  • Use a milk frother: For a café-style finish, froth the milk before adding it to the tea.
  • Mind your proportions: Maintain a good balance of tea to milk for the best flavor.

Frequently Asked Questions

To wrap up our guide, here are some common questions about vanilla cinnamon milk tea:

  • Can I use a different type of tea for this recipe? Absolutely! Feel free to experiment with green or herbal teas.
  • How can I make this recipe dairy-free? Simply substitute the milk with your choice of non-dairy milk, like almond or oat milk.
  • Can I adjust the sweetness? Yes! Taste your tea and add sweetener until it’s perfect for you.
  • Is this drink suitable for kids? Yes, this drink is kid-friendly and can be made without sweeteners if preferred.
  • How can I store leftovers? Refrigerate any leftover tea and reheat before serving.
  • Can I make this drink iced? Yes! Brew the tea, cool it, and serve it over ice for a refreshing drink.
  • What other flavors can I add? Consider adding nutmeg, ginger, or cardamom for additional warmth.
  • Can I make this ahead of time? Yes! Brew the tea and store it in the fridge for up to three days.

Nutrition Tips and Dietary Adaptations

This vanilla cinnamon milk tea can be adapted to fit various dietary needs:

  • Low-carb: Use a sugar substitute for a low-carb option.
  • Vegan: Use plant-based milk and a vegan sweetener.
  • Gluten-free: All ingredients are naturally gluten-free.

Equipment Recommendations

For the best results, here are some tools you might need:

  • Tea kettle: Essential for boiling water efficiently.
  • Measuring cups: Ensure accurate ingredient proportions.
  • Frother: For fancier milk textures.
  • Mug: Choose your favorite mug for a cozy experience.

Serving Suggestions

Your homemade vanilla cinnamon milk tea is ready to be enjoyed! Consider serving it with:

  • Freshly baked cookies: Chocolate chip or oatmeal raisin complement the flavors beautifully.
  • A slice of cake: Vanilla or spice cakes enhance the tea experience.
  • Fruit scones: These add a delightful texture contrast.

As we conclude this comprehensive guide, remember that the heart of cooking lies in the joy of sharing. With each cup of homemade vanilla cinnamon milk tea, you create moments of connection, joy, and comfort. Whether enjoyed alone or shared with loved ones, this simple recipe is sure to be a hit. Happy brewing!

Homemade Vanilla Cinnamon Milk Tea

Prep Time 5 minutes
Cook Time 10 minutes
Total Time 15 minutes
Servings 1 cup
Calories 150
A warm and comforting beverage combining the rich flavors of black tea, vanilla, and cinnamon, perfect for cozy moments.

Ingredients

Water

  • 1 cup water

Tea

  • 1 tea bag black tea or chai tea bag

Milk

  • ½ cup milk

Spices and Flavorings

  • ½ tsp cinnamon
  • ½ tsp vanilla extract

Sweetener

  • optional sweetener (to taste)

Instructions 

  • Boil 1 cup of water.
  • Add the tea bag and steep for 3-5 minutes.
  • Mix in cinnamon.
  • Pour in milk and heat without boiling.
  • Add vanilla extract and sweetener if desired.
  • Strain and serve warm.

Notes

You can adjust the sweetness to your preference or add more spices for extra flavor.
Calories: 150kcal
Cost: $5
Course: Beverage
Cuisine: fusion
Keyword: tea