Author

Mike

Browsing

Welcome to the Ultimate Pumpkin Board Experience

As the leaves turn and the air grows crisp, it’s the perfect time to embrace the flavors of autumn by creating a stunning pumpkin board. Not only is this dish visually captivating, but it also brings together a delightful array of flavors and textures that are sure to impress your guests. In this comprehensive guide, we’ll explore how to craft the perfect pumpkin charcuterie board, complete with tips, variations, and even some common pitfalls to avoid. Let’s dive in and celebrate the season with a fun and festive pumpkin board!

Why You’ll Love This Pumpkin Board Recipe

  • Impressive Presentation: This pumpkin board is not just food; it’s a centerpiece that enhances your autumn gatherings, making it visually appealing and inviting.
  • Flavorful Variety: With a mix of cheeses, fruits, and sweet treats, each bite offers a unique flavor experience that will satisfy your guests’ taste buds.
  • Easy to Assemble: No complicated cooking techniques here! This board is simple to put together, allowing you to focus on enjoying your time with friends and family.
  • Customizable Ingredients: Whether you prefer savory or sweet, you can easily swap in your favorite ingredients to make the board your own.
  • Perfect for Any Occasion: Whether it’s a Halloween party, a fall gathering, or a cozy night in, this pumpkin board fits perfectly into any autumn celebration.

Ingredient Breakdown and Substitutions

Creating the ultimate pumpkin board starts with selecting the right ingredients. Here’s what you’ll need:

  • 10 oz sharp cheddar (cubed): Aged cheddar adds a rich, tangy flavor. Substitute with mild cheddar or gouda for a different taste.
  • 8 oz smoked gouda (triangles): The smoky flavor enhances the board’s complexity. Try havarti or fontina for a milder option.
  • 1 baguette (24 slices): Provides a crunchy texture, perfect for pairing with cheeses. Use gluten-free bread or crackers if needed.
  • 2 cups green grapes: Fresh and juicy, they add sweetness. Substitute with apple slices or pear pieces.
  • 2 cups mandarin segments: Bright and citrusy, they complement the cheeses well. Canned mandarins work if fresh ones aren’t available.
  • 1 cup dried apricots: Their chewy texture and sweetness contrast beautifully with the cheeses. Dried figs or cranberries can be used instead.
  • ½ cup pepitas: These pumpkin seeds add crunch. Toasted almonds or walnuts are great alternatives.
  • ½ cup honey (for serving): Drizzled over cheese, it enhances the flavors. Maple syrup is a delightful substitute.
  • 8–10 candy pumpkins (for garnish): They add a festive touch! Use chocolate candies or other seasonal decorations as alternatives.

Pro Tips for Crafting Your Pumpkin Board

An enticing pumpkin board featuring sharp cheddar, gouda, and assorted fruits arranged beautifully.
  • Plan for Color: Aim for a vibrant mix of colors to make your board visually appealing. Include dark and light tones for contrast.
  • Cheese Temperature: Let the cheeses sit at room temperature for 30 minutes before serving for optimal flavor.
  • Use Seasonal Ingredients: Incorporate local produce and seasonal items for freshness and flavor.
  • Balance Flavors: Combine sweet, salty, and savory elements on your board for a well-rounded taste experience.
  • Layer Textures: Aim for a mix of crunchy, creamy, and chewy items to keep each bite interesting.
  • Garnish Wisely: Use fresh herbs or edible flowers for a beautiful finish and a pop of color.
  • Don’t Overcrowd: Leave some space on the board to enhance the presentation and make it easier for guests to serve themselves.
  • Use Small Containers: For honey or dips, use small bowls to keep the board tidy and organized.
  • Include Labels: If serving a variety of cheeses, consider labeling them to help guests choose their favorites.

Avoiding Common Mistakes

  • Not Enough Variety: Ensure a good mix of flavors and textures to cater to different preferences.
  • Serving Cold Ingredients: Cold cheeses lose their flavor; always let them warm up a bit.
  • Ignoring Dietary Restrictions: Consider guests’ dietary needs by including vegan options or gluten-free crackers.
  • Overpacking the Board: A cluttered board can look unappealing and make it hard for guests to serve themselves.

Delicious Variations to Try

  • Spooky Themed Board: Add Halloween-themed foods like ghost-shaped cheese or bat-shaped crackers for a festive twist.
  • Sweet Dessert Board: Replace savory items with sweets like chocolate-covered pretzels, caramel popcorn, and seasonal candies.
  • Breakfast Board: Include breakfast items like mini muffins, yogurt, and fresh fruit for a morning gathering.
  • Global Flavors Board: Incorporate international cheeses and accompaniments like olives, hummus, and pita bread for a worldly touch.

Storage and Make-Ahead Instructions

You can prepare several components of your pumpkin board ahead of time:


Digital Kitchen Scale

★ Recommended Kitchen Tool

Digital Kitchen Scale

Make this recipe even easier with a quality Digital Kitchen Scale — a must-have kitchen staple!


🛒 Check Price on Amazon →

As an Amazon Associate, we earn from qualifying purchases.
  • Cheese: Pre-cut cheeses can be stored in the fridge for up to three days. Just cover them to prevent drying out.
  • Fruits: Wash and slice fruits a day before and store them in airtight containers to maintain freshness.
  • Assembly: Assemble the board no more than a couple of hours ahead of serving to keep everything fresh and visually appealing.

Frequently Asked Questions

  • Can I make a pumpkin board vegan? Yes! Use plant-based cheeses and fresh vegetables instead of meats.
  • What can I use instead of a cutting board? A large serving platter or a clean baking sheet works well in a pinch.
  • How long will leftovers last? Leftover components can typically be stored for 2-3 days in the fridge.
  • What’s the best way to serve the board? Provide small plates and utensils to allow guests to easily serve themselves.
  • Can I include hot items on the board? While it’s best to stick to cold items, you can include warm dips in small containers.
  • How do I prevent fruits from browning? Toss apple or pear slices in lemon juice to keep them fresh.
  • What drinks pair well with a pumpkin board? Cider, wine, or even a festive punch can complement the flavors beautifully.
  • How can I get creative with presentation? Use seasonal elements like mini pumpkins or decorative leaves to enhance the visual appeal.

Nutrition Tips and Dietary Adaptations

While indulging in delicious treats, consider these tips for a balanced approach:

  • Portion Control: Offer a variety of items in smaller quantities to encourage sampling without overindulgence.
  • Healthy Substitutes: Opt for whole-grain bread and low-fat cheese options when possible.
  • Include Vegetables: Add raw vegetables like carrots, celery, or bell peppers for crunch and additional nutrients.

Essential Equipment for Your Pumpkin Board

To create your beautiful pumpkin board, you won’t need much. Here are a few essentials:

  • Large Cutting Board or Platter: A sturdy base to arrange your ingredients.
  • Small Bowls: For dips, honey, or smaller items to keep your board organized.
  • Knife: A good cheese knife to cut and serve cheeses easily.
  • Serving Utensils: Provide tongs or small spoons for guests to serve themselves.

Serving Suggestions

Pair your pumpkin board with a variety of drinks and bites for a complete experience:

  • Warm Apple Cider: A comforting drink that complements the autumn flavors.
  • White Wine: A crisp Sauvignon Blanc pairs beautifully with the cheeses.
  • Seasonal Cookies: Offer pumpkin spice or ginger snaps as a sweet complement.

As you prepare to gather with friends and family this fall, let this ultimate pumpkin board be the highlight of your celebration. With its vibrant colors, diverse flavors, and easy assembly, it’s a dish that guarantees smiles. Remember, the best part of cooking is sharing, so enjoy every moment spent around the table. Happy cooking!

Pumpkin Boards

Prep Time 15 minutes
Total Time 15 minutes
Servings 4 people
Calories 450
A festive cheese and fruit platter perfect for fall gatherings, featuring seasonal flavors and vibrant presentation.

Ingredients

Cheeses

  • 10 oz sharp cheddar (cubes)
  • 8 oz smoked gouda (triangles)

Bread

  • 1 baguette baguette (24 slices)

Fruits

  • 2 cups green grapes
  • 2 cups mandarin segments
  • 1 cup dried apricots

Seeds & Honey

  • ½ cup pepitas
  • ½ cup honey (ramekin)

Garnish

  • 8–10 candy pumpkins candy pumpkins (garnish)

Instructions 

  • Center honey ramekin; fan cheeses around.
  • Build two fruit arcs; sprinkle apricots and pepitas.
  • Tuck bread along bottom; dot with candy pumpkins.

Notes

Arrange ingredients visually appealing for a festive presentation.
Calories: 450kcal
Cost: $15
Course: Appetizer
Cuisine: American
Keyword: Cheese, Fruit, Pumpkin

Welcome to a culinary journey that promises to transform your dinner routine! In this article, we’ll explore the art of making a rich and creamy Smoked Gouda Risotto. This dish not only captivates the palate with its smoky flavors and velvety texture but also serves as a wonderful canvas for creativity in the kitchen. Whether you’re a seasoned chef or a kitchen novice, this risotto recipe will guide you step-by-step to achieve a delightful meal that’s perfect for any occasion.

Why You’ll Love This Recipe

Before we delve into the recipe, let’s highlight why this Smoked Gouda Risotto deserves a spot on your dinner table:

  • Comforting flavors: The combination of smoky gouda and pancetta offers a cozy, satisfying taste.
  • Versatility: Easily customize the dish by adding seasonal vegetables or proteins to suit your palate.
  • Impressive presentation: This risotto looks and tastes gourmet, perfect for impressing guests.
  • Easy to follow: With clear instructions, even beginners can create a restaurant-quality dish.
  • Comfort food with a twist: Enjoy a familiar dish enhanced with the rich flavors of gouda.

Ingredients Breakdown

To prepare this delectable Smoked Gouda Risotto, you’ll need the following ingredients:


Digital Kitchen Scale

★ Recommended Kitchen Tool

Digital Kitchen Scale

Make this recipe even easier with a quality Digital Kitchen Scale — a must-have kitchen staple!


🛒 View on Amazon →

As an Amazon Associate, we earn from qualifying purchases.
  • 4 oz cubed pancetta: Adds a savory, meaty flavor. For a vegetarian option, substitute with sautéed mushrooms.
  • 3 cloves garlic (minced): Enhances the aroma and taste. Shallots can be used for a sweeter flavor.
  • 1 shallot (minced): Provides a subtle sweetness. Yellow or red onions can work in a pinch.
  • 1 cup arborio rice: The star of the dish, known for its creamy texture. You can swap with other short-grain rice if necessary.
  • 4-5 cups chicken broth: Use homemade or store-bought. Vegetable broth is a great alternative for vegetarians.
  • 4 oz Artikaas Smoked Goat Gouda (shredded): The key ingredient for that smoky richness. Other smoked cheeses can be substituted, but the flavor may differ.

Step-by-Step Cooking Instructions

Now, let’s dive into the cooking process:

  1. In a separate skillet over medium heat, add the pancetta and cook until brown and crispy, about 5-10 minutes. Remove and set aside, reserving the fat in the pan.
  2. Meanwhile, heat your chicken broth in a pot over low heat to keep it warm.
  3. Add 2 tablespoons of the reserved pancetta fat to a wide pot on low heat. Stir in the garlic and shallots and sauté for 2-3 minutes until soft and fragrant.
  4. Introduce the arborio rice to the pot and toast for 3-5 minutes until the grains are slightly translucent.
  5. Pour in the first round of warm broth until it just covers the rice (about 1-1.5 cups). Stir gently, allowing the rice to absorb the liquid before adding more broth.
  6. Continue adding broth gradually, stirring frequently. After about 15-18 minutes, the rice should be creamy and al dente. Adjust with more broth if necessary.
  7. Once the rice is cooked to your liking, remove from heat and fold in the shredded gouda until melted. Top with crispy pancetta and serve immediately!

Pro Tips for Perfect Risotto

A steaming bowl of Smoked Gouda Risotto with a rich, creamy texture.

Creating the perfect risotto can be a breeze with these expert tips:

  • Consistent stirring: Regular stirring helps release the rice’s starch, creating a creamy texture.
  • Quality broth: Using homemade or high-quality broth enhances the overall flavor of your risotto.
  • Don’t rush: Allow the rice to absorb the broth slowly for the best results.
  • Experiment with flavors: Try adding herbs like thyme or parsley for an extra pop of flavor.
  • Finishing touches: A drizzle of olive oil or a sprinkle of parmesan can elevate the dish even further.
  • Don’t skip the resting: Letting the risotto sit for a few minutes before serving allows the flavors to meld.
  • Use a wide pot: This helps the rice cook evenly and absorb the liquid efficiently.
  • Test for doneness: The rice should be al dente, with a slight bite left.

Common Mistakes and Troubleshooting

Even the best chefs can make mistakes! Here are some common pitfalls and how to avoid them:

  • Too much broth at once: Adding too much broth at the start can lead to mushy rice. Always add gradually.
  • Not stirring enough: This can prevent a creamy texture. Stir often to release starch.
  • Using low-quality ingredients: This can impact flavor. Invest in good quality cheese and broth.
  • Overcooking the rice: Keep a close eye on the cooking time and taste regularly.

Variations to Try

Feel free to get creative! Here are some delicious variations of the basic recipe:

  • Mushroom Risotto: Add sautéed mushrooms for an earthy flavor.
  • Vegetable Risotto: Incorporate seasonal vegetables like asparagus or peas for a fresh twist.
  • Seafood Risotto: Add shrimp or scallops for a luxurious touch.
  • Herbed Risotto: Mix in fresh herbs like basil or chives for added freshness.

Storage and Make-Ahead Instructions

This risotto is best enjoyed fresh, but here’s how to store leftovers:

  • Refrigerate: Store in an airtight container for up to 3 days.
  • Reheat gently: Add a splash of broth or water to loosen the risotto when reheating.
  • Make-ahead: Cook the risotto up to the point before adding the gouda, then finish cooking when ready to serve.

Frequently Asked Questions

Here are some common queries about making risotto:

  • Can I use brown rice instead of arborio?: While possible, brown rice will require a longer cooking time and won’t achieve the same creamy texture.
  • What if I don’t have gouda?: You can substitute with other smoked cheeses or even parmesan for a different flavor.
  • Can I make risotto vegan?: Yes, simply omit the pancetta and use vegetable broth along with a dairy-free cheese.
  • How do I know when the risotto is done?: It should be creamy and the grains tender yet firm to the bite.
  • Can I freeze risotto?: While possible, it’s best enjoyed fresh as freezing can alter the texture.
  • What can I serve with risotto?: Pair it with a green salad, grilled vegetables, or as a side to roasted meats.
  • How can I add spice?: Incorporate red pepper flakes or your favorite hot sauce for a kick!
  • What’s the best way to serve risotto?: Serve warm, garnished with fresh herbs or extra cheese for an appealing presentation.

Nutritional Tips and Dietary Adaptations

This dish can be tailored to fit your dietary needs:

  • Gluten-free: The ingredients used are naturally gluten-free, making it safe for those with gluten sensitivities.
  • Lower fat: Opt for turkey bacon instead of pancetta to reduce fat content.
  • Increase fiber: Add vegetables like spinach or peas for added nutrients.

Recommended Equipment

To make this Smoked Gouda Risotto, consider having these kitchen tools handy:

  • Wide, heavy-bottomed pot: Essential for even cooking.
  • Wooden spoon: Perfect for stirring without scratching your pot.
  • Ladle: Useful for adding broth gradually.
  • Sharp knife: For chopping ingredients efficiently.

Serving Suggestions

To elevate your dining experience, consider these serving ideas:

  • Garnish: Top with fresh herbs, a drizzle of olive oil, or a sprinkle of parmesan.
  • Pairing: Serve with a crisp salad or roasted vegetables for balance.
  • Presentation: Use shallow bowls for a beautiful plate-up that showcases the creamy texture of the risotto.

In conclusion, mastering the art of Smoked Gouda Risotto not only enriches your cooking repertoire but also allows you to create memorable meals with loved ones. With its comforting flavors and endless customization options, this dish is sure to become a favorite in your home. Happy cooking!

Smoked Gouda Risotto

Prep Time 10 minutes
Cook Time 30 minutes
Total Time 40 minutes
Servings 4 servings
Calories 450
A creamy and flavorful risotto infused with smoked Gouda and crispy pancetta, perfect for a comforting meal.

Ingredients

Protein

  • 4 oz cubed pancetta
  • 3 cloved garlic (minced)
  • 1 shallot shallot (minced)
  • 1 cup arborio rice
  • 4-5 cups chicken broth
  • 4 oz Artikaas Smoked Goat Gouda (shredded) (see substitutions in body)

Instructions 

  • Cook pancetta in a skillet until crispy, then strain and set aside. Strain out excess fat.
  • Heat broth on low. In a separate pan, sauté garlic and shallots in pancetta fat for 2-3 minutes.
  • Add rice to the pan and toast for 3-5 minutes. Gradually add broth, stirring until absorbed, until rice is al dente (about 15-18 minutes).
  • Turn off heat, fold in shredded Gouda until melted. Top with crispy pancetta and serve immediately.

Notes

Stir frequently to prevent sticking and ensure creamy risotto.
Calories: 450kcal
Cost: $15
Course: Main Course
Cuisine: Italian
Keyword: Risotto

As the crisp air of autumn settles in, there’s nothing quite like a warm bowl of pumpkin curry to wrap you in comfort. This pumpkin curry with chickpeas and coconut is not just a meal; it’s an experience that combines the rich flavors of spices with the natural sweetness of pumpkin. In this comprehensive guide, I’ll walk you through everything you need to know to make this delightful dish at home. You’ll discover tips, variations, and expert insights that will elevate your cooking and bring joy to your table.

Why is this recipe so special? Well, it perfectly balances savory and sweet while showcasing the earthy taste of roasted pumpkin and the creaminess of coconut milk. Whether you’re a seasoned chef or just starting your culinary journey, this recipe is designed to inspire and encourage you to embrace your kitchen.

Why You’ll Love This Recipe

  • Nutrient-Dense Ingredients: Packed with vitamins and minerals, pumpkin and chickpeas provide a wholesome base that nourishes both body and soul.
  • Quick and Easy Preparation: With straightforward steps and minimal prep time, this dish is perfect for busy weeknights.
  • Versatile and Customizable: You can easily modify the ingredients to suit your taste or dietary needs, making it a great option for everyone.
  • Rich, Layered Flavors: The combination of spices like garam masala and chili powder creates a complex taste that keeps you coming back for more.
  • Perfect for Meal Prep: This curry stores well, making it an excellent choice for make-ahead meals that are easy to reheat and enjoy later.

Ingredients You’ll Need

To create this delicious pumpkin curry, gather the following ingredients:


Meal Prep Container Set

★ Recommended Kitchen Tool

Meal Prep Container Set

Make this recipe even easier with a quality Meal Prep Container Set — a must-have kitchen staple!


🛒 See Deals on Amazon →

As an Amazon Associate, we earn from qualifying purchases.
  • 2 lbs pumpkin: Peeled and cut into 1½-inch cubes; you can also use 1½ lbs of pre-cut pumpkin for convenience.
  • 1 tablespoon extra-virgin olive oil: Alternatively, use avocado oil or coconut oil for different flavor profiles.
  • ¼ teaspoon salt: Enhances the natural flavors of the ingredients.
  • 1 teaspoon garlic powder: Adds depth to the flavor.
  • ¼ teaspoon chili powder: Adjust to your spice preference.
  • ¼ teaspoon garam masala: For an authentic touch, you can substitute with curry powder if needed.
  • 1½ cups cooked chickpeas: Drained and rinsed; canned chickpeas work perfectly.
  • 1 large onion: Finely chopped, it adds sweetness and texture.
  • 1½ tablespoons grated garlic: Fresh garlic will elevate the dish.
  • 1½ tablespoons grated ginger: Adds warmth and spiciness.
  • 6 tablespoons tomato paste: Or 8 oz of crushed tomatoes for acidity and sweetness.
  • 1 can coconut milk: Full fat for a creamy texture.
  • 1 tablespoon maple syrup: A hint of sweetness to balance the spices.
  • 2 tablespoons chopped cilantro: Fresh herbs for garnish.
  • Toasted coconut flakes: For an added crunch and flavor.

How to Make Pumpkin Curry with Chickpeas and Coconut

Follow these simple steps to create your pumpkin curry:

Step 1: Prepare the Pumpkin

Start by peeling and cutting the pumpkin into 1½-inch cubes. If you’re using pre-cut pumpkin, rinse it to remove any preservatives. Roasting the pumpkin enhances its natural sweetness and depth of flavor.

Step 2: Roast the Pumpkin

Preheat your oven to 400°F (200°C). Toss the pumpkin cubes with olive oil, salt, and a sprinkle of garlic powder on a baking sheet. Roast for about 25 minutes or until tender and slightly caramelized.

Step 3: Roast the Chickpeas

While the pumpkin is roasting, spread the cooked chickpeas on another baking sheet. Drizzle with olive oil, salt, and garam masala. Roast for approximately 20 minutes until crispy.

Step 4: Sauté the Aromatics for the Curry Sauce

In a large pot, heat 2 tablespoons of olive oil over medium heat. Add the chopped onion, grated garlic, and ginger. Sauté until the onion is translucent and fragrant, about 5-7 minutes.

Step 5: Build and Simmer the Sauce

Stir in the tomato paste, remaining garlic powder, turmeric, cumin, and coriander. Cook for an additional 2-3 minutes. Then, pour in the coconut milk and add the roasted pumpkin. Bring to a gentle simmer.

Step 6: Finish with Chickpeas and Fresh Herbs

Once the curry is simmering, stir in the roasted chickpeas and maple syrup. Cook for another 5 minutes to let the flavors meld. Garnish with chopped cilantro and toasted coconut flakes before serving.

How to Serve Pumpkin Curry

Side view of creamy pumpkin curry with chickpeas, garnished with herbs and coconut, in a rustic bowl.

There are several delicious ways to enjoy your pumpkin curry:

  • With Rice: Serve over fluffy jasmine or basmati rice to soak up the rich sauce.
  • With Naan: Use warm naan bread to scoop up the curry for a delightful experience.
  • As a Bowl Meal: Top with fresh greens, avocado, and a drizzle of lime for a nutritious bowl.
  • Elevate with Garnishes: Add a dollop of yogurt or a sprinkle of feta for extra creaminess.

Storage and Make-Ahead Instructions

This pumpkin curry is perfect for meal prep and can be stored in the refrigerator for up to 5 days. To freeze, portion into airtight containers and store for up to 3 months. When ready to eat, simply thaw overnight in the fridge and reheat on the stovetop or in the microwave until warmed through.

Common Mistakes and Troubleshooting

To ensure your pumpkin curry turns out perfectly every time, keep these tips in mind:

  • Overcooking the Pumpkin: Be careful not to over-roast the pumpkin, as it can become too mushy.
  • Spice Balance: Taste as you go! Adjust the spices according to your preference to achieve the perfect flavor.
  • Using Low-Fat Coconut Milk: For the richest flavor and texture, opt for full-fat coconut milk.
  • Skipping the Maple Syrup: This ingredient balances the spices, so don’t omit it!

Variations

Feel free to experiment with these variations to make this recipe your own:

  • Protein Additions: Stir in cooked chicken, shrimp, or tofu for added protein.
  • Spicy Kick: Add diced jalapeños or a dash of cayenne pepper for heat.
  • Vegetable Medley: Incorporate other vegetables like spinach, carrots, or bell peppers for added nutrition.
  • Different Cuisines: Swap out the spices for a Jamaican twist by using allspice and thyme.

FAQs

  • Can I use canned pumpkin instead of fresh? Yes, canned pumpkin works well, but be sure to adjust the cooking time as it may not need to roast.
  • Is this recipe gluten-free? Absolutely! All the ingredients used are naturally gluten-free.
  • Can I make this curry vegan? Yes, this recipe is already vegan-friendly with no animal products.
  • How long does this curry last in the fridge? It can be stored in the refrigerator for up to 5 days.
  • Can I freeze the pumpkin curry? Yes, it freezes well! Just store it in airtight containers.
  • What can I serve with pumpkin curry? Serve it with rice, naan, or over a bed of greens for a wholesome meal.
  • How can I make it less spicy? Use less chili powder and garam masala, or omit them entirely if you prefer a milder flavor.
  • Is this curry good for meal prep? Yes, it’s excellent for meal prep and tastes great reheated!

Nutrition Tips and Dietary Adaptations

This dairy-free pumpkin recipe is not only delicious but also nutritious. Here are some tips to enhance its health benefits:

  • Incorporate More Vegetables: Feel free to add additional vegetables to increase fiber and nutrients.
  • Adjust the Oil: Reduce the amount of oil used to lower fat content if desired.
  • Use Less Salt: Opt for low-sodium versions of canned goods to manage sodium intake.

Equipment Recommendations

To make your cooking experience seamless, consider using the following tools:

  • High-quality Chef’s Knife: For efficient chopping and dicing.
  • Cutting Board: A sturdy cutting board will make prep work easier.
  • Large Pot: Essential for sautéing and simmering your curry.
  • Baking Sheets: For roasting the pumpkin and chickpeas.

Conclusion

This pumpkin curry with chickpeas and coconut is a testament to how simple ingredients can come together to create something truly delightful. With its rich flavors, nutrient-dense ingredients, and comforting aroma, it’s perfect for any occasion. So, gather your ingredients and dive into this cozy culinary adventure! You’ll not only enjoy the cooking process but also the wonderful moments shared around the table. Happy cooking!

Pumpkin Curry with Chickpeas and Coconut

Prep Time 15 minutes
Cook Time 30 minutes
Total Time 45 minutes
Servings 4 servings
Calories 350
A hearty and flavorful vegan curry combining pumpkin, chickpeas, and coconut milk, perfect for cozy meals.

Ingredients

Pumpkin

  • 2 lbs pumpkin (peeled and cut into 1½-inch cubes, or pre-cut)
  • 1 tablespoon extra-virgin olive oil (avocado oil, or coconut oil)
  • ¼ teaspoon salt
  • 1 teaspoon garlic powder
  • ¼ teaspoon chili powder
  • ¼ teaspoon garam masala (or curry powder)
  • cups cooked chickpeas (drained and rinsed)
  • 1 tablespoon extra-virgin olive oil
  • ¼ teaspoon salt (adjust per taste)
  • 1 teaspoon garam masala (tandoori masala, paprika, and ground cumin or curry powder)
  • ½ teaspoon garam masala (or curry powder)
  • ½ teaspoon garam masala (or curry powder)
  • 2 tablespoons olive oil
  • 1 large onion (finely chopped)
  • tablespoons grated garlic
  • tablespoons grated ginger
  • teaspoons garam masala (or curry powder)
  • ½ teaspoon Kashmiri red chili powder (see note)
  • ½ teaspoon turmeric
  • ½ teaspoon ground cumin
  • ½ teaspoon ground coriander
  • 6 tablespoons tomato paste (or crushed tomatoes)
  • 1 teaspoon salt (or to taste)
  • 1 can coconut milk (full fat)
  • 1 tablespoon maple syrup
  • 1 tablespoon ghee (optional)
  • 2 tablespoons chopped cilantro (or kasoori methi)

Toasted coconut flakes

Instructions 

  • Sauté chopped onion, garlic, and ginger in oil until fragrant and translucent.
  • Add spices and tomato paste, cook for 2 minutes to develop flavor.
  • Add pumpkin cubes and chickpeas, stir to coat with spices.
  • Pour in coconut milk and maple syrup, simmer for 20 minutes until pumpkin is tender.
  • Finish with cilantro and toasted coconut flakes before serving.

Notes

Adjust salt and spice levels to taste. For a creamier texture, add more coconut milk.
Calories: 350kcal
Cost: $15
Course: Main Course
Cuisine: Indian
Keyword: Pumpkin

Unleash Your Inner Chef: Crafting Adorable Spider Hot Dogs for Halloween

As Halloween approaches, there’s no better way to celebrate than by whipping up some fun and festive treats. One of the most delightful and eye-catching options is the Spider Hot Dog. This creative dish combines the classic comfort of hot dogs with the whimsical charm of a spider, making it a perfect addition to your Halloween menu. Whether you’re hosting a spooky gathering or just want to surprise the kids, these treats are sure to delight. In this guide, I’ll walk you through everything you need to know about crafting these spooky snacks, from the ingredients to tips and tricks for making them a hit at your Halloween festivities. Let’s get started!

Why You’ll Love This Recipe

  • Simple Ingredients: With just four main ingredients—hot dogs, crescent roll dough, candy eyes, and optional condiments—you can create a fun dish without a lengthy shopping list.
  • Quick Preparation: In about 30 minutes, you can prepare and bake these creepy-crawly delights, making them a great choice for last-minute party snacks or a quick family dinner.
  • Kid-Friendly Fun: Kids will love the interactive process of making their own spider hot dogs, encouraging creativity and teamwork in the kitchen.
  • Versatile Serving Options: These treats can be served with a variety of dipping sauces, such as ketchup and mustard, allowing for personalization and extra flavor.
  • Perfect for Parties: The spooky aesthetic makes these spider hot dogs a conversation starter and a perfect fit for Halloween-themed gatherings.

Ingredients for Spider Hot Dogs

To make these delicious treats, you’ll need the following ingredients:

  • 6 hot dogs: Choose your favorite type—beef, turkey, or even veggie options work well.
  • 1 8-ounce can refrigerated crescent roll dough: This dough provides the spider’s body and legs.
  • 24 candy eyes: These add the perfect spooky touch to your spider hot dogs.
  • Ketchup and mustard (optional): For dipping, these condiments add flavor and fun to the presentation.

Feel free to customize your ingredients by swapping the hot dogs for veggie dogs or using different dipping sauces to accommodate dietary preferences.


Professional Chef Knife Set

★ Recommended Kitchen Tool

Professional Chef Knife Set

Make this recipe even easier with a quality Professional Chef Knife Set — a must-have kitchen staple!


🛒 Shop This Tool →

As an Amazon Associate, we earn from qualifying purchases.

How to Make Spider Hot Dogs

Juicy Spider Hot Dogs wrapped in crescent roll dough with ketchup and mustard.

Creating these spider hot dogs is a straightforward process. Follow these steps:

  1. Preheat the oven: Set your oven to 375°F (190°C) and line a large baking sheet with parchment paper to prevent sticking.
  2. Cut the hot dogs: Start by cutting each hot dog in half. Then, slice each half lengthwise, leaving about 1 inch intact at the top to form legs. Ensure you cut thin strips to allow them to curl while baking.
  3. Prepare the crescent dough: Unroll the crescent roll dough and cut it into thin strips, about 1/4 inch wide. This dough will wrap around the hot dog bodies.
  4. Wrap the spiders: Take each hot dog piece and wrap a strip of crescent dough around the uncut portion to create the spider’s body, leaving the cut ends exposed for legs.
  5. Bake: Arrange the wrapped hot dogs on the prepared baking sheet. Bake for 12-15 minutes, or until the dough is golden brown and the hot dog legs have curled up.
  6. Add the eyes: Allow the spider hot dogs to cool for a few minutes. Then, carefully place two candy eyes on each spider.
  7. Serve: These spooky snacks are best served warm with a side of ketchup, mustard, or your favorite dipping sauce!

How to Make a Ketchup and Mustard Spiderweb

To enhance the presentation, consider creating a spiderweb design with ketchup and mustard:

  • Draw the web: On a clean plate, use ketchup and mustard to create a web pattern. Start from the center and work your way outwards.
  • Arrange the spider hot dogs: Place the completed spider hot dogs on top of the web design for a spooky visual effect.

Tips for the Best Hot Dog Spiders

  • Cut the legs carefully: Ensure your hot dog legs are thin enough to curl but not so thin that they break apart.
  • Experiment with flavors: Try using flavored crescent dough, such as garlic or herb, for an added twist.
  • Use a variety of eyes: Mix and match candy eyes for a fun and quirky look.
  • Don’t overcrowd the baking sheet: Give the hot dogs space to puff up and turn golden without sticking together.
  • Serve immediately: These are best enjoyed fresh out of the oven when the dough is still warm and flaky.

Spider Hot Dog Variations

Want to mix things up? Here are a few fun variations on the classic spider hot dog:

  • Veggie Spider Dogs: Substitute traditional hot dogs with plant-based veggie dogs for a healthier, vegetarian-friendly option.
  • Cheesy Spiders: Add small pieces of cheese between the crescent dough layers for extra flavor and gooeyness.
  • Spicy Hot Dogs: Use spicy hot dogs or add jalapeño slices to the wrapping for those who enjoy a kick.
  • Mini Spider Dogs: Use mini hot dogs or cocktail sausages for bite-sized treats perfect for snacking.

Storage and Make-Ahead Instructions

If you’re planning ahead, here’s how to store and prepare your spider hot dogs:

  • Make-Ahead: You can prepare the hot dogs and wrap them in crescent dough a few hours in advance. Keep them covered in the refrigerator until you’re ready to bake.
  • Storing leftovers: Store any leftover spider hot dogs in an airtight container in the refrigerator for up to 3 days. Reheat in the oven or microwave before serving.
  • Freezing: For longer storage, you can freeze the wrapped hot dogs before baking. Thaw in the refrigerator overnight before baking.

Frequently Asked Questions

1. Can I use different types of hot dogs?

Absolutely! Feel free to use any type of hot dog, including turkey, chicken, or veggie options to suit your tastes.

2. How do I ensure the legs curl nicely?

Cut the legs thinly and make sure to leave enough of the hot dog intact at the top. This allows them to curl while baking.

3. Can I make these spider hot dogs ahead of time?

Yes, you can prepare them a few hours in advance and store them in the refrigerator until you’re ready to bake.

4. What if I don’t have crescent roll dough?

You can substitute with puff pastry, biscuit dough, or even homemade dough if you prefer.

5. Are spider hot dogs suitable for kids?

Definitely! Kids love the fun, interactive process of making and eating these treats. They’re a great way to get them involved in the kitchen.

6. Can I add extra toppings?

Yes! Feel free to add cheese, spices, or sauces to customize the flavor to your liking.

7. How do I store leftovers?

Store any leftovers in an airtight container in the refrigerator for up to 3 days. Reheat before serving.

8. What are some fun side dishes to serve with spider hot dogs?

Consider serving with a spooky salad, sweet potato fries, or a Halloween-themed punch for a festive meal.

Nutrition Tips and Dietary Adaptations

While enjoying these delicious spider hot dogs, consider the following tips for making them a little healthier:

  • Opt for turkey or chicken hot dogs: These options typically have lower fat content compared to traditional beef hot dogs.
  • Whole grain crescent dough: If available, choose whole grain options for added fiber.
  • Load up on veggies: Serve with a side of fresh veggies or a salad to add nutrients and balance the meal.

Equipment Recommendations

To make the process smooth, here’s what you’ll need:

  • Baking sheet: A large, rimmed baking sheet ensures plenty of space for your spider hot dogs.
  • Parchment paper: This prevents sticking and makes for easier cleanup.
  • Sharp knife: Use a good quality knife for precision cutting of the hot dogs and dough.
  • Measuring tools: While not strictly necessary, having measuring cups and spoons can help with precise ingredient preparation.

Serving Suggestions

These spider hot dogs shine when paired with other festive treats:

  • Spooky Fruit Salad: Combine fruits like grapes, oranges, and apples for a colorful, healthy side.
  • Pumpkin Spice Cupcakes: A sweet finish to your Halloween feast, these treats will be a hit with both kids and adults.
  • Monster Juice: Create a fun drink by mixing green punch with gummy worms for a creepy effect.

As you can see, creating spider hot dogs for Halloween is not only easy but also a delightful way to bring some fun and creativity into your kitchen. With these tips and variations, you can make this spooky snack a memorable part of your Halloween celebrations. So gather your ingredients, invite some friends, and get ready to have a blast in the kitchen!


Spider Hot Dogs

Prep Time 10 minutes
Cook Time 15 minutes
Total Time 25 minutes
Servings 6 pieces
Calories 250
Fun and spooky, these spider hot dogs are perfect for Halloween parties or a playful snack.

Ingredients

Main ingredients

  • 6 pieces hot dogs
  • 1 can refrigerated crescent roll dough (8-ounce can)
  • 24 pieces candy eyes
  • to taste Ketchup and mustard (for serving, optional)

Instructions 

  • Preheat oven to 375°F (190°C). Line a baking sheet with parchment paper.
  • Cut each hot dog in half lengthwise, then into quarters. Carefully cut the ends into thin strips for legs.
  • Unroll crescent dough and cut into thin strips. Wrap dough around the uncut part of each hot dog, leaving legs exposed.
  • Arrange on baking sheet and bake for 12–15 minutes until golden and legs curl.
  • Cool slightly, then add candy eyes to each spider. Serve with ketchup and mustard if desired.

Notes

Use a sharp knife to carefully cut the hot dogs for best results.
Calories: 250kcal
Cost: $8
Course: Appetizer
Keyword: Halloween, hot dogs, party

Discover the Joy of Baking with Candy Corn Muffins

Welcome to the delightful world of Candy Corn Muffins! As a professional chef with over two decades of culinary experience, I can assure you that this recipe is a fantastic way to bring joy and warmth into your kitchen, especially during the festive season. These muffins are not just another treat; they embody the spirit of celebration with their sweet, playful flavor and vibrant appearance. Whether you’re planning a Halloween gathering or just want a fun snack for your family, these muffins will surely be a hit. Let’s dive into the magic of baking these Candy Corn Muffins and discover the delightful flavors they bring!

Why You’ll Love This Recipe

  • Festive Flavor: The perfect blend of sweet and savory, these muffins capture the essence of the season.
  • Quick and Easy: With simple ingredients and straightforward steps, you’ll have these muffins ready in no time.
  • Kid-Friendly Fun: Involving kids in the baking process makes for a fun family activity, and they’ll love the taste!
  • Versatile Treat: Perfect for breakfast, snacks, or dessert, these muffins can be enjoyed any time of day.
  • Great for Sharing: Whether at a party or just with friends, these muffins are sure to impress and make everyone smile.

Ingredient Breakdown

To create these delightful Candy Corn Muffins, you will need the following ingredients:

  • All-Purpose Flour: Provides the base structure of the muffins.
  • Yellow Cornmeal: Adds a unique texture and corn flavor.
  • Sugar: Sweetens the muffins and balances the flavors.
  • Baking Powder: Essential for leavening, ensuring a fluffy texture.
  • Baking Soda: Works with the acid in the recipe to create lift.
  • Salt: Enhances the sweetness of the muffins.
  • Egg: Binds the ingredients together and adds richness.
  • Milk: Provides moisture and aids in flavor blending.
  • Butter: For a rich, buttery flavor and moist texture.
  • Candy Corn: The star ingredient that adds sweetness and festive flair.

Possible Substitutions

  • Gluten-Free Flour: Substitute all-purpose flour with a 1:1 gluten-free blend for a gluten-free option.
  • Agave Syrup or Honey: Use in place of sugar for a different sweetness profile.
  • Non-Dairy Milk: Almond or oat milk can replace regular milk for a dairy-free version.
  • Vegetable Oil: Swap butter for oil for a lighter texture.

Expert Baking Tips

Side view of freshly baked Candy Corn Muffins displaying their fluffy texture and vibrant candy corn sprinkles.

To ensure your Candy Corn Muffins turn out perfectly, keep these pro tips in mind:


5-Speed Electric Hand Mixer

★ Recommended Kitchen Tool

5-Speed Electric Hand Mixer

Make this recipe even easier with a quality 5-Speed Electric Hand Mixer — a must-have kitchen staple!


🛒 View on Amazon →

As an Amazon Associate, we earn from qualifying purchases.
  • Don’t Overmix: Mix the batter just until combined to keep the muffins light and fluffy.
  • Room Temperature Ingredients: Use room temperature eggs and milk for better mixing.
  • Check for Doneness: Insert a toothpick into the center; it should come out clean when the muffins are done.
  • Let Them Cool: Allow muffins to cool in the pan for 5 minutes before transferring to a wire rack.
  • Experiment with Add-Ins: Feel free to add chocolate chips or nuts for extra flavor and texture.
  • Use Fresh Ingredients: Ensure your baking powder and soda are fresh for the best rise.
  • Store Properly: Keep muffins in an airtight container to maintain freshness.
  • Adjust Sweetness: Taste the batter before adding candy corn to adjust sweetness if needed.

Avoiding Common Baking Mistakes

Even seasoned bakers can face challenges. Here’s how to troubleshoot:

  • Dense Muffins: This often results from overmixing. Stir until just combined.
  • Dry Muffins: Check your measurements; too much flour can lead to dryness.
  • Burnt Tops: If your oven runs hot, try lowering the temperature or covering the muffins with foil halfway through baking.
  • Uneven Baking: Rotate the muffin pan halfway through baking for even heat distribution.

Delicious Variations to Try

Once you master the basic Candy Corn Muffins, consider these fun variations:

  • Candy Corn Fudge Muffins: Swirl in some melted fudge for a rich, chocolatey twist.
  • Chocolate Chip Candy Corn Muffins: Add semi-sweet chocolate chips to the batter for an extra layer of sweetness.
  • Spiced Pumpkin Candy Corn Muffins: Incorporate pumpkin puree and spices for a fall-inspired treat.
  • Maple Pecan Candy Corn Muffins: Replace sugar with maple syrup and add pecans for a nutty flavor.

Make-Ahead and Storage Instructions

These muffins can be made ahead of time for convenience. Here’s how:

  • Make Ahead: Prepare the batter a day in advance and store it in the refrigerator. Bake fresh in the morning!
  • Storage: Store muffins in an airtight container at room temperature for up to 3 days or freeze for up to 3 months.
  • Reheating: Warm in the microwave for a few seconds or in an oven to regain freshness.

Frequently Asked Questions

Here are some common questions and answers about Candy Corn Muffins:

  • Can I use fresh candy corn? Yes, fresh candy corn is great; just ensure it’s not too sticky.
  • How can I make these muffins healthier? Use whole wheat flour and reduce the sugar for a healthier option.
  • What if I don’t have cornmeal? You can substitute it with more all-purpose flour, but the texture will differ.
  • Can I make mini muffins? Absolutely! Just adjust the baking time to about 12-15 minutes.
  • What’s the best way to serve these muffins? Serve warm with a pat of butter or cream cheese for added flavor.
  • How do I know when they’re done? A toothpick inserted in the center should come out clean or with a few moist crumbs.
  • Can I freeze these muffins? Yes, they freeze well. Just ensure they’re cooled completely before storing.
  • Are there any dietary adaptations? Yes, you can make them gluten-free or dairy-free based on your needs.

Nutritional Insights and Dietary Adaptations

Understanding the nutritional value of your treats is important. Here’s a quick breakdown:

  • Calories: Each muffin contains approximately 200 calories, making it a satisfying snack.
  • Protein: With ingredients like eggs and milk, these muffins provide a decent protein boost.
  • Fiber: Adding cornmeal increases fiber content, aiding digestion.
  • Sugar Content: Adjust the sugar level based on dietary preferences; use natural sweeteners if desired.

Must-Have Equipment for Success

To make your baking experience seamless, here’s what you’ll need:

  • Mixing Bowls: A set of mixing bowls in various sizes for ease of use.
  • Measuring Cups and Spoons: Accurate measurements are key to perfect muffins.
  • Whisk: For mixing dry ingredients and incorporating the wet ingredients smoothly.
  • Muffin Tin: A standard 12-cup muffin tin is essential for baking.
  • Parchment Paper Liners: These help prevent sticking and make cleanup easier.

Serving Suggestions

These Candy Corn Muffins are versatile and can be served in various delightful ways:

  • Breakfast Treat: Pair with coffee or tea for a sweet start to your day.
  • Party Snack: Serve them at gatherings, especially during Halloween, for a festive touch.
  • Brunch Delight: Include them in a brunch spread alongside fruit and yogurt.
  • Gift Idea: Package them in a cute box as a thoughtful gift for friends and family.

In conclusion, the Candy Corn Muffins are not just a recipe; they’re a celebration of flavors that brings people together. Baking these muffins is an enjoyable experience, and they’ll undoubtedly become a cherished treat in your home. So, gather your ingredients, invite your loved ones into the kitchen, and let’s create something magical together!

Candy Corn Muffins Recipe

Prep Time 10 minutes
Cook Time 20 minutes
Total Time 30 minutes
Servings 12 muffins
Calories 200
Enjoy these sweet and colorful muffins perfect for fall celebrations or Halloween parties.

Ingredients

Dry Ingredients

  • 1 1/2 cups All Purpose Flour
  • 1/2 cup Yellow Cornmeal
  • 1 cup Sugar
  • 1 1/2 teaspoons Baking Powder
  • 1/2 teaspoon Baking Soda
  • 1/4 teaspoon Salt

Wet Ingredients

  • 1 egg Egg
  • 1 cup Milk
  • 1/2 cup Butter (melted)

Add-ins

  • 1 cup Candy Corn

Instructions 

  • Preheat oven to 375°F (190°C) and line a muffin tin with paper liners.
  • In a large bowl, whisk together the dry ingredients: flour, cornmeal, sugar, baking powder, baking soda, and salt.
  • In another bowl, beat the egg, then mix in the milk and melted butter.
  • Pour the wet ingredients into the dry ingredients and stir until just combined. Fold in the candy corn.
  • Divide the batter evenly among the muffin cups and bake for 20 minutes or until golden brown.

Notes

For extra sweetness, add a sprinkle of sugar on top before baking.
Calories: 200kcal
Cost: $8
Course: Dessert
Cuisine: American
Keyword: Candy Corn

As the colder months approach, there’s nothing quite like a warm, hearty soup to bring comfort and joy to our dining experiences. The Vegan White Bean Pot Pie Soup is a delightful dish that captures the essence of cozy family meals, bringing together the creamy richness of white beans, fresh vegetables, and fluffy biscuits. This recipe is perfect for a quick weeknight dinner or a gathering with friends, ensuring everyone leaves the table satisfied and smiling.

In this comprehensive guide, I’ll walk you through everything you need to know to make this soup, from ingredient breakdowns to cooking tips, variations, and storage instructions. By the end, you will feel confident in your cooking skills and ready to impress your friends and family!

Why You’ll Love This Recipe

  • Comforting and Hearty: This soup is packed with flavors and textures that will warm your heart and fill your belly, making it a perfect choice for chilly evenings.
  • Nutrient-Dense: With ingredients like white beans, vegetables, and nutritious spices, this recipe is not only delicious but also rich in vitamins, minerals, and plant-based protein.
  • Quick and Easy: The preparation and cooking time is manageable, allowing you to whip up a comforting meal without spending hours in the kitchen.
  • Customizable: You can easily adapt this recipe to suit your taste preferences or dietary needs by substituting different vegetables or using alternative thickeners.
  • Perfect for Meal Prep: This soup stores well, making it an excellent option for batch cooking and enjoying throughout the week or freezing for later.

Ingredient Breakdown

To create the perfect Vegan White Bean Pot Pie Soup, you’ll need the following ingredients:


Vegetable Spiralizer

★ Recommended Kitchen Tool

Vegetable Spiralizer

Make this recipe even easier with a quality Vegetable Spiralizer — a must-have kitchen staple!


🛒 View on Amazon →

As an Amazon Associate, we earn from qualifying purchases.
  • Raw Cashews: 2/3 cup, which will create a creamy base for the soup. A nut-free option is to substitute with a 14 oz. can of light coconut milk.
  • Water: 1 cup, used to blend with cashews for the creaminess.
  • Vegan Butter: 3 tablespoons, providing richness and flavor. Choose a high-quality brand for the best taste.
  • Yellow Onion: 1 small, diced (about 1 ½ cups when diced), adding sweetness and depth to the soup.
  • Garlic: 3 large cloves, minced, for a burst of flavor.
  • Gluten-Free Flour Blend: 1/3 cup, to thicken the soup. You can also use all-purpose flour if gluten is not a concern.
  • Sea Salt and Black Pepper: ½ teaspoon each, plus more to taste, to enhance the flavors.
  • Vegetable Broth: 2 ½ cups, either homemade or store-bought, forming the soup’s flavorful base.
  • Frozen Mixed Vegetables: 1 (16 oz.) bag, yielding about 3 ½ cups, which can include corn, green beans, peas, and carrots. Feel free to substitute fresh vegetables if preferred.
  • White Beans: 2 (15 oz.) cans, drained, providing protein and texture to the soup.
  • Easy Vegan Gluten-Free Biscuit Dough: 1 batch, or you can use store-bought biscuit dough for convenience.

How to Make Vegan White Bean Pot Pie Soup

Creating this delicious soup is simple! Follow these steps for the best results:

  • Prepare the Cashew Cream: In a high-speed blender, add the cashews and water. Blend on high until the mixture is super smooth and creamy. If you prefer a nut-free option, feel free to skip this step and use light coconut milk instead.
  • Sauté the Aromatics: Heat a large Dutch oven over medium heat. Once hot, add the vegan butter and let it melt. Add the diced onion and cook for 3-4 minutes until it becomes translucent and fragrant. Then, reduce the heat to medium-low and stir in the minced garlic, gluten-free flour, salt, and pepper.
  • Combine the Base: Gradually whisk in the vegetable broth, stirring frequently to prevent clumps. Continue stirring until the mixture is lightly simmering and has thickened, about 3-5 minutes.
  • Add Creaminess: Stir in the cashew cream (or light coconut milk), frozen mixed veggies, and drained white beans. Mix well, then cover and let the soup simmer on low heat for 10-15 minutes.
  • Prepare the Biscuit Dough: While the soup simmers, prepare your biscuit dough. Preheat the oven to 400°F (204°C).
  • Top with Biscuits: Scoop the biscuit dough into 2 tablespoon amounts and evenly distribute it over the top of the soup. You can form well-defined scoops or do drop biscuits depending on your preference.
  • Bake the Soup: Transfer the pot to the preheated oven and bake uncovered for 15-20 minutes, or until a toothpick inserted into the center of the biscuits comes out clean.
  • Enjoy!: Once baked, remove from the oven and let cool for a few minutes before serving. This soup is best enjoyed fresh, though leftovers can be stored for up to 3-4 days in the refrigerator or frozen for up to 1 month.

Pro Tips for Success

Side view of steaming Vegan White Bean Pot Pie Soup featuring white beans and colorful vegetables.
  • Soak Cashews: For an even creamier texture, soak the cashews in water for a few hours before blending.
  • Adjust Consistency: If the soup seems too thick, add up to ½ cup of water to thin it out. Adjust seasoning as needed.
  • Use Fresh Herbs: Incorporate fresh herbs like thyme or rosemary for added depth of flavor.
  • Experiment with Vegetables: Feel free to mix and match your favorite vegetables, such as zucchini, bell peppers, or spinach.
  • Customize the Biscuits: Add herbs or nutritional yeast to the biscuit dough for an extra burst of flavor.
  • Don’t Skip the Garlic: Fresh garlic adds a lovely pungency that elevates the overall taste of the soup.
  • Store Properly: Keep leftovers in an airtight container for optimal freshness. Reheat gently on the stove or in the microwave.
  • Freeze for Later: Portion out the soup into containers for easy meal prep. Just remember that the texture of the biscuits may change when frozen.
  • Serve with a Side Salad: Pair your soup with a fresh salad for a complete meal.
  • Invite Friends Over: This soup is perfect for sharing! Invite friends for a cozy dinner and enjoy the lovely company.

Common Mistakes and Troubleshooting

Here are some common mistakes to avoid while making your Vegan White Bean Pot Pie Soup:

  • Not Blending Enough: Ensure the cashews are blended until completely smooth to achieve the desired creaminess.
  • Overcooking the Biscuits: Keep an eye on the biscuits while baking; they should be golden brown but not overdone.
  • Skipping Seasoning: Taste and adjust the seasoning throughout the cooking process to enhance flavors.
  • Using Old Beans: Ensure your canned beans are fresh for optimal flavor and texture.
  • Not Allowing Enough Simmer Time: Letting the soup simmer allows the flavors to meld together beautifully.

Variations to Try

If you’re looking to switch things up, here are some fun variations to try with your Vegan White Bean Pot Pie Soup:

  • Chickpea Variation: Substitute white beans with chickpeas for a different texture and flavor profile.
  • Spicy Kick: Add red pepper flakes or diced jalapeños for a spicy twist.
  • Herbed Version: Incorporate fresh herbs like dill or parsley for a burst of freshness.
  • Cheesy Flavor: Mix in nutritional yeast or vegan cheese for a cheesy flavor without dairy.

How to Store and Freeze

Storing and freezing your Vegan White Bean Pot Pie Soup is easy with these tips:

  • Refrigeration: Store leftovers in an airtight container in the refrigerator for up to 3-4 days. Reheat gently on the stove or microwave.
  • Freezing: Portion out the soup into individual containers and freeze for up to 1 month. Note that the texture of the biscuits may change upon freezing.
  • Thawing: Thaw the soup overnight in the refrigerator before reheating.
  • Reheating: Add a splash of water or broth when reheating to restore the soup’s consistency.

Vegan White Bean Pot Pie Soup Recipe FAQs

  • Can I make this soup gluten-free? Yes! Use a gluten-free flour blend as specified in the ingredient list.
  • Can I use fresh vegetables instead of frozen? Absolutely! Just be sure to adjust cooking times as needed.
  • How can I make this soup spicier? Add red pepper flakes or diced jalapeños to the soup during cooking.
  • Can I use canned beans instead of dried? Yes, canned beans are convenient and work perfectly in this recipe.
  • What can I serve with this soup? A fresh salad or crusty bread pairs beautifully with this dish.
  • Can I make this soup in advance? Yes, it stores well in the refrigerator or freezer, making it perfect for meal prep.
  • How do I know when the biscuits are done? The biscuits should be golden brown and a toothpick inserted into the center should come out clean.
  • Is this soup kid-friendly? Yes! The creamy texture and mild flavors are usually a hit with kids.

Nutrition Tips and Dietary Adaptations

This Vegan White Bean Pot Pie Soup is not only delicious but also nutritious. Here are some tips for making it even healthier:

  • Increase Vegetables: Add more vegetables, such as spinach or kale, for added nutrients and fiber.
  • Reduce Sodium: Use low-sodium vegetable broth to keep the sodium content in check.
  • Healthy Fats: Consider using avocado oil instead of vegan butter for a healthier fat option.
  • Protein Boost: Add quinoa or lentils to increase the protein content of your soup.

Equipment Recommendations

Here’s a list of equipment that will make the process smoother:

  • High-Speed Blender: Essential for achieving a smooth and creamy cashew base.
  • Large Dutch Oven: Perfect for cooking and simmering your soup evenly.
  • Measuring Cups and Spoons: Accurate measurements ensure your dish turns out perfectly every time.
  • Wooden Spoon: Great for stirring and mixing your ingredients together.

Serving Suggestions

To create the perfect meal, consider serving your Vegan White Bean Pot Pie Soup with:

  • Crusty Bread: A slice of your favorite crusty bread is perfect for dipping.
  • Side Salad: A fresh garden salad adds a nice crunch and balances the warmth of the soup.
  • Herb Garnish: Top your soup with fresh herbs like parsley or chives for a lovely presentation.

With this comprehensive guide, you are now equipped to create a heartwarming Vegan White Bean Pot Pie Soup that will not only nourish your body but also delight your taste buds. Remember, cooking is about experimentation and enjoyment, so don’t hesitate to adjust the recipe to suit your preferences. Thank you for sharing this delightful culinary journey with me, and I hope you enjoy every comforting bowl of this lovely soup!

Vegan White Bean Pot Pie Soup

Prep Time 10 minutes
Cook Time 30 minutes
Total Time 40 minutes
Servings 4 servings
Calories 350
A hearty and comforting vegan soup topped with flaky biscuits, perfect for cozy meals.

Ingredients

Dairy Substitutes

  • 2/3 cup raw cashews (see notes for a cashew-free option)
  • 1 cup water
  • 3 Tbsp vegan butter

Vegetables

  • 1 small yellow onion, diced (yields ~1.5 cups or 225 g diced)
  • 3 cloves garlic, minced
  • 1/3 cup MB 1:1 Gluten-Free Flour Blend (or other gluten-free or all-purpose flour)
  • 1/2 tsp sea salt
  • 1/2 tsp black pepper
  • 2 ½ cups vegetable broth (or store-bought)
  • 1 16 oz. bag frozen mixed vegetables (corn, green beans, peas, carrots)
  • 2 15 oz. cans white beans, drained
  • 1 batch Easy Vegan Gluten-Free Biscuit DOUGH (or store-bought biscuit dough)

Instructions 

  • Blend cashews and water until smooth; set aside. Alternatively, use light coconut milk.
  • Cook onion in melted vegan butter until translucent. Add garlic, flour, salt, and pepper; cook briefly. Whisk in vegetable broth and simmer until thickened.
  • Add cashew cream or coconut milk, mixed vegetables, and white beans. Simmer for 10-15 minutes, adjusting water if needed.
  • Drop spoonfuls of biscuit dough over the soup and bake at 400°F (204°C) for 15-20 minutes until biscuits are golden.
  • Let cool slightly, then serve. Best enjoyed fresh.

Notes

For a creamier texture, blend cashews thoroughly or use coconut milk. Adjust seasoning to taste.
Calories: 350kcal
Cost: $15
Course: Main Course
Cuisine: vegan
Keyword: Vegetables

Welcome to your ultimate guide for crafting delicious and whimsical Mummy Hot Dogs using crescent rolls! Perfect for Halloween or any family gathering, this recipe combines flaky crescent rolls with tasty hot dogs, creating a dish that not only tantalizes taste buds but also ignites creativity in the kitchen. Get ready to embark on a culinary adventure that’s as fun to make as it is to eat!

In this article, we’ll dive deep into the ingredients, preparation steps, and clever variations, ensuring your mummy dogs are a hit at any party. Let’s get started!

Why You’ll Love This Recipe

  • Kid-Friendly Fun: The spooky mummy look always gets giggles and eager hands reaching for seconds, making it an excellent choice for family gatherings.
  • Quick and Easy: With a prep time of under 20 minutes and baking time of just 15 minutes, these Mummy Hot Dogs are perfect for busy weeknights or last-minute gatherings!
  • Customizable Ingredients: You can easily swap out hot dogs for a vegetarian option or use different types of cheese for added flavor.
  • Creative Presentation: The fun of wrapping the mummies allows kids and adults alike to unleash their creativity, making each mummy unique.
  • Perfect for Halloween: These spooky treats are a fun way to celebrate Halloween or any festive occasion with a touch of whimsy.

Ingredients You’ll Need

Here’s what you’ll need to create these delightful Mummy Hot Dogs:


Professional Chef Knife Set

★ Recommended Kitchen Tool

Professional Chef Knife Set

Make this recipe even easier with a quality Professional Chef Knife Set — a must-have kitchen staple!


🛒 Shop This Tool →

As an Amazon Associate, we earn from qualifying purchases.
  • 1 (8-ounce) tube of crescent rolls
  • 8 hot dogs (regular or all-beef)
  • Mustard, mayo, or ketchup (for the eyes)
  • Mozzarella cheese (for the eyeballs)
  • Black olives (for the eyes)
  • 1 large straw (for cutting cheese)
  • 1 regular straw (for cutting olives)

Feel free to substitute ingredients according to your tastes or dietary needs. For instance, you can use vegetarian hot dogs or even switch to puff pastry for a flaky alternative!

How to Make Crescent Mummy Dogs

Follow these simple steps to create your own Mummy Hot Dogs:

  1. Preheat your oven to 375°F (190°C).
  2. Prepare the dough: Unroll the crescent roll dough and separate it into 4 rectangles, pressing the perforations to seal.
  3. Cut the dough: Using a sharp knife, slice the dough into strips that are about 1/2 inch wide. Join 3 strips together to form one long “bandage”.
  4. Wrap the hot dogs: Carefully wrap the “bandage” dough around each hot dog, leaving gaps for the mummy’s face.
  5. Arrange for baking: Place the wrapped hot dogs on a baking sheet lined with parchment paper.
  6. Bake: Put in the oven and bake until golden brown, about 15 minutes.
  7. Prepare the eyeballs: While the mummies are baking, cut slices of mozzarella cheese to the desired thickness for the eyeballs. Use the large straw to cut circles out of the cheese, and the small straw for the centers.
  8. Prepare the olives: Slice the black olives to create flat pieces for the eyes.
  9. Decorate the mummies: Once the mummies are done, brush their faces with mayo, mustard, or ketchup, and place the cheese eyeballs topped with olive pieces.

Pro Tips for Making Crescent Mummy Dogs

Side view of Crescent Roll Mummy Hot Dogs wrapped in dough.
  • Use crescent dough sheets: If available, crescent dough sheets make it easier to wrap without dealing with perforations.
  • Experiment with flavors: Try different types of mustard or sauces to give each mummy a unique flavor.
  • Make them ahead: You can prepare the mummies a few hours in advance and store them in the fridge before baking.
  • Use cookie cutters: For a fun twist, use cookie cutters to create fun shapes with the dough before wrapping.
  • Garnish creatively: Consider adding small pieces of red bell pepper or other colorful vegetables for added flair.
  • Double the recipe: These mummies disappear fast, so consider making a double batch!
  • Perfect for parties: Set up a mummy-making station at parties where guests can wrap their own hot dogs.
  • Involve the kids: Let children assist in wrapping the dough; it’s a fun way to get everyone involved in the cooking process!
  • Store leftovers: Any leftover mummies can be stored in an airtight container in the refrigerator for up to three days.

Common Mistakes and Troubleshooting

Here are some common pitfalls to avoid when making your Mummy Hot Dogs:

  • Not sealing the dough: Ensure you press the perforations well to prevent the dough from unraveling during baking.
  • Overcrowding the baking sheet: Leave space between each mummy to allow for even cooking and browning.
  • Underbaking: Make sure they are golden brown before removing them from the oven for the best texture.

Variations to Try

Here are some creative twists you can add to your Mummy Hot Dogs:

  • Cheesy Mummies: Add a slice of cheese inside the crescent roll before wrapping for an extra cheesy surprise.
  • Spicy Mummies: Use spicy sausage or hot dogs for a kick, or add jalapeño slices for heat.
  • Vegetarian Version: Substitute hot dogs with veggie dogs or even grilled vegetables wrapped in dough.
  • Sweet Mummies: Try wrapping crescent rolls around chocolate bars or marshmallows for a dessert version!

Storage and Make-Ahead Instructions

To keep your Mummy Hot Dogs fresh:

  • Refrigerate: Store baked mummies in an airtight container in the fridge for up to three days.
  • Freeze: Unbaked mummies can be frozen. Wrap tightly in plastic before storing in the freezer for up to a month.
  • Reheat: To reheat, bake frozen mummies at 375°F (190°C) for about 20-25 minutes or until heated through.

Frequently Asked Questions

  • Can I use different types of hot dogs? Absolutely! You can use turkey, chicken, or vegetarian hot dogs depending on your preference.
  • What kind of dipping sauce goes well with these? Mustard, ketchup, and BBQ sauce are all great options!
  • Can I make them gluten-free? Yes, simply use gluten-free crescent rolls or puff pastry.
  • How can I make them spicier? Consider using spicy sausage or adding hot sauce to the dipping sauce.
  • Can I prepare them in advance? Yes! You can prepare them a few hours before and bake them when ready.
  • What’s the best way to store leftovers? Store them in an airtight container in the refrigerator for up to three days.
  • Can I bake them in an air fryer? Yes, adjust the temperature to 375°F and cook for about 10-12 minutes.
  • What’s the best way to cut cheese for the eyes? Using a straw helps create perfectly round shapes!

Nutrition Tips and Dietary Adaptations

This recipe can be adjusted to fit various dietary needs:

  • Low-carb option: Use zucchini or other vegetables instead of hot dogs.
  • Dairy-free option: Substitute cheese with dairy-free alternatives.
  • Whole grain dough: Opt for whole grain crescent rolls for added fiber.
  • Portion control: Consider making mini mummies using smaller hot dogs or cut-up vegetables.

Equipment Recommendations

To successfully make your Mummy Hot Dogs, here’s what you’ll need:

  • Baking sheet: A sturdy baking sheet lined with parchment paper ensures easy cleanup.
  • Sharp knife: For cutting dough and cheese with precision.
  • Straws: For cutting cheese and olives into fun shapes.
  • Plastic wrap: Useful for storing prepared mummies in the fridge or freezer.

Serving Suggestions

Make your Mummy Hot Dogs a centerpiece at your gathering:

  • Serve with dips: Create a dip station with various sauces to enhance the experience.
  • Add side dishes: Pair with a fresh salad, crispy fries, or spooky fruit skewers for balance.
  • Creative plating: Use decorative platters and garnishes to make your presentation pop!

With these tips and tricks, you’re all set to create the most delightful Mummy Hot Dogs that will impress your family and friends. Cooking is not just about food; it’s about creating moments of joy and connection. So roll up those sleeves, get into the kitchen, and enjoy making these spooky treats!

Happy cooking, and may your kitchen be filled with laughter and deliciousness!

Crescent Roll Mummy Hot Dogs

Prep Time 15 minutes
Cook Time 15 minutes
Total Time 30 minutes
Servings 8 pieces
Calories 250
A fun and spooky treat perfect for Halloween, these mummy hot dogs are wrapped in crescent roll bandages with cheese and olive eyeballs.

Ingredients

Dough

  • 1 tube 8-ounce tube crescent rolls

Hot Dogs

  • 8 pieces Hot Dogs

Condiments

  • to taste mustard (mayo or ketchup for the eyes)

Cheese

  • 1 piece Mozzarella cheese

Olives

  • Black olives Black olives (sliced for eyes)

Tools

  • 1 large straw large straw (for cutting cheese)
  • 1 regular straw regular straw (for cutting olives)

Instructions 

  • Preheat oven to 375°F (190°C). Unroll crescent dough, press perforations to seal, and cut into strips 1/2 inch wide.
  • Wrap each hot dog with dough strips, leaving space for the face, and place on a parchment-lined baking sheet.
  • Bake for about 15 minutes until golden brown. Meanwhile, cut cheese into circles and olives into small pieces for eyes.
  • Use large straw to cut cheese circles and small straw to cut olive pieces; place olives on cheese for eyeballs.
  • Remove from oven, brush faces with mustard or ketchup, and add cheese eyeballs with olives for eyes.

Notes

For best results, keep cheese and olives chilled before assembling.
Calories: 250kcal
Cost: $10
Course: Appetizer
Keyword: Halloween, hot dogs, mummy

Indulge in the Creamy Comfort of Vegan Caramelised Onion Risotto

If you’re looking for a dish that combines rich flavors, creamy textures, and a touch of elegance, you’ve come to the right place! This Vegan Caramelised Onion Risotto is not just a meal; it’s an experience that invites warmth and connection around the dinner table. With its savory caramelised onions and perfectly cooked rice, this recipe delivers on all fronts, making it an ideal option for any night of the week. As a professional chef, I can assure you that this dish is both easy to prepare and deeply satisfying.

Why You’ll Love This Recipe

Here are five compelling reasons to make this Vegan Caramelised Onion Risotto a staple in your kitchen:

  • Rich Flavor Profile: The caramelisation of onions brings out their natural sweetness, infusing the dish with a deep, savory flavor that balances beautifully with the creamy texture.
  • Comforting Texture: The creamy risotto, combined with the silkiness of the caramelised onions, offers a comforting mouthfeel that warms the soul.
  • Versatile and Customizable: This recipe serves as a base that you can easily adapt with various seasonal vegetables or proteins for a unique twist each time.
  • Quick and Easy Preparation: With minimal prep time and straightforward steps, you can have this delicious risotto ready in about 40 minutes.
  • Perfect for Any Occasion: Whether it’s a cozy family dinner or an elegant gathering with friends, this dish is sure to impress your guests.

Ingredients You’ll Need

Here’s what you’ll need to prepare this delightful risotto:


Bamboo Tofu Press

★ Recommended Kitchen Tool

Bamboo Tofu Press

Make this recipe even easier with a quality Bamboo Tofu Press — a must-have kitchen staple!


🛒 View on Amazon →

As an Amazon Associate, we earn from qualifying purchases.
  • 3 medium white onions: Essential for the base flavor; ensure one is finely chopped while the others are sliced into crescents.
  • 1 liter vegetable stock: For depth of flavor—feel free to use homemade or your favorite vegan bouillon.
  • 30 grams vegan butter: Adds a luxurious richness that complements the dish beautifully.
  • 2 tablespoons olive oil: Used to sauté the onions and garlic, enhancing their flavors.
  • 3 cloves garlic: Peeled and crushed, they add aromatic depth.
  • 220 grams risotto rice (Arborio): This type of rice is key for achieving that signature creamy risotto texture.
  • 1/4 teaspoon red pepper flakes: For a subtle kick of heat.
  • 70 milliliters soy milk: Contributes to the creaminess while keeping the dish vegan.
  • 1 tablespoon tapioca starch: Helps thicken the risotto for that velvety finish.
  • 2 tablespoons nutritional yeast: Offers a cheesy flavor that’s perfect for vegan dishes.
  • 1 teaspoon lemon juice: Brightens up the dish beautifully.
  • Flaky salt and crushed black pepper: To taste—essential for seasoning.
  • Small bunch chives: For a fresh garnish.
  • 1 teaspoon vegan parmesan (for topping): Optional, but highly recommended for added flavor.

How to Make Vegan Caramelised Onion Risotto

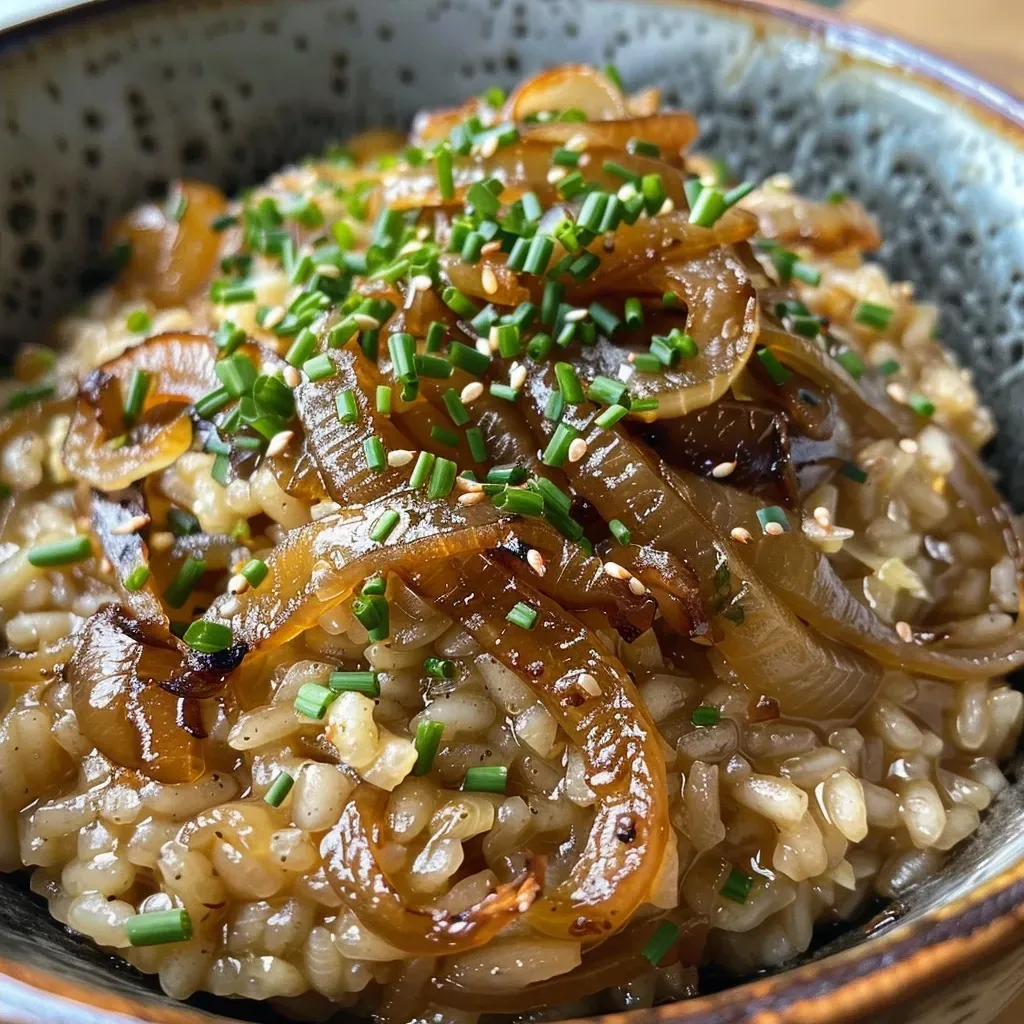
A close-up side view of vegan risotto featuring rich caramelized onions and a sprinkle of black pepper.

Follow these simple steps for a perfect risotto every time:

  1. Peel the onions. Slice one finely and set aside. Slice the other two into thin crescents and keep separate.
  2. In a heavy-bottomed saucepan, combine the vegan butter and 1 tablespoon of olive oil over medium heat. Add the onion crescents, reduce heat to medium-low, and fry for 10-15 minutes. Stir occasionally and add a pinch of salt halfway through. If the onions dry out, add a splash of water.
  3. Once caramelised, transfer the onions to a plate and set aside.
  4. In the same pan, add the remaining tablespoon of olive oil and bring to temperature. Add the finely chopped onion and sauté for a minute until soft; don’t let them brown. Add the garlic and sauté for another minute, adding water if necessary.
  5. While the onions and garlic are cooking, heat the vegetable stock in a separate saucepan until it simmers, then reduce to low.
  6. Add the risotto rice to the pan with the onions and garlic, stirring for about a minute. Add just enough vegetable stock to cover the rice, stirring often until absorbed.
  7. Repeat this process, gradually adding more stock and allowing it to absorb each time. This method is crucial for achieving the right texture.
  8. Meanwhile, in a jar, combine the soy milk, tapioca starch, nutritional yeast, and lemon juice. Shake well and set aside.
  9. Once all stock is added, check the rice for doneness—it should be al dente. Stir in the caramelised onions, salt, pepper, and red pepper flakes.
  10. Lower the heat and mix in the tapioca starch mixture until the risotto is smooth and creamy. Serve hot, garnished with chives and a sprinkle of vegan parmesan.

Pro Tips for Perfect Risotto

Enhance your cooking experience with these expert insights:

  • Use a heavy-bottomed pan: This ensures an even heat distribution, preventing the rice from burning.
  • Stir often: Frequent stirring releases the starches, enhancing the creaminess of the risotto.
  • Keep the stock warm: Adding cold stock can shock the rice and affect texture; keep it simmering on low heat.
  • Don’t rush the caramelisation: Allow the onions to slowly brown for the best flavor; patience is key!
  • Taste as you go: Adjust seasoning and texture according to your preference.
  • Experiment with add-ins: Consider adding mushrooms, peas, or spinach for variety and nutrition.
  • Make it ahead: This dish can be prepared in advance and stored in the fridge; just reheat gently.
  • Finish with a drizzle of olive oil: For an added layer of richness and flavor before serving.

Common Mistakes and Troubleshooting

Here’s how to avoid common pitfalls when making risotto:

  • Rice is too hard: If the rice is still crunchy, you may not have added enough stock. Continue adding stock until it reaches your desired texture.
  • Risotto is too dry: Always keep some stock on hand to add during cooking; a little extra liquid can make a big difference.
  • Onions burn: If your onions are browning too quickly, lower the heat and add a splash of water to prevent burning.
  • Too salty: If you’ve over-seasoned, adding a splash of water or more vegan butter can help balance the flavors.

Variations to Try

Here are some delicious variations you can experiment with:

  • Mushroom Risotto: Add sautéed mushrooms for an earthy flavor that complements the caramelised onions.
  • Spinach and Pea Risotto: Stir in fresh spinach and peas in the last few minutes of cooking for a pop of color and nutrition.
  • Pumpkin Risotto: Substitute some of the vegetable stock with pureed pumpkin for a creamy, seasonal twist.
  • Herb-Infused Risotto: Add fresh herbs like thyme or rosemary for an aromatic flavor boost.

Storage and Make-Ahead Instructions

This Vegan Caramelised Onion Risotto can be stored and reheated easily:

  • Storing leftovers: Place in an airtight container and refrigerate for up to 3 days.
  • Freezing: Risotto can be frozen for up to 2 months. However, it’s best enjoyed fresh due to its creamy texture.
  • Reheating: Reheat gently on the stove with a splash of broth or water to restore its creamy consistency.

Comprehensive FAQ

Got questions? Here are some common queries about Vegan Caramelised Onion Risotto:

  • Can I use a different type of rice?: Yes, but Arborio rice is recommended for its starch content, which creates the creamy texture.
  • Is this risotto gluten-free?: Use gluten-free vegetable stock and ensure your vegan parmesan is also gluten-free.
  • How can I add more protein?: Consider adding cooked lentils or chickpeas for a protein boost.
  • Can I make this dish nut-free?: Yes, just omit any nut-based cheeses or creams and use soy milk as indicated.
  • What to serve with this risotto?: This dish pairs well with a simple green salad or roasted vegetables.
  • How do I make it spicier?: Add more red pepper flakes or even diced jalapeños for an extra kick.
  • Why is my risotto sticky?: This can occur if the rice is overcooked. Make sure to stir frequently and add stock gradually.
  • Can I make this risotto vegan?: Yes, this recipe is completely vegan as written!

Nutrition Tips and Dietary Adaptations

This risotto can be tailored to suit various dietary needs:

  • Low-carb option: Substitute rice with cauliflower rice for a lower-carb alternative.
  • For added fiber: Incorporate chopped spinach or kale while cooking for a nutritious boost.
  • Calorie-conscious: Reduce the amount of vegan butter and olive oil to lower the calorie content.

Equipment Recommendations

Here are some kitchen tools that will make your risotto-making experience even better:

  • Heavy-bottomed saucepan: Essential for even heat distribution.
  • Wooden spoon: Best for stirring, as it won’t scratch your cookware.
  • Measuring cups and spoons: Ensure accurate ingredient measurements for best results.

Serving Suggestions

Make your risotto even more special with these serving ideas:

  • Garnish with fresh herbs: A sprinkle of chives or parsley adds color and freshness.
  • Serve with a side salad: A simple green salad can balance the richness of the risotto.
  • Accompany with crusty bread: Perfect for soaking up any leftover sauce.

Conclusion

In conclusion, this Vegan Caramelised Onion Risotto is a fantastic dish that marries flavor and comfort in a bowl. With its rich, creamy texture and the sweetness of caramelised onions, it’s perfect for any occasion. I hope you enjoy making it as much as I enjoyed sharing it with you. Remember, cooking is about connection and joy, so gather your loved ones and share this delicious meal together. Happy cooking!

Vegan Caramelised Onion Risotto

Prep Time 15 minutes
Cook Time 40 minutes
Total Time 55 minutes
Servings 4 servings
Calories 450
A rich and creamy vegan risotto featuring sweet caramelised onions and a flavorful, dairy-free sauce.

Ingredients

Vegetables

  • 3 medium white onions (peeled and sliced)
  • 1 l vegetable stock (or vegan bouillon)
  • 30 g vegan butter
  • 2 tbsp olive oil
  • 3 cloves garlic (peeled and crushed)
  • 220 g risotto rice (arborio)
  • 0.25 tsp red pepper flakes
  • 70 ml soy milk
  • 1 tbsp tapioca starch
  • 2 tbsp nutritional yeast
  • 1 tsp lemon juice

Seasoning

  • flaky salt and crushed black pepper

Garnish

  • small bunch chives
  • 1 tsp vegan parmesan (for topping)

Instructions 

  • Caramelise sliced onions in a pan with vegan butter and olive oil until golden and sweet.
  • Fry finely chopped onion and garlic in a separate pan until soft, then add risotto rice and cook briefly.
  • Gradually add hot vegetable stock, stirring until absorbed before adding more, until rice is al dente.
  • Mix soy milk, tapioca starch, nutritional yeast, and lemon juice in a jar, then stir into the risotto to make it creamy.
  • Stir in caramelised onions, season with salt, pepper, and chili flakes, then serve topped with chives and vegan parmesan.

Notes

Use a good quality vegan parmesan for best flavor.
Calories: 450kcal
Cost: $15
Course: Main Course
Cuisine: vegan
Keyword: Risotto

Welcome to Your New Favorite Dessert: Dirty Chai Spiced Fudge

Are you ready to indulge in the comforting blend of spices and sweetness? This Dirty Chai Spiced Fudge is a delightful treat that combines the creamy richness of white chocolate, the boldness of espresso, and the aromatic warmth of chai spices. Perfect for special occasions or a cozy night in, this fudge is not just a dessert; it’s an experience that brings people together around the table.

In this article, I’ll guide you through every aspect of making this delicious fudge, ensuring you have all the tools and tips to create a successful treat. From ingredient breakdowns to troubleshooting, we’ll cover it all!

Why You’ll Love This Recipe

  • Quick and Easy: With minimal prep time and simple ingredients, you can whip up this fudge in no time.
  • Versatile Treat: Perfect for gifting, parties, or a cozy movie night at home!
  • Unique Flavor Profile: The combination of chai spices and espresso makes it a standout dessert that’s sure to impress.
  • Adaptable Recipe: Easily customize with your favorite nuts or spices to make it your own.
  • Make-Ahead Friendly: Prepare in advance and store for later enjoyment without sacrificing flavor or texture.

Ingredient Breakdown

Let’s dive into what you’ll need to create this delectable fudge.


Professional Chef Knife Set

★ Recommended Kitchen Tool

Professional Chef Knife Set

Make this recipe even easier with a quality Professional Chef Knife Set — a must-have kitchen staple!


🛒 Check Price on Amazon →

As an Amazon Associate, we earn from qualifying purchases.
  • 1 ½ teaspoons instant espresso powder: Adds a robust coffee flavor that pairs beautifully with the sweetness of the fudge. If you prefer, you can substitute with strong brewed coffee.
  • ¼ teaspoon ground ginger: Provides a warm, spicy kick. Fresh ginger can also be used for a different flavor profile.
  • ¾ teaspoon ground cardamom: A key spice in chai, it adds depth and complexity; try using fresh cardamom pods for a more vibrant flavor.
  • ¼ teaspoon ground cinnamon: For that classic warm spice aroma. Adjust to taste for more or less sweetness.
  • Pinch ground cloves: A little goes a long way in enhancing the chai flavor.
  • 11 ounces white chocolate: The base of our fudge, ensuring it’s creamy and smooth. You can use dark chocolate for a richer taste.
  • ¾ cup sweetened condensed milk: Provides sweetness and creaminess. For a dairy-free option, consider coconut condensed milk.
  • 1 teaspoon pure vanilla extract: Enhances the overall flavor profile; skip the imitation vanilla for the best results.
  • Pinch sea salt: Balances the sweetness and elevates all the flavors.

Pro Tips for Making the Perfect Fudge

A delectable slice of Dirty Chai Spiced Fudge with visible spices and a smooth white chocolate exterior.
  • Use Quality Ingredients: The flavor of your fudge depends heavily on the quality of your chocolate and spices. Choose high-quality white chocolate and fresh spices.
  • Don’t Rush the Cooling Process: Allow your fudge to cool completely before cutting; this helps maintain its shape and texture.
  • Mix Thoroughly: Ensure all ingredients are well combined for a consistent flavor throughout the fudge.
  • Use Non-Stick Spray: This prevents your fudge from sticking to the pan and makes for easier removal.
  • Experiment with Spices: Feel free to adjust the spices according to your taste; more cinnamon or ginger can create a different flavor dimension.
  • Cut After Chilling: Once the fudge has set in the fridge, use a sharp knife to cut it into clean squares for a polished look.
  • Store Properly: Keep your fudge in an airtight container at room temperature for up to a week, or refrigerate for longer shelf life.
  • Plan Ahead: Make your fudge a day or two in advance to let the flavors meld.

Common Mistakes and Troubleshooting

Even the best chefs make mistakes! Here are some common issues and how to avoid them:

  • Grainy Texture: This can happen if the chocolate overheats. Use low heat and stir continuously.
  • Too Sweet: If your fudge ends up too sweet, consider adding a pinch of salt or a splash of lemon juice to balance the flavors.
  • Doesn’t Set: If your fudge is too soft, it may need more time in the refrigerator. Give it a few extra hours to firm up.

Delicious Variations

Want to mix things up? Here are some fun variations to try:

  • Nutty Chai Fudge: Add chopped walnuts or pecans for a crunchy texture.
  • Dark Chocolate Chai Fudge: Swap out white chocolate for dark chocolate for a richer flavor.
  • Spicy Chai Fudge: Incorporate a pinch of cayenne pepper to add a delightful heat.
  • Chai Latte Fudge: Replace the espresso powder with chai tea for a different take on the classic.

Storage and Make-Ahead Instructions

This fudge is perfect for make-ahead gifting or personal indulgence. Here’s how to store it:

  • Room Temperature: Store in an airtight container for up to one week.
  • Refrigerator: For longer shelf life, keep it in the fridge for up to two weeks.
  • Freezing: Wrap tightly in plastic wrap and store in a freezer-safe container for up to three months. Thaw in the fridge overnight before serving.

Frequently Asked Questions

Here are some common questions I get about making Dirty Chai Spiced Fudge:

  • Can I use milk chocolate instead of white chocolate? Yes, but the flavor will change significantly—expect a sweeter fudge.
  • What if I don’t have instant espresso powder? You can substitute strong brewed coffee, but the texture may vary.
  • How can I tell if my fudge is done? It should be firm to the touch and hold its shape when cut.
  • Can I add other spices? Absolutely! Feel free to experiment with nutmeg or even a hint of star anise.
  • Is this recipe suitable for vegans? Use dairy-free white chocolate and coconut condensed milk for a vegan-friendly option.
  • What’s the best way to cut the fudge? Use a sharp knife and cut while the fudge is cold for clean edges.
  • Can I double the recipe? Yes, just use a larger pan to accommodate the increased volume.
  • How do I make it gluten-free? This recipe is naturally gluten-free, just ensure your chocolate and other ingredients are certified gluten-free.

Nutritional Tips and Dietary Adaptations

For those mindful of nutrition, here are a few tips:

  • Low Sugar Option: Use sugar-free sweetened condensed milk and sugar-free chocolate for a lower sugar treat.
  • Protein Boost: Add a scoop of protein powder to the mixture for an extra nutritional punch.
  • Healthy Fats: Incorporate nut butters for added healthy fats and flavor.

Equipment Recommendations

To make your fudge-making experience easier, here is a list of essential equipment:

  • 8×8 or 9×9-inch baking pan: For the perfect size and thickness of fudge.
  • Parchment paper: Helps with easy removal and cleanup.
  • Mixing bowls: Use heat-resistant bowls for melting chocolate.
  • Spatula: For mixing and smoothing the fudge into the pan.

Serving Suggestions

How you present your fudge can elevate the experience:

  • Chocolate Drizzle: Top with a drizzle of melted chocolate for added elegance.
  • Sprinkle of Sea Salt: A light sprinkle enhances the flavor and adds a gourmet touch.
  • Pair with Coffee: Serve alongside a cup of espresso or chai tea for the perfect pairing.

With this comprehensive guide, you’re all set to create an indulgent batch of Dirty Chai Spiced Fudge that will have everyone coming back for more! Remember, cooking is about joy and connection—so gather your loved ones and enjoy the sweet moments this fudge brings.

Happy cooking!

Dirty Chai Spiced Fudge

Prep Time 10 minutes
Cook Time 5 minutes
Total Time 15 minutes
Servings 16 pieces
Calories 150
A rich and flavorful fudge infused with chai spices and espresso for a delightful treat.

Ingredients

Spices

  • 1 ½ teaspoons instant espresso powder
  • ¼ teaspoon ground ginger
  • ¾ teaspoon ground cardamom
  • ¼ teaspoon ground cinnamon
  • pinch ground cloves

Main ingredients

  • 11 ounces white chocolate
  • ¾ cup sweetened condensed milk
  • 1 teaspoon pure vanilla extract
  • pinch sea salt

Instructions 

  • Mix spices (espresso powder through cloves) together in a small bowl. Set aside.
  • Line pan with parchment and spray with non-stick spray.
  • Heat white chocolate and condensed milk until smooth, then stir in vanilla and salt.
  • Mix in the chai spices until well combined.
  • Pour mixture into prepared pan and chill until set, about 2 hours.

Notes

Store in an airtight container in the refrigerator for best freshness.
Calories: 150kcal
Cost: $12
Course: Dessert
Cuisine: fusion
Keyword: chocolate, Spice

Elevate Your Snacking with a Healthy Bean Dip

Welcome to the world of delicious and nutritious snacking! Our Healthy Easy Bean Dip is not just a recipe; it’s a gateway to satisfying cravings while keeping health in check. Packed with protein and vibrant flavors, this dip is perfect for any occasion, whether you’re entertaining guests or enjoying a quiet evening at home. In this guide, we’ll explore everything you need to know to make the perfect bean dip that everyone will love.

Why You’ll Love This Recipe

This dip isn’t just easy to make; it’s also incredibly versatile and packed with benefits. Here are five reasons to adore this healthy easy bean dip:

  • Quick and Simple: With minimal ingredients and straightforward steps, you can whip this dip up in no time.
  • Nutritious Ingredients: High in protein and fiber, black beans provide a solid nutritional base, while Greek yogurt adds creaminess without the extra fat.
  • Flavorful Variations: Customize the dip to your taste with different spices, herbs, or mix-ins for a unique twist every time.
  • Perfect for Sharing: Whether it’s a family gathering or a casual get-together, this dip is a crowd-pleaser that pairs well with various dippers.
  • Make-Ahead Friendly: You can prepare it ahead of time, making it ideal for busy days or last-minute entertaining.

Ingredients Breakdown

To create the ultimate healthy easy bean dip, you’ll need the following ingredients:


Professional Chef Knife Set

★ Recommended Kitchen Tool

Professional Chef Knife Set

Make this recipe even easier with a quality Professional Chef Knife Set — a must-have kitchen staple!


🛒 View on Amazon →

As an Amazon Associate, we earn from qualifying purchases.
  • 1 tablespoon olive oil: Adds richness and helps to blend the flavors smoothly.
  • 1.5 cups cooked black beans: The main ingredient, providing protein and fiber. Use canned beans for convenience, just drain and rinse them.
  • 1/3 cup non-fat Greek yogurt: A creamy alternative to sour cream that packs protein while lowering fat content.
  • 1/4 teaspoon salt (optional): Enhances flavor, adjust according to taste.
  • 1/2 teaspoon cumin: Adds warmth and depth to the dip.
  • 1/2 teaspoon chili powder: A hint of heat to spice things up.
  • 1 tablespoon lime juice: Brightens up the flavors and adds a fresh kick.
  • 1 tablespoon fresh cilantro leaves (optional): A burst of freshness; feel free to omit if you’re not a fan.
  • 1 tablespoon water (optional): Adjusts consistency if the dip is too thick.
  • 3/4 cup cheddar cheese: Topping that melts beautifully, adding a delicious cheesy layer.

Pro Tips for the Best Bean Dip

Side angle of Healthy Easy Bean Dip, showcasing its smooth texture and garnishes.

Here’s how to elevate your healthy bean dip with these expert insights:

  • Blend Until Smooth: Ensure all ingredients are well-blended to achieve a creamy texture. Add water gradually if needed.
  • Preheat Your Oven: Always preheat your oven to 450°F to ensure even cooking and perfect cheese melting.
  • Add More Spice: If you like it spicy, consider adding jalapeños or cayenne pepper for an extra kick.
  • Let It Chill: Allow the dip to sit in the fridge for at least 30 minutes before serving. This enhances the flavors.
  • Use Fresh Ingredients: Fresh lime juice and herbs can significantly boost the flavor profile of your dip.
  • Experiment with Cheeses: Try different cheeses like Monterey Jack or pepper jack for varied flavors.
  • Serve with a Variety of Dippers: While tortilla chips are classic, veggies, pita bread, or even crackers make excellent dippers.
  • Double or Triple the Batch: If you’re serving a crowd, it’s easy to scale up the recipe.

Common Mistakes and Troubleshooting

Even the best recipes can go awry. Here’s how to avoid common pitfalls:

  • Too Thick? If the dip is too thick, simply blend in a little water or additional lime juice until you reach the desired consistency.
  • Flavor Lacking? Adjust seasoning. Sometimes a pinch of salt or a squeeze of lime can elevate the flavor significantly.
  • Cheese Not Melting? Ensure your oven is adequately preheated and consider broiling for a minute or two at the end to get that perfect bubbly cheese.
  • Too Spicy? Balance it out with a little more Greek yogurt or sour cream to mellow the heat.

Variations to Try

Looking to mix things up? Here are a few variations of this healthy easy bean dip:

  • Southwestern Style: Add corn, diced tomatoes, and jalapeños for a southwestern twist.
  • Italian Flair: Incorporate sun-dried tomatoes and basil for an Italian-inspired dip.
  • Vegan Option: Replace Greek yogurt with silken tofu or avocado for a vegan-friendly version.
  • Spicy Black Bean Dip: Add chipotle peppers for a smoky, spicy flavor profile.

Storage and Make-Ahead Instructions

This dip can be made ahead of time and stored properly:

  • Refrigerate: Store in an airtight container for up to 4 days. Just stir before serving.
  • Freeze: You can freeze the dip for up to 3 months. Thaw in the refrigerator and reheat before serving.
  • Make-Ahead: Prepare the dip a day in advance for best flavor. Just bake right before you’re ready to serve.

Comprehensive FAQ

Have questions? We’ve got you covered with answers to your most common inquiries:

  • Can I use canned beans directly? Yes, just drain and rinse them to remove excess sodium.
  • Can this dip be made vegan? Absolutely! Substitute Greek yogurt with silken tofu or a dairy-free yogurt.
  • How do I make it spicier? Add more chili powder or incorporate fresh jalapeños into the blend.
  • What can I serve with this dip? Tortilla chips, veggie sticks, pita bread, or crackers work wonderfully!
  • How long does this dip last? It can last up to 4 days in the fridge and 3 months in the freezer.
  • Is this dip gluten-free? Yes, as long as you serve it with gluten-free dippers.
  • Can I add other beans? Yes, you can mix in pinto or kidney beans for a different flavor profile.
  • How can I adjust the texture? If it’s too thick, blend in a little water or olive oil for a smoother consistency.

Nutritional Tips and Dietary Adaptations

Want to make this dip even healthier? Here are some tips:

  • Lower Sodium: Use low-sodium canned beans and limit added salt for a heart-healthy option.
  • Increase Fiber: Serve with high-fiber vegetables like carrots and celery.
  • Protein Boost: Add more Greek yogurt or top with additional cheese for a higher protein content.

Essential Equipment Recommendations

Having the right tools makes all the difference. Here are some essentials:

  • Food Processor or Blender: For a smooth and creamy dip.
  • Baking Dish: A medium-sized dish works best for baking the dip.
  • Measuring Cups and Spoons: Accurate measurements ensure the best flavor balance.
  • Spatula: For easy mixing and serving.

Serving Suggestions

How you serve your dip can enhance the experience:

  • Chilled: Serve it cold with fresh veggies for a refreshing snack.
  • Hot: Serve warm right out of the oven for that gooey cheese topping experience.
  • Garnished: Top with extra cilantro or a drizzle of olive oil for a beautiful presentation.

With this Healthy Easy Bean Dip, you have a delightful recipe that’s sure to impress. Whether you’re snacking solo or hosting a gathering, this dip will be a hit. So grab your ingredients, roll up your sleeves, and let’s get dipping!

Healthy Easy Bean Dip

Prep Time 10 minutes
Cook Time 15 minutes
Total Time 25 minutes
Servings 4 servings
Calories 250
A quick and nutritious bean dip perfect for snacking or parties. Made with simple ingredients and baked to perfection.

Ingredients

Main

  • 1 tablespoon olive oil
  • 1.5 cups cooked black beans, drained & rinsed (15 oz can)
  • 1/3 cup non fat greek yogurt
  • 1/4 teaspoon salt (optional)
  • 1/2 teaspoon cumin
  • 1/2 teaspoon chili powder
  • 1 tablespoon lime juice
  • 1 tablespoon fresh cilantro leaves (optional)
  • 1 tablespoon water (optional)
  • 3/4 cup cheddar cheese

Instructions 

  • Preheat oven to 450°F (230°C).
  • Blend all ingredients except cheese until smooth, adding water if needed.
  • Pour into a baking dish and sprinkle cheese on top.
  • Bake for 15 minutes until bubbly and cheese is melted.

Notes

You can add more water for a thinner dip or skip optional ingredients for simplicity.
Calories: 250kcal
Cost: $8
Course: Appetizer
Cuisine: American
Keyword: Bean, Dip