Author

Mike

Browsing

Delightful Mini Pumpkin Pies: Your Perfect Fall Treat

As the leaves turn golden and the air becomes crisp, there’s no better way to celebrate the fall season than with a batch of delightful mini pumpkin pies. These bite-sized treats are perfect for cozy gatherings, festive parties, or just a comforting evening at home. In this comprehensive guide, I’ll walk you through everything you need to know to make these delicious pies—from the ingredients to expert tips, and even variations to suit your taste. Whether you’re a seasoned baker or a beginner, you’ll find joy in creating these charming desserts that capture the essence of autumn.

Why You’ll Love This Recipe

  • Perfect Portion Size: Mini pumpkin pies are easy to manage and serve, making them ideal for gatherings where guests want to sample multiple desserts.
  • Simple Ingredients: With a few common pantry staples, you can whip up these delightful treats without any fuss.
  • Rich, Flavorful Filling: The blend of spices and pumpkin puree creates a filling that’s both comforting and flavorful, perfect for the fall season.
  • Make-Ahead Friendly: These pies can be made in advance and stored, making them a stress-free option for your holiday gatherings.
  • Endless Variations: Customize your mini pies with different toppings or crusts to suit your personal taste or dietary needs.

Ingredient Breakdown

Let’s dive into the ingredients you’ll need to create these delightful mini pumpkin pies. I’ll also provide some substitutions for those who may have dietary restrictions or want to try something different.

Ingredients

  • 1 Pie Crust: You can use homemade or store-bought. If you’re short on time, pre-made crusts work wonderfully.
  • 4 tablespoons butter: Melted, for richness in the filling.
  • ¼ cup light brown sugar: Adds sweetness and depth.
  • ¼ cup granulated sugar: For additional sweetness balance.
  • 1 teaspoon ground cinnamon: Essential for that warm, fall flavor.
  • ¼ teaspoon ground nutmeg: Adds a fragrant touch to the filling.
  • ⅛ teaspoon ground cloves: A little goes a long way for depth of flavor.
  • ½ cup pumpkin puree: Use fresh pumpkin for a more robust flavor or canned for convenience.
  • 1 tablespoon flour: Helps thicken the filling.
  • ½ cup sweetened condensed milk: For creaminess and sweetness.
  • 1 egg: Binds the filling together.
  • ½ cup brown sugar (packed): For sweetness and moisture.
  • ¼ cup granulated sugar: Additional sweetness.
  • 2 teaspoons ground cinnamon: Enhances the pumpkin spice flavor.
  • ½ teaspoon salt: Balances the sweetness.
  • ½ cup butter (melted): For the crust.
  • 1 cup all-purpose flour: For the crust texture.

Substitution Ideas

  • Gluten-Free Option: Substitute the all-purpose flour with a 1:1 gluten-free flour blend.
  • Dairy-Free Option: Use coconut cream instead of sweetened condensed milk and a dairy-free butter substitute.
  • Natural Sweeteners: For a healthier twist, try using maple syrup or honey instead of sugars.

How to Make Mini Pumpkin Pies

Side view of a delectable mini pumpkin pie with a golden-brown crust and creamy pumpkin center.

Follow these simple steps to create your mini pumpkin pies, and don’t worry if you don’t get it right the first time—practice makes perfect!


Digital Kitchen Scale

★ Recommended Kitchen Tool

Digital Kitchen Scale

Make this recipe even easier with a quality Digital Kitchen Scale — a must-have kitchen staple!


🛒 View on Amazon →

As an Amazon Associate, we earn from qualifying purchases.

Instructions

  • Roll out the crust dough on a lightly floured surface to about ¼ inch thick.
  • Using a 5-inch cookie cutter, press out twelve circles and line 12 sections of a muffin pan with the discs.
  • Chill the crust in the pan for another 20 minutes.
  • Preheat the oven to 350°F (180°C).
  • In a mixing bowl, combine the melted butter, brown sugar, granulated sugar, cinnamon, nutmeg, cloves, pumpkin puree, flour, sweetened condensed milk, and egg. Mix until smooth.
  • Pour the filling into each crust, filling until just below the top.
  • Bake for 20-25 minutes or until the filling is set and a toothpick inserted comes out clean.
  • Allow to cool before serving. You can serve them warm or chilled.

Pro Tips for Perfect Mini Pumpkin Pies

To ensure your mini pumpkin pies turn out perfectly every time, consider these expert tips:

  • Use a Cookie Scoop: For uniform filling portions, use a cookie scoop to fill each crust.
  • Don’t Overmix: Mix just until the ingredients are combined to avoid a tough filling.
  • Check for Doneness: The pies should be set but slightly jiggly in the center when they come out of the oven.
  • Cool Completely: Let the pies cool completely in the pan before transferring them to avoid breaking the crust.
  • Experiment with Spices: Feel free to adjust spices to your taste—try adding ginger or allspice for a unique twist.
  • Use Fresh Pumpkin: If you can, roast and puree your own pumpkin for a richer flavor.
  • Make Crust Ahead: You can prepare the crust a day in advance and refrigerate it until you’re ready to bake.
  • Top with Whipped Cream: Serve with a dollop of fresh whipped cream or a sprinkle of pecans for added texture.

Common Mistakes and Troubleshooting

Even experienced bakers can run into issues. Here are some common pitfalls and how to avoid them:

  • Too Watery Filling: Ensure your pumpkin puree is well-drained. If using fresh pumpkin, bake it until soft and mash thoroughly.
  • Crust Shrinking: Make sure to chill the dough before rolling it out to prevent shrinkage during baking.
  • Burnt Edges: If the edges of your crust are browning too quickly, cover them with foil during baking.

Variations to Try

Feeling adventurous? Here are some fun variations to switch things up:

  • Chocolate Chip Mini Pumpkin Pies: Fold in mini chocolate chips into the filling for a decadent treat.
  • Maple Pecan Topping: Top your mini pies with a mixture of chopped pecans and maple syrup for a crunchy topping.
  • Spiced Rum Pumpkin Pies: Add a splash of spiced rum to the filling for an adult twist.
  • Vegan Mini Pumpkin Pies: Substitute the egg with a flax egg and use coconut cream in the filling.

Storage and Make-Ahead Instructions

These mini pumpkin pies are great for make-ahead preparation:

  • Refrigeration: Store in an airtight container in the fridge for up to 4 days.
  • Freezing: Freeze baked pies in a single layer in an airtight container. They can be frozen for up to 1 month. Thaw overnight in the refrigerator before serving.

Comprehensive FAQ

Here are some frequently asked questions to help you navigate your mini pumpkin pie-making journey:

  • Can I use fresh pumpkin instead of canned? Yes, just ensure it is cooked and pureed smoothly.
  • How do I know when the pies are done? The filling should be set with a slight jiggle in the center.
  • Can I make these pies without a muffin pan? Yes, you can use a tart pan or individual tartlet pans.
  • What can I serve with mini pumpkin pies? They pair wonderfully with whipped cream, ice cream, or a sprinkle of nuts.
  • How do I store leftover pies? Keep them in an airtight container in the fridge for up to 4 days.
  • Can I make the crust ahead of time? Absolutely! Prepare it a day in advance and refrigerate.
  • What is the best way to reheat mini pumpkin pies? Reheat in the oven at 350°F for about 10 minutes until warmed through.
  • Are these pies gluten-free? You can easily adapt the recipe by using gluten-free flour for the crust.

Nutritional Considerations

These mini pumpkin pies can fit into a balanced diet when enjoyed in moderation. Each pie offers a delightful mix of carbohydrates, fats, and vitamins from the pumpkin. Here are some nutritional tips:

  • Portion Control: Due to their small size, it’s easy to enjoy one without overindulging.
  • Healthier Sweeteners: Consider using honey or maple syrup to reduce refined sugars.
  • Pair with Protein: Serve with Greek yogurt or a scoop of nut butter for added protein.

Equipment Recommendations

Having the right tools can make your baking experience much smoother:

  • Quality Muffin Pan: A non-stick muffin pan ensures easy release of your mini pies.
  • Rolling Pin: A good rolling pin helps you achieve even dough thickness.
  • Cookie Cutter: A 5-inch cutter makes perfect crust circles.
  • Mixing Bowls: Use a variety of bowl sizes for mixing ingredients.

Serving Suggestions

To elevate your mini pumpkin pies, consider these serving ideas:

  • With Whipped Cream: A dollop of freshly whipped cream enhances the flavors beautifully.
  • Garnished with Nuts: Sprinkle chopped pecans or walnuts on top for added crunch.
  • Drizzled with Caramel: A drizzle of caramel sauce adds a sweet touch and looks stunning.

Conclusion

Baking mini pumpkin pies is not just about making a dessert; it’s about creating memories and embracing the flavors of the season. With this comprehensive guide, I hope you feel empowered to whip up these delightful treats in your own kitchen. Remember, cooking is a journey—don’t be afraid to experiment and make these pies your own. Enjoy the process, and let the delicious aroma of pumpkin spice fill your home. Happy baking!

Mini Pumpkin Pies

Prep Time 20 minutes
Cook Time 15 minutes
Total Time 35 minutes
Servings 12 pieces
Calories 150
Delight in these adorable mini pumpkin pies, perfect for fall gatherings or a cozy treat.

Ingredients

Pie Crust

  • 4 tablespoons butter
  • 0.25 cup light brown sugar
  • 0.25 cup granulated sugar
  • 1 teaspoon ground cinnamon
  • 0.25 teaspoon ground nutmeg
  • 0.125 teaspoon ground cloves
  • 0.5 cup pumpkin puree
  • 1 tablespoon flour
  • 0.5 cup sweetened condensed milk
  • 1 egg egg
  • 0.5 cup brown sugar (packed)
  • 0.25 cup granulated sugar
  • 2 teaspoons ground cinnamon
  • 0.5 teaspoon salt
  • 0.5 cup butter (melted)
  • 1 cup all-purpose flour

Instructions 

  • Roll out the crust dough on a lightly floured surface to about ¼ inch thick.
  • Using a 5-inch cookie cutter, cut out twelve circles and line muffin pan sections.
  • Chill the lined pan for 20 minutes.
  • Preheat oven to 350F/180C and bake until filling is set, about 15 minutes.
Notes

Ensure not to overfill the crusts to prevent spilling during baking.
Calories: 150kcal
Cost: $12
Course: Dessert
Cuisine: American
Keyword: Pumpkin

Welcome to the exciting world of Halloween treats! This season, let’s dive into crafting a delightful and spooky Halloween classic: Graveyard Chocolate Bark. This easy-to-make dessert combines the rich flavors of chocolate with the fun and festive spirit of Halloween, making it perfect for parties, family gatherings, or a cozy night in. In this comprehensive guide, we’ll walk you through every step of the process, ensuring you have all the tips, tricks, and variations to create your own delicious masterpiece.

Why You’ll Love This Recipe

There are countless reasons to love this Halloween Chocolate Bark recipe. Here are just a few:

  • Easy to Make: This recipe requires minimal effort and only a few ingredients. Perfect for cooks of all skill levels!
  • Customizable: You can easily adapt the bark with your favorite chocolates and toppings, making it uniquely yours.
  • Fun for Everyone: Get the kids involved! Making this treat can be a fun family activity, fostering creativity and teamwork.
  • Festive Presentation: The spooky decorations make this dessert a festive centerpiece that will impress your guests.
  • Delicious Taste: The combination of creamy white chocolate and rich milk chocolate creates an irresistible flavor that everyone will love.

Ingredients Breakdown

To get started, let’s look at the ingredients you’ll need for this spooky treat:


5-Speed Electric Hand Mixer

★ Recommended Kitchen Tool

5-Speed Electric Hand Mixer

Make this recipe even easier with a quality 5-Speed Electric Hand Mixer — a must-have kitchen staple!


🛒 See Deals on Amazon →

As an Amazon Associate, we earn from qualifying purchases.
  • Skeleton Candy Mold: Essential for creating the spooky skeleton shapes. You can find these at most craft or baking stores.
  • White Chocolate Chips or Candy Melts: You’ll need between 1/2 to 3/4 cup. Feel free to substitute with any high-quality white chocolate.
  • Milk Chocolate Chips: A standard 12-ounce bag or about 2 cups of your preferred chocolate works well.
  • Chocolate Wafers: About 8, crushed. This adds texture and a delicious crunch to your bark.
  • Disposable Decorating Bag (Optional): This is handy for neat filling of the mold, but not strictly necessary.

Step-by-Step Instructions

Now that we have all our ingredients, let’s dive into the step-by-step instructions to make your Graveyard Chocolate Bark:

  1. Melt the White Chocolate: Follow the package directions to melt your white chocolate chips or candy melts. If using a microwave, heat at 70 percent power for 90 seconds, stirring every 15 seconds until smooth.
  2. Fill the Mold: Use a piping bag or spoon to fill the skeleton molds with melted white chocolate. Bang the mold gently on the counter to settle the chocolate and remove air bubbles.
  3. Clear the Mold: Using a dough scraper or knife, carefully remove excess chocolate from the top of the mold for a clean finish.
  4. Set the Skeletons: Allow the filled molds to set. You can place them in the fridge for quicker results.
  5. Melt the Milk Chocolate: In a microwave-safe bowl, melt the milk chocolate chips. Spread the melted chocolate onto a baking tray lined with wax paper, aiming for an even layer that fills about 3/4 of the tray.
  6. Add the Skeletons: Once the milk chocolate is spread, arrange the set skeletons on top. Sprinkle the crushed chocolate wafers around them.
  7. Final Set: Refrigerate for about 30 minutes. Score the chocolate with a knife to create break lines before it fully sets, making it easier to break into pieces later.
  8. Serve and Enjoy: Turn the pieces over to remove excess cookie crumbs and serve your delightful Graveyard Chocolate Bark!

Pro Tips for Perfect Bark

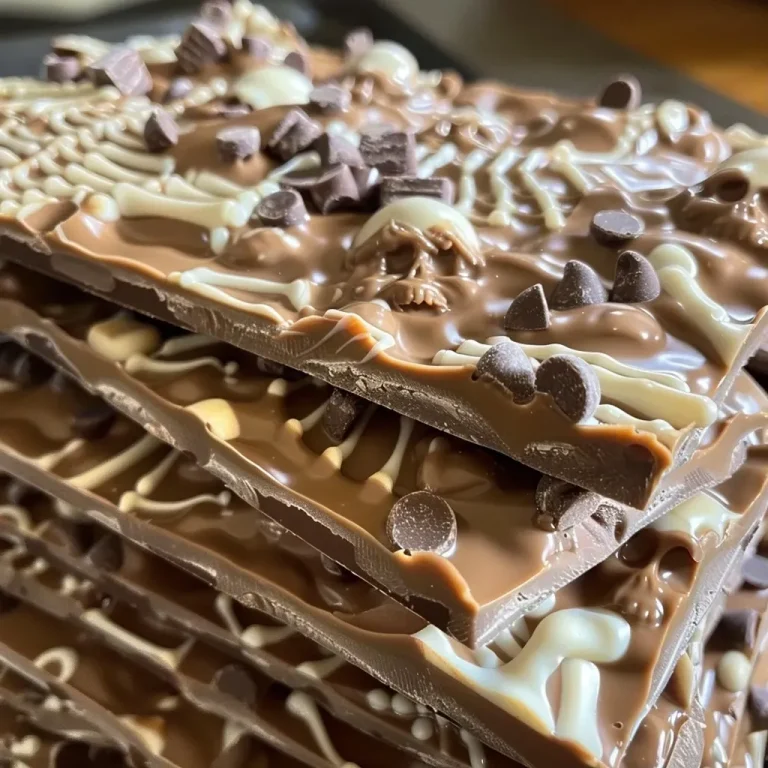
Side view of chocolate bark decorated with spooky skeleton candies.

To ensure your Halloween Chocolate Bark turns out perfectly, here are some expert tips:

  • Work Quickly: Chocolate sets fast! Be prepared to add your toppings swiftly before it hardens.
  • Quality Ingredients Matter: Use high-quality chocolate for the best flavor and texture.
  • Mix and Match: Feel free to use dark chocolate, colored candy melts, or any other fun toppings that embody Halloween.
  • Store Properly: Keep your bark in an airtight container to maintain freshness.
  • Experiment: Don’t hesitate to try different molds and shapes to make your bark even spookier!
  • Layer Flavors: Consider adding a sprinkle of sea salt or a dash of cinnamon for an unexpected flavor twist.
  • Be Mindful of Temperatures: If your chocolate is too hot, it can cause condensation when placed in the fridge. Let it cool slightly before refrigerating.
  • Involve the Kids: Let children decorate with additional spooky sweets like gummy worms or candy eyes.

Common Mistakes and Troubleshooting

Every cook faces challenges, so here’s how to avoid common mistakes when making your bark:

  • Chocolate Not Melting Properly: If chocolate isn’t melting smoothly, it may have overheated. Always melt in short bursts and stir frequently.
  • Mold Not Releasing: If your chocolate is stuck, try placing the mold in the freezer briefly to help it pop out.
  • Too Many Crumbs: If you have excess cookie crumbs on your finished bark, gently shake or tap to remove them before serving.

Delicious Variations

Want to switch things up? Here are some fun variations to try:

  • Dark Chocolate Delight: Use dark chocolate instead of milk chocolate for a richer flavor.
  • Nutty Crunch: Add chopped nuts like pecans or almonds for an extra crunch.
  • Fruity Twist: Incorporate dried fruits such as cranberries or raisins for a chewy contrast.
  • Spooky Sprinkles: Top with Halloween-themed sprinkles to enhance the festive look.

Storage and Make-Ahead Instructions

Your Graveyard Chocolate Bark can be made ahead of time and stored properly:

  • Storage: Keep the bark in an airtight container at room temperature for up to two weeks. Refrigeration can extend freshness but may alter texture slightly.
  • Make-Ahead: You can prepare the bark a few days in advance. Just ensure it’s stored well to maintain its delightful crunch.

Frequently Asked Questions

Let’s address some common questions about making Graveyard Chocolate Bark:

  • Can I use any kind of chocolate? Absolutely! Feel free to mix and match your favorite types of chocolate.
  • What if I don’t have a mold? You can pour the chocolate onto a baking sheet and create free-form shapes instead.
  • How do I prevent chocolate from seizing? Ensure no moisture comes into contact with the chocolate while melting.
  • Can I freeze the bark? Yes, but it’s best to store it in an airtight container to prevent freezer burn.
  • What toppings work well? Use any candy or nuts that you enjoy! The possibilities are endless.
  • How do I make it more festive? Decorate with edible glitter or Halloween-themed candies for an extra touch.
  • Can I use coconut oil to thin the chocolate? Yes, a little coconut oil can help achieve a smoother consistency.
  • How long does it take to set? Typically, about 30 minutes in the refrigerator.

Nutritional Tips and Dietary Adaptations

If you’re looking to adapt this recipe for dietary preferences:

  • Vegan Option: Use dairy-free chocolate chips and ensure any molds or toppings are vegan-friendly.
  • Gluten-Free: Most chocolate and candy options are gluten-free, but always check labels to be sure.
  • Lower Sugar: Opt for unsweetened chocolate and adjust sweetness with stevia or another sugar substitute.

Equipment Recommendations

Here’s a quick list of equipment that can make the process smoother:

  • Microwave-Safe Bowls: For melting chocolate without risk of burns.
  • Baking Tray: A lined tray for spreading your chocolate bark.
  • Piping Bags: Handy for filling molds neatly.
  • Dough Scraper: Great for smoothing and leveling chocolate.
  • Offset Spatula: Perfect for spreading melted chocolate evenly.

Serving Suggestions

When it’s time to serve your delightful Graveyard Chocolate Bark, consider these fun ideas:

  • Party Platter: Arrange pieces on a spooky-themed platter for a festive display.
  • Gift Bags: Wrap pieces in Halloween-themed bags as treats for friends and family.
  • Pair with Hot Cocoa: This bark pairs wonderfully with a warm cup of hot chocolate for a cozy treat.
  • Movie Night Snack: Serve as a fun snack during Halloween movie marathons.

In conclusion, making Graveyard Chocolate Bark is not just a recipe; it’s a creative culinary experience perfect for Halloween festivities. With a few simple ingredients and steps, you can create a treat that’s as delightful to look at as it is to eat. So grab your ingredients, get creative, and enjoy the spooky season with this delicious bark!

graveyard chocolate bark

Prep Time 15 minutes
Cook Time 15 minutes
Total Time 30 minutes
Servings 8 pieces
Calories 250
A spooky and delicious chocolate bark perfect for Halloween, featuring skeleton shapes and crushed cookies for a creepy effect.

Ingredients

candy molds

  • 0.5 cup white chocolate chips or white candy melts (enough to fill the mold)
  • 1 12-ounce bag milk chocolate chips (or preferred chocolate)
  • 8 pieces chocolate wafers (crushed)

disposable decorating bag (optional)

Instructions 

  • Melt white chocolate or candy melts as per package instructions, then pipe into molds and settle.
  • Melt the milk chocolate chips and spread onto a lined tray, then arrange skeletons and sprinkle crushed wafers.
  • Let set in the fridge for 30 minutes, then score and break into pieces.

Notes

Overturn broken pieces to remove excess cookie crumbs for a cleaner look.
Calories: 250kcal
Cost: $10
Course: Dessert
Cuisine: American
Keyword: bark, chocolate, Halloween

Unleash Creativity: The Fun of Making Edible Googly Eyes

Are you ready to add a touch of whimsy to your treats? In this guide, I’ll show you how to make delightful edible googly eyes using just two kinds of chocolate and coconut oil. Whether you’re decorating cakes, cookies, or any fun snacks, these googly eyes are perfect for bringing your culinary creations to life. Let’s dive into the sweet world of edible googly eyes!

Why You’ll Love This Recipe

Creating edible googly eyes is not only fun, but it also offers several benefits that will make your baking adventures even more enjoyable:

  • Instant Personality: Edible googly eyes add an element of fun and whimsy to your desserts, making them eye-catching and memorable.
  • Simple Ingredients: With just two kinds of chocolate and coconut oil, this recipe is straightforward and accessible for bakers of all skill levels.
  • Customizable Colors: You can easily adapt the colors of the eyes using different chocolates or food colorings, making them perfect for any occasion.
  • Kid-Friendly Activity: Making these googly eyes is a great activity to do with kids, fostering creativity and making baking a family affair.
  • Versatile Usage: Use them for cakes, cupcakes, cookies, or as decoration for Halloween treats, birthdays, and more!

Ingredients Breakdown

Let’s take a closer look at what you’ll need to create these delightful edible googly eyes:


Silicone Baking Cups Set

★ Recommended Kitchen Tool

Silicone Baking Cups Set

Make this recipe even easier with a quality Silicone Baking Cups Set — a must-have kitchen staple!


🛒 Check Price on Amazon →

As an Amazon Associate, we earn from qualifying purchases.
  • Two Kinds of Chocolate: Dark and white chocolate work best for a contrasting look. You can also use milk chocolate if preferred.
  • Coconut Oil: This helps to smooth out the chocolate and gives a lovely sheen. If you’re looking for a substitute, vegetable oil can work in a pinch, but the flavor may differ.

Pro Tips for Perfecting Your Edible Googly Eyes

A side view of googly eyes made with chocolate and coconut oil.

Here are some expert insights to ensure your googly eyes turn out just right:

  • Use Quality Chocolate: The better the chocolate, the smoother and shinier your googly eyes will be.
  • Temperature Matters: Make sure your chocolate is melted gently—burnt chocolate will ruin the texture.
  • Pipe with Precision: Use a piping bag for more control when creating the eyes, ensuring they have a clean and neat appearance.
  • Mind the Thickness: The eyes should not be too thick; otherwise, they may not dry properly or look too bulky on your treats.
  • Experiment with Sizes: Create different sizes for a variety of looks—big googly eyes for cupcakes and smaller ones for cookies!
  • Add a Fun Twist: Mix in some colorful sprinkles while the chocolate is still wet for added texture and design.
  • Chill to Set: Allow the googly eyes to set in the refrigerator for quicker solidification.
  • Practice Makes Perfect: Don’t worry if your first batch isn’t perfect! With practice, you’ll get the hang of it.

Common Mistakes and Troubleshooting

Even the best chefs have their off days. Here are some common pitfalls to avoid:

  • Chocolate Too Thick: If your melted chocolate is too thick, add a little more coconut oil until you reach the desired consistency.
  • Eyes Not Setting: Ensure your chocolate is cooled enough before piping; if it’s too warm, it may not hold its shape.
  • Uneven Sizes: Use a template or guide to ensure uniformity when piping out the eyes.

Delicious Variations to Explore

Once you’ve mastered the basics, try these fun variations:

  • Chocolate Variants: Use white chocolate dyed with food coloring for vibrant colors.
  • Flavored Chocolate: Experiment with flavored chocolates like mint or raspberry for a unique twist.
  • Sprinkle Fun: Add edible glitter or colored sprinkles on top before the chocolate sets for an extra festive touch.
  • Non-Chocolate Options: Consider using yogurt melts or colored candy melts for a different flavor profile.

Storage and Make-Ahead Instructions

Want to prepare a batch in advance? Here’s how to store your googly eyes:

  • Room Temperature: Keep your googly eyes in an airtight container at room temperature for up to two weeks.
  • Refrigeration: For longer storage, refrigerate them in an airtight container, but allow them to come to room temperature before using.

Frequently Asked Questions

Let’s address some common questions about making edible googly eyes:

  • Can I use white chocolate instead of dark chocolate? Absolutely! White chocolate can create a fun and different aesthetic.
  • How do I make them dairy-free? Use dairy-free chocolate options to keep the recipe vegan.
  • Can I freeze the googly eyes? It’s not recommended, as freezing can affect the texture and appearance of the chocolate.
  • How do I attach them to my treats? Simply press them gently into the frosting or melted chocolate on your treats for a secure hold.
  • What’s the best way to melt chocolate? Use a double boiler or microwave in short bursts, stirring frequently to avoid burning.
  • Can I make them without coconut oil? Yes, but the texture may be affected; consider using a small amount of vegetable oil instead.
  • How do I store leftover chocolate? Allow it to cool, then store it in an airtight container for future use.
  • What if my chocolate seizes? If your chocolate seizes, add a bit of coconut oil to help loosen it back up.

Nutritional Tips and Dietary Adaptations

Looking to adapt this recipe for dietary needs? Here are some tips:

  • Vegan Options: Ensure the chocolate you use is labeled vegan for a completely plant-based treat.
  • Low-Sugar Alternative: Use sugar-free chocolate or adjust the sweetness according to your preference.

Equipment Recommendations

To make your googly eyes, you’ll need a few simple tools:

  • Piping Bags: Essential for creating the eyes with precision.
  • Silicone Mat or Parchment Paper: Great for setting the eyes without sticking.
  • Microwave or Double Boiler: For melting the chocolate smoothly.

Serving Suggestions

Now that you’ve created your edible googly eyes, here are some fun serving ideas:

  • Cupcake Toppers: Place them on frosted cupcakes for a playful look.
  • Cake Decorations: Use them on layered cakes to create character faces.
  • Cookie Accents: Add them to decorated cookies for an extra pop of fun.
  • Party Favors: Package them up in cute bags for party giveaways.

In conclusion, making edible googly eyes is a fun, engaging, and delicious way to bring your baking to life. With just a few simple ingredients and a little creativity, you can create whimsical treats that are sure to delight kids and adults alike. So, roll up your sleeves, gather your ingredients, and let’s get started on crafting some sweet surprises!

GOOGLY EYES

Prep Time 10 minutes
Cook Time 10 minutes
Total Time 20 minutes
Servings 12 pieces
Calories 150
A fun and adorable treat featuring two kinds of chocolate shaped into googly eyes, perfect for parties or playful snacking.

Ingredients

chocolates

  • 200 grams two kinds of chocolate (dark and white chocolate)
  • 2 tablespoons coconut oil

Instructions 

  • Melt the chocolates separately with coconut oil.
  • Use a spoon to drop small dollops of melted chocolate onto parchment paper, creating eye shapes.
  • Place small white chocolate dots for the pupils while the chocolate is still soft.
  • Allow the eyes to set at room temperature or refrigerate for quicker setting.
  • Once hardened, serve and enjoy your googly eyes!

Notes

Use high-quality chocolates for best flavor and appearance.
Calories: 150kcal
Cost: $8
Course: Dessert
Cuisine: American
Keyword: chocolate

Unlock the Magic of No-Bake High-Protein Candy Corn Cheesecake

Are you ready to discover a delightful dessert that combines the whimsical flavors of Disney with the nutritional benefits of high-protein ingredients? This Protein Disney Candy Corn Cheesecake is not just a treat; it’s a celebration of flavors, textures, and health. Perfect for family gatherings, Halloween parties, or just a cozy night in, this cheesecake is designed to impress without the hassle of baking. In this guide, you’ll learn how to craft this magical dessert step by step, along with tips, variations, and storage options to make it your own!

Why You’ll Love This Recipe

There are countless reasons to fall in love with this cheesecake, but here are the top five:

  • No Baking Required: Save time and energy with a simple no-bake recipe that requires minimal effort.
  • High Protein Content: Each jar is packed with 33g of protein thanks to a blend of cottage cheese and protein powder, making it a satisfying treat.
  • Festive and Fun: The vibrant colors and flavors of candy corn make it the perfect dessert for Halloween or any festive occasion.
  • Customizable Ingredients: Tailor the recipe to your taste or dietary needs with various substitutions, ensuring everyone can enjoy it.
  • Easy to Prepare Ahead: Make it in advance and store it for later, making entertaining a breeze.

Ingredients Breakdown

Here’s what you’ll need to create this delicious cheesecake:


Cake Decorating Set

★ Recommended Kitchen Tool

Cake Decorating Set

Make this recipe even easier with a quality Cake Decorating Set — a must-have kitchen staple!


🛒 View on Amazon →

As an Amazon Associate, we earn from qualifying purchases.
  • 1 cup Greek yogurt or cottage cheese: Choose Greek yogurt for a tangy flavor or cottage cheese for a creamier texture.
  • 1 package (8 oz) light cream cheese: This adds richness without too many calories.
  • 1 cup vanilla protein powder: Essential for that protein boost; feel free to use your favorite brand.
  • ½ cup pumpkin puree (or seasonal flavor of choice): This adds moisture and a hint of seasonal flavor.
  • 1 teaspoon cinnamon: A warm spice that complements the flavors beautifully.
  • 2 tablespoons maple syrup or preferred sweetener: Adjust sweetness to your preference.
  • Cooking spray or coconut oil for greasing pan: To ensure easy removal from the pan.

Step-by-Step Instructions

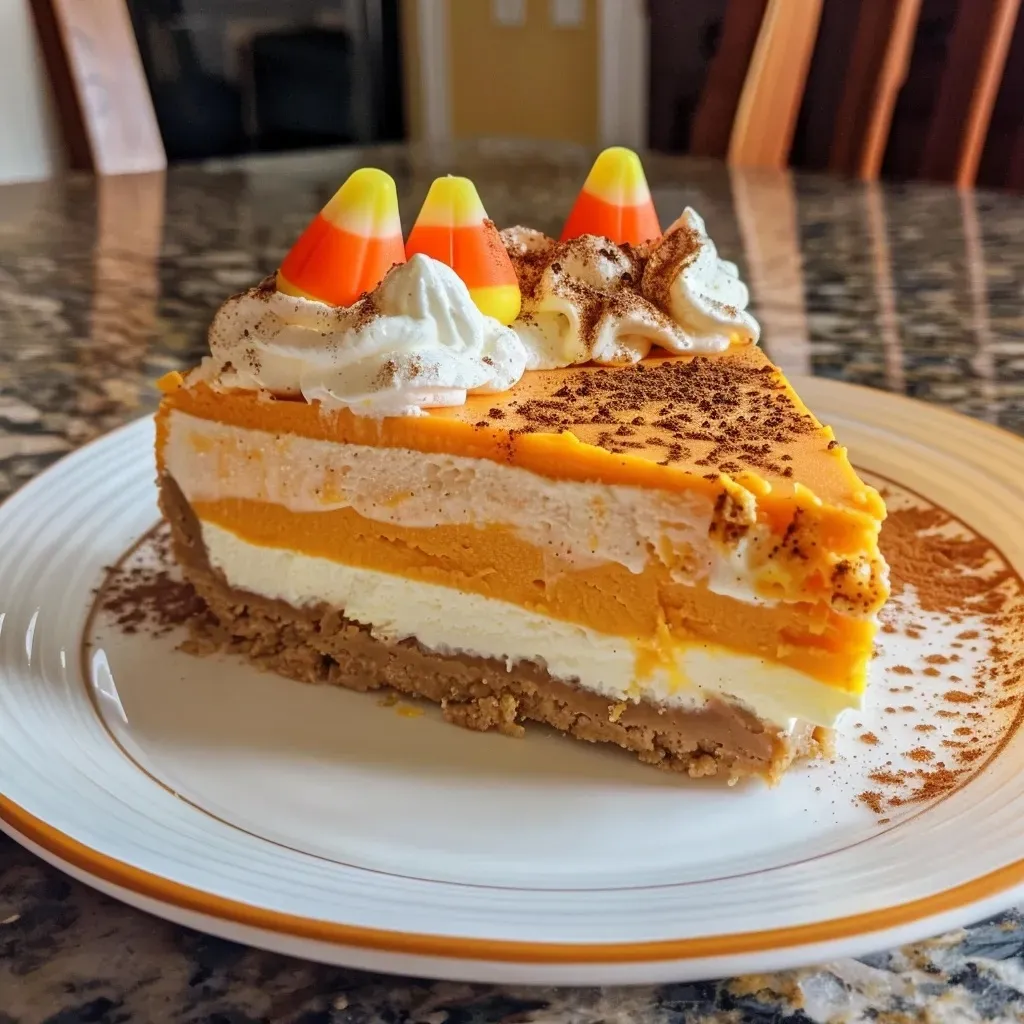
Close-up of a slice of Protein Candy Corn Cheesecake decorated with colorful candy corn pieces.

Crafting this cheesecake is simple! Follow these steps for a delightful result:

  1. Start by greasing your springform pan lightly with cooking spray or coconut oil.
  2. In a mixing bowl, combine the Greek yogurt and cream cheese, blending until smooth.
  3. Gradually add the protein powder, mixing until creamy and well combined.
  4. Stir in the pumpkin puree and cinnamon, ensuring everything is evenly mixed.
  5. Add the maple syrup and adjust sweetness according to your taste.
  6. Pour the mixture into the prepared pan, smoothing the top with a spatula.
  7. Chill in the refrigerator for at least 4 hours or overnight until set.
  8. Once set, carefully remove from the pan and garnish with toppings of your choice, such as melted candy corn or whipped cream.

Pro Tips for Perfect Cheesecake

Here are some expert insights to ensure your cheesecake turns out perfectly:

  • Chilling Time: Allow ample time for the cheesecake to set; overnight is best for optimal texture.
  • Ingredient Temperature: Let cream cheese come to room temperature for easier mixing.
  • Texture Adjustments: For a creamier texture, blend longer to incorporate more air into the batter.
  • Sweetness Levels: Start with less sweetener and adjust, as toppings can add sweetness too.
  • Garnishing Options: Use fresh fruit, chocolate shavings, or crushed candy corn for added flair.
  • Serving Size: Portion into jars for easy serving and visual appeal.
  • Flavor Variations: Experiment with different flavor extracts like vanilla or almond to change the profile.
  • Storage Tips: Keep leftovers in an airtight container in the fridge for up to 5 days.

Common Mistakes and Troubleshooting

Even seasoned cooks can run into issues. Here are some common pitfalls and how to avoid them:

  • Overmixing: Avoid overmixing to prevent a dense texture; mix just until blended.
  • Undersetting: If the cheesecake doesn’t set properly, it may need more time in the fridge.
  • Cracking: Chill slowly to prevent cracks from forming on the surface.
  • Taste Testing: Always taste your mixture before pouring it into the pan to ensure it meets your flavor preference.

Variations to Spice Up Your Cheesecake

Feel free to get creative with these variations:

  • Chocolate Delight: Add cocoa powder to the mixture for a rich chocolate flavor.
  • Nutty Crunch: Fold in crushed nuts or granola for added texture.
  • Berry Bliss: Swirl in berry puree for a fruity twist.
  • Minty Fresh: Add a few drops of peppermint extract for a refreshing mint flavor.

Storage and Make-Ahead Instructions

This cheesecake is perfect for make-ahead desserts. Here’s how to store:

  • Refrigeration: Keep covered in the fridge for up to 5 days.
  • Freezing: For longer storage, freeze individual jars for up to 3 months. Thaw overnight in the fridge before serving.

Frequently Asked Questions (FAQs)

Got questions? Here are some common inquiries about this recipe:

  • Can I use all Greek yogurt instead of cottage cheese? Yes! The cheesecake will still be delicious with Greek yogurt alone.
  • How can I lower the carbs or calories? Use a low-calorie sweetener and opt for light cream cheese.
  • Can I use pudding mix in cheesecake jars? Yes! It adds extra creaminess and flavor.
  • What’s the best way to garnish? Melted candy corn or whipped cream work wonderfully!
  • Can I make this dairy-free? Substitute with dairy-free cream cheese and yogurt alternatives.
  • How do I know when it’s set? It should be firm to the touch and hold its shape when removed from the pan.
  • What if I want to make a larger batch? Simply double the ingredients and use a larger pan!
  • Can I use flavored protein powder? Absolutely! Flavored protein will enhance the cheesecake’s taste.

Nutritional Insights and Dietary Adaptations

This cheesecake is not just a treat; it’s packed with nutritional benefits:

  • Protein-Rich: Each serving contains significant protein, making it a great post-workout snack.
  • Low in Sugar: With controlled sweetness, you can enjoy this dessert guilt-free.
  • Vitamins from Pumpkin: Pumpkin puree adds vitamins A and C, boosting the nutritional profile.

Equipment You’ll Need

Here’s a quick rundown of the essential tools for making this cheesecake:

  • Mixing Bowls: For combining all your ingredients.
  • Springform Pan: Ideal for easy removal of the cheesecake.
  • Spatula: For smoothing and spreading the cheesecake mixture.
  • Measuring Cups and Spoons: To ensure accurate ingredient amounts.

Serving Suggestions

Ready to serve? Here are some ideas to elevate your presentation:

  • Layered Jars: Serve in clear jars for a beautiful display of layers.
  • Garnish with Whipped Cream: A dollop of whipped cream adds elegance.
  • Top with Seasonal Fruits: Fresh berries or sliced bananas enhance flavor and nutrition.

Conclusion

This Protein Disney Candy Corn Cheesecake is not just a dessert; it’s a delightful experience that combines nutrition with fun. Whether you’re celebrating Halloween, hosting a family gathering, or simply treating yourself, this no-bake cheesecake is bound to impress. Embrace the magic of cooking and bring joy to your table with this easy-to-make, high-protein dessert. Happy cooking and enjoy every delightful bite!

Protein Disney Candy Corn Cheesecake

Prep Time 15 minutes
Total Time 15 minutes
Servings 8 pieces
Calories 250
A creamy, protein-packed cheesecake inspired by Disney candy corn, perfect for a seasonal treat.

Ingredients

Dairy

  • 1 cup Greek yogurt or cottage cheese
  • 1 package 8 oz light cream cheese
  • 1 cup protein powder (preferably vanilla)
  • ½ cup pumpkin puree (or seasonal flavor of choice)
  • 1 teaspoon cinnamon
  • 2 tablespoons maple syrup or preferred sweetener
  • as needed Cooking spray or coconut oil for greasing pan

Instructions 

  • Grease the springform pan lightly.
  • Mix Greek yogurt and cream cheese until smooth.
  • Add protein powder and mix until creamy.
  • Stir in pumpkin puree and cinnamon.
  • Sweeten with maple syrup to taste, then pour into pan and smooth.
  • Refrigerate for at least 4 hours or overnight, then serve.

Notes

Ensure the cheesecake is fully chilled before serving for best texture.
Calories: 250kcal
Cost: $15
Course: Dessert
Cuisine: American
Keyword: Candy Corn, cheesecake, Protein

Transform Your Weeknight Dinners with Roasted Vegetable Flatbread

Are you tired of the same old dinner routine? If so, it’s time to elevate your weeknight meals with a delightful Roasted Vegetable Flatbread that not only tantalizes your taste buds but also brings a burst of color and nutrition to your table. This recipe takes simple ingredients and transforms them into a mouthwatering dish that everyone will love. Perfect for any night of the week, this flatbread is quick to prepare and offers endless customization options to suit your family’s preferences.

In this article, we’ll dive deep into the art of making a flavorful roasted vegetable flatbread, complete with tips, variations, and everything you need to create a dish that’s as impressive as it is delicious.

Why You’ll Love This Recipe

  • Quick and Easy: With only a handful of ingredients and straightforward steps, you can whip this up in under 30 minutes.
  • Healthy and Nutritious: Packed with vegetables, this flatbread is a great way to sneak in those essential nutrients while keeping meals light.
  • Customizable: Feel free to swap out vegetables based on what you have on hand or your personal favorites.
  • Great for Meal Prep: Make extra flatbreads for easy lunches or snacks throughout the week.
  • Perfect for Any Occasion: Whether it’s a casual family dinner or a gathering with friends, this dish is sure to impress!

Ingredient Breakdown and Substitutions

Let’s take a closer look at the ingredients that make this roasted vegetable flatbread shine. You can easily adapt these ingredients to fit your dietary needs or to use what you have available.


Meal Prep Container Set

★ Recommended Kitchen Tool

Meal Prep Container Set

Make this recipe even easier with a quality Meal Prep Container Set — a must-have kitchen staple!


🛒 View on Amazon →

As an Amazon Associate, we earn from qualifying purchases.
  • Storebought Pizza Crust: While a storebought crust is convenient, you can use homemade dough if you prefer. Gluten-free options are also available!
  • Olive Oil: This adds flavor and helps to roast the veggies. Feel free to substitute with avocado oil or any neutral oil.
  • Garlic: Fresh garlic cloves work best, but you can use garlic powder in a pinch.
  • Vegetables: Portobello mushrooms, zucchini, red onion, and yellow peppers are used here, but you can also try bell peppers, asparagus, or spinach.
  • Cheeses: Ricotta is used for creaminess, while Parmesan and mozzarella provide a delightful cheesiness. Feel free to swap these for dairy-free alternatives.
  • Fresh Herbs: Basil and rosemary add a burst of flavor; however, you can use any herbs that you enjoy.

How to Make This Flatbread

Side view of juicy roasted vegetable flatbread on a wooden surface.

Follow these simple steps to create your own roasted vegetable flatbread:

  1. Preheat your oven to 500 degrees Fahrenheit.
  2. Brush the pizza crust with 1 tbsp olive oil and season with salt and pepper. Sprinkle minced garlic on top. Bake for 8-10 minutes until slightly golden.
  3. While the crust is baking, slice your vegetables and add them to a non-stick baking sheet. Season with salt and pepper and drizzle the remaining 1 tbsp olive oil over them. Roast for 5 minutes.
  4. Remove the crust from the oven and layer with ricotta cheese first, followed by the roasted vegetables, herbs, and the remaining cheeses.
  5. Return to the oven and bake for an additional 12-15 minutes until the cheese is melted and bubbly. Remove, slice, and enjoy!

Pro Tips for the Best Flatbread

  • Pre-bake the crust: This ensures a crispy base, so don’t skip this step!
  • Don’t overcrowd the veggies: Spread them out on the baking sheet to allow for even roasting.
  • Experiment with toppings: Try adding your favorite proteins like grilled chicken or chickpeas for extra substance.
  • Use a pizza stone: If you have one, it can help achieve a perfectly crispy crust.
  • Let it cool: Allow the flatbread to cool for a few minutes before slicing to prevent the cheese from sliding off.
  • Consider the season: Use seasonal vegetables for the best flavor and freshness.

Common Mistakes and Troubleshooting

Here are some common pitfalls to avoid when making your roasted vegetable flatbread:

  • Not preheating the oven: This can lead to soggy crusts. Always ensure your oven is at the right temperature.
  • Overcooking the veggies: Keep an eye on the roasting time; you want them tender but not mushy.
  • Skipping the oil: This is crucial for flavor and texture. Don’t skip out on oiling your crust and veggies.
  • Using too many toppings: While it’s tempting to load up, too many toppings can make the flatbread soggy. Keep it balanced.

Variations to Try

Here are some delicious variations to inspire your next flatbread:

  • Mediterranean Delight: Use feta cheese, olives, and artichokes with a drizzle of balsamic glaze.
  • BBQ Chicken Flatbread: Top with shredded chicken, BBQ sauce, red onion, and cilantro.
  • Pesto Veggie Flatbread: Swap olive oil for pesto and add roasted eggplant and cherry tomatoes.
  • Spicy Southwest: Use taco-seasoned ground beef, jalapeños, cheddar cheese, and a sprinkle of cilantro.

Storage and Make-Ahead Instructions

This recipe is great for meal prep! Here’s how to store and reheat your flatbread:

  • In the Refrigerator: Store leftover flatbread in an airtight container for up to 3 days.
  • In the Freezer: If you want to freeze it, wrap the flatbread tightly in plastic wrap and then foil. It will keep well for up to 2 months.
  • Reheating: Reheat in the oven at 350 degrees Fahrenheit for about 10-15 minutes or until heated through.

Frequently Asked Questions

  • Can I make this flatbread gluten-free? Yes! Use a gluten-free pizza crust or make your own with gluten-free flour.
  • What vegetables work best? You can use any vegetables you enjoy, just make sure they roast well.
  • Can I use frozen vegetables? Yes, but be sure to thaw and drain them well to avoid excess moisture.
  • How do I make this vegan? Substitute the cheeses with vegan alternatives and use a vegan pizza crust.
  • Can I add protein to this recipe? Absolutely! Grilled chicken, sausage, or beans are great additions.
  • What should I serve with this flatbread? A fresh salad or a light soup would pair perfectly!
  • How long does it take to prepare? Preparation time is about 10 minutes, with a total cooking time of around 25 minutes.
  • Is this a good meal prep option? Yes! It can be prepped ahead of time and stored for quick meals throughout the week.

Nutritional Tips and Dietary Adaptations

This roasted vegetable flatbread is not only delicious but can be tailored to meet various dietary needs:

  • Low Carb: Opt for a cauliflower crust to keep it low-carb while still enjoying a savory flatbread experience.
  • Dairy-Free: Substitute all cheeses with plant-based alternatives for a dairy-free option.
  • Low Sodium: Use low-sodium versions of cheeses and seasonings to keep sodium levels in check.

Essential Equipment Recommendations

To make your flatbread-making experience seamless, consider these essential tools:

  • Baking Sheet: A non-stick baking sheet is ideal for roasting vegetables and baking your flatbread.
  • Pizza Stone: If you have one, it helps achieve a crispy crust.
  • Cutting Board: For chopping veggies efficiently.
  • Olive Oil Sprayer: This can help evenly distribute oil over your ingredients.

Serving Suggestions

Once your roasted vegetable flatbread is ready, consider serving it with:

  • A side salad: A fresh green salad with a light vinaigrette complements the flatbread beautifully.
  • Dipping sauces: Try garlic aioli or a spicy marinara for dipping.
  • Wine pairings: A light white wine or a fruity red pairs nicely with the flavors of the flatbread.

In conclusion, creating a Roasted Vegetable Flatbread is not just a cooking task; it’s an opportunity to bring joy and connection to your dining table. With its vibrant colors, delicious flavors, and endless customization options, this dish is bound to become a weeknight favorite in your home. So gather your ingredients, get cooking, and share this delightful meal with those you love. Happy cooking!

Roasted Vegetable Flatbread

Prep Time 10 minutes
Cook Time 15 minutes
Total Time 25 minutes
Servings 4 pieces
Calories 350
A delicious and colorful roasted vegetable flatbread perfect for a quick, satisfying meal or snack.

Ingredients

Dough

  • 1 piece storebought pizza crust
  • 2 tbsp olive oil (divided)
  • 2 cloves garlic (minced)
  • 1 piece portobello mushroom
  • 0.5 medium zucchini (medium size)
  • 7-8 slices sundried tomato slices
  • 0.5 red onion red onion (sliced)
  • 0.5 yellow pepper yellow pepper (sliced)
  • 0.5 tsp salt
  • 0.5 tsp pepper
  • 1/3 cup ricotta cheese
  • 2 tbsp fresh basil (chopped)
  • 0.5 tsp dried rosemary
  • 0.5 cup Parmesan cheese
  • 0.5 cup mozzarella cheese

Instructions 

  • Preheat oven to 500°F (260°C).
  • Brush crust with 1 tbsp olive oil, season with salt & pepper, add garlic. Bake for 8-10 minutes.
  • Slice vegetables, season, and roast in oven for 5 minutes.
  • Spread ricotta on crust, top with vegetables, herbs, and cheeses. Bake for 12-15 minutes until cheese melts.

Notes

Feel free to customize with your favorite vegetables and herbs for a personalized touch.
Calories: 350kcal
Cost: $15
Course: Main Course
Cuisine: American
Keyword: Vegetables

Welcome to the Ultimate Salted Caramel Pretzel Latte Journey

Are you ready to embark on a delightful taste adventure? The Salted Caramel Pretzel Latte is not just a drink; it’s a perfect harmony of sweet and salty flavors that warms the heart. In this guide, you’ll learn how to create this comforting beverage that is bound to become your new go-to treat. With rich caramel notes, the crunch of pretzels, and a hint of salt, this recipe encapsulates everything you love about a cozy coffee shop experience, but right in your own kitchen!

Why You’ll Love This Recipe

Here are just a few reasons this Salted Caramel Pretzel Latte will steal the spotlight:

  • Flavor Explosion: Experience the perfect blend of sweet caramel and salty pretzels, making each sip a celebration of taste.
  • Customizable: Adjust the sweetness and creaminess to match your preferences—perfect for everyone!
  • Quick and Easy: Prepare this luxurious drink in just a few minutes with minimal fuss.
  • Impress Your Guests: Serve this latte at your next gathering to wow friends and family with your barista skills.
  • Comforting and Cozy: Perfect for chilly days or as a sweet pick-me-up any time of year.

Ingredients Breakdown

Let’s dive into the ingredients you’ll need for crafting this delightful drink:


Professional Chef Knife Set

★ Recommended Kitchen Tool

Professional Chef Knife Set

Make this recipe even easier with a quality Professional Chef Knife Set — a must-have kitchen staple!


🛒 Check Price on Amazon →

As an Amazon Associate, we earn from qualifying purchases.
  • 1–2 teaspoons Javvy Salted Caramel Coffee Concentrate: A robust base that infuses rich caramel flavor.
  • 1 tablespoon Javvy Caramel Coffee Syrup: Adds sweetness and enhances the caramel notes.
  • 8 oz (1 cup) milk of choice: Use whole, skim, or a dairy-free alternative like oat or almond milk.
  • 1 tablespoon caramel sauce: For drizzling on top, adding extra sweetness and visual appeal.
  • A handful of crushed pretzels: The star of the show, providing a crunchy texture and salty contrast.
  • Pinch of sea salt: Elevates the flavors and enhances the overall experience.
  • Whipped cream (optional): For that café-style finish.

Pro Tips for the Perfect Salted Caramel Pretzel Latte

Side view of a creamy latte with caramel drizzle and crushed pretzels, served in a clear cup.

Here are some expert insights to elevate your latte game:

  • Quality Ingredients: Use high-quality coffee concentrate and syrups for the best flavor profile.
  • Temperature Control: Heat your milk gently to avoid scalding; aim for a warm but not boiling temperature.
  • Texture Matters: Consider frothing your milk for a creamier texture—ideal for lattes!
  • Make It Vegan: Substitute dairy milk with almond, soy, or oat milk for a delightful dairy-free version.
  • Experiment with Flavors: Try adding a splash of vanilla or hazelnut syrup for an extra flavor kick.
  • Garnish Creatively: Don’t just stop at caramel; consider adding chocolate shavings or a sprinkle of cinnamon.
  • Balance Sweetness: Adjust the amount of caramel syrup based on your taste preference—less for a less sweet version.
  • Chill It: For a refreshing summer drink, consider making a cold version by blending ingredients with ice.

Common Mistakes and Troubleshooting

Here are some common pitfalls and how to avoid them:

  • Overheating Milk: Heat slowly and stir to prevent scalding, which can alter the taste.
  • Too Much Sweetness: Start with less caramel syrup and adjust to taste; you can always add more!
  • Imbalanced Flavors: If it tastes too salty or sweet, try adding more milk or adjusting the syrup.
  • Texture Issues: Ensure your pretzels are finely crushed to avoid large chunks that can disrupt the drinking experience.

Delicious Variations

Don’t hesitate to experiment! Here are some fun variations:

  • Chocolate Caramel Pretzel Latte: Add a swirl of chocolate sauce for a decadent twist.
  • Spiced Salted Caramel Latte: Incorporate a pinch of nutmeg or cinnamon for a warm, spiced flavor.
  • Mocha Pretzel Latte: Mix in some cocoa powder for a rich mocha experience.
  • Frozen Salted Caramel Pretzel Latte: Blend with ice for a refreshing summer treat.

Storage and Make-Ahead Instructions

If you want to prepare this latte in advance, here’s how:

  • Store the Javvy Salted Caramel Coffee Concentrate in the fridge for up to a week.
  • Pre-mix the syrups and caramel sauce in a bottle for easy access.
  • Assemble the drink just before serving for the best flavor and texture.

Frequently Asked Questions

Here are some common queries regarding the Salted Caramel Pretzel Latte:

  • Can I make this latte sugar-free? Yes! Use sugar-free syrup and adjust to taste.
  • What’s the best milk for this latte? Any milk works, but whole milk or oat milk creates a creamy texture.
  • How can I enhance the caramel flavor? Use more caramel sauce or flavored syrups.
  • Can I serve this hot or cold? Yes! It’s delicious either way!
  • Is there a way to make this a decaf version? Absolutely! Use decaffeinated coffee concentrate.
  • What’s the shelf life of the ingredients? Follow the storage instructions on the product labels.
  • Can I use homemade caramel sauce? Yes! Homemade adds a personal touch.
  • How do I make a lower-calorie version? Use low-fat milk and less syrup.

Nutritional Tips and Dietary Adaptations

If you’re mindful of nutrition, consider these tips:

  • Low-Calorie Options: Use almond milk and reduce the amount of syrup for a lighter version.
  • High-Protein Versions: Add protein powder to your milk before mixing.
  • Allergen Considerations: Ensure pretzels are gluten-free if necessary, and adjust milk for lactose intolerance.

Essential Equipment Recommendations

Here’s what you’ll need to make your latte:

  • Milk Frother: For creating that creamy, café-style milk.
  • Measuring Spoons: For accurate ingredient measurements.
  • Blender (optional): If you’re making a frozen version or want a super smooth texture.

Serving Suggestions

To elevate your serving experience:

  • Serve in a Tall Glass: Showcase the beautiful layers of your latte.
  • Garnish with Crushed Pretzels: Add a sprinkle on top for extra crunch.
  • Pair with Snacks: Enjoy alongside cookies or pastries for a delightful treat.

Conclusion

The Salted Caramel Pretzel Latte is not just a drink; it’s a delightful experience that you can recreate in your own home. With its perfect balance of flavors and textures, this recipe is bound to impress. So gather your ingredients, follow the steps, and enjoy a moment of pure bliss. Happy brewing!

Salted Caramel Pretzel Latte

Prep Time 5 minutes
Total Time 5 minutes
Servings 1 cup
Calories 250
A deliciously sweet and salty coffee treat combining caramel, pretzels, and creamy milk for a perfect indulgence.

Ingredients

Coffee Concentrate

  • 1 1/2 teaspoons Javvy Salted Caramel Coffee Concentrate
  • 1 tablespoon Javvy Caramel Coffee Syrup
  • 8 oz milk of choice
  • 1 tablespoon caramel sauce
  • a handful crushed pretzels
  • pinch sea salt
  • optional Whipped cream (for garnish)

Instructions 

  • Mix Javvy Salted Caramel Coffee Concentrate and Javvy Caramel Coffee Syrup until combined.
  • Fill a glass with ice, pour in the coffee mixture, then add milk and stir gently.
  • Top with crushed pretzels and a pinch of sea salt.
  • Optional: garnish with whipped cream and drizzle caramel sauce.

Notes

Adjust the amount of pretzels and salt to taste for optimal flavor.
Calories: 250kcal
Cost: $15
Course: Beverage
Keyword: caramel, coffee, Pretzel

Unleashing the Flavors: The Allure of Caramel Apple Cookies

Welcome to the delightful world of Caramel Apple Cookies! This recipe beautifully marries the rich sweetness of caramel with the crisp, tart flavor of apples, creating a dessert that’s not only delicious but also evokes the warmth of home and family gatherings. Whether you’re looking to impress guests or simply indulge your sweet tooth, these cookies are sure to become a favorite in your kitchen. Let’s dive into the details of making these irresistible treats!

Why You’ll Love This Recipe

This recipe for caramel apple cookies offers an exciting twist on traditional cookie flavors. Here are five compelling reasons to fall in love with these cookies:

  • Unique Flavor Combination: The balance of sweet caramel and tart apples creates a flavor profile that’s both comforting and exciting.
  • Easy to Make: With straightforward steps, even novice bakers can achieve cookie perfection without any fuss.
  • Versatile Ingredients: Most ingredients are pantry staples, making it easy to whip these cookies up at a moment’s notice.
  • Great for Any Occasion: Whether it’s a family gathering, a bake sale, or just a cozy night in, these cookies fit right in.
  • Leftover Love: These cookies stay fresh for days, and you can even freeze them for later enjoyment!

Ingredients You’ll Need

Let’s gather everything we need to create these delectable treats. Here’s a detailed breakdown of the ingredients, along with some substitutions:


5-Speed Electric Hand Mixer

★ Recommended Kitchen Tool

5-Speed Electric Hand Mixer

Make this recipe even easier with a quality 5-Speed Electric Hand Mixer — a must-have kitchen staple!


🛒 Shop This Tool →

As an Amazon Associate, we earn from qualifying purchases.
  • 1 tbsp oil: For sautéing the apples—use coconut or vegetable oil for a neutral flavor.
  • 1 medium apple, finely chopped: Granny Smith or Honeycrisp are excellent choices for their tartness and firmness.
  • 1/2 cup peanut butter: Alternatively, use almond or sunflower seed butter for different flavor profiles.
  • 1 tsp vanilla (optional): A splash of vanilla enhances the overall flavor.
  • 1/8 teaspoon fine grain sea salt: Balances sweetness and enhances flavor.
  • 1/2 teaspoon cinnamon: Adds warmth and depth to the cookie dough.
  • 2 tablespoons maple syrup: A natural sweetener that pairs perfectly with the apples.
  • 1/2 cup oat flour (or almond flour): For a gluten-free option, use almond flour instead of oat flour.
  • 1 tbsp cashew (or peanut, almond) butter for caramel: This adds a creamy texture to your drizzle.
  • 1 tbsp maple syrup for caramel: Sweetens the caramel drizzle beautifully.
  • 1 tsp blackstrap molasses or brown sugar for caramel: Adds a rich, deep sweetness.

How to Make Caramel Apple Cookies

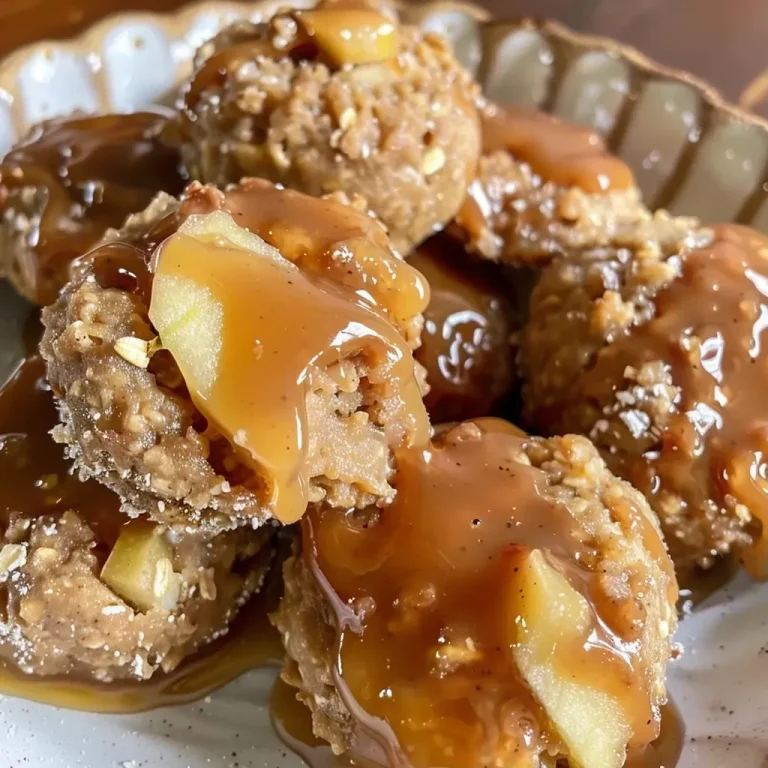
Side angle of cookie dough bites featuring caramel and apple pieces.

Ready to bake? Follow these simple steps to create your caramel apple cookies:

Step 1: Prep the Apples

Chop the apples into small pieces and sauté them in oil over medium heat until softened. This step enhances their sweetness and creates a lovely texture.

Step 2: Prepare the Cookie Dough

In a mixing bowl, combine all the cookie dough ingredients except for the apples. Mix until a dough forms, then fold in the sautéed apples.

Step 3: Shape the Cookies

Using your hands or a cookie scoop, form the dough into 12 cookie bites, ensuring they are compact and well-formed.

Step 4: Make the Caramel Drizzle

In a small bowl, mix the caramel ingredients until smooth. Drizzle over the cookies once they have cooled.

Step 5: Storage

Store any leftovers in an airtight container in the fridge for up to 3 days, or freeze for up to 6 months. Enjoy them chilled or warmed up!

Pro Tips for Making the Best Caramel Apple Cookies

  • Choose the Right Apples: Opt for firm apples like Granny Smith to prevent them from turning mushy in the cookies.
  • Don’t Overmix the Dough: This keeps the cookies tender and prevents them from becoming tough.
  • Experiment with Spices: Add nutmeg or ginger for a unique twist that complements the apple flavor.
  • Chill the Dough: For thicker cookies, refrigerate the dough for 30 minutes before baking.
  • Use Quality Nut Butter: Higher quality nut butters will enhance the overall flavor of your cookies.
  • Drizzle Caramel Generously: Don’t be shy with that caramel drizzle; it’s what makes these cookies truly indulgent!
  • Keep an Eye on Baking Time: Watch the cookies closely in the oven; they should be golden but not overbaked.
  • Pair with Ice Cream: For an extra treat, serve these cookies warm with a scoop of vanilla ice cream.

Common Mistakes and Troubleshooting

Even the best bakers can run into issues. Here are some common mistakes and how to avoid them:

  • Overcooking the Apples: Make sure to sauté the apples just until they are soft but still hold their shape.
  • Dry Cookies: Ensure accurate measurements and do not overbake the cookies to keep them chewy.
  • Too Much Flour: If the dough feels dry, try adding a splash of milk or additional nut butter.
  • Caramel Hardening: If your caramel drizzle hardens too much, gently reheat it to restore its pourable consistency.

Variations on Caramel Apple Cookies

If you’re feeling adventurous, here are some variations to try:

  • Chocolate Chip Caramel Apple Cookies: Add semi-sweet chocolate chips to the dough for extra richness.
  • Gluten-Free Version: Use almond flour or a gluten-free 1:1 baking mix instead of oat flour.
  • Nut-Free Option: Substitute nut butters with sunbutter or soy nut butter to make it allergy-friendly.
  • Spiced Caramel Apples: Incorporate pumpkin spice or chai spices into the dough for a seasonal twist.

Storing and Make-Ahead Instructions

These cookies are perfect for meal prep! Here’s how to store and make ahead:

  • Refrigerator Storage: Keep cookies in an airtight container for up to 3 days.
  • Freezing Cookies: Freeze individually wrapped cookies for up to 6 months; thaw at room temperature before serving.
  • Make-Ahead Dough: Prepare the dough in advance and store it in the fridge for up to 3 days before baking.

FAQs About Caramel Apple Cookies

Here are some frequently asked questions to help you with your baking:

  • Can I use a different type of apple? Yes! Any firm apple will work, but Granny Smith offers a delightful tartness.
  • How do I know when the cookies are done? They should be lightly golden on the edges and slightly soft in the center.
  • Can I add nuts to the cookies? Absolutely! Chopped pecans or walnuts can add a nice crunch.
  • What should I do if the dough is too sticky? Add a bit more flour until the desired consistency is reached.
  • Is it necessary to chill the dough? Chilling is optional but helps in achieving thicker cookies.
  • Can I use store-bought caramel? Yes, store-bought caramel sauce can be used for convenience.
  • How can I make these cookies vegan? Substitute the egg with flaxseed meal and use maple syrup instead of honey.
  • What drinks pair well with these cookies? A hot cup of apple cider or a chilled glass of milk complements these cookies wonderfully.

Nutrition Tips and Dietary Adaptations

Whether you’re health-conscious or have specific dietary needs, here are some tips:

  • Reduce Sugar: Substitute sugar with a natural sweetener like stevia or monk fruit.
  • Increase Fiber: Add chia seeds or flaxseeds to the dough for an extra fiber boost.
  • Dairy-Free Option: Use coconut cream or almond milk in place of any dairy ingredients.

Equipment Recommendations

Here’s a quick list of essential equipment to make your baking experience seamless:

  • Mixing Bowls: A set of various sizes for mixing dough and preparing ingredients.
  • Cookie Scoop: Helps in portioning out cookies evenly for consistent baking.
  • Baking Sheet: Use non-stick or lined with parchment paper for easy clean-up.
  • Measuring Cups and Spoons: For accurate measurements of all ingredients.

Serving Suggestions

Finally, here are some delightful ways to serve your caramel apple cookies:

  • Warm with Ice Cream: Serve fresh out of the oven with a scoop of vanilla ice cream.
  • With a Drizzle of Caramel: Enhance the experience with extra caramel drizzle on top.
  • As a Dessert Platter: Arrange on a platter with fresh apple slices and nuts for a beautiful presentation.
  • Gift-Worthy Treats: Package them in a decorative box for a thoughtful homemade gift.

In conclusion, the joy of baking caramel apple cookies is not just in creating delicious treats but also in sharing them with loved ones. With this comprehensive guide, you have everything you need to bake a batch that will surely impress. So, roll up your sleeves, gather your ingredients, and let the comforting aroma of these cookies fill your kitchen. Happy baking!

Caramel Apple Cookie Dough Bites

Prep Time 10 minutes
Cook Time 10 minutes
Total Time 20 minutes
Servings 12 bites
Calories 150
Delightful bite-sized treats combining fresh apples, cookie dough, and caramel for a sweet, satisfying snack.

Ingredients

Main

  • 1 tbsp oil
  • 1 medium apple, finely chopped
  • 1/2 cup peanut butter (or your favorite nut or seed butter)
  • 1 tsp vanilla (optional)
  • 1/8 teaspoon fine grain sea salt
  • 1/2 teaspoon cinnamon
  • 2 tablespoons maple syrup
  • 1/2 cup oat flour (or almond)
  • 1 tbsp cashew (or peanut, almond) butter for caramel
  • 1 tbsp maple syrup for caramel
  • 1 tsp blackstrap molasses or brown sugar for caramel

Instructions 

  • Sauté chopped apples in oil until softened.
  • Mix all ingredients to form dough, then fold in cooled apples.
  • Form 12 bites using hands or a scoop.
  • Mix caramel ingredients and drizzle over bites.
  • Store in fridge for up to 3 days or freeze for longer.

Notes

Chill the bites before serving for best texture.
Calories: 150kcal
Cost: $15
Course: Dessert
Keyword: apple, caramel, cookie dough

Crafting the Ultimate Vanilla Almond Spiced Chai Smoothie

If you’re looking for a delicious and nutritious way to kickstart your day or refuel after a workout, you’ve come to the right place! This Vanilla Almond Spiced Chai Smoothie is not just another drink; it’s a flavorful experience that blends the warmth of chai with the smoothness of almond and banana. Let’s dive into the world of flavors and health benefits this smoothie offers, and why it’s perfect for any time of the day.

Why You’ll Love This Recipe

  • Rich in Nutrients: Packed with protein, healthy fats, and fiber, this smoothie provides a well-rounded nutritional profile to support your lifestyle.
  • Quick and Easy: With simple ingredients and only two steps, you can whip this up in no time, making it ideal for busy mornings.
  • Customizable: Whether you prefer it sweeter or more spiced, you can easily adjust the flavors to suit your taste.
  • Perfect for Any Occasion: Enjoy it as a breakfast option, a post-workout snack, or a comforting evening treat.
  • Supports Muscle Recovery: The combination of protein and carbohydrates aids in muscle repair, making it a fantastic post-exercise drink.

Ingredient Breakdown

Creating this delightful smoothie is as simple as gathering a few key ingredients. Here’s what you’ll need:

  • 2 scoops Chai Ka’Chava: A nutritious base that adds spiced chai flavor and protein.
  • 1 frozen banana: This adds natural sweetness and creaminess to the smoothie.
  • 1 tbsp almond butter: For healthy fats and a rich, nutty flavor.
  • 1 cup unsweetened almond milk: A low-calorie liquid base that keeps the smoothie light.
  • 1/2 tsp vanilla extract: Enhances the flavor profile with a sweet aroma.
  • 2 tbsp hemp hearts: These tiny seeds are loaded with protein and omega-3 fatty acids.
  • A handful of ice: To achieve the perfect chilled and refreshing texture.

Pro Tips for the Perfect Smoothie

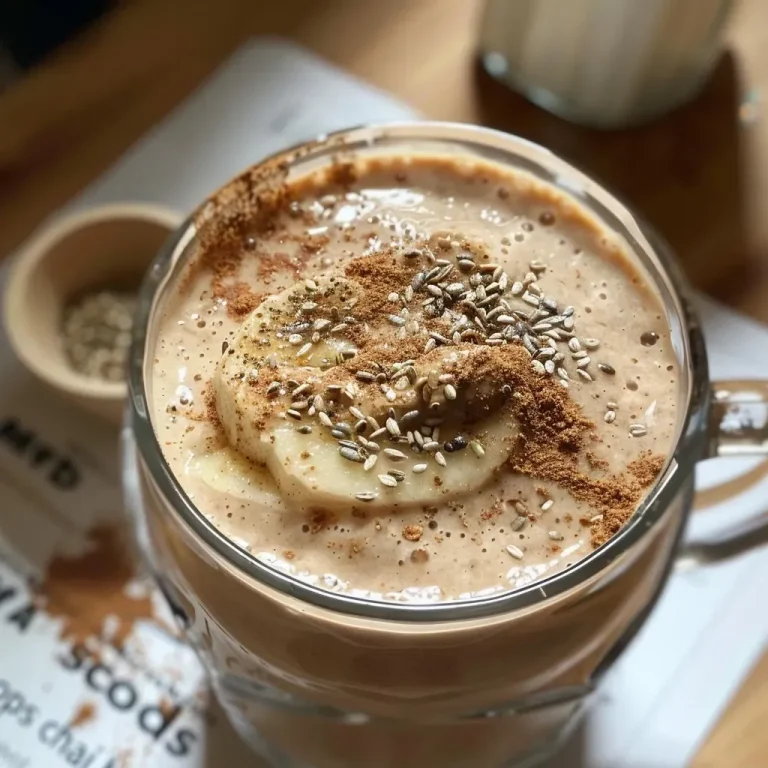
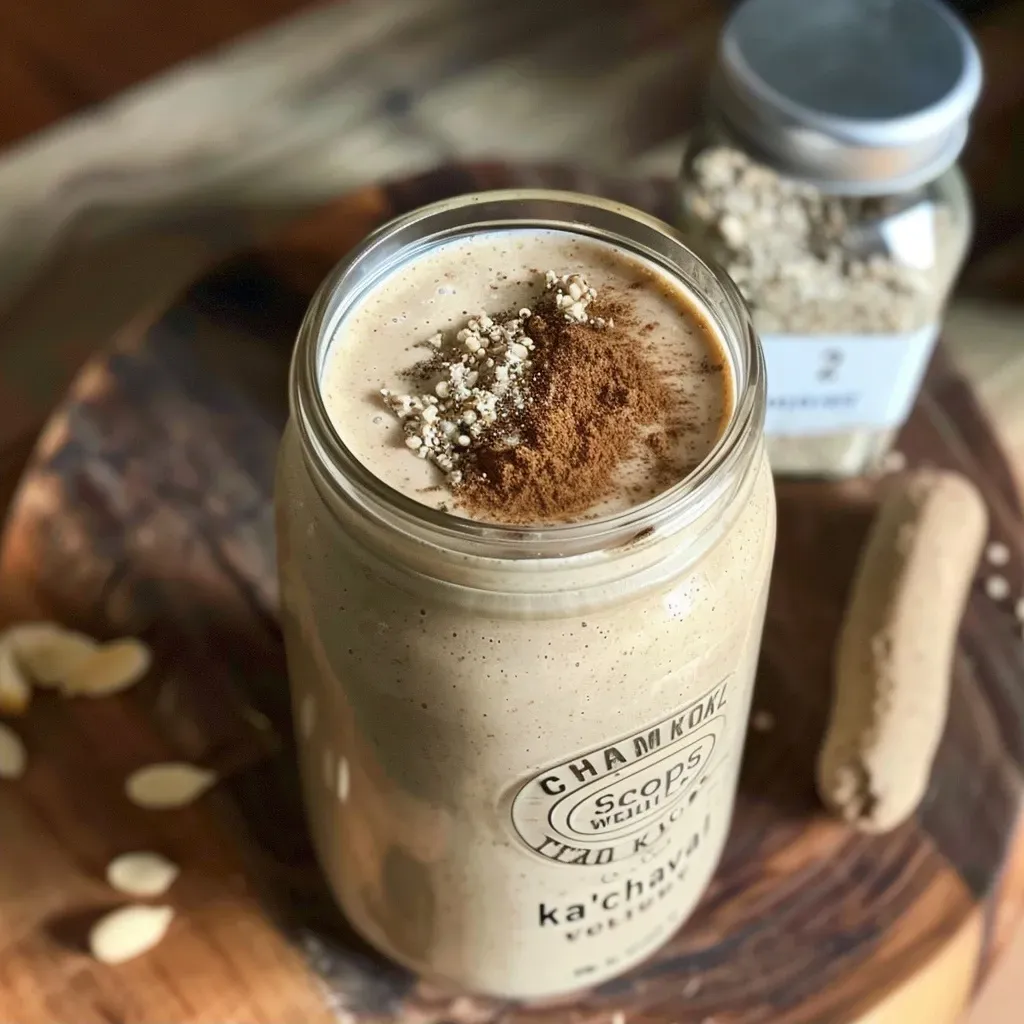
Side view of a deliciously thick smoothie with spices and toppings.
  • Use frozen bananas: They add creaminess without the need for ice cream, making your smoothie thicker and colder.
  • Adjust the consistency: If your smoothie is too thick, blend in more almond milk until you reach your desired texture.
  • Vary the spices: If you love spice, consider adding a pinch of cinnamon or nutmeg for extra warmth.
  • Experiment with protein sources: Try different protein powders if you want a variety of flavors or nutritional profiles.
  • Blend in greens: Toss in a handful of spinach or kale for an added nutrient boost without altering the taste significantly.
  • Make it a meal: Add oats or chia seeds for a heartier breakfast option.
  • Cool it down: Freeze the almond milk in advance for an ultra-creamy texture.
  • Garnish for flair: Top with extra hemp hearts or a sprinkle of cinnamon for a beautiful presentation.

Common Mistakes and Troubleshooting

Even the best recipes can go awry. Here are some common pitfalls and how to avoid them:


Belgian Waffle Maker

★ Recommended Kitchen Tool

Belgian Waffle Maker

Make this recipe even easier with a quality Belgian Waffle Maker — a must-have kitchen staple!


🛒 View on Amazon →

As an Amazon Associate, we earn from qualifying purchases.
  • Too Thick? Add more almond milk to thin it out until it reaches your desired consistency.
  • Too Sweet? Balance out sweetness with a squeeze of lemon juice or a pinch of salt.
  • Not Smooth Enough? Make sure to blend long enough and consider a high-powered blender for best results.
  • Flavors Not Blending? Ensure your ingredients are fresh, particularly the spices, to guarantee vibrant flavors.
  • Overpowering Spice? Start with a smaller amount of chai powder and gradually add more to find your perfect balance.

Variations to Try

Feeling adventurous? Here are some delightful variations to take your smoothie game to the next level:

  • Chocolate Almond Chai Smoothie: Add 1-2 tablespoons of cacao powder for a rich chocolate twist.
  • Green Chai Smoothie: Incorporate a handful of spinach or kale for a refreshing green boost.
  • Berry Bliss Chai Smoothie: Toss in a cup of mixed berries for a fruity flavor and a burst of antioxidants.
  • Minty Chai Smoothie: Add fresh mint leaves for a refreshing twist that complements the chai spices.

Storage and Make-Ahead Instructions

This smoothie is best enjoyed fresh, but you can prepare ingredients in advance:

  • Pre-Prep Ingredients: Portion out dry ingredients and store them in an airtight container for quick assembly.
  • Make Ahead: You can blend and refrigerate for up to 24 hours, but the texture may change slightly.
  • Freeze Portions: Freeze individual servings in jars for a quick grab-and-blend breakfast option.

FAQs About Your Vanilla Almond Spiced Chai Smoothie

  • Can I use regular milk instead of almond milk? Absolutely! Use any milk of your choice, such as oat or cow’s milk.
  • How much protein does this smoothie contain? Depending on the protein powder used, it can range between 20-30 grams of protein per serving.
  • Is this smoothie vegan? Yes, all the ingredients used here are plant-based.
  • Can I add more protein? Yes! You can include Greek yogurt or additional protein powder for an extra boost.
  • What if I don’t have chai powder? You can use brewed chai tea or a mix of cinnamon, cardamom, and ginger.
  • How do I make this smoothie lower in calories? Use less almond butter or substitute with a lower-calorie nut butter.
  • Is it okay to use protein powder? Yes, protein powder enhances the nutritional value and can be tailored to your dietary needs.
  • Can I skip the banana? Yes, but it may affect the creaminess; consider using avocado as a substitute.

Nutritional Tips and Dietary Adaptations

This smoothie offers a variety of nutritional benefits, and you can easily adapt it to your dietary needs:

  • Low-carb option: Use unsweetened almond milk and skip the banana, adding avocado instead.
  • Boost fiber intake: Add chia seeds or flaxseeds for an additional fiber boost.
  • Nut-free alternative: Substitute almond butter with sunflower seed butter.

Equipment Recommendations

To create the perfect smoothie, using the right equipment is essential:

  • High-speed blender: For the smoothest texture, invest in a powerful blender.
  • Measuring cups and spoons: Ensure accuracy in your ingredients for the best flavor.
  • Storage jars: Glass jars are perfect for storing prepped ingredients or leftover smoothie.

Serving Suggestions

Serve your smoothie in a tall glass, and consider these suggestions to enhance your experience:

  • Garnish with hemp hearts: A sprinkle on top adds texture and visual appeal.
  • Serve with a straw: This makes it easier to sip and enjoy your smoothie.
  • Pair with a side: Complement your smoothie with whole grain toast or a fruit salad for a balanced meal.

In conclusion, the Vanilla Almond Spiced Chai Smoothie is more than just a drink; it’s a celebration of flavors and health benefits. With its ease of preparation and endless customization options, it’s bound to become a staple in your kitchen. So go ahead, blend up this delicious smoothie and treat yourself to a moment of joy and nourishment!

Vanilla Almond Spiced Chai Smoothie

Prep Time 5 minutes
Total Time 5 minutes
Servings 1 serving
Calories 250
A creamy and flavorful smoothie combining chai spices, vanilla, and almonds for a delightful start to your day.

Ingredients

Chai Ka'Chava

  • 2 scoops Chai Ka'Chava

Frozen Banana

  • 1 piece frozen banana

Almond Butter

  • 1 tbsp almond butter

Unsweetened Almond Milk

  • 1 cup unsweetened almond milk

Vanilla Extract

  • 1/2 tsp vanilla extract

Hemp Hearts

  • 2 tbsp hemp hearts

Ice

  • a handful ice

Instructions 

  • Blend all ingredients until smooth and creamy.
  • Add more almond milk as needed to blend.

Notes

Adjust the ice for desired thickness.
Calories: 250kcal
Cost: $8
Course: Breakfast, Smoothie
Cuisine: fusion
Keyword: almond, chai, vanilla

Discover the Irresistible Smoked Gouda Macaroni Fritters

If you’re looking to elevate your comfort food game, look no further than these Smoked Gouda Macaroni Fritters. With a delightful blend of creamy gouda and crispy exterior, these fritters are the perfect appetizer or side dish for any occasion. In this comprehensive guide, I’ll walk you through every step, share tips for success, and provide variations to suit any palate. Let’s dive into the world of these delicious cheese balls!

Why You’ll Love This Recipe

There are countless reasons to adore smoked gouda fritters. Here are just a few:

  • Rich and Flavorful: The smokiness of the gouda adds depth, while the creamy interior creates a satisfying bite.
  • Textural Contrast: The golden-brown crust offers a satisfying crunch against the soft, cheesy center.
  • Quick to Prepare: These fritters can be whipped up in under an hour, perfect for last-minute gatherings.
  • Versatile Pairings: They pair beautifully with a variety of dipping sauces, enhancing your culinary experience.
  • Make-Ahead Friendly: You can prepare the mixture in advance and fry them just before serving, making hosting a breeze.

Ingredients Breakdown

Let’s take a closer look at the ingredients for these smoked gouda macaroni fritters. Each component plays a vital role in achieving the perfect flavor and texture:


Meal Prep Container Set

★ Recommended Kitchen Tool

Meal Prep Container Set

Make this recipe even easier with a quality Meal Prep Container Set — a must-have kitchen staple!


🛒 Check Price on Amazon →

As an Amazon Associate, we earn from qualifying purchases.
  • 2 Tbs. Shallots, minced: Adds a mild onion flavor; can substitute with green onions for a fresher taste.
  • 4 oz. Butter: Provides richness; feel free to use olive oil for a healthier option.
  • 6 oz. Flour: Acts as a binder; whole wheat flour can be used for a nuttier flavor.
  • 1 quart Cream: Gives a luxurious creaminess; half-and-half can work in a pinch.
  • 4 oz. Chardonnay: Adds depth; you may substitute with white wine or even vegetable broth for a non-alcoholic version.
  • 4 oz. Smoked Gouda: The star ingredient; feel free to mix in other cheeses like cheddar for additional flavor.
  • Salt and Pepper to taste: Essential for seasoning; don’t skip this step!
  • 1 lb. Elbow Macaroni, cooked: The base of the fritters; any short pasta will work.
  • Toasted Onion Sea Salt to taste: Enhances flavor; regular sea salt can be used if unavailable.

Step-by-Step Instructions for Making Fritters

Side view of a crispy smoked gouda macaroni fritter showcasing its cheesy interior.

Now that we have our ingredients, let’s get cooking! Follow these steps for perfectly crispy smoked gouda fritters.

  1. Melt butter: In a saucepan, melt butter over medium heat. Add minced shallots and sauté for 2 minutes until translucent.
  2. Add flour: Stir in flour to create a roux, cooking for about 3 minutes.
  3. Incorporate cream and wine: Gradually whisk in cream and Chardonnay, bringing the mixture to a boil.
  4. Stir in cheese: Once boiling, add the smoked gouda, stirring until melted and smooth. Season with salt and pepper.
  5. Mix in macaroni: Fold in the cooked macaroni, mixing well to ensure even distribution. Chill the mixture overnight for better texture.
  6. Shape fritters: Use your hands to scoop out small balls of the mixture, rolling them into tight balls.
  7. Prepare for frying: Set up a breading station with flour, beaten eggs, and breadcrumbs. Roll each ball in flour, dip into egg, then coat in breadcrumbs.
  8. Deep fry: Heat oil in a deep fryer or large pot to 350°F (175°C). Fry the fritters in batches until golden brown, about 3-4 minutes each. Drain on paper towels.
  9. Season: Sprinkle with toasted onion sea salt while hot and serve immediately.

Pro Tips for Perfect Fritters

To ensure your fritters turn out perfectly, consider the following tips:

  • Chill the mixture: Chilling the macaroni mixture helps the fritters hold their shape while frying.
  • Use a thermometer: Maintain oil temperature for even cooking and to avoid greasy fritters.
  • Don’t overcrowd the pan: Fry in small batches to keep the oil temperature consistent.
  • Experiment with cheeses: Feel free to mix different cheeses for unique flavor profiles.
  • Test fry: Fry a small fritter first to check seasoning and texture before frying the entire batch.
  • Add herbs: Fresh herbs like chives or parsley can elevate the flavor.
  • Make them spicier: Incorporate diced jalapeños or red pepper flakes for a kick!
  • Serve hot: Enjoy them fresh out of the fryer for the best flavor and texture.

Common Mistakes and Troubleshooting

Even the best chefs encounter hiccups! Here are some common mistakes and how to avoid them:

  • Too greasy: Ensure oil is hot enough before frying and avoid overcrowding.
  • Fritters falling apart: If this happens, your mixture may need more chilling time or an extra binding agent like flour.
  • Undercooked centers: Fry at the right temperature and for sufficient time to achieve a golden-brown exterior.

Variations on Smoked Gouda Fritters

Feeling adventurous? Here are some delicious variations on the classic recipe:

  • Vegetable Medley: Add finely chopped spinach, roasted red peppers, or artichokes to the mixture.
  • Spicy Cajun: Incorporate Cajun seasoning and serve with a spicy dipping sauce.
  • Herbed Delight: Mix in fresh herbs like basil, dill, or thyme for an aromatic twist.
  • Sweet and Savory: Serve with a honey mustard sauce to balance the richness of the fritters.

Storage and Make-Ahead Instructions

Planning to make these fritters in advance? Here’s how to store and reheat them:

  • Refrigerator: Store cooked fritters in an airtight container for up to 3 days. To reheat, place them on a baking sheet in a 350°F (175°C) oven for about 10 minutes.
  • Freezer: Uncooked fritters can be frozen. Place them on a baking sheet to freeze individually before transferring to a freezer bag. Fry them directly from the freezer when ready to serve.

Comprehensive FAQ

Here are some frequently asked questions about smoked gouda fritters:

  • Can I use different cheeses? Yes! Feel free to substitute with your favorite cheese while maintaining the balance of flavors.
  • What dipping sauces pair well? Try honey mustard, balsamic glaze, or a simple marinara for dipping.
  • Can I bake these instead of frying? Yes! Bake them at 400°F (200°C) for 20-25 minutes until golden, flipping halfway.
  • How do I know when they are done frying? They should be golden brown and float to the top of the oil.
  • Can I make them gluten-free? Absolutely! Use gluten-free flour and breadcrumbs for a delicious alternative.
  • What’s the best way to serve them? Serve immediately while hot with your favorite dipping sauce.
  • How can I make them vegetarian? Ensure that all ingredients, especially the dipping sauces, are vegetarian-friendly.
  • Can I double the recipe? Yes, simply adjust the quantities and ensure your frying equipment can handle the increased volume.

Nutrition Tips and Dietary Adaptations

For those mindful of their dietary needs, consider these adaptations:

  • Lower Fat: Use low-fat cream and cheese options to reduce calories.
  • Vegan Version: Swap out dairy ingredients for plant-based alternatives and use flax eggs as a binder.
  • High-Protein: Add cooked quinoa or lentils to the mixture for an extra protein boost.

Equipment Recommendations

Having the right tools can make all the difference in your cooking experience. Here’s what I recommend:

  • Deep Fryer: For consistent temperature and results, a deep fryer is ideal.
  • Cooking Thermometer: Essential for checking oil temperature and ensuring perfectly fried fritters.
  • Mixing Bowls: Have various sizes on hand for mixing and prepping ingredients.
  • Slotted Spoon: Perfect for removing fritters from hot oil safely.

Serving Suggestions

Pair these fritters with delightful accompaniments to enhance your meal:

  • Fresh Salad: A light arugula or mixed greens salad can balance the richness.
  • Dipping Sauces: Experiment with honey mustard, balsamic reduction, or even spicy ketchup for variety.
  • Wine Pairing: A crisp white wine like Sauvignon Blanc complements the flavors beautifully.

Conclusion

With this comprehensive guide, you’re well-equipped to create mouthwatering Smoked Gouda Macaroni Fritters that will impress friends and family alike. Remember, cooking is all about experimentation and joy. Don’t hesitate to customize this recipe to suit your preferences. Happy cooking!

Smoked Gouda Macaroni Fritter

Prep Time 15 minutes
Cook Time 10 minutes
Total Time 25 minutes
Servings 4 servings
Calories 650
A delicious appetizer featuring creamy smoked Gouda cheese, crispy breaded macaroni balls, perfect for parties or casual gatherings.

Ingredients

Dairy and Seasonings

  • 2 Tbs. Shallots, minced
  • 4 oz. Butter
  • 6 oz. Flour
  • 1 quart Cream
  • 4 oz. Chardonnay
  • 4 oz. Smoked Gouda
  • to taste Salt and Pepper
  • 1 lb. Elbow Macaroni, cooked
  • to taste Toasted Onion Sea Salt

Instructions 

  • Melt butter and sauté shallots for 2 minutes. Add flour and cook for 3 minutes. Stir in cream and wine, bring to a boil, then add cheese and simmer for 5 minutes.
  • Season with salt and pepper, stir in cooked macaroni, and chill overnight.
  • Form mixture into small balls, bread, and deep fry until golden. Season with toasted onion salt before serving.

Notes

Ensure oil is hot enough before frying to achieve a crispy exterior.
Calories: 650kcal
Cost: $15
Course: Appetizer
Cuisine: American
Keyword: Cheese, Fritters, Macaroni

Unlock the Sweetness: A Guide to Protein-Packed Marshmallows

If you’re looking to indulge in a sweet treat that doesn’t compromise your health goals, you’ve landed in the right place! This Protein Marshmallows Recipe is a delightful twist on a classic favorite, offering a fluffy texture and a protein boost perfect for snacking or as an addition to your favorite desserts. Imagine adding a cloud of sweetness to your hot chocolate or using them as a topping for your favorite treat—this recipe is versatile and simple, making it a must-try in your kitchen.

Why You’ll Love This Recipe

  • Protein Power: Each marshmallow is packed with protein, making it a healthier snack option that satisfies your sweet tooth.
  • Easy to Make: With just a few ingredients and straightforward steps, you can whip up these marshmallows in no time.
  • Customizable Flavors: Infuse your marshmallows with different flavors or extracts to suit your palate—think vanilla, chocolate, or even peppermint!
  • Low-Calorie Option: By using Fairlife fat-free milk and sugar-free powdered sugar, you can enjoy these marshmallows without the guilt.
  • Perfect for Any Occasion: Whether you’re hosting a party, celebrating with family, or indulging in a movie night, these marshmallows are a crowd-pleaser!

Essential Ingredients for Protein Marshmallows

Let’s take a closer look at what you’ll need to create these fluffy delights:

  • 2 cups Fairlife fat-free milk: This milk is not only lower in calories but also rich in protein, making it the perfect base for our marshmallows.
  • 4 tbsp gelatin: This ingredient acts as the binding agent, giving our marshmallows their unique texture.
  • 3 scoops protein powder: Choose your favorite flavor—whether it’s vanilla, chocolate, or something fun like unicorn cake!
  • Dusting of powdered sugar: A sprinkle for sweetness and to prevent sticking; you can opt for sugar-free if desired.

How to Make Protein Marshmallows

Side view of juicy protein-packed marshmallows on a plate.

Now that we have our ingredients, let’s dive into the step-by-step process of creating these delicious marshmallows.


Digital Kitchen Scale

★ Recommended Kitchen Tool

Digital Kitchen Scale

Make this recipe even easier with a quality Digital Kitchen Scale — a must-have kitchen staple!


🛒 Check Price on Amazon →

As an Amazon Associate, we earn from qualifying purchases.
  1. Bloom the Gelatin: Pour the milk into a saucepan and sprinkle the gelatin on top. Let it sit for about 5 minutes so the gelatin can bloom.
  2. Heat the Mixture: Heat the mixture over low heat, whisking constantly, until it thins out and is no longer frothy. Avoid boiling—just warm enough to dissolve the gelatin.
  3. Cool Down: Remove from heat and let it cool for a few minutes.
  4. Mix in Protein Powder: Transfer the mixture to a stand mixer and add in your protein powder. Whisk on high speed for about 5-8 minutes, until soft peaks form and it looks fluffy and glossy.
  5. Set and Chill: Pour the mixture into a parchment paper-lined baking dish or container, smooth the top, and refrigerate until fully set (about 2-3 hours).
  6. Slice and Dust: Once set, slice into squares, toss in powdered sugar, and store in the fridge.

Pro Tips for Perfect Protein Marshmallows

  • Use Cold Ingredients: Starting with cold milk helps the gelatin bloom more effectively.
  • Whip Well: Ensure you whip the mixture long enough to achieve that light, fluffy texture.
  • Experiment with Sweetness: Adjust the sweetness by adding more or less powdered sugar to suit your taste.
  • Add Flavorings: Consider adding extracts or flavorings to the protein powder for an extra twist.
  • Use Quality Gelatin: Opt for high-quality gelatin for the best texture and flavor.
  • Don’t Skip the Refrigeration: Allowing the marshmallows to chill properly helps them set correctly.
  • Store Properly: Keep your marshmallows in an airtight container to maintain freshness.
  • Use Non-Stick Spray: Lightly spray your baking dish with non-stick spray for easier removal.

Common Mistakes and Troubleshooting

Even the best chefs can face challenges in the kitchen. Here are a few common mistakes and how to avoid them:

  • Not Blooming Gelatin Properly: Always allow gelatin to sit in the milk for a few minutes before heating to ensure it activates fully.
  • Overheating the Mixture: Keep the heat low; overheating can cause the mixture to lose its fluffiness.
  • Insufficient Whipping: If you don’t whip long enough, your marshmallows won’t achieve that desired fluffy texture.
  • Not Waiting to Chill: Patience is key! Make sure to let them set completely before slicing.

Delicious Variations to Try

Once you’ve mastered the basic recipe, feel free to experiment! Here are some exciting variations you can try:

  • Chocolate Protein Marshmallows: Use chocolate protein powder and add cocoa powder for a richer flavor.
  • Mint Chocolate Chip: Add mint extract and mini chocolate chips to the mix for a refreshing twist.
  • Coconut Cream: Use coconut milk instead of Fairlife milk and add shredded coconut for a tropical flavor.
  • Fruit-Flavored Marshmallows: Incorporate fruit puree or flavorings like strawberry or raspberry for a fruity delight.

Storing Your Protein Marshmallows

To maintain the freshness and texture of your marshmallows:

  • Keep in the Fridge: Store them in an airtight container in the fridge to keep them from drying out.
  • Use Within a Week: For the best taste and texture, consume them within a week.
  • Freezing Option: You can freeze them for longer storage; just ensure they are well-wrapped to prevent freezer burn.

Frequently Asked Questions (FAQs)

  • Can I use regular milk instead of Fairlife milk? Yes, but it may alter the nutritional content and texture slightly.
  • Is there a vegan substitute for gelatin? Yes, you can use agar-agar as a plant-based alternative.
  • How do I know when the marshmallows are set? They should be firm to the touch and not sticky once fully chilled.
  • Can I use flavored protein powder? Absolutely! It adds an exciting flavor twist to your marshmallows.
  • What if my marshmallows don’t fluff up? Ensure you whipped them long enough; if not, try again next time!
  • Can I add mix-ins like nuts or chocolate chips? Yes, but add them after whipping to maintain fluffiness.
  • How do I prevent my marshmallows from sticking together? Dust them with powdered sugar and store them in a single layer.
  • Can I use these marshmallows in recipes? Yes, they’re great for recipes like s’mores, toppings for desserts, or in hot chocolate.

Nutrition Tips and Dietary Adaptations

This recipe not only satisfies your sweet cravings but also offers nutritional benefits:

  • High Protein Content: Perfect for post-workout snacks, helping with muscle recovery.
  • Low Sugar Option: By using sugar-free powdered sugar, this recipe can cater to those on low-sugar diets.
  • Gluten-Free Friendly: All ingredients are gluten-free, making these marshmallows accessible for everyone.

Recommended Equipment

To ensure a smooth cooking process, here’s what you’ll need:

  • Stand Mixer: For achieving that fluffy texture effortlessly.
  • Saucepan: A medium-sized saucepan works best for heating the mixture.
  • Baking Dish: Use a parchment-lined dish to easily remove the marshmallows post-setting.
  • Whisk: A good whisk is essential for mixing ingredients thoroughly.

Serving Suggestions

These marshmallows are delicious on their own, but you can elevate your serving game:

  • In Hot Chocolate: Add them as a topping for a comforting cup of hot cocoa.
  • As a Snack: Enjoy them straight out of the fridge for a protein-packed treat.
  • In Desserts: Use them as a topping for cakes, pies, or frozen yogurt.

With this comprehensive guide, you’re set to create delightful Protein Marshmallows that not only taste amazing but also align with your healthy lifestyle. Embrace the magic of cooking and enjoy these treats that bring both joy and nutrition to your table. Happy cooking!

Protein Marshmallows Recipe

Prep Time 10 minutes
Cook Time 15 minutes
Total Time 25 minutes
Servings 12 pieces
Calories 150
Delight in fluffy, protein-packed marshmallows perfect for a healthy treat or snack.

Ingredients

Dried ingredients

  • 2 cups Fairlife fat free milk
  • 4 tbsp gelatin
  • 3 scoops protein powder
  • dusting of powdered sugar powdered sugar (can use sugar-free)

Instructions 

  • Sprinkle gelatin over milk and let sit for 5 minutes to bloom.
  • Warm over low heat, whisking until smooth and no longer frothy, then cool slightly.
  • Transfer to a mixer, add protein powder, and whisk on high until fluffy, about 5-8 minutes.
  • Pour into a lined dish, smooth, and refrigerate for 2-3 hours until set.
  • Slice into squares, toss in powdered sugar, and store in the fridge.

Notes

Ensure the mixture is fully set before slicing for best texture.
Calories: 150kcal
Cost: $15
Course: Snack
Keyword: Protein