Author

Mike

Browsing

Welcome to the exciting world of plant-based cooking! Today, we’re diving into a delicious recipe that will not only tantalize your taste buds but also enrich your diet with wholesome nutrition. These high protein zucchini fritters are perfect for any meal, featuring a delightful blend of flavors and textures that everyone will love. Whether you’re a seasoned chef or a beginner in the kitchen, this recipe is designed to inspire and empower you to create amazing, healthy dishes from the comfort of your own home.

With the perfect balance of protein-rich ingredients like chickpea flour and white beans, these fritters are not just tasty; they’re also filling and nutritious. Let’s explore why you’ll love this recipe, how to make it, and all the little tips and tricks to ensure it turns out perfectly every time.

Why You’ll Love This Recipe

  • Protein Power: Each fritter is packed with protein from quinoa and navy beans, making them a satisfying meal option.
  • Vegan-Friendly: This recipe is entirely plant-based, perfect for anyone following a vegan or vegetarian diet.
  • Simple Ingredients: Made with easily accessible ingredients, you can whip these fritters up with what you already have in your pantry.
  • Versatile Serving Options: Serve them as a main course, snack, or appetizer; they’re delicious any way you choose!
  • Quick and Easy: These fritters come together in under 30 minutes, making them a fantastic choice for a busy weeknight meal.

Ingredient Breakdown

Let’s take a closer look at the ingredients that make these zucchini fritters so special:


Vegetable Spiralizer

★ Recommended Kitchen Tool

Vegetable Spiralizer

Make this recipe even easier with a quality Vegetable Spiralizer — a must-have kitchen staple!


🛒 Check Price on Amazon →

As an Amazon Associate, we earn from qualifying purchases.
  • Zucchini: The star of the show, zucchini adds moisture and a refreshing flavor. You’ll need about 3½ cups, grated and squeezed to remove excess water.
  • Sea Salt: Enhances the natural flavors of the ingredients and helps draw out moisture from the zucchini.
  • Green Onions: Adds a mild onion flavor and a pop of color to the fritters.
  • Nutritional Yeast: Provides a cheesy flavor, making these fritters rich and savory while keeping them vegan.
  • Cooked Quinoa: A fantastic source of protein and fiber, quinoa gives the fritters added texture and nutrition.
  • Navy Beans: Creamy and earthy, white beans contribute to the overall flavor and protein content.
  • Chickpea Flour: Acts as a binding agent and adds a nutty flavor, making these fritters gluten-free and nutritious.
  • Garlic Powder & Onion Powder: These spices enhance the flavor profile of the fritters.
  • Olive Oil: For frying, providing a crispy texture while keeping the fritters healthy.
  • Salt and Pepper: To taste, adjusting flavors to your preference.

Pro Tips for Perfect Fritters

Follow these expert tips to ensure your zucchini fritters turn out perfectly every time:

  • Moisture Management: Always squeeze out excess water from the zucchini to avoid soggy fritters. Use a cheesecloth or a clean kitchen towel.
  • Even Cooking: Fry in batches and avoid overcrowding the pan to ensure they cook evenly and get a nice golden-brown color.
  • Check for Doneness: Cook until both sides are golden brown, about 3 minutes per side, for the best flavor and texture.
  • Flavor Boost: Experiment with adding spices like cumin or smoked paprika for a unique twist on the classic flavor.
  • Use a Non-Stick Pan: To prevent sticking, use a non-stick skillet and don’t skip the olive oil.
  • Serving Suggestions: Pair these fritters with a vegan sour cream or your favorite dipping sauce for added flavor.
  • Storage: Store leftover fritters in an airtight container in the fridge for up to 3 days.
  • Reheating: Reheat in a skillet over medium heat to maintain their crispy texture.

Common Mistakes and Troubleshooting
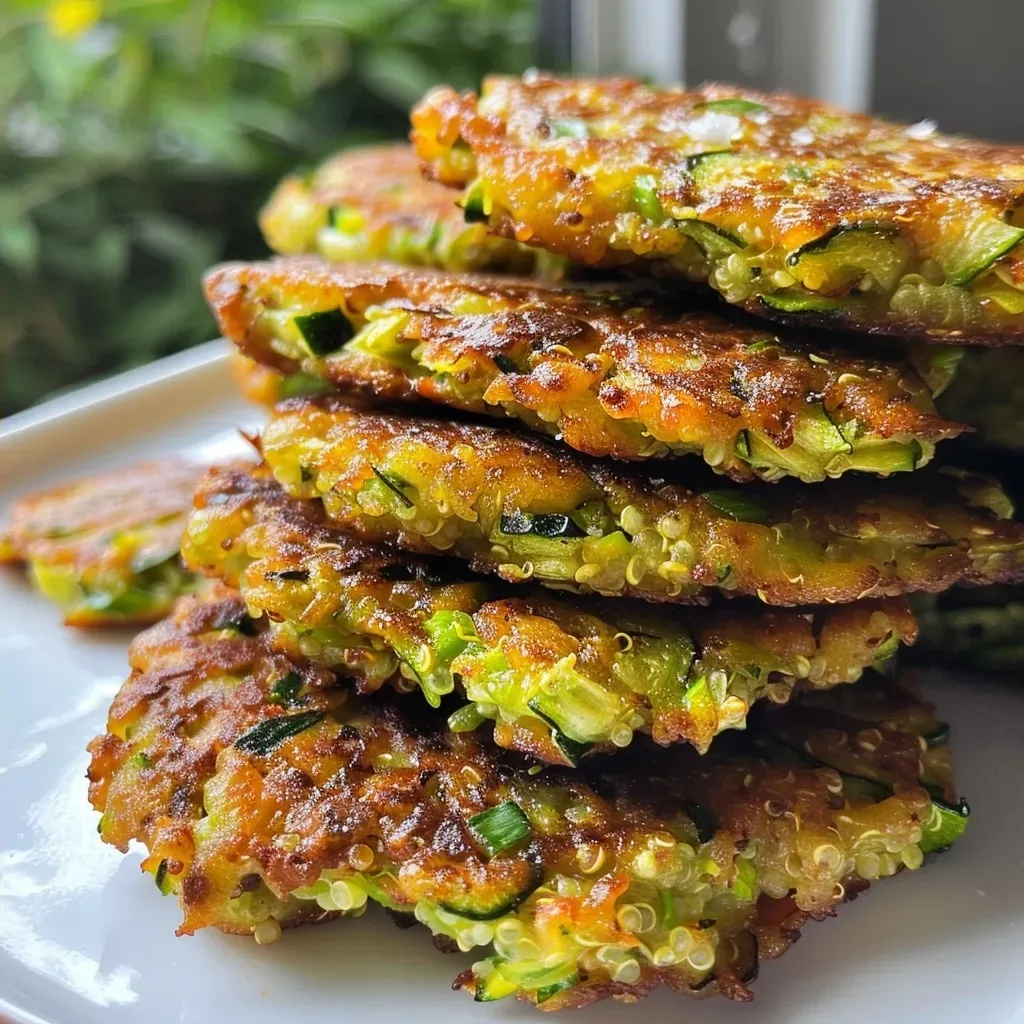
Side view of freshly cooked zucchini fritters with green onions, garnished and ready to serve.

Even the best chefs encounter challenges in the kitchen! Here are some common mistakes and how to fix them:

  • Fritters Falling Apart: Ensure you’ve squeezed out enough water from the zucchini and used enough chickpea flour to bind the mixture.
  • Burnt Outside, Raw Inside: Lower the heat and give the fritters more time to cook through; adjust your cooking time based on your stovetop.
  • Bland Flavor: Don’t skimp on seasoning! Add more salt, pepper, or spices to enhance the flavor.

Variations of Zucchini Fritters

Get creative in the kitchen! Here are some delicious variations you can try:

  • Cheesy Zucchini Fritters: Add vegan cheese or nutritional yeast for a cheesy flavor.
  • Herbed Fritters: Incorporate fresh herbs like dill, parsley, or basil for a fresh twist.
  • Spicy Fritters: Mix in chopped jalapeños or red pepper flakes for a spicy kick.
  • Sweet Potato Fritters: Substitute half of the zucchini with grated sweet potato for a different flavor and added sweetness.

Storage and Make-Ahead Instructions

These fritters are perfect for meal prep! Here’s how to store and prepare them ahead of time:

  • Make-Ahead: Prepare the batter and refrigerate it for up to 24 hours before cooking.
  • Storing Leftovers: Keep cooked fritters in an airtight container in the fridge for up to 3 days.
  • Freezing: Freeze uncooked fritters on a baking sheet until solid, then transfer to a freezer bag for up to 3 months. Cook from frozen by adding a few extra minutes to the cooking time.

Frequently Asked Questions

Here are some common questions about making zucchini fritters:

  • Can I use other types of beans? Yes! Feel free to substitute navy beans with black beans or chickpeas for a different flavor.
  • Are these fritters gluten-free? Yes, they are gluten-free as long as you use chickpea flour and ensure no other gluten-containing ingredients are added.
  • How do I make them spicier? Add chopped jalapeños to the batter or sprinkle chili flakes on top before serving.
  • Can I bake these fritters? Yes, you can bake them at 400°F (200°C) on a lined baking sheet for about 20-25 minutes, flipping halfway through.
  • What can I serve with these fritters? They pair wonderfully with vegan sour cream, guacamole, or a fresh salad.
  • How do I store leftover fritters? Keep them in an airtight container in the fridge for up to 3 days.
  • Can I reheat them? Yes! Reheat in a skillet over medium heat to retain their crispiness.
  • How many servings does this recipe yield? This recipe typically yields around 12 fritters, depending on the size.

Nutrition Tips and Dietary Adaptations

These zucchini fritters are not only delicious but also nutritious! Here’s how to adapt them for various dietary needs:

  • Low-Carb Option: Substitute the quinoa with more zucchini or use almond flour instead of chickpea flour.
  • High-Fiber Boost: Add flaxseeds or chia seeds to the batter for extra fiber.
  • Keto-Friendly: Replace the beans with additional nuts or seeds to lower the carb content.

Equipment Recommendations

To make these zucchini fritters, you’ll need:

  • Grater: For shredding the zucchini, a box grater works perfectly.
  • Mixing Bowls: Use large bowls for mixing ingredients and for squeezing out excess moisture.
  • Non-Stick Skillet: Ensures even cooking and prevents fritters from sticking.
  • Measuring Cups and Spoons: For precise ingredient measurements.

Serving Suggestions

These fritters make for a delicious main course or appetizer. Serve them with:

  • Vegan Sour Cream: A perfect creamy dip that complements the fritters beautifully.
  • Chopped Spring Onions: Fresh herbs or greens add a burst of flavor.
  • Garden Salad: Pair with a light salad for a refreshing side.
  • Avocado: Sliced or mashed avocado adds creaminess and healthy fats.

In conclusion, these high protein zucchini fritters are a delightful addition to any meal, bringing together flavor, nutrition, and ease of preparation. With every bite, you’ll not only enjoy their deliciousness but also feel good about nourishing your body. Happy cooking, and I can’t wait to hear how your fritters turn out!

High Protein Vegan Zucchini Fritters

Prep Time 15 minutes
Cook Time 15 minutes
Total Time 30 minutes
Servings 4 servings
Calories 250
These protein-packed vegan zucchini fritters are crispy, flavorful, and perfect for a healthy snack or meal. Made with quinoa, navy beans, and nutritional yeast, they offer a delicious plant-based option.

Ingredients

Vegetables

  • 3.5 cups grated zucchini (measured/weighed before squeezing out water)
  • 1 teaspoon sea salt
  • 2 green onions chopped green onions
  • 0.25 cup nutritional yeast
  • 1 cup cooked quinoa
  • 1.5 cups canned navy white beans (drained, rinsed, and smashed)
  • 0.25 cup chickpea flour
  • 0.5 teaspoon garlic powder
  • 0.25 teaspoon onion powder
  • to taste salt and pepper salt and pepper
  • 2-3 tablespoons olive oil (for frying)

Instructions 

  • Grate the zucchini, add salt, and let sit for 10 minutes. Squeeze out excess water using a cheese cloth.
  • Mix the squeezed zucchini with green onions, nutritional yeast, quinoa, smashed beans, chickpea flour, garlic, onion, salt, and pepper until combined.
  • Heat olive oil in a skillet. Scoop batter with a ⅓ cup measure and cook until browned, about 3 minutes per side.
  • Transfer cooked fritters to a warm oven to keep warm. Repeat with remaining batter, adding more oil as needed.
  • Serve with vegan sour cream and chopped spring onions.

Notes

Ensure to squeeze out as much water as possible from the zucchini for best results.
Calories: 250kcal
Cost: $15
Course: Main Course
Cuisine: vegan
Keyword: Fritters, vegan, Zucchini

Discover the Ultimate Comfort Food: A Wholesome Twist on Classic Chili

Welcome to a culinary journey that blends the rich, hearty flavors of traditional chili with a surprising twist: the sweetness of apples and the warmth of spices. In this article, we’ll explore the delightful world of Paleo and Whole30 Apple Cider Chili. This unique recipe not only satisfies your taste buds but also aligns beautifully with your health goals. Let’s dive into why this dish is a must-try for anyone looking to enjoy comfort food without compromising on nutrition.

Why You’ll Love This Recipe

This Paleo and Apple Cider Chili is not just another bowl of chili; it’s a wholesome experience packed with flavor and nutrition. Here are just a few reasons why you’ll adore this recipe:

  • Flavor Explosion: The combination of spices and the natural sweetness of apples creates a unique and satisfying flavor profile.
  • Health Benefits: Packed with protein and healthy fats, this chili supports muscle growth and keeps you satiated longer.
  • Easy to Make: With straightforward instructions and minimal prep time, this chili is perfect for both novice and experienced cooks.
  • Meal Prep Friendly: It stores well, making it an excellent choice for meal prepping your week’s lunches or dinners.
  • Kid-Friendly: The sweetness from the apple cider makes this chili appealing to children, ensuring the whole family enjoys it.

Ingredient Breakdown and Substitutions

Let’s take a closer look at the ingredients that make this chili so special, along with some potential substitutions if you’re looking to customize your dish.


Meal Prep Container Set

★ Recommended Kitchen Tool

Meal Prep Container Set

Make this recipe even easier with a quality Meal Prep Container Set — a must-have kitchen staple!


🛒 See Deals on Amazon →

As an Amazon Associate, we earn from qualifying purchases.
  • Beef Tallow: This adds a rich flavor; you can substitute with olive oil or coconut oil for a different taste.
  • Grass-Fed Ground Beef: Feel free to use ground turkey, chicken, or even plant-based alternatives for a lighter option.
  • Yellow Onion: White or red onions can be used interchangeably.
  • Tomato Paste: For a fresh twist, replace with crushed tomatoes or tomato sauce.
  • Spices: Adjust the spice levels according to your preference; add more chili powder for heat or leave out the chipotle powder for a milder version.

Step-by-Step Instructions

A side photo of a hearty Apple Cider Chili, showing ingredients like beef and apples.

Follow these simple steps to create your delicious chili:

  1. In a Dutch oven, melt the beef tallow over medium-high heat. Add the chopped onions and cook for about 2 minutes until they soften.
  2. Add the ground beef and cook for 5-7 minutes, stirring occasionally, until it’s browned.
  3. Stir in the tomato paste and the spices (chili powder, chipotle powder, cumin, cinnamon, allspice, nutmeg, sea salt) and cook for about 2 minutes, letting the spices bloom.
  4. Pour in the beef broth, apple cider, and chopped apples. Bring the mixture to a boil.
  5. Reduce the heat and let it simmer for 20-30 minutes, allowing the flavors to meld and the liquid to reduce.
  6. Adjust seasoning with extra sea salt and chipotle powder to taste before serving.

Pro Tips for Perfection

Here are some expert insights to elevate your chili-making skills:

  • Cook Low and Slow: Allowing the chili to simmer longer deepens the flavor and enhances the overall experience.
  • Batch Cooking: Make a double batch and freeze portions for quick meals on busy days.
  • Garnish Creatively: Top with fresh herbs, avocado, or a dollop of guacamole for added texture and flavor.
  • Experiment with Spices: Don’t hesitate to adjust spices based on your family’s palate. A pinch of smoked paprika can add a wonderful depth.
  • Use Fresh Ingredients: Fresh herbs and quality produce can significantly influence the final taste of your chili.
  • Make it a Meal: Pair your chili with a fresh salad or serve over a bed of cauliflower rice for a more filling meal.
  • Try Different Apples: While Granny Smith apples are tart and ideal for this dish, feel free to experiment with other varieties for different flavor profiles.
  • Let it Rest: Allowing your chili to sit for a few hours or overnight in the fridge can enhance the flavors.

Common Mistakes and Troubleshooting

Even the most experienced cooks can encounter challenges. Here’s how to avoid common pitfalls:

  • Too Runny: If your chili is too liquidy, continue to simmer uncovered to reduce the liquid.
  • Too Spicy: If it’s too hot, add a bit of sugar or more apples to balance the heat.
  • Not Enough Flavor: Ensure you’re using fresh spices and taste as you go. Adjust seasoning if necessary.
  • Overcooked Apples: If you prefer your apples firmer, add them in during the last 10 minutes of cooking.

Variations to Try

Feeling adventurous? Here are some variations to keep your chili exciting:

  • Vegetarian Chili: Substitute beans and lentils for the ground beef for a plant-based option.
  • Sweet Potato Chili: Add diced sweet potatoes for extra sweetness and nutrition.
  • Spicy Sausage Chili: Use chorizo or spicy Italian sausage for a flavor kick.
  • Pumpkin Chili: Stir in pureed pumpkin for added creaminess and fall flavor.

Storage and Make-Ahead Instructions

This Paleo Apple Cider Chili is perfect for meal prep! Here’s how to store it:

  • Refrigerate: Store leftovers in an airtight container in the fridge for up to 5 days.
  • Freeze: Portion out the chili in freezer-safe bags or containers. It can be frozen for up to 3 months.
  • Reheat: Reheat on the stovetop over medium heat, adding a splash of broth or water if needed to loosen it up.

Comprehensive FAQ

Let’s address some common questions to enhance your chili-making experience:

  • Can I use chicken instead of beef? Yes, ground chicken or turkey works well in this recipe.
  • How do I make this chili spicier? Add more chili powder or diced jalapeños to increase the heat.
  • Can I make this chili in a slow cooker? Absolutely! Brown the meat and onions first, then transfer to the slow cooker with the remaining ingredients and cook on low for 6-8 hours.
  • What can I serve with this chili? It pairs wonderfully with cornbread, fresh salads, or over rice for a heartier meal.
  • Is it gluten-free? Yes, all ingredients used in this recipe are naturally gluten-free.
  • Can I add beans to this chili? If you’re not strictly following a Paleo diet, feel free to add black or kidney beans.
  • What apples work best in this recipe? Granny Smith apples are ideal for their tartness, but feel free to experiment with your favorites!
  • How can I make this chili less sweet? Reduce the amount of apple cider or add more savory spices to balance the sweetness.

Nutrition Tips and Dietary Adaptations

This chili is not only delicious but also packed with nutrition. Here’s how to enhance its health benefits:

  • Increase Fiber: Add more vegetables such as bell peppers or zucchini to boost fiber content.
  • Protein Boost: Incorporate black beans or lentils for additional protein.
  • Healthy Fats: Top with avocado for a dose of healthy fats and creaminess.

Equipment Recommendations

Having the right tools can make your cooking experience smoother. Here are my top picks:

  • Dutch Oven: Perfect for slow cooking and developing flavors.
  • Wooden Spoon: Ideal for stirring without scratching your cookware.
  • Measuring Cups and Spoons: Accuracy in measuring ingredients ensures consistent results.

Serving Suggestions

Enhance your chili experience with these serving ideas:

  • Top with Fresh Herbs: A sprinkle of cilantro or parsley can brighten up the dish.
  • Serve with Avocado: Creamy avocado slices add a delightful contrast to the chili.
  • Pair with Fresh Bread: A slice of whole-grain bread or cornbread complements the flavors beautifully.

In conclusion, this Paleo and Whole30 Apple Cider Chili is not just a recipe; it’s a celebration of flavors and a testament to the joy of cooking. Whether you’re making it for a cozy family dinner or meal prepping for a busy week, this chili is sure to become a favorite in your home. So grab your ingredients, embrace the process, and enjoy the warmth of delicious home-cooked comfort food. Happy cooking!

Paleo and Whole30 Apple Cider Chili

Prep Time 10 minutes
Cook Time 30 minutes
Total Time 40 minutes
Servings 4 servings
Calories 350
A hearty, flavorful chili perfect for paleo and Whole30 diets, featuring tender beef, apples, and warming spices.

Ingredients

Main

  • 1 tbsp beef tallow
  • 1 lb grass fed ground beef
  • 1 large yellow onion, chopped
  • 6 oz tomato paste
  • 2 tbsp chili powder
  • 0.5 tsp chipotle powder
  • 2 tsp cumin
  • 1 tsp cinnamon
  • 0.5 tsp allspice
  • 0.25 tsp nutmeg
  • 1 tsp sea salt
  • 3 c beef broth
  • 1 c apple cider (100% apple cider)
  • 2 large Granny Smith apples, peeled, cored and chopped

Instructions 

  • Melt beef tallow in a Dutch oven over medium-high heat. Add onions and cook 2 minutes.
  • Add ground beef and cook 5-7 minutes until browned.
  • Stir in tomato paste and spices; cook 2 minutes.
  • Add beef broth, apple cider, and apples; bring to a boil.
  • Reduce heat and simmer 20-30 minutes until liquid reduces.
  • Adjust seasoning with sea salt and chipotle powder to taste.

Notes

This chili is perfect for a cozy, healthy meal that fits paleo and Whole30 guidelines.
Calories: 350kcal
Cost: $15
Course: Main Course
Cuisine: American
Keyword: apple, Chili, paleo, whole30

Experience the Joy of Baking with Sweet Potato Donuts

Welcome to the delightful world of baking! These Delightfully Decadent Pecan Sweet Potato Baked Donuts with Coconut Maple Glaze are an incredible way to experience the flavors of fall while treating yourself to something both delicious and nutritious. With a combination of wholesome ingredients and the warmth of sweet potatoes and pecans, this recipe is sure to become a family favorite. Not only do these donuts satisfy your sweet tooth, but they also provide health benefits, making them a perfect guilt-free indulgence. Dive in and discover how easy it is to create these baked sweet potato donuts in your own kitchen!

Why You’ll Love This Recipe

  • Nutritious Ingredients: Each donut is packed with the goodness of sweet potatoes, providing vitamins and minerals that are good for you.
  • Easy to Make: This recipe is straightforward, making it perfect for both beginners and seasoned bakers.
  • Customizable Toppings: You can easily add your favorite toppings like nuts or coconut for unique flavors.
  • Perfect for Any Occasion: Whether it’s a weekend brunch or a cozy family gathering, these donuts are the ideal treat.
  • Freezer Friendly: Make a batch ahead of time and store them in the freezer for a quick breakfast or snack.

Ingredients Breakdown

To create these delectable donuts, you’ll need the following ingredients:

  • 1½ cups organic flour: Provides structure and a light texture to the donuts.
  • 1 tsp baking powder: Essential for achieving that perfect rise.
  • ½ tsp kosher salt: Enhances the flavors of the other ingredients.
  • 1 tsp ground cinnamon: Adds a warm and inviting spice that complements sweet potatoes.
  • ¾ cup mashed sweet potato: Naturally sweet and nutritious, it forms the base of the donuts.
  • 3 tbsp coconut oil: Adds richness and moisture; you can substitute with melted butter if desired.
  • ⅓ cup Harmless Harvest Unsweetened Plain Dairy-Free Yogurt: Provides creaminess without dairy; perfect for a moist texture.
  • 1 tsp vanilla extract: Enhances the overall flavor profile.
  • Pecans (optional for topping): Adds a delightful crunch and nutty flavor.
  • 1⅓ cup powdered monk fruit: A healthier sweetener option that keeps the donuts deliciously sweet.
  • 2 tbsp Harmless Harvest Unsweetened Plain Dairy-Free Yogurt (for glaze): Creates a creamy glaze that pairs wonderfully with the donuts.
  • 1 tbsp maple syrup: Adds a natural sweetness to the glaze.
  • ¼ cup chopped pecans (for glaze): Optional, but adds extra texture and flavor.

How to Make Pecan Sweet Potato Baked Donuts

Side view of delicious baked donuts topped with chopped pecans and coconut glaze.

Ready to bring these tasty donuts to life? Follow these simple steps:


Silicone Baking Cups Set

★ Recommended Kitchen Tool

Silicone Baking Cups Set

Make this recipe even easier with a quality Silicone Baking Cups Set — a must-have kitchen staple!


🛒 Check Price on Amazon →

As an Amazon Associate, we earn from qualifying purchases.
  1. Preheat your oven to 375°F (190°C).
  2. Mix the Dry Ingredients: In a large bowl, combine all dry ingredients (flour, baking powder, salt, cinnamon) and mix well. Reserve the pecans for later.
  3. Incorporate Wet Ingredients: Slowly add the mashed sweet potato, coconut oil, yogurt, and vanilla extract to the dry mixture. Stir until fully combined.
  4. Fill the Donut Molds: Pour the donut batter into 7 silicone molds, filling each about ¾ full.
  5. Bake for 11-13 minutes, or until a toothpick comes out clean.
  6. Prepare the Coconut Maple Glaze: While the donuts are baking, mix the yogurt, maple syrup, and optional chopped pecans in a bowl until smooth.
  7. Cool and Glaze: Let the donuts cool completely before drizzling the glaze on top.
  8. Enjoy! Sprinkle more pecans on top of the glaze for added crunch and flavor.

Pro Tips for Perfect Donuts

  • Use Fresh Ingredients: Ensure your sweet potatoes are fresh for optimal flavor and moisture.
  • Don’t Overmix: Gently combine the wet and dry ingredients to avoid dense donuts.
  • Check Doneness: Use a toothpick to check if donuts are baked through; they should spring back when touched.
  • Experiment with Flavors: Feel free to add in spices like nutmeg or ginger for a unique twist.
  • Consider a Glaze Alternative: If you’re looking for a lighter option, a dusting of powdered sugar works beautifully.
  • Use High-Quality Maple Syrup: The quality of your syrup can greatly affect the glaze’s flavor.
  • Let Them Cool Completely: This prevents the glaze from melting into the donuts.
  • Try Different Shapes: If you don’t have a donut pan, use muffin tins for sweet potato muffins!

Common Mistakes and Troubleshooting

Even experienced bakers encounter issues. Here are some common mistakes and how to fix them:

  • Dense Donuts: This often happens from overmixing. Mix until just combined.
  • Uneven Baking: Ensure your oven is calibrated correctly and rotate the pans halfway through baking.
  • Glaze Too Runny: Add more powdered monk fruit to thicken it up.
  • Sticking to the Pan: Make sure to use silicone molds or grease the molds well before filling.

Variations to Try

Add your personal touch to these baked donuts with these variations:

  • Chocolate Chip Sweet Potato Donuts: Add ½ cup of dairy-free chocolate chips to the batter for a chocolatey twist.
  • Pumpkin Spice Donuts: Substitute half of the sweet potato with pumpkin puree and add pumpkin pie spice.
  • Maple Pecan Donuts: Mix chopped pecans into the batter for extra crunch and flavor.
  • Coconut Lime Glaze: Replace maple syrup in the glaze with lime juice for a zesty flavor.

Storage and Make-Ahead Instructions

These donuts can be made ahead of time and stored for future enjoyment:

  • Room Temperature: Store in an airtight container for up to 3 days.
  • Refrigerator: Keep in the fridge for up to 1 week; reheat in the microwave for a few seconds before serving.
  • Freezer: Wrap each donut in plastic wrap and store in a freezer-safe bag for up to 3 months. Thaw at room temperature or microwave for a quick treat.

Frequently Asked Questions

  • Can I use regular flour instead of organic flour? Yes, all-purpose flour works perfectly as well.
  • How do I know if my sweet potato is cooked? A cooked sweet potato should be soft and mash easily with a fork.
  • Can I substitute the coconut oil? You can use melted butter or any neutral oil like vegetable or canola oil.
  • What can I use instead of monk fruit? Coconut sugar or brown sugar can be used as alternatives, keeping in mind they may alter the sweetness level.
  • Are these donuts gluten-free? You can make them gluten-free by using a gluten-free flour blend.
  • Can I add nuts to the batter? Absolutely! Adding nuts like walnuts or pecans can add a delicious crunch.
  • How do I make the glaze thicker? Simply add more powdered monk fruit or reduce the amount of liquid in the glaze.
  • Are these donuts suitable for kids? Yes, they are a healthy and tasty treat that kids will love!

Nutritional Tips and Dietary Adaptations

These baked sweet potato donuts are not just tasty but can also fit various dietary needs:

  • Vegan Option: The recipe is already vegan-friendly due to the use of dairy-free yogurt and coconut oil.
  • Lower Sugar Option: Substitute monk fruit with a sugar substitute that fits your dietary needs.
  • High Fiber: Sweet potatoes are a great source of fiber, promoting digestive health.

Equipment Recommendations

To make your baking experience seamless, consider using:

  • Silicone Donut Molds: These allow for easy removal and are reusable.
  • Mixing Bowls: A set of nesting bowls is perfect for combining ingredients.
  • Whisk: A sturdy whisk helps mix ingredients thoroughly.
  • Measuring Cups and Spoons: Accurate measurements ensure consistent results.

Serving Suggestions

These donuts can be served in various delightful ways:

  • With Coffee or Tea: Pair these donuts with a warm beverage for a cozy breakfast.
  • As a Dessert: Top with additional chocolate or a scoop of dairy-free ice cream for a decadent treat.
  • Gift Them!: Package them beautifully to share with friends or family. They make a lovely homemade gift!

In conclusion, these Pecan Sweet Potato Baked Donuts with Coconut Maple Glaze bring together the best of flavor, nutrition, and ease of preparation. They’re not just a dessert; they’re an experience of warmth, creativity, and connection. So roll up your sleeves, gather your ingredients, and indulge in the joy of baking with this wonderful recipe. Happy baking!

Pecan Sweet Potato Baked Donuts With Coconut Maple Glaze

Prep Time 10 minutes
Cook Time 12 minutes
Total Time 22 minutes
Servings 7 donuts
Calories 210
Delight in these moist, flavorful donuts combining sweet potato, cinnamon, and crunchy pecans, topped with a luscious coconut maple glaze.

Ingredients

Dry Ingredients

  • 1.5 cups organic flour
  • 1 tsp baking powder
  • 0.5 tsp kosher salt
  • 1 tsp ground cinnamon

Wet Ingredients

  • 0.75 cup mashed sweet potato
  • 3 tbsp coconut oil
  • 0.33 cup Harmless Harvest Unsweetened Plain Dairy-Free Yogurt
  • 1 tsp vanilla extract

Toppings & Glaze

  • 1⅓ cup powdered monk fruit
  • 2 tbsp Harmless Harvest Unsweetened Plain Dairy-Free Yogurt (for glaze)
  • 1 tbsp maple syrup
  • 0.25 cup chopped pecans (for glaze)

Instructions 

  • Preheat oven to 375°F (190°C).
  • Mix dry ingredients in a bowl, then add wet ingredients and combine.
  • Pour batter into silicone molds and bake for 11-13 minutes.
  • Prepare glaze by mixing yogurt, maple syrup, and monk fruit.
  • Cool donuts completely, then top with glaze and pecans.

Notes

Store leftovers in an airtight container for up to 2 days.
Calories: 210kcal
Cost: $15
Course: Dessert
Cuisine: American
Keyword: Sweet Potato

Welcome to the whimsical world of Molten Monster Chocolate Bark! This gluten-free treat combines gooey white chocolate, vibrant colors, and playful toppings for a delightful dessert that’s perfect for any occasion. In this comprehensive guide, you’ll discover everything from the ingredients needed to expert tips, variations, and creative serving suggestions. Let’s dive into the fun!

Why You’ll Love This Recipe

This Molten Monster Chocolate Bark isn’t just a treat; it’s an experience! Here are five reasons why you’ll adore making this recipe:

  • Easy to Make: With just a few simple ingredients and minimal preparation time, you can whip up this dessert in no time!
  • Gluten-Free Delight: Perfect for those with dietary restrictions, this bark is entirely gluten-free, making it a safe and tasty option for everyone.
  • Visually Stunning: The vibrant colors and playful decorations make this dessert a feast for the eyes, perfect for parties and gatherings.
  • Customizable Toppings: You can easily adapt the toppings to suit your tastes or the season—think Halloween, Christmas, or any festive occasion!
  • Make Ahead: This chocolate bark can be prepared in advance, allowing you to plan ahead for events or just have a sweet treat on hand.

Ingredients Breakdown

For this recipe, you’ll need the following ingredients:


Silicone Baking Cups Set

★ Recommended Kitchen Tool

Silicone Baking Cups Set

Make this recipe even easier with a quality Silicone Baking Cups Set — a must-have kitchen staple!


🛒 Check Price on Amazon →

As an Amazon Associate, we earn from qualifying purchases.
  • 300g white chocolate: Ensure you use high-quality chocolate for the best flavor and melting consistency.
  • Blue and green gel-based food colorings: These vibrant colors will bring your monster bark to life!
  • A handful of mini marshmallows: Perfect for creating texture and fun.
  • Edible eye decorations: These will give your bark its monster character!
  • 40g lips and teeth gummy sweets: A delightful touch to enhance the visual appeal.

How to Make Molten Monster Chocolate Bark

Follow these simple steps to create your Molten Monster Chocolate Bark:

  1. Line a small baking tray (ideally 26cm x 19cm or similar) with greaseproof paper and set aside.
  2. Prepare two small ramekins and squeeze a small blob of food gel into each—one green, one blue.
  3. Finely chop the white chocolate and place it into a microwaveable bowl. Microwave in 30-second blasts, stirring in between, until you have lovely smooth molten chocolate.
  4. Now pour a tablespoon of white chocolate into each of the ramekins containing the food coloring, and then pour the rest of the chocolate into the tray. Use a spatula to level the chocolate out and push it into the corners.
  5. You’ll need to work quite quickly with the colored chocolate. Stir each ramekin so that the white chocolate and food gel are well mixed, then immediately drizzle the green and blue chocolates over the main tray of white chocolate. Drag a skewer or fork through the surface of the chocolate to create a swirling pattern.
  6. Scatter the mini marshmallows onto the chocolate so that they sink slightly into it.
  7. After a couple of minutes, the chocolate should have begun to thicken—test by adding a few sprinkles to the middle. If they sink, wait another couple of minutes as you want them to stick to the top of the bark.
  8. Generously scatter the sprinkles all over the surface, then arrange the edible eyes, lips, and teeth in the white chocolate to create some spookily cute monster faces.
  9. Place into the fridge to set for 1-2 hours.
  10. Once set, remove from the tray and peel off the greaseproof paper. Break into shards with your hands or cut with a knife if you prefer. You can either serve straight away or store in the fridge until ready. It’ll keep for a few days in the fridge so you can make it ahead of time.

Pro Tips for Perfecting Your Bark

Side view of a chocolate bark layered with white chocolate and topped with edible decorations.

To ensure your Molten Monster Chocolate Bark turns out perfectly every time, consider these expert insights:

  • Choose Quality Chocolate: The flavor of your bark heavily depends on the quality of the white chocolate you select. Opt for real chocolate rather than compound chocolate for the best results.
  • Work Quickly: Chocolate can set rapidly, especially when mixed with other ingredients. Be prepared to move swiftly when drizzling colors and adding toppings.
  • Get Creative with Colors: While this recipe features blue and green, feel free to use any colors you like! Seasonal themes can add a unique twist.
  • Use a Toothpick or Skewer: For creating swirling patterns, a toothpick or skewer works wonderfully. The swirls can add an artistic touch to your bark.
  • Experiment with Toppings: Don’t hesitate to change up the toppings! Consider crushed nuts, dried fruits, or even other candies for a unique flavor profile.
  • Storage Matters: Store your chocolate bark in an airtight container to keep it fresh for longer. If storing in the fridge, allow it to come to room temperature before serving for the best texture.
  • Consider Dietary Needs: Always check labels for gluten content, especially in sprinkles and gummies, to ensure your treat remains gluten-free.
  • Chill Before Cutting: If you want neat edges, chill the bark until fully set before cutting into pieces.

Common Mistakes and Troubleshooting

Even the best chefs can face challenges! Here are some common mistakes to avoid:

  • Chocolate Isn’t Melting Smoothly: If your chocolate seizes or doesn’t melt smoothly, you may have overheated it. Try adding a teaspoon of coconut oil to smooth it out.
  • Colors Aren’t Vibrant: If your colors seem muted, ensure you’re using gel-based colorings, as liquid colorings can dilute the chocolate.
  • Toppings Are Sinking: If your toppings sink instead of staying on top, wait a few minutes after pouring the chocolate before adding them. The chocolate should start to thicken slightly.
  • Bark Won’t Break Cleanly: If the bark crumbles or doesn’t break into clean pieces, it may not have set long enough. Allow it to chill longer in the fridge.

Delicious Variations to Try

Here are some fun variations you can explore to keep things exciting:

  • Chocolate Lovers’ Delight: Swap white chocolate for milk or dark chocolate for a richer flavor.
  • Nutty Monster Bark: Add a handful of chopped nuts like almonds or hazelnuts for a crunchy texture.
  • Fruity Fun: Toss in some dried fruits like cranberries or apricots for a chewy bite.
  • Holiday Themed Bark: Change the colors and toppings to fit any holiday, such as red and green for Christmas or pastels for Easter.

Storage and Make-Ahead Instructions

Planning ahead? Here’s how to store your Molten Monster Chocolate Bark:

  • In the Fridge: Store in an airtight container for up to a week. Allow to sit at room temperature before serving for optimal texture.
  • In the Freezer: For longer storage, freeze individual pieces between layers of parchment paper in a freezer-safe container for up to three months.
  • Make Ahead: You can prepare this bark up to a week in advance, making it a perfect choice for parties or holiday gatherings.

FAQ: Your Questions Answered

Here are some common questions about Molten Monster Chocolate Bark:

  • Is this recipe gluten-free? Yes! All ingredients used in the recipe are gluten-free.
  • Can I use different types of chocolate? Absolutely! Feel free to substitute with milk or dark chocolate for a different flavor.
  • How do I know when the chocolate is melted? It should be smooth and shiny, with no lumps. Stir it well to ensure even melting.
  • Can I add more colors? Yes! Get creative with as many colors as you like to make your bark festive.
  • How long does the bark last? When stored properly, it lasts for about a week in the fridge or up to three months in the freezer.
  • What are some good toppings for this bark? You can use sprinkles, crushed cookies, dried fruits, nuts, or any candy you love!
  • Can I make this recipe vegan? Yes! Use vegan white chocolate and ensure all toppings are vegan-friendly.
  • What’s the best way to cut the bark? Use a sharp knife or simply break it with your hands for a rustic look.

Nutrition Tips and Dietary Adaptations

When crafting your Molten Monster Chocolate Bark, consider these nutrition tips:

  • Portion Control: Keep servings reasonable, as chocolate can be high in calories and sugar.
  • Mindful Ingredients: Check for allergens in toppings, especially if serving to a group.
  • Healthier Options: Substitute some of the chocolate with a nut butter layer for added nutrition.

Equipment Recommendations

Here are a few tools that will make your chocolate bark making journey easier:

  • Microwave-safe Bowl: For melting the chocolate efficiently.
  • Baking Tray: A small, lined baking tray is essential for setting the bark.
  • Spatula: For leveling the chocolate in the tray.
  • Ramekins: To mix and hold your food coloring.
  • Skewer or Toothpick: For creating designs in the chocolate.

Serving Suggestions

To serve your Molten Monster Chocolate Bark, consider these creative ideas:

  • Platter Display: Arrange pieces on a colorful platter for a festive presentation.
  • Party Favors: Wrap individual pieces in clear bags tied with ribbon for fun party favors.
  • Ice Cream Topping: Crumble pieces over ice cream for a delicious combination.

Now that you have all the tips and tricks, you’re ready to create your own Molten Monster Chocolate Bark! Enjoy the process and the delightful treat that follows. Remember, cooking is about connection, joy, and creativity—so have fun with it!

Molten Monster Chocolate Bark (GF)

Prep Time 15 minutes
Cook Time 10 minutes
Total Time 25 minutes
Servings 8 pieces
Calories 250
A fun and spooky gluten-free chocolate bark perfect for Halloween or any monster-themed celebration.

Ingredients

Main ingredients

  • 300 g white chocolate
  • 1 tsp blue gel-based food colouring
  • 1 tsp green gel-based food colouring
  • 1 handful mini marshmallows
  • A handful edible eye decorations
  • 40 g lips and teeth gummy sweets

Instructions 

  • Line a small baking tray with greaseproof paper.
  • Microwave chopped white chocolate in 30-second bursts until smooth. Squeeze small blobs of blue and green gel into ramekins.
  • Mix a small amount of white chocolate with each gel colour, then pour the rest into the tray. Swirl the colours with a skewer for a marbled effect.
  • Scatter mini marshmallows and press sprinkles into the surface. Decorate with edible eyes, lips, and teeth to create monster faces.
  • Refrigerate for 1-2 hours until set. Break into shards and serve or store in the fridge.

Notes

Work quickly when swirling the colours to achieve a marbled effect.
Calories: 250kcal
Cost: $15
Course: Dessert
Cuisine: International
Keyword: chocolate, gluten free, monster

Unleashing the Magic: Witches’ Brew Punch for Your Halloween Party

As the leaves turn and the air gets crisp, it’s time to embrace the enchanting spirit of Halloween. One delightful way to do this is by crafting a mesmerizing Witches’ Brew Punch that will not only tantalize the taste buds but also enchant your guests. This punch is a vibrant blend of citrusy sodas, tart juices, and a swirl of creamy sherbet that creates a delightful experience, making it the star of any Halloween gathering. Whether you’re planning a spooky soirée or a family-friendly celebration, this punch is sure to be a hit.

In this guide, we will walk you through all the steps to make the perfect Witches’ Brew Punch, complete with tips, variations, and answers to your burning questions. So grab your cauldron (or punch bowl) and let’s brew up some fun!

Why You’ll Love This Recipe

  • Quick and Easy: This punch comes together in just a few minutes, making it an effortless addition to your Halloween festivities.
  • Kid-Friendly: The vibrant colors and sweet flavors are sure to delight children and adults alike, making it perfect for family gatherings.
  • Customizable: You can easily adjust the ingredients to cater to different tastes, whether you prefer a sweeter punch or something with a bit more tartness.
  • Visually Stunning: With its bubbling, colorful appearance, this punch not only tastes great but also serves as a beautiful centerpiece for your table.
  • Incorporates Fun Elements: Adding dry ice for a smoky effect creates an enchanting experience that will wow your guests!

Ingredients Breakdown

Here’s what you’ll need to create your Witches’ Brew Punch:


Digital Kitchen Scale

★ Recommended Kitchen Tool

Digital Kitchen Scale

Make this recipe even easier with a quality Digital Kitchen Scale — a must-have kitchen staple!


🛒 Shop This Tool →

As an Amazon Associate, we earn from qualifying purchases.
  • Citrusy sodas: Use lemon-lime soda or orange soda as a base for a refreshing fizz.
  • Tart juices: Pineapple juice adds a sweet and tangy element that balances the punch perfectly.
  • Sherbet: Lime or orange sherbet adds a creamy texture and delightful flavor, making the punch extra special.
  • Sweet foam: Whipped cream or marshmallow fluff can be added for a fun, frothy top.
  • Candy and sprinkles: Use Halloween-themed candy or colorful sprinkles to add a festive touch to your punch.

Crafting the Perfect Witches’ Brew Punch

Side angle of a bowl filled with Witches' Brew Punch, showcasing fizzy sodas and colorful garnishes.

Ready to make your magical concoction? Follow these steps:

  • Blend citrusy sodas and tart juices together in a large punch bowl.
  • Add a generous scoop of sherbet to create a foggy potion effect.
  • Top the punch with sweet foam, and decorate it with candy and sprinkles for that final touch.

Pro Tips for the Perfect Punch

Make your Witches’ Brew Punch even more enchanting with these expert tips:

  • Use Chilled Ingredients: Keep your sodas and juices chilled before mixing to ensure your punch stays refreshing.
  • Dry Ice Safety: If you want to add dry ice for a spooky fog effect, always handle it with gloves and never serve it directly in drinks.
  • Mix Just Before Serving: For optimal fizz, mix your ingredients just before your guests arrive.
  • Garnish Creatively: Add gummy worms, plastic spiders, or creepy eyeball candies for an extra fun presentation.
  • Make It Ahead: Prepare the juices and sodas in advance, but add the sherbet right before serving to maintain its texture.
  • Serving Size: Estimate about 1 cup of punch per guest to ensure everyone gets their fill.
  • Use a Large Bowl: A big punch bowl or cauldron not only holds more but also allows for better mixing and presentation.
  • Experiment with Flavors: Don’t hesitate to swap out ingredients for your favorites or seasonal fruits!

Common Mistakes and Troubleshooting

Even the best of us can make mistakes in the kitchen. Here’s how to avoid common pitfalls:

  • Too Sweet: If your punch turns out too sweet, balance it with a splash of citrus juice.
  • Flat Punch: If your punch loses its fizz, consider serving it in smaller batches and refreshing it as needed.
  • Color Issues: If your punch isn’t as vibrant as you hoped, try adding a splash of food coloring or using colorful sodas.
  • Foam Too Thick: If the foam becomes too thick, you can dilute it slightly with more soda to achieve the desired consistency.

Variations on the Classic Recipe

Feeling adventurous? Here are some fun variations to try:

  • Zombie Brains Punch: Add a splash of cranberry juice for a spooky red hue and a tart flavor.
  • Pumpkin Patch Punch: Incorporate pumpkin puree and spices like cinnamon for a fall-inspired twist.
  • Berry Boo Punch: Use berry-flavored sodas and add fresh berries for a colorful and fruity option.
  • Spooky Green Punch: Mix in green food coloring and serve with gummy worms for a creepy effect.

Storage and Make-Ahead Instructions

Planning ahead? Here’s how to store your punch:

  • Refrigerate Ingredients: Keep all your punch ingredients in the refrigerator until you’re ready to mix.
  • Mixing Ahead: You can prepare the juices and sodas the night before, but wait to add the sherbet until just before serving.
  • Leftover Punch: If you have any punch left over, store it in an airtight container in the refrigerator for up to 2 days. Just remember, the fizz will diminish over time.

Frequently Asked Questions (FAQs)

  • Can I use diet sodas? Yes! Feel free to substitute with diet options for a lower-calorie punch.
  • How do I make this punch more adult-friendly? Consider adding a splash of vodka or rum for a spirited twist.
  • Can I use fresh fruit? Absolutely! Fresh fruit slices add flavor and a beautiful presentation.
  • What if I can’t find sherbet? You can use ice cream or frozen yogurt as a substitute.
  • Is this punch gluten-free? Yes, all the ingredients can be gluten-free; always check labels to be sure.
  • How can I make this punch non-alcoholic? Simply omit any alcohol and enjoy the fruity flavors!
  • What type of punch bowl should I use? A large, clear punch bowl or a decorative cauldron works best to showcase the colorful layers.
  • Can I make this punch vegan? Yes! Use plant-based sherbet or sorbet and ensure all other ingredients are vegan-friendly.

Nutritional Tips and Dietary Adaptations

Here are some considerations to keep in mind:

  • Lower Sugar Options: Opt for sugar-free sodas and juices for a healthier version.
  • Incorporate Fresh Ingredients: Use fresh fruit juices instead of store-bought for added nutrients.
  • Allergy Considerations: Always ask your guests about allergies, especially regarding candies and toppings.

Essential Equipment for Punch Perfection

To craft your Witches’ Brew Punch, you’ll need:

  • A Large Punch Bowl: For mixing and serving.
  • Measuring Cups: To measure liquids accurately.
  • Serving Ladle: For easy serving of your punch.
  • Garnishing Tools: Use a knife for slicing fruits and a spoon for scooping sherbet.

Serving Suggestions

To create an inviting atmosphere, consider these serving suggestions:

  • Use Fun Glassware: Serve the punch in Halloween-themed cups or mason jars for an extra festive touch.
  • Pair with Snacks: Offer salty snacks like popcorn or chips to balance the sweetness of the punch.
  • Create a Punch Station: Set up a self-serve station with cups, garnishes, and decorations for guests to customize their drinks.

Conclusion

There you have it! Your ultimate guide to crafting the perfect Witches’ Brew Punch that will surely enchant your guests this Halloween. Remember, cooking is all about creativity and connection, so feel free to make this recipe your own. Enjoy the laughter, the memories, and of course, the delicious punch! Happy brewing!

Witches’ Brew Punch

Prep Time 10 minutes
Total Time 10 minutes
Servings 8 cups
Calories 150
A spooky and fun Halloween punch that combines citrusy sodas, tart juices, and playful toppings for a magical effect.

Ingredients

Beverages

  • 2 cups citrusy sodas
  • 1.5 cups tart juices

Toppings

  • 1 cup sherbet
  • 1/2 cup sweet foam
  • 1 cup candy (Halloween-themed)
  • 2 tbsp sprinkles (Colorful for decoration)

Instructions 

  • Blend citrusy sodas and tart juices together.
  • Add sherbet to create a foggy effect.
  • Top with sweet foam, candy, and sprinkles.

Notes

Use colorful candies and sprinkles for a more festive look.
Calories: 150kcal
Cost: $15
Course: Beverage
Cuisine: Halloween
Keyword: punch

Welcome to the Ultimate Comfort Food: Chili Cornbread Casserole

There’s a special place in every heart for comforting meals that bring family and friends together. One such dish is the Chili Cornbread Casserole, an irresistible blend of zesty chili and fluffy cornbread that warms the soul. In this guide, you’ll discover not just how to make this delicious casserole but also tips for enhancing your culinary skills and creating memories around the dinner table. Let’s dive into the rich flavors and textures that make this dish a must-try!

Why You’ll Love This Recipe

Here are just a few reasons why this Chili Cornbread Casserole will become a favorite in your kitchen:

  • Easy Preparation: With a straightforward process, this recipe allows you to enjoy cooking without stress, making it perfect for weeknight dinners.
  • Hearty and Satisfying: The combination of ground beef and chili beans provides a filling meal that will keep everyone satisfied.
  • Versatile Ingredients: You can easily swap ingredients based on what you have on hand or dietary preferences.
  • Make-Ahead Friendly: Prepare it in advance for busy nights and simply reheat when needed.
  • Perfect for Gatherings: This casserole is a crowd-pleaser, making it an excellent choice for potlucks and family meals.

Ingredient Breakdown

Before we start cooking, let’s take a closer look at the ingredients that make this dish shine:


Professional Chef Knife Set

★ Recommended Kitchen Tool

Professional Chef Knife Set

Make this recipe even easier with a quality Professional Chef Knife Set — a must-have kitchen staple!


🛒 See Deals on Amazon →

As an Amazon Associate, we earn from qualifying purchases.
  • 2 tablespoons olive oil: For sautéing your onions and garlic, adding a lovely richness.
  • 2 pounds lean ground beef: This will form the base of your chili; opt for 80/20 for the best balance of flavor and moisture.
  • 1 cup diced yellow onion: Essential for flavor; feel free to substitute with shallots for a sweeter taste.
  • 1 tablespoon minced garlic: Fresh garlic elevates the flavor profile significantly.
  • 2 tablespoons tomato paste: Adds depth and richness to the chili.
  • 14.5 ounce can petite diced tomatoes (drained): A juicy addition that enhances the sauce.
  • 30 ounce can tomato sauce: Creates the base of your chili sauce.
  • 15 ounce can mild chili beans in sauce (drained but not rinsed): A hearty addition that brings texture and flavor.
  • 1.25 ounce packet chili seasoning mix: For convenience, use store-bought or make your own blend with cumin, paprika, and chili powder.
  • ¾ cup whole milk: Adds moisture to the cornbread batter.
  • 2 large eggs (room temperature): Essential for binding the cornbread.
  • 2 (8.5 ounce) boxes Jiffy brand cornbread mix: A quick and easy base for your cornbread topping.
  • ¾ cup sweet yellow corn: For added texture and sweetness.
  • 1 cup shredded mild cheddar cheese: Melts beautifully and adds a cheesy goodness to the top.
  • Sour Cream: A dollop on top adds creaminess and tang.
  • Thinly sliced green onions (scallions): For garnish and freshness.

Pro Tips for the Perfect Chili Cornbread Casserole

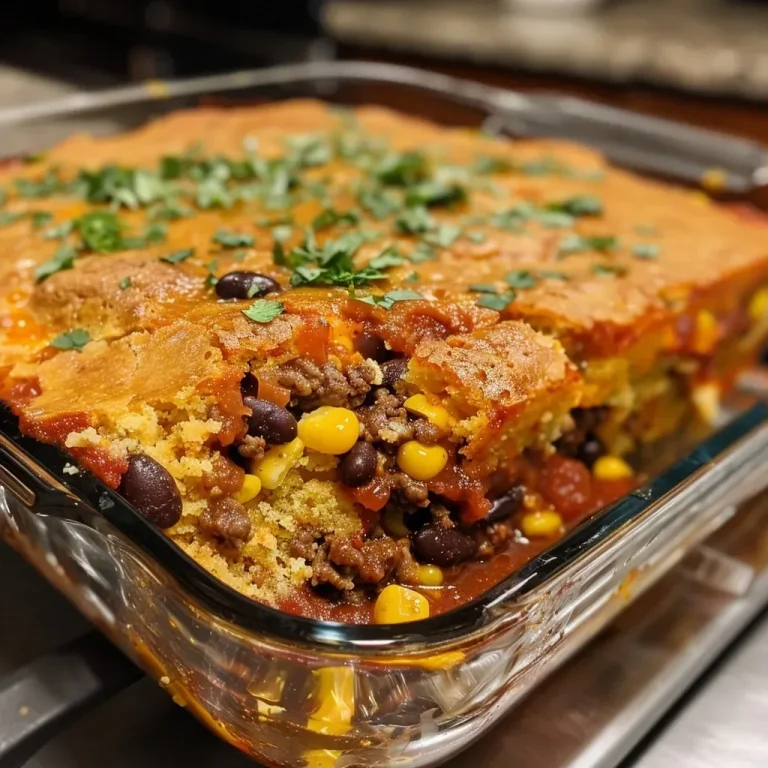
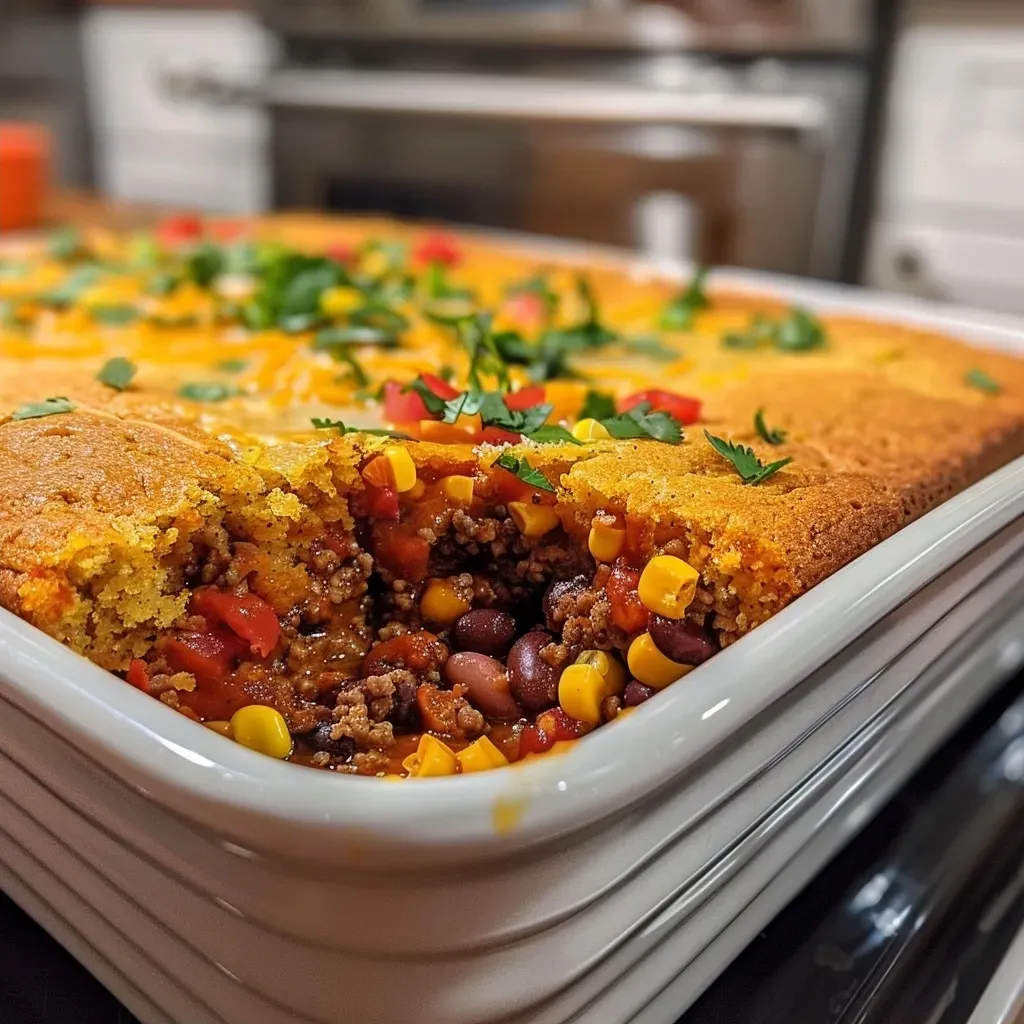
Side view of a hearty Chili Cornbread Casserole, with melted cheese and green onions garnishing the top.

Here are some expert insights to ensure your casserole turns out perfect every time:

  • Simmering is Key: Let your chili mixture simmer for at least 15 minutes to develop rich flavors and avoid excess moisture.
  • Check the Cornbread: If the top browns too quickly, tent it with foil to ensure the center cooks through.
  • Don’t Skimp on Cheese: Adding cheese to both the chili and the topping creates a delightful gooey texture.
  • Ingredient Temperature Matters: Use room temperature eggs and milk for the cornbread batter to ensure even mixing.
  • Layering Technique: Pour the cornbread batter over the chili mixture instead of mixing them together for distinct layers.
  • Herb Enhancements: Add fresh herbs like cilantro or parsley for a burst of freshness.
  • Spice it Up: If you like heat, consider adding diced jalapeños or a splash of hot sauce to the chili.
  • Storage Solutions: Use airtight containers to keep leftovers fresh for up to three days.

Common Mistakes and Troubleshooting

Even the best cooks can run into issues. Here’s how to troubleshoot common problems:

  • Too Watery Chili: If your chili is too runny, allow it to simmer longer, or add a thickening agent like cornstarch.
  • Mushy Cornbread: Ensure you’re not adding too much liquid to the cornbread batter. Check your ingredient measurements!
  • Burnt Cornbread Topping: Keep an eye on baking times and cover with foil if it starts to brown too much.
  • Uneven Cooking: Make sure your oven is preheated and check for hot spots by rotating the casserole halfway through baking.

Delicious Variations

Get creative with these variations to keep things fresh:

  • Vegetarian Option: Substitute ground beef with a mix of black beans, lentils, and chopped bell peppers.
  • Spicy Twist: Use spicy chili seasoning and add diced green chilies for extra heat.
  • Southwestern Style: Incorporate corn, black beans, and diced tomatoes with green chiles for a southwestern flair.
  • BBQ Flavor: Mix in some barbecue sauce to the chili for a smoky sweetness.

How to Store and Make-Ahead Instructions

This casserole is perfect for making ahead. Here’s how:

  • Refrigerate: Store leftovers in an airtight container for up to 3 days.
  • Freezing: Freeze individual portions in airtight containers for up to 3 months. Thaw in the refrigerator before reheating.
  • Make-Ahead: Assemble the casserole a day in advance, cover, and refrigerate before baking. Just add a few extra minutes to the cooking time.
  • Reheating: To reheat, cover with foil and bake at 350°F for 20-25 minutes or until heated through.

Frequently Asked Questions

Got questions? We’ve got answers! Here are some common queries about Chili Cornbread Casserole:

  • Can I use a different type of meat? Absolutely! Ground turkey, chicken, or even sausage can be substituted.
  • Is this recipe gluten-free? To make it gluten-free, use a gluten-free cornbread mix and check your chili seasoning.
  • Can I add other vegetables? Yes! Diced bell peppers, zucchini, or mushrooms can be added for more nutrition.
  • How spicy is this dish? The spice level can be adjusted based on your chili seasoning—feel free to use mild or hot!
  • What can I serve with this casserole? Serve with a crisp salad, or a side of guacamole and tortilla chips for a complete meal.
  • Is it okay to double the recipe? Yes, simply adjust the baking time if using a larger dish.
  • How do I know when it’s done? The casserole should be bubbly and the cornbread lightly golden on top.
  • Can I make it in a slow cooker? Yes, layer the ingredients in your slow cooker and cook on low for 4-6 hours.

Nutrition Tips and Dietary Adaptations

This dish can be tailored to fit various dietary needs:

  • Low-Carb: Use a cauliflower rice base instead of beans for a lower carbohydrate option.
  • High-Protein: Add more beans or use leaner cuts of meat to boost protein content.
  • Dairy-Free: Substitute milk with almond or coconut milk and skip the cheese.
  • Vegan: Replace meat with lentils or jackfruit and use a vegan cornbread mix.

Equipment Recommendations

For the best results, here are some kitchen essentials:

  • Cast Iron Skillet: Ideal for even cooking and a lovely presentation.
  • Measuring Cups and Spoons: Accurate measurements are crucial for baking.
  • Mixing Bowls: A set of varying sizes will help with ingredient preparation.
  • Spatula: For mixing and spreading the cornbread batter smoothly.

Serving Suggestions

To elevate your Chili Cornbread Casserole experience, consider serving it with:

  • Fresh Cilantro: Sprinkle chopped cilantro for added flavor and freshness.
  • Avocado Slices: Creamy avocado complements the spices beautifully.
  • Hot Sauce: A drizzle of your favorite hot sauce can kick things up a notch!
  • Crushed Tortilla Chips: Add a crunchy texture on top for a fun twist.

Final Thoughts

With its hearty flavors and comforting textures, the Chili Cornbread Casserole is more than just a meal; it’s a way to gather loved ones around the table and create lasting memories. Whether you’re hosting a dinner party, feeding a family, or simply looking for a quick weeknight solution, this recipe is versatile and loved by all. So roll up your sleeves, enjoy the process, and let the aroma of this delicious dish fill your home. Happy cooking!

Chili Cornbread Casserole

Prep Time 15 minutes
Cook Time 40 minutes
Total Time 55 minutes
Servings 6 servings
Calories 650
A hearty and flavorful casserole combining spicy chili with moist cornbread, perfect for a comforting family dinner.

Ingredients

Meat and Vegetables

  • 2 tablespoons olive oil
  • 2 pounds lean ground beef
  • 1 cup diced yellow onion
  • 1 tablespoon minced garlic
  • 2 tablespoons tomato paste
  • 14.5 ounce can petite diced tomatoes (drained)
  • 30 ounce cans tomato sauce
  • 15 ounce can mild chili beans in sauce (drained but not rinsed)
  • 1.25 ounce packet chili seasoning mix

Dairy

  • ¾ cup whole milk
  • 2 large eggs (room temperature)
  • 2 boxes Jiffy brand cornbread mix
  • ¾ cup sweet yellow corn
  • 1 cup shredded mild cheddar cheese

Toppings

  • Sour Cream Sour Cream
  • Thinly sliced green onions (scallions) green onions (scallions)

Instructions 

  • Cook ground beef with onions and garlic until browned.
  • Add tomato paste, diced tomatoes, tomato sauce, beans, and chili seasoning; simmer for 10 minutes.
  • Prepare cornbread batter according to package instructions, then fold in corn and shredded cheese.
  • Spread beef mixture in a casserole dish, top with cornbread batter, and bake at 375°F (190°C) for 25-30 minutes.
  • Garnish with sliced green onions and serve with sour cream.

Notes

For extra flavor, add a dash of hot sauce or chopped cilantro.
Calories: 650kcal
Cost: $15
Course: Main Course
Cuisine: American
Keyword: Chili, Cornbread

Welcome to the world of delightful desserts! Today, we’re diving into the aromatic and comforting realm of Asha’s Chai Apple Hand Pies. These little pockets of joy are inspired by the mini pies I used to buy as a kid at the corner store down the street. Each bite is a perfect blend of spiced apples encased in a flaky crust that brings warmth to any gathering. Perfect for both novice bakers and seasoned chefs, this dish is sure to impress at any occasion!

Why You’ll Love This Recipe

There’s something truly special about Asha’s Chai Apple Hand Pies. Here are five reasons why you’ll fall in love with this recipe:

  • Unforgettable Flavor: The combination of sweet apples and aromatic chai spices creates a symphony of flavors that dance on your palate.
  • Perfect for Any Occasion: Whether it’s a cozy family gathering or a festive holiday party, these hand pies are the ultimate crowd-pleaser.
  • Portable Delight: Enjoy them on the go! These hand-held desserts are easy to share and perfect for picnics or potlucks.
  • Customizable Options: You can easily modify the filling to suit your taste or dietary needs—explore endless variations!
  • Make Ahead Convenience: Prep them in advance and bake just before serving for that fresh-out-of-the-oven taste.

Ingredient Breakdown

Let’s look at the ingredients needed for these delicious hand pies, along with some handy substitutions:


Silicone Baking Cups Set

★ Recommended Kitchen Tool

Silicone Baking Cups Set

Make this recipe even easier with a quality Silicone Baking Cups Set — a must-have kitchen staple!


🛒 View on Amazon →

As an Amazon Associate, we earn from qualifying purchases.
  • All-Purpose Flour: 2 cups (270g). For a gluten-free option, substitute with a gluten-free flour blend.
  • Granulated Sugar: 1½ tablespoons. You can use coconut sugar for a lower glycemic index alternative.
  • Kosher Salt: ¾ teaspoon. Sea salt works just fine too!
  • Unsalted Butter: 10 tablespoons, cold and cubed. For a dairy-free option, use coconut oil or vegan butter.
  • Ice Water: 4 to 6 tablespoons. Keep your water icy cold for the perfect dough consistency.
  • Baking Apples: 1¼ pounds of sweet apples like Honey Crisp or Braeburn. Feel free to mix in tart apples for a flavor twist!
  • Chai Masala: 1½ tablespoons. If you can’t find chai spice, a mix of cinnamon, cardamom, and ginger will work.
  • Egg for Egg Wash: 1 large egg, lightly beaten. For a vegan version, use a mixture of plant-based milk and cornstarch.

Step-by-Step Instructions

Now, let’s embark on the journey of creating these delightful hand pies:

  • Make the Dough: In a large bowl, mix flour, sugar, and salt. Add the cold butter and rub it into the flour until the mixture resembles cooked chickpeas. Gradually add ice water until the dough holds together. Press into a rectangle, wrap, and refrigerate for at least 1 hour.
  • Prepare the Filling: In a saucepan, combine diced apples, butter, lemon juice, vanilla, and sugars. Cook over medium heat until apples are tender. Mix in chai masala and flour, cooking until thickened. Let cool.
  • Roll and Shape: Preheat your oven to 375°F. Roll the dough into a rectangle and cut into 8 rectangles. Place filling on one half, brush edges with egg wash, fold, and crimp to seal.
  • Chill and Bake: Refrigerate assembled hand pies for 15 minutes. Cut slits on top, brush with egg wash, and bake until golden, about 30-34 minutes.
  • Glaze the Pies: Mix confectioners’ sugar with water and vanilla until smooth. Spoon the glaze over the cooled pies and allow it to set.

Pro Tips for Perfect Hand Pies

Juicy Chai Apple Hand Pies displayed on a rustic wooden surface, showcasing their apple filling.

To ensure your hand pies turn out perfectly, consider these expert tips:

  • Keep It Cold: Make sure all ingredients are cold to create a flaky crust. Chill your mixing bowl and utensils if possible.
  • Don’t Overfill: While it’s tempting to pack in the filling, overfilling can lead to messy hand pies. Stick to about 2 tablespoons per pie.
  • Use a Fork to Seal: Crimping with a fork not only seals your pies but adds a decorative touch.
  • Experiment with Spices: Don’t hesitate to adjust the spices to your liking. A pinch of nutmeg or clove can elevate flavors!
  • Monitor Baking Time: Ovens vary, so keep an eye on your hand pies. They should be golden brown when done.
  • Let Cool Completely: Allow your hand pies to cool before glazing; this helps the glaze set better.

Common Mistakes and Troubleshooting

Even seasoned bakers can run into snags. Here’s how to avoid common pitfalls:

  • Too Tough Dough: If your dough is tough, it could be overworked. Mix just until combined for the best texture.
  • Filling Overflow: If your filling is too watery, cook it longer to reduce moisture before filling the dough.
  • Burnt Edges: If edges burn before the center is cooked, cover the hand pies with foil while baking.
  • Underbaked Pastry: If they seem undercooked, give them a few extra minutes in the oven—golden brown is key!

Variations on Asha’s Chai Apple Hand Pies

Get creative with these fun variations:

  • Pear and Cinnamon: Substitute half the apples with pears and add extra cinnamon for a different flavor profile.
  • Mixed Berry Delight: Replace the apple filling with a mixture of berries for a summer twist.
  • Nutty Crunch: Add chopped nuts like pecans or walnuts to the apple filling for added texture.
  • Chocolate Drizzle: Top with a chocolate glaze instead of the traditional sugar glaze for a decadent treat.

Storage and Make-Ahead Instructions

These hand pies can be made ahead of time and stored for later enjoyment:

  • Refrigerator: Store baked hand pies in an airtight container for up to 3 days.
  • Freezer: Unbaked hand pies can be frozen for up to 3 months. Bake straight from the freezer, adding a few extra minutes to the baking time.
  • Reheating: Reheat in the oven at 350°F for about 10 minutes to maintain crispiness.

Comprehensive FAQ

Got questions? Here are some common queries about Asha’s Chai Apple Hand Pies:

  • Can I use frozen fruit? Yes, but thaw and drain excess moisture before using.
  • What if I don’t have chai masala? A mix of cinnamon, ginger, and cardamom will work well as a substitute.
  • Can these be made vegan? Absolutely! Use vegan butter and a plant-based milk mixture for the egg wash.
  • What apples are best for pies? Sweet and tart varieties like Honey Crisp, Granny Smith, or Braeburn are ideal.
  • Can I make the dough ahead of time? Yes, the dough can be made up to 2 days in advance and stored in the fridge.
  • How do I prevent soggy bottoms? Pre-baking the dough for about 5 minutes before adding filling can help.
  • What’s the best way to serve these hand pies? They’re delicious warm, but also delightful at room temperature.
  • How can I make my hand pies more flavorful? Experiment with adding zest from citrus fruits like lemon or orange to the filling.

Nutritional Tips and Dietary Adaptations

Here are some tips for making Asha’s Chai Apple Hand Pies healthier:

  • Use Whole Wheat Flour: For a nuttier flavor and added fiber, substitute half the all-purpose flour with whole wheat flour.
  • Reduce Sugar: Feel free to cut down the sugar in the filling without sacrificing flavor, especially if using sweet apples.
  • Healthier Fats: Consider using avocado oil for a healthier fat option in the dough.
  • Mindful Portions: Cut smaller rectangles for mini hand pies, perfect for portion control!

Essential Equipment Recommendations

To achieve the best results, here are some kitchen tools you’ll need:

  • Rolling Pin: A good rolling pin is essential for even dough thickness.
  • Pastry Cutter or Knife: For cutting the dough into rectangles and sealing edges.
  • Mixing Bowls: A set of mixing bowls will help in organizing your ingredients.
  • Parchment Paper: Great for lining your baking sheet and preventing sticking.

Serving Suggestions

These hand pies are delightful on their own, but here are some serving suggestions:

  • With Ice Cream: Serve warm hand pies with a scoop of vanilla ice cream for a decadent dessert.
  • Drizzled with Caramel: Add a drizzle of caramel sauce for an extra sweet touch.
  • Accompanied by Tea: Pair with a cup of chai or herbal tea to complement the flavors.
  • Fresh Fruit Slices: Serve with fresh fruit slices for a refreshing contrast.

Enjoy creating your own version of Asha’s Chai Apple Hand Pies! Remember, cooking is about love and sharing moments, so invite friends and family to join you in the kitchen. Happy baking!

Asha's Chai Apple Hand Pies

Prep Time 30 minutes
Cook Time 35 minutes
Total Time 1 hour 5 minutes
Servings 8 pieces
Calories 250
Delight in these flaky hand pies filled with spiced apple filling and topped with a sweet glaze, perfect for a cozy treat or dessert.

Ingredients

Dough

  • 2 cups all-purpose flour
  • 1.5 tablespoons granulated white sugar
  • 0.75 teaspoon kosher salt
  • 10 tablespoons unsalted butter, cold and cubed
  • 4 to 6 tablespoons ice water

Filling

  • 1.25 pounds sweet baking apples, peeled, cored and diced
  • 1 tablespoon butter
  • 1 tablespoon lemon juice
  • 1 teaspoon vanilla extract
  • 0.25 cup light or dark brown sugar
  • 0.25 cup granulated white sugar
  • 1.5 tablespoons chai masala
  • 0.25 teaspoon kosher salt
  • 2 tablespoons all-purpose flour
  • 1 large egg, lightly beaten

Glaze

  • 1 cup powdered confectioners' sugar
  • 2.5 tablespoons water
  • 0.5 teaspoon vanilla extract

Instructions 

  • Mix flour, sugar, and salt; cut in butter until crumbly. Add water gradually, form dough, chill for 1 hour.
  • Cook apples with butter, lemon juice, vanilla, sugars, chai, and salt until tender. Thicken with flour and cool.
  • Preheat oven to 375°F. Roll dough, cut into rectangles, and fill with apple mixture. Seal edges and refrigerate 15 minutes.
  • Cut slits, brush with egg wash, and bake for 30-34 minutes until golden. Cool on rack.
  • Mix powdered sugar, water, and vanilla to make glaze. Spoon over cooled pies and let set.

Notes

Chill the dough well for easier handling and ensure the pies are fully cooled before glazing for best results.
Calories: 250kcal
Cost: $15
Course: Dessert
Cuisine: American
Keyword: apple, chai, hand pies

Discover the Joy of Homemade Pear Galette

Welcome to your ultimate guide to creating an easy and delightful pear galette! This rustic dessert is not only visually stunning but also incredibly simple to make. Using just a handful of ingredients, you can whip up a dessert that feels gourmet without the fuss of traditional pie-making. If you’re looking for a way to impress guests or simply indulge yourself, this recipe will become a go-to in your kitchen.

In this comprehensive guide, I’ll walk you through every step of the process, from selecting the right pears to mastering the perfect crust. Let’s get started!

Why You’ll Love This Recipe

This easy pear galette is perfect for any occasion. Here are five reasons why you’ll fall in love with it:


Meal Prep Container Set

★ Recommended Kitchen Tool

Meal Prep Container Set

Make this recipe even easier with a quality Meal Prep Container Set — a must-have kitchen staple!


🛒 Shop This Tool →

As an Amazon Associate, we earn from qualifying purchases.
  • Simple Ingredients: This recipe uses everyday items you likely already have in your pantry, making it accessible.
  • Rustic Charm: The free-form nature of the galette means you don’t need to worry about perfect shapes—its rustic appearance is part of its charm.
  • Versatile Flavor: You can easily customize the filling with spices, nuts, or other fruits, making it adaptable to your taste.
  • Quick Prep Time: With minimal prep time, you can enjoy this dessert in under an hour, including baking!
  • Impressive Presentation: The golden-brown crust and beautifully arranged pear slices make for an eye-catching centerpiece.

Ingredients Breakdown

Here’s what you’ll need for this easy pear galette:

  • 4 pears (peeled, cored, and sliced): Choose firm but ripe pears for the best texture.
  • 1 teaspoon ground cinnamon: Adds warmth and spice to the filling.
  • 1 tablespoon lemon juice: Prevents browning and enhances flavor.
  • Pinch of salt: Balances sweetness.
  • 1 egg (lightly beaten): For the egg wash, giving the crust a beautiful golden color.
  • 1 tablespoon water: To mix with the egg for the wash.
  • Sugar for sprinkling: Adds a touch of sweetness to the crust.
  • 8 tablespoons unsalted butter (well-chilled): Essential for a flaky crust.
  • 1-1/4 cups all-purpose flour: The base for your pie crust.
  • 1 tablespoon sugar: For the crust to add sweetness.
  • 1/4 teaspoon salt: Enhances flavor.
  • 3 to 5 tablespoons ice water: Helps bring the dough together without warming the butter.

How to Make Your Easy Pear Galette

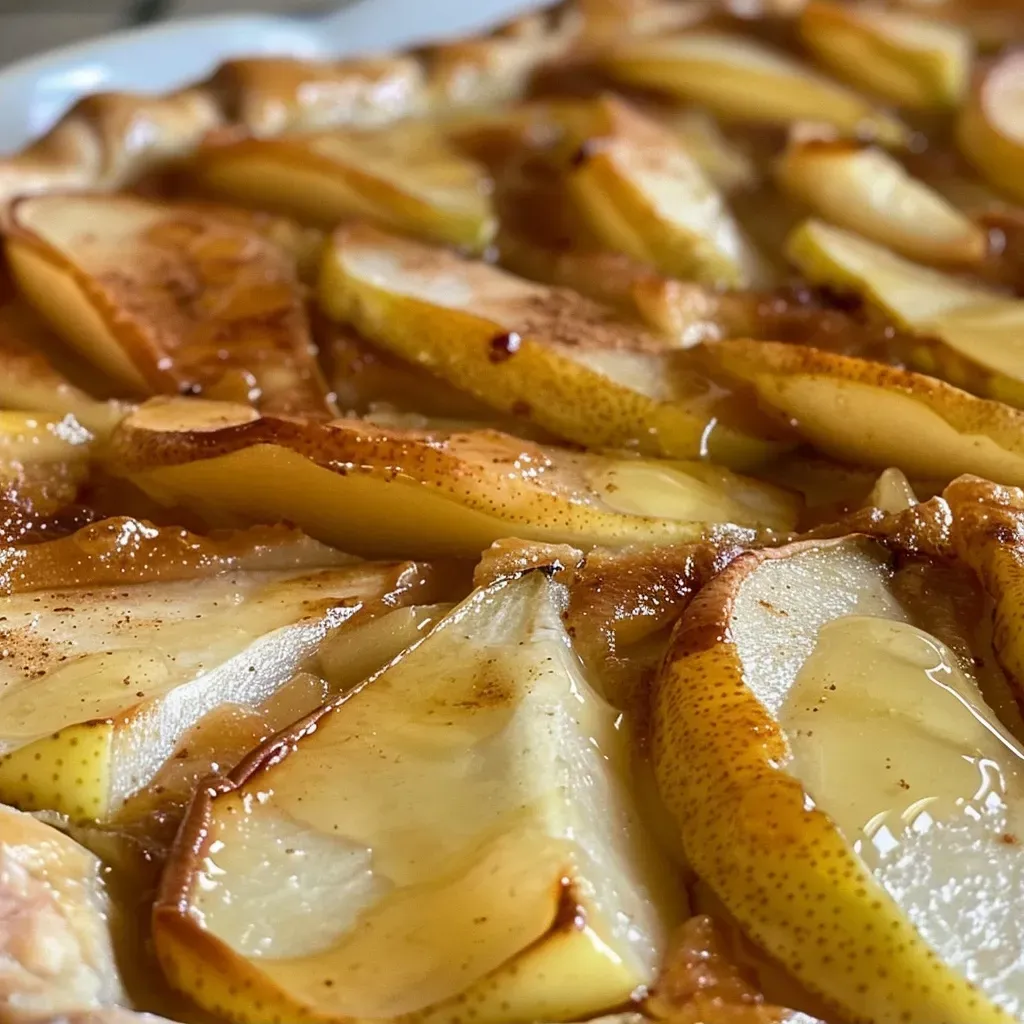
Juicy pear galette displaying flaky crust and caramelized fruit, taken with an iPhone 15 Pro.

Follow these straightforward steps to create your pear galette:

Step 1: Prepare the Dough

Start by making the pie crust. Combine the flour, sugar, and salt in a bowl. Add the chilled butter and mix until the mixture resembles coarse crumbs. Gradually add ice water, one tablespoon at a time, until the dough holds together. Shape it into a disk, wrap it in plastic wrap, and chill for at least 30 minutes.

Step 2: Prepare the Filling

While the dough chills, prepare the pear filling. In a large bowl, combine the sliced pears, lemon juice, cinnamon, and salt. Toss gently to coat and set aside.

Step 3: Roll Out the Dough

Once chilled, roll out the dough on a floured surface to about 12 inches in diameter. Transfer it to a baking sheet lined with parchment paper.

Step 4: Assemble the Galette

Arrange the pear mixture in the center of the dough, leaving about a 2-inch border. Fold the edges of the dough over the pears, pleating as necessary to create a rustic look.

Step 5: Brush and Sprinkle

Brush the edges of the crust with the beaten egg wash and sprinkle sugar over the dough and pears for added sweetness.

Step 6: Bake

Preheat your oven to 375°F (190°C) and bake the galette for 35-40 minutes or until the crust is golden brown and the pears are tender.

Step 7: Serve and Enjoy

Let the galette cool for a few minutes before slicing. Serve warm or at room temperature with a scoop of vanilla ice cream for an extra treat!

Pro Tips for Galette Success

Here are some expert insights to ensure your pear galette turns out perfectly:

  • Choose the Right Pears: Varieties like Bosc or Anjou work best due to their firmness and flavor.
  • Chill Your Ingredients: Keep your butter and water ice-cold to achieve a flaky crust.
  • Don’t Overwork the Dough: Mix just until combined to prevent a tough crust.
  • Experiment with Spices: Try adding nutmeg or cardamom for a unique twist.
  • Use a Baking Sheet: Line with parchment for easy cleanup and to prevent sticking.
  • Let It Cool: Allow the galette to cool slightly before serving to set the filling.
  • Pair with Ice Cream: A scoop of vanilla or cinnamon ice cream complements the galette beautifully.
  • Store Leftovers Properly: Keep in an airtight container in the fridge for up to 3 days.

Common Mistakes and Troubleshooting

Even the best chefs can face challenges. Here are some common mistakes and how to avoid them:

  • Crust Too Tough: This usually happens from overworking the dough; handle it gently.
  • Pears Too Mushy: Make sure to choose firm pears and don’t overbake.
  • Filling Leaking Out: Ensure the edges are well-pleated and the dough is thick enough.
  • Uneven Baking: Rotate the baking sheet halfway through baking for an even color.

Delicious Variations

Want to switch things up? Here are some tasty variations you can try:

  • Spiced Pear Galette: Add ginger and nutmeg for a warming spice blend.
  • Mixed Fruit Galette: Combine pears with apples or berries for a colorful twist.
  • Pecan Pear Galette: Sprinkle chopped pecans in the filling for added crunch.
  • Chocolate Drizzle: Finish with a drizzle of melted chocolate for a decadent touch.

Storage and Make-Ahead Instructions

This galette is best enjoyed fresh, but you can certainly prepare components ahead of time:

  • Dough Prep: Make the dough a day in advance and store it in the fridge.
  • Filling Prep: Prepare the pear filling a few hours ahead and toss with lemon juice to prevent browning.
  • Storing Leftovers: Wrap any leftover galette in plastic wrap and keep in the fridge for up to 3 days. Reheat in the oven for the best texture.

Frequently Asked Questions

Here are some common questions about making a pear galette:

  • Can I use frozen pears? Yes, but make sure to thaw and drain excess moisture before using.
  • What if my dough is too crumbly? Add a little more ice water, one tablespoon at a time, until it holds together.
  • How do I know when the galette is done? The crust should be golden brown and the filling bubbly.
  • Can I make this gluten-free? Absolutely! Substitute with a gluten-free flour blend.
  • How do I prevent the crust from getting soggy? Make sure your pears are not too juicy and consider pre-baking the crust for 10 minutes.
  • Can I use other fruits? Yes! Apples, peaches, or cherries would be delicious substitutions.
  • What’s the best way to serve it? Serve warm with a scoop of vanilla ice cream or whipped cream.
  • How long does it take to bake? Typically, 35-40 minutes at 375°F (190°C).

Nutrition Tips and Dietary Adaptations

This pear galette can be made to suit various dietary needs:

  • Reduced Sugar: Substitute sugar with a natural sweetener like honey or maple syrup.
  • Vegan Option: Use coconut oil instead of butter and a flax egg instead of the egg wash.
  • Lower Carb: Consider using almond flour for a low-carb crust option.

Essential Equipment for Success

Having the right tools can make a big difference. Here’s what I recommend:

  • Rolling Pin: A good quality rolling pin makes rolling out the dough easy.
  • Baking Sheet: A sturdy, rimmed baking sheet helps catch any drips.
  • Parchment Paper: Keeps the galette from sticking and makes cleanup a breeze.
  • Sharp Knife: For slicing your pears with ease.

Serving Suggestions

This easy pear galette pairs wonderfully with:

  • Vanilla Ice Cream: The creamy texture complements the warm fruit beautifully.
  • Whipped Cream: Light and airy, it’s a classic pairing.
  • Custard Sauce: A drizzle of custard offers richness and sweetness.

Conclusion

Creating a delicious pear galette at home is an achievable and enjoyable task. With this guide, you’re equipped to make a dessert that will impress your family and friends. Remember, cooking is all about enjoying the process, so have fun with it! I’d love to hear how your galette turns out—leave a comment and share your experience. Happy baking!

Easy Pear Galette

Prep Time 20 minutes
Cook Time 30 minutes
Total Time 50 minutes
Servings 8 pieces
Calories 250
A simple and delicious pear galette that highlights fresh fruit and flaky pastry, perfect for a quick dessert or snack.

Ingredients

Fruits

  • 4 pieces pears (peeled, cored and sliced)
  • 1 teaspoon ground cinnamon
  • 1 tablespoon lemon juice
  • Pinch salt
  • 1 egg lightly beaten egg
  • 1 tablespoon water
  • Sugar for sprinkling sugar (for sprinkling on top)
  • 8 tablespoons unsalted butter (well-chilled)
  • 1-1/4 cups all-purpose flour
  • 1 tablespoon sugar
  • 1/4 teaspoon salt
  • 3 to 5 tablespoons ice water

Instructions 

  • Have a glass of ice water standing by and cut the butter into 16 pieces.

Notes

Chill the butter well for a flaky crust and keep the pears fresh for the best flavor.
Calories: 250kcal
Cost: $12
Course: Dessert
Cuisine: French
Keyword: pear

Discover the Joy of Cooking: Deliciously Crispy Butternut Squash Fritters

If you’re looking for a fantastic way to incorporate more vegetables into your meals, you’ve come to the right place! These butternut squash fritters are not only gluten-free and paleo-friendly, but they also promise a delightful crunch and a burst of flavor that will make your taste buds dance. Made with just a few simple ingredients, this recipe is perfect for anyone, whether you’re an experienced cook or just starting your culinary journey.

In this article, we’ll delve into everything you need to know about making the best butternut squash fritters. From ingredient substitutions to cooking tips and even variations to suit different dietary needs, we’ve got you covered. Let’s get cooking!

Why You’ll Love This Recipe

  • Easy to Make: With just a handful of ingredients, you can whip up these fritters in no time, making them a perfect weeknight meal.
  • Nutrition Packed: Butternut squash is rich in vitamins A and C, making these fritters a healthy addition to your diet.
  • Versatile Dish: Whether you serve them as an appetizer or a side dish, they pair wonderfully with a variety of meals.
  • Kid-Friendly: The crispy texture and savory flavor are sure to be a hit with kids, making it easier to sneak in some vegetables.
  • Freezer Friendly: Make a big batch and freeze them for quick meals later on; they reheat beautifully!

Ingredient Breakdown

Understanding each ingredient in this recipe can help you make informed choices and substitutions. Here’s a detailed breakdown:


Digital Kitchen Scale

★ Recommended Kitchen Tool

Digital Kitchen Scale

Make this recipe even easier with a quality Digital Kitchen Scale — a must-have kitchen staple!


🛒 See Deals on Amazon →

As an Amazon Associate, we earn from qualifying purchases.
  • Butternut Squash: Approximately 3 pounds, peeled and shredded. This is the star of the dish. If you prefer, you can use pre-packaged shredded butternut squash available at most grocery stores.
  • Eggs: Three large eggs, which help bind the fritters together. If you’re looking for a vegan alternative, consider using flaxseed meal mixed with water as a binding agent.
  • Gluten-Free Flour: 1/2 cup, which can be a mix of almond flour and tapioca, as I used in this recipe. You can substitute with other gluten-free flours like coconut flour or a gluten-free all-purpose blend.
  • Fresh Herbs: 1/4 cup finely chopped (such as parsley, basil, sage, or cilantro). These add a delightful freshness. Dried herbs can be used in a pinch, but fresh really elevates the flavor.
  • Garlic Powder: A pinch (1/4-1/2 tsp) for flavor. Fresh minced garlic can also be used for a stronger taste.
  • Salt: 1 tsp, to enhance the overall flavor. Adjust according to your taste preferences.
  • Cooking Oil: Ghee or avocado oil for frying, which can withstand high temperatures and add a delicious richness.
  • Dipping Sauce: A simple mix of yogurt (dairy-free or regular) with lemon juice and chopped parsley for a refreshing accompaniment.

Step-by-Step Instructions

Juicy butternut squash fritters with a crispy exterior served with a dollop of yogurt.

Now that you have your ingredients ready, let’s dive into the preparation:

  1. In a large bowl, combine the shredded butternut squash, eggs, gluten-free flour, herbs, garlic powder, and salt. Mix until everything is well incorporated.
  2. Heat a generous amount of ghee or avocado oil in a large skillet over medium-high heat.
  3. Scoop out about 2 tablespoons of the mixture, form it into a ball, and place it in the skillet. Flatten it gently using the back of a spatula.
  4. Cook each fritter until golden brown, approximately 3-4 minutes on each side. Flip carefully and cook the other side until it achieves the same beautiful color.
  5. Transfer the cooked fritters to a wire rack to keep them crispy while you repeat the process with the remaining mixture.
  6. For the dipping sauce, mix together the yogurt, lemon juice, chopped parsley, and a pinch of salt in a small bowl. Serve it alongside your warm fritters.

Pro Tips for Perfect Fritters

  • Shred Finely: The finer you shred the butternut squash, the easier it will be to form the fritters and achieve a crispy texture.
  • Don’t Overcrowd the Pan: Fry fritters in batches to avoid steaming them; this ensures they become crispy, not soggy.
  • Let the Mixture Rest: Allowing the combined ingredients to rest for about 10 minutes can help the flavors meld and improve texture.
  • Adjust Thickness: If the mixture feels too wet, add a little more gluten-free flour until it reaches a manageable consistency.
  • Pre-heat the Oil: Ensure your oil is hot enough before adding fritters to achieve that crispy golden goodness.
  • Experiment with Spices: Feel free to add spices like cumin or paprika to give your fritters an extra kick.
  • Use a Wire Rack: Placing cooked fritters on a wire rack instead of paper towels prevents them from getting soggy.
  • Try Different Dips: Mix it up with different dipping sauces such as spicy aioli, tahini sauce, or even a simple salsa!

Common Mistakes and Troubleshooting

Even the most seasoned chefs can run into problems. Here are some common mistakes and how to avoid them:

  • Soggy Fritters: If your fritters are soggy, ensure the oil is hot enough and that you didn’t overcrowd the pan.
  • Fritters Falling Apart: If they are crumbling, try adding more flour to the mixture or ensure they’re cooked long enough for the egg to set.
  • Not Enough Flavor: Always taste the mixture before cooking. Adjust the seasoning as needed to ensure the fritters are flavorful.

Variations to Try

Feel free to customize this recipe to suit your taste or dietary needs!

  • Cheesy Fritters: Add 1/2 cup of shredded cheese (like cheddar or feta) for a rich flavor.
  • Spicy Kick: Incorporate finely chopped jalapeños or crushed red pepper flakes into the mixture.
  • Herb Variations: Experiment with different herbs such as dill or chives for a unique flavor twist.
  • Sweet Potato Swap: Substitute butternut squash with sweet potatoes for a different taste profile.

Storage and Make-Ahead Instructions

These fritters are perfect for meal prep! Here’s how to store them:

  • Refrigeration: Store cooked fritters in an airtight container in the refrigerator for up to 3 days.
  • Freezing: Place cooked fritters in a single layer on a baking sheet and freeze. Once frozen, transfer to a freezer bag for up to 3 months.
  • Reheating: Reheat in a preheated oven at 350°F (175°C) for about 10-15 minutes or until warmed through and crispy again.

Frequently Asked Questions

  • Can I make these fritters vegan? Yes! Use flaxseed meal mixed with water instead of eggs.
  • How do I know when the fritters are done? They should be golden brown and crispy on both sides.
  • What can I serve with butternut squash fritters? They pair well with a variety of dips, salads, or as a side to grilled meats.
  • Can I bake these fritters instead of frying? Yes! Bake at 400°F (200°C) on a parchment-lined baking sheet for about 20-25 minutes, flipping halfway through.
  • What if I don’t have butternut squash? You can substitute with zucchini or sweet potato for different flavors.
  • Can I use frozen butternut squash? Yes, just ensure it is thawed and drained of excess moisture before using.
  • How can I add more flavor? Consider adding spices like cumin, paprika, or even a splash of soy sauce for an umami kick.
  • What is the best oil for frying? Ghee and avocado oil are great options as they have high smoke points and add wonderful flavor.

Nutrition Tips and Dietary Adaptations

This recipe is naturally gluten-free and can easily be adapted for various dietary needs:

  • Low-Carb: Substitute the flour with ground almond meal to lower the carb content.
  • Dairy-Free: Use dairy-free yogurt for the dipping sauce to keep it vegan.
  • Nut-Free: If you have nut allergies, opt for a gluten-free flour blend that does not contain nut flours.

Recommended Equipment

To make these fritters successfully, consider having the following equipment:

  • Large Mixing Bowl: For combining your ingredients.
  • Skillet or Frying Pan: A non-stick skillet is ideal for frying fritters.
  • Spatula: To flip the fritters easily without breaking them.
  • Wire Rack: To keep fritters crispy while they cool.

Serving Suggestions

These butternut squash fritters are incredibly versatile and can be served in numerous ways:

  • As an Appetizer: Serve warm with your favorite dipping sauce.
  • On a Salad: Crumble over mixed greens for a hearty salad.
  • With Grains: Pair with quinoa or brown rice for a filling meal.
  • For Breakfast: Top with a poached egg for a nutritious start to your day.

Conclusion

Now that you have all the insights and tips to create the perfect butternut squash fritters, it’s time to roll up your sleeves and enjoy the cooking process! This recipe not only brings together wholesome ingredients but also fosters moments of joy and connection around the table. Whether you’re sharing a meal with family or enjoying a quiet dinner alone, these fritters are sure to bring a smile to your face. Happy cooking!

Butternut Squash Fritters (gluten free + paleo)

Prep Time 10 minutes
Cook Time 15 minutes
Total Time 25 minutes
Servings 4 servings
Calories 150
These crispy, flavorful butternut squash fritters are perfect for a gluten-free and paleo-friendly snack or meal.

Ingredients

Main

  • 1 pound butternut squash (peeled and shredded)
  • 3 eggs eggs (whisked)
  • 1/2 cup gluten free flour (almond flour and tapioca blend)
  • 1/4 cup fresh herbs (finely chopped parsley, basil, sage, or cilantro)
  • 1/4-1/2 tsp garlic powder
  • 1 tsp salt
  • for cooking ghee or avocado oil (for frying)
  • 1/4 cup plain yogurt (dairy free or regular)
  • 1 tsp lemon or lime juice
  • 1 tbsp chopped parsley
  • pinch cumin
  • pinch salt

Instructions 

  • Combine shredded squash, eggs, flour, herbs, garlic powder, and salt in a bowl.
  • Heat oil in a skillet over medium-high heat. Scoop 2 tbsp of mixture, form into a ball, flatten, and cook until golden brown. Flip and cook other side.
  • Repeat with remaining mixture, adding more oil as needed. Drain on a wire rack.
  • Mix yogurt with lemon/lime juice to make dipping sauce. Serve fritters warm with sauce.

Notes

Ensure squash is well drained to prevent sogginess.
Calories: 150kcal
Cost: $15
Course: Appetizer, Snack
Cuisine: American
Keyword: butternut squash, gluten free, paleo

Welcome to a delightful culinary experience! In this article, we’re diving into the world of Spicy Chicken Chili Stew, a dish that not only warms your body but also fills your heart with joy. This recipe combines tender chicken, vibrant vegetables, and just the right amount of spice to create a meal that’s perfect for any gathering. Whether it’s a cozy family dinner or a gathering with friends, this stew will leave everyone asking for seconds. Ready to make this flavorful dish? Let’s get started!

Why You’ll Love This Recipe

This recipe is a true crowd-pleaser, and here are just a few reasons why:

  • Quick Preparation: With only 15 minutes of hands-on time, you can have this stew simmering on the stove in no time.
  • Nutritious Ingredients: Packed with protein from the chicken and fiber from beans and veggies, this dish is as healthy as it is delicious.
  • Customizable Heat: Adjust the spice level by adding more or fewer jalapeños based on your family’s preference.
  • Perfect for Meal Prep: This stew can be made ahead of time and tastes even better the next day, making it ideal for busy weeknights.
  • Family-Friendly: Everyone loves a warm bowl of chili, and this recipe is sure to satisfy even the pickiest eaters.

Ingredient Breakdown

To make this flavorful chicken chili stew, you will need the following ingredients:


Air Fryer XL

★ Recommended Kitchen Tool

Air Fryer XL

Make this recipe even easier with a quality Air Fryer XL — a must-have kitchen staple!


🛒 Check Price on Amazon →

As an Amazon Associate, we earn from qualifying purchases.
  • 1.75 lbs boneless, skinless chicken thighs
  • Salt to taste
  • Garlic powder to taste
  • Onion powder to taste
  • 1/4 cup olive oil
  • 4 jalapeños, diced (adjust for spice preference)
  • 1 white onion, diced
  • 1 bell pepper, diced
  • 4 cloves garlic, minced
  • 1 heaping tablespoon potato starch (for thickening)
  • 3 tablespoons tomato paste
  • 2 tablespoons brown sugar
  • 1½ tablespoons chili powder
  • 1/2 teaspoon cumin
  • 1 teaspoon dried oregano
  • 1/2 teaspoon cinnamon
  • Pinch ground cloves
  • 1½ teaspoons salt
  • 1/2 teaspoon black pepper
  • 32 oz low sodium chicken broth
  • 15 oz cannellini beans, drained and rinsed
  • 15 oz red kidney beans, drained and rinsed
  • 1/2 cup sweet potato puree (optional for added sweetness)

Feel free to make substitutions based on what you have available! For example, you can use turkey instead of chicken or swap out the beans for lentils.

Step-by-Step Instructions

Now that you have your ingredients ready, let’s walk through the steps to create this delicious stew:

  1. Season the chicken thighs with salt, garlic powder, and onion powder. Brown the chicken in 2 tablespoons of olive oil over medium heat, then set aside.
  2. In the same pot, sauté the diced jalapeños, onion, and bell pepper in the remaining olive oil until they’re softened, about 5-7 minutes. Add minced garlic and cook for an additional 30 seconds.
  3. Stir in potato starch, tomato paste, chili powder, cumin, oregano, cinnamon, brown sugar, and a pinch of cloves. Cook for 2 minutes to develop the flavors.
  4. Pour in the chicken broth, and add the browned chicken, cannellini beans, red kidney beans, and optional sweet potato puree. Bring the mixture to a simmer.
  5. Cover and let it simmer on low heat for 25-30 minutes, allowing the flavors to meld beautifully. Adjust seasonings to taste before serving.

Pro Tips for the Best Chili Stew

Side view of a hearty Spicy Chicken Chili Stew with colorful vegetables and chicken pieces.

To make this stew truly exceptional, consider these expert insights:

  • Marinate for Flavor: Letting the chicken marinate in spices for 30 minutes before cooking can enhance the flavor.
  • Use Fresh Ingredients: Fresh vegetables will provide a vibrant taste compared to frozen or canned varieties.
  • Balance the Flavors: Taste as you go! Adjust sweetness and spiciness by adding more brown sugar or jalapeños.
  • Thicken with Care: If you prefer a thicker stew, let it simmer uncovered. The steam will help reduce the liquid.
  • Garnish for Appeal: Top with fresh cilantro, avocado slices, or sour cream for added texture and flavor.
  • Keep It Warm: If serving at a gathering, keep the stew warm in a slow cooker on low heat.
  • Experiment with Spices: Feel free to add spices like smoked paprika or cayenne pepper for an extra kick!
  • Pair with Sides: Serve with crusty bread or over rice for a complete meal.

Common Mistakes and Troubleshooting

Even experienced cooks can run into issues. Here are some common mistakes and how to fix them:

  • Too Watery: If your stew is too thin, allow it to simmer uncovered for a while to evaporate excess liquid.
  • Overcooked Chicken: Ensure you don’t overcook the chicken; it should be tender but not falling apart.
  • Bland Flavor: Always taste as you go! Adjust seasonings with salt, spices, or a splash of vinegar for a flavor boost.
  • Too Spicy: If it’s too hot, add a dollop of sour cream or a tablespoon of sugar to balance the heat.

Variations to Spice It Up

Want to give your chili stew a unique twist? Here are some variations to consider:

  • Vegetarian Option: Substitute chicken with mushrooms or a meat substitute like jackfruit and use vegetable broth.
  • Sweet and Spicy: Add diced mango or pineapple for a sweet contrast to the heat.
  • Cheesy Delight: Stir in shredded cheddar cheese just before serving for a creamy texture.
  • Southwestern Flair: Incorporate corn and black beans for a Southwestern twist.

Storage and Make-Ahead Instructions

This stew stores well and can be made ahead of time:

  • Refrigeration: Store leftovers in an airtight container in the refrigerator for up to 4 days.
  • Freezing: Freeze in portions for up to 3 months. Thaw overnight in the fridge before reheating.
  • Reheating: Reheat on the stovetop over medium heat or in the microwave until warmed through.

Comprehensive FAQ

Here are answers to some common questions:

  • Can I use chicken breasts instead of thighs? Yes, but thighs tend to be juicier and more flavorful.
  • What can I use instead of potato starch? Cornstarch can also work well for thickening.
  • Is this stew gluten-free? Yes, as long as you use gluten-free broth and starch.
  • Can I add more vegetables? Absolutely! Carrots and zucchini can enhance the flavor and nutrition.
  • How do I adjust the spice level? Use fewer jalapeños or remove the seeds for less heat.
  • Can I make this in a slow cooker? Yes! Brown the chicken and vegetables first, then transfer to a slow cooker and cook on low for 6-8 hours.
  • What can I serve with this stew? It pairs beautifully with cornbread, rice, or a simple salad.
  • Can I use canned beans? Yes, canned beans are a great time saver; just rinse them beforehand.

Nutritional Information and Dietary Adaptations

This stew is not only delicious but also nutritious! Here’s a quick overview of the health benefits:

  • Protein-Rich: Chicken thighs provide a hearty source of protein, essential for muscle health.
  • Fiber Boost: Beans add dietary fiber, promoting digestive health and satiety.
  • Low Sodium Options: Using low-sodium broth helps control sodium intake, making it a heart-healthy choice.

For dietary adaptations, consider these options:

  • Low-Carb: Omit beans and substitute with cauliflower rice.
  • Vegan: Use vegetable broth and replace chicken with hearty vegetables or tofu.
  • Whole30 Compliant: Ensure all ingredients are compliant, avoiding sugar and processed foods.

Equipment Recommendations

To prepare this stew, here are some essential tools that will make your cooking experience smoother:

  • Large Dutch Oven: Ideal for browning meat and simmering the stew.
  • Wooden Spoon: Perfect for stirring and preventing sticking.
  • Measuring Cups and Spoons: Ensure accuracy in your ingredients for the best results.
  • Cutting Board and Sharp Knife: For efficient chopping of vegetables and chicken.

Serving Suggestions

Now that your stew is ready, here are some serving ideas:

  • Garnish: Top with fresh cilantro, diced avocado, or a squeeze of lime for added flavor.
  • Side Dishes: Serve with crusty bread, cornbread, or over a bed of fluffy rice.
  • Make It a Feast: Offer toppings like shredded cheese, sour cream, or jalapeños for a build-your-own chili bar.

As you gather around the table, this Spicy Chicken Chili Stew is sure to become a family favorite. Enjoy the warmth and love that comes from sharing a homemade meal, and remember—great cooking is all about creating connections. Dive into this recipe, and let the flavors embrace you!

Spicy Chicken Chili Stew

Prep Time 15 minutes
Cook Time 30 minutes
Total Time 45 minutes
Servings 6 servings
Calories 450
A hearty and spicy chicken chili stew packed with bold flavors and wholesome ingredients, perfect for warming up on a chilly day.

Ingredients

Meat

  • 1.75 lbs boneless, skinless chicken thighs
  • 1.5 teaspoons salt (to taste)
  • 1.5 teaspoons garlic powder (to taste)
  • 1.5 teaspoons onion powder (to taste)
  • 0.25 cup olive oil
  • 4 pieces jalapeños (diced)
  • 1 white onion white onion (diced)
  • 1 bell pepper bell pepper (diced)
  • 4 cloves garlic (minced)
  • 1 heaping tablespoon potato starch
  • 3 tablespoons tomato paste
  • 2 tablespoons brown sugar
  • 1.5 tablespoons chili powder
  • 0.5 teaspoon cumin
  • 1 teaspoon dried oregano
  • 0.5 teaspoon cinnamon
  • Pinch ground cloves
  • 1.5 teaspoons salt
  • 0.5 teaspoon black pepper
  • 32 oz low sodium chicken broth
  • 15 oz cannellini beans (drained and rinsed)
  • 15 oz red kidney beans (drained and rinsed)
  • 0.5 cup sweet potato puree (optional)

Instructions 

  • Season chicken with salt, garlic powder, and onion powder. Brown in 2 tbsp olive oil, then set aside.
  • Sauté jalapeños, onion, and bell pepper in remaining olive oil until softened. Add garlic and cook for 30 seconds.
  • Stir in potato starch, tomato paste, spices, and sugar. Add broth, beans, chicken, and sweet potato. Simmer for 25-30 minutes.

Notes

For extra flavor, garnish with fresh cilantro or a squeeze of lime before serving.
Calories: 450kcal
Cost: $15
Course: Main Course
Cuisine: American
Keyword: Chicken, Spicy, Stew