Author

Mike

Browsing

Unlock the Delight of Air Fryer Roasted Broccoli

Welcome to the world of air frying, where healthy eating meets incredible flavor! If you’re looking for a simple yet delicious way to prepare broccoli, you’ve landed in the right place. This article dives deep into the joy of making Air Fryer Roasted Broccoli, ensuring you master this technique and enjoy all the benefits it brings. With just a few ingredients and a trusted air fryer, you can create a crispy, flavorful side dish that complements any meal. Let’s get started!

Why You’ll Love This Recipe

Here are five compelling reasons to try this air fryer roasted broccoli:

  • Crispy Perfection: Air frying gives broccoli a delightful crunch without the excess oil used in traditional frying methods.
  • Quick and Easy: In just 10 minutes, you can whip up a nutritious side dish that’s perfect for busy weeknights.
  • Flavorful Variations: Customize your broccoli with a variety of seasonings, from garlic to Parmesan, to suit your taste.
  • Health Benefits: Broccoli is packed with vitamins and minerals, making it an excellent choice for maintaining a balanced diet.
  • Kid-Friendly: The crispy texture and enhanced flavor make broccoli more appealing to even the pickiest eaters.

Ingredients You’ll Need

Gather these simple ingredients to create your air fryer roasted broccoli:

  • 1 Medium Broccoli Head: Cut into bite-sized florets for even cooking.
  • 1 Tablespoon Olive Oil or Avocado Oil: Choose a mild oil to enhance flavor without overpowering the broccoli.
  • 1/2 Teaspoon Salt and Pepper: Adjust to taste for the perfect seasoning.
  • 1/2 Teaspoon Garlic Powder: Adds a delicious garlicky flavor.
  • 1/4 Teaspoon Onion Powder: A hint of sweetness to balance the flavors.
  • 1/2 Teaspoon All-Purpose Seasoning: I recommend Vegeta for a savory kick.
  • 1 Tablespoon Grated Parmesan Cheese (optional): For those who enjoy a cheesy finish.

How to Make Air Fryer Roasted Broccoli
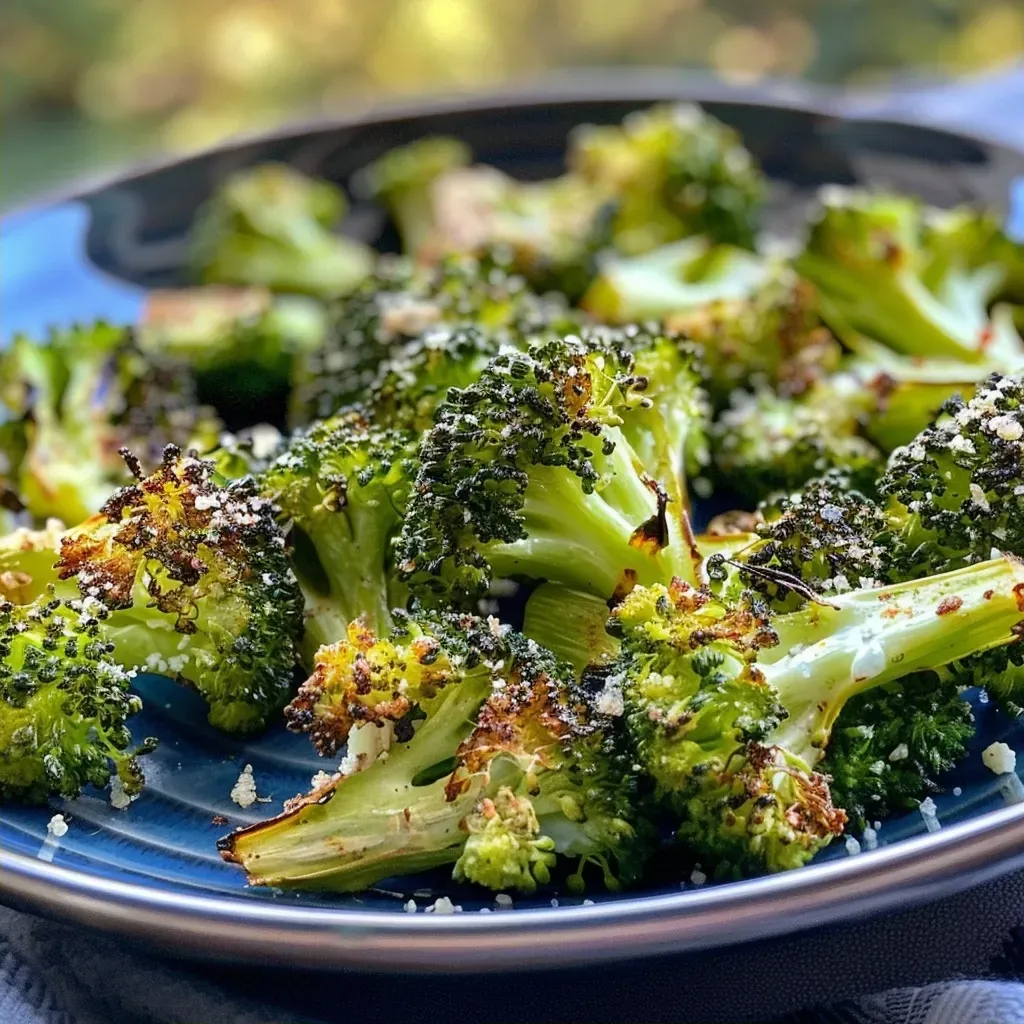
Close-up view of roasted broccoli florets with a golden-brown finish.

Follow these simple steps to prepare your roasted broccoli:

  • Season: In a large bowl, combine the broccoli florets with olive oil, salt, pepper, and your choice of seasonings. Toss until evenly coated. Using your hands ensures every floret is seasoned to perfection.
  • Cook: Preheat your air fryer to 375°F. Place the seasoned broccoli in the air fryer basket in a single layer. Air fry for 8-10 minutes, shaking the basket halfway through for even cooking. The broccoli should be crispy with lovely charred edges.
  • Garnish: Once cooked, sprinkle with Parmesan cheese or any other toppings you desire, like minced garlic or a dash of red pepper flakes, to enhance the flavor.

Pro Tips for Perfect Air Fryer Broccoli

To elevate your air fryer broccoli game, consider these expert tips:

  • Dry Thoroughly: Make sure to dry your broccoli well after washing to achieve maximum crispiness.
  • Uniform Florets: Cut the florets into uniform sizes for even cooking.
  • Avoid Overcrowding: Cook in batches if necessary to ensure hot air circulates freely around the broccoli.
  • Experiment with Seasonings: Don’t hesitate to try different spices such as smoked paprika or cayenne for a kick.
  • Check for Doneness: If you prefer softer broccoli, adjust cooking time to your liking.
  • Use Fresh Broccoli: Fresh broccoli tends to have a better texture and flavor compared to frozen varieties.
  • Preheat the Air Fryer: This helps in achieving that perfect crispiness from the start.
  • Shake the Basket: Shaking the basket halfway through cooking promotes even browning.

Common Mistakes and Troubleshooting

Even the best chefs make mistakes. Here are some common pitfalls and how to fix them:

  • Overcooked Broccoli: If your broccoli turns mushy, reduce the cooking time and check for doneness more frequently.
  • Undercooked Broccoli: If the broccoli isn’t crispy after the recommended cooking time, simply add a few more minutes and check.
  • Too Greasy: If you find your broccoli oily, reduce the amount of oil used next time.
  • Flavorless Broccoli: Always ensure you season adequately. Taste before cooking if unsure.

Delicious Variations to Try

Switch things up with these creative variations:

  • Cheesy Garlic Broccoli: Add minced garlic and extra Parmesan cheese before air frying.
  • Sriracha Broccoli: Toss with Sriracha sauce for a spicy twist.
  • Asian-Style Broccoli: Drizzle with soy sauce and sesame seeds after cooking.
  • Herbed Broccoli: Use fresh herbs like thyme or rosemary for a fragrant finish.

Storage and Make-Ahead Instructions

If you want to plan ahead, here’s how to store your air fryer broccoli:

  • Refrigeration: Store leftover broccoli in an airtight container in the refrigerator for up to 3 days.
  • Reheating: Reheat in the air fryer at 350°F for about 5 minutes to regain crispiness.
  • Make-Ahead: You can prep and season your broccoli ahead of time. Just store it in the fridge until you’re ready to air fry.

Frequently Asked Questions

Here are some common questions about air fryer broccoli:

  • Can I use frozen broccoli? Yes! Just increase the cooking time by a few minutes.
  • What other vegetables can I air fry? Carrots, Brussels sprouts, and cauliflower are great options.
  • How do I know when the broccoli is done? Look for a crispy texture and slight browning around the edges.
  • Can I double the recipe? Yes, but do it in batches to avoid overcrowding the air fryer basket.
  • Is air-fried broccoli healthy? Absolutely! It retains nutrients while being lower in fat compared to frying.
  • Can I use other oils? Yes, feel free to use other oils like grapeseed or sunflower for different flavor profiles.
  • How long can I store leftovers? In an airtight container, leftovers can last up to 3 days in the fridge.
  • Can I add nuts or seeds? Yes, sprinkle some toasted almonds or sunflower seeds for added crunch.

Nutrition Tips and Dietary Adaptations

For a healthier twist, consider these adaptations:

  • Low-Sodium Option: Use less salt or a salt substitute for a heart-healthy choice.
  • Vegan-Friendly: Omit the Parmesan cheese or substitute it with nutritional yeast for a cheesy flavor.
  • Gluten-Free: This recipe is naturally gluten-free, making it suitable for those with dietary restrictions.

Recommended Equipment

To successfully make air fryer roasted broccoli, here’s what you need:

  • Air Fryer: A reliable air fryer is essential for even cooking.
  • Mixing Bowl: For coating the broccoli with oil and spices.
  • Measuring Spoons: To ensure accurate ingredient portions.

Serving Suggestions

Pair your air fryer roasted broccoli with these meal ideas:

  • Grilled Chicken: A classic combination that adds protein to your meal.
  • Quinoa Salad: Toss broccoli with quinoa for a nutrient-rich dish.
  • Pasta Dishes: Add roasted broccoli to pasta for a delicious veggie boost.
  • Steak or Fish: Broccoli makes a perfect side for any grilled meat or fish dish.

Conclusion

Air fryer roasted broccoli is not just a side dish; it’s a celebration of flavor and health. With its crispy texture and endless customization options, this recipe will quickly become a favorite in your kitchen. Whether you’re preparing a quick weeknight dinner or planning a family feast, this broccoli dish is sure to impress. So, grab your air fryer and let’s start cooking!

Air Fryer Roasted Broccoli

Prep Time 5 minutes
Cook Time 10 minutes
Total Time 15 minutes
Servings 4 servings
Calories 150
A quick and healthy side dish, roasted to perfection in the air fryer with simple seasonings and optional Parmesan cheese.

Ingredients

Vegetables

  • 1 head Broccoli (cut into florets)
  • 1 tablespoon Oil (Olive or avocado oil)
  • 0.5 teaspoon salt and pepper (or to taste)
  • 0.5 teaspoon Garlic powder
  • 0.25 teaspoon Onion Powder
  • 0.5 teaspoon Seasoning (e.g., Vegeta All-purpose seasoning)
  • 1 tablespoon Parmesan Cheese (optional)

Instructions 

  • Toss broccoli florets with oil, salt, pepper, and seasonings until evenly coated.
  • Preheat air fryer to 375°F (190°C). Spread broccoli in a single layer in the basket.
  • Cook for 8-10 minutes, shaking occasionally for even crispness.
  • Optional: sprinkle with Parmesan cheese or other toppings before serving.

Notes

Be careful not to over-season to keep the broccoli’s natural flavor.
Calories: 150kcal
Cost: $10
Course: Side Dish
Cuisine: American
Keyword: Broccoli

Start Your Day Right with Cottage Cheese Pancakes

When it comes to breakfast, few dishes are as versatile, nutritious, and downright delicious as pancakes. Today, we’re diving into the world of high-protein cottage cheese pancakes, a recipe that not only satisfies your morning cravings but also fuels your day with wholesome ingredients. With the perfect blend of protein, fiber, and flavor, these pancakes are an ideal choice for anyone looking to elevate their breakfast game. Let’s explore how to make these pancakes, the benefits they offer, and some tips for perfecting your breakfast experience!

Why You’ll Love This Recipe

These cottage cheese pancakes offer a delightful twist to your traditional breakfast fare. Here are five reasons to love them:

  • High in Protein: Each serving is packed with protein, making them a great option for muscle recovery or a sustained energy boost.
  • Easy to Prepare: This recipe requires minimal effort—just blend your ingredients and cook!
  • Customizable Flavors: You can easily adapt the recipe with different spices, sweeteners, or toppings to suit your taste.
  • Healthy Ingredients: Made with wholesome components like rolled oats and low-fat cottage cheese, these pancakes are a healthier alternative to traditional recipes.
  • Kid-Friendly: With their fluffy texture and mild flavor, these pancakes are a hit with both kids and adults alike.

Ingredients Breakdown

Before we start making our pancakes, let’s go through the ingredients you’ll need. These ingredients are not only nutritious but also easy to find at your local grocery store.

  • 1 cup low-fat cottage cheese: This is the star of the recipe, providing creaminess and protein. You can substitute with Greek yogurt if needed.
  • 2 large eggs: Eggs add structure and richness. For a vegan option, consider using flax eggs (1 tablespoon ground flaxseed + 2.5 tablespoons water = 1 egg).
  • 1/2 cup rolled oats: The oats give the pancakes a hearty texture. You can use quick oats, but the texture may vary slightly.
  • 1 teaspoon vanilla extract: This adds a subtle sweetness and flavor depth. Feel free to use almond extract for a twist.
  • 1/2 teaspoon ground cinnamon: Cinnamon enhances the flavor profile. You can also add nutmeg for additional warmth.
  • 1/2 teaspoon baking powder: This is crucial for fluffiness. Make sure it’s fresh for the best rise.
  • 1/8 teaspoon kosher salt: Salt balances the sweetness and enhances overall flavor.
  • 1 teaspoon coconut oil for greasing: This helps prevent sticking while adding a hint of flavor. You can substitute with butter or a non-stick spray if preferred.

How to Make Cottage Cheese Pancakes

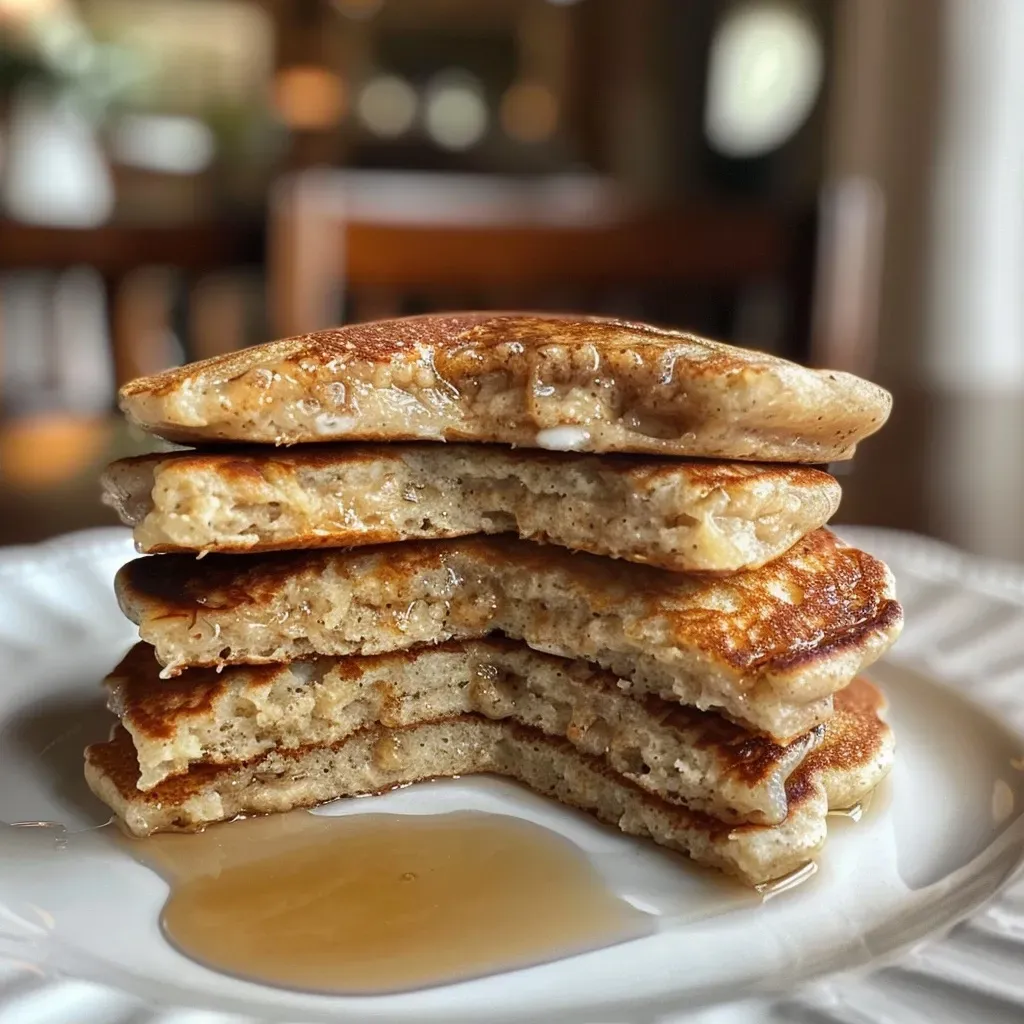
Close-up view of fluffy high-protein cottage cheese pancakes topped with syrup.

Now that we have our ingredients ready, let’s get to the fun part—making the pancakes!

  • Combine cottage cheese, eggs, rolled oats, vanilla extract, cinnamon, baking powder, and salt in a high-speed blender.
  • Process on high speed for 30 to 45 seconds until the batter is completely smooth and the oats are pulverized.
  • Preheat a non-stick griddle or skillet over medium-low heat and lightly coat with coconut oil.
  • Portion 1/4 cup of batter per pancake onto the heated surface, leaving space between each.
  • Cook for 3 minutes until bubbles form on the surface and the edges are firm to the touch.
  • Flip the pancakes carefully with a thin spatula and cook for an additional 2 minutes until golden brown and cooked through.
  • Transfer to a plate and serve immediately to maintain texture.

Expert Pro Tips for Perfect Pancakes

To ensure your pancakes turn out perfectly every time, consider these expert tips:

  • Blend thoroughly: Ensure the batter is completely smooth to avoid grainy textures.
  • Let the batter rest: Allowing the batter to sit for a few minutes can help improve texture.
  • Don’t overcrowd the pan: Give each pancake enough space to cook evenly.
  • Adjust heat as needed: If pancakes are browning too quickly, reduce the heat to ensure they cook through.
  • Use fresh ingredients: Check the expiration dates on baking powder and eggs for the best results.
  • Experiment with toppings: Try fresh fruit, nuts, or a drizzle of honey or maple syrup to elevate your pancakes.
  • Make a double batch: These pancakes freeze well, so make extra for busy mornings!
  • Keep them warm: If cooking in batches, keep pancakes warm in a low oven while finishing the rest.

Common Mistakes and Troubleshooting

Even the best cooks can run into issues. Here are some common mistakes and how to avoid them:

  • Pancakes are too dense: This can happen if the batter is over-blended. Blend just until smooth.
  • Burnt pancakes: If your pancakes are burning, your heat may be too high. Lower the temperature for a more controlled cook.
  • Pancakes sticking to the pan: Ensure the pan is well-greased and heated before pouring the batter.
  • Uneven cooking: Make sure the batter is distributed evenly on the griddle for uniform cooking.

Variations to Try

Feeling adventurous? Here are some variations to spice up your pancakes:

  • Add fruit: Mix in blueberries, bananas, or chocolate chips directly into the batter for added flavor.
  • Go savory: Incorporate fresh herbs, cheese, or spinach for a savory twist.
  • Protein boost: Add a scoop of your favorite protein powder for an extra punch.
  • Flavored pancakes: Experiment with different extracts like almond or coconut for unique flavors.

Storage and Make-Ahead Instructions

Want to prepare ahead? Here’s how to store your pancakes:

  • In the fridge: Store leftovers in an airtight container for up to 3 days.
  • In the freezer: Freeze pancakes in a single layer, then transfer to a zip-top bag for up to 2 months.
  • To reheat: Microwave pancakes for 30-60 seconds or warm them in a toaster or oven.

Frequently Asked Questions

Got questions? Here are some common inquiries about cottage cheese pancakes:

  • Can I use low-fat cottage cheese?: Absolutely! Low-fat cottage cheese works perfectly in this recipe.
  • Do these pancakes contain gluten?: If using rolled oats, ensure they are certified gluten-free for a gluten-free option.
  • How can I make these pancakes sweeter?: Adjust sweetness by adding maple syrup or honey to the batter or as a topping.
  • Are these pancakes suitable for meal prep?: Yes, they store well and reheat easily, making them perfect for meal prep!
  • Can I make these pancakes without a blender?: Yes, you can mash the cottage cheese and mix the ingredients by hand, though the texture may vary.
  • What can I serve with these pancakes?: Serve them with fresh fruit, yogurt, or a drizzle of nut butter for a balanced meal.
  • How do I know when the pancakes are done?: Look for bubbles forming on the surface and edges that appear set; this indicates they’re ready to flip.
  • Can I make these pancakes vegan?: Yes, substitute eggs with flax eggs and use a plant-based yogurt instead of cottage cheese.

Nutritional Insights and Dietary Adaptations

These pancakes not only taste great, but they also offer various health benefits:

  • High protein content: Perfect for those looking to boost protein intake for muscle repair and satiety.
  • Low in sugar: This makes them a healthier choice compared to traditional pancakes loaded with sugar and refined flour.
  • Customizable for dietary needs: Easily adapt the recipe for gluten-free, dairy-free, or vegan diets!

Essential Equipment for Perfect Pancakes

Here’s what you’ll need to make these delicious pancakes:

  • High-speed blender: Essential for creating a smooth batter.
  • Non-stick skillet or griddle: Provides an even cooking surface for perfectly golden pancakes.
  • Spatula: A thin spatula is ideal for flipping pancakes without breaking them.
  • Measuring cups and spoons: Accurate measurements ensure the best results!

Serving Suggestions

When it comes to serving your cottage cheese pancakes, the options are endless:

  • Top with fresh fruit: Sliced bananas, berries, or a sprinkle of nuts add color and flavor.
  • Drizzle with maple syrup: A classic topping that enhances the pancakes’ sweetness.
  • Add a dollop of yogurt: This adds creaminess and pairs beautifully with the pancakes’ texture.
  • Sprinkle cinnamon or powdered sugar: A light dusting can elevate presentation and flavor.

In conclusion, these high-protein cottage cheese pancakes are not just a breakfast option; they’re a delightful way to share moments with family and friends. With their nutritious ingredients and endless variations, you can enjoy a delicious and fulfilling meal that sets the tone for a great day ahead. So, gather your ingredients, grab your blender, and let’s make some pancakes!

High-Protein Cottage Cheese Pancakes

Prep Time 5 minutes
Cook Time 10 minutes
Total Time 15 minutes
Servings 4 pancakes
Calories 250
Enjoy these protein-packed pancakes that are quick to make and perfect for a nutritious breakfast.

Ingredients

Dairy

  • 1 cup low-fat cottage cheese
  • 2 large eggs
  • 1/2 cup rolled oats
  • 1 teaspoon vanilla extract
  • 1/2 teaspoon ground cinnamon
  • 1/2 teaspoon baking powder
  • 1/8 teaspoon kosher salt
  • 1 teaspoon coconut oil for greasing

Instructions 

  • Combine cottage cheese, eggs, oats, vanilla, cinnamon, baking powder, and salt in a blender.
  • Blend until smooth and oats are pulverized.
  • Preheat a skillet and lightly coat with coconut oil.
  • Pour 1/4 cup batter per pancake onto the skillet.
  • Cook 3 minutes, flip, then cook 2 more minutes until golden.
  • Serve immediately.

Notes

For extra flavor, add fresh berries or a drizzle of honey.
Calories: 250kcal
Cost: $10
Course: Breakfast
Cuisine: American
Keyword: Pancakes

Welcome to a culinary adventure where we transform simple ingredients into a stunning appetizer that will impress your guests and delight your taste buds! Caprese Salad Skewers are not just a feast for the eyes; they are a celebration of fresh flavors and textures. If you’ve ever thought about how to make your gatherings more memorable, these skewers are the perfect addition. In this article, we will explore everything you need to know about creating these delightful bites, from ingredients to tips for success.

Why You’ll Love This Recipe

Here are just a few reasons why Caprese Salad Skewers deserve a spot on your appetizer table:

  • Fresh Ingredients: Featuring vibrant cherry tomatoes, aromatic basil, and creamy bocconcini, this recipe embraces the best of seasonal produce.
  • Quick and Easy: With minimal prep time, you can whip up these skewers in no time, making them perfect for unexpected guests or last-minute gatherings.
  • Versatile Serving Options: Whether as an elegant starter for a dinner party or a casual snack for a picnic, these skewers fit any occasion.
  • Customizable Flavors: Feel free to mix and match ingredients to suit your taste preferences or dietary needs.
  • Eye-Catching Presentation: The colorful layers of ingredients make these skewers a showstopper on any table.

Ingredients Breakdown

To create perfect Caprese Salad Skewers, you will need the following ingredients:

  • 16 cherry tomatoes: Look for ripe, juicy tomatoes for the best flavor.
  • 16 fresh basil leaves: Choose medium to large leaves for a bold flavor.
  • 16 bocconcini: These are small balls of mozzarella that offer a creamy texture.
  • 1 Tbsp extra-virgin olive oil: This adds a rich flavor and helps season the mozzarella.
  • A drizzle of balsamic glaze: This adds a sweet tang that complements the freshness of the ingredients.
  • Sea salt flakes: A pinch will enhance all the flavors.

**Substitutions:** If you are unable to find bocconcini, you can use larger mozzarella balls and cut them into smaller pieces. You can also experiment with different herbs, such as mint or arugula, for a unique twist.

Pro Tips for Perfect Skewers

To ensure your Caprese Salad Skewers are a hit, consider these expert insights:

  • Marinate for Flavor: Allow the bocconcini to marinate in olive oil and salt for at least 30 minutes. This enhances their flavor significantly.
  • Use a Variety of Colors: Incorporate a mix of yellow and red cherry tomatoes for a vibrant presentation.
  • Thread with Care: When assembling, try to alternate colors and textures for an eye-catching effect.
  • Keep it Simple: Don’t overload the skewers; a few key ingredients will shine better than a complicated mix.
  • Serving Temperature: Serve these skewers at room temperature for the best flavor.
  • Invest in Quality Ingredients: Fresh, high-quality ingredients will make all the difference in flavor.
  • Prep Ahead: You can assemble the skewers a few hours in advance—just drizzle with balsamic glaze right before serving.
  • Experiment with Drizzles: Besides balsamic glaze, try adding a touch of pesto or a sprinkle of lemon zest for added flavor.

Common Mistakes to Avoid

Here are some pitfalls to watch out for:

  • Using Overripe Tomatoes: They can make your skewers soggy. Choose firm tomatoes for the best results.
  • Skipping the Seasoning: Don’t forget to season the bocconcini. A little salt can elevate the dish.
  • Neglecting to Marinate: Skipping the marination step can result in bland flavors.
  • Overcrowding the Skewers: Keep some space between ingredients to ensure even flavor distribution.

Delicious Variations

Feel free to get creative! Here are some variations to consider:

  • Caprese with Prosciutto: Add slices of prosciutto for a savory twist.
  • Fruit Twist: Substitute cherry tomatoes with fresh peaches or strawberries for a fruity flavor.
  • Vegan Option: Replace bocconcini with marinated tofu or avocado cubes.
  • Spicy Kick: Include jalapeño slices or a sprinkle of chili flakes for heat.

Storage and Make-Ahead Instructions

To keep your Caprese Salad Skewers fresh:

  • Refrigeration: Store assembled skewers in an airtight container in the refrigerator for up to 2 days.
  • Make-Ahead: You can prep ingredients a day in advance. Assemble the skewers the day of your event for optimal freshness.

Frequently Asked Questions

Here are some common questions about Caprese Salad Skewers:

  • Can I use different cheeses? Yes! Feel free to experiment with feta or goat cheese for a different flavor profile.
  • What can I serve them with? These skewers pair beautifully with crusty bread, olives, or a charcuterie board.
  • How do I make them gluten-free? This recipe is naturally gluten-free, just ensure any accompanying dips or drizzles are also gluten-free.
  • Can I prepare these skewers for meal prep? Absolutely! They make a great addition to lunch boxes or light dinners.
  • What’s the best way to serve them? Serve them on a beautiful platter, drizzled with balsamic glaze for a stunning presentation.
  • How long do they last? They are best enjoyed fresh but can last in the fridge for 2 days if stored properly.
  • Can I use wooden skewers? Yes! Just soak them in water for 30 minutes before using to prevent burning.
  • Are these suitable for kids? Definitely! Kids love the fun presentation and delicious flavors.

Nutritional Tips and Dietary Adaptations

For a healthier version of Caprese Salad Skewers:

  • Lower Fat: Use part-skim mozzarella to reduce fat content.
  • Vegetarian Option: This recipe is vegetarian-friendly, making it perfect for meatless meals.
  • Keto-Friendly: These skewers are low in carbs, making them a great choice for keto diets.

Equipment Recommendations

Here’s what you’ll need to create your Caprese Salad Skewers:

  • Skewers: Bamboo or metal skewers work well; choose a size that suits your presentation.
  • Knife: A sharp knife is essential for cutting tomatoes and cheese.
  • Cutting Board: A sturdy cutting board will help you prep your ingredients efficiently.
  • Serving Platter: A beautiful platter will showcase your skewers and impress your guests.

Serving Suggestions

Caprese Salad Skewers are incredibly versatile. Here are some serving suggestions:

  • As Part of a Buffet: Serve alongside other appetizers like meatballs or bruschetta for a varied spread.
  • At a Picnic: Pack them up for a fresh and easy outdoor meal.
  • For a Romantic Dinner: Pair with a nice bottle of wine for an elegant touch.

Conclusion

Creating Caprese Salad Skewers is not only simple but also a delightful way to elevate any gathering. With their fresh ingredients, vibrant colors, and delicious flavors, these skewers are sure to be a hit. Whether you’re hosting a dinner party, a casual get-together, or just want to treat yourself, these skewers offer a taste of summer in every bite. Thank you for joining me on this culinary journey—now go ahead, gather your ingredients, and make these delightful skewers that everyone will love!

Caprese Salad Skewers with Bocconcini (Appetizer)

Prep Time 20 minutes
Total Time 20 minutes
Servings 16 skewers
Calories 150
Enjoy these fresh and flavorful Caprese skewers, perfect for a quick appetizer with cherry tomatoes, basil, and mozzarella.

Ingredients

Produce

  • 16 pieces cherry tomatoes
  • 16 leaves fresh basil leaves ((medium-large))
  • 16 balls bocconcini ((cherry-sized mozzarella balls))

Pantry

  • 1 Tbsp extra-virgin olive oil
  • A drizzle balsamic glaze
  • to taste sea salt flakes sea salt flakes ((for seasoning))

Instructions 

  • Drain bocconcini from brine, toss with olive oil and a pinch of sea salt. Marinate for 15-30 minutes.
  • Wash cherry tomatoes and pluck basil leaves from stems.
  • Thread cherry tomatoes, basil leaves, and cheese onto skewers, finishing with a cheese ball.
  • Arrange skewers on a plate, drizzle with balsamic glaze, and sprinkle with sea salt.

Notes

Use fresh ingredients for best flavor and presentation.
Calories: 150kcal
Cost: $10
Course: Appetizer
Cuisine: Italian
Keyword: basil, Mozzarella, Tomato

Welcome to your next favorite dinner recipe! This High Protein Chicken Fajita Pasta combines the bold flavors of fajitas with the satisfaction of pasta, making it a delightful meal for family and friends. Packed with nutritious ingredients, this dish not only satisfies your taste buds but also provides a healthy dose of protein. In less than 30 minutes, you can create a nourishing meal that everyone will love. Let’s dive into the details of this fantastic recipe!

Why You’ll Love This Recipe

  • Quick and Easy: Perfect for busy weeknights, this dish can be made in under 30 minutes, making it a go-to option for dinner.
  • High Protein: With lean chicken breast and high-protein pasta, this recipe fuels your body, perfect for fitness enthusiasts or anyone looking to maintain a healthy lifestyle.
  • Flavor Explosion: The combination of spices used in the fajita seasoning brings a burst of flavor that elevates the entire dish.
  • Customizable: Easily adapt this recipe to accommodate dietary preferences or ingredient availability, making it versatile for any kitchen.
  • Kid-Friendly: The creamy texture and savory flavors make this a hit for both kids and adults, ensuring everyone leaves the table satisfied.

Ingredients You’ll Need

Gather these ingredients to whip up your High Protein Chicken Fajita Pasta:

  • 1 tablespoon olive oil: A healthy fat that enhances flavor.
  • 1 tablespoon butter: Adds richness to the dish.
  • 1 1/2 lb chicken breast: Cut into bite-size pieces for quick cooking.
  • 1/2 tablespoon smoked paprika: Provides a depth of flavor.
  • 1 teaspoon garlic powder: For aromatic flavor.
  • 1 teaspoon onion powder: Complements the chicken beautifully.
  • 1/2 teaspoon ground cumin: A key spice in fajita seasoning.
  • 1/2 teaspoon salt: Enhances overall taste.
  • 1/2 teaspoon ground black pepper: Adds mild heat.
  • 12 oz high-protein pasta: Your choice of shape, such as penne or rotini.
  • 1 medium red onion: Diced for sweetness.
  • 1 medium green bell pepper: Adds crunch and color.
  • 2 tablespoons tomato paste: Enriches the sauce.
  • 1/2 cup low-sodium chicken stock: For a flavorful base.
  • 1/2 cup light cream cheese: Makes the sauce creamy.
  • 1 cup light cheddar cheese: Shredded for topping.
  • A handful of fresh parsley: For garnish.

Step-by-Step Instructions

Follow these easy steps to create your High Protein Chicken Fajita Pasta:

  1. Cook the Pasta: Bring a large pot of salted water to a boil. Add the high-protein pasta and cook according to package instructions until al dente. Reserve 1 cup of pasta water, then drain and set aside.
  2. Season the Chicken: In a bowl, season the chicken pieces with smoked paprika, garlic powder, onion powder, cumin, salt, and black pepper, ensuring each piece is coated well.
  3. Cook the Chicken: In a large skillet, heat 1 tablespoon of olive oil and the butter over medium-high heat. Add the seasoned chicken to the pan and cook for 6-8 minutes, stirring occasionally until golden and cooked through. Remove the chicken from the skillet and set aside.
  4. Sauté the Veggies: In the same skillet, add another tablespoon of olive oil. Add the diced red onion and green bell pepper, sautéing for about 5 minutes until softened.
  5. Build the Sauce Base: Stir in garlic powder, cumin, paprika, oregano, salt, black pepper, and tomato paste. Cook for 1-2 minutes until fragrant.
  6. Create the Creamy Sauce: Pour in the chicken stock, scraping the bottom of the skillet to release any browned bits. Lower the heat and mix in the cream cheese and cheddar until melted and smooth.
  7. Combine Everything: Toss in the cooked pasta, adding reserved pasta water as necessary to achieve a silky sauce. Stir in the cooked chicken, allowing it to warm through. Garnish with fresh parsley before serving.

Pro Tips for Success

A side view of a bowl filled with high protein chicken fajita pasta, showcasing colorful ingredients.
  • Use High-Protein Pasta: Opt for lentil, chickpea, or whole wheat pasta to boost the protein content further.
  • Don’t Overcook the Chicken: Remove the chicken from the heat as soon as it’s cooked through to keep it tender.
  • Reserve Pasta Water: This starchy water is key to creating a rich sauce; don’t skip this step!
  • Mix Up the Veggies: Feel free to add zucchini, mushrooms, or spinach for added nutrition and color.
  • Make It Spicy: Add diced jalapeños or a splash of hot sauce for an extra kick.
  • Cheese Alternative: For a dairy-free option, use vegan cream cheese and cheese alternatives.
  • Meal Prep: This dish can be made ahead and stored in the fridge for up to three days.
  • Freeze for Later: Leftovers freeze well; just reheat on the stovetop or microwave.

Common Mistakes and Troubleshooting

Here are some frequent pitfalls to avoid:

  • Underseasoning: Always taste and adjust seasoning as you go. Don’t be afraid to add more spices!
  • Overcooking the Pasta: Follow package instructions closely; al dente pasta holds up better in the sauce.
  • Skipping the Pasta Water: This helps bind the sauce to the pasta, so use it generously.
  • Neglecting to Sauté the Veggies: Sautéing brings out their natural sweetness, enhancing the overall flavor.

Variations to Try

Feel free to experiment with these variations:

  • Vegetarian Version: Substitute chicken with black beans or roasted chickpeas.
  • Gluten-Free Option: Use gluten-free pasta and ensure all other ingredients are gluten-free.
  • Creamy Avocado Fajita Pasta: Blend ripe avocado into the sauce for a creamy texture without dairy.
  • Fajita Shrimp Pasta: Swap chicken for shrimp for a seafood twist.

Storage and Make-Ahead Instructions

This High Protein Chicken Fajita Pasta is perfect for meal prep:

  • Refrigerate: Store in an airtight container for up to three days.
  • Freeze: Cool completely before transferring to a freezer-safe container; it can last up to three months.
  • Reheat: Thaw overnight in the fridge and reheat on the stovetop with a splash of water or chicken stock to loosen the sauce.

Frequently Asked Questions

  • Can I use chicken thighs instead of chicken breast? Yes, chicken thighs will add more flavor, but ensure they are cooked thoroughly.
  • What pasta works best for the highest protein content? High-protein options include chickpea or lentil pasta, which are excellent alternatives.
  • Can I make this dish dairy-free? Absolutely! Use dairy-free cream cheese and cheese alternatives to maintain creaminess.
  • Is this chicken fajita pasta kid-friendly? Yes! The creamy sauce and mild spices make it appealing for children.
  • How can I make this dish spicier? Add jalapeños, cayenne pepper, or your favorite hot sauce to the dish for a kick.
  • Can I prep this dish ahead of time? Yes, you can prepare the chicken and sauce ahead of time and combine them with pasta when ready to serve.
  • What side dishes pair well with this pasta? A fresh green salad or garlic bread complements this dish perfectly.
  • How can I store leftovers? Store leftovers in an airtight container in the fridge for up to three days or freeze them for longer storage.

Nutritional Tips and Dietary Adaptations

This recipe is not only delicious but also nutritious. Here’s how you can adapt it:

  • High-Protein: Incorporating high-protein pasta and lean chicken ensures you’re getting enough protein, essential for muscle repair and growth.
  • Low-Carb Option: For a low-carb version, swap traditional pasta for zucchini noodles or spaghetti squash.
  • Increased Fiber: Add more vegetables like spinach or kale to boost fiber content, helping digestion and satiety.

Equipment Recommendations

For the best cooking experience, consider using:

  • Large Pot: For boiling pasta, a 6-quart pot is ideal.
  • Skillet: A non-stick skillet for sautéing the chicken and vegetables ensures easy cleanup.
  • Measuring Cups and Spoons: To accurately measure ingredients for consistent results.
  • Wooden Spoon: For mixing and stirring sauces without scratching your cookware.

Serving Suggestions

When it comes to serving High Protein Chicken Fajita Pasta, consider these ideas:

  • Garnish: Fresh parsley or cilantro adds a pop of color and freshness.
  • Cheese Topping: Sprinkle additional shredded cheddar or a dollop of sour cream for a creamy finish.
  • Side Salads: Pair with a simple green salad tossed in vinaigrette for a refreshing contrast.
  • Wine Pairing: A crisp white wine like Sauvignon Blanc complements the dish beautifully.

Conclusion

Your culinary adventure with this High Protein Chicken Fajita Pasta promises to be both satisfying and nutritious. With its bold flavors and creamy texture, it’s a dish that not only nourishes but also brings people together around the table. Whether you’re a seasoned chef or a novice cook, this recipe is designed for success. Enjoy the process, and most importantly, enjoy the meal!

High Protein Chicken Fajita Pasta

Prep Time 10 minutes
Cook Time 20 minutes
Total Time 30 minutes
Servings 4 servings
Calories 850
A flavorful and protein-packed pasta dish combining tender chicken, vibrant vegetables, and a creamy sauce with a smoky kick.

Ingredients

Protein

  • 1 tbsp olive oil
  • 1 tbsp butter
  • 1.5 lb chicken breast (cut into bite-size pieces)
  • 0.5 tbsp smoked paprika
  • 1 tsp garlic powder
  • 1 tsp onion powder
  • 0.5 tsp ground cumin
  • 0.5 tsp salt
  • 0.5 tsp ground black pepper
  • 12 oz high-protein pasta
  • 1 tbsp olive oil
  • 1 medium red onion
  • 1 medium green bell pepper
  • 1 tsp garlic powder
  • 1 tsp ground cumin
  • 1 tsp paprika
  • 1 tsp dried oregano
  • 0.5 tsp salt
  • 0.25 tsp ground black pepper
  • 2 tbsp tomato paste
  • 0.5 cup low-sodium chicken stock
  • 0.5 cup light cream cheese
  • 1 cup light cheddar cheese (shredded)
  • A handful fresh parsley (roughly chopped)

Instructions 

  • Cook pasta in boiling salted water until al dente; drain and set aside.
  • Season chicken with spices; cook in oil and butter until golden and cooked through. Remove and set aside.
  • Sauté diced onion and bell pepper until softened. Add spices and tomato paste; cook briefly.
  • Stir in chicken stock, then melt in cream cheese and cheddar to form sauce. Add pasta and cooked chicken, warm through, then garnish with parsley.

Notes

Use high-protein pasta for extra protein content and adjust seasoning to taste.
Calories: 850kcal
Cost: $15
Course: Main Course
Cuisine: Mexican-American
Keyword: Chicken, Fajita, Pasta

Cool Down This Summer with a Refreshing Watermelon Slushie

Summer days can be scorching, and there’s nothing better than a cool, refreshing drink to help you beat the heat. That’s where this watermelon slushie comes in! This deliciously icy concoction combines the natural sweetness of watermelon with zesty lime and a hint of fresh mint, making it the perfect summer drink for gatherings or just a quiet afternoon at home. In this post, we’ll explore everything you need to know to create the ultimate watermelon slushie, from step-by-step instructions to expert tips and variations.

Why You’ll Love This Watermelon Slushie Recipe

  • Deliciously refreshing: The combination of watermelon and lime creates a revitalizing flavor that is perfect for hot days.
  • Healthy and hydrating: Watermelon is made up of over 90% water, making this slushie a great way to stay hydrated.
  • Quick and easy: This recipe takes only minutes to prepare, making it a hassle-free option for busy days.
  • Customizable: Add your favorite fruits or herbs to make this slushie uniquely yours.
  • Perfect for any occasion: Whether it’s a backyard barbecue or a quiet evening at home, this slushie fits right in.

Ingredients for Your Watermelon Slushie

Before we dive into the preparation, let’s gather the ingredients you’ll need to make this delightful watermelon slushie.

  • 10 cups seedless watermelon cubes: Frozen is recommended for the best texture.
  • 2-4 tablespoons maple syrup: Adjust based on the sweetness of your watermelon.
  • Juice of 1 large lime: Adds a zesty kick that brightens the flavors.
  • 1/4 cup fresh mint or basil leaves: Provides a refreshing herbal note.
  • 1 1/2 cups filtered water: Helps blend everything smoothly.

Step-by-Step Instructions for Making a Watermelon Slushie

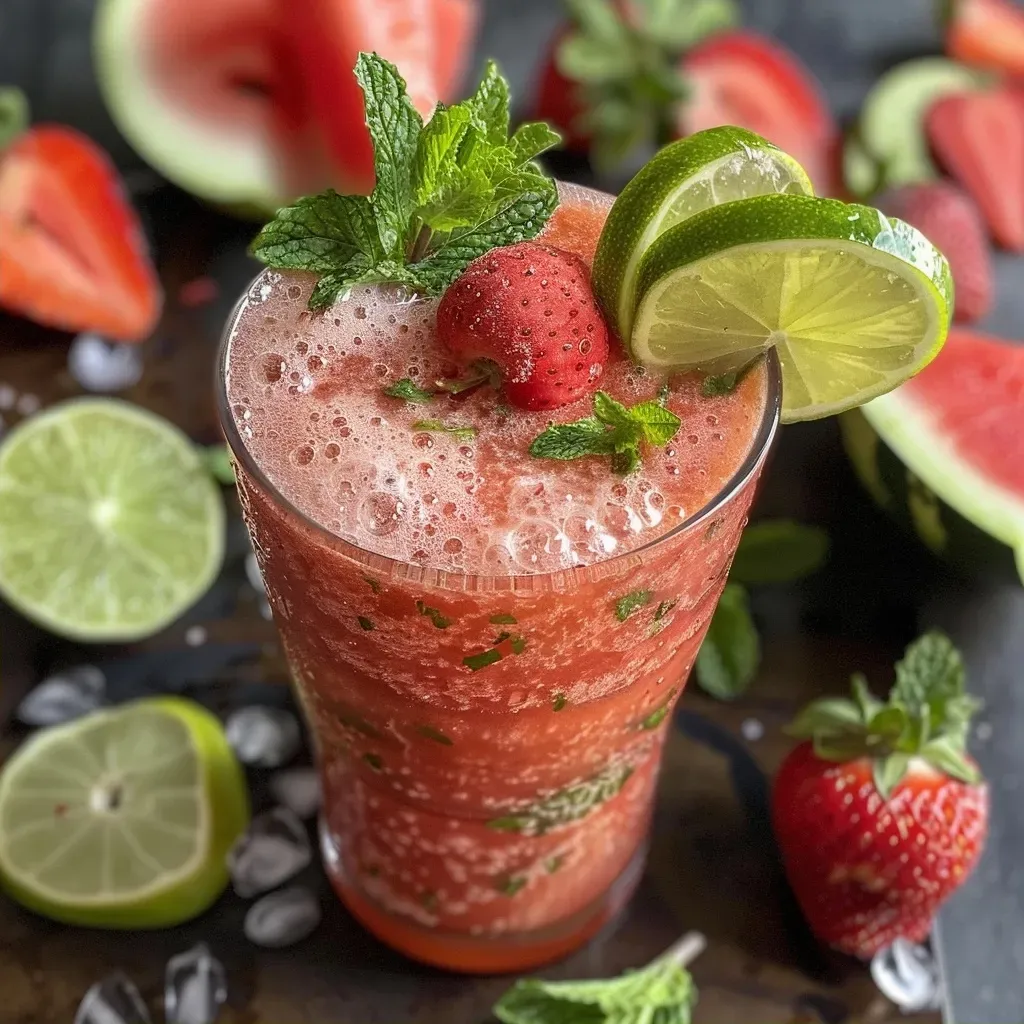
Close-up of a vibrant watermelon slushie in a clear glass, garnished with mint leaves.

Ready to get blending? Here’s how to create your slushie:

  1. Let the frozen watermelon cubes soften slightly (about 5–10 minutes).
  2. Add the watermelon into a blender.
  3. Pour in the lime juice and water.
  4. Add the fresh mint or basil leaves for that extra flavor.
  5. Blend until you achieve a smooth, slushie consistency.
  6. Adjust sweetness by adding more maple syrup if desired.
  7. If the mixture is too thick, add more water to reach your preferred consistency.
  8. Pour into glasses and serve immediately for the best experience.

Pro Tips for the Best Watermelon Slushie

  • Use frozen watermelon: Freezing the watermelon beforehand ensures a slushie that is icy and refreshing.
  • Pick ripe watermelon: Choose a watermelon that is heavy for its size and has a uniform shape for the sweetest flavor.
  • Experiment with herbs: Basil or mint can elevate the slushie’s flavor profile, so don’t be afraid to try both!
  • Balance sweetness: If your watermelon is particularly sweet, you might not need as much maple syrup.
  • Garnish creatively: Top with lime slices or a sprig of mint for a beautiful presentation.
  • Consider ice cubes: If you prefer a thicker slushie, you can add a few ice cubes when blending.
  • Chill your glasses: For an extra frosty experience, place your serving glasses in the freezer for a short while before pouring in the slushie.
  • Blend in batches: If you’re making a large batch, blend in smaller portions to ensure everything mixes evenly.

Common Mistakes and Troubleshooting

Even the best chefs can run into issues! Here are some common pitfalls and how to avoid them:

  • Too watery: If your slushie is too watery, try adding more frozen watermelon or blending less water into the mixture.
  • Not sweet enough: If you find the slushie lacking sweetness, gradually add more maple syrup while blending until you reach the desired taste.
  • Pulpy texture: If your slushie has a chunky texture, ensure your blender is powerful enough to fully blend the frozen watermelon.
  • Too thick: If the slushie is too thick to blend, add a little more water or let the watermelon thaw slightly longer.

Delicious Variations of Watermelon Slushie

Feel free to get creative! Here are some tasty variations you can try:

  • Berry Blast: Add a cup of frozen strawberries or blueberries for a fruity twist.
  • Coconut Delight: Replace half the water with coconut water for a tropical flavor.
  • Spicy Kick: Add a pinch of cayenne pepper or jalapeño slices for a spicy version.
  • Alcoholic Version: Blend in a splash of vodka or rum for an adult slushie option.

Storage and Make-Ahead Instructions

This watermelon slushie is best enjoyed fresh, but if you have leftovers, here’s how to store them:

  • Freezing: Pour any leftover slushie into an airtight container and freeze it. You can blend it again after thawing for a fresh texture!
  • Refrigeration: If you plan to consume it within a day, store it in the fridge in a sealed container.

Frequently Asked Questions

Got questions? Here are some common inquiries about making watermelon slushies:

  • Can I use fresh watermelon instead of frozen? Yes, but the texture will be different. If using fresh, add ice to achieve a slushie consistency.
  • How do I sweeten my slushie? Maple syrup is a great natural sweetener, but you can also use honey or agave syrup.
  • Is this recipe vegan? Absolutely! This watermelon slushie is naturally vegan-friendly.
  • Can I add other fruits? Yes, feel free to mix in any of your favorite fruits!
  • How long can I store leftovers? Leftover slushie can be frozen for up to a month. Just blend again before serving!
  • What’s the best way to serve it? Serve chilled in frosted glasses with a garnish of mint or lime.
  • Can I make this slushie with a different fruit? Definitely! You can use any fruit that blends well—mango and pineapple are great options.
  • Is it possible to make a thicker slushie? Yes! Use more frozen fruit and less liquid for a thicker consistency.

Nutrition Tips and Dietary Adaptations

This watermelon slushie is not only delicious but also healthy! Here’s how to adapt it for various dietary needs:

  • Low-sugar option: Use less maple syrup or omit it altogether if your watermelon is particularly sweet.
  • Gluten-free: This recipe is naturally gluten-free, making it suitable for those with gluten sensitivities.
  • Dairy-free: This slushie is dairy-free, allowing everyone to enjoy it!

Equipment Recommendations

To make your watermelon slushie, you’ll need a few essential tools:

  • High-speed blender: A powerful blender ensures that your slushie is smooth and creamy.
  • Measuring cups and spoons: For accurate ingredient measurements.
  • Serving glasses: Choose fun, vibrant glasses to enhance the presentation!

Serving Suggestions

Here are some ideas for serving your watermelon slushie:

  • Garnish: Top with fresh mint leaves or a slice of lime for a pop of color.
  • Pairing: Serve alongside light appetizers like fruit skewers or vegetable platters.
  • Make it a party: Create a slushie bar with different fruits and toppings for guests to customize their drinks.

In conclusion, this watermelon slushie recipe is a delightful, healthy way to cool off during those hot summer days. With easy-to-follow instructions, expert tips, and plenty of room for customization, you can make this drink your own. Whether you’re enjoying it solo or sharing it with friends, this slushie is sure to be a hit. So grab your blender, gather your ingredients, and let the refreshing fun begin!

Watermelon Slushie Recipe That’s Refreshing, Healthy, and Perfect for Summer

Prep Time 10 minutes
Total Time 10 minutes
Servings 4 cups
Calories 120
Enjoy a cool, healthy watermelon slushie that’s perfect for hot summer days. It’s easy to make and naturally sweet.

Ingredients

Watermelon

  • 10 cups seedless watermelon cubes
  • 2-4 tablespoons maple syrup
  • 1 large lime (juice of 1 large lime)
  • 1/4 cup fresh mint or basil leaves
  • 1 1/2 cups filtered water

Instructions 

  • Let frozen watermelon soften slightly.
  • Add watermelon into blender, pour in lime juice and water, then add mint or basil leaves.
  • Blend until slushie consistency forms, adjusting sweetness or water as needed.
  • Pour into glasses and serve immediately.

Notes

Use ripe watermelon for the best flavor.
Calories: 120kcal
Cost: $15
Course: Beverage
Cuisine: summer
Keyword: Watermelon

Discover the Irresistible Charm of Garlic Butter Noodles

If you’re looking for a quick, comforting meal that tantalizes the taste buds, look no further than garlic butter noodles. This delightful dish combines the richness of butter and the savory flavor of garlic with the delightful texture of egg noodles. Whether it’s a busy weeknight or a lazy weekend, this recipe is not only easy to prepare but also packs a flavor punch that’s bound to impress. In this comprehensive guide, we’ll explore everything you need to know about making the perfect garlic butter noodles, including tips, variations, storage options, and more!

Why You’ll Love This Recipe

  • Quick and Easy: This recipe comes together in just 15-20 minutes, making it perfect for busy weeknights or last-minute dinners.
  • Comfort Food: The combination of butter and garlic creates a warm, satisfying dish that feels like a hug in a bowl.
  • Versatile: You can customize this recipe with various add-ins, making it suitable for everyone’s palate.
  • Kid-Friendly: With its simple yet delicious flavor, garlic butter noodles are a hit with kids and adults alike.
  • Nutritious: Using fresh ingredients and whole egg noodles makes this dish a wholesome choice for your family.

Ingredients Breakdown

To create the perfect garlic butter noodles, you’ll need the following ingredients:

  • 8 ounces uncooked egg noodles: The ideal shape for the buttery sauce to cling to, creating a perfect mouthful.
  • 1/4 cup butter (1/2 stick): Unsalted butter is recommended for better control over the saltiness of the dish.
  • 4 cloves garlic (minced): Fresh garlic adds a robust flavor that elevates the dish.
  • 1/2 cup freshly grated parmesan cheese: This adds a creamy richness that complements the garlic and butter.
  • 1 tablespoon chopped fresh parsley: Fresh herbs provide a burst of color and freshness.
  • Salt & pepper (to taste): Essential for enhancing the flavors.

Ingredient Substitutions

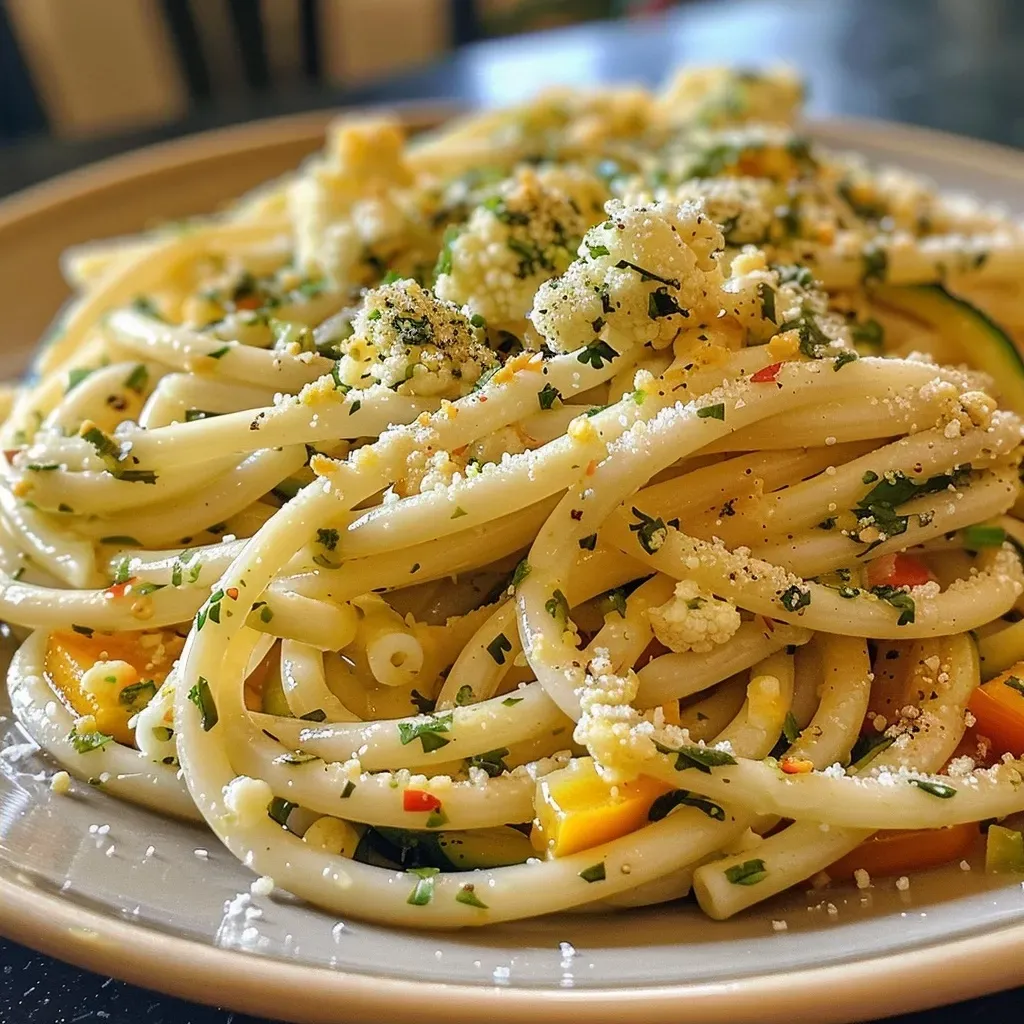
Close-up view of a plate of Garlic Butter Noodles topped with parsley.

If you find yourself missing an ingredient, don’t worry! Here are some substitutions:

  • Pasta: Feel free to use spaghetti, fettuccine, or even gluten-free pasta.
  • Butter: Olive oil can be used for a lighter flavor.
  • Parmesan: Pecorino Romano or nutritional yeast can be substituted for a dairy-free option.
  • Parsley: Basil or chives make excellent alternatives for a fresh garnish.

How to Make Garlic Butter Noodles

Follow these simple steps to prepare your garlic butter noodles:

  1. Boil a salted pot of water for the egg noodles and cook them according to package directions.
  2. When the noodles are about 5 minutes away from being done, melt the butter over medium heat in a skillet.
  3. Add in the minced garlic and cook for 1-2 minutes, stirring constantly. Be careful not to let the garlic brown or burn.
  4. Add in about 2 tablespoons of the hot pasta water to the skillet.
  5. Drain the noodles and add them to the skillet along with the parmesan cheese and parsley. Toss until the cheese has melted and the noodles are nicely coated.
  6. Season with salt and pepper as needed and serve immediately.

Pro Tips for Perfection

  • Use Fresh Ingredients: Fresh garlic and herbs will enhance the flavor significantly compared to dried alternatives.
  • Don’t Overcook the Noodles: Aim for al dente for the best texture and overall dish integrity.
  • Reserve Pasta Water: The starchy pasta water helps create a creamy sauce that clings to the noodles.
  • Adjust to Taste: Feel free to tweak the amount of garlic or cheese according to your preferences.
  • Serve Immediately: Garlic butter noodles are best enjoyed fresh, so serve right after cooking.

Common Mistakes and Troubleshooting

Even experienced cooks can run into issues. Here are some common pitfalls and how to avoid them:

  • Burnt Garlic: Stir garlic consistently and watch closely to prevent burning.
  • Too Dry: If the noodles seem dry, add more pasta water or butter to create a luscious sauce.
  • Flavors Not Strong Enough: Increase the quantity of garlic or parmesan if the flavors lack intensity.

Delicious Variations

Get creative with these variations to make your garlic butter noodles even more exciting:

  • Add Protein: Toss in cooked chicken, shrimp, or tofu for a heartier meal.
  • Veggie Boost: Add sautéed spinach, peas, or broccoli to increase nutrition and flavor.
  • Spicy Kick: Add red pepper flakes or a dash of hot sauce for some heat.
  • Creamy Version: Stir in a splash of heavy cream for a richer, creamier sauce.

Storage and Make-Ahead Instructions

To store leftover garlic butter noodles, follow these guidelines:

  • Refrigeration: Store in an airtight container in the fridge for up to 3 days.
  • Reheating: Warm in a skillet over low heat, adding a splash of water or broth to loosen the sauce.
  • Make-Ahead: Cook the noodles and prepare the garlic butter sauce separately, combining them just before serving for the best texture.

Frequently Asked Questions

  • Can I use gluten-free noodles? Yes! Gluten-free pasta works beautifully in this recipe.
  • What is the best type of noodle to use? Egg noodles are traditional, but spaghetti or fettuccine also work well.
  • Can I prepare this dish without garlic? While garlic is essential to the flavor, you can try substituting with garlic powder or omit it entirely.
  • How do I make this a vegan dish? Substitute butter with vegan butter and use nutritional yeast instead of parmesan.
  • Can I add other spices? Absolutely! Italian seasoning or herbs de Provence can add an aromatic twist.
  • Is this dish kid-friendly? Yes! Its mild flavor is generally appealing to kids.
  • What should I serve with garlic butter noodles? Pair with a salad, garlic bread, or roasted vegetables for a complete meal.
  • How can I make it healthier? Consider adding more vegetables or using whole grain noodles for added fiber.

Nutritional Tips and Dietary Adaptations

To make your garlic butter noodles more nutritious:

  • Whole Wheat Noodles: Using whole wheat egg noodles increases fiber content.
  • More Veggies: Incorporate more vegetables to boost vitamins and minerals.
  • Lean Proteins: Add grilled chicken or chickpeas for protein, making it more balanced.

Essential Equipment Recommendations

For best results, ensure you have the following equipment:

  • Large Pot: For boiling the noodles.
  • Skillet: A non-stick skillet works best for sautéing and combining ingredients.
  • Measuring Cups and Spoons: To ensure accurate ingredient quantities.
  • Colander: For draining the noodles efficiently.

Serving Suggestions

Garlic butter noodles can be served as a main dish or a side. Here are some ideas:

  • As a Side: Pair with grilled chicken or steak for a hearty meal.
  • Garnish: Top with extra parmesan and freshly chopped parsley for added flavor and presentation.
  • Complementary Dishes: Serve with a fresh garden salad or roasted vegetables for a complete dinner experience.

In conclusion, garlic butter noodles are a delightful, versatile dish that anyone can master. By following this comprehensive guide, you now have all the tools and knowledge needed to create a delicious meal that will surely impress your family and friends. So, roll up your sleeves, grab your ingredients, and let’s get cooking!

Garlic Butter Noodles

Prep Time 5 minutes
Cook Time 10 minutes
Total Time 15 minutes
Servings 4 servings
Calories 450
Deliciously simple garlic butter noodles perfect for a quick and satisfying meal.

Ingredients

Main ingredients

  • 8 ounces uncooked egg noodles
  • 0.25 cup butter (1/2 stick)
  • 4 cloves garlic (minced)
  • 0.5 cup freshly grated parmesan cheese
  • 1 tablespoon chopped fresh parsley
  • to taste Salt & pepper

Instructions 

  • Cook the noodles in salted boiling water until al dente, then drain.
  • While noodles cook, melt butter in a skillet over medium heat.
  • Add minced garlic to the butter and cook for 1-2 minutes.
  • Stir in hot pasta water, then add drained noodles, parmesan, and parsley. Toss to coat.
  • Season with salt and pepper, then serve immediately.

Notes

For extra flavor, add a squeeze of lemon or red pepper flakes.
Calories: 450kcal
Cost: $8
Course: Main Course
Cuisine: American
Keyword: Noodles

Quench Your Thirst with a Watermelon Berry Slushie!

As the summer sun blazes down, there’s nothing quite like a refreshing drink to cool you off. Enter the Watermelon Berry Slushie, a delightful blend of juicy watermelon, sweet strawberries, and a zesty hint of lime. This easy-to-make slushie recipe is perfect for those hot days when you crave something icy and delicious. Whether you’re hosting a backyard barbecue or simply lounging by the pool, this slushie is the ultimate summer treat!

Why You’ll Love This Recipe

This watermelon berry slushie isn’t just about taste; it’s packed with benefits that make it a go-to summer drink:

  • Hydrating goodness: With its high water content, watermelon helps keep you hydrated on hot days.
  • Natural sweetness: The slushie is sweetened naturally with fresh fruit, making it a healthier option compared to sugary drinks.
  • Quick and easy: This recipe requires minimal ingredients and just a few minutes of prep time.
  • Customizable flavors: You can easily adapt the recipe with different fruits or add-ins to suit your taste.
  • Perfect for gatherings: Serve it at parties or family events, and watch everyone enjoy this delightful drink!

Ingredients Breakdown

Here’s what you’ll need to make your watermelon berry slushie:

  • 3 cups watermelon: Use fresh or frozen watermelon for a frosty texture. If using fresh, remove the seeds and rind for easier blending.
  • 2 tbsp sugar: Adjust to taste; you can substitute with honey or agave for a healthier option.
  • Lime juice: Freshly squeezed lime juice adds a refreshing tang that elevates the flavors.
  • 1 cup strawberries: Fresh strawberries work best, but frozen ones can also be used for added chill.
  • 2 cups ice cubes: This gives your slushie that perfect icy consistency.
  • Mint sprigs: For garnish and a hint of freshness.
  • Lime slices: A beautiful garnish that enhances presentation.

Step-by-Step Instructions

Close-up of a refreshing watermelon berry slushie with mint and lime garnishes.

Ready to make your slushie? Follow these simple steps:

  1. In a blender, combine the watermelon, sugar, lime juice, and strawberries. Blend until smooth.
  2. Add the ice cubes and blend again until you achieve a slushy consistency.
  3. Pour the slushie into serving glasses and garnish with lime wedges and mint sprigs.
  4. Serve immediately and enjoy the refreshing taste!

Pro Tips for the Perfect Watermelon Slushie

Achieve slushie perfection with these expert insights:

  • Choosing the right watermelon: Look for a heavy watermelon with a uniform shape and a creamy yellow spot, indicating ripeness.
  • Freeze your watermelon: Cut watermelon into chunks and freeze them ahead of time for a thicker, frostier slushie.
  • Experiment with flavors: Add a splash of coconut water or lemonade for a tropical twist.
  • Watch the sugar: Always taste test before adding more sugar; ripe fruits often provide enough sweetness.
  • Don’t over-blend: Blend just until combined to keep some texture in your slushie.
  • Serve chilled: Make sure your glasses are chilled for an extra refreshing experience.
  • Add a splash of alcohol: For adults, consider adding a shot of vodka or rum for a fun twist.
  • Layer your flavors: For a stunning presentation, layer the slushie with different fruit purees.

Common Mistakes and Troubleshooting

Here’s how to avoid common pitfalls when making your slushie:

  • Grainy texture: If your slushie turns out grainy, check the blending duration; over-blending can break down the ice too much.
  • Too watery: If you find your slushie is too thin, add more frozen watermelon or ice to thicken it up.
  • Too sweet or tangy: Adjust sugar and lime juice gradually, tasting as you go to find the perfect balance.

Variations to Try

Switch things up with these fun slushie variations:

  • Mango Watermelon Slushie: Substitute half the watermelon with ripe mango for a tropical flavor.
  • Berry Blast Slushie: Use a mix of berries (like blueberries and raspberries) instead of strawberries for a colorful twist.
  • Pineapple Watermelon Slushie: Add fresh pineapple chunks for a sweet and tangy delight.
  • Green Smoothie Slushie: Blend in a handful of spinach or kale for a health boost without compromising flavor!

Storage and Make-Ahead Instructions

If you want to prepare this slushie in advance:

  • Make ahead: Prepare the slushie and store it in the freezer for up to 2 hours. Stir before serving to restore its texture.
  • Leftovers: If you have any slushie leftover, keep it in an airtight container in the freezer. Just blend again before serving.

Frequently Asked Questions

Here are some common questions about making watermelon slushies:

  • Can I use other fruits in this recipe? Absolutely! Feel free to mix in your favorite fruits for unique flavors.
  • Can I make this slushie without sugar? Yes, you can skip the sugar or use a sugar substitute like stevia or monk fruit.
  • Is this slushie gluten-free? Yes, all the ingredients are gluten-free, making it suitable for those with gluten sensitivities.
  • How long can I store a watermelon slushie? It’s best enjoyed fresh, but you can store it in the freezer for a few hours if needed.
  • Can I make this slushie alcoholic? Yes, just add your favorite spirit for an adult version!
  • What’s the best way to blend the ice? Start blending at a low speed to break up the ice, then increase to high for a smooth consistency.
  • Can I use canned watermelon? While fresh is best, canned watermelon can work in a pinch, but drain it well to avoid excess liquid.
  • What’s the nutritional value of this slushie? It’s low in calories and packed with vitamins, especially vitamin C from the watermelon and strawberries.

Nutritional Tips and Dietary Adaptations

This watermelon berry slushie not only tastes incredible but can also fit into various dietary plans:

  • Low-calorie option: Skip the sugar and use fruits that are naturally sweet to lower calories.
  • Vegan-friendly: This recipe is naturally vegan, making it suitable for plant-based diets.
  • Whole30 compliant: Replace sweeteners with fruit and eliminate any added sugar to align with Whole30 guidelines.

Essential Equipment for Making Slushies

To create the perfect watermelon slushie, you’ll need:

  • High-speed blender: A powerful blender is key to achieving that smooth, slushy texture.
  • Measuring cups: For accurate ingredient measurements to ensure consistency.
  • Serving glasses: Chilled glasses are ideal for serving your refreshing drink.

Serving Suggestions

Enhance your watermelon slushie experience with these serving ideas:

  • Garnish creatively: Use colorful fruit slices and fresh herbs to make your slushie visually appealing.
  • Pair with snacks: Serve alongside light summer snacks like chips and salsa or fruit platters for a complete summer experience.
  • Make it a party drink: Create a slushie bar where guests can mix and match flavors and garnishes.

In conclusion, the Watermelon Berry Slushie is an unbeatable summer beverage that brings joy and refreshment. With its simple ingredients and endless customization options, this recipe is sure to become a staple in your home. So grab your blender, get creative, and savor the flavors of summer!

Watermelon Berry Slushies Recipe

Prep Time 10 minutes
Total Time 10 minutes
Servings 4 cups
Calories 150
Enjoy a refreshing and fruity watermelon berry slushie perfect for hot days. This easy recipe combines juicy watermelon and strawberries with a hint of lime and mint.

Ingredients

Fruits and Ice

  • 3 cups watermelon
  • 1 cup strawberries
  • 2 tbsp sugar
  • 1 tbsp lime juice
  • 2 cups ice cubes
  • 2 mint sprigs mint sprigs
  • 1 lime slices lime slices

Instructions 

  • Blend watermelon, sugar, lime juice, and strawberries until smooth.
  • Pour into glasses and add ice cubes.
  • Garnish with lime slices and mint sprigs. Serve immediately.

Notes

For a colder slushie, freeze the watermelon beforehand.
Calories: 150kcal
Cost: $10
Course: Beverage
Cuisine: fusion
Keyword: Watermelon

Beat the heat with our delightful Lemon Berry Slush! This easy-to-make recipe combines frozen strawberries, zesty lemons, and sweet orange juice for a revitalizing drink that’s perfect for any occasion. In less than 15 minutes, you can whip up this delicious slush that will cool you down on hot summer days or serve as a fun treat for kids and adults alike. Let’s dive into how to create this refreshing slush at home today!

Why You’ll Love This Recipe

This Lemon Berry Slush is not just any drink; it’s a celebration of flavors and textures that you and your family will adore. Here are five reasons why this slush is a must-try:

  • Quick and Easy: With just a few simple steps, you can create a delightful slush in under 15 minutes, making it perfect for spontaneous gatherings.
  • Refreshing Flavor: The combination of lemon, strawberries, and orange juice offers a **perfect balance** of sweet and tart that tantalizes your taste buds.
  • Healthy Ingredients: Packed with real fruit, this slush contains no artificial flavors or preservatives—just pure deliciousness!
  • Customizable: You can easily modify the recipe with your favorite fruits or sugar substitutes, making it suitable for a variety of diets.
  • Fun for Everyone: This slush is a hit among kids and adults alike—perfect for parties, picnics, or a relaxing afternoon treat.

Ingredients Breakdown

To get started on your Lemon Berry Slush, gather the following ingredients:

  • 2 cups frozen strawberries: These provide the base flavor and texture. Fresh strawberries can be used if you prefer, but adjust the ice amount accordingly.
  • 1/2 cup prepared orange juice: Freshly squeezed is best for optimal flavor. If using store-bought, choose a brand with no added sugars.
  • 1/2 cup water: This helps to blend the ingredients smoothly.
  • 2 lemons: Freshly juiced lemons add brightness and acidity—don’t skip this step!
  • 1/4 cup granulated sugar: Adjust the amount based on your sweetness preference. You can substitute with honey or a sugar alternative.
  • 2 cups ice: The key to achieving that slushy texture. For a smoother blend, crush the ice beforehand.

Pro Tips for the Best Lemon Berry Slush

To ensure your slush turns out perfectly every time, keep these expert tips in mind:

  • Use a high-powered blender: This ensures that all ingredients blend smoothly without any ice chunks remaining.
  • Add ingredients in the right order: Start with the softer ingredients (strawberries, juices) before adding ice to facilitate smoother blending.
  • Taste as you go: After blending, taste the slush and adjust sweetness or acidity as necessary—adding more lemon or sugar based on your preference.
  • Don’t over-blend: While you want a smooth texture, over-blending can lead to a watery slush. Blend until just combined.
  • Chill your glasses: For an extra refreshing experience, chill your serving glasses in the freezer before pouring in the slush.
  • Consider using frozen fruit: Using frozen fruit not only enhances the slush’s texture but also keeps it cold without watering it down.
  • Experiment with flavors: Feel free to add other fruits like raspberries or blueberries for a unique twist on the classic flavor.
  • Serve immediately: This slush is best enjoyed right after making it, as it can lose its texture if left to sit.

Common Mistakes and Troubleshooting

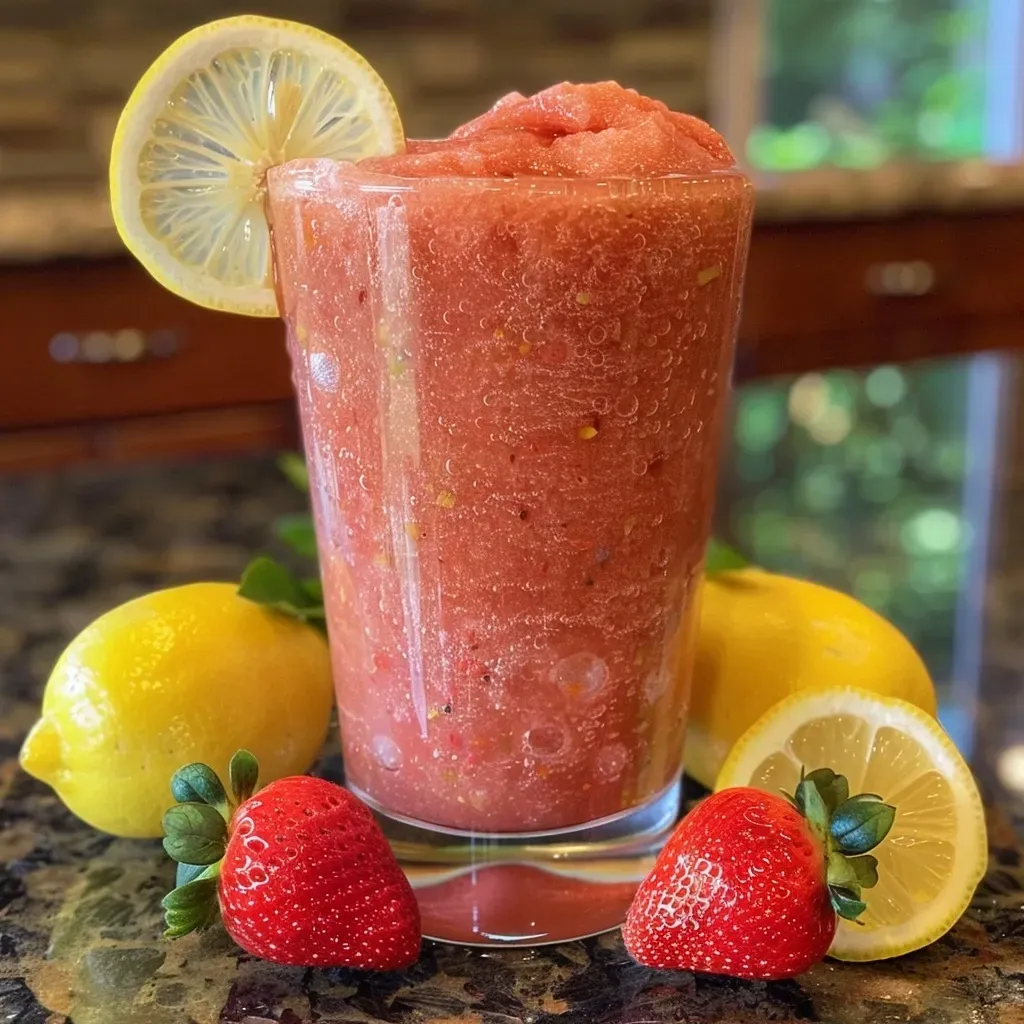
Close-up side view of a colorful Lemon Berry Slush in a clear cup with ice.

Even the best chefs can run into issues! Here are common mistakes to avoid:

  • Not using enough ice: Ice is crucial for a slushy texture. Make sure to use the full amount specified in the recipe.
  • Over-blending: If your slush becomes too watery, try blending for shorter periods and check the consistency often.
  • Skipping the taste test: Don’t forget to taste and adjust your slush before serving; flavors can vary based on fruit ripeness.
  • Using bottled lemon juice: Fresh lemon juice provides a flavor that bottled versions can’t replicate, so always opt for fresh!

Delicious Variations

Mix things up with these fun variations on the classic Lemon Berry Slush:

  • Tropical Twist: Add 1/2 cup of frozen mango chunks for a tropical flavor that pairs beautifully with lemon.
  • Berry Medley: Substitute half the strawberries with frozen blueberries or raspberries for a mixed berry slush.
  • Minty Fresh: Toss in a handful of fresh mint leaves before blending for a refreshing mint flavor.
  • Peach Lemonade Slush: Replace strawberries with frozen peaches for a juicy peach slush that’s equally refreshing.

Storage and Make-Ahead Instructions

Want to prepare ahead of time? Here’s how to store your Lemon Berry Slush:

  • Short-term storage: If you have any leftovers, store them in an airtight container in the freezer. When ready to serve, blend again briefly to restore texture.
  • Make-ahead: You can pre-juice the lemons and prepare the orange juice in advance. Just combine everything fresh on the day of serving.

Frequently Asked Questions

Here are some common questions about making a Lemon Berry Slush:

  • Can I use fresh strawberries instead of frozen? Yes, but you’ll need to adjust the ice quantity to maintain the right slushy consistency.
  • Is there a sugar-free option? Absolutely! Try using a sugar substitute like stevia or monk fruit for a lower-calorie version.
  • Can I make this slush vegan? Yes, all ingredients in this recipe are vegan-friendly, making it a great plant-based treat.
  • What can I use instead of orange juice? You can substitute with any fruit juice you enjoy, such as pineapple or cranberry, for different flavors.
  • How long will this slush last in the freezer? While it’s best fresh, it can be stored in the freezer for up to 1 week. Just re-blend before serving.
  • Can I add alcohol to this recipe? Yes! A splash of vodka or rum can make for a refreshing adult slushy drink.
  • How do I make it smoother? Blend the ice in smaller batches or use crushed ice for an easier blending process.
  • Can I use a different fruit? Absolutely! Feel free to get creative with your favorite fruits—just ensure they’re compatible with lemon.

Nutrition Tips and Dietary Adaptations

This Lemon Berry Slush can be made to fit various dietary needs:

  • Low-calorie: Substitute sugar with a low-calorie sweetener and use less fruit juice.
  • Gluten-free: This recipe is naturally gluten-free, so it’s safe for those with gluten sensitivities.
  • Nut-free: Free from nuts, this slush is suitable for those with nut allergies.
  • Keto-friendly: Use a sugar substitute and limit the amount of orange juice for a low-carb option.

Equipment Recommendations

To make the perfect Lemon Berry Slush, you’ll need:

  • High-powered blender: A good blender is crucial for achieving that smooth, slushy texture.
  • Measuring cups: Ensure accuracy in your ingredient quantities for the best results.
  • Juicer: A handheld juicer can make extracting lemon juice quick and easy.
  • Ice crusher (optional): If you prefer using whole ice cubes, an ice crusher can help achieve the right texture before blending.

Serving Suggestions

Serve your Lemon Berry Slush in style with these fun ideas:

  • Garnish: Add a slice of lemon or a sprig of mint to each glass for a beautiful presentation.
  • Pair with snacks: This slush pairs wonderfully with light snacks like popcorn, chips, or fruit skewers.
  • Make it festive: For special occasions, consider serving in mason jars with fun straws for a charming touch.

In conclusion, this Lemon Berry Slush is a fantastic way to cool off and enjoy the vibrant flavors of summer. With easy preparation, endless customization options, and a refreshing taste, it’s a drink that promises joy with every sip. So grab your blender and get ready to enjoy a delicious treat that brings smiles to faces young and old!

Lemon Berry Slush

Prep Time 10 minutes
Total Time 10 minutes
Servings 4 cups
Calories 150
A refreshing and tangy frozen beverage perfect for hot days, blending strawberries and lemons into a cool, icy treat.

Ingredients

Fruits and liquids

  • 2 cups frozen strawberries
  • 0.5 cup prepared orange juice (see note 1)
  • 0.5 cup water
  • 2 lemons lemons (for juice)
  • 0.25 cup granulated sugar
  • 2 cups ice

Instructions 

  • Place strawberries, orange juice, water, 1/4 cup lemon juice, and sugar in a blender. Blend for 15–20 seconds.
  • Add ice and blend until smooth and no chunks remain.
  • Pour into glasses and serve immediately.

Notes

Use fresh lemons for the best flavor.
Calories: 150kcal
Cost: $10
Course: Beverage
Cuisine: American
Keyword: Fruit, ice, refreshing

Discover the Ultimate Peach Raspberry Iced Tea Recipe

Summer is the perfect time to refresh and rejuvenate, and there’s no better way to do this than with a delightful glass of Peach Raspberry Iced Tea. This recipe combines the juicy sweetness of ripe peaches with the tart brightness of raspberries, creating a drink that not only quenches your thirst but also tantalizes your taste buds. In this comprehensive guide, we’ll take you through every step of making this refreshing iced tea, ensuring that you can serve up a glass that will impress family and friends.

Why You’ll Love This Recipe

This Peach Raspberry Iced Tea is more than just a beverage; it’s a celebration of summer flavors. Here are some compelling reasons to try this recipe:

  • Refreshing Flavors: The combination of fresh peaches and raspberries creates a vibrant, fruity taste that’s perfect for hot days.
  • Easy to Make: With simple ingredients and straightforward steps, this recipe is accessible for cooks of all skill levels.
  • Customizable: Adjust the sweetness and flavor intensity to your liking, making it a versatile drink for everyone.
  • Perfect for Gatherings: Whether it’s a picnic, a barbecue, or just a cozy afternoon at home, this iced tea is sure to be a hit.
  • Health Benefits: Both peaches and raspberries are packed with vitamins and antioxidants, making this drink not just delicious but also nutritious.

Peach Raspberry Iced Tea Ingredients

To make this refreshing iced tea, you’ll need the following ingredients:

  • 1 cup water: For the simple syrup.
  • 1 cup honey: Adds natural sweetness.
  • 1 cup raspberries: Fresh or frozen, these add a vibrant color and tang.
  • 3 large peaches (peeled and sliced): Their sweetness forms the base of the flavor.
  • 4 cups water: Used for brewing the tea.
  • 3 Perfect Peach Bigelow Tea Bags: Brings a rich peach flavor to the mix.
  • 3 Red Raspberry Bigelow Tea Bags: Enhances the raspberry flavor.
  • 2 Tbsp lemon juice: For a hint of tartness.
  • Lemon Wedges: For garnish.
  • Mint: Fresh mint leaves elevate the drink’s freshness.

How to Make Peach Raspberry Iced Tea

Side view of a glass filled with Peach Raspberry Iced Tea, garnished with mint, peaches, and raspberries.

Follow these simple steps to create your Peach Raspberry Iced Tea:

Step 1: Make the Simple Syrup

Combine the honey and 1 cup of water in a small saucepan and bring to a boil over medium-low heat, stirring constantly. Once the honey has dissolved, turn off the heat and allow the syrup to cool. If you opt to skip the simple syrup, you may need to add another cup of water to the final tea mixture to adjust the sweetness.

Step 2: Brew the Tea

In a separate saucepan, bring 4 cups of water to a boil. Remove from heat and steep the 6 tea bags for 10-12 minutes (covered) to extract maximum flavor. Once steeped, remove the tea bags and let the tea cool.

Step 3: Prepare the Fruit Puree

Using a food processor or blender, combine the peeled and sliced peaches with the raspberries. Add 1 cup of water and blend until smooth. Strain the mixture through a fine mesh strainer to remove seeds and achieve a smooth puree.

Step 4: Combine All Ingredients

In a large pitcher, mix the simple syrup, brewed tea, lemon juice, and the peach-raspberry puree. Stir well until combined.

Step 5: Chill and Serve

Add in sliced peaches, raspberries, lemon wedges, and mint for garnish. Chill in the fridge for 3-4 hours or serve immediately over ice. Enjoy your refreshing drink!

Pro Tips for Making the Best Peach Raspberry Iced Tea

Here are some expert insights to ensure your iced tea turns out perfectly:

  • Use Fresh Ingredients: Select ripe, fresh peaches and raspberries for the best flavor. Frozen fruit can also work if fresh isn’t available.
  • Adjust Sweetness: Feel free to modify the amount of honey based on your preference for sweetness.
  • Experiment with Teas: Try using different brands of peach or raspberry tea to find the flavor that you love most.
  • Infuse Flavors: Consider adding a sprig of rosemary or basil during steeping for an aromatic twist.
  • Batch Prep: Double or triple the recipe for larger gatherings to ensure everyone can enjoy this delightful beverage.
  • Serving Temperature: Chill the tea thoroughly to enhance the refreshing qualities.
  • Presentation Matters: Serve in clear glasses to showcase the beautiful colors of the tea and fruit.
  • Garnish Generously: The lemon wedges and mint not only enhance flavor but also add visual appeal.

Common Mistakes to Avoid

To help you navigate the process smoothly, here are some common pitfalls and how to avoid them:

  • Over-steeping the Tea: This can result in a bitter taste. Keep an eye on your steeping time!
  • Skipping the Straining Step: Be sure to strain the fruit puree to avoid a gritty texture in your iced tea.
  • Not Chilling Enough: Allowing adequate time for chilling ensures the tea is refreshing and at the right temperature.
  • Using Too Much Sugar: Adjust the sweetness gradually to prevent the tea from becoming overly sweet.

Variations on Peach Raspberry Iced Tea

Feel free to get creative with your iced tea! Here are some delightful variations to consider:

  • Peach-Mango Iced Tea: Substitute mango for raspberries for a tropical twist.
  • Herbal Peach Raspberry Iced Tea: Use herbal tea bags for a caffeine-free option.
  • Sparkling Peach Raspberry Iced Tea: Add sparkling water for a fizzy, refreshing drink.
  • Peach Raspberry Lemonade Iced Tea: Mix in lemonade for a sweeter, citrusy option.

Storage and Make-Ahead Instructions

This iced tea can be made ahead of time and stored effectively:

  • Make Ahead: Prepare the tea and syrup a day in advance. Combine everything just before serving.
  • Storage: Keep the iced tea in an airtight pitcher in the refrigerator for up to 5 days.
  • Freezing: Pour leftover iced tea into ice cube trays for instant flavor boosts in future drinks.

Peach Raspberry Iced Tea FAQs

Here are some frequently asked questions to enhance your iced tea experience:

  • Can I use frozen fruit? Yes, frozen peaches and raspberries can be used directly without thawing.
  • What if I don’t have honey? You can substitute sugar, agave syrup, or any sweetener of your choice.
  • How can I make this tea less sweet? Reduce the amount of honey used or opt for unsweetened tea bags.
  • Can I use a different type of tea? Absolutely! Experiment with your favorite fruit teas for unique flavors.
  • Is this recipe suitable for kids? Yes, it’s a family-friendly drink suitable for all ages.
  • How long will the iced tea last in the fridge? It can be stored for up to 5 days when kept in an airtight container.
  • Can I add alcohol to this recipe? Yes, adding a splash of vodka or rum can turn this into a delightful summer cocktail.
  • What should I serve with Peach Raspberry Iced Tea? This tea pairs well with light snacks, salads, and grilled meats.

Nutritional Tips and Dietary Adaptations

This Peach Raspberry Iced Tea is not only refreshing but can also fit various dietary needs:

  • Low-Calorie Option: Use a sugar substitute to reduce calories.
  • Vegan Version: Ensure to use agave syrup instead of honey for a fully vegan drink.
  • Gluten-Free: This recipe is naturally gluten-free, making it suitable for those with gluten sensitivities.

Equipment Recommendations

Here are some tools that will help you make the best iced tea:

  • Food Processor or Blender: Essential for making the fruit puree.
  • Fine Mesh Strainer: For straining the puree to achieve a smooth texture.
  • Large Pitcher: Ideal for combining and serving your iced tea.
  • Measuring Cups and Spoons: Accurate measurements ensure perfect flavor balance.

Serving Suggestions

To elevate your presentation, consider the following serving ideas:

  • Garnish with Fresh Mint: A sprig of mint adds a pop of color and an aromatic touch.
  • Use Clear Glasses: Show off the beautiful colors of your iced tea.
  • Serve with Ice: Fill glasses with ice cubes to keep the drink cold and refreshing.

Now that you have all the knowledge and tips at your fingertips, it’s time to get into the kitchen and make this delightful Peach Raspberry Iced Tea. With its vibrant flavors and refreshing qualities, it’s sure to be a favorite for summer gatherings or quiet afternoons at home. Enjoy every sip!

Peach Raspberry Iced Tea

Prep Time 15 minutes
Cook Time 15 minutes
Total Time 30 minutes
Servings 4 cups
Calories 150
A refreshing and fruity iced tea combining peaches and raspberries, perfect for hot days.

Ingredients

Simple Syrup

  • 1 cup water (for syrup)
  • 1 cup honey

Tea

  • 1 cup water (for steeping tea)
  • 3 large peaches (peeled and sliced)
  • 3 bags Perfect Peach Bigelow Tea Bags
  • 3 bags Red Raspberry Bigelow Tea Bags
  • 2 Tbsp lemon juice

Additional ingredients

  • to taste Lemon Wedges
  • to taste Raspberries
  • to taste Sliced Peaches
  • to taste Mint

Instructions 

  • Make simple syrup by boiling honey and water; cool.
  • Steep tea bags in boiling water for 10-12 minutes, then remove.
  • Puree peaches and raspberries, then blend with 1 cup water and strain seeds.
  • Combine syrup, tea, remaining water, lemon juice, and puree in a pitcher. Stir well.
  • Add sliced peaches, raspberries, lemon wedges, and mint. Chill and serve over ice.

Notes

Adjust sweetness by adding more honey or water as desired.
Calories: 150kcal
Cost: $15
Course: Beverage
Cuisine: American
Keyword: iced tea, Peach, raspberry

Discover the Joy of One-Pot Creamy Beef and Garlic Butter Pasta

Welcome to a culinary adventure where simplicity meets flavor! In this guide, we will explore how to craft a delightful One-Pot Creamy Beef and Garlic Butter Pasta that not only satisfies your taste buds but also makes cooking a breeze. With just one pot and a handful of ingredients, this recipe is perfect for busy weeknights or when you want to impress your family and friends with minimal fuss. Let’s dive into the world of creamy goodness, where rich flavors and comforting textures await.

Why You’ll Love This Recipe

This dish is not just about convenience; it’s a celebration of flavors and textures. Here are some compelling reasons why you’ll keep coming back for more:

  • Quick and Easy: With a preparation and cooking time of only 30 minutes, this recipe is perfect for those hectic evenings when you need a satisfying meal without the hassle.
  • One-Pot Wonder: Say goodbye to piles of dishes! Everything cooks in one pot, making cleanup a breeze and allowing you to enjoy more time with loved ones.
  • Kid-Approved: The creamy, cheesy sauce and tender pasta appeal to even the pickiest eaters, making it a family favorite.
  • Customizable: This recipe is versatile! Feel free to swap ingredients based on your pantry staples or dietary preferences.
  • Comfort Food: The rich flavors of beef, garlic, and cream create a warm and comforting meal that feels like a big hug on a plate.

Ingredients Breakdown

Let’s take a closer look at the ingredients needed for this delicious dish, along with some substitution options for those with dietary preferences:

  • 1 lb ground beef: Provides protein and richness. For a leaner option, consider using ground turkey or chicken.
  • 2 tablespoons butter: Adds flavor and richness. If you’re looking for dairy-free options, use olive oil or a plant-based butter.
  • 4 cloves garlic (minced): Offers a robust flavor. Feel free to adjust based on your love for garlic.
  • 1 medium onion (finely chopped): Adds sweetness and depth. Shallots can be a great alternative for a milder taste.
  • 1 teaspoon dried Italian seasoning: A blend of herbs that enhances flavor. You can use fresh herbs for a more vibrant taste.
  • 1/2 teaspoon salt: Essential for flavor. Adjust to taste based on dietary needs.
  • 1/4 teaspoon black pepper: Adds a subtle kick. You can substitute with white pepper for a milder flavor.
  • 1/2 cup beef broth: Intensifies the beef flavor. Vegetable broth works well for a lighter option.
  • 1 cup heavy cream: Creates the creamy sauce. If you prefer a lighter version, you can use half-and-half or a plant-based cream.
  • 1/2 cup grated Parmesan cheese: Provides a cheesy richness. Nutritional yeast can be used for a vegan alternative.

How to Make One-Pot Creamy Beef and Garlic Butter Pasta

Close-up of creamy beef pasta garnished with herbs in a bowl.

Now that we have our ingredients ready, let’s walk through the steps to create this delightful dish:

  1. Melt the Butter: In a large pot over medium heat, melt the butter until bubbling.
  2. Brown the Beef: Add the ground beef to the pot. Cook it until no longer pink, breaking it up with a spatula.
  3. Sauté the Aromatics: Once the beef is browned, stir in the chopped onion and minced garlic. Cook for about 3-4 minutes until the onion is translucent.
  4. Season It Up: Sprinkle in the Italian seasoning, salt, and black pepper. Stir everything together for an even flavor distribution.
  5. Add the Liquid: Carefully pour in the beef broth and let it simmer for a minute to meld the flavors.
  6. Create the Creamy Sauce: Reduce the heat to low and stir in the heavy cream. Warm it slowly to avoid boiling.
  7. Grate the Cheese: Lastly, add the grated Parmesan cheese and stir continuously until melted into a silky sauce.
  8. Serve and Enjoy: Taste for seasoning adjustments, then serve the pasta warm. Garnish with extra parsley or cheese if desired!

Top Tips for Perfecting Your Dish

To elevate your cooking game, here are some expert tips to ensure your One-Pot Creamy Beef and Garlic Butter Pasta turns out perfectly every time:

  • Don’t Rush the Garlic: Sauté the garlic gently to avoid burning, which can impart a bitter flavor.
  • Check for Consistency: If your sauce is too thick, thin it out with a splash of beef broth or water.
  • Ingredient Substitutions: For a lighter option, swap heavy cream with a light cream or milk. For a vegan version, use ground turkey and a plant-based cream.
  • Leftover Magic: This dish is fantastic for meal prep! Make a double batch and enjoy it throughout the week.
  • Garnish Wisely: Fresh herbs or extra cheese can enhance presentation and flavor.
  • Check Pasta Doneness: Aim for al dente pasta for the best texture and flavor absorption.
  • Serve with Care: Pair this pasta with a fresh salad or crusty bread for a balanced meal.
  • Store Properly: Keep leftovers in an airtight container in the refrigerator for up to three days.

Common Mistakes and Troubleshooting

Even the best chefs encounter challenges, so here are some common pitfalls and how to avoid them:

  • Overcooking the Beef: Make sure to brown your beef just until it’s no longer pink to keep it juicy.
  • Burning the Garlic: Always sauté garlic on low to medium heat and add it later in the cooking process for the best flavor.
  • Too Thick of Sauce: If your sauce becomes too thick, don’t hesitate to add more broth or cream gradually.
  • Skimping on Seasoning: Taste and adjust seasoning as you go to ensure a well-balanced dish.

Variations to Try

Looking to switch things up? Here are some delicious variations to consider:

  • Vegetarian Option: Replace ground beef with lentils or mushrooms for a hearty vegetarian version.
  • Spicy Kick: Add red pepper flakes or diced jalapeños for a spicy twist.
  • Cheesy Delight: Mix in different cheeses like cheddar or gouda for a unique flavor profile.
  • Herb Infusion: Experiment with fresh herbs like basil or thyme to enhance the dish’s aroma and taste.

Storage and Make-Ahead Instructions

If you’d like to prepare ahead of time or save leftovers, here’s what you need to know:

  • Refrigeration: Store leftovers in an airtight container in the refrigerator for up to three days.
  • Freezing: Freeze portions in well-packed containers for up to one month. Thaw overnight in the refrigerator before reheating.
  • Reheating: Reheat gently on the stovetop over low heat, adding a splash of broth or cream to maintain creaminess.

Frequently Asked Questions

Here are some common questions about this recipe:

  • Can I use whole wheat pasta? Yes, whole wheat pasta can be used for a healthier version, but adjust cooking time accordingly.
  • What can I substitute for heavy cream? You can use half-and-half or a plant-based cream for lighter options.
  • Is this recipe gluten-free? Use gluten-free pasta and ensure your broth is also gluten-free.
  • How can I make this dish spicier? Add crushed red pepper flakes or fresh chopped chili peppers during cooking.
  • Can I add vegetables? Absolutely! Vegetables like spinach, bell peppers, or mushrooms can be added for extra nutrition.
  • How do I make it dairy-free? Substitute cheese and cream with plant-based alternatives.
  • What’s the best way to reheat leftovers? Gently reheat on the stovetop, adding a splash of broth or cream to keep the sauce creamy.
  • Can I use frozen ground beef? Yes, just ensure it’s fully thawed and cooked thoroughly.

Nutrition Tips and Dietary Adaptations

This One-Pot Creamy Beef and Garlic Butter Pasta can be tailored to fit various dietary preferences:

  • Low-Carb: Swap traditional pasta for zucchini noodles or spaghetti squash.
  • Dairy-Free: Utilize plant-based cream and cheese alternatives.
  • High-Protein: Add extra lean beef or beans for additional protein content.

Equipment Recommendations

To make your cooking experience seamless, here’s a list of essential tools:

  • Large Pot: A sturdy pot is crucial for cooking the pasta and sauce together.
  • Wooden Spoon: Ideal for stirring and breaking up the meat without scratching your pot.
  • Measuring Cups and Spoons: Precision is key for perfect flavors.
  • Grater: For freshly grating cheese, which enhances flavor and texture.

Serving Suggestions

This delightful pasta pairs beautifully with a variety of sides:

  • Fresh Side Salad: A crisp salad balances the richness of the dish.
  • Sautéed Vegetables: Asparagus or spinach complement the creamy pasta perfectly.
  • Garlic Bread: Perfect for mopping up any leftover sauce!
  • Wine Pairings: A light white wine can enhance the overall flavor experience.

Conclusion

Now that you have all the insights and tips for crafting the perfect One-Pot Creamy Beef and Garlic Butter Pasta, it’s time to roll up your sleeves and get cooking! Enjoy the creamy goodness and the warm family vibes that come with this delightful dish. Remember, cooking is not just about the food; it’s about creating moments of connection and joy around the table. Happy cooking!

One-Pot Creamy Beef and Garlic Butter Pasta

Prep Time 10 minutes
Cook Time 20 minutes
Total Time 30 minutes
Servings 4 servings
Calories 650
A rich and creamy pasta dish featuring ground beef, garlic, and Parmesan, all cooked in one pot for easy cleanup and maximum flavor.

Ingredients

Meat and Dairy

  • 1 lb ground beef
  • 2 tablespoons butter
  • 4 cloves garlic (minced)
  • 1 medium onion (finely chopped)
  • 1 teaspoon dried Italian seasoning
  • 1/2 teaspoon salt
  • 1/4 teaspoon black pepper
  • 1/2 cup beef broth
  • 1 cup heavy cream
  • 1/2 cup grated Parmesan cheese

Instructions 

  • Melt butter in a large pot over medium heat.
  • Add ground beef; cook until browned, then stir in onion and garlic; cook 3-4 minutes.
  • Season with Italian seasoning, salt, and pepper; pour in beef broth and simmer briefly.
  • Reduce heat; stir in heavy cream and cook until warmed through; add Parmesan cheese and stir until melted.
  • Adjust seasoning if needed; serve warm, garnished as desired.

Notes

This dish pairs well with a side salad or sautéed greens. For a lighter version, substitute heavy cream with milk or a plant-based alternative.
Calories: 650kcal
Cost: $15
Course: Main Course
Cuisine: Italian
Keyword: Beef, garlic, Pasta