Author

Mike

Browsing

Unlock the Joy of Cooking: Hot Honey Chicken Bites You’ll Love

If you’re looking to impress your guests or simply indulge your taste buds, you’ve come to the right place! In this guide, we’ll explore how to craft the perfect Hot Honey Chicken Bites. This delectable dish combines crispy chicken with a sweet and spicy honey glaze, making it a crowd-pleaser for any occasion. Whether you’re a seasoned chef or a home cook looking to elevate your skills, this recipe is designed to be approachable, yet deliciously satisfying.

Why You’ll Love This Recipe

Here are five compelling reasons to whip up these Hot Honey Chicken Bites:

  • Flavor Explosion: The combination of sweet honey and spicy red pepper flakes creates a flavor profile that tantalizes the taste buds.
  • Quick and Easy: With a total prep and cook time of under 30 minutes, these bites are perfect for weeknight dinners or last-minute gatherings.
  • Customizable Heat: You can adjust the spice level of the honey glaze to suit your palate—add more or less red pepper flakes as desired.
  • Family-Friendly: Even the pickiest eaters will love these chicken bites; they’re great for kids and adults alike.
  • Versatile Serving Options: Serve them as an appetizer, snack, or main dish—perfect for game day or casual get-togethers!

Essential Ingredients and Substitutions

To make your Hot Honey Chicken Bites, you’ll need the following ingredients:

  • Chicken: 2 boneless, skinless chicken breasts, cut into 1-inch cubes. You can substitute chicken thighs for extra juiciness.
  • Buttermilk: 1 cup (or ¾ cup milk + 1 tbsp vinegar). This adds moisture and flavor.
  • All-purpose flour: 1 cup for coating. For a gluten-free option, use almond or coconut flour.
  • Cornstarch: ½ cup; it helps achieve that crispy texture. You can also use potato starch.
  • Seasonings: Salt, black pepper, paprika, garlic powder, and onion powder are vital for flavoring.
  • Egg: 1, beaten for binding the coating.
  • Oil: For frying, choose vegetable or canola oil for higher smoke points.
  • Honey: ½ cup for the glaze. You can also use agave syrup for a vegan alternative.
  • Butter: 1 tablespoon for richness in the glaze.
  • Red pepper flakes: 1 teaspoon, adjustable based on your heat preference.
  • Smoked paprika: ½ teaspoon for a smoky flavor that pairs beautifully with the sweetness of honey.
  • Apple cider vinegar: 1 teaspoon for a slight tang in the glaze.
  • Pinch of salt: To enhance all flavors.

Step-by-Step Instructions for Hot Honey Chicken Bites
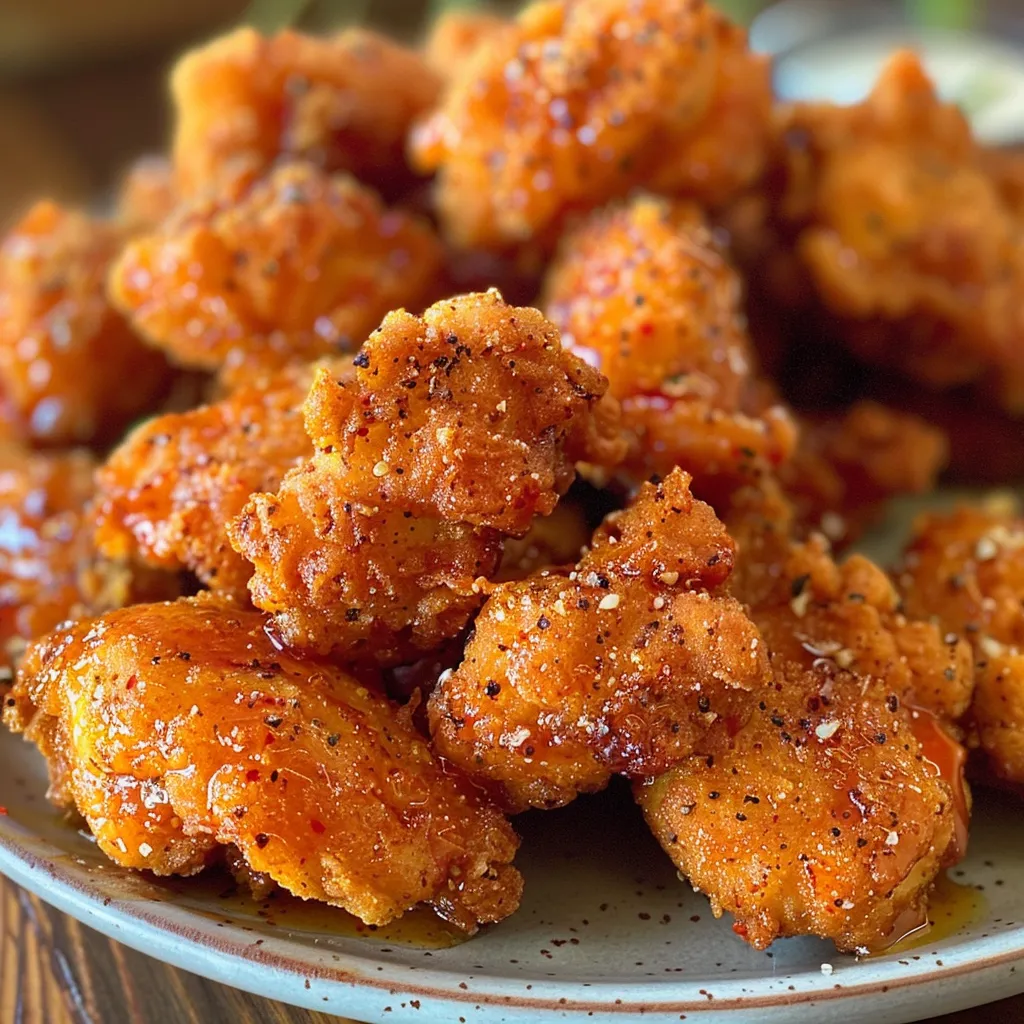
Appetizing Hot Honey Chicken Bites arranged elegantly, with a honey drizzle glistening on top.

Follow these simple steps to create your Hot Honey Chicken Bites:

  1. Marinate the Chicken: In a bowl, combine the chicken cubes and buttermilk. Let them soak for at least 30 minutes, or overnight for maximum tenderness.
  2. Prepare the Coating: In a separate bowl, mix the flour, cornstarch, salt, pepper, paprika, garlic powder, and onion powder.
  3. Heat the Oil: In a heavy-bottomed pan, heat about 2 inches of oil over medium-high heat until it reaches 350°F (175°C).
  4. Coat the Chicken: Remove the chicken from the marinade, allowing excess liquid to drip off. Dip each piece into the egg, then dredge in the flour mixture until fully coated.
  5. Fry the Chicken: Carefully place coated chicken pieces into the hot oil, frying in batches to avoid overcrowding. Cook for 4-5 minutes until golden brown and cooked through. Use a slotted spoon to transfer to a paper towel-lined plate.
  6. Make the Hot Honey Glaze: In a small saucepan over medium heat, melt the butter. Stir in the honey, red pepper flakes, smoked paprika, garlic powder, apple cider vinegar, and a pinch of salt. Heat until combined but do not boil.
  7. Toss and Serve: In a large bowl, toss the fried chicken bites with the hot honey glaze until evenly coated. Serve immediately!

Pro Tips for Perfect Hot Honey Chicken Bites

Here are some expert insights to ensure your cooking experience is smooth and successful:

  • Use Fresh Chicken: Ensure your chicken is fresh and of high quality for the best flavor and texture.
  • Maintain Oil Temperature: Keep an eye on the oil temperature while frying. If it drops too low, the chicken will absorb excess oil and become soggy.
  • Don’t Overcrowd the Pan: Fry in small batches to ensure even cooking and a crispy texture.
  • Experiment with Glaze: Feel free to mix in different spices or herbs into the honey glaze for a unique twist!
  • Make Ahead: You can marinate the chicken in advance and store it in the fridge until you’re ready to fry.
  • Use a Thermometer: For perfectly cooked chicken, use a meat thermometer to ensure the internal temperature reaches 165°F (75°C).
  • Presentation Matters: Serve on a rustic platter with extra hot honey on the side for drizzling.
  • Pair with Dipping Sauces: Offer ranch or blue cheese dressing as a cooling counterpart to the spicy bites.

Common Mistakes and Troubleshooting

Even the best cooks can make mistakes. Here are some common issues and how to avoid them:

  • Soggy Bites: Ensure your oil is hot enough before adding the chicken—this will create a crispy exterior.
  • Underseasoned Chicken: Don’t skip on seasoning! The marinade and coating should be well-flavored.
  • Glaze Too Thick: If your honey glaze is too thick, you can thin it with a bit of warm water or additional vinegar.

Delicious Variations to Try

Here are a few creative twists on the classic Hot Honey Chicken Bites:

  • Buffalo Honey Chicken Bites: Add hot sauce to the honey glaze for a buffalo twist!
  • Honey Garlic Chicken Bites: Mix garlic powder and soy sauce into the glaze for an Asian-inspired flavor.
  • Spicy Mango Chicken Bites: Add mango puree to the honey glaze for a tropical flair.
  • Pineapple Honey Chicken Bites: Mix crushed pineapple into the glaze for a sweet and tangy finish.

Storage and Make-Ahead Instructions

Here’s how to store and prepare these chicken bites for future enjoyment:

  • Storage: Store any leftover chicken bites in an airtight container in the refrigerator for up to 3 days.
  • Reheating: To maintain crispiness, reheat in an oven at 375°F (190°C) for about 10-15 minutes.
  • Make-Ahead Option: You can marinate the chicken a day in advance and keep it in the fridge until you’re ready to fry.

Frequently Asked Questions

Here are some common questions about Hot Honey Chicken Bites:

  • Can I use frozen chicken? Yes, but ensure it’s fully thawed before marinating.
  • What can I serve with these bites? They pair wonderfully with coleslaw, fries, or a fresh salad.
  • Is this recipe gluten-free? You can make it gluten-free by using gluten-free flour or cornstarch.
  • How long does it take to cook? The total cooking time is under 30 minutes.
  • Can I bake these instead of frying? Yes, you can bake them at 400°F (200°C) for about 20-25 minutes, flipping halfway through.
  • What type of honey should I use? Use high-quality, pure honey for the best flavor.
  • Can I add different spices? Absolutely! Feel free to experiment with your favorite spices in the coating.
  • How do I know when the chicken is done? Use a meat thermometer; the internal temperature should reach 165°F (75°C).

Nutritional Tips and Dietary Adaptations

This recipe can be adapted to fit various dietary needs:

  • For Lower Calories: Use less honey in the glaze or opt for a sugar substitute.
  • For a Healthier Option: Bake the chicken bites instead of frying.
  • Vegetarian Version: Substitute chicken with tofu or cauliflower for a plant-based alternative.

Essential Equipment for the Best Results

While you may have most of the necessary tools, here’s a quick checklist:

  • Heavy-bottomed pan: For even frying and heat retention.
  • Slotted spoon: To remove the chicken from the hot oil.
  • Meat thermometer: To ensure perfectly cooked chicken.
  • Mixing bowls: For marinating and coating preparation.

Serving Suggestions

To make your Hot Honey Chicken Bites even more appealing, consider these serving ideas:

  • Garnish with Fresh Herbs: Chopped parsley or cilantro adds a fresh touch.
  • Provide Dipping Sauces: Offer ranch, blue cheese, or spicy mayo as a counterbalance to the heat.
  • Pair with Drinks: Serve with refreshing beverages like iced tea or lemonade.

In conclusion, these Hot Honey Chicken Bites are sure to become a favorite in your culinary repertoire. They embody the perfect combination of sweet and spicy, making them an irresistible choice for any meal. So gather your ingredients, roll up your sleeves, and let the magic of cooking transform your kitchen into a haven of flavor and delight!

Hot Honey Chicken Bites

Prep Time 15 minutes
Cook Time 10 minutes
Total Time 25 minutes
Servings 4 servings
Calories 450
Enjoy crispy, tender chicken bites drizzled with sweet and spicy honey sauce for a flavorful snack or meal.

Ingredients

Chicken

  • 2 pieces boneless, skinless chicken breasts (cut into 1-inch cubes)
  • 1 cup buttermilk (or ¾ cup milk + 1 tbsp vinegar)
  • 1 cup all-purpose flour
  • ½ cup cornstarch
  • 1 teaspoon salt
  • ½ teaspoon black pepper
  • ½ teaspoon paprika
  • ½ teaspoon garlic powder
  • ½ teaspoon onion powder
  • 1 egg beaten egg
  • Oil for frying vegetable or canola oil (enough for deep frying)
  • ½ cup honey
  • 1 tablespoon butter
  • 1 teaspoon red pepper flakes (adjust for spice level)
  • ½ teaspoon smoked paprika
  • ½ teaspoon garlic powder
  • 1 teaspoon apple cider vinegar (for a slight tang)

Pinch of salt

Instructions 

  • Marinate chicken cubes in buttermilk for 10 minutes.
  • Mix flour, cornstarch, salt, pepper, paprika, garlic powder, and onion powder. Coat chicken in the mixture.
  • Deep fry chicken until golden and cooked through, about 8-10 minutes.
  • In a saucepan, melt butter, then add honey, red pepper flakes, smoked paprika, garlic powder, and apple cider vinegar. Simmer for 2-3 minutes.
  • Toss fried chicken in the honey sauce and serve immediately.
Notes

Adjust spice level by varying red pepper flakes.
Calories: 450kcal
Cost: $15
Course: Appetizer, Main Course
Cuisine: American
Keyword: Chicken, Honey, Spicy

Welcome to a Heartwarming Morning with Strawberry Baked Oatmeal

If you’re searching for a healthy breakfast that’s both comforting and delicious, look no further! Strawberry Baked Oatmeal is the perfect blend of sweetness from fresh strawberries and the hearty goodness of oats. This recipe is not only simple to make but also provides a nutritious start to your day. Whether you’re cooking for your family or prepping meals for the week, this dish checks all the boxes. Let’s dive into why this recipe should become your new breakfast staple!

Why You’ll Love This Recipe

  • Easy to Prepare: This recipe requires minimal effort—just mix, layer, and bake! Perfect for busy mornings.
  • Make-Ahead Friendly: This baked oatmeal can be prepared in advance and stored in the fridge, making it ideal for meal prep.
  • Customizable: Add your favorite nuts, seeds, or fruits to tailor the dish to your taste. The possibilities are endless!
  • Nutritious: Packed with fiber and antioxidants, strawberries and oats make this a wholesome breakfast option.
  • Versatile Serving Options: Enjoy it warm or cold, with a dollop of yogurt, a drizzle of honey, or a sprinkle of nuts.

Ingredient Breakdown: What You Need

Strawberry Baked Oatmeal is made with simple ingredients that you probably already have in your pantry. Here’s what you’ll need:

  • 2 cups Old-Fashioned Oats: These provide the base of your oatmeal and are essential for texture.
  • ½ cup Brown Sugar: For sweetness; you can substitute with honey or maple syrup if preferred.
  • 1 tsp. Cinnamon: Adds warmth and flavor; feel free to add more for a spicier kick.
  • 1 tsp. Baking Powder: Helps the oatmeal rise and become fluffy.
  • ¼ tsp. Salt: Enhances the sweetness of the dish.
  • 2 cups Milk: You can use dairy or any plant-based alternative like almond or oat milk.
  • 2 Eggs: Acts as a binder and adds protein. For a vegan option, replace with flax eggs.
  • 1 tsp. Vanilla Extract: For added flavor.
  • 2 Tbsp. Butter (melted and slightly cooled): Adds richness; substitute with coconut oil for a dairy-free option.
  • 2 cups Frozen Sliced Strawberries: The star of the dish, bringing natural sweetness and color.

How to Make Strawberry Baked Oatmeal

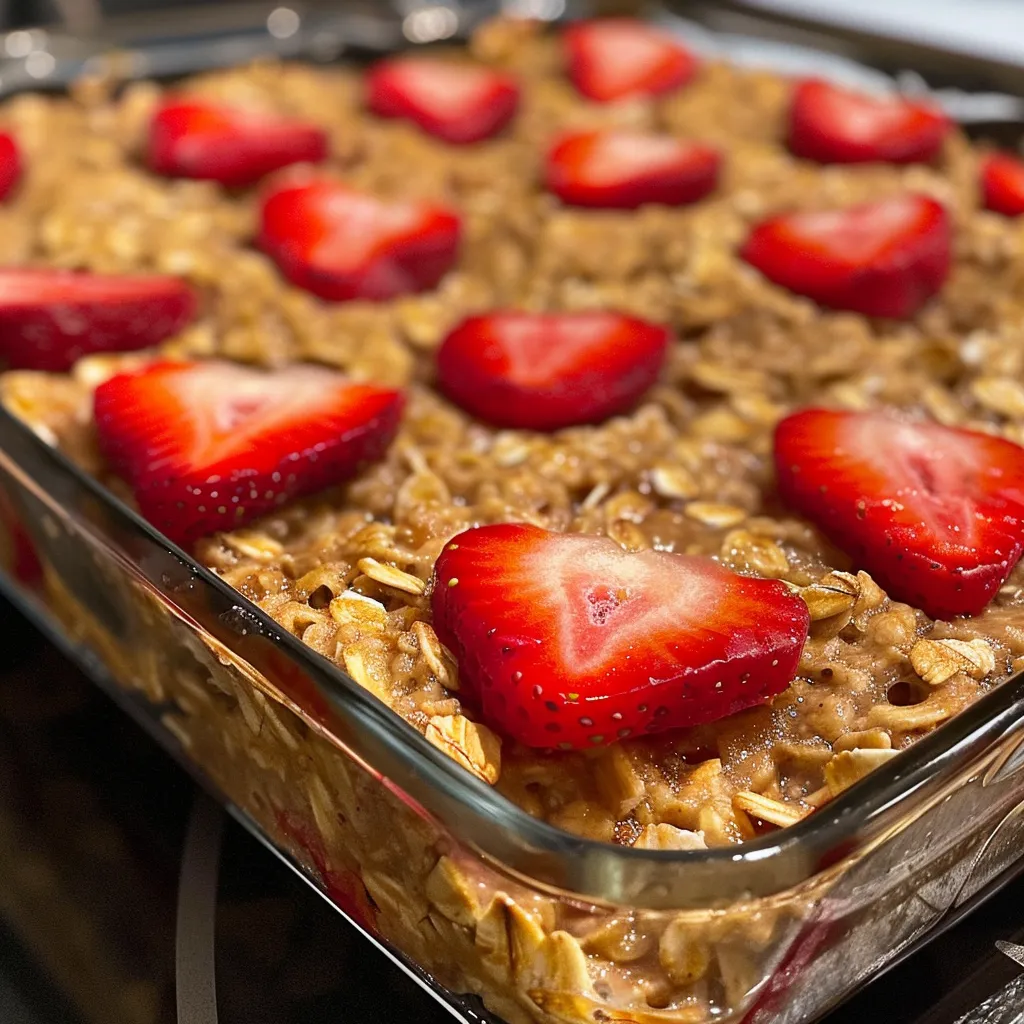
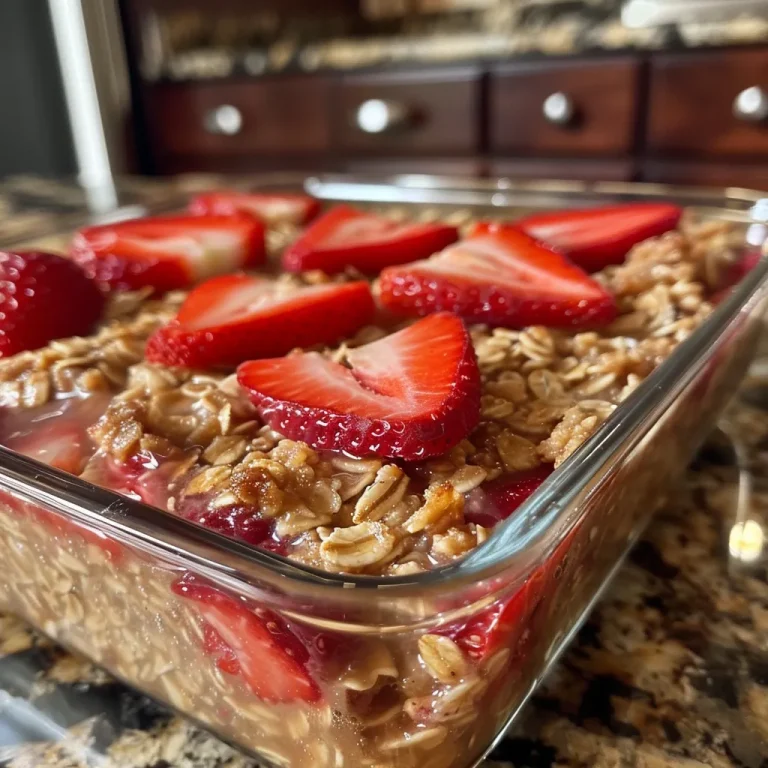
Succulent baked oatmeal with visible strawberries, highlighting its delicious appeal.

Follow these simple steps to create your Strawberry Baked Oatmeal:

  1. Preheat your oven to 375°F (190°C) and lightly grease a 2-quart or 13” X 7.5” baking dish.
  2. In a medium bowl, stir together the oats, brown sugar, cinnamon, baking powder, and salt.
  3. In a separate bowl, whisk together the milk, eggs, vanilla extract, and melted butter.
  4. Layer one cup of sliced strawberries in the baking dish. Spread the dry oat mixture evenly over the strawberries.
  5. Pour the wet mixture into the baking dish. Evenly top with the remaining sliced strawberries.
  6. Bake in the preheated oven for 35-40 minutes. Let cool slightly before serving.

Pro Tips for Perfect Strawberry Baked Oatmeal

  • Choose Quality Strawberries: Use fresh or high-quality frozen strawberries to ensure the best flavor.
  • Don’t Skip the Cinnamon: This spice adds warmth and depth to the dish, enhancing the overall flavor.
  • Let It Rest: Allow the baked oatmeal to cool slightly after baking; it will set up nicely.
  • Texture Matters: Old-fashioned oats are best for this recipe; steel-cut oats will require longer cooking time.
  • Experiment with Flavors: Consider adding nuts like walnuts or pecans for crunch, or a scoop of protein powder for an extra boost.
  • Feel Free to Adjust Sweetness: Depending on your preference, adjust the amount of brown sugar or use ripe bananas for natural sweetness.
  • Storage Tips: Store leftovers in an airtight container in the fridge for up to 5 days.
  • Reheat Properly: Microwave portions with a splash of milk to keep it moist when reheating.

Common Mistakes and Troubleshooting

Even the best recipes can have hiccups. Here’s how to troubleshoot:

  • Too Dry? If your baked oatmeal is too dry, it might have baked too long. Check it periodically after 30 minutes.
  • Too Wet? If it’s too wet, it may need more oats. You can also bake it longer until the consistency thickens.
  • Flavor Lacking? Ensure to use fresh ingredients and seasonings. A pinch more salt or cinnamon can enhance flavor significantly.
  • Not Setting Up? If it’s too runny, it may need more baking time. Allow it to cool to thicken before serving.

Delicious Variations to Try

Here are some fun variations to keep your breakfast exciting:

  • Mixed Berry Baked Oatmeal: Swap out strawberries for a mix of blueberries and raspberries for a berry medley.
  • Chocolate Chip Delight: Add semi-sweet chocolate chips for a decadent twist.
  • Banana Nut Oatmeal: Incorporate ripe mashed bananas and chopped walnuts for a delightful flavor.
  • Peanut Butter Banana: Swirl in peanut butter and top with banana slices before baking.

Storage and Make-Ahead Instructions

Planning ahead is easy with this recipe:

  • Refrigeration: Allow the baked oatmeal to cool completely, then cover it tightly with plastic wrap or transfer it to an airtight container. It can be stored in the fridge for up to 5 days.
  • Freezing: For longer storage, freeze portions in individual containers. Thaw overnight in the refrigerator before reheating.

Frequently Asked Questions

  • Can I use quick oats instead of old-fashioned oats? Quick oats may work, but the texture will be softer. Old-fashioned oats provide a chewier texture.
  • Can I make this recipe vegan? Absolutely! Substitute eggs with flax eggs and use plant-based milk and butter.
  • What can I serve with baked oatmeal? Top with Greek yogurt, fresh fruit, or a drizzle of maple syrup for added flavor.
  • How do I know when it’s done? The top should be golden brown and a toothpick inserted into the center should come out clean.
  • Can I make this recipe gluten-free? Yes! Use certified gluten-free oats to make it suitable for a gluten-free diet.
  • How do I reheat leftovers? Microwave individual portions with a splash of milk to keep them moist.
  • Can I use fresh strawberries instead of frozen? Yes, but fresh strawberries may release more moisture. Adjust baking time if necessary.
  • What’s the nutritional content of this dish? Baked oatmeal is high in fiber and protein, making it a filling breakfast option.

Nutrition Tips and Dietary Adaptations

Want to make this Strawberry Baked Oatmeal even healthier? Here are some tips:

  • Boost Fiber: Add chia seeds or flaxseeds to increase fiber content.
  • Reduce Sugar: Substitute brown sugar with mashed bananas or applesauce for natural sweetness.
  • Increase Protein: Incorporate Greek yogurt as a topping or mix protein powder into the wet ingredients.

Equipment Recommendations

To achieve the best results, consider using the following:

  • Mixing Bowls: Use a set of mixing bowls for easy ingredient preparation.
  • Whisk: A good whisk will help combine wet ingredients smoothly.
  • Baking Dish: Choose a 2-quart or 13” X 7.5” baking dish for even baking.
  • Measuring Cups and Spoons: Accurate measurements are crucial for the success of this recipe.

Serving Suggestions

To elevate your breakfast experience, consider these serving ideas:

  • Top with Yogurt: A dollop of Greek yogurt adds creaminess and protein.
  • Fresh Fruits: Serve with sliced bananas, additional strawberries, or any seasonal fruit.
  • Drizzle of Honey: A light drizzle of honey enhances the sweetness.
  • Chopped Nuts: Sprinkle with walnuts or almonds for added crunch and healthy fats.

Conclusion

Strawberry Baked Oatmeal is more than just a breakfast dish; it’s a heartfelt way to start your day. With its delightful combination of flavors and textures, it’s a recipe that invites creativity and adaptation. Whether you’re enjoying it fresh out of the oven or as a meal prep option for busy days, this dish is sure to become a beloved part of your morning routine. So gather your ingredients, preheat that oven, and get ready to enjoy a comforting bowl of Strawberry Baked Oatmeal!

Strawberry Baked Oatmeal

Prep Time 10 minutes
Cook Time 40 minutes
Total Time 50 minutes
Servings 4 servings
Calories 250
A delicious and wholesome breakfast featuring baked oats and fresh strawberries, perfect for starting your day.

Ingredients

Dry ingredients

  • 2 cups Old-Fashioned Oats
  • ½ cup Brown Sugar
  • 1 tsp. Cinnamon
  • 1 tsp. Baking Powder
  • ¼ tsp. Salt

Wet ingredients

  • 2 cups Milk
  • 2 Eggs
  • 1 tsp. Vanilla Extract
  • 2 Tbsp. Butter (melted and slightly cooled)

Strawberries

  • 2 cups Frozen Sliced Strawberries

Instructions 

  • Preheat oven to 375°F and grease a 2-quart baking dish.
  • Mix oats, brown sugar, cinnamon, baking powder, and salt in a bowl.
  • Whisk milk, eggs, vanilla, and melted butter in a separate bowl.
  • Layer 1 cup strawberries in dish, spread dry mixture, pour wet mixture, then top with remaining strawberries.
  • Bake for 35-40 minutes, then cool slightly before serving.

Notes

For added flavor, serve with a drizzle of honey or a dollop of yogurt.
Calories: 250kcal
Cost: $15
Course: Breakfast
Keyword: oats, Strawberries

Discover the Joy of Strawberry Sheet Cake Cookies

Welcome to a delightful culinary adventure where we explore the magic of Strawberry Sheet Cake Cookies. This recipe combines the sweetness of strawberry cake mix with simple ingredients, resulting in soft, chewy cookies that burst with flavor. Whether you’re a baking novice or an experienced chef, these cookies are a fantastic addition to your dessert repertoire. Not only are they easy to make, but they also bring a splash of summer to any occasion, making them perfect for gatherings, parties, or simply to indulge in at home.

Let’s dive deep into everything you need to know about making these irresistible cookies, from ingredients and variations to tips for perfecting the recipe!

Why You’ll Love This Recipe

  • Quick and Easy: With just a few ingredients, you can whip up a batch of cookies in no time, making them perfect for last-minute gatherings or a quick treat.
  • Versatile Base: Using a strawberry cake mix as the foundation allows for endless variations—try adding chocolate chips, nuts, or even citrus zest for a unique twist!
  • Soft and Chewy Texture: These cookies are designed to be soft and chewy, with a slight crisp on the edges, ensuring a delightful bite every time.
  • Beautiful Presentation: Topped with a luscious strawberry glaze, these cookies not only taste amazing but also look stunning on any dessert table.
  • Perfect for Any Occasion: Be it a birthday party, family gathering, or a cozy night in, these cookies are bound to be a hit!

Ingredient Breakdown

Let’s take a closer look at the ingredients that make these cookies so special, along with some helpful substitutions:

  • 15.25 ounces box of strawberry cake mix: This is the heart of our cookies. Using a quality mix, like Pillsbury, ensures a rich strawberry flavor.
  • 2 large eggs (room temperature): Eggs provide necessary moisture and help bind the ingredients together.
  • ⅓ cup vegetable oil: This keeps the cookies soft and adds a lovely richness to the dough.
  • 1 cup powdered sugar: This will be used in our glaze, giving it a sweet and smooth finish.
  • ¼ cup strawberry preserves: Adds an extra burst of strawberry flavor to the glaze, making it irresistible.
  • 2 tablespoons half and half: This adds creaminess to the glaze; you can substitute with milk if you don’t have it.

How to Make Strawberry Sheet Cake Cookies

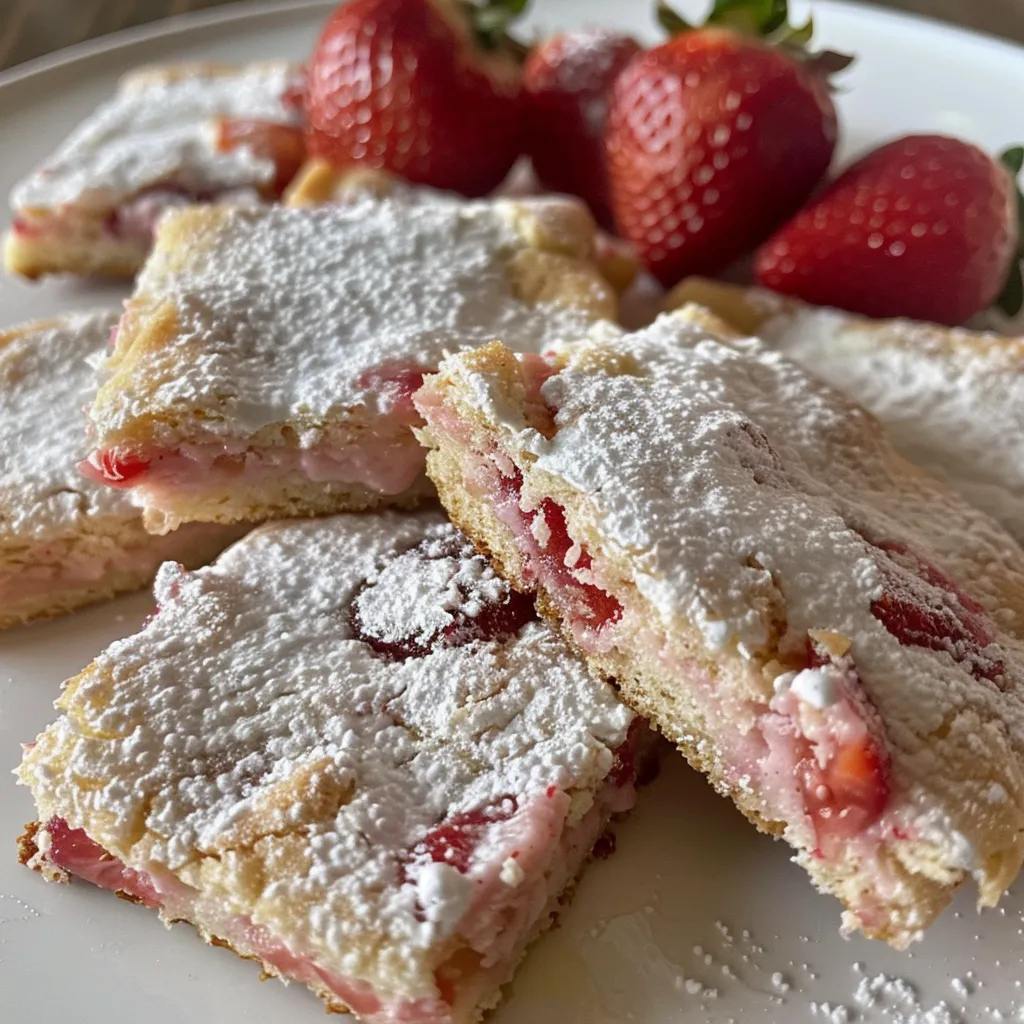
Freshly baked Strawberry Sheet Cake Cookies with glistening strawberry preserves on top.

Ready to bake? Follow these simple steps:

  1. Preheat the Oven: Start by preheating your oven to 350°F (175°C). Line a cookie sheet with parchment paper for easy cleanup.
  2. Mix Ingredients: In a medium-sized mixing bowl, combine the strawberry cake mix, eggs, and vegetable oil. Use a handheld mixer on medium speed to blend until just combined; the mixture will be thick.
  3. Scoop and Bake: Using a 1½ tablespoon cookie scoop, portion out the dough and place it on the prepared cookie sheet, spacing them about 2 inches apart. Bake for 10-12 minutes, until the edges are barely golden. Let them rest on the cookie sheet for 5 minutes before transferring to a cooling rack.
  4. Prepare the Glaze: While the cookies are cooling, prepare the glaze by whisking together the powdered sugar, strawberry preserves, and half and half until smooth.
  5. Glaze the Cookies: Once cooled, drizzle the glaze over the cookies, allowing it to set before serving.

Expert Tips for the Best Strawberry Cookies

  • Room Temperature Eggs: Make sure your eggs are at room temperature for better mixing and texture.
  • Don’t Overmix: When combining the ingredients, mix just until combined to avoid tough cookies.
  • Adjust Baking Time: Oven temperatures can vary, so keep an eye on your cookies as they bake to prevent overbaking.
  • Cool Completely: Allow the cookies to cool completely before glazing to ensure the glaze sets properly.
  • Experiment with Flavors: Feel free to add chocolate chips, nuts, or even a hint of lemon zest for a delightful twist.
  • Use High-Quality Ingredients: The better the ingredients, the better the flavor—choose a quality cake mix and preserves!
  • Storage Tips: Store cookies in an airtight container for up to a week or freeze for longer storage.
  • Make Ahead: You can prepare the cookie dough in advance; just refrigerate it for up to 24 hours before baking.

Common Mistakes and Troubleshooting

Here are some common pitfalls and how to avoid them:

  • Cookies Are Too Dry: This can happen if you overbake them. Keep a close watch during the last few minutes of baking.
  • Glaze Is Too Runny: If your glaze is too thin, add more powdered sugar until it reaches your desired consistency.
  • Cookies Spread Too Much: If your cookies spread excessively, make sure your dough is cold before baking. Chill it in the refrigerator for 15-30 minutes.

Delicious Variations

Want to mix things up? Here are some tasty variations to try:

  • Chocolate Chip Strawberry Cookies: Add ½ cup of chocolate chips to the dough for a delightful chocolate-strawberry combination.
  • Lemon Zest Cookies: Incorporate the zest of one lemon into the dough for a bright, citrusy flavor.
  • Nutty Strawberry Cookies: Fold in ½ cup of chopped nuts, like walnuts or pecans, for added crunch.
  • Strawberry Shortcake Style: Add whipped cream and fresh strawberries on top of the glazed cookies for an extra indulgent treat.

Storage and Make-Ahead Instructions

To keep your cookies fresh:

  • Storage: Store cookies in an airtight container at room temperature for up to a week. For longer storage, freeze them in a single layer, then transfer to a freezer-safe bag for up to 3 months.
  • Make-Ahead: You can prepare the dough in advance and refrigerate it for up to 24 hours before baking. Just scoop the dough onto the baking sheet and bake when ready!

Frequently Asked Questions

  • Can I use other cake mixes? Yes! Feel free to experiment with other flavors like lemon or vanilla for different taste experiences.
  • What can I use instead of vegetable oil? You can substitute with melted coconut oil or unsweetened applesauce for a healthier option.
  • How do I know when my cookies are done? Look for a slightly golden edge; the center may look soft, but they will firm up as they cool.
  • Can I add fresh strawberries? Yes, but use them sparingly as they can add too much moisture to the dough.
  • Do I need to chill the dough? Chilling is optional but recommended if you want thicker cookies that don’t spread too much.
  • What’s the best way to glaze the cookies? Use a spoon to drizzle or dip the tops of the cookies in the glaze for an even coating.
  • Can I make these gluten-free? Yes, use a gluten-free strawberry cake mix and ensure your other ingredients are gluten-free as well.
  • Can I double the recipe? Absolutely! Just make sure to adjust your baking sheets and oven space accordingly.

Nutritional Tips and Dietary Adaptations

For a healthier twist on these cookies, consider the following adjustments:

  • Lower Sugar: Reduce the amount of powdered sugar in the glaze.
  • Healthier Fats: Use unsweetened applesauce or Greek yogurt instead of oil for a lower fat content.
  • Gluten-Free Option: Substitute with a gluten-free cake mix and check all ingredients for gluten content.

Essential Equipment Recommendations

To achieve the best results, here’s a handy list of kitchen tools you’ll need:

  • Mixing Bowls: A set of medium and large mixing bowls for combining ingredients.
  • Handheld Mixer: Makes mixing the thick dough easier and more efficient.
  • Cookie Scoop: A 1½ tablespoon cookie scoop for uniform cookie size.
  • Parchment Paper: Essential for lining your baking sheets and preventing sticking.
  • Cooling Rack: Allows cookies to cool evenly after baking, ensuring the perfect texture.

Serving Suggestions

These delightful cookies can be enjoyed in various ways:

  • With Ice Cream: Serve warm cookies with a scoop of vanilla ice cream for an indulgent dessert.
  • At Parties: Arrange them on a platter for parties or gatherings; they will be a hit!
  • As a Gift: Package them in a decorative box for thoughtful, homemade gifts.

Final Thoughts

Strawberry Sheet Cake Cookies are not only a delightful treat but also a fantastic way to bring joy to your kitchen and your loved ones. With their easy preparation, vibrant flavor, and beautiful presentation, they are sure to become a favorite in your home. So gather your ingredients, follow the steps, and enjoy the sweet rewards of your culinary efforts. Happy baking!

Strawberry Sheet Cake Cookies

Prep Time 10 minutes
Cook Time 12 minutes
Total Time 22 minutes
Servings 24 cookies
Calories 150
Delight in these soft, strawberry-flavored cookies topped with a sweet glaze, perfect for a quick treat or special occasion.

Ingredients

Cake Mix

  • 15.25 ounces box of strawberry cake mix (Pillsbury recommended)
  • 2 large eggs (room temperature)
  • cup vegetable oil
  • 1 cup powdered sugar
  • ¼ cup strawberry preserves
  • 2 tablespoons half and half

Instructions 

  • Preheat oven to 350°F (175°C). Line a cookie sheet with parchment.
  • Mix cake mix, eggs, and oil until just combined; dough will be thick.
  • Use a 1½ tablespoon scoop to form cookies, spacing 2 inches apart. Bake 10-12 minutes.
  • Mix powdered sugar, strawberry preserves, and half and half to make glaze.
  • Cool cookies, then spoon glaze over and let set before serving.

Notes

Store cookies in an airtight container for freshness.
Calories: 150kcal
Cost: $10
Course: Dessert
Cuisine: American
Keyword: strawberry

Why Ranch Garlic Parmesan Chicken Skewers Will Be Your New Favorite

Welcome to a culinary adventure that promises to elevate your grilling game! Ranch Garlic Parmesan Chicken Skewers are not just a dish; they are an experience filled with flavors that dance on your palate. Imagine tender pieces of chicken marinated in savory ranch seasoning, grilled to perfection, and drizzled with a rich garlic butter sauce. This easy recipe is perfect for gatherings, family dinners, or a quick weeknight meal. Let’s delve into why this recipe is a must-try!

The Benefits of Ranch Garlic Parmesan Chicken Skewers

Here are some compelling reasons to fall in love with this recipe:

  • Quick Preparation: Ready in under 30 minutes! Perfect for busy weeknights or impromptu gatherings.
  • Flavor Explosion: The combination of ranch seasoning and garlic parmesan creates an irresistible flavor that will have everyone asking for more.
  • Versatile Serving Options: Enjoy these skewers on their own, over rice, or in wraps—ideal for any occasion.
  • Kid-Friendly: Even the pickiest eaters will love the savory taste, making it a great dish for family dinners.
  • Health-Conscious: Use lean cuts of chicken and fresh ingredients to keep this dish both delicious and nutritious.

Ingredients You’ll Need

Gathering the right ingredients is key to the perfect Ranch Garlic Parmesan Chicken Skewers. Here’s what you’ll need:

  • 2 lbs chicken tenders: You can substitute with thighs or breasts, but cut into 3-inch pieces for even cooking.
  • 2 tbsp olive oil: This helps the seasoning adhere and keeps the chicken moist.
  • 1½ tbsp dry ranch seasoning: The star of the marinade, delivering that classic ranch flavor.
  • 1 tsp dried dill: Adds a fresh, herbaceous note to the marinade.
  • 2 tsp paprika: For a hint of smokiness and color.
  • 1 tsp garlic powder: Enhances the garlic flavor in the dish.
  • 1 tsp onion powder: Complements the ranch seasoning beautifully.
  • ½ tsp salt and black pepper: Essential for seasoning the chicken.
  • ½ cup unsalted butter: The base for the luscious garlic butter sauce.
  • 8-10 cloves garlic (minced): Fresh garlic adds an aromatic punch.
  • ½ cup grated Parmesan cheese: For that creamy, cheesy goodness.
  • 1 tbsp hot sauce: Adjust according to your spice preference.
  • 2 tsp red pepper flakes: For an extra kick!
  • ⅓ cup fresh parsley (minced): Adds a pop of color and freshness.

How to Make Ranch Garlic Parmesan Chicken Skewers

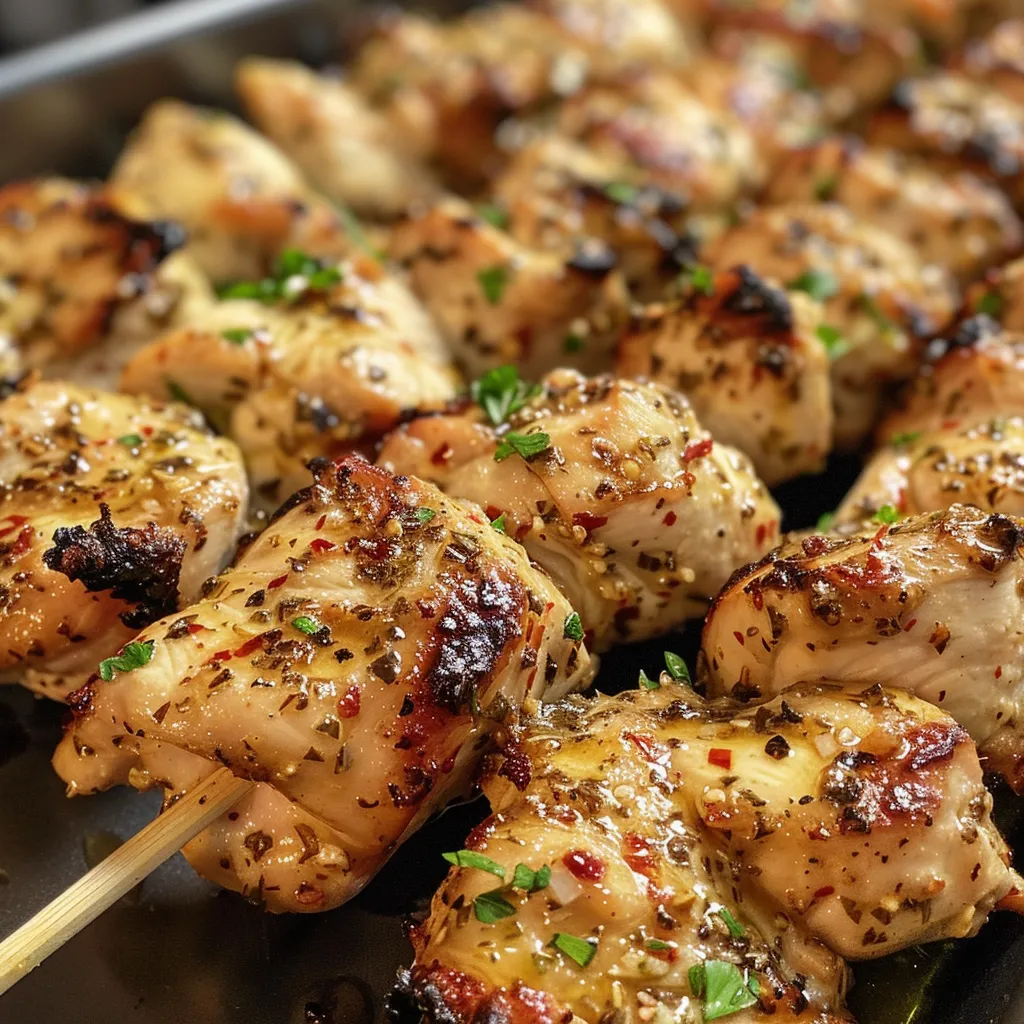
Appetizing Ranch Garlic Parmesan Chicken Skewers ready to serve.

Follow these simple steps to create your delicious skewers:

  • Step 1: Marinate the Chicken
    In a large bowl, combine all chicken seasonings: ranch seasoning, dill, paprika, garlic powder, onion powder, salt, and pepper. Add chicken pieces and olive oil, tossing to coat thoroughly.
  • Step 2: Skewer the Chicken
    Thread the chicken tightly onto soaked skewers, leaving about ½ inch between pieces. Aim for 5-6 pieces per skewer.
  • Step 3: Prepare the Garlic Parmesan Sauce
    In a saucepan over medium heat, melt the butter. Add minced garlic and cook for 1 minute until fragrant. Remove from heat and stir in Parmesan, hot sauce, red pepper flakes, parsley, and remaining seasonings. Whisk until smooth.
  • Step 4: Cook the Skewers
    Reserve ⅔ of the sauce for basting. Cook skewers using your preferred method:
    • Air Fryer: 400°F for 5 minutes, flip, baste with ⅓ of sauce, cook 2 minutes, flip again, baste, and cook 5-6 more minutes.
    • Oven: Preheat to 450°F, bake skewers on a foil-lined sheet for 14 minutes, flipping halfway and basting.
    • Grill: Medium-high heat for 5-6 minutes per side, basting with garlic butter as they cook.
  • Step 5: Final Touch
    Once the chicken reaches an internal temperature of 165°F, remove from heat and brush with reserved sauce. Sprinkle with additional Parmesan cheese before serving.

Pro Tips for Perfect Skewers

Maximize your success with these expert insights:

  • Soak Wooden Skewers: Soak them in water for at least 30 minutes to prevent burning while grilling.
  • Uniform Sizes: Cut chicken pieces uniformly for even cooking and a beautiful presentation.
  • Marinate Time: Allow the chicken to marinate for at least 30 minutes for maximum flavor absorption.
  • Use Fresh Ingredients: Fresh garlic and herbs elevate the flavor profile significantly.
  • Adjust Spice Levels: Feel free to tweak the hot sauce and red pepper flakes according to your spice tolerance.
  • Test Cooking Temperature: Use a meat thermometer to ensure the chicken is cooked through to avoid any food safety issues.
  • Experiment with Cooking Methods: Try different methods (grilling, baking, air frying) to find your favorite!
  • Garnish Generously: Fresh herbs on top before serving add a vibrant touch and enhance the dish visually.

Common Mistakes and Troubleshooting

Don’t let common pitfalls ruin your cooking experience. Here’s what to watch out for:

  • Overcrowding Skewers: Ensure there’s space between pieces for even cooking.
  • Not Preheating Grill/Oven: Always preheat your cooking surface for the best results.
  • Skipping the Marinade: The marinade is crucial for flavor; don’t skip this step!
  • Underestimating Cooking Time: Keep an eye on the chicken; cooking times can vary based on thickness and method.

Variations to Try

Make this recipe your own with these fun variations:

  • Vegetable Skewers: Add bell peppers, onions, or zucchini for a colorful and nutritious twist.
  • Spicy Ranch: Incorporate chipotle powder for a smoky, spicy kick.
  • Herb-Infused: Use fresh herbs like cilantro or basil in the marinade for a fresh flavor profile.
  • Cheesy Twists: Swap the Parmesan for feta or add mozzarella for a different cheesy experience.

Storage and Make-Ahead Instructions

This dish is great for meal prep! Here’s how to store and prep ahead:

  • Refrigerate: Store cooked skewers in an airtight container in the fridge for up to 3 days.
  • Freeze: Freeze uncooked skewers before grilling for up to 2 months. Thaw overnight in the fridge before cooking.
  • Reheat: Reheat in the oven or air fryer to retain crispness rather than using a microwave.

Nutrition Tips and Dietary Adaptations

Looking for a healthier take? Consider these options:

  • Low-Fat Options: Use skinless chicken breasts to reduce fat content.
  • Dairy-Free: Substitute the butter with olive oil and omit the cheese for a dairy-free version.
  • Gluten-Free: Ensure all seasonings are certified gluten-free to accommodate dietary restrictions.

Equipment Recommendations

Make sure you have the right tools for the best results:

  • Skewers: Use metal skewers for easy handling or soak wooden ones in water before use.
  • Meat Thermometer: A must-have to ensure your chicken is cooked perfectly.
  • Grill or Air Fryer: Both methods yield delicious results, so choose based on your preference.

Serving Suggestions

Enhance your meal with these serving ideas:

  • Side Dishes: Pair with grilled vegetables, a fresh salad, or garlic bread.
  • Dipping Sauces: Serve with ranch, blue cheese, or a spicy aioli for added flavor.
  • Garnishes: Fresh parsley or chives not only add color but also enhance the flavor profile.

Frequently Asked Questions

Got questions? We’ve got answers!

  • Can I use chicken breasts instead of tenders?
    Yes! Chicken breasts work well; just be sure to cut them into even pieces to maintain cooking consistency.
  • Can I make these skewers dairy-free?
    Absolutely! Substitute the butter with olive oil and omit the cheese.
  • How can I make these skewers spicier?
    Add more hot sauce or red pepper flakes to elevate the heat level.
  • Can I make these ahead of time?
    Yes, you can marinate the chicken and store it in the fridge for up to 24 hours before grilling.
  • What can I serve with Ranch Garlic Parmesan Chicken Skewers?
    These skewers pair wonderfully with rice, salads, or grilled veggies.
  • How long do these skewers last in the fridge?
    Cooked skewers can be stored in an airtight container in the fridge for up to 3 days.
  • Can I use an air fryer for cooking?
    Yes! Air frying yields crispy and juicy skewers, making it a great option.
  • What if I don’t have ranch seasoning?
    You can make a homemade version using dried herbs and spices like dill, garlic powder, and onion powder.

In conclusion, Ranch Garlic Parmesan Chicken Skewers are a delightful addition to your culinary repertoire. Their simplicity, combined with bold flavors, makes them a perfect choice for any occasion. Whether you’re entertaining guests or enjoying a cozy family meal, these skewers are sure to impress. Happy cooking!

Ranch Garlic Parmesan Chicken Skewers

Prep Time 15 minutes
Cook Time 20 minutes
Total Time 35 minutes
Servings 4 servings
Calories 350
Deliciously seasoned chicken skewers coated in garlic Parmesan sauce, perfect for grilling or baking.

Ingredients

Chicken

  • 2 lbs chicken tenders (or thighs/breasts) (cut into 3-inch pieces)
  • 2 tbsp olive oil
  • 1.5 tbsp dry ranch seasoning
  • 1 tsp dried dill
  • 2 tsp paprika
  • 1 tsp garlic powder
  • 1 tsp onion powder
  • 0.5 tsp salt
  • 0.5 tsp black pepper
  • 0.5 cup unsalted butter (1 stick)
  • 8-10 cloves garlic (minced)
  • 0.5 cup grated Parmesan cheese
  • 1 tbsp hot sauce (adjust to taste)
  • 2 tsp red pepper flakes
  • cup fresh parsley (minced)
  • 1 tbsp dry ranch seasoning
  • 1 tsp dried dill
  • 0.5 tsp onion powder

Instructions 

  • Mix all chicken seasonings and coat chicken pieces evenly.
  • Thread chicken onto soaked skewers, leaving space between pieces.
  • Melt butter, cook garlic briefly, then stir in Parmesan, hot sauce, red pepper flakes, parsley, and remaining seasonings to make sauce.
  • Cook skewers via your preferred method, basting with sauce as needed.
  • Ensure chicken reaches 165°F, then brush with reserved sauce and sprinkle with Parmesan before serving.

Notes

For best results, marinate chicken for at least 30 minutes before cooking.
Calories: 350kcal
Cost: $15
Course: Main Course
Cuisine: American
Keyword: Chicken, garlic, parmesan, skewers

Transform Your Mornings with Cottage Cheese Hard Boiled Egg Toast

Are you looking for a nourishing, quick, and delicious breakfast? Look no further than the Cottage Cheese Hard Boiled Egg Toast. This dish combines creamy cottage cheese, perfectly cooked hard-boiled eggs, and your choice of toppings on crispy toast. Not only is it a visual delight, but it’s also packed with nutrients to kickstart your day. In this article, we’ll explore the nuances of this delightful breakfast option, from ingredient breakdowns and variations to tips for perfect execution. Let’s dive in!

Why You’ll Love This Recipe

This cottage cheese toast is not just another breakfast option. Here’s why it stands out:

  • High in Protein: With a solid protein boost from cottage cheese and eggs, this toast helps keep you full and satisfied until lunch.
  • Quick to Prepare: In just a few minutes, you can whip up a delicious and healthy breakfast, making it perfect for busy mornings.
  • Versatile Toppings: Customize with sweet or savory toppings to suit your mood and taste preferences.
  • Nutritious Ingredients: Packed with vitamins, minerals, and healthy fats, this breakfast supports overall health and well-being.
  • Gluten-Free Option: Easily swap in gluten-free bread to accommodate dietary needs without sacrificing flavor.

Ingredient Breakdown

To create the perfect Cottage Cheese Hard Boiled Egg Toast, you’ll need the following ingredients:

  • 1 slice of sprouted bread: Provides a hearty base; you can also choose whole grain, sourdough, or gluten-free options.
  • 1/4 cup cottage cheese: The creamy element that adds protein and texture to your toast.
  • 1 tablespoon almond butter: Adds a nutty flavor; substitute with peanut butter if preferred.
  • 1/4 cup mixed berries: Choose from raspberries, blueberries, or strawberries for a sweet touch.
  • 1 tablespoon natural or homemade peanut butter: For added creaminess and flavor.
  • 1/3 banana, sliced: A natural sweetener and energy booster.
  • Pinch of cinnamon: Enhances flavor and adds a warm touch.
  • 1 hard-boiled egg, sliced: The star of the dish, providing protein and richness.
  • 1/2 teaspoon everything bagel seasoning: For an explosion of flavor.
  • 1/4 avocado, sliced: Adds healthy fats and creaminess.
  • Pinch of red pepper flakes: For a hint of heat.
  • Pinch of flaky sea salt: Enhances all the flavors.
  • 1-2 ounces smoked salmon (optional): For an upscale touch and extra protein.
  • 1 tablespoon thinly sliced red onion: Adds a zesty crunch.
  • 1 tablespoon capers: Brings a briny flavor that elevates the dish.
  • Optional: fresh dill sprigs: For a fresh finish.
  • 1 tablespoon black olive tapenade (store-bought): A twist that adds depth.
  • Sliced cucumbers and cherry tomatoes: Fresh elements to round out your toast.

Pro Tips for Perfecting Your Toast

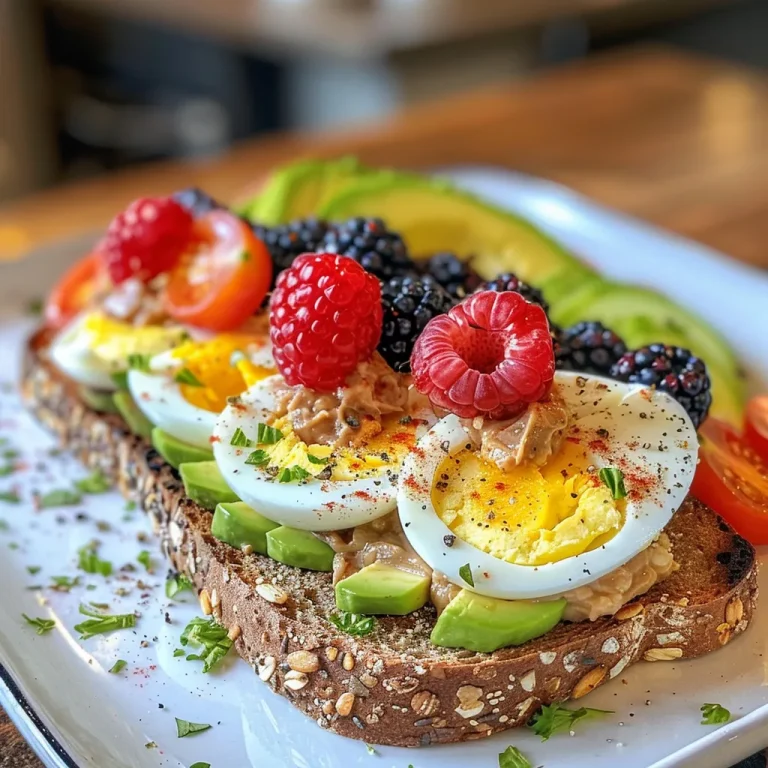
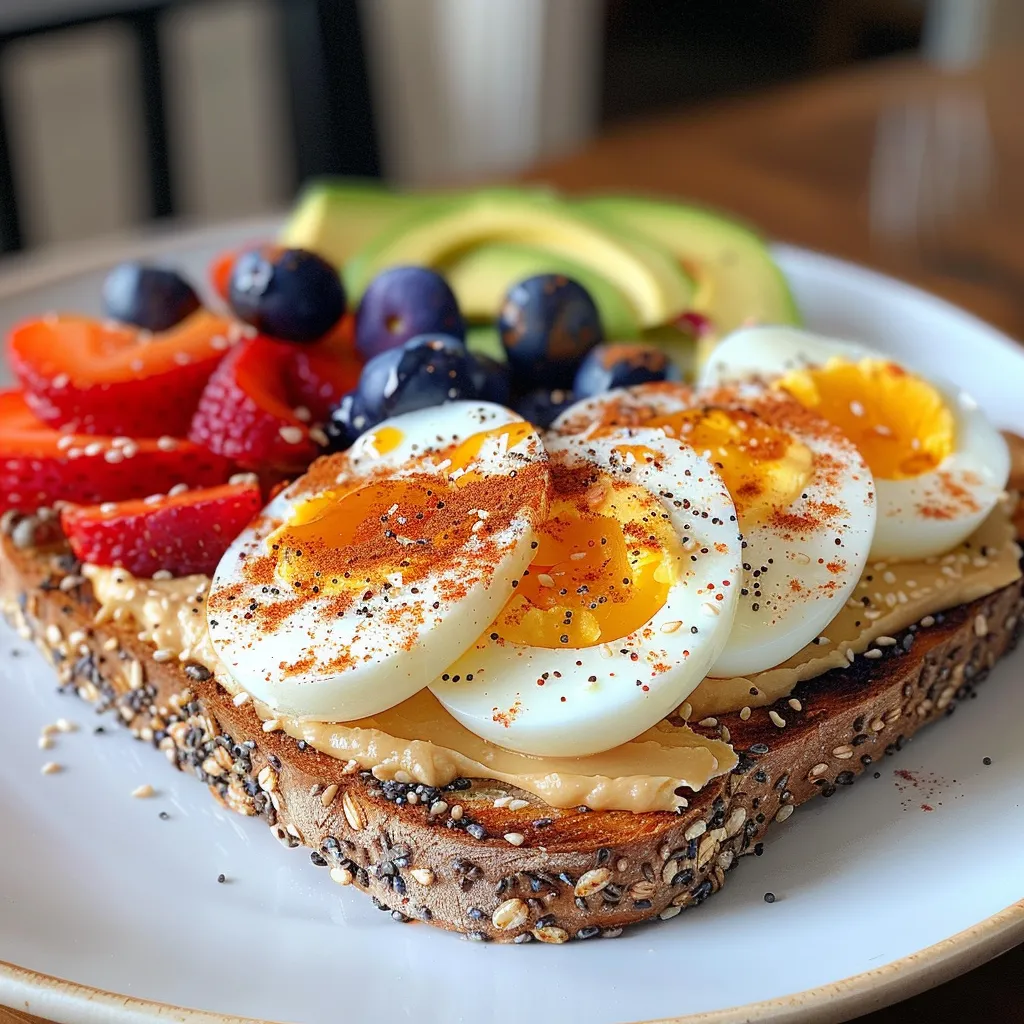
Gourmet toast with sprouted bread, cottage cheese, and a variety of fresh toppings like avocado and cherry tomatoes.

Here are some expert insights to ensure your Cottage Cheese Hard Boiled Egg Toast is perfect every time:

  • Use Fresh Ingredients: Fresh cottage cheese and eggs yield the best flavor and texture. Check expiration dates!
  • Toast Bread Until Crispy: Aim for a golden-brown toast for the perfect crunch that holds up under toppings.
  • Customize Your Cheese: Experiment with different types of cheese for varied flavors. Try feta or ricotta for something different.
  • Season Generously: Don’t skimp on the seasonings; they elevate the entire dish!
  • Perfectly Cook Your Eggs: For hard-boiled eggs, simmer for about 9-12 minutes and then place them in cold water to cool.
  • Balance Flavors: Combine sweet and savory toppings for a well-rounded taste experience.
  • Layer Strategically: Start with cottage cheese, then add toppings from softest to firmest to prevent sogginess.
  • Serve Immediately: Enjoy your toast fresh for the best flavor and texture.

Common Mistakes and Troubleshooting

Even simple recipes can have pitfalls. Here are some common mistakes and how to avoid them:

  • Soggy Toast: Ensure your toast is crisp before adding toppings. Consider toasting it again if it gets soggy.
  • Overcooked Eggs: Keep an eye on your boiling eggs to avoid rubbery whites. A timer helps!
  • Too Much Topping: While toppings are delightful, too many can overwhelm the toast. Stick to 2-3 key toppings.
  • Ignoring Dietary Needs: Make sure to check for gluten allergies if serving to others—opt for gluten-free bread if necessary.
  • Underseasoning: Taste as you go to ensure your toast has balanced flavors.

Flavor Variations

One of the best things about this toast is the ability to customize it. Here are some variations to consider:

  • Sweet Berry Delight: Top with cottage cheese, mixed berries, a drizzle of honey, and sliced almonds.
  • Savory Avocado & Egg: Use avocado instead of almond butter, topped with sliced eggs, everything bagel seasoning, and cherry tomatoes.
  • Smoked Salmon Sensation: Layer cottage cheese, smoked salmon, capers, and red onion for a gourmet breakfast.
  • Spicy Mediterranean: Add black olive tapenade, feta cheese, and a sprinkle of chili flakes for extra kick.

Storage and Make-Ahead Instructions

This breakfast is best enjoyed fresh, but if you want to prepare some components in advance, here’s how:

  • Hard-Boiled Eggs: Boil several eggs and store them in the refrigerator for up to a week.
  • Cottage Cheese: Keep cottage cheese in a sealed container in the fridge. Use within the expiration date.
  • Prepped Toppings: Slice avocados and other toppings just before serving to maintain freshness.

Nutritional Tips and Dietary Adaptations

This dish is inherently nutritious, but here are some tips to enhance its health benefits:

  • Opt for Low-Fat Cottage Cheese: If calorie counting, choose low-fat or fat-free cottage cheese.
  • Increase Fiber: Add chia seeds or flaxseeds for extra fiber and omega-3s.
  • Include More Veggies: Top with spinach, arugula, or other greens for added vitamins.
  • Protein Boost: Add a scoop of protein powder to the cottage cheese for an even higher protein breakfast.

Essential Kitchen Equipment

While making Cottage Cheese Hard Boiled Egg Toast is simple, having the right tools can help. Here are some essentials:

  • Non-stick Skillet: Perfect for frying or toasting without sticking.
  • Egg Timer: A simple tool that helps you achieve the perfect egg consistency.
  • Sharp Knife: For cleanly slicing your toppings and eggs.
  • Cutting Board: A sturdy surface for prepping ingredients.

Serving Suggestions

To make your breakfast even more delightful, consider these serving ideas:

  • Pair with Fresh Juice: A glass of freshly squeezed orange juice or green juice complements the meal beautifully.
  • Enjoy with a Side of Fruit: Fresh fruit salad or a whole piece of fruit adds a refreshing touch.
  • Accompany with Herbal Tea: A warm cup of herbal tea can enhance the breakfast experience.

Frequently Asked Questions

Here are some common questions regarding this recipe:

  • Can I use different types of bread? Yes! Whole grain, sourdough, or gluten-free bread are all great options.
  • How do I store leftovers? Best eaten fresh, but you can store components separately in the fridge for up to 3 days.
  • Is this recipe suitable for meal prep? Yes, you can prepare the ingredients ahead of time but assemble just before eating.
  • Can I make this vegan? Substitute cottage cheese with a vegan alternative and omit the egg or replace it with tofu.
  • What can I use instead of cottage cheese? Ricotta, Greek yogurt, or a nut-based cheese can be used as alternatives.
  • How can I make it spicier? Add jalapeños or hot sauce as a topping for extra heat.
  • Can I freeze the toast? It’s best enjoyed fresh, but you can freeze bread and re-toast it when ready to serve.
  • What’s the best way to hard-boil eggs? Simmer eggs for 9-12 minutes, then cool in ice water for easy peeling.

In conclusion, the Cottage Cheese Hard Boiled Egg Toast is not just a meal; it’s a celebration of flavors and nutrition. Perfect for any time of day, this toast is adaptable, quick, and utterly satisfying. So gather your ingredients, and let’s make breakfast a highlight of your day!

Easy Cottage Cheese Hard Boiled Egg Toast

Prep Time 10 minutes
Cook Time 10 minutes
Total Time 20 minutes
Servings 1 serving
Calories 450
A delicious and nutritious toast topped with cottage cheese, hard-boiled eggs, fresh vegetables, and flavorful seasonings, perfect for a quick breakfast or snack.

Ingredients

Bread

  • 1 slice sprouted bread or your favorite bread

Dairy

  • 0.25 cup cottage cheese
  • 1 tablespoon almond butter
  • 1 hard-boiled egg hard-boiled egg, sliced

Fruits & Vegetables

  • 0.25 cup mixed berries ((raspberries, blueberries, strawberries, etc.))
  • 0.33 banana banana, sliced
  • 0.25 avocado avocado, sliced

Seasonings & Spices

  • Pinch cinnamon
  • 1/2 teaspoon red pepper flakes
  • 1/4 teaspoon flaky sea salt

Seafood & Condiments

  • 1-2 ounces smoked salmon
  • 1 tablespoon red onion, sliced
  • 1 tablespoon capers
  • 1 tablespoon black olive tapenade ((store-bought))

Vegetables

  • Sliced cucumbers
  • Sliced cherry tomatoes

Optional

  • as desired fresh dill sprigs

Instructions 

  • Toast the bread until golden brown.
  • Spread cottage cheese and almond butter on the toasted bread.
  • Top with sliced hard-boiled egg, avocado, berries, and seasonings.
  • Add smoked salmon, red onion, capers, tapenade, cucumbers, and cherry tomatoes.
  • Finish with a pinch of flaky sea salt, red pepper flakes, cinnamon, and dill if desired.

Notes

Feel free to customize toppings based on your preferences for a nutritious start to your day.
Calories: 450kcal
Cost: $12
Course: Breakfast
Cuisine: American
Keyword: cottage cheese, Egg, Toast

Start Your Day Right with Baked Oatmeal

Welcome to a delightful morning experience that transforms your breakfast routine! This baked oatmeal recipe is perfect for families looking to enjoy a nourishing meal together. Combining wholesome ingredients like old-fashioned rolled oats, fresh berries, and a touch of maple syrup, this dish promises to bring comfort and joy to your table. Whether you’re a busy parent or just someone who loves a hearty breakfast, this recipe is designed to make mornings easier and more enjoyable.

In this article, we’ll explore everything you need to know about baked oatmeal—from the ingredients that make it special to tips for perfecting your dish. Plus, I’ll share my own experiences and insights from over two decades in the culinary world. Let’s dive into the deliciousness!

Why You’ll Love This Recipe

  • Easy Preparation: With just a few simple steps, you can whip up a hearty breakfast that requires minimal effort and cleanup.
  • Customizable Ingredients: Feel free to mix and match ingredients based on what you have at home or your family’s preferences.
  • Perfect for Meal Prep: Bake a batch ahead of time, and you’ll have tasty breakfasts ready all week long!
  • Nutritious and Filling: Packed with fiber and healthy fats, this baked oatmeal keeps you satisfied and energized.
  • Family-Friendly: Kids will love it topped with their favorite fruits or yogurt, making it a dish everyone can enjoy.

Ingredient Breakdown

Let’s take a closer look at the ingredients that make this baked oatmeal so special and how you can adapt them to suit your taste:

  • Milk: 2 cups of any dairy or nondairy option for moisture. Almond, soy, or oat milk works beautifully!
  • Eggs: 2 large eggs bind the mixture and add richness, but you can substitute with flax eggs for a vegan option.
  • Maple syrup: 1/2 cup adds natural sweetness. Feel free to adjust based on your taste preferences.
  • Butter: 5 tablespoons of unsalted butter, melted, adds flavor and a tender texture. Coconut oil can be used as a substitute.
  • Applesauce or Banana: 1/4 cup of unsweetened applesauce or mashed banana lightens the texture and adds subtle sweetness.
  • Old-fashioned rolled oats: 3 1/3 cups provide the hearty, chewy structure that makes this dish satisfying.
  • Baking powder: 1 teaspoon helps lift the oatmeal slightly for a fluffier texture.
  • Cinnamon: 1 1/4 teaspoons of ground cinnamon brings warmth and flavor. Feel free to add nutmeg for an extra spice kick.
  • Vanilla extract: 1 1/4 teaspoons adds aroma and depth to the dish.
  • Salt: 1/4 teaspoon balances the sweetness of the dish.
  • Mixed berries: 1 3/4 cups of fresh or frozen berries add vibrant color and flavor. Just make sure not to thaw them for the best texture!
  • Nuts: 1/2 cup of chopped walnuts or pecans (optional) provide a delightful crunch.

How to Make Baked Oatmeal

Detailed shot of a serving of baked oatmeal, highlighting its moist texture and rich colors.

Now that you have your ingredients ready, let’s walk through the straightforward process of making this baked oatmeal:

  1. Position the oven rack in the lower third and preheat the oven to 350°F (177°C). Lightly grease a square or similarly sized baking dish.
  2. In a large mixing bowl, stir all the ingredients together until evenly combined.
  3. Pour the mixture into the prepared dish and sprinkle with nuts on top, if using.
  4. Bake for about 35 minutes, or until the center is just barely firm for a softer texture, or fully set for a drier slice.
  5. Let cool for 5 minutes before serving, then spoon or cut into portions. Add yogurt if you like for an extra creamy touch!

Pro Tips for Perfect Baked Oatmeal

  • Don’t skip the resting time: Allowing the oatmeal to cool slightly helps it set better for slicing.
  • Mix thoroughly: Ensure that all ingredients are well combined to avoid dry spots in your baked oatmeal.
  • Experiment with flavors: Add chocolate chips, peanut butter, or spices like nutmeg to tailor the flavor to your preference.
  • Check for doneness: If you’re unsure whether it’s done, insert a toothpick into the center; it should come out clean.
  • Use seasonal fruits: Swap in whatever fruits are in season for a fresh twist on the recipe.
  • Adjust baking time: If using a larger or smaller dish, keep an eye on your oatmeal to adjust the baking time as needed.
  • Store leftovers properly: Keep any uneaten portions in an airtight container in the fridge for up to five days.
  • Reheat gently: When reheating, add a splash of milk to keep the texture creamy.

Variations to Try

Feeling adventurous? Here are some exciting variations you can try with this baked oatmeal recipe:

  • Chocolate Chip Delight: Add 1/2 cup of chocolate chips for a sweet, dessert-like breakfast.
  • Banana Nut: Swap in mashed bananas for the applesauce and add chopped walnuts for a classic flavor combination.
  • Apple Cinnamon: Substitute diced apples for the berries and increase the cinnamon for a cozy twist.
  • Peanut Butter Banana: Stir in 1/4 cup of peanut butter and sliced bananas for a protein-packed option.

Storage and Make-Ahead Instructions

This baked oatmeal is perfect for meal prep! Here’s how to store it:

  • Refrigeration: Store in an airtight container in the fridge for up to five days.
  • Freezing: You can freeze baked oatmeal for up to three months. Just make sure to cut it into portions for easy reheating!
  • Make-Ahead: Prepare the mixture the night before and refrigerate it in the baking dish. Bake it in the morning for a fresh breakfast.

Frequently Asked Questions

Here are some common questions about baked oatmeal:

  • Can I use quick oats instead of rolled oats? Quick oats are softer and may result in a mushier texture, but they can work in a pinch.
  • What can I use instead of eggs? You can substitute eggs with 1/4 cup of unsweetened applesauce or mashed banana per egg.
  • How do I make it vegan? Substitute dairy milk with almond or soy milk and use flax eggs instead of regular eggs.
  • Can I add protein powder? Yes, you can add a scoop of protein powder to the mix for an extra boost!
  • How long does baked oatmeal last? It can last up to five days in the fridge or three months in the freezer.
  • Can I reheat it? Yes, reheat portions in the microwave; adding a splash of milk helps maintain moisture.
  • What toppings can I add? Fresh fruit, yogurt, nut butter, or honey are all great options to enhance your baked oatmeal.
  • Is this recipe good for meal prep? Absolutely! It’s an excellent option for meal prep, making it easy to grab breakfast on the go.

Nutrition Tips and Dietary Adaptations

This baked oatmeal recipe can be easily adapted to fit various dietary needs:

  • Gluten-Free: Use certified gluten-free oats to make this recipe gluten-free.
  • Low-Sugar: Reduce the amount of maple syrup and substitute with a low-calorie sweetener if desired.
  • Nut-Free: Omit the nuts or substitute with seeds like sunflower or pumpkin seeds for added texture.

Equipment Recommendations

Having the right tools makes all the difference. Here’s what I recommend:

  • Mixing Bowl: A large mixing bowl is essential for combining ingredients.
  • Baking Dish: A square or rectangular baking dish works best for this recipe.
  • Measuring Cups and Spoons: Accurate measurements ensure the best results.
  • Spatula: For mixing and transferring your batter smoothly.

Serving Suggestions

Once your baked oatmeal is ready, consider serving it with:

  • Greek Yogurt: A dollop adds creaminess and extra protein.
  • Fresh Fruit: Top with additional berries, banana slices, or seasonal fruits.
  • Nut Butter: A swirl of almond or peanut butter enhances flavor and adds healthy fats.

In conclusion, baked oatmeal is not just a meal; it’s an experience that brings families together. With its comforting flavors and nourishing ingredients, you can create a breakfast that nourishes both the body and soul. So, gather your loved ones, share this delightful recipe, and enjoy the warmth of togetherness at your breakfast table. Happy cooking!

baked oatmeal

Prep Time 10 minutes
Cook Time 35 minutes
Total Time 45 minutes
Servings 6 slices
Calories 350
A hearty and wholesome baked oatmeal perfect for a nutritious breakfast or snack, customizable with berries and nuts.

Ingredients

Dairy & Liquids

  • 2 cups milk (any dairy or nondairy option for moisture)
  • 2 large eggs (binds mixture and adds richness)
  • 1/2 cup pure maple syrup (natural sweetness and moisture)

Fats & Oils

  • 5 tablespoons unsalted butter (melted (adds flavor and tender texture))

Fruits & Vegetables

  • 1/4 cup unsweetened applesauce or mashed banana (lightens texture and adds subtle sweetness)
  • 1 1/3 cups old-fashioned rolled oats (best for hearty, chewy structure)
  • 1 teaspoon baking powder (helps lift the oatmeal slightly)
  • 1 1/4 teaspoons ground cinnamon (warm spice flavor)
  • 1 1/4 teaspoons vanilla extract (adds aroma and depth)
  • 1/4 teaspoon salt (balances sweetness)
  • 1 3/4 cups mixed berries (fresh or frozen (do not thaw for best texture))
  • 1/2 cup chopped walnuts or pecans (optional (crunchy finishing element))

Instructions 

  • Preheat oven to 350°F (177°C) and lightly grease a baking dish.
  • Mix all ingredients in a large bowl, pour into dish, and sprinkle nuts on top if desired.
  • Bake for 35 minutes until set or just barely firm in the center.
  • Cool for 5 minutes, then serve with yogurt if desired.

Notes

You can customize with different fruits or nuts for variety.
Calories: 350kcal
Cost: $12
Course: Breakfast
Keyword: oats

Elevate Your Breakfast with Cottage Cheese Egg & Sriracha Protein Toast

Start your day on a high note with a delicious and nutritious breakfast that combines creamy cottage cheese, perfectly cooked eggs, and a kick of spicy sriracha. This cottage cheese egg toast is not just a meal; it’s a vibrant way to fuel your body and excite your taste buds. Whether you’re rushing out the door or enjoying a leisurely weekend brunch, this protein toast can fit seamlessly into your routine. Let’s dive into why this recipe is a must-try!

Why You’ll Love This Recipe

  • Nutrient-Dense Powerhouse: Packed with protein from cottage cheese and eggs, this dish supports muscle repair and keeps you satisfied longer.
  • Quick and Easy: Ready in under 15 minutes, it’s the perfect solution for busy mornings or spontaneous snack cravings.
  • Flavor Fusion: The creamy texture of cottage cheese pairs beautifully with the spicy kick of sriracha, creating a delightful balance of flavors.
  • Versatile and Customizable: Add your favorite toppings like avocado, smoked salmon, or fresh herbs to make it your own.
  • Visual Appeal: With vibrant colors from fresh ingredients, this toast not only tastes good but looks great on your plate!

Ingredients You’ll Need

Before we get cooking, let’s gather our ingredients. Here’s what you’ll need for the ultimate cottage cheese egg toast:

  • 2 slices whole grain bread
  • 1/2 cup cottage cheese
  • 2 large eggs
  • 1-2 teaspoons sriracha sauce (adjust to taste)
  • 1 teaspoon butter or olive oil
  • Salt, to taste
  • Black pepper, to taste
  • Fresh herbs (chives, cilantro, or parsley), chopped
  • Avocado slices or spread
  • Sliced tomatoes, spinach, or bell peppers
  • Smoked salmon or hemp seeds for extra protein

Step-by-Step Instructions

An appetizing side angle of Cottage Cheese Egg & Sriracha Protein Toast highlighting fresh ingredients.

Now that we have our ingredients ready, let’s walk through the steps to create this delicious cottage cheese egg & sriracha protein toast.

  • Step 1: Toast Your Bread – Start by toasting your whole grain bread slices until they are golden and crispy. This creates a sturdy base that won’t get soggy.
  • Step 2: Prepare the Eggs – Cook the eggs to your preference—fried, scrambled, or poached. For a creamy texture, aim for slightly runny yolks. Use butter or olive oil to cook the eggs to golden perfection, seasoning with salt and pepper.
  • Step 3: Spread Cottage Cheese – Generously spread the cottage cheese over the warm toasted bread. The tangy creaminess balances perfectly with the spicy sriracha.
  • Step 4: Assemble the Toast – Place the cooked eggs on top of the cottage cheese layer. Drizzle sriracha sauce over the eggs to your desired spice level.
  • Step 5: Add Finishing Touches – Season with additional salt and pepper if needed. Sprinkle freshly chopped herbs on top for brightness and a pop of color. Optionally, add avocado slices, veggies, or other toppings as desired.

Pro Tips for Perfect Cottage Cheese Egg & Sriracha Protein Toast

  • Choose Quality Ingredients: For the best flavor and nutrition, opt for fresh, high-quality ingredients. Look for whole grain bread and organic eggs if possible.
  • Experiment with Cooking Techniques: Try different cooking methods for your eggs. Poached eggs provide a beautiful runny yolk, while scrambled eggs offer a soft texture.
  • Adjust Spice Levels: If you’re sensitive to heat, start with less sriracha and add more gradually to find your perfect balance.
  • Herb Variations: Fresh herbs can elevate the dish—consider using dill or basil for a different flavor profile.
  • Make It Ahead: Prepare the cottage cheese and toppings in advance for a quick breakfast during busy mornings.
  • Utilize Leftovers: If you have leftover toast, store toppings separately and reassemble for a quick meal.
  • Consider Dietary Needs: Substitute cottage cheese with a plant-based alternative if you’re lactose intolerant or prefer vegan options.
  • Presentation Matters: Use a sharp knife to cut the toast in half for a more appealing presentation—perfect for Instagram!

Common Mistakes and Troubleshooting

Even the best chefs make mistakes! Here are some common pitfalls and how to avoid them:

  • Overcooking the Eggs: Watch your eggs closely to avoid tough or rubbery texture. Cook on lower heat for best results.
  • Soggy Toast: Ensure your toast is fully cooled before adding toppings to prevent sogginess.
  • Too Much Sriracha: If you accidentally add too much heat, balance it out with an extra layer of cottage cheese or creamy avocado.
  • Missing Flavor: Don’t skip seasoning your eggs. A pinch of salt and pepper can enhance the overall taste significantly.

Variations to Try

Looking to mix things up? Here are some delicious variations on the classic cottage cheese egg toast:

  • Smoked Salmon & Capers: Add slices of smoked salmon and a sprinkle of capers for a gourmet touch.
  • Avocado & Tomato: Substitute the cottage cheese with mashed avocado and top with fresh tomato slices for a creamy twist.
  • Veggie Delight: Load your toast with sautéed spinach, bell peppers, and onions for a hearty option.
  • Spicy Mexican Style: Add black beans, jalapeños, and a sprinkle of feta for a zesty twist on the traditional recipe.

Storage and Make-Ahead Instructions

This cottage cheese egg toast is best enjoyed fresh, but you can prepare components ahead of time:

  • Store cooked eggs in an airtight container in the fridge for up to 3 days.
  • Keep toppings separate to maintain freshness until you’re ready to assemble.
  • Toast the bread just before serving for optimal crunch.

Comprehensive FAQ

  • Can I use different types of bread? Absolutely! Any bread of your choice will work, including gluten-free options.
  • Is cottage cheese healthy? Yes! Cottage cheese is high in protein and low in fat, making it a nutritious choice for breakfast.
  • Can I make this recipe vegan? Yes! Use a plant-based cottage cheese alternative and substitute eggs with tofu scramble or chickpea flour.
  • How can I make this dish even more filling? Add extra protein like chickpeas or lentils, or serve alongside a smoothie.
  • Can I freeze this toast? It’s best to freeze the bread and toppings separately. Assemble fresh when you want to eat.
  • What can I substitute for sriracha? Try hot sauce, chili paste, or even a mild salsa for a different flavor profile.
  • How do I know when my eggs are perfectly cooked? For fried eggs, look for firm whites and runny yolks. For scrambled eggs, aim for a soft, creamy texture.
  • Can I add cheese? Definitely! A sprinkle of shredded cheese on top before broiling for a few minutes can add delicious flavor.

Nutrition Tips and Dietary Adaptations

This cottage cheese egg toast is inherently nutritious, but consider these tips:

  • High Protein Boost: Incorporate additional protein sources like hemp seeds or nuts to enhance nutrition.
  • Low-Calorie Option: Use low-fat cottage cheese and skip the butter for a lighter meal.
  • Fiber-Rich Twist: Add more vegetables like leafy greens or roasted veggies for added fiber and nutrients.

Equipment Recommendations

To make this recipe, you’ll need:

  • A non-stick skillet for cooking the eggs
  • A toaster or toaster oven for the bread
  • A sharp knife for slicing
  • A mixing bowl for any toppings preparation

Serving Suggestions

Pair your cottage cheese egg & sriracha protein toast with:

  • A refreshing side salad with lemon vinaigrette
  • A cup of Greek yogurt topped with honey and fruits
  • Your favorite smoothie for a delicious breakfast combo

In conclusion, this cottage cheese egg toast is not just a meal; it’s an experience. With its creamy, spicy, and wholesome elements, it promises to be a favorite in your breakfast repertoire. So gather your ingredients, follow these steps, and enjoy the delightful flavors of this nutritious toast. Happy cooking!

Cottage Cheese Egg & Sriracha Protein Toast

Prep Time 5 minutes
Cook Time 10 minutes
Total Time 15 minutes
Servings 2 servings
Calories 450
A flavorful and protein-packed breakfast featuring toasted bread topped with cottage cheese, eggs, and spicy sriracha, perfect for a quick and satisfying start to your day.

Ingredients

Bread

  • 2 slices whole grain bread

Dairy

  • 0.5 cup cottage cheese

Eggs

  • 2 large eggs

Sauce

  • 1-2 teaspoons sriracha sauce (adjust to taste)

Cooking fat

  • 1 teaspoon butter or olive oil

Seasonings

  • to taste salt
  • to taste black pepper

Fresh herbs

  • as desired chopped herbs (chives, cilantro, or parsley)

Additional toppings

  • as desired avocado slices or spread, sliced tomatoes, spinach, bell peppers, smoked salmon or hemp seeds

Instructions 

  • Toast the bread slices until golden and crispy.
  • Cook eggs to your preference with butter or oil, season with salt and pepper.
  • Spread cottage cheese over the toasted bread.
  • Place cooked eggs on top, drizzle with sriracha, and add herbs and optional toppings.

Notes

Feel free to customize toppings for extra flavor and nutrition.
Calories: 450kcal
Cost: $10
Course: Breakfast
Cuisine: American
Keyword: Egg, Protein, Sriracha

Start Your Day Right with Banana Protein Pancakes

Are you looking for a nutritious and delicious breakfast option that fuels your busy mornings? Look no further than these mouthwatering Banana Protein Pancakes. Packed with flavor and nutrients, they are perfect for anyone seeking a high-protein start to their day. In this comprehensive guide, we’ll cover everything from the benefits of this recipe to variations, troubleshooting tips, and much more!

Why You’ll Love This Recipe

  • High in Protein: Each serving provides a substantial amount of protein, helping you stay full and energized throughout the day.
  • Quick and Easy: This recipe takes minimal time to prepare, making it perfect for busy mornings when you need a nutritious meal in a pinch.
  • Gluten-Free Option: With rolled oats and no flour, these pancakes can easily be made gluten-free if you choose certified gluten-free oats.
  • Natural Sweetness: Ripe bananas add a naturally sweet flavor, reducing the need for added sugars.
  • Customizable: You can easily adapt the recipe with different ingredients and toppings to suit your taste and dietary needs.

Ingredients Breakdown

Before you dive into the kitchen, let’s take a look at the ingredients you’ll need for these delicious pancakes:

  • 2 large ripe bananas: Ensure they are fully ripe for the best flavor.
  • 2 large eggs: Provides structure and enhances the protein content.
  • 2/3 cup rolled oats: Acts as the base, giving texture and fiber.
  • 1 cup vanilla-flavored whey protein powder: Boosts protein levels and adds a hint of sweetness.
  • 1/4 teaspoon vanilla extract: Enhances the overall flavor profile.
  • 1 teaspoon baking powder: Helps the pancakes rise for a fluffy texture.

If you need substitutions, consider:

  • Using almond milk instead of regular milk for a dairy-free version.
  • Replacing whey protein with plant-based protein powder for a vegan option.
  • Omitting eggs and using flaxseed meal mixed with water as a binding agent.

How to Make Banana Protein Pancakes

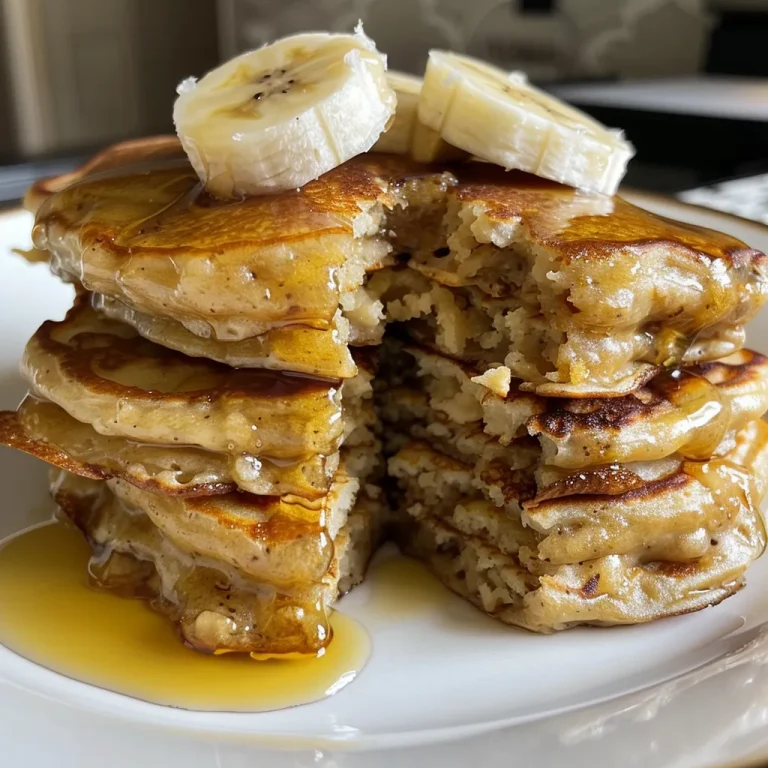
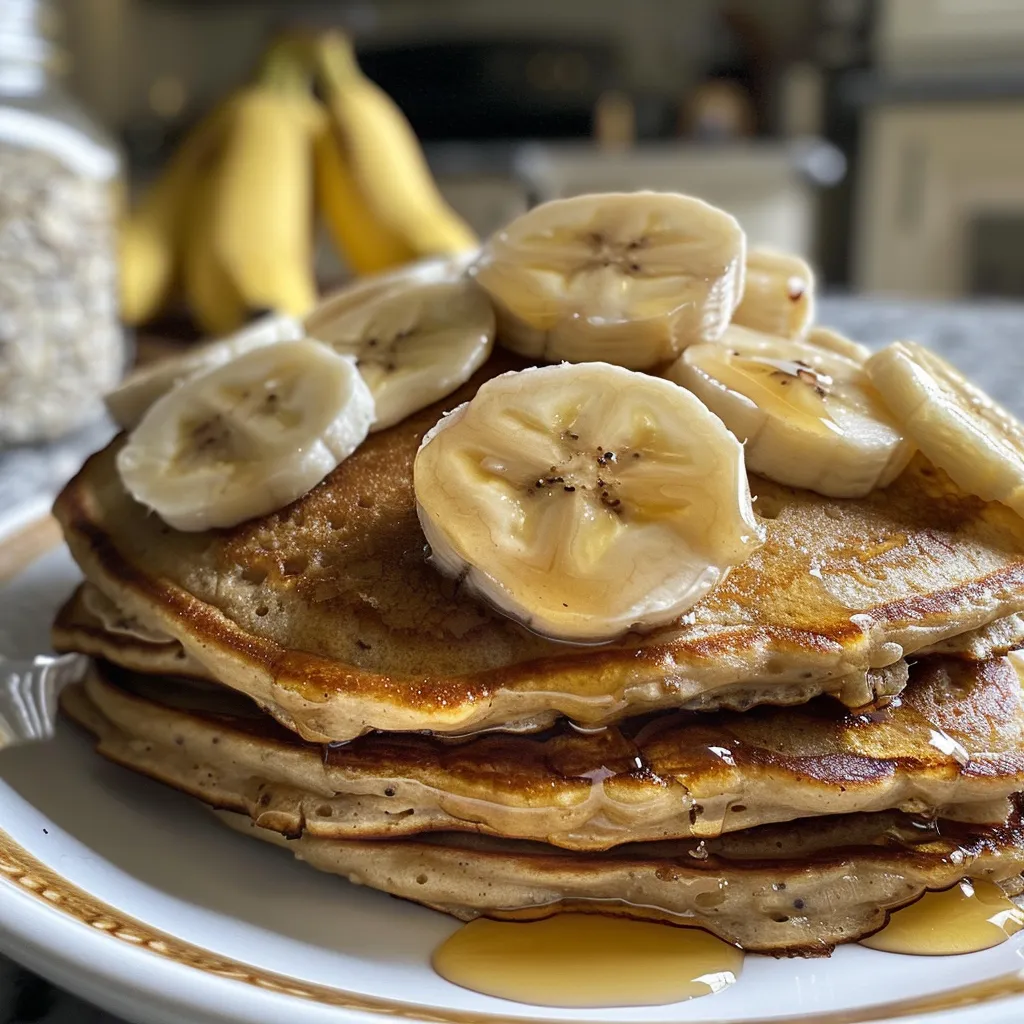
Detailed shot of freshly made banana pancakes, highlighting their moist interior.
  1. Add the rolled oats and protein powder to a high-power blender. Blend until the oats are fully ground and combined.
  2. Add the ripe bananas, eggs, and vanilla extract. Blend again until smooth and creamy.
  3. Add baking powder and blend for a few seconds. Let the batter rest for 5 minutes to thicken.
  4. Heat a nonstick skillet over medium-high heat. Spoon in the batter to form pancakes.
  5. Cook until bubbles form on the surface, then flip and cook until golden on the other side.
  6. Repeat with the remaining batter. Serve warm with toppings of choice.

Pro Tips for Perfect Pancakes

  • Rest the batter: Allowing the batter to rest helps achieve a thicker consistency, resulting in fluffier pancakes.
  • Monitor the heat: Keep your skillet on medium heat to avoid burning the pancakes.
  • Use a nonstick spray: Ensure easy flipping and prevent sticking by using a light cooking spray on your skillet.
  • Test for doneness: Pancakes are ready to flip when bubbles appear on the surface and the edges look set.
  • Keep warm: If making multiple batches, keep pancakes warm in a low oven until ready to serve.

Common Mistakes and Troubleshooting

  • Pancakes are too thick: If your batter is too thick, add a splash of milk to loosen it up.
  • Pancakes are burning: Lower the heat and ensure your skillet is not too hot.
  • Not rising: Check the freshness of your baking powder; old baking powder may not activate properly.
  • Too much banana flavor: If you prefer less banana flavor, reduce the number of bananas slightly.

Variations to Try

These banana protein pancakes are incredibly versatile! Here are some variations to consider:

  • Chocolate Chip Banana Protein Pancakes: Add mini chocolate chips to the batter for a sweet twist.
  • Nutty Banana Protein Pancakes: Mix in chopped nuts like walnuts or pecans for added crunch.
  • Berry Blast: Fold in fresh or frozen berries for a fruity flavor boost.
  • Spiced Pumpkin Pancakes: Substitute half the bananas with pumpkin puree and add pumpkin spice for a seasonal treat.

Storage and Make-Ahead Instructions

These pancakes can be made ahead of time and stored for later use:

  • Refrigeration: Store cooked pancakes in an airtight container in the fridge for up to 3 days.
  • Freezing: Freeze pancakes in a single layer, then transfer to a freezer bag. They can last up to 2 months.
  • Reheating: Reheat in the microwave for about 30 seconds, or toast in a toaster oven until warmed through.

Frequently Asked Questions

  • Can I make the batter ahead of time? Yes! You can prepare the batter and store it in the fridge for up to 24 hours.
  • Can I replace the bananas? Yes, you can use applesauce or pumpkin puree as a substitute, though the flavor will vary.
  • Why are my pancakes burning? Ensure your skillet is at the right temperature and not too hot.
  • Can I use a plant-based protein powder? Absolutely! Just keep in mind that the texture may vary slightly.
  • Can I make these pancakes without eggs? Yes, use flaxseed meal mixed with water as an egg replacement.
  • What toppings go well with these pancakes? Try fresh fruits, yogurt, nut butter, or a drizzle of maple syrup!
  • How can I increase the fiber content? Add chia seeds or ground flaxseeds into the batter for added fiber.
  • Are these pancakes suitable for meal prep? Yes! They store well and can be frozen for easy breakfast options.

Nutrition Tips and Dietary Adaptations

If you’re looking to enhance the nutritional profile of your pancakes, consider the following:

  • Protein Boost: Adding a scoop of protein powder increases the protein content even further, perfect for post-workout recovery.
  • Fiber Increase: Incorporate more oats or use whole grain oats to enhance fiber.
  • Low-Carb Option: Substitute the oats with ground almond flour for a low-carb variant.

Equipment Recommendations

To make your pancake-making experience seamless, here are a few essential tools:

  • High-Power Blender: A good blender is crucial for achieving a smooth batter.
  • Nonstick Skillet: A quality nonstick skillet ensures pancakes cook evenly and don’t stick.
  • Spatula: A thin, flexible spatula is perfect for flipping pancakes without breaking them.

Serving Suggestions

Once your pancakes are ready, here are some delightful ways to serve them:

  • Classic Maple Syrup: Drizzle warm maple syrup over your pancakes for a traditional touch.
  • Fruit Medley: Top with a mix of fresh berries, sliced bananas, and a dollop of yogurt.
  • Nut Butter Delight: Spread almond or peanut butter for a protein-packed topping.

Conclusion

These Banana Protein Pancakes are not just a breakfast; they’re a delicious way to energize your day! With their wholesome ingredients and customizable options, they cater to various dietary needs and preferences. Don’t hesitate to experiment with the recipe and make it your own. Happy cooking, and enjoy every delightful bite!

Banana Protein Pancakes

Prep Time 10 minutes
Cook Time 10 minutes
Total Time 20 minutes
Servings 4 pancakes
Calories 250
Enjoy these healthy and protein-packed banana pancakes perfect for a quick breakfast or snack.

Ingredients

Bananas

  • 2 large ripe bananas
  • 2 large eggs
  • 2/3 cup rolled oats
  • 1 cup vanilla-flavored whey protein powder
  • 1/4 teaspoon vanilla extract
  • 1 teaspoon baking powder

Instructions 

  • Add oats and protein powder to a blender. Blend until ground.
  • Add bananas, eggs, and vanilla. Blend until smooth.
  • Add baking powder and rest batter for 5 minutes.
  • Heat skillet and pour batter to form pancakes. Cook until golden.
  • Flip and cook other side. Serve warm.

Notes

You can top these pancakes with fresh fruit or a drizzle of honey for extra flavor.
Calories: 250kcal
Cost: $10
Course: Breakfast
Cuisine: American
Keyword: Banana, Pancakes, Protein

Welcome to a journey of flavors where we celebrate the joy of baking with carrot cake bars. These delectable treats combine the classic essence of a traditional carrot cake with the convenience of bar form. In this comprehensive guide, you will discover how to create the most delicious and moist carrot cake bars, perfectly spiced and topped with creamy frosting. Perfect for any occasion, whether it’s a casual gathering or a festive celebration, these bars are sure to impress your family and friends!

Why are carrot cake bars so beloved? Let’s dive into the reasons:

  • Easy to Make: With straightforward steps and minimal prep time, these bars are perfect for bakers of all levels.
  • Moist & Flavorful: The combination of finely shredded carrots and spices ensures a tender crumb and a burst of flavor in every bite.
  • Versatile Treat: Perfect for dessert, snacks, or even breakfast, they fit into any meal or occasion.
  • Customizable Add-Ins: Elevate your bars with optional add-ins like nuts, raisins, or coconut for added texture and flavor.
  • Frosting Delight: Topped with a creamy, tangy cream cheese frosting, each bite is a delightful experience.

Key Ingredients & Their Roles

Let’s break down the essential ingredients that make these carrot cake bars a must-try:

  • 2 cups finely shredded carrots: Freshly grated carrots lend natural sweetness, moisture, and texture. They are the stars of this recipe!
  • 1 ½ cups all-purpose flour: This provides the structure for your bars. Ensure you spoon and level your flour for accuracy.
  • ¾ cup brown sugar & ½ cup granulated sugar: The brown sugar adds depth and moisture, while granulated sugar balances the sweetness.
  • 3 large eggs: Eggs help bind the ingredients and contribute to the overall richness.
  • ¾ cup vegetable oil: Using oil instead of butter ensures a moist texture that lasts longer.
  • Spices: Ground cinnamon, nutmeg, and ginger create a warm, comforting flavor profile.
  • 8 oz cream cheese & ½ cup unsalted butter: These are the key ingredients for a smooth and tangy cream cheese frosting that complements the bars beautifully.
  • Optional Add-Ins: Consider adding ½ cup of chopped walnuts, pecans, raisins, or shredded coconut for added texture and flavor.

Essential Equipment You’ll Need

Before diving into the baking process, gather your tools:

  • 9×13-inch baking pan: Perfect for baking the bars evenly.
  • Mixing bowls: A large bowl for wet ingredients and another for dry ingredients.
  • Whisk and spatula: Essential for mixing and folding ingredients gently.
  • Grater or food processor: For finely shredding carrots to achieve the right texture.

Steps to Create Perfect Carrot Cake Bars

Follow these straightforward steps for success:

  1. Preheat Oven: Set your oven to 350°F (175°C). Grease your baking pan or line it with parchment paper for easy removal.
  2. Prep Carrots: Finely grate the carrots. A food processor can speed up this process!
  3. Mix Wet Ingredients: In a bowl, whisk together eggs, oil, brown sugar, granulated sugar, and vanilla extract until well combined.
  4. Mix Dry Ingredients: In another bowl, sift together flour, baking powder, baking soda, salt, and spices.
  5. Combine Batter: Gently fold the dry ingredients into the wet mixture until just combined. Avoid overmixing to maintain a tender crumb.
  6. Add Optional Ingredients: If desired, fold in nuts, raisins, or coconut for extra flavor and texture.
  7. Bake Bars: Pour the batter into the prepared pan and smooth the top. Bake for 35-40 minutes, rotating the pan halfway through. A toothpick inserted into the center should come out clean or with a few moist crumbs.
  8. Cool: Let the bars cool completely on a wire rack before frosting.
  9. Prepare Frosting: Beat cream cheese and butter until smooth. Gradually add powdered sugar and vanilla extract, adjusting consistency with milk as needed.
  10. Frost Bars: Spread the frosting evenly over the cooled bars. Garnish with additional nuts or a sprinkle of cinnamon for flair. Slice into 12 bars and enjoy!

Pro Tips for the Best Results

Delicious carrot cake squares with cream cheese topping showcased.

To elevate your carrot cake bars, consider these expert insights:

  • Ingredient Quality: Use fresh, high-quality ingredients for the best flavor and texture.
  • Do Not Overmix: Gently fold ingredients together to avoid dense bars; a light touch is key!
  • Cool Before Frosting: Ensure the bars have cooled completely before adding frosting to prevent melting.
  • Storage: Store bars in an airtight container at room temperature for up to 3 days or refrigerate for up to a week.
  • Freezing: These bars freeze well; wrap them tightly in plastic wrap and aluminum foil for up to 3 months.
  • Flavor Development: For even better flavor, allow the frosted bars to sit for a few hours before serving.
  • Experiment with Spices: Feel free to adjust the spices to suit your taste. Adding a touch of cloves or allspice can deepen the flavor.
  • Consistency Matters: Adjust the frosting with milk for a spreadable consistency based on your preference.

Common Mistakes & Troubleshooting

Don’t let baking mishaps deter you! Here’s how to troubleshoot:

  • Bars Are Too Dense: This can happen from overmixing; mix only until combined.
  • Dry Bars: Ensure you measure flour accurately; too much flour can lead to dryness.
  • Frosting Is Too Runny: Add more powdered sugar to thicken or refrigerate for a short while to firm it up.
  • Burnt Edges: If edges are browning too quickly, cover with foil halfway through baking.

Delicious Variations to Try

Get creative with these variations to make your carrot cake bars unique:

  • Carrot Cake Bars with Pineapple: Add 1 cup of crushed pineapple (drained) for added moisture and a tropical twist.
  • Spiced Nut Bars: Incorporate ½ cup of chopped pecans and a pinch of allspice for a nutty flavor.
  • Chocolate Chip Carrot Bars: Fold in ½ cup of chocolate chips for a delightful contrast to the spices.
  • Gluten-Free Option: Substitute all-purpose flour with a gluten-free 1:1 baking blend for a gluten-free version.

Storage & Make-Ahead Instructions

Planning ahead? Here’s how to store and make your carrot cake bars:

  • Room Temperature: Keep bars in an airtight container at room temperature for 3 days.
  • Refrigeration: Store in the fridge for a week; allow to come to room temperature before serving.
  • Freezing: Wrap in plastic wrap and foil, then freeze for up to 3 months. Thaw in the refrigerator before serving.

Frequently Asked Questions

Got questions? Here’s what people often ask about making carrot cake bars:

  • Can I use whole wheat flour? Yes, whole wheat flour can be used, but it may change the texture slightly.
  • How can I make these bars healthier? Reduce sugar, use applesauce in place of some oil, or add nuts for healthy fats.
  • Do I have to use cream cheese frosting? No, you can top them with a simple glaze or dust with powdered sugar instead.
  • Can I make these bars vegan? Yes, substitute eggs with flaxseed meal and use plant-based butter and cream cheese.
  • What’s the best way to cut the bars? Use a sharp knife and wipe it clean between cuts for neat edges.
  • Can I double the recipe? Absolutely! Just make sure to adjust the baking time as needed.
  • How do I know when they are done baking? A toothpick inserted should come out clean or with a few moist crumbs.
  • What can I use instead of vegetable oil? You can use melted coconut oil or applesauce for a lighter option.

Nutritional Tips & Dietary Adaptations

For those considering dietary needs:

  • Low-Sugar Option: Use sugar substitutes like erythritol for a lower-calorie version.
  • Dairy-Free: Use dairy-free cream cheese and butter alternatives for a dairy-free frosting.
  • Nut-Free: Simply omit any nuts or choose seeds like sunflower for a similar crunch without allergies.

Serving Suggestions

Make your dessert table shine with these serving tips:

  • Warm Bars: Serve slightly warmed for a gooey frosting experience.
  • Pair with Ice Cream: A scoop of vanilla ice cream complements the bars beautifully.
  • Presentation: Garnish with additional shredded carrots or nuts for an appealing look.

In conclusion, baking these decadent carrot cake bars is not just about creating a delicious dessert, but also about creating moments of joy and connection around the table. Whether you are celebrating a special occasion or simply treating yourself on a weekday, these bars are sure to bring warmth and happiness. So roll up your sleeves, gather your ingredients, and let’s bake some love into your kitchen! Happy baking!

Decadent Carrot Cake Bars – Moist, Spiced & Topped with Cream Cheese Frosting

Prep Time 20 minutes
Cook Time 40 minutes
Total Time 1 hour
Servings 12 bars
Calories 350
Enjoy these moist and flavorful carrot cake bars, perfectly spiced and topped with creamy frosting for a delightful treat.

Ingredients

Carrots

  • 2 cups finely shredded carrots (about 4 medium carrots)
  • 1 ½ cups all-purpose flour
  • 1 tsp baking powder
  • ½ tsp baking soda
  • ½ tsp salt
  • 1 ½ tsp ground cinnamon
  • ½ tsp ground nutmeg
  • ¼ tsp ground ginger
  • ¾ cup brown sugar, packed
  • ½ cup granulated sugar
  • 3 large eggs
  • ¾ cup vegetable oil
  • 1 tsp vanilla extract

Optional Mix-ins

  • ½ cup chopped walnuts or pecans
  • ½ cup raisins
  • ½ cup shredded coconut

Cream Cheese Frosting

  • 8 oz cream cheese, softened
  • ½ cup unsalted butter, softened
  • 2 cups powdered sugar
  • 1 tsp vanilla extract
  • Optional 1–2 tsp milk (for desired consistency)

Instructions 

  • Preheat oven to 350°F (175°C). Grease or line a 9×13-inch pan.
  • Mix eggs, oil, sugars, and vanilla until smooth. Sift dry ingredients and fold into wet mixture. Add optional nuts, raisins, or coconut.
  • Pour batter into pan, bake for 35–40 minutes. Cool completely before frosting.
  • Beat cream cheese and butter, add powdered sugar and vanilla. Adjust with milk if needed. Spread over cooled bars and slice into 12 pieces.

Notes

Ensure not to overmix the batter for a tender texture.
Calories: 350kcal
Cost: $15
Course: Dessert
Cuisine: American
Keyword: Bars, cake, carrot

Start Your Day Right with Protein Oatmeal Blender Pancakes

Are you looking for a delicious way to kickstart your mornings? Look no further! These Protein Oatmeal Blender Pancakes are not only easy to whip up but are also packed with nutrition. In just a few simple steps, you can enjoy a fluffy stack of pancakes that will fuel your day. Let’s dive into why this recipe is a must-try!

Why You’ll Love This Recipe

Here are five compelling reasons to add these pancakes to your breakfast rotation:

  • High Protein Content: With Greek yogurt and eggs as key ingredients, these pancakes provide a satisfying dose of protein to keep you full longer.
  • Quick and Easy: The blender makes preparation a breeze, cutting down on cleanup time and allowing you to enjoy your meal faster.
  • Customizable and Versatile: You can easily adapt this recipe with your favorite mix-ins like chocolate chips, blueberries, or even peanut butter for added flavor.
  • Healthy Ingredients: Made with wholesome rolled oats and natural sweeteners like maple syrup, these pancakes are a guilt-free indulgence.
  • Perfect for Meal Prep: Make a large batch and store them for quick breakfasts throughout the week!

Ingredient Breakdown

Understanding each ingredient is key to mastering this recipe. Here’s what you’ll need:

  • 2 Eggs: Essential for binding the batter and adding protein.
  • 1/2 cup Greek Yogurt: Choose plain or vanilla for moisture and extra protein.
  • 2/3 cup Almond Milk: Any plant milk works, but almond adds a nice nutty flavor.
  • 2 Tbsp Pure Maple Syrup: Natural sweetness that enhances flavor.
  • 1.5 tsp Vanilla Extract: Adds a warm, inviting aroma.
  • 2 cups Rolled Oats: The base of the pancakes, providing fiber and heartiness.
  • 2 tsp Baking Powder: Ensures the pancakes are fluffy.
  • 1/2 tsp Cinnamon: For a touch of warmth and spice.
  • Optional Mix-ins: Feel free to add in blueberries, chocolate chips, banana slices, or chia seeds for extra flavor and texture.

How to Make Fluffy Protein Oatmeal Pancakes

Captivating image of golden Protein Oatmeal Blender Pancakes served with a dollop of Greek yogurt.

Follow these simple steps to create your pancakes:

  1. Add the eggs, Greek yogurt, almond milk, maple syrup, vanilla extract, rolled oats, baking powder, and cinnamon to your blender. Blend until smooth for about 20 to 40 seconds.
  2. Let the batter sit for 8 minutes while you heat your pan. This resting time helps thicken the batter.
  3. Heat a large nonstick pan over medium-low heat and lightly butter or oil it with non-stick spray.
  4. Pour about 1/4 – 1/3 cup of batter onto the hot pan, adding any desired mix-ins. Cook for about 2 – 3 minutes until edges firm up and bubbles form on top. Carefully flip and cook the other side for about 1 minute.
  5. Serve immediately with fresh fruit, maple syrup, nut butter, or honey!
  6. If making a large batch, preheat your oven to 200°F to keep pancakes warm while cooking.

Expert Pro Tips for Perfect Pancakes

To elevate your pancake game, consider these expert tips:

  • Don’t Over-blend: Blend just until smooth; over-blending can make the batter tough.
  • Rest the Batter: Allowing the batter to sit helps achieve a fluffier pancake.
  • Control Your Heat: Medium-low heat ensures even cooking without burning.
  • Use Quality Ingredients: Fresh eggs and high-quality Greek yogurt make a noticeable difference in flavor.
  • Experiment with Flours: Try substituting some oats with oat flour for different textures.
  • Keep an Eye on Timing: Cooking times may vary based on your stove and pan.
  • Stack and Serve: Keep pancakes warm in the oven while you finish cooking the entire batch.
  • Make it Fun: Encourage kids to help mix in fun add-ins like sprinkles or fruit!

Common Mistakes and Troubleshooting

Even seasoned chefs can run into hiccups. Here’s how to avoid common pitfalls:

  • Pancakes are Too Dense: This can happen if you over-blend the batter. Aim for a smooth but slightly chunky texture.
  • Pancakes Burn Easily: If they are browning too quickly, lower the heat and give them more time to cook through.
  • Mix-ins Burn: Add delicate ingredients like fruits or chocolate chips towards the end of cooking to prevent burning.
  • Batter is Too Thick: If your batter is thicker than expected, add a splash of milk to loosen it.

Variations to Try

Here are four exciting variations to keep your breakfast interesting:

  • Banana Oatmeal Pancakes: Add one mashed banana to the batter for a natural sweetness.
  • Chocolate Chip Pancakes: Mix in 1/2 cup of dark chocolate chips for a decadent twist.
  • Nutty Banana Pancakes: Incorporate 1/4 cup of chopped nuts for added crunch and flavor.
  • Spiced Pumpkin Pancakes: Add 1/2 cup of pumpkin puree and a teaspoon of pumpkin spice for a fall-inspired flavor.

Storage and Make-Ahead Instructions

For those busy mornings, here’s how to store and reheat your pancakes:

  • Storing Leftovers: Place leftover pancakes in an airtight container in the fridge for up to 3 days.
  • Freezing: Freeze pancakes in a single layer, then transfer to a freezer bag for up to 3 months.
  • Reheating: Reheat pancakes in a toaster, microwave, or oven until warm.
  • Meal Prep: Make a big batch on the weekend and enjoy them throughout the week.

Comprehensive FAQ

Have more questions? Here are answers to some common queries:

  • Can I use quick oats instead of rolled oats? Yes, quick oats can be used but may change the texture slightly.
  • What can I substitute for Greek yogurt? You can use any non-dairy yogurt or cottage cheese as a substitute.
  • Can I make these pancakes gluten-free? Absolutely! Use certified gluten-free oats and a gluten-free flour blend.
  • How do I know when the pancakes are done? Look for bubbles on the surface and firm edges; they should be golden brown.
  • Can I add protein powder to the recipe? Yes, adding protein powder can boost the protein content, just adjust liquid accordingly.
  • What’s the best way to serve these pancakes? Top with fresh fruit, a drizzle of maple syrup, or nut butter for a delicious finish.
  • How can I make these pancakes vegan? Substitute eggs with flax eggs and use dairy-free yogurt and milk.
  • Can I reheat these pancakes? Yes, they reheat well in a toaster or microwave.

Nutrition Tips and Dietary Adaptations

For a healthier start, consider these nutritional adaptations:

  • Use Whole Ingredients: Opt for organic eggs and dairy for better nutrition.
  • Limit Sugars: Reduce the amount of maple syrup or use sugar alternatives like stevia.
  • Add Seeds: Sprinkle chia or flax seeds into the batter for added omega-3s.
  • Portion Control: Keep an eye on serving sizes to maintain balanced nutrition.

Essential Equipment Recommendations

Having the right tools makes all the difference:

  • High-Powered Blender: Essential for achieving a smooth batter.
  • Nonstick Skillet: Prevents pancakes from sticking and ensures even cooking.
  • Spatula: A flexible spatula makes flipping pancakes a breeze.
  • Measuring Cups and Spoons: Accurate measurements lead to consistent results.

Serving Suggestions

Pair your pancakes with:

  • Fresh Fruit: Berries, sliced bananas, or stone fruits add freshness.
  • Nut Butters: Almond or peanut butter offer healthy fats and protein.
  • Maple Syrup: A classic choice for sweetness.
  • Greek Yogurt: Add a dollop for creaminess and extra protein.

Conclusion

These Protein Oatmeal Blender Pancakes are an excellent way to start your day with a nutritious and delicious meal. With easy preparation, a wealth of variations, and plenty of storage options, you can enjoy them any day of the week. So gather your ingredients and embrace the joy of cooking! Happy flipping!

Protein Oatmeal Blender Pancakes

Prep Time 10 minutes
Cook Time 10 minutes
Total Time 20 minutes
Servings 4 pancakes
Calories 250
Enjoy healthy and fluffy protein-packed pancakes made effortlessly in your blender, perfect for a quick nutritious breakfast.

Ingredients

Eggs

  • 2 pieces egg
  • 1/2 cup Greek yogurt (plain or vanilla)
  • 2/3 cup almond milk or plant milk
  • 2 Tbsp pure maple syrup
  • 1.5 tsp vanilla extract
  • 2 cups rolled oats
  • 2 tsp baking powder
  • 1/2 tsp cinnamon

Optional mix-ins

  • blueberries, chocolate chips, banana slices, fresh fruit, chia seeds (Add as desired)

Instructions 

  • Add eggs, Greek yogurt, almond milk, maple syrup, vanilla extract, oats, baking powder, and cinnamon in a blender. Blend until smooth (~20-40 seconds).
  • Let the batter sit for 8 minutes while you heat your pan.
  • Heat a nonstick pan over medium-low heat and lightly oil.
  • Pour 1/4 to 1/3 cup batter onto the pan, add desired mix-ins, and cook 2-3 minutes until edges set. Flip and cook 1 minute.
  • Serve immediately with toppings like fruit, syrup, or nut butter.

Notes

Preheat oven to keep pancakes warm if making a large batch.
Calories: 250kcal
Cost: $10
Course: Breakfast
Cuisine: American
Keyword: Pancakes