Author

Mike

Browsing

Welcome to the World of Peach Dump Cake

There’s a special magic that happens when you combine the warmth of a family kitchen with the delightful sweetness of peaches. Welcome to the world of Peach Dump Cake, a beloved dessert that offers both simplicity and indulgence. In this comprehensive guide, we’ll explore everything you need to know about crafting this delightful dessert—from essential ingredients to variations and expert tips. Whether you’re a seasoned baker or just starting out, you’re in for a treat!

Why You’ll Love This Recipe

This Peach Dump Cake is not just another dessert; it’s a celebration of flavors and textures. Here are five reasons why you’ll fall in love with this recipe:

  • Easy Preparation: With just a few ingredients and minimal prep time, this dessert is perfect for busy schedules or spontaneous gatherings.
  • Comforting Flavor: The combination of sweet, juicy peaches with a buttery cake topping creates a comforting flavor profile that’s perfect for any occasion.
  • Versatile Serving Options: Serve it warm with a scoop of vanilla ice cream, or enjoy it as is; the possibilities are endless!
  • Customizable Ingredients: Swap out peaches for your favorite fruits or adjust the spices to make it your own.
  • Always a Crowd-Pleaser: This dessert has a way of bringing people together, making it a hit at potlucks, family gatherings, or simply as a weeknight treat.

Ingredients You’ll Need

To create the perfect Peach Dump Cake, gather the following ingredients:

  • 2 cans peaches in heavy syrup (16 ounces each): The syrup adds sweetness and moisture.
  • 1 package yellow cake mix (15.25 ounces): This is the base for the cake layer.
  • ½ cup butter: Melted butter ensures a rich and golden topping.
  • ½ teaspoon ground cinnamon (or to taste): Adds warmth and enhances the peach flavor.

Ingredient Substitutions

Don’t have the exact ingredients? No problem! Here are some substitutions you can use:

  • Fresh Peaches: If you have fresh peaches, feel free to use them! Just be sure to adjust the moisture by draining some juice if needed.
  • Gluten-Free Cake Mix: For a gluten-free option, substitute with a gluten-free yellow cake mix.
  • Brown Sugar: Add a touch of brown sugar for a richer flavor if you prefer.

Step-by-Step Directions
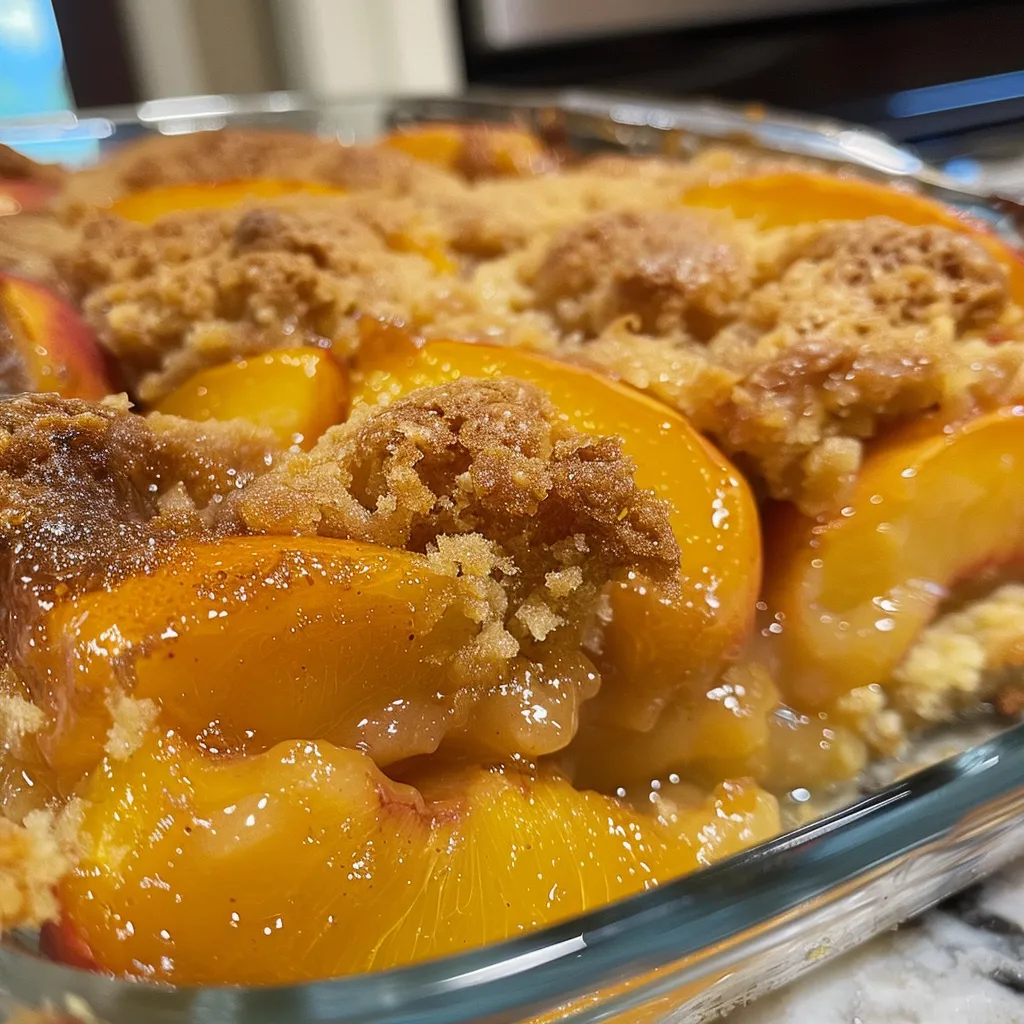
Detailed close-up of a Peach Dump Cake, highlighting the golden cake mix and luscious peach filling.

Follow these simple steps to create your Peach Dump Cake:

  1. Gather all ingredients. Preheat the oven to 375 degrees F (190 degrees C).
  2. Empty peaches into a 9×13-inch baking dish. Make sure to spread them evenly.
  3. Cover peaches with dry cake mix and press down firmly. This helps create a crust.
  4. Cut or grate butter into small pieces and scatter on top of the cake mix. Sprinkle cinnamon on top.
  5. Bake in the preheated oven until peaches are hot and bubbling and the top of the dump cake is golden brown, about 45 minutes.
  6. Serve and enjoy your delightful creation!

Pro Tips for Perfection

To ensure your Peach Dump Cake turns out perfectly every time, consider these expert insights:

  • Use good quality peaches: Whether using canned or fresh, quality matters. Look for peaches that are ripe and flavorful.
  • Don’t skip the cinnamon: This spice significantly enhances the overall flavor of the cake.
  • Let it cool slightly: Allowing the cake to cool for about 10 minutes before serving helps it set, making it easier to slice.
  • Experiment with toppings: Consider adding nuts or oats to the cake mix for an extra crunch.
  • Check for doneness: The cake should be golden brown on top and bubbling around the edges.
  • Pair with ice cream: Vanilla ice cream complements the warm cake beautifully!
  • Use a nonstick pan: This helps prevent sticking and ensures smooth serving.
  • Adjust sweetness: If you prefer it less sweet, opt for less syrup or use unsweetened peaches.

Common Mistakes and Troubleshooting

Even the best bakers make mistakes! Here’s how to avoid common pitfalls:

  • Dry cake: If your cake turns out dry, ensure you’re using enough syrup from the canned peaches.
  • Soggy bottom: If the base is too soggy, drain excess syrup before adding the cake mix.
  • Uneven baking: Make sure to evenly distribute the peaches and cake mix for consistent baking.
  • Not golden brown: If the cake isn’t browning, you may need to bake it a little longer.

Delicious Variations

Want to switch things up? Here are four delightful variations to try:

  • Berry Blast: Add a cup of raspberries or blueberries along with the peaches for a fruity twist.
  • Spiced Peach Dump Cake: Incorporate nutmeg or allspice for a warming flavor profile.
  • Chocolate Peach Dump Cake: Mix in chocolate chips to the cake mix for a decadent dessert.
  • Coconut Peach Dump Cake: Add shredded coconut on top for a tropical flair.

Storage and Make-Ahead Instructions

Want to prepare your Peach Dump Cake in advance? Here’s how:

  • Storing Leftovers: Store any leftover cake in an airtight container in the fridge for up to 3 days.
  • Freezing: You can freeze the cake (without toppings) for up to 3 months. Thaw in the fridge before reheating.
  • Reheating: Warm individual servings in the microwave for a quick treat, or reheat the entire cake in the oven at 350 degrees F until warmed through.

Frequently Asked Questions

Here are some common questions about Peach Dump Cake:

  • Can I use fresh peaches instead of canned? Yes! Just be sure to adjust for moisture accordingly by draining excess juice.
  • How can I make this recipe gluten-free? Substitute with a gluten-free cake mix for a delicious alternative.
  • What’s the best way to serve Peach Dump Cake? Serve warm with a scoop of vanilla ice cream for the ultimate comfort dessert!
  • Can I add other fruits? Absolutely! Feel free to mix in your favorite fruits for a unique twist.
  • How long does it take to bake? Bake for approximately 45 minutes or until golden brown and bubbly.
  • Can I double the recipe? Yes! Just use a larger baking dish and adjust the baking time as needed.
  • Is it okay to make this ahead of time? Yes! It stores well in the fridge for several days.
  • What should I do if the top isn’t browning? If the top isn’t browning, you may need to bake it longer or broil for a few minutes at the end.

Nutritional Tips and Dietary Adaptations

If you’re watching your nutrition, consider these tips:

  • Portion control: Enjoy in moderation to keep your dessert indulgent yet balanced.
  • Choose low-sugar cake mix: Opt for a low-sugar variant of cake mix if you’re looking to reduce sugar intake.
  • Add nuts for protein: Consider adding nuts for a boost of protein and healthy fats.

Essential Equipment for Success

To make the process easier, here’s a list of essential equipment:

  • 9×13-inch baking dish: Perfect for even baking and easy serving.
  • Mixing bowls: For combining ingredients.
  • Measuring cups and spoons: Ensure accurate measurements for the best results.
  • Spatula: For spreading the cake mix evenly over the peaches.

Serving Suggestions

Here are some delightful ways to serve your Peach Dump Cake:

  • With Ice Cream: A scoop of vanilla ice cream adds creaminess and balances the sweetness.
  • With Fresh Whipped Cream: A dollop of homemade whipped cream enhances the dessert’s richness.
  • With a Drizzle of Caramel Sauce: Add caramel for a sweet finishing touch.
  • Packed in Individual Servings: For a potluck, serve in small cups for easy sharing.

In Conclusion

The Peach Dump Cake is more than just a dessert; it’s a delightful experience filled with flavor, warmth, and nostalgia. With its simple preparation and endless variations, it’s a recipe worth mastering. I hope this guide inspires you to whip up a batch and share it with loved ones. Remember, cooking is all about creating connections and joyful moments around the table. Enjoy every bite!

Peach Dump Cake

Prep Time 10 minutes
Cook Time 45 minutes
Total Time 55 minutes
Servings 8 pieces
Calories 250
A quick and delicious dessert combining peaches and cake for an easy treat.

Ingredients

Canned Peaches

  • 2 cans peaches in heavy syrup (16 ounces each)

Cake Mix

  • 1 package yellow cake mix (15.25 ounces)

Butter

  • ½ cup butter (cut into small pieces)

Ground Cinnamon

  • ½ teaspoon ground cinnamon (or to taste)

Instructions 

  • Preheat oven to 375°F (190°C).
  • Pour peaches into a 9x13-inch baking dish.
  • Sprinkle cake mix over peaches and press down.
  • Distribute butter pieces on top and sprinkle cinnamon.
  • Bake for 45 minutes until golden and bubbly.
  • Serve warm and enjoy!

Notes

This dessert is perfect for a quick sweet treat with minimal effort.
Calories: 250kcal
Cost: $10
Course: Dessert
Cuisine: American
Keyword: Peach

Welcome to my kitchen! Today, we’re diving into a delightful dish that brings together the rich flavors of creamy spinach, juicy tomatoes, and tender tortellini. This creamy spinach tomato tortellini recipe is not just a meal; it’s a celebration of comfort food that’s perfect for family gatherings or a cozy dinner for two. With its ease of preparation and heartwarming taste, this dish is bound to become a staple in your home.

As a professional chef, I’ve spent over two decades perfecting recipes that balance tradition with innovation. Join me as we explore this fantastic recipe that combines wholesome ingredients and a touch of love.

Why You’ll Love This Recipe

  • Quick and Easy: This dish can be prepared in under 30 minutes, making it perfect for busy weeknights.
  • Rich and Creamy: The combination of whipping cream and Parmesan creates a luxurious sauce that coats each piece of tortellini beautifully.
  • Nutritious Spinach: Packed with vitamins and minerals, spinach adds not only nutrition but also a lovely color and flavor to the dish.
  • Versatile Ingredients: This recipe allows for easy substitutions and variations based on your pantry staples and preferences.
  • Impressive Presentation: The vibrant colors of the spinach and tomatoes make this dish a feast for the eyes, perfect for impressing guests.

Detailed Ingredient Breakdown

Let’s look at the stars of our recipe and discuss potential substitutions to cater to your needs.

  • Ground Beef (1 lb): Provides a hearty base. You can swap it for ground turkey or omit it for a vegetarian version.
  • Onion (1, diced): Adds sweetness and depth. Shallots or leeks can be great alternatives.
  • Garlic (2 cloves, diced): Essential for flavor. Feel free to use garlic powder if fresh isn’t available.
  • Pasta Sauce (16 oz): A ready-made option for convenience. Homemade sauce can elevate the dish.
  • Whipping Cream (1 cup): Creates a luscious sauce. For a lighter version, use half-and-half or a plant-based cream.
  • Tortellini (2 lbs, packaged): Use cheese or meat-filled tortellini, or substitute with gnocchi for a twist.
  • Garlic Parsley Salt (1 tbsp): For seasoning. Regular salt with minced garlic and parsley can replace this.
  • Dried Parsley (1 tbsp): Enhances flavor. Fresh parsley is a wonderful substitute if available.
  • Spinach (2 cups, chopped): Adds nutrition and color. Kale or Swiss chard can work as alternatives.
  • Parmesan (1 cup): A key flavor component. Nutritional yeast can replace it for a dairy-free option.

How to Make Creamy Spinach Tomato Tortellini

Now that we’ve gathered our ingredients, let’s dive into the step-by-step process of making this creamy spinach tomato tortellini.

  1. Gather the ingredients for the recipe and chop all the veggies.
  2. Preheat a deep skillet over medium heat and add the ground beef. Brown the beef, breaking it apart as you go.
  3. Add in the chopped onions and garlic and cook until they soften.
  4. Pour in the pasta sauce to the meat mixture.
  5. As soon as it simmers, pour in the whipping cream and stir until it’s evenly distributed.
  6. Add in the tortellini and bring the mixture to a simmer.
  7. Season it with garlic parsley salt and dried parsley.
  8. Mix in the spinach and Parmesan cheese, stirring until well-combined.
  9. Serve immediately and enjoy!

Pro Tips for Perfection

  • Don’t Overcook the Spinach: Add spinach at the end to preserve its vibrant color and nutrients.
  • Check Tortellini Cooking Time: Follow package instructions; overcooking can lead to mushy pasta.
  • Experiment with Cheese: Try mixing different cheeses like mozzarella for a gooey texture.
  • Make It Ahead: You can prepare the sauce a day in advance to develop deeper flavors.
  • Garnish with Fresh Herbs: A sprinkle of fresh basil or parsley elevates the dish’s presentation.
  • Adjust Seasoning: Taste and adjust salt and pepper before serving for the best flavor.
  • Pair with Toast: Serve with crusty bread to soak up the delicious sauce.
  • Keep It Creamy: If the sauce thickens too much, add a splash of broth or extra cream to loosen it.

Common Mistakes and Troubleshooting

Even experienced cooks can run into challenges. Here’s how to avoid common pitfalls:

  • Too Thick Sauce: If your sauce is too thick, add a little pasta water or broth to loosen it.
  • Overcooked Tortellini: Keep an eye on the cooking time; a minute too long can ruin the texture.
  • Not Enough Flavor: Taste as you go, and don’t hesitate to add more seasoning if needed.
  • Greasy Meat: If using fatty beef, drain excess fat before adding other ingredients.

Variations to Try

Get creative with these variations to keep things exciting:

  • Vegetarian Delight: Replace ground beef with sautéed mushrooms and zucchini for a veggie-packed version.
  • Spicy Kick: Add red pepper flakes or diced jalapeños for a spicy twist.
  • Cheesy Baked Version: Transfer to a baking dish, top with mozzarella, and bake until bubbly and golden.
  • Herb Infusion: Mix in fresh herbs like basil or thyme for an aromatic enhancement.

Storage and Make-Ahead Instructions

This creamy spinach tomato tortellini is perfect for meal prep! Here’s how to store it:

  • Refrigeration: Store leftovers in an airtight container in the fridge for up to 3 days.
  • Freezing: To freeze, let it cool completely, then transfer to a freezer-safe container for up to 2 months.
  • Reheating: Reheat on the stovetop with a splash of water or broth to maintain creaminess.

Comprehensive FAQ

1. Can I use fresh tortellini?

Absolutely! Fresh tortellini may require less cooking time.

2. What can I substitute for whipping cream?

You can use half-and-half or a plant-based cream for a lighter option.

3. Is this recipe gluten-free?

To make it gluten-free, use gluten-free tortellini and pasta sauce.

4. How do I make it dairy-free?

Substitute cream with coconut milk and omit cheese.

5. Can I add other vegetables?

Definitely! Broccoli, bell peppers, or peas make great additions.

6. How spicy is this dish?

It’s not spicy, but you can easily add heat with red pepper flakes.

7. How long does it take to prepare?

This dish takes about 30 minutes from start to finish.

8. Can I make this dish in advance?

Yes, the sauce can be made a day ahead and stored in the fridge.

Nutritional Tips and Dietary Adaptations

This dish can be tailored to meet various dietary needs:

  • Low-Calorie Option: Use turkey or chicken instead of beef and reduce the cream.
  • High-Protein Twist: Add cooked lentils or chickpeas for an extra protein boost.
  • Low-Carb Version: Swap tortellini for spiralized zucchini or cauliflower rice.

Equipment Recommendations

To make this recipe, you’ll need:

  • Deep Skillet: Ideal for browning meat and combining ingredients.
  • Wooden Spoon: Perfect for stirring without scratching your pans.
  • Measuring Cups and Spoons: Accurate measurements ensure recipe success.

Serving Suggestions

To elevate your dining experience, consider these serving ideas:

  • Fresh Salad: A light green salad with vinaigrette pairs beautifully.
  • Garlic Bread: Serve with warm, crusty garlic bread for dipping.
  • Wine Pairing: Enjoy with a glass of white wine like Chardonnay or a light red.

In conclusion, this creamy spinach tomato tortellini is a testament to the joy of cooking. It’s comforting, easy to make, and customizable to your taste. I hope you enjoy every bite, and remember, cooking is about creating memories and sharing joy. Happy cooking!

Creamy Spinach Tomato Tortellini Recipe

Prep Time 10 minutes
Cook Time 20 minutes
Total Time 30 minutes
Servings 4 servings
Calories 650
A delicious and creamy tortellini dish packed with spinach, tomatoes, and savory flavors. Perfect for a quick and satisfying meal.

Ingredients

Meat

  • 1 lb ground beef
  • 1 diced onion
  • 2 diced garlic cloves

Sauce

  • 16 oz pasta sauce
  • 1 cup whipping cream

Pasta

  • 2 lbs packaged tortellini
  • 1 tbsp garlic parsley salt
  • 1 tbsp dried parsley

Vegetables

  • 2 cups spinach (chopped)
  • 1 cup Parmesan

Instructions 

  • Brown ground beef in a skillet, then add onions and garlic; cook until softened.
  • Add pasta sauce and simmer, then pour in whipping cream and stir.
  • Stir in tortellini, season with herbs, then add spinach and Parmesan; cook until heated through.

Notes

For a richer flavor, let the sauce simmer longer before adding the tortellini.
Calories: 650kcal
Cost: $15
Course: Main Course
Cuisine: Italian
Keyword: Tortellini

Discover the Perfect Trio: Steak, Potato, and Broccoli

When it comes to creating a hearty family meal, few combinations can rival the classic trio of steak, potatoes, and broccoli. Not only do these ingredients complement each other in flavor, but they also balance nutrition beautifully. In this article, we’ll dive into a comprehensive guide on how to prepare a delicious Steak Potato Broccoli dish that your family will love. With my two decades of culinary experience, I’m excited to share expert tips, variations, and everything you need to make this meal a staple in your kitchen.

Why You’ll Love This Recipe

Here are some compelling reasons to embrace this Steak Potato Broccoli recipe:

  • Balanced Nutrition: This dish provides a wholesome balance of protein, carbohydrates, and vitamins, making it a hearty choice for any meal.
  • Time-Saving One-Pan Meal: Cooking everything in one pan means less cleanup and more time spent enjoying your meal.
  • Customizable Ingredients: You can easily swap in different vegetables or cuts of meat based on what you have on hand.
  • Flavor Packed: The combination of seared steak with roasted potatoes and broccoli creates a symphony of flavors that will delight your palate.
  • Family-Friendly: This dish is sure to please even the pickiest eaters in your family, making it perfect for family dinners.

Ingredient Breakdown

To create the perfect Steak Potato Broccoli dish, gather the following ingredients:

  • 1.5 pounds of beef steak (cut into 1-inch cubes): Choose your favorite cut! Ribeye, sirloin, or tenderloin all work beautifully.
  • 1.5 pounds of potatoes (cut into 1-inch cubes): Russets or Yukon Golds are excellent for their creamy texture.
  • 1 pound of broccoli florets: Fresh or frozen, just ensure they’re cooked until tender.
  • 3 tablespoons of olive oil: For flavor and to help with roasting.
  • 0.5 teaspoon salt: To enhance the flavors of your dish.
  • 0.25 teaspoon black pepper: For a hint of spice.
  • 1 teaspoon garlic powder: Adds depth and aromatic flavor.

**Substitutions:** If you’re looking to make this dish even healthier, consider these substitutions:

  • Lean cuts of meat: Opt for chicken breast or turkey if you want a lighter protein source.
  • Sweet potatoes: Swap out regular potatoes for sweet potatoes for added nutrients.
  • Different veggies: Try asparagus or green beans in place of broccoli.

Pro Tips for Success

Here are some expert insights to elevate your cooking:

  • Let the steak rest: After cooking, allow your steak to rest for 5-10 minutes. This helps retain its juices.
  • Use a hot pan: Ensure your pan is hot before adding the steak for a perfect sear.
  • Don’t overcrowd the pan: Cook in batches if necessary to ensure even cooking and browning.
  • Season generously: Don’t be shy with the salt and pepper; it enhances the overall flavor.
  • Experiment with marinades: Try a simple marinade for the steak to infuse it with extra flavor.
  • Use fresh herbs: Adding herbs like rosemary or thyme can elevate the taste profile of your dish.
  • Pair with sauces: Consider a chimichurri or garlic butter sauce to drizzle over your steak.
  • Check doneness: Use a meat thermometer for perfect results: 130°F for medium rare, 140°F for medium.

Common Mistakes and Troubleshooting

Even experienced cooks can make mistakes. Here are some common issues and how to solve them:

  • Steak is tough: This usually happens due to overcooking. Use a meat thermometer to avoid this.
  • Potatoes are undercooked: Cut them into uniform sizes for even cooking, and consider pre-boiling if necessary.
  • Broccoli is mushy: Cook just until tender to retain its vibrant color and crunch.
  • Flavor is lacking: Adjust seasonings to taste and consider adding more garlic or herbs.

Delicious Variations

Keep your meals exciting with these variations:

  • Asian-inspired stir-fry: Use soy sauce, ginger, and sesame oil for a different flavor profile.
  • Cheesy baked version: Top with cheese and broil for a few minutes for a decadent twist.
  • Taco night: Use the steak in tacos with potatoes and broccoli as toppings.
  • Sheet pan meal: Roast everything together on a sheet pan for a crispy texture.

Storage and Make-Ahead Instructions

This dish can be made ahead of time and stored for later. Here’s how:

  • Refrigeration: Store cooked steak, potatoes, and broccoli in an airtight container for up to 3 days.
  • Freezing: For longer storage, freeze the components separately for up to 3 months. Reheat gently in the oven or microwave.
  • Make-ahead tip: Prepare the vegetables and steak cubes a day in advance for an easier cooking experience.

Frequently Asked Questions

Here are answers to some common queries about this recipe:

  • Can I use frozen vegetables? Yes! Just ensure they are thawed and dried before cooking.
  • What’s the best steak for this recipe? Ribeye or sirloin are great options for their flavor and tenderness.
  • How can I make this dish vegetarian? Substitute steak with firm tofu or tempeh and add more veggies.
  • Is it okay to marinate the steak overnight? Absolutely! Just be cautious with acidic marinades to avoid toughening the meat.
  • Can I grill the steak instead of pan-searing? Yes! Grilling adds a wonderful smoky flavor.
  • What should I serve with this dish? A fresh salad or crusty bread pairs beautifully.
  • How can I adjust the spice level? Add red pepper flakes or hot sauce for a spicier kick.
  • What’s the best way to reheat leftovers? Microwave on low power or reheat in an oven at 350°F until warmed through.

Nutrition Tips and Dietary Adaptations

This dish can easily fit various dietary needs:

  • Low-carb option: Skip the potatoes and replace them with cauliflower for a keto-friendly alternative.
  • Gluten-free: This recipe is naturally gluten-free as long as no additional sauces contain gluten.
  • High-protein: For a protein boost, add more steak or incorporate legumes.

Essential Equipment Recommendations

To prepare this dish effectively, you’ll need:

  • Chef’s knife: For precise cutting of ingredients.
  • Cutting board: A sturdy surface for chopping.
  • Large skillet or frying pan: Essential for searing steak and roasting veggies.
  • Meat thermometer: To ensure your steak is cooked perfectly.

Serving Suggestions

Finish your meal with these serving ideas:

  • Garnish with fresh herbs: A sprinkle of parsley or cilantro adds a fresh touch.
  • Pair with a simple salad: A light side salad balances the richness of the steak.
  • Offer sauces on the side: Consider providing chimichurri or a creamy sauce for added flavor.

In conclusion, the Steak Potato Broccoli dish is more than just a meal; it’s a comforting experience that brings family together. With its rich flavors, nutritional benefits, and versatility, this recipe can easily become a beloved staple in your kitchen. Whether you’re cooking for family or entertaining friends, this hearty dish is sure to impress. Enjoy cooking, and remember, great meals are all about creating memories around the table!

Steak Potato Broccoli

Prep Time 15 minutes
Cook Time 20 minutes
Total Time 35 minutes
Servings 4 servings
Calories 650
A hearty and flavorful dish combining tender beef, roasted potatoes, and fresh broccoli for a satisfying meal.

Ingredients

Meat and Vegetables

  • 1.5 pounds beef steak (cut into 1-inch cubes)
  • 1.5 pounds potatoes (cut into 1-inch cubes)
  • 1 pound broccoli florets
  • 3 tablespoons olive oil
  • 0.5 teaspoon salt
  • 0.25 teaspoon black pepper
  • 1 teaspoon garlic powder

Instructions 

  • Preheat oven to 400°F (200°C). Toss potatoes with 1.5 tbsp olive oil, salt, and pepper; roast for 20 minutes.
  • Meanwhile, season beef cubes with garlic powder, salt, and pepper. Heat 1 tbsp olive oil in a skillet and cook beef until browned, about 5-7 minutes.
  • Steam or blanch broccoli until tender, about 3-4 minutes.
  • Combine cooked beef, roasted potatoes, and broccoli. Drizzle with remaining olive oil if desired.
  • Serve hot and enjoy your hearty meal.

Notes

For extra flavor, add a squeeze of lemon or a sprinkle of fresh herbs before serving.
Calories: 650kcal
Cost: $15
Course: Main Course
Cuisine: American
Keyword: Beef, Broccoli, Potatoes

Transform Your Dinner Experience with Chicken Alfredo Stuffed Shells

Welcome to a culinary adventure that will elevate your dinner game! Chicken Alfredo Stuffed Shells are not just a meal; they are an experience packed with rich flavors and creamy goodness. This dish will quickly become a family favorite, bringing smiles to the dinner table. With a perfect blend of cheesy filling, tender chicken, and a luscious Alfredo sauce, this recipe is designed to make cooking enjoyable and accessible for everyone.

In this comprehensive guide, we’ll walk you through every step of making these delicious stuffed shells. Whether you’re a seasoned chef or a beginner, you’ll find tips and insights to help you create a dish that’s not only tasty but also visually appealing. Let’s dive into what makes Chicken Alfredo Stuffed Shells a must-try recipe!

Why You’ll Love This Recipe

Here are just a few reasons why Chicken Alfredo Stuffed Shells will become a staple in your kitchen:

  • Comforting and Satisfying: These cheesy shells are the ultimate comfort food, perfect for cozy family dinners.
  • Easy to Prepare: With straightforward steps, you can whip up this dish with minimal effort, making it ideal for busy weeknights.
  • Customizable: Feel free to mix and match ingredients based on your preferences, ensuring every batch is unique.
  • Great for Meal Prep: This recipe is perfect for making ahead of time and reheating, saving you time on hectic days.
  • Kid-Friendly: The combination of flavors is sure to please even the pickiest eaters, making it a great family meal.

The Ingredients You’ll Need

Here’s what you’ll need to create your Chicken Alfredo Stuffed Shells:

  • Jumbo Pasta Shells: 1 box (12 oz) of jumbo pasta shells, cooked until al dente.
  • Olive Oil: 1 tablespoon to sauté garlic.
  • Chicken: 1 pound of boneless, skinless chicken breasts, cooked and shredded. (Rotisserie chicken works great!)
  • Heavy Cream: 1 cup for a rich sauce.
  • Chicken Broth: 1/2 cup for added flavor in the sauce.
  • Unsalted Butter: 1/2 cup to create a luscious Alfredo base.
  • Garlic: 2 cloves, minced, to enhance the flavor profile.
  • Parmesan Cheese: 1 1/2 cups grated, plus extra for topping.
  • Salt and Pepper: To taste, enhancing the overall flavor.
  • Ricotta Cheese: 1 (15 oz) container for the filling.
  • Large Egg: 1 to bind the filling.
  • Fresh Parsley: 1/4 cup, chopped, for a touch of freshness.
  • Shredded Mozzarella Cheese: 2 cups for that gooey topping.
  • Alfredo Sauce: 1 cup, either store-bought or homemade.

Feel free to make substitutions based on your dietary needs. For example, use gluten-free pasta for a gluten-free version, or swap out chicken for sautéed vegetables for a vegetarian alternative.

Step-by-Step Instructions

Mouthwatering Chicken Alfredo stuffed shells presented on a plate, drizzled with sauce.

Ready to get cooking? Follow these detailed steps to create your Chicken Alfredo Stuffed Shells:

  1. Preheat Your Oven: Set it to 375°F (190°C) and lightly grease a 9×13 inch baking dish.
  2. Cook the Jumbo Shells: Prepare the shells according to package directions until al dente. Drain and set aside to cool slightly.
  3. Make the Alfredo Sauce: In a medium saucepan over medium heat, melt the butter. Add minced garlic and sauté for one minute until fragrant.
  4. Combine Ingredients for Sauce: Whisk in heavy cream and chicken broth. Bring to a simmer, then stir in 1 1/2 cups Parmesan cheese, salt, and pepper until smooth. Remove from heat.
  5. Prepare the Filling: In a large bowl, combine shredded chicken, ricotta cheese, and egg. Mix until well incorporated.
  6. Incorporate Alfredo Sauce: Pour half of the prepared Alfredo sauce into the chicken mixture and stir in fresh parsley.
  7. Stuff the Shells: Carefully fill each cooked shell with the chicken and ricotta filling, then arrange them in the prepared baking dish.
  8. Top with Sauce: Pour the remaining Alfredo sauce evenly over the stuffed shells and sprinkle with shredded mozzarella cheese and a bit of extra Parmesan.
  9. Bake to Perfection: Bake for 20 to 25 minutes, or until the cheese is melted, bubbly, and lightly golden brown. Allow to stand for 5 minutes before serving.

Expert Tips for Flawless Stuffed Shells

Achieving the perfect Chicken Alfredo Stuffed Shells requires attention to detail. Here are some expert tips to ensure success:

  • Prep Ahead: You can prepare the filling and sauce a day in advance. Just assemble and bake when ready.
  • Flavor Boost: Add a pinch of nutmeg to the Alfredo sauce for a subtle depth of flavor.
  • Don’t Overstuff: Fill each shell generously, but don’t overfill to prevent tearing during baking.
  • Cheese Variations: Experiment with different types of cheese, such as Gouda or Gruyère, for a unique twist.
  • Fresh Herbs: Consider adding fresh basil or oregano to the filling for an aromatic kick.
  • Check for Doneness: Ensure the dish is hot throughout by testing the center with a knife.
  • Broil for Extra Crispiness: For a golden top, broil for an additional 2-3 minutes after baking.
  • Serve Warm: This dish is best enjoyed hot out of the oven, paired with a fresh salad or garlic bread.

Common Mistakes and Troubleshooting

Even the best chefs can make mistakes! Here’s how to avoid common pitfalls:

  • Shells Breaking: Be gentle when handling cooked shells. Ensure they are al dente to prevent breakage.
  • Overcooked Chicken: Cook chicken just until done to maintain moisture; rotisserie chicken can be a quick alternative.
  • Too Much Sauce: Balance is key! Ensure sauce coats the filling without drowning the shells.
  • Filling Too Dry: Ensure your filling includes enough ricotta and sauce for creaminess.

Delicious Variations

Mix things up by trying these variations of the classic Chicken Alfredo Stuffed Shells:

  • Spinach and Chicken: Add fresh spinach to the filling for added nutrition and flavor.
  • Mushroom Alfredo: Incorporate sautéed mushrooms into the filling for an earthy twist.
  • Buffalo Chicken: Spice it up by adding buffalo sauce to the chicken mixture for a kick!
  • Vegetarian Version: Substitute chicken with sautéed zucchini and bell peppers for a veggie-packed dish.

Storage and Make-Ahead Instructions

Planning ahead? Here’s how to store and reheat your Chicken Alfredo Stuffed Shells:

  • Refrigeration: Store leftovers in an airtight container in the fridge for up to 3-4 days.
  • Freezing: Assemble the dish without baking, cover tightly, and freeze for up to 3 months. Thaw overnight in the fridge before baking.
  • Reheating: Reheat in the oven at 350°F (175°C) for 20-30 minutes or until heated through.

Frequently Asked Questions

Here are some common questions about Chicken Alfredo Stuffed Shells:

  • Can I make this recipe gluten-free? Yes! Use gluten-free jumbo shells, and ensure your sauces are gluten-free.
  • How can I make the sauce from scratch? Use butter, garlic, heavy cream, and Parmesan cheese to create a homemade Alfredo sauce.
  • Can I prepare the dish the night before? Absolutely! Assemble the stuffed shells and store them in the fridge, then bake when ready.
  • What side dishes pair well with this meal? A fresh garden salad, steamed vegetables, or garlic bread are excellent choices!
  • Is this dish suitable for freezing? Yes, you can freeze both baked and unbaked versions. Just ensure they’re well covered.
  • How do I know when it’s done baking? The dish should be bubbly and golden on top; you can check the center with a knife to ensure it’s hot.
  • Can I use a different type of cheese? Yes! Feel free to mix and match your favorite cheeses for a different flavor profile.
  • What should I do if my filling is too runny? Add more ricotta cheese or a bit of breadcrumbs to thicken it up.

Nutritional Insights and Dietary Adaptations

For those mindful of their dietary choices, here are some tips to consider:

  • Low-Fat Option: Use low-fat dairy products like low-fat cream cheese or skim milk to reduce calories.
  • High-Protein Variation: Add extra chicken or use cottage cheese in place of ricotta for more protein.
  • Vegetarian Adaptation: Swap chicken for lentils or chickpeas for a hearty plant-based option.

Equipment Recommendations

To achieve the best results, having the right equipment is essential:

  • Large Baking Dish: A 9×13 inch baking dish works perfectly for this recipe.
  • Medium Saucepan: Ideal for making your Alfredo sauce.
  • Mixing Bowls: Use various sizes for combining ingredients.
  • Measuring Cups and Spoons: Accurate measurements lead to consistent results.

Serving Suggestions

Enhance your presentation with these serving suggestions:

  • Garnish: Top with freshly chopped parsley or basil for a pop of color.
  • Accompaniments: Serve with a side of garlic bread or a crisp Caesar salad for balance.
  • Wine Pairing: A chilled glass of Chardonnay or Pinot Grigio complements the creamy flavors beautifully.

With this definitive guide to Chicken Alfredo Stuffed Shells, you’re now equipped to create a deliciously satisfying meal that your family will love. Remember, cooking is about experimenting and enjoying the process. So gather your ingredients, roll up your sleeves, and let’s make some amazing stuffed shells together!

Amazing Chicken Alfredo Stuffed Shells: 1 Flawless Fix

Prep Time 20 minutes
Cook Time 25 minutes
Total Time 45 minutes
Servings 6 servings
Calories 650
A delicious baked pasta dish featuring jumbo shells filled with creamy chicken and ricotta, topped with cheese and baked to perfection.

Ingredients

Pasta and Shells

  • 1 box jumbo pasta shells (12 oz)
  • 1 tablespoon olive oil
  • 1 pound boneless, skinless chicken breasts (cooked and shredded)
  • 1 cup heavy cream
  • 1/2 cup chicken broth
  • 1/2 cup unsalted butter
  • 2 cloves garlic, minced
  • 1 1/2 cups grated Parmesan cheese (plus more for topping)
  • 1/2 teaspoon salt
  • 1/4 teaspoon black pepper
  • 1 container (15 oz) ricotta cheese
  • 1 large egg
  • 1/4 cup chopped fresh parsley
  • 2 cups shredded mozzarella cheese
  • 1 cup Alfredo sauce (store-bought or homemade)

Instructions 

  • Preheat oven to 375°F (190°C) and grease a 9x13 inch baking dish.
  • Cook shells until al dente, drain, and set aside.
  • Make Alfredo sauce: melt butter, cook garlic, add cream and broth, simmer, then stir in Parmesan, salt, and pepper.
  • Mix shredded chicken, ricotta, egg, and parsley; combine with half of Alfredo sauce for filling.
  • Stuff shells with filling, arrange in dish, pour remaining sauce over, top with mozzarella and Parmesan, then bake 20-25 minutes.

Notes

For best results, use freshly grated Parmesan and shredded mozzarella.
Calories: 650kcal
Cost: $15
Course: Main Course
Cuisine: Italian
Keyword: Chicken

Welcome to a culinary journey where tradition meets comfort! Today, we’re diving into the rich flavors of Marry Me Tuscan Chicken, a delightful dish that combines tender chicken breasts with fresh spinach, sun-dried tomatoes, and creamy Parmesan sauce. Whether you’re looking to impress your loved ones or enjoy a cozy dinner at home, this recipe is sure to win hearts and appetites alike. Let’s explore why this recipe is a favorite in kitchens around the world and how you can make it your own!

Why You’ll Love This Recipe

  • Flavor Explosion: The harmonious blend of garlic, sun-dried tomatoes, and Italian herbs creates a rich, savory sauce that elevates the chicken to a new level of deliciousness.
  • Quick and Easy: This recipe comes together in under 30 minutes, making it perfect for weeknight dinners when time is tight but you still want something extraordinary.
  • One-Pan Wonder: Minimal cleanup is required since everything cooks in a single skillet, allowing you to focus on enjoying your meal rather than worrying about the dishes.
  • Impressive Presentation: The vibrant colors of the spinach and sun-dried tomatoes create an eye-catching dish that looks as good as it tastes, perfect for entertaining guests.
  • Customizable Ingredients: With a few simple substitutions, you can tailor this recipe to fit dietary needs or personal preferences, making it versatile for any occasion.

Ingredients Breakdown

Here’s what you’ll need to create this mouthwatering Marry Me Tuscan Chicken:

  • 4 boneless, skinless chicken breasts: The foundation of the dish, lean and tender.
  • Salt and freshly ground black pepper: Essential for seasoning the chicken and enhancing the flavors.
  • 2 tablespoons olive oil: For sautéing the chicken and infusing it with flavor.
  • 3 cloves garlic, minced: Adds depth and aroma to the dish.
  • 1 cup heavy cream: Creates a rich and creamy sauce that envelops the chicken.
  • 1/2 cup chicken broth: Provides moisture and enhances the overall flavor.
  • 1/2 cup grated Parmesan cheese: Adds a nutty, savory richness to the sauce.
  • 1/4 cup sun-dried tomatoes, chopped: Brings a sweet-tart flavor that complements the creaminess.
  • 2 cups fresh baby spinach: A nutritious addition that wilts beautifully in the sauce.
  • 1 teaspoon dried Italian herbs: A blend of oregano, basil, and thyme for that quintessential Italian flavor.
  • Red pepper flakes, optional: For a touch of heat, if desired.
  • Fresh basil, for garnish: Adds a burst of freshness and color when serving.

Step-by-Step Instructions

Follow these easy steps to create your Marry Me Tuscan Chicken:

  1. Season both sides of the chicken breasts with salt and pepper.
  2. Heat olive oil in a large skillet over medium-high heat. Add chicken and cook until golden and cooked through, about 5-7 minutes per side. Remove chicken and set aside.
  3. In the same skillet, add the minced garlic and sauté for 1 minute until fragrant.
  4. Add heavy cream, chicken broth, and Parmesan cheese; stir to combine and bring to a simmer.
  5. Stir in chopped sun-dried tomatoes, dried Italian herbs, and red pepper flakes if using.
  6. Add fresh spinach and cook until wilted, about 2 minutes.
  7. Return the chicken breasts to the skillet and spoon some sauce over the top. Simmer for 2-3 minutes until heated through.
  8. Garnish with fresh basil and serve immediately.

Pro Tips for Perfecting Your Dish

Delicately plated Tuscan chicken with vibrant colors and textures.
  • Perfectly Cooked Chicken: Use a meat thermometer to check that chicken is cooked to an internal temperature of 165°F (75°C) for safety.
  • Thicken the Sauce: If you prefer a thicker sauce, let it simmer for a few extra minutes or add a cornstarch slurry (1 tablespoon cornstarch mixed with 1 tablespoon water).
  • Enhance Flavor: Marinate the chicken in olive oil and herbs for 30 minutes before cooking to infuse more flavor.
  • Fresh Ingredients: Opt for fresh spinach over frozen to prevent excess moisture in the sauce.
  • Cheese Variations: Experiment with different cheeses like mozzarella or goat cheese for a unique twist.
  • Make it Ahead: Prepare the sauce in advance and store it in the fridge. Just add the chicken when ready to serve.
  • Spice Level: Adjust the amount of red pepper flakes according to your heat preference.
  • Presentation Matters: Serve with a sprinkle of extra Parmesan and fresh herbs for a restaurant-style finish.

Common Mistakes and Troubleshooting

  • Overcooking Chicken: Keep an eye on your chicken to ensure it stays juicy. Cooking it too long can lead to dryness.
  • Too Much Salt: Remember that Parmesan cheese is salty. Taste before adding more salt to the dish.
  • Not Enough Sauce: If your sauce is too thick, add a splash of chicken broth or cream to loosen it up.
  • Underseasoned Sauce: Don’t be afraid to taste and adjust seasoning as necessary throughout the cooking process.
  • Skipping Fresh Herbs: Fresh basil adds a beautiful flavor and aroma, so don’t skip this step!

Delicious Variations

Feeling adventurous? Try these variations of the classic Marry Me Tuscan Chicken:

  • Chicken Thighs: Substitute chicken breasts for thighs for a juicier, more flavorful option.
  • Vegetarian Version: Swap chicken for hearty mushrooms or eggplant for a delicious plant-based meal.
  • Pasta Dish: Serve the Tuscan chicken over your favorite pasta instead of on its own to create a comforting meal.
  • Spicy Tuscan Chicken: Add diced jalapeños or a splash of hot sauce for an extra kick.

Storage and Make-Ahead Instructions

This dish is perfect for meal prep! Here’s how to store and reheat:

  • Refrigeration: Store leftovers in an airtight container in the fridge for up to 3 days.
  • Freezing: Freeze portions in freezer-safe containers for up to 2 months. Thaw in the refrigerator overnight before reheating.
  • Reheating: Gently reheat in a skillet over low heat, adding a splash of chicken broth or cream to restore creaminess.

Frequently Asked Questions

  • Can I make Marry Me Tuscan Chicken ahead of time?: Yes, you can prepare the sauce in advance and cook the chicken fresh when ready to serve.
  • What if I don’t have sun-dried tomatoes?: You can substitute with fresh tomatoes or omit them altogether for a different flavor profile.
  • How do I store leftover Marry Me Tuscan Chicken?: Keep in an airtight container in the fridge for up to 3 days.
  • Can I use chicken thighs instead of breasts?: Absolutely! Chicken thighs work well and provide a richer taste.
  • Is this recipe gluten-free?: Yes, it is naturally gluten-free as long as you use gluten-free chicken broth.
  • How do I thicken the creamy Tuscan sauce without cream?: You can use a cornstarch slurry or let it simmer longer to reduce.
  • What sides pair well with Marry Me Tuscan Chicken?: Serve with garlic bread, mashed potatoes, or a fresh salad.
  • Can I add more vegetables?: Definitely! Feel free to add bell peppers, zucchini, or asparagus to the sauce for extra nutrition.

Nutritional Tips and Dietary Adaptations

If you’re looking to lighten up this dish or make it suitable for specific dietary needs, consider these tips:

  • Low-Fat Option: Use low-fat cream or Greek yogurt in place of heavy cream to reduce calories.
  • Dairy-Free: Substitute with coconut cream and nutritional yeast for a dairy-free version.
  • Paleo-Friendly: Use chicken broth and coconut milk for a paleo-compliant meal.
  • Low-Carb: Serve over cauliflower rice instead of pasta for a low-carb alternative.

Essential Equipment Recommendations

To make the most of your cooking experience, here are some tools you might find helpful:

  • Non-Stick Skillet: Ideal for cooking chicken without sticking and ensuring even cooking.
  • Meat Thermometer: Ensures your chicken is cooked to the perfect temperature.
  • Wooden Spoon: Perfect for stirring and scraping up any bits stuck to the pan for maximum flavor.
  • Chopping Board: Essential for prepping your ingredients efficiently and safely.

Serving Suggestions

Elevate your dining experience with these serving ideas:

  • Pair with Mashed Potatoes: The creamy sauce is perfect over fluffy mashed potatoes for a comforting meal.
  • Complement with a Green Salad: A fresh salad with vinaigrette balances the richness of the chicken.
  • Serve with Garlic Bread: Perfect for soaking up the delicious sauce.
  • Add a Glass of Wine: Pair with a crisp white wine like Chardonnay or a light red for the perfect dinner.

In conclusion, Marry Me Tuscan Chicken is more than just a meal—it’s an experience that brings friends and family together. With its creamy sauce, tender chicken, and vibrant ingredients, it’s bound to become a favorite in your household. So gather your ingredients, follow these steps, and get ready to create a dish that truly warms the heart. Happy cooking!

Marry Me Tuscan Chicken

Prep Time 10 minutes
Cook Time 20 minutes
Total Time 30 minutes
Servings 4 servings
Calories 550
A creamy, flavorful Tuscan chicken dish with sun-dried tomatoes and spinach, perfect for a quick and elegant meal.

Ingredients

Protein

  • 4 pieces boneless, skinless chicken breasts

Seasoning

  • Salt and freshly ground black pepper Salt and pepper (to taste)

Cooking Oil

  • 2 tablespoons olive oil

Aromatics

  • 3 cloves garlic, minced

Sauce & Cheese

  • 1 cup heavy cream
  • 1/2 cup chicken broth
  • 1/2 cup grated Parmesan cheese

Sun-Dried Tomatoes

  • 1/4 cup chopped sun-dried tomatoes

Vegetables

  • 2 cups fresh baby spinach

Herbs & Spices

  • 1 teaspoon dried Italian herbs
  • Red pepper flakes Red pepper flakes (optional)

Garnish

  • Fresh basil Fresh basil (for garnish)

Instructions 

  • Season chicken with salt and pepper.
  • Cook chicken in olive oil until golden, then set aside.
  • Sauté garlic in the same skillet, then add cream, broth, and Parmesan; simmer.
  • Stir in sun-dried tomatoes, Italian herbs, and spinach; cook until wilted.
  • Return chicken to skillet, heat through, garnish with basil, and serve.

Notes

For extra flavor, add a splash of white wine during simmering.
Calories: 550kcal
Cost: $15
Course: Main Course
Cuisine: Italian
Keyword: Chicken

Unlock the Deliciousness of Spinach Ricotta Stuffed Chicken

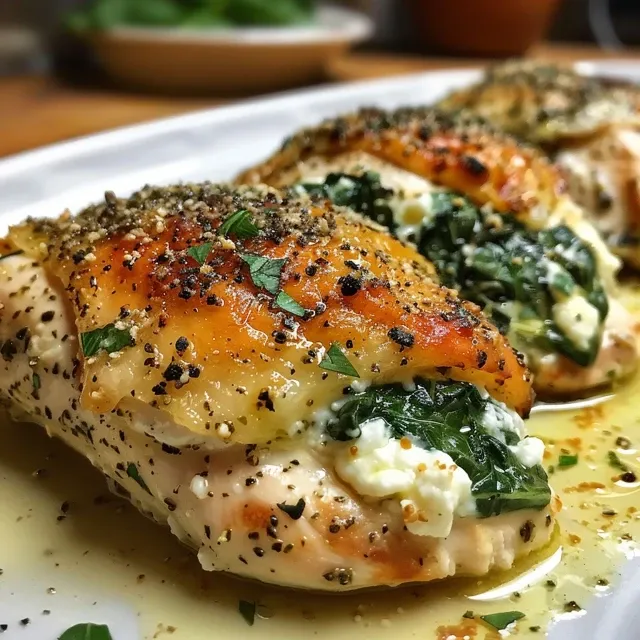
Are you ready to elevate your dinner experience? This Spinach Ricotta Stuffed Chicken recipe combines tender chicken breasts with a flavorful spinach and cheese filling, creating a dish that’s not only delicious but also impressive enough for any occasion. In this article, we will guide you through every step of the process, share valuable tips, and explore variations to suit your taste. Let’s get cooking!

Why You’ll Love This Recipe

  • Easy to Make: This recipe requires minimal ingredients and straightforward steps, making it perfect for both novice and experienced cooks.
  • A Crowd-Pleaser: The combination of spinach, ricotta, and chicken is always a hit at dinner parties and family gatherings.
  • Nutritious Ingredients: Packed with protein and vitamins, this dish is a healthy choice that doesn’t compromise on flavor.
  • Versatile: Whether you’re serving it with a side salad, pasta, or roasted vegetables, this stuffed chicken pairs well with various sides.
  • Make-Ahead Friendly: Prepare it in advance and bake it just before serving for a stress-free dinner.

Ingredients You’ll Need

Gathering the right ingredients is crucial for creating a delicious spinach and ricotta stuffed chicken. Here’s what you’ll need:

  • 4 boneless skinless chicken breasts: Choose thick breasts for the best stuffing results.
  • Kosher salt and black pepper: Essential for seasoning the chicken and the filling.
  • 2 tablespoons extra virgin olive oil (divided): Adds flavor and moisture.
  • 1/2 cup yellow onion (diced): For a savory base.
  • 3 cloves garlic (minced): Adds depth and aroma.
  • 2 cups fresh spinach (chopped): The star ingredient, rich in vitamins.
  • 2 tablespoons fresh parsley (chopped): Enhances freshness.
  • 1/2 cup ricotta cheese: Creamy and rich, it binds the filling.
  • 1/4 cup shredded mozzarella: Melts beautifully for a gooey texture.
  • 1/4 cup grated Parmesan: Adds a sharp, tangy flavor.
  • 1 egg yolk: Helps bind the filling.
  • 1 teaspoon dried oregano: For an aromatic touch.
  • Pinch of nutmeg: A secret ingredient that enhances the flavor.

How to Make Spinach Ricotta Stuffed Chicken

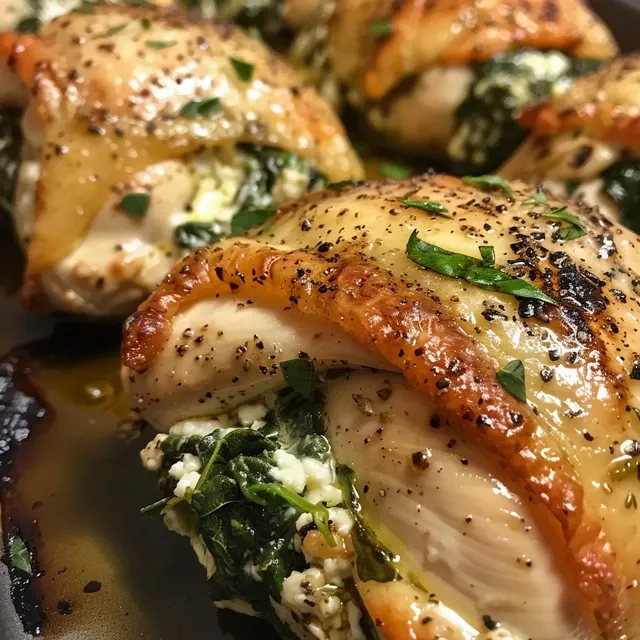
A detailed side shot of a stuffed chicken breast filled with spinach, ricotta, and herbs.

Follow these steps for a perfect spinach ricotta stuffed chicken:

  1. Preheat the Oven: Start by preheating your oven to 375 degrees Fahrenheit.
  2. Prepare the Chicken: Pat the chicken breasts dry. Using a sharp knife, cut a 3-4 inch wide pocket into the thickest part of each breast. Season both sides with salt and pepper.
  3. Cook the Aromatics: In a large skillet, heat 1 tablespoon of olive oil over medium heat. Add the diced onion and minced garlic, sautéing for 3-5 minutes until softened.
  4. Add Spinach: Stir in the chopped spinach and parsley, cooking for 2-3 minutes until the spinach wilts. Transfer the mixture to a bowl and let it cool.
  5. Mix the Filling: In a separate bowl, combine ricotta, mozzarella, Parmesan, egg yolk, oregano, nutmeg, salt, and pepper. Once the spinach mixture has cooled, fold it into the cheese mixture.
  6. Stuff the Chicken: Divide the filling among the pockets of each chicken breast, ensuring they are generously filled.
  7. Sear the Chicken: In the same skillet, heat the remaining olive oil over medium-high heat. Add the stuffed chicken and cook for 5-7 minutes on one side until golden, then flip and cook for another 5 minutes.
  8. Bake to Perfection: Transfer the skillet to the oven and bake for 16-20 minutes, or until the internal temperature reaches 165 degrees F.
  9. Rest and Serve: Let the chicken rest for 3-5 minutes before slicing. Serve with your favorite sides.

Expert Tips for Perfect Stuffed Chicken

  • Choose the Right Chicken Breasts: Opt for thicker chicken breasts for easier stuffing and to prevent drying out.
  • Don’t Overstuff: Leave some space in the pockets to allow for the filling to expand during cooking.
  • Use Fresh Ingredients: Fresh spinach and herbs will enhance the flavor profile of the dish.
  • Add Flavors: Experiment with spices like paprika or crushed red pepper for an extra kick.
  • Let It Rest: Resting the chicken after baking allows the juices to redistribute, ensuring juicy results.
  • Monitor Cooking Time: Use a meat thermometer to ensure the chicken is cooked through without overcooking.
  • Make It Ahead: Prepare the stuffed chicken the day before and refrigerate until ready to bake.
  • Experiment with Cheeses: Swap out ricotta for goat cheese or feta for a different flavor profile.

Common Mistakes and Troubleshooting

Even the best chefs make mistakes! Here are some common pitfalls to avoid:

  • Underseasoning: Always taste your filling before stuffing to ensure it’s flavorful.
  • Overcooking: Keep an eye on the internal temperature to prevent dry chicken.
  • Not Cooling the Filling: Adding a hot filling to the chicken can lead to tough meat. Always let it cool first.
  • Not Using a Meat Thermometer: This tool is essential for ensuring perfectly cooked chicken every time.

Variations to Try

Customize your spinach and ricotta stuffed chicken with these creative ideas:

  • Sun-Dried Tomato and Feta: Add sun-dried tomatoes and crumbled feta cheese to the filling for a Mediterranean twist.
  • Herbed Cream Cheese: Swap ricotta for herbed cream cheese for a creamy, tangy flavor.
  • Mushroom and Spinach: Sauté mushrooms with the spinach for an earthy addition.
  • Spicy Jalapeño: Mix in diced jalapeños for a spicy kick.

Storage and Make-Ahead Instructions

This recipe is perfect for meal prep! Here’s how to store and reheat:

  • Refrigerate: Store leftover stuffed chicken in an airtight container in the fridge for up to 3 days.
  • Freeze: Freeze uncooked stuffed chicken for up to 3 months. Thaw in the refrigerator before baking.
  • Reheat: Reheat in the oven at 350 degrees F until warmed through, about 15-20 minutes.

Frequently Asked Questions

Here are some common questions about making spinach ricotta stuffed chicken:

  • Can I use frozen spinach? Yes, just make sure to thaw and squeeze out excess moisture before using.
  • What can I serve with this dish? It pairs well with a side salad, roasted veggies, or pasta.
  • Can I use chicken thighs instead of breasts? Absolutely! Just adjust the cooking time as needed.
  • What if I don’t have ricotta? Substitute with cottage cheese or cream cheese for a similar texture.
  • Can this be made gluten-free? Yes, ensure all ingredients are gluten-free, including any sauces used.
  • How long does it take to cook? The total time is about 45 minutes, including prep and baking.
  • Can I make this dish dairy-free? Use dairy-free cheese alternatives for the filling.
  • What’s the best way to store leftovers? Keep in an airtight container in the fridge for up to 3 days.

Nutrition Tips and Dietary Adaptations

This spinach ricotta stuffed chicken is not only delicious but can also be adjusted to fit various dietary needs:

  • Low Carb: This recipe is naturally low in carbs, making it ideal for keto diets.
  • High Protein: Rich in protein from chicken and cheese, it’s perfect for muscle recovery.
  • Vegetarian Option: Substitute chicken with large portobello mushrooms for a meat-free version.
  • Low-Calorie: Use reduced-fat cheeses and lean chicken to cut calories without sacrificing taste.

Equipment Recommendations

To make your cooking experience smoother, here are some recommended tools:

  • Sharp Chef’s Knife: Essential for preparing chicken and chopping ingredients.
  • Large Skillet: A good quality skillet helps with even cooking and browning.
  • Meat Thermometer: Ensures perfectly cooked chicken every time.
  • Baking Dish: Utilize a deep baking dish for optimal cooking.

Serving Suggestions

Make your meal complete by pairing your spinach ricotta stuffed chicken with:

  • Mixed Green Salad: A light and refreshing option to balance the richness of the chicken.
  • Garlic Bread: Perfect for soaking up any delicious sauce.
  • Roasted Vegetables: Seasonal veggies add color and nutrition.
  • Pasta: Serve with a light sauce or drizzle of olive oil for a hearty meal.

Conclusion

Now that you’ve discovered the art of making Spinach Ricotta Stuffed Chicken, it’s time to bring this delightful recipe to your kitchen. With its rich flavors and impressive presentation, you’ll be sure to wow your family and friends. Remember, cooking is about enjoying the journey as much as the delicious results. Happy cooking!

Spinach Ricotta Stuffed Chicken

Prep Time 15 minutes
Cook Time 25 minutes
Total Time 40 minutes
Servings 4 servings
Calories 350
A delicious and hearty dish featuring tender chicken breasts filled with a flavorful spinach and cheese mixture, baked to perfection.

Ingredients

Chicken

  • 4 pieces boneless skinless chicken breasts
  • to taste N/A Kosher salt
  • to taste N/A Black pepper

Oil

  • 2 tablespoons extra virgin olive oil (divided)
  • 1/2 cup yellow onion (diced)
  • 3 cloves garlic (minced)

Vegetables

  • 2 cups fresh spinach (chopped)
  • 2 tablespoons fresh parsley (chopped)

Cheese

  • 1/2 cup ricotta cheese
  • 1/4 cup shredded mozzarella
  • 1/4 cup grated Parmesan
  • 1 egg yolk egg yolk
  • 1 teaspoon dried oregano
  • pinch N/A nutmeg

Instructions 

  • Preheat oven to 375°F (190°C).
  • Cut pockets into chicken breasts, season with salt and pepper.
  • Sauté onion and garlic in 1 tbsp olive oil until softened.
  • Add spinach and parsley; cook until wilted. Cool mixture.
  • Mix cheeses, egg yolk, oregano, nutmeg, salt, and pepper. Combine with spinach mixture.
  • Stuff mixture into chicken pockets, sear in skillet, then bake for 20 minutes.

Notes

Ensure chicken is cooked to an internal temperature of 165°F (74°C) before serving.
Calories: 350kcal
Cost: $15
Course: Main Course
Cuisine: American
Keyword: Cheese, Chicken, Spinach

Elevate Your Dinner Experience with a Korean Beef Power Bowl

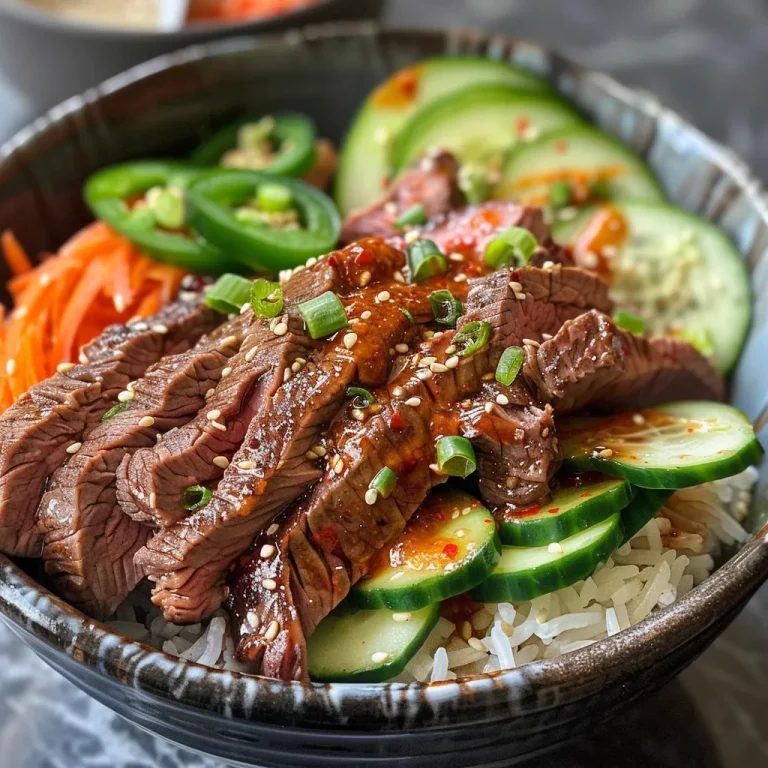
Welcome to the world of culinary delight where flavor meets nutrition! This Korean Beef Power Bowl is not just a meal; it’s an experience that brings together the zest of marinated beef, the crunch of fresh vegetables, and the creaminess of sriracha mayo. Perfect for weeknight dinners or meal prep, it’s a dish that ensures you never settle for ordinary.

Let’s dive into why this bowl is a must-try, its benefits, and how to make it your own.

Why You’ll Love This Recipe

  • Quick and Convenient: With a total time of under 40 minutes, you can whip up a restaurant-quality dish without the stress.
  • Customizable Ingredients: Whether you prefer flank steak or sirloin, this recipe allows for flexibility based on what you have at home.
  • Bursting with Flavor: The combination of savory beef, tangy pickled carrots, and creamy sriracha mayo creates a perfect harmony of tastes.
  • Nutrient-Dense: Packed with fresh veggies, this bowl is as nutritious as it is delicious, providing a good balance of protein, fiber, and vitamins.
  • Meal Prep Friendly: Prepare components ahead of time for a quick assembly during busy weekdays.

Detailed Ingredient Breakdown

Let’s break down the ingredients to ensure you have everything you need for the ultimate Korean Beef Power Bowl.

  • Flank Steak or Sirloin: 1.1 lbs. Choose flank steak for its tenderness, or go for sirloin for a leaner option.
  • Soy Sauce: 2 tablespoons. This adds a depth of flavor to the marinade.
  • Sesame Oil: 1 tablespoon. Infuses a nutty aroma and taste.
  • Fresh Ginger: 1 tablespoon, grated. Provides a warm spice that complements the beef beautifully.
  • Garlic: 2 cloves, minced. Enhances the overall flavor profile.
  • Brown Sugar: 1 tablespoon. Balances the savory notes with a touch of sweetness.
  • Rice Vinegar: 1 tablespoon, plus 1/3 cup for pickling. Adds acidity to brighten the flavors.
  • Gochujang: 1 teaspoon (optional). For those who enjoy a hot kick!
  • Black Pepper: 1/4 teaspoon. Freshly ground for optimal flavor.
  • Cooked Rice: 2 cups. Use jasmine or short-grain white rice for a sticky texture.
  • Carrots: 1 cup, julienned. The perfect crunchy contrast.
  • Cucumber: 1 cup, thinly sliced. Adds refreshing coolness.
  • Jalapeño: 1 fresh, thinly sliced. For a spicy kick!
  • Toasted Sesame Seeds: 2 tablespoons. A lovely garnish that adds texture.
  • Green Onions: 2, thinly sliced. Bright and fresh, they elevate the dish.
  • Mayonnaise: 1/3 cup. For creaminess and to blend with the sriracha.
  • Sriracha: 1 to 2 tablespoons, to taste. For that iconic spicy punch!
  • Lime Juice: 1 teaspoon. A touch of acidity to finish the mayo.

Preparation Steps

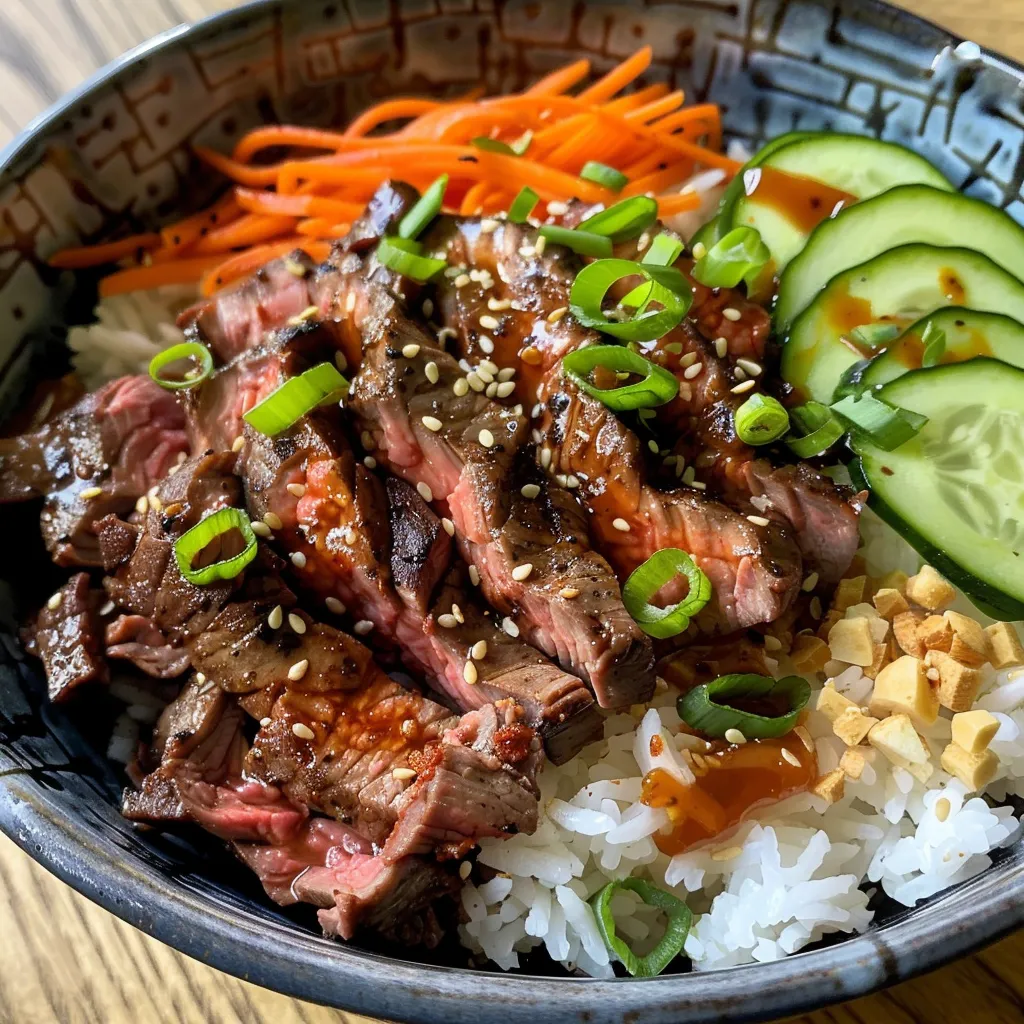
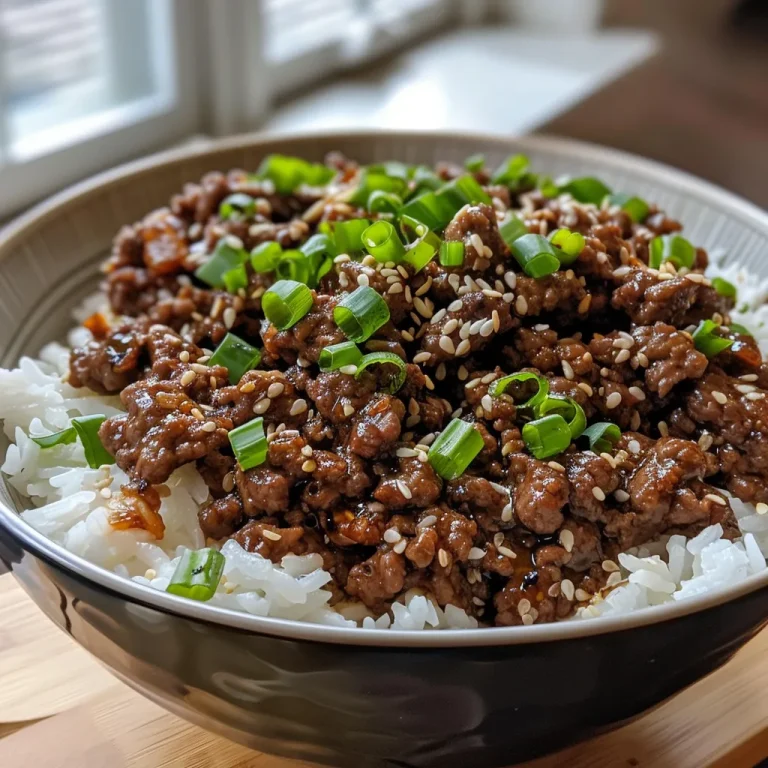
Side perspective of a Korean Beef Power Bowl filled with beef, rice, and fresh garnishes.

Follow these steps for a flawlessly executed bowl:

  1. In a small bowl, mix 1/3 cup rice vinegar, 1 tablespoon sugar, and 1/2 teaspoon salt. Add the julienned carrots and let them pickle for at least 20 minutes, tossing occasionally.
  2. In a large bowl, whisk together soy sauce, sesame oil, grated ginger, minced garlic, brown sugar, 1 tablespoon rice vinegar, gochujang (if using), and black pepper. Add the sliced beef, ensuring it’s well coated. Marinate for 15 to 20 minutes.
  3. Cook rice according to package instructions if not prepared in advance. Keep warm.
  4. In another small bowl, combine mayonnaise, sriracha, and lime juice. Adjust spiciness according to your preference.
  5. Heat a large skillet or wok over high heat. Add marinated beef in a single layer and cook for 2 to 3 minutes per side until browned and just cooked through.
  6. Assemble the bowls: Divide the warm rice into four bowls. Top with seared beef, drained pickled carrots, cucumber, jalapeños, green onions, and toasted sesame seeds. Drizzle generously with sriracha mayo.
  7. Serve immediately while the beef and rice are warm for optimal enjoyment!

Pro Tips for Perfecting Your Bowl

  • Slice Against the Grain: Always slice your beef against the grain to ensure tenderness.
  • Marinate Longer: For an even richer flavor, marinate the beef for up to an hour.
  • Customize Your Veggies: Feel free to add or swap in your favorite vegetables such as bell peppers or snap peas.
  • Adjust the Heat: Play around with the amount of gochujang and sriracha to suit your spice preference.
  • Use Leftover Rice: This dish is perfect for using up leftover rice from previous meals.
  • Make it Vegan: Substitute beef with tofu or tempeh and use vegan mayo for a plant-based option.
  • Experiment with Toppings: Consider adding avocado for creaminess or edamame for extra protein.
  • Stay Organized: Prepare ingredients ahead of time for a smooth cooking experience.

Common Mistakes and Troubleshooting

Even the best chefs can face challenges. Here are some common pitfalls and how to avoid them:

  • Beef Cooking Time: Overcooking the beef can lead to toughness. Keep an eye on it and remove from heat as soon as it’s browned.
  • Not Marinating Enough: A quick marinate won’t do justice to the flavors. At least 15 minutes is essential.
  • Over-Pickling: Don’t let your carrots sit too long; they lose their crunch if pickled excessively.
  • Too Much Heat: If the dish becomes too spicy, balance it out with more mayonnaise or serve with a side of rice.

Variations to Try

Get creative with these variations of the classic Korean Beef Power Bowl:

  • Spicy Chicken Bowl: Swap beef for marinated chicken thighs, following the same cooking method.
  • Vegetarian Delight: Use tofu marinated in soy sauce and sesame oil, then seared until crispy.
  • Quinoa Bowl: Substitute rice with quinoa for a protein-packed alternative.
  • Asian Noodle Bowl: Serve the beef over soba noodles instead of rice for a different texture.

Storage and Make-Ahead Instructions

This recipe is perfect for meal prep! Here’s how to store your ingredients:

  • Refrigeration: Store assembled bowls in airtight containers for up to 3 days. Keep sriracha mayo separate to avoid sogginess.
  • Freezing: Freeze marinated beef for up to 3 months. Thaw in the refrigerator before cooking.
  • Make-Ahead Veggies: Pickle carrots and slice other vegetables in advance for quicker assembly.

FAQ: Your Korean Beef Power Bowl Questions Answered

  • Can I use a different cut of beef? Yes! Cuts like ribeye or skirt steak work well too.
  • How do I make it gluten-free? Use gluten-free soy sauce and ensure your sriracha is gluten-free.
  • Is this recipe suitable for meal prep? Absolutely! It stores well and tastes great reheated.
  • Can I add more vegetables? Definitely! Feel free to include any veggies you enjoy.
  • What can I serve with this bowl? A simple side salad or kimchi complements it perfectly!
  • How do I adjust the spice level? Modify the amount of gochujang and sriracha to your taste.
  • Can I make the sriracha mayo vegan? Yes! Substitute with vegan mayo and adjust the seasoning.
  • How do I ensure the beef is tender? Always slice against the grain and avoid overcooking.

Nutritional Tips and Dietary Adaptations

This recipe is versatile enough to cater to various dietary needs:

  • Low-Carb Option: Serve over cauliflower rice for a low-carb meal.
  • High-Protein: Add edamame or chickpeas for extra protein.
  • For Diabetics: Use brown rice and reduce sugar in the marinade.

Recommended Equipment

To create your Korean Beef Power Bowl, here’s what you’ll need:

  • Skillet or Wok: For searing the beef to perfection.
  • Cutting Board and Knife: Essential for prepping your vegetables.
  • Mixing Bowls: For marinating and mixing ingredients.
  • Measuring Cups and Spoons: To ensure accurate ingredient measurements.

Serving Suggestions

Enhance your dining experience by serving your Korean Beef Power Bowl with:

  • Fresh Herbs: Garnish with cilantro or basil for added freshness.
  • Sesame Oil Drizzle: A light drizzle of sesame oil can elevate the flavors.
  • Side Dishes: Pair with traditional Korean sides like kimchi or seaweed salad.

In conclusion, the Korean Beef Power Bowl is not just a meal; it’s a culinary journey that brings together vibrant flavors, textures, and health benefits. So, roll up your sleeves and get cooking! Remember, cooking should be enjoyable, and this dish proves that great food can be simple and satisfying. Enjoy your delicious creation, and don’t forget to share it with loved ones!

Korean Beef Power Bowl

Prep Time 20 minutes
Cook Time 10 minutes
Total Time 30 minutes
Servings 4 servings
Calories 650
A vibrant and flavorful bowl featuring marinated beef, pickled vegetables, and spicy mayo, perfect for a quick and satisfying meal.

Ingredients

Meat and Marinade

  • 1.1 lbs flank steak or sirloin, thinly sliced
  • 2 tablespoons soy sauce
  • 1 tablespoon sesame oil
  • 1 tablespoon fresh ginger, grated
  • 2 cloves garlic, minced
  • 1 tablespoon brown sugar
  • 1 tablespoon rice vinegar
  • 1 teaspoon gochujang, optional for extra heat
  • 0.25 teaspoon black pepper

Rice and Vegetables

  • 2 cups cooked jasmine or short-grain white rice
  • 1 cup carrots, julienned
  • 1/3 cup rice vinegar (for pickling)
  • 1 tablespoon sugar (for pickling)
  • 0.5 teaspoon salt (for pickling)
  • 1 cup cucumber, thinly sliced
  • 1 fresh jalapeño, thinly sliced
  • 2 tablespoons toasted sesame seeds
  • 2 green onions thinly sliced

Spicy Mayo

  • 1/3 cup mayonnaise
  • 1-2 tablespoons sriracha, to taste
  • 1 teaspoon lime juice

Instructions 

  • Mix rice vinegar, sugar, and salt; toss with carrots and let sit for 20 minutes.
  • Whisk soy sauce, sesame oil, ginger, garlic, sugar, rice vinegar, gochujang, and pepper; marinate beef for 15-20 minutes.
  • Cook rice and keep warm.
  • Mix mayonnaise, sriracha, and lime juice for spicy mayo.
  • Cook beef in a hot skillet 2-3 minutes per side until browned.
  • Assemble bowls with rice, beef, pickled carrots, cucumber, jalapeños, green onions, sesame seeds, and drizzle with spicy mayo. Serve immediately.

Notes

For extra heat, add more gochujang or sriracha to the mayo.
Calories: 650kcal
Cost: $15
Course: Main Course
Cuisine: Korean
Keyword: Beef

If you’re looking for a wholesome, comforting meal that brings the family together, look no further than this incredible recipe for stuffed bell peppers. Bursting with flavors and textures, these stuffed beauties incorporate lean ground beef, fresh vegetables, and a melty cheese topping that will have everyone reaching for seconds. In under an hour, you can whip up a dinner that’s not only delicious but also visually stunning. Let’s dive into why this recipe is a must-try!

Why You’ll Love This Recipe

  • Quick and Easy: With prep and cooking time under 60 minutes, these stuffed peppers are perfect for busy weeknights.
  • Healthy Ingredients: Packed with vegetables and lean protein, this dish is a nutritious choice for the whole family.
  • Make-Ahead Friendly: Prepare the filling in advance and just stuff the peppers before baking for an even quicker meal.
  • Customizable: Feel free to swap in your favorite ingredients or use leftovers to make it your own.
  • Kid-Approved: The cheesy topping and colorful presentation make these stuffed peppers a hit with kids and adults alike!

Ingredients You’ll Need

Gather these fresh ingredients for a delectable stuffed pepper experience:

  • 6 large bell peppers: Any color works—red, yellow, green, or orange.
  • 1 tbsp olive oil: For sautéing and flavor.
  • 1 lb lean ground beef: You can also use ground turkey for a lighter option.
  • 1 medium onion, diced: Adds sweetness and depth to the filling.
  • 3 garlic cloves, minced: Brings aromatic flavor.
  • 1 zucchini, finely diced: A great way to sneak in extra veggies!
  • 1 cup cooked rice: Choose from white, brown, or cauliflower rice for a low-carb version.
  • 1 can (14.5 oz) diced tomatoes: Use well-drained tomatoes for a perfect consistency.
  • 2 tbsp tomato paste: Enhances the sauce’s richness.
  • 1 tsp Italian seasoning: A blend of herbs that adds a savory touch.
  • ½ tsp smoked paprika: Introduces a warm smokiness.
  • ¼ tsp red pepper flakes: Optional, for a bit of heat.
  • Salt & pepper to taste: Essential for balancing flavors.
  • 1 ½ cups shredded cheese: A blend of mozzarella and cheddar is perfect for melting.
  • 2 tbsp fresh parsley, chopped: For garnish and freshness.
  • 1 can (8 oz) tomato sauce: To pour around the peppers for moisture while baking.
  • ¼ tsp garlic powder: For added flavor in the sauce.
  • ¼ tsp onion powder: Complements the garlic perfectly.
  • 1 tsp honey or sugar: Optional, to balance acidity from the tomatoes.

Step-By-Step Instructions

Follow these simple steps to create your flavor-packed stuffed bell peppers:

  1. Slice the tops off the peppers and carefully remove the seeds and membranes.
  2. If necessary, trim the bottoms a little so they stand upright in the baking dish.
  3. Brush the outsides of the peppers lightly with olive oil and place them in a 9×13 baking dish.
  4. In a large skillet, cook the ground beef or turkey over medium heat for about 5–7 minutes, or until browned.
  5. Add the diced onion and cook until softened, about 3 minutes. Stir in the minced garlic and zucchini, cooking for another 2-3 minutes.
  6. Mix in the tomato paste and cook for 1 minute to deepen the flavors.
  7. Add the diced tomatoes, cooked rice, and seasonings. Let the mixture simmer for 3 minutes to combine.
  8. Remove from heat and stir in ½ cup of the shredded cheese and chopped parsley.
  9. In a separate bowl, mix the tomato sauce with garlic powder, onion powder, and honey (if using).
  10. Pour this sauce around the peppers in the baking dish for added moisture.
  11. Spoon the filling into each pepper, dividing the mixture evenly among them.
  12. Cover the dish with foil and bake in a preheated oven at 375°F (190°C) for 30 minutes.
  13. Remove the foil, top with the remaining cheese, and bake uncovered for an additional 5–10 minutes until the cheese is melted and bubbly.
  14. Let the stuffed peppers rest for 5 minutes before serving.
  15. Garnish with additional fresh parsley or basil before plating.

Pro Tips for Perfect Stuffed Peppers

  • Choose Your Peppers Wisely: Make sure the peppers are firm and free from blemishes for the best results.
  • Cook Rice Ahead: If using brown rice, prepare it beforehand as it takes longer to cook.
  • Mix and Match Fillings: Experiment with different proteins or grains; quinoa or lentils can be great substitutes!
  • Don’t Overstuff: Ensure there is enough room for the filling to expand while baking.
  • Experiment with Seasonings: Feel free to add other herbs or spices to customize the flavor profile.
  • Use Fresh Ingredients: Fresh vegetables make a noticeable difference in taste and texture.
  • Let Them Rest: Allowing the peppers to sit after baking helps the flavors meld and makes serving easier.
  • Make It a Meal: Serve with a side salad or garlic bread to round out the dinner experience.

Common Mistakes and Troubleshooting

Even the best chefs can encounter a few hiccups in the kitchen. Here’s how to avoid common mistakes:

  • Peppers Are Too Crunchy: If your peppers are undercooked, cover and bake a little longer.
  • Filling Is Too Dry: Ensure you have enough moisture in the filling—add more diced tomatoes or sauce if needed.
  • Cheese Doesn’t Melt Properly: Bake uncovered at the end to ensure the cheese gets bubbly and golden.
  • Too Much Liquid: If the filling is watery, let it simmer longer to reduce excess moisture.
  • Filling Falls Out: Make sure the filling is packed in and that you’re not overstuffing.

Delicious Variations

Not only can you make this dish your own, but you can also explore various flavor profiles. Here are some fun variations:

  • Mexican Style: Add black beans, corn, and taco seasoning to the filling. Top with salsa and avocado.
  • Italian Flare: Incorporate Italian sausage instead of beef and add basil and oregano.
  • Vegetarian Delight: Use lentils, mushrooms, and extra veggies instead of meat for a hearty vegetarian option.
  • International Twist: Try curry powder in your filling along with chickpeas for an Indian-inspired dish.

Storage and Make-Ahead Instructions

This recipe is great for meal prep! Here’s how to store and reheat your stuffed peppers:

  • Make-Ahead: Prepare the filling a day in advance and store it in the refrigerator. Stuff the peppers right before baking.
  • Refrigeration: Store leftover stuffed peppers in an airtight container for up to 3 days.
  • Freezing: You can freeze unbaked stuffed peppers for up to 3 months. Just thaw before cooking.
  • Reheating: Reheat in the oven at 350°F (175°C) for about 20 minutes or until heated through.

Nutrition Tips and Dietary Adaptations

This dish can be tailored to fit various dietary needs:

  • Low-Carb: Substitute rice with cauliflower rice or skip it altogether!
  • Dairy-Free: Use dairy-free cheese or omit it for a lighter dish.
  • Gluten-Free: Ensure your tomato sauce and any other added ingredients are gluten-free.
  • Paleo-Friendly: Use ground turkey, skip the cheese, and load up on veggies.

Equipment Recommendations

Make your cooking experience smoother with the right tools:

  • Sharp Knife: Essential for cutting the tops off the peppers and dicing vegetables.
  • Large Skillet: For sautéing the filling ingredients evenly.
  • Baking Dish: A 9×13 dish is perfect for holding all six peppers securely.
  • Spoon or Scoop: For stuffing the peppers easily and mess-free.

Serving Suggestions

Pair your stuffed peppers with complementary sides for a well-rounded meal:

  • Garlic Bread: A crispy, buttery side that is perfect for soaking up the delicious sauce.
  • Side Salad: A fresh green salad with a light vinaigrette adds a refreshing contrast.
  • Quinoa or Couscous: These grains can provide a nutty flavor and additional texture.
  • Yogurt or Sour Cream: A dollop on top adds creaminess that balances the dish’s flavors.

Frequently Asked Questions

Here are some common questions about stuffed bell peppers:

  • Can I use frozen peppers? Yes, thaw them before stuffing and proceed with the recipe.
  • How do I know when they’re done? The peppers should be tender but not mushy. The filling should be hot and the cheese melted.
  • Can I make stuffed peppers in a slow cooker? Absolutely! Fill the peppers and place them in the slow cooker with a little sauce. Cook on low for 6-8 hours.
  • What else can I add to the filling? Feel free to mix in olives, capers, or different grains!
  • How do I store leftovers? Keep them in an airtight container in the fridge for up to 3 days.
  • Can I prep these in advance? Yes! Prepare the filling ahead of time and stuff the peppers just before baking.
  • What’s the best way to reheat stuffed peppers? Reheat in the oven at 350°F (175°C) for about 20 minutes or until heated through.
  • Are stuffed peppers healthy? Yes! They’re packed with vegetables, lean protein, and can be customized for low-carb or gluten-free diets.

In conclusion, stuffed bell peppers are not just a meal; they’re an experience that brings joy, nourishment, and connection. With this comprehensive guide, you’re well-equipped to create your version of this classic dish. Whether you follow the recipe as is or make it your own, I encourage you to enjoy the process and share it with those you love. Happy cooking!

Stuffed Bell Peppers

Prep Time 15 minutes
Cook Time 40 minutes
Total Time 55 minutes
Servings 6 pieces
Calories 420
A delicious and hearty dish featuring colorful bell peppers filled with seasoned meat, rice, and cheese, baked to perfection.

Ingredients

Bell Peppers

  • 6 large bell peppers (any color)
  • 1 tbsp olive oil
  • 1 lb lean ground beef or ground turkey
  • 1 medium onion, diced (about 1 cup)
  • 3 cloves garlic, minced
  • 1 cup zucchini, finely diced
  • 1 cup cooked rice (white, brown, or cauliflower)
  • 1 can (14.5 oz) diced tomatoes, well-drained
  • 2 tbsp tomato paste
  • 1 tsp Italian seasoning
  • ½ tsp smoked paprika
  • ¼ tsp red pepper flakes (optional)
  • to taste Salt & pepper
  • 1 ½ cups shredded cheese (mozzarella + cheddar blend)
  • 2 tbsp fresh parsley, chopped
  • 1 can (8 oz) tomato sauce
  • ¼ tsp garlic powder
  • ¼ tsp onion powder
  • 1 tsp honey or sugar (optional) (to balance acidity)

Instructions 

  • Slice tops off peppers, remove seeds, and trim bottoms if needed. Brush with olive oil and place in baking dish.
  • Cook ground meat in a skillet, add onion, garlic, and zucchini; cook until softened. Mix in tomato paste, tomatoes, rice, and seasonings; simmer briefly.
  • Stir in half the cheese and parsley. Prepare tomato sauce with garlic powder, onion powder, and honey.
  • Pour sauce around peppers, fill with meat mixture, cover with foil, and bake at 375°F (190°C) for 30 minutes. Uncover, add remaining cheese, and bake 5–10 minutes until bubbly.
  • Let rest for 5 minutes, then garnish with parsley or basil before serving.

Notes

For a low-carb option, use cauliflower rice instead of regular rice.
Calories: 420kcal
Cost: $15
Course: Main Course
Cuisine: American
Keyword: stuffed peppers

If you’re looking to elevate your taco night, you’ve landed in the right place! This taco meat recipe combines rich spices, fresh ingredients, and a few pro tips to help you create delicious, homemade taco meat that will impress your family and friends. Whether you’re filling tacos, burritos, or salads, this easy-to-follow guide will unlock the flavors you crave.

With over two decades of culinary experience, I’m excited to share my take on taco meat that balances traditional flavors with modern techniques. Let’s dive into why you’ll love this recipe and how to make it your own!

Why You’ll Love This Recipe

  • Flavor-packed seasoning: A blend of spices like chili powder and cumin brings depth to the meat, making every bite burst with flavor.
  • Customization options: This recipe allows for ingredient substitutions, ensuring it fits your dietary preferences or whatever you have on hand.
  • Versatile uses: Taco meat isn’t just for tacos! Use it in quesadillas, burritos, or even as a topping for salads and nachos.
  • Freezer-friendly: Make a large batch and freeze it for later use—perfect for busy weeknights!
  • Easy to follow: The step-by-step instructions make this recipe accessible for both novice and experienced cooks.

Ingredients Breakdown

Crafting the perfect taco meat starts with quality ingredients. Here’s what you’ll need:

  • 1 tablespoon chili powder: This is the foundation of your taco seasoning, providing a rich, smoky flavor.
  • 2 teaspoons ground cumin: Adds warmth and earthiness to the dish.
  • 1 teaspoon salt: Enhances all the flavors in the meat.
  • 1 teaspoon ground black pepper: A spice that adds just the right amount of heat.
  • 1/2 teaspoon garlic powder: For that essential garlic flavor without the chopping.
  • 1/2 teaspoon onion powder: Adds sweetness and depth, complementing the garlic.
  • 1/2 teaspoon crushed red pepper flakes: Adjust according to your heat preference.
  • 1/2 teaspoon dried oregano: Brings a hint of herbaceousness to the mix.
  • 1/2 teaspoon paprika: Adds color and a subtle sweetness.
  • Optional: 1/2 teaspoon sugar: Balances the acidity and enhances the flavors.
  • 1 tablespoon olive oil: For sautéing the aromatics and browning the meat.
  • 1 small white onion (diced; about 1 cup): Fresh onion provides a savory base.
  • 3 cloves garlic (minced): Fresh garlic is key for authentic flavor.
  • 2 pounds lean ground beef: The star of the dish; you can also substitute with ground turkey or chicken for healthier options.
  • 1 cup beef broth: Adds moisture and richness; chicken broth can also be used.

How to Make Taco Meat

Ready to whip up this delicious taco meat? Follow these simple steps:

  1. In a small bowl, mix together the chili powder, ground cumin, salt, pepper, garlic powder, onion powder, red pepper flakes, paprika, and optional sugar until well combined.
  2. In a large skillet, heat the olive oil over medium-high heat. Sauté the diced onion, stirring frequently, until softened (about 4 to 5 minutes). Add the minced garlic and cook for an additional 30 to 60 seconds.
  3. Add the ground beef and cook for 5-7 minutes, or until no longer pink, breaking up the meat with a wooden spoon or spatula as it browns. Drain off excess grease.
  4. Sprinkle 3-4 tablespoons of taco seasoning over the meat and stir until coated. Pour in 1 cup of broth and bring to a simmer. Reduce the heat to medium-low and simmer uncovered until the mixture has reduced slightly (about 5 minutes).
  5. Serve your taco meat in tacos, quesadillas, baked nachos, burritos, or atop a Mexican chopped salad.

Pro Tips for Perfect Taco Meat

Delicious taco meat preparation, emphasizing a juicy and flavorful outcome.
  • Use lean beef: Opt for 80/20 ground beef for juiciness without excess grease. If using leaner beef, consider adding a tablespoon of broth or oil to maintain moisture.
  • Chop ingredients finely: Finely diced onions and garlic will cook evenly, ensuring every bite is flavorful.
  • Don’t rush the browning: Allow the meat to brown well, as this caramelization adds depth to the flavor.
  • Season to taste: Feel free to adjust the spice levels according to your preference; more chili powder or less salt can dramatically change the profile.
  • Make it ahead: Prepare a larger batch and refrigerate or freeze for easy meals later on.
  • Use fresh spices: Ensure your spices are fresh for maximum flavor impact; replace old spices as needed.
  • Try different meats: Ground turkey, chicken, or even plant-based alternatives can work beautifully!
  • Experiment with toppings: Enhance your tacos with toppings like avocado, cheese, or salsa for a complete dish.

Common Mistakes and Troubleshooting

Even experienced cooks can face challenges. Here are some common mistakes and how to fix them:

  • Dry meat: If your meat turns out dry, consider adding more broth or oil during cooking or use a fattier ground beef.
  • Too salty: If it becomes too salty, adding a small amount of sugar or more broth can help balance the flavors.
  • Not enough flavor: Make sure to season well and taste as you go; adding fresh herbs at the end can also brighten the dish.
  • Meat clumps together: To avoid clumping, break up the meat thoroughly while cooking to ensure even browning and seasoning.

Variations for Taco Meat

Feel free to customize this taco meat recipe to suit your tastes! Here are a few ideas:

  • Spicy taco meat: Add more crushed red pepper flakes or diced jalapeños for an extra kick.
  • Vegetarian version: Substitute the meat with lentils or black beans, and use vegetable broth.
  • Smoky flavor: Incorporate smoked paprika or chipotle powder for a deep, smoky essence.
  • Herb-infused: Experiment by adding fresh cilantro or parsley to the finished dish for a fresh burst of flavor.

Storage and Make-Ahead Instructions

Making taco meat in advance is a great way to save time! Here’s how to store it:

  • Refrigerate: Store cooled taco meat in an airtight container in the fridge for up to 4 days.
  • Freeze: For longer storage, transfer cooled meat to a freezer bag. Flatten the bag to save space and freeze for up to 3 months.
  • Reheat: Thaw overnight in the fridge and reheat in a skillet with a splash of broth to prevent drying out.

Comprehensive FAQ

Here are some frequently asked questions about taco meat:

  • Can I use ground chicken or turkey? Yes, both ground chicken and turkey are great substitutes for ground beef.
  • How much taco meat per person? Typically, 1/4 to 1/3 pound of meat per person is ideal for tacos.
  • Can I make taco meat in a slow cooker? Absolutely! Brown the meat and onions first, then add to the slow cooker with broth and seasonings.
  • What can I do with leftover taco meat? Use it in burritos, nachos, or even freeze it for a quick meal later.
  • How do I make it less spicy? Reduce the amount of crushed red pepper flakes and opt for milder spices.
  • Is it necessary to drain the fat? Yes, draining excess fat will result in a cleaner flavor and prevent greasiness.
  • Can I add more vegetables? Definitely! Bell peppers, corn, or zucchini can add flavor and nutrition.
  • What’s the best way to serve taco meat? Serve it in soft or hard taco shells, with various toppings like cheese, lettuce, and salsa.

Nutrition Tips and Dietary Adaptations

This taco meat recipe can be adapted to meet various dietary needs:

  • Low-carb option: Serve the taco meat in lettuce wraps instead of traditional tortillas.
  • Dairy-free: Skip cheese or use dairy-free alternatives.
  • Gluten-free: Ensure all seasonings and broth are certified gluten-free, and serve with gluten-free tortillas.

Equipment Recommendations

To make this recipe, you’ll need:

  • Skillet: A large skillet is essential for browning the meat and sautéing the vegetables.
  • Measuring spoons: Accurate measurements of spices ensure the best flavor.
  • Wooden spoon or spatula: For breaking up the meat while cooking.
  • Cutting board and knife: Essential for chopping onions and garlic.

Serving Suggestions

Now that you have your delicious taco meat ready, here are some serving suggestions to consider:

  • Taco Bar: Set up a taco bar with various toppings like shredded cheese, guacamole, sour cream, and pico de gallo for a fun, interactive meal.
  • Layered salads: Use the taco meat as a protein layer in a Mexican chopped salad with fresh greens and veggies.
  • Quesadillas: Fill tortillas with taco meat and cheese, then grill until crispy for a tasty quesadilla.
  • Nachos: Top tortilla chips with taco meat, cheese, and your favorite toppings for a delicious nacho platter.

In conclusion, this taco meat recipe is not just a meal; it’s a way to bring friends and family together around the table. With its rich flavors, customization options, and ease of preparation, it’s sure to become a staple in your kitchen. So gather your ingredients, follow the steps, and let the wonderful aromas fill your home. Enjoy your taco night!

Taco Meat Recipe

Prep Time 10 minutes
Cook Time 15 minutes
Total Time 25 minutes
Servings 4 servings
Calories 350
A flavorful and versatile taco meat recipe perfect for tacos, burritos, and more. Easy to prepare with simple ingredients and quick steps.

Ingredients

Spice Mix

  • 1 tablespoon chili powder
  • 2 teaspoon ground cumin
  • 1 teaspoon salt
  • 1 teaspoon ground black pepper
  • 0.5 teaspoon garlic powder
  • 0.5 teaspoon onion powder
  • 0.5 teaspoon crushed red pepper flakes ((or less for sensitive palates))
  • 0.5 teaspoon dried oregano
  • 0.5 teaspoon paprika
  • 0.5 teaspoon sugar (optional)
  • 1 tablespoon olive oil ((sub: avocado oil))
  • 1 small white onion (diced; about 1 cup)
  • 3 cloves garlic (minced)
  • 2 pounds lean ground beef ((sub: ground turkey))
  • 1 cup beef broth ((sub: chicken broth))

Instructions 

  • Mix chili powder, cumin, salt, pepper, garlic powder, onion powder, red pepper flakes, oregano, paprika, and sugar in a small bowl.
  • Heat oil in a skillet over medium-high heat. Sauté onion until softened, then add garlic and cook briefly.
  • Add ground beef, cook until browned, then drain excess grease.
  • Stir in seasoning, add broth, and simmer until mixture reduces, about 5 minutes.
  • Serve in tacos, burritos, or your favorite dishes.

Notes

Adjust spice level to taste and use lean meat for healthier options.
Calories: 350kcal
Cost: $15
Course: Main Course
Cuisine: Mexican
Keyword: ground beef

Unlock the Flavor of Your Kitchen with This Korean Ground Beef Bowl

Welcome to a culinary journey where the heart of Korean comfort food meets the ease of busy weeknights. This Quick & Easy Korean Ground Beef Bowl is not just a meal; it’s an experience, packed with flavor and ready in no time. Whether you’re a seasoned chef or a home cook just starting out, this dish will quickly become a staple in your kitchen. Let’s dive into why you’ll love this recipe and how to make it shine!

Why You’ll Love This Recipe

  • Quick Preparation: Ready in just 30 minutes, perfect for busy weeknights when time is of the essence.
  • Flavor Explosion: The combination of soy sauce, sesame oil, and garlic creates a savory, sweet, and slightly spicy flavor that will tantalize your taste buds.
  • Versatile Ingredients: Customize your bowl with your favorite vegetables, making it as healthy or indulgent as you want.
  • Family-Friendly: This dish is sure to please everyone at the table, from picky eaters to adventurous foodies.
  • Leftover Friendly: Perfectly delicious as leftovers, making lunch the next day something to look forward to!

Ingredient Breakdown with Substitutions

To achieve the best flavor and texture for your Korean Ground Beef Bowl, use the following ingredients:

  • 1 pound Ground Beef: Aim for 85/15 for a balance of flavor and lean meat. For a lighter option, ground turkey or chicken can be used instead.
  • 3 cloves Garlic: Minced, to infuse the beef with rich flavor. You can substitute with garlic powder in a pinch.
  • 1 tablespoon Ginger: Freshly grated for warmth. Ground ginger can work but will alter the flavor profile slightly.
  • 1/4 cup Soy Sauce: Opt for low-sodium for a healthier option. Tamari is a great gluten-free alternative.
  • 2 tablespoons Brown Sugar: Adds sweetness reminiscent of bulgogi. Honey or maple syrup can be suitable substitutes.
  • 1 teaspoon Sesame Oil: Enhances flavor; add at the end for a fragrant finish. If unavailable, olive oil can work, but the flavor will differ.
  • 1 teaspoon Crushed Red Pepper Flakes: Optional for gentle heat; adjust to your spice level preference.
  • 2 tablespoons Green Onions: Chopped, for freshness. Feel free to replace with chives or scallions.
  • 2 cups Cooked White Rice: Jasmine or short-grain rice is ideal; brown rice or cauliflower rice can be excellent healthy alternatives.

Mastering the Cooking Process: Step-by-Step Instructions

Delicious Korean Ground Beef Bowl with ground beef, soy sauce glaze, and fresh toppings.

Now that we have our ingredients ready, let’s break down the cooking process into easy steps to ensure success.

  • Step 1: Heat a large skillet over medium-high heat. Add the ground beef and cook until browned, breaking it apart with a spatula.
  • Step 2: Drain excess fat if necessary, then add minced garlic and ginger. Stir for about 30 seconds until aromatic.
  • Step 3: Pour in the soy sauce and sprinkle the brown sugar. Stir to combine, letting the sauce glaze the beef mixture for a couple of minutes.
  • Step 4: Add crushed red pepper flakes if using, and drizzle in the sesame oil. Stir well and remove from heat.
  • Step 5: In serving bowls, layer cooked rice and top generously with the Korean ground beef mixture. Garnish with chopped green onions.

Pro Tips for Perfecting Your Bowl

To elevate your cooking experience, consider these expert insights:

  • Perfect Meat Texture: Avoid overcooking the beef to maintain juiciness; it should be browned but not dry.
  • Flavor Depth: Let the beef mixture simmer for a few extra minutes to deepen the flavors before serving.
  • Fresh Garnishes: Add fresh vegetables like cucumber or shredded carrots on top for added crunch and health benefits.
  • Serving Temperature: Serve hot for the best flavor experience; reheating in the microwave may dry the beef.
  • Rice Options: Experiment with different types of rice or even quinoa for a protein boost.
  • Add a Kick: For more heat, consider adding sliced jalapeños or a drizzle of sriracha on top.
  • Make It Colorful: Incorporate colorful vegetables into the mix, such as bell peppers or snap peas, for visual appeal.
  • Mind the Salt: Adjust the soy sauce amount to taste, especially if you’re using other salty ingredients.

Common Mistakes and Troubleshooting

Even the best cooks can run into issues. Here’s how to troubleshoot common mistakes:

  • Dry Beef: If your beef ends up dry, try cooking it with a bit of beef broth or adding more sauce next time.
  • Too Salty: To balance excessive saltiness, add a splash of water or a pinch of sugar to the mixture.
  • Overcooked Rice: Ensure to follow rice cooking instructions precisely; testing for doneness can prevent mushy rice.
  • Flavorless Bowl: If the flavors are lacking, consider marinating the beef beforehand or adding more aromatics.

Delicious Variations to Try

Once you’ve mastered the classic Korean Ground Beef Bowl, try these fun variations:

  • Korean Beef Tacos: Use taco shells instead of rice; add kimchi for a unique twist.
  • Vegetarian Option: Substitute ground beef with textured vegetable protein or crumbled tofu for a plant-based alternative.
  • Spicy Korean Beef Bowl: Increase the amount of crushed red pepper flakes or add gochujang for more heat.
  • BBQ Korean Beef Bowl: Mix in a bit of BBQ sauce for a sweet, smoky flavor profile.

Storage and Make-Ahead Instructions

This dish is not only quick to prepare but easy to store as well:

  • Refrigeration: Store leftovers in an airtight container in the fridge for up to 3 days.
  • Freezing: The beef mixture can be frozen for up to 3 months; simply reheat before serving.
  • Make-Ahead: Prepare the beef mixture a day in advance and simply warm it up when ready to serve.

Frequently Asked Questions

Still have questions? Here are some common ones:

  • Can I use ground turkey instead of beef? Yes, ground turkey or chicken can be a healthier alternative.
  • What can I substitute for soy sauce? Tamari or coconut aminos are great gluten-free options.
  • How can I make this dish spicier? Add more red pepper flakes or incorporate fresh chili peppers.
  • Is this dish gluten-free? To make it gluten-free, ensure to use tamari instead of regular soy sauce.
  • What vegetables can I add? Bell peppers, broccoli, and carrots make excellent additions.
  • Can I prepare this in advance? Yes, the beef mixture can be made ahead of time and reheated.
  • What’s the best way to reheat leftovers? Microwave or warm in a skillet over low heat with a splash of water.
  • Can I serve this with something other than rice? Absolutely! Quinoa, cauliflower rice, or even in lettuce wraps are great alternatives.

Nutritional Tips and Dietary Adaptations

This Korean Ground Beef Bowl can be nutritious and healthy with a few adjustments:

  • Low-Carb Option: Substitute rice with cauliflower rice for a low-carb meal.
  • High-Protein Variation: Add edamame or chickpeas for an extra protein punch.
  • Vegetable Boost: Increase the amount of vegetables for added vitamins and minerals.
  • Lower Sugar: Reduce or omit brown sugar for a less sweet dish.

Essential Equipment Recommendations

To make your cooking experience seamless, consider these tools:

  • Non-Stick Skillet: Perfect for browning the beef without it sticking.
  • Rice Cooker: A handy appliance for perfectly cooked rice every time.
  • Spatula: Essential for breaking up the beef and mixing ingredients effortlessly.
  • Measuring Cups and Spoons: Ensure accurate measurements for consistent results.

Serving Suggestions

To elevate your dining experience, consider these serving ideas:

  • Pair with Kimchi: The tangy crunch of kimchi complements the savory beef beautifully.
  • Garnish with Sesame Seeds: A sprinkle of sesame seeds adds a nice touch of texture and flavor.
  • Offer Side Dishes: Serve with pickled vegetables or a light salad for a balanced meal.

In conclusion, this Quick & Easy Korean Ground Beef Bowl is a delightful dish that combines flavor, convenience, and versatility. Perfect for any night of the week, it will surely become a beloved recipe in your home. So gather your ingredients, follow these steps, and enjoy the warmth and comfort that comes from a delicious meal shared with loved ones. Happy cooking!

Quick & Easy Korean Ground Beef Bowl for Busy Nights

Prep Time 10 minutes
Cook Time 15 minutes
Total Time 25 minutes
Servings 4 servings
Calories 550
A flavorful and quick Korean-inspired beef bowl perfect for busy weeknights. Ready in under 30 minutes, it's a satisfying meal for the whole family.

Ingredients

Meat

  • 1 pound Ground Beef (Use 85/15 for the best balance of flavor and lean meat.)
  • 3 cloves Garlic (Minced; adds a punchy depth.)
  • 1 tablespoon Ginger (Freshly grated for warmth.)
  • 1/4 cup Soy Sauce (Use low-sodium for a healthier option.)
  • 2 tablespoons Brown Sugar (Adds sweetness reminiscent of bulgogi.)
  • 1 teaspoon Sesame Oil (Enhances flavor; add at the end.)
  • 1 teaspoon Crushed Red Pepper Flakes (Optional for gentle heat.)
  • 2 tablespoons Green Onions (Chopped; adds freshness.)
  • 2 cups Cooked White Rice (Jasmine or short-grain rice is ideal.)

Instructions 

  • Cook the ground beef in a skillet over medium-high heat until browned, about 5-7 minutes.
  • Add minced garlic and grated ginger; cook for 1-2 minutes until fragrant.
  • Stir in soy sauce, brown sugar, and red pepper flakes; cook for another 2-3 minutes.
  • Remove from heat and stir in sesame oil and chopped green onions.
  • Serve the beef mixture over cooked white rice and enjoy!

Notes

For a spicier kick, add more red pepper flakes or a dash of hot sauce.
Calories: 550kcal
Cost: $15
Course: Main Course
Cuisine: Korean
Keyword: ground beef