Discover the Allure of Garlic Herb Cheese Bombs
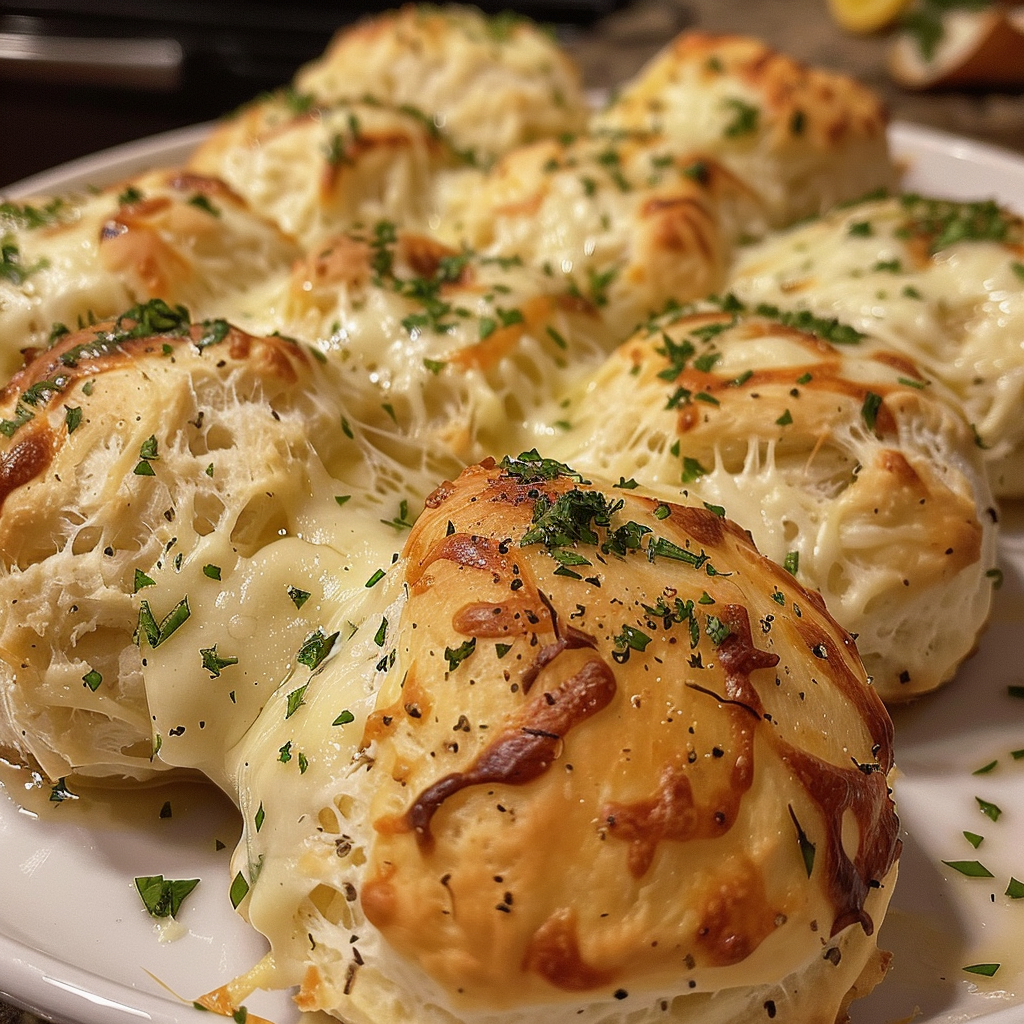
Welcome to the world of **Garlic Herb Cheese Bombs**, where cheesy goodness meets aromatic herbs in a delightful bite-sized treat! If you’re looking for a crowd-pleasing appetizer that’s easy to make and incredibly satisfying, you’ve landed in the right place. These cheese bombs are perfect for gatherings, cozy nights in, or even as a snack for yourself. With just a handful of ingredients, you can whip up a batch that will have everyone asking for seconds.
Why You’ll Love This Recipe
Before diving into the cooking process, let’s explore why this recipe is a must-try:
- Quick Preparation: From start to finish, these cheese bombs take less than 30 minutes to prepare and bake, making them an ideal choice for last-minute gatherings.
- Versatile Ingredients: With simple pantry staples like biscuit dough and cream cheese, you can customize the flavor profile to suit your tastes.
- Deliciously Cheesy: The combination of cream cheese and mozzarella creates a melty, cheesy center that is simply irresistible.
- Flavorful Herb Infusion: The blend of garlic, oregano, thyme, and parsley adds a burst of flavor that elevates these cheese bombs to gourmet status.
- Perfect for Any Occasion: Whether it’s a party appetizer, game day snack, or a comforting treat for movie night, these bombs fit the bill!
Essential Ingredients for Garlic Herb Cheese Bombs
Here’s what you’ll need to create these delightful treats:
- 1 can of refrigerated biscuit dough (about 16 oz): This convenient option saves time and helps achieve a fluffy exterior.
- 8 oz cream cheese, softened: The creamy base that provides a rich texture.
- 1 teaspoon garlic powder: For that essential garlic flavor.
- 1 teaspoon dried oregano: Adds a warm, slightly bitter herb note.
- 1 teaspoon dried thyme: Complements the garlic with its earthy aroma.
- 1 teaspoon dried parsley: A touch of freshness to balance the richness.
- 1 cup shredded mozzarella cheese: The gooey goodness that makes these bombs irresistible.
- 4 tablespoons butter, melted: For brushing, adding flavor and a beautiful golden color.
- 1/2 teaspoon garlic salt: Enhances the overall garlic flavor.
Ingredient Substitutions & Alternatives
If you need to make adjustments based on dietary preferences or ingredient availability, here are some alternatives:
- Dairy-Free Option: Use vegan cream cheese and dairy-free biscuit dough for a lactose-free version.
- Cheese Variations: Feel free to mix in other cheeses like cheddar or pepper jack for a spicier kick.
- Herb Substitutes: Fresh herbs can be used instead of dried, just double the amount for a more vibrant flavor.
- Healthier Dough Option: Whole wheat biscuit dough can add extra fiber and nutrients.
How to Make Garlic Herb Cheese Bombs: Step-by-Step Guide
Now that you have your ingredients ready, let’s get cooking!
- Preheat your oven: Set your oven to 375°F (190°C) so it’s hot and ready when you are.
- Prepare the cheese filling: In a mixing bowl, combine softened cream cheese, garlic powder, oregano, thyme, parsley, and mozzarella. Mix until well blended.
- Flatten the biscuit dough: Open the can of refrigerated biscuit dough and separate the biscuits. Gently flatten each one using your fingers or a rolling pin.
- Fill the biscuits: Place a generous tablespoon of the cheese mixture in the center of each flattened biscuit. Carefully fold the edges over the filling and pinch to seal tightly.
- Arrange on a baking sheet: Place the filled biscuit bombs seam-side down on a baking sheet, ensuring they’re spaced about 2 inches apart.
- Brush with garlic butter: Mix melted butter with garlic salt and brush this mixture over the tops of each cheese bomb for added flavor.
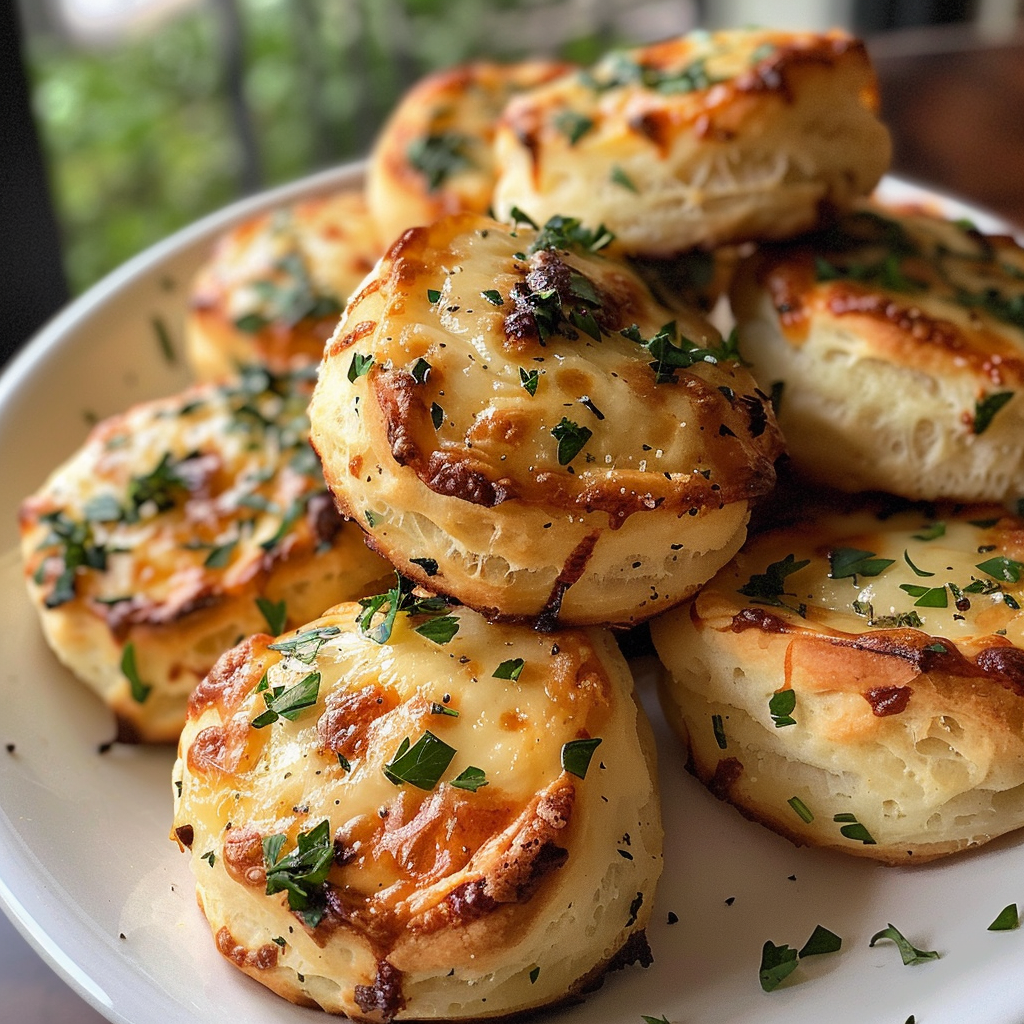
- Bake to perfection: Bake for 15-20 minutes, or until golden brown and puffed up. Keep an eye on them to avoid burning!
- Cool and serve: Remove from the oven and let cool for a few minutes before serving warm. Enjoy the heavenly aroma!
Pro Tips for Success
Here are some expert insights to ensure your garlic herb cheese bombs turn out perfectly:
- Check the freshness of your yeast: If using fresh or active dry yeast, make sure it’s still active to achieve the best rise.
- Use room temperature ingredients: Allow cream cheese to soften at room temperature for easier mixing.
- Don’t overload the filling: A generous tablespoon is enough; overstuffing can lead to leaks while baking.
- Space them out: Ensure the cheese bombs have enough room on the baking sheet to puff up without touching.
- Keep an eye on baking time: Every oven is different, so check them a few minutes before the suggested time.
- Brush before baking: For extra flavor and that golden finish, don’t skip the garlic butter brushing!
- Let them cool slightly: Allowing them to cool for a few minutes will make them easier to handle and help maintain their shape.
- Experiment with flavors: Feel free to add spicy ingredients like jalapeños or a hint of lemon zest for a twist!
Common Mistakes and Troubleshooting
Here are some common pitfalls and how to avoid them:
- Sealing issues: If the bombs leak while baking, ensure the edges are pinched tightly closed.
- Dense texture: If the dough is too tough, it might be overworked; handle it gently.
- Blurry flavor: Always taste the filling before sealing; adjust seasoning as needed.
- Overbaking: Keep an eye on the color; they should be golden brown, not burnt.
Variations to Try
If you want to mix things up, here are some delicious variations:
- Spinach and Feta Bombs: Add sautéed spinach and crumbled feta cheese for a Mediterranean twist.
- Buffalo Chicken Cheese Bombs: Incorporate shredded cooked chicken and buffalo sauce into the cheese mixture.
- Caprese Cheese Bombs: Mix fresh basil and diced tomatoes with mozzarella for a refreshing flavor.
- Sweet Cheese Bombs: Swap savory herbs for cinnamon and sugar, using cream cheese mixed with a hint of vanilla for a dessert version.
Storage and Make-Ahead Instructions
Want to prepare these cheese bombs in advance? Here’s how:
- Make Ahead: Assemble the cheese bombs up to a day in advance, cover tightly, and refrigerate until ready to bake.
- Freezer-Friendly: Freeze unbaked cheese bombs on a baking sheet, then transfer to a freezer-safe bag. Bake directly from frozen, adding a few extra minutes to the baking time.
- Leftover Storage: Store any leftovers in an airtight container in the refrigerator for up to three days. Reheat in the oven for best results.
Frequently Asked Questions
Got questions about making garlic herb cheese bombs? Here are some common ones:
- Can I use fresh herbs instead of dried? Yes, just double the quantity for the best flavor.
- What can I serve with these cheese bombs? They pair well with marinara sauce, ranch dressing, or your favorite dipping sauces.
- How do I know when they’re done baking? They should be golden brown and puffed up, with a slight crispiness on the outside.
- Can I make these gluten-free? Yes, use gluten-free biscuit dough for a suitable alternative.
- What’s the best way to reheat leftovers? Reheat in the oven at 350°F (175°C) for about 10 minutes for the best texture.
- Can I add more cheese? Absolutely! Feel free to customize the cheese blend to your liking.
- How do I prevent leaks while baking? Make sure the edges are securely pinched closed before baking.
- Can I make these vegan? Yes, use vegan cream cheese and biscuit dough for a plant-based option.
Nutritional Insights and Dietary Adaptations
For those mindful of their nutrition, here are some tips:
- Lower-Calorie Option: Substitute cream cheese with Greek yogurt for a lighter filling.
- Protein Boost: Add cooked sausage, chicken, or tofu to the filling for added protein.
- Herbal Benefits: Incorporating fresh herbs not only adds flavor but also enhances nutritional value.
Equipment Recommendations
To make the process smoother, consider having the following tools on hand:
- Baking Sheet: A large, flat baking sheet ensures even cooking.
- Mixing Bowls: A set of various sizes will make mixing ingredients easier.
- Baking Brush: A silicone brush helps to evenly apply the butter mixture.
- Measuring Cups and Spoons: Accurate measurements lead to the best results.
Serving Suggestions
For an impressive presentation, consider serving your garlic herb cheese bombs with:
- Fresh Herbs: Garnish with chopped parsley or basil for a pop of color.
- Dipping Sauces: Offer a variety of sauces like marinara, ranch, or a spicy aioli.
- Cheese Platter: Pair them with an assortment of cheeses and crackers for a delightful appetizer spread.
Conclusion
In closing, these **Garlic Herb Cheese Bombs** are not just a recipe; they’re a culinary experience that brings joy and flavor to your table. With their ease of preparation and rich taste, they’re bound to become a favorite among family and friends. So why wait? Gather your ingredients and start creating these delightful bites today. You’ll be amazed at how something so simple can make such a big impression. Happy cooking!
Garlic Herb Cheese Bombs
Ingredients
Dough
- 1 can refrigerated biscuit dough (about 16 oz)
Filling
- 8 oz cream cheese (softened)
- 1 teaspoon garlic powder
- 1 teaspoon dried oregano
- 1 teaspoon dried thyme
- 1 teaspoon dried parsley
- 1 cup shredded mozzarella cheese
- 4 tablespoons butter (melted)
- 1/2 teaspoon garlic salt
Instructions
- Preheat oven to 375°F (190°C).
- Mix cream cheese, herbs, garlic powder, and mozzarella. Set aside.
- Flatten biscuits, add cheese mixture, seal edges.
- Place on baking sheet, brush with garlic butter mixture.
- Bake 15-20 minutes until golden. Cool slightly before serving.