Author

Mike

Browsing

Discover the Joy of Crafting a Lemon Strawberry Crepe Cake

Welcome to a culinary adventure that will transform your dessert game: the Lemon Strawberry Crepe Cake. This delightful creation layers fluffy crepes with luscious lemon-infused cream cheese and fresh strawberries, resulting in a dessert that’s not only visually stunning but also bursting with flavor. Whether you’re celebrating a special occasion or simply indulging your sweet tooth, this recipe is your ticket to impressing friends and family alike. Let’s dive into the world of crepe cakes and explore why you’ll love making this masterpiece.

Why You’ll Love This Recipe

This Lemon Strawberry Crepe Cake is more than just a dessert—it’s an experience. Here’s why you’ll be excited to make this recipe:

  • Layered Perfection: Each slice reveals beautiful layers, making it a showstopper for any gathering.
  • Bright Flavors: The combination of zesty lemon and sweet strawberries creates a refreshing balance.
  • Easy to Customize: With simple ingredient swaps, you can adapt this recipe to suit your taste preferences.
  • Make-Ahead Friendly: Prepare the crepes and filling in advance for stress-free entertaining.
  • Impressive Yet Simple: The techniques involved are straightforward, allowing even novice bakers to shine.

Ingredients Breakdown

Understanding your ingredients is key to culinary success. Here’s what you’ll need for the Lemon Strawberry Crepe Cake:

  • 1 brick of cream cheese (softened): Provides a rich and creamy base for the filling.
  • Juice of half a lemon: Adds a zesty kick; feel free to adjust based on your taste.
  • 1/2 cup white sugar: Sweetens the cream cheese filling perfectly.
  • 1.5 pints of chopped strawberries: Fresh strawberries enhance the cake’s flavor and texture.
  • 1 cup sugar (for strawberry syrup): This will create a delicious syrup to drizzle over the cake.
  • Crepe batter: A light, thin batter is essential for the perfect crepe. (Recipe not provided, but you can use your favorite crepe recipe.)

Expert Tips for Perfecting Your Crepe Cake
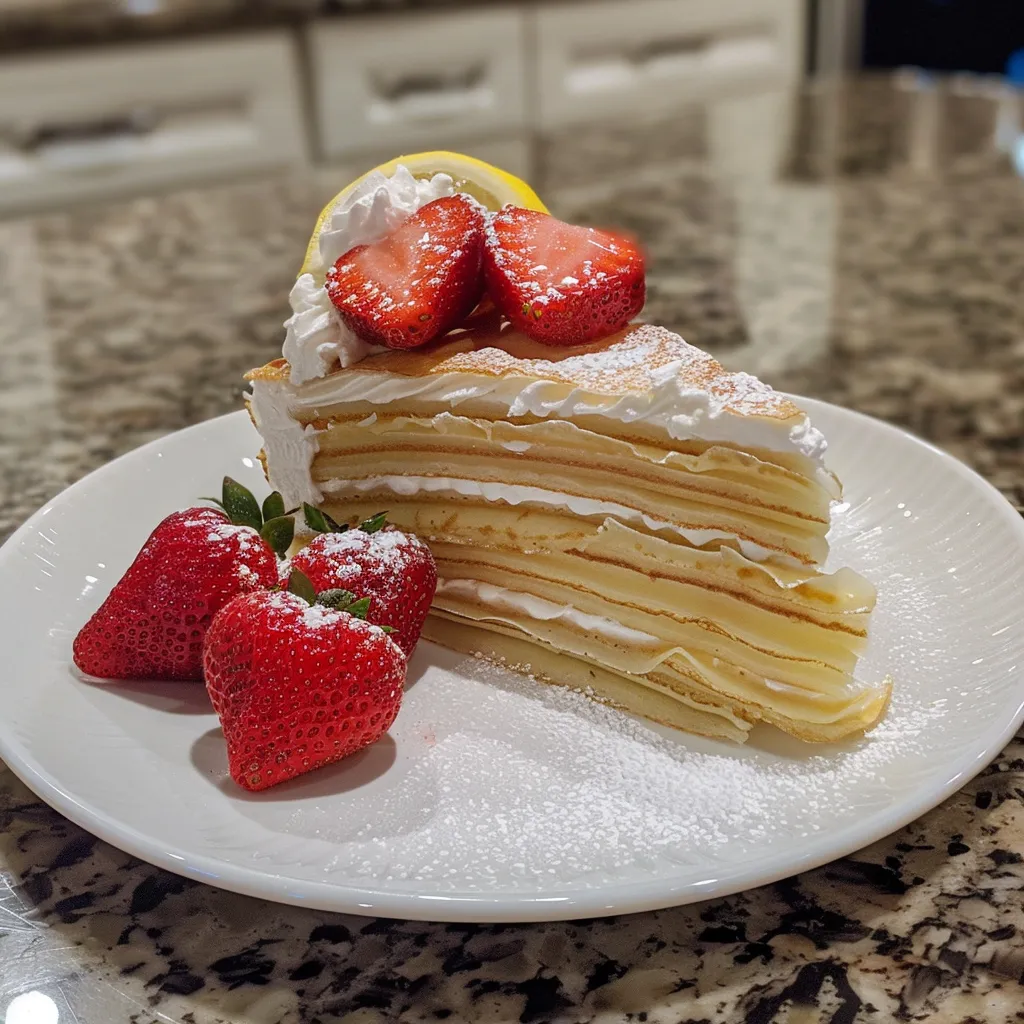
Detailed view of a multi-layered Lemon Strawberry Crepe Cake featuring strawberries and cream cheese frosting.

To ensure your Lemon Strawberry Crepe Cake turns out perfectly, consider these expert tips:

  • Use room temperature ingredients: Allow your cream cheese to soften fully for a smooth filling.
  • Rest the crepe batter: Let it sit for at least 30 minutes; this helps create a tender texture.
  • Control the heat: Cook the crepes on medium-low heat to prevent burning.
  • Layer evenly: Spread your filling evenly between crepes to maintain balance and stability.
  • Chill before serving: Refrigerating the cake for a few hours helps it set and makes slicing easier.
  • Opt for fresh ingredients: The quality of your strawberries and cream cheese directly impacts flavor.
  • Experiment with flavors: Consider adding vanilla or almond extract to the filling for a twist.
  • Serve with whipped cream: A dollop of whipped cream adds an extra layer of delight!

Common Mistakes and Troubleshooting

Even the best of us can face challenges in the kitchen. Here are some common mistakes and how to avoid them:

  • Crepes tearing: Ensure your batter is well-blended and your pan is adequately heated.
  • Overcooked crepes: Monitor cooking time closely; crepes should be lightly golden, not browned.
  • Filling too runny: Adjust the sugar in your cream cheese mixture to achieve a thicker consistency.
  • Not enough flavor: Taste and adjust the lemon juice and sugar in the filling to your liking.

Delicious Variations

Why not switch things up? Here are some delightful variations to try:

  • Chocolate Hazelnut Crepe Cake: Swap out the lemon filling for chocolate hazelnut spread and layer with bananas.
  • Matcha Green Tea Crepe Cake: Add matcha powder to the crepe batter for a unique twist.
  • Peach Melba Crepe Cake: Replace strawberries with fresh peaches and raspberry sauce.
  • Nutty Banana Crepe Cake: Incorporate crushed nuts into the filling for added texture and flavor.

Storage and Make-Ahead Instructions

This cake is perfect for making ahead of time. Here are some storage tips:

  • Refrigerate: Store any leftovers in an airtight container in the refrigerator for up to 3 days.
  • Freeze: Wrap slices tightly in plastic wrap and freeze for up to 2 months. Thaw in the refrigerator before serving.
  • Prep ahead: You can make the crepes and filling a day in advance; just assemble before serving.

Frequently Asked Questions

Got questions? We’ve got answers! Here are some FAQs about the Lemon Strawberry Crepe Cake:

  • Can I use frozen strawberries? Yes, but fresh strawberries taste better and provide a firmer texture.
  • How do I prevent the crepes from sticking? Use a non-stick pan and grease it lightly with butter or oil.
  • Can I make this gluten-free? Absolutely! Substitute regular flour with a gluten-free blend.
  • What can I use instead of cream cheese? Mascarpone or ricotta cheese can be great alternatives.
  • How do I know when the crepes are done? They should be lightly golden and set, with edges that slightly lift away from the pan.
  • Can I add food coloring? Yes! You can add natural food coloring to the crepe batter for a fun twist.
  • What’s the best way to serve this cake? Serve chilled with a drizzle of strawberry syrup and a dollop of whipped cream.
  • How can I make the filling dairy-free? Use a dairy-free cream cheese alternative and adjust sugar as needed.

Nutrition Tips and Dietary Adaptations

Here are some tips to make your Lemon Strawberry Crepe Cake healthier:

  • Reduce sugar: Use less sugar in the filling or opt for a natural sweetener like honey or maple syrup.
  • Whole grain flour: Substitute all-purpose flour with whole wheat or oat flour for a boost of fiber.
  • Add protein: Incorporate Greek yogurt into the filling for added creaminess and protein.

Essential Equipment for Success

To create your stunning Lemon Strawberry Crepe Cake, you’ll need some essential kitchen tools:

  • Non-stick skillet: Ideal for cooking crepes without sticking.
  • Mixing bowls: For combining your filling ingredients and crepe batter.
  • Whisk or electric mixer: Helps achieve a smooth cream cheese filling.
  • Spatula: Perfect for flipping crepes and spreading filling evenly.
  • Measuring cups and spoons: Precision is key to a successful recipe.

Serving Suggestions

When it comes to serving your Lemon Strawberry Crepe Cake, presentation is everything. Here are some creative ideas:

  • Garnish with mint leaves: Fresh mint adds a pop of color and freshness.
  • Drizzle with chocolate sauce: A chocolate drizzle elevates the dessert’s elegance.
  • Serve with ice cream: A scoop of vanilla ice cream pairs beautifully with the cake.
  • Layer with additional fruits: Enhance the cake with more seasonal fruits like blueberries or raspberries.

In conclusion, crafting a Lemon Strawberry Crepe Cake is a rewarding endeavor that anyone can master. With the right ingredients, techniques, and a little patience, you’ll create a dessert that dazzles and delights. So roll up your sleeves and get ready to impress your loved ones with a creation that’s as beautiful as it is delicious. Happy baking!

Lemon Strawberry Crepe Cake

Prep Time 30 minutes
Cook Time 20 minutes
Total Time 50 minutes
Servings 8 slices
Calories 350
A delightful layered dessert combining tangy lemon, fresh strawberries, and creamy filling in delicate crepes.

Ingredients

Cream Cheese Filling

  • 1 brick cream cheese (softened)
  • 0.5 lemon juice of half a lemon
  • 0.5 cup white sugar

Strawberry Syrup

  • 1.5 pints chopped strawberries
  • 1 cup sugar (for strawberry syrup)

Crepe Batter

  • as needed crepe batter (recipe not provided)

Instructions 

  • Whip together cream cheese, lemon juice, and sugar for the filling.
  • Cook crepes and layer with filling every 2-3 crepes.
  • Mix strawberries with sugar, refrigerate for 12 hours, then stir to make syrup.
  • Assemble the cake, top with strawberry syrup and whipped cream.

Notes

Use fresh strawberries for best flavor and refrigerate the assembled cake before serving.
Calories: 350kcal
Cost: $15
Course: Dessert
Cuisine: fusion
Keyword: crepe, lemon, strawberry

Welcome to the world of vibrant flavors and flaky textures! If you’re looking to impress your friends and family with a delightful pastry, look no further than this Lemon Cream Cheese Danish. Combining the **flaky goodness of puff pastry** with a luscious cream cheese filling and the bright zing of lemon curd, this recipe is not just about making a delicious treat—it’s about creating a moment of joy at your table. Let’s dive into why this recipe is a must-try and how you can master it in your own kitchen!

Why You’ll Love This Recipe

This Lemon Cream Cheese Danish isn’t just another pastry; it’s a celebration of flavor and texture that you will adore for several reasons:

  • Quick & Easy Prep: With only a few ingredients and simple steps, you can whip up this danish in under an hour, making it perfect for brunch or a last-minute dessert.
  • Impressive Presentation: The beautiful golden-brown pastry and creamy filling will have your guests thinking you spent hours in the kitchen.
  • Versatile Flavor: The balance of sweet cream cheese and tart lemon curd creates a flavor profile that appeals to everyone.
  • Make-Ahead Friendly: You can prepare the filling and pastry ahead of time, making it a convenient option for busy mornings or gatherings.
  • Customizable Variations: Feel free to switch up the fillings or toppings to suit your taste or the season.

Ingredients for Lemon Cream Cheese Danish

To create this delightful pastry, gather the following ingredients:

  • 1 sheet frozen puff pastry (thawed): This is the flaky base that makes your danish irresistible.
  • 4 oz cream cheese (softened): Provides a rich, creamy filling that balances the tartness of the lemon.
  • ¼ cup powdered sugar: Sweetens the cream cheese and adds a touch of elegance.
  • 1 tsp vanilla extract: Enhances the flavor profile of the cream cheese filling.
  • 1 lemon zest: Infuses a bright, zesty flavor into the cream cheese mixture.
  • 1 cup lemon curd: The star of the show, offering a tart and sweet contrast that pairs perfectly with the cream cheese.
  • 1 large egg: Used for the egg wash to give the pastry a beautiful golden color.
  • 1 tbsp water: Combined with the egg for the wash.

How to Make Lemon Cream Cheese Danish

Follow these simple steps to create your own Lemon Cream Cheese Danish:

  • Step 1: Preheat your oven to 400°F (200°C). Roll out the thawed puff pastry on a lightly floured surface to a rectangle measuring about 12×9 inches. Slice the pastry into four equal rectangles.
  • Step 2: In a mixing bowl, combine the softened cream cheese, powdered sugar, vanilla extract, and lemon zest. Blend until smooth and creamy.
  • Step 3: On each rectangle of puff pastry, create a border by making a small cut about 1 inch from the edges. Spread a spoonful of the cream cheese mixture in the center of each rectangle and top with lemon curd.
  • Step 4: Whisk the egg with water and brush the mixture over the outer edges of the danish. Bake in the preheated oven for about 15-20 minutes until golden brown.
  • Step 5: Remove from the oven and let cool on a wire rack for a few minutes. Serve warm or at room temperature.

Pro Tips for the Best Lemon Cream Cheese Danish

A beautifully styled Lemon Cream Cheese Danish highlighting its layers of cream cheese and bright lemon zest.

To ensure your danish turns out perfectly every time, consider these expert tips:

  • Thaw Completely: Make sure your puff pastry is completely thawed before rolling out to avoid tearing.
  • Room Temperature Cream Cheese: Ensure your cream cheese is softened to room temperature for the smoothest filling.
  • Use Fresh Lemon Zest: Fresh zest will provide the most flavor; dried lemon zest won’t have the same impact.
  • Watch the Baking Time: Keep an eye on your pastries; ovens can vary, and overbaking can lead to a tough texture.
  • Experiment with Fillings: Try using fruit preserves or chocolate ganache in place of lemon curd for a twist.
  • Chill the Pastry: If your pastry gets too warm while working with it, pop it in the fridge for a few minutes before baking.
  • Serve with Fresh Fruit: Accompany your danish with fresh berries for a pop of color and flavor.
  • Make Ahead: You can prepare the cream cheese filling the night before and store it in the refrigerator.

Common Mistakes and Troubleshooting

Here are some common mistakes to avoid while making your Lemon Cream Cheese Danish:

  • Overworking the Dough: Make sure to handle the puff pastry gently to maintain its flaky texture.
  • Too Much Filling: Overfilling can cause the danish to burst during baking; stick to a spoonful of each filling.
  • Skipping the Egg Wash: Don’t skip the egg wash; it gives the pastry that beautiful golden finish.

Variations on the Lemon Cream Cheese Danish

Feel free to customize your danish with these delicious variations:

  • Berry Blast: Add fresh berries like blueberries or raspberries to the cream cheese filling for added flavor and color.
  • Chocolate Delight: Incorporate chocolate chips into the cream cheese filling for a decadent twist.
  • Spiced Pumpkin: Swap out the lemon curd for spiced pumpkin filling in the fall months.
  • Nutty Crunch: Sprinkle chopped pecans or almonds on top before baking for an extra crunch.

Storage and Make-Ahead Instructions

To preserve the freshness of your danish, follow these storage tips:

  • Room Temperature: Store any leftovers in an airtight container at room temperature for up to 2 days.
  • Refrigerator: For longer storage, place in the fridge where it will keep for up to a week.
  • Freezing: You can freeze unbaked danishes for up to 2 months. Just assemble them, wrap tightly, and bake from frozen, adding a few extra minutes to the baking time.

FAQ: Your Questions Answered

Here are some frequently asked questions about making Lemon Cream Cheese Danish:

  • Can I use homemade lemon curd? Yes, homemade lemon curd works wonderfully in this recipe for a fresh taste.
  • What can I substitute for cream cheese? Mascarpone cheese is a great alternative if you’re looking for something creamier.
  • Can I make this recipe gluten-free? Yes, you can use gluten-free puff pastry, which is available in many stores.
  • How do I know when the danish is done? Look for a golden brown color on the pastry; it should be flaky and crisp.
  • Is this danish suitable for freezing? Absolutely! You can freeze the assembled danishes before baking.
  • Can I add more lemon flavor? Yes, feel free to add more lemon zest or a splash of lemon juice to the filling.
  • What should I serve with these danishes? Pair them with a cup of coffee or tea, or serve them alongside fresh fruit.
  • How long does it take to make these danishes? You can make them in under an hour, including baking time!

Nutritional Information & Dietary Adaptations

Each Lemon Cream Cheese Danish contains approximately 250 calories, along with essential nutrients. Here are some dietary adaptations:

  • Low Sugar Option: Use a sugar substitute in the cream cheese to reduce sugar content.
  • Dairy-Free Version: Substitute the cream cheese with a dairy-free alternative, such as cashew cream.

Equipment Recommendations

To successfully create your danish, consider having these tools on hand:

  • Rolling Pin: Essential for rolling out your puff pastry evenly.
  • Mixing Bowls: A set of mixing bowls will help you prepare the filling.
  • Baking Sheet: Use a baking sheet lined with parchment paper for easy cleanup.
  • Pastry Brush: For applying the egg wash to achieve that golden finish.

Serving Suggestions

To enhance your dining experience, consider pairing your danish with:

  • Fresh Berries: Strawberries, blueberries, or raspberries add a delightful touch.
  • Coffee or Tea: The rich flavors of coffee or herbal tea complement the danish beautifully.
  • Whipped Cream: A dollop of whipped cream can enhance the sweetness of the pastry.
  • Vanilla Ice Cream: For dessert lovers, a scoop of vanilla ice cream makes an indulgent pairing.

In conclusion, this Lemon Cream Cheese Danish is not just a recipe; it’s an experience waiting to be shared. Whether you’re enjoying it at brunch or savoring it with a cup of coffee, the combination of flaky pastry, creamy filling, and zesty lemon is sure to leave a lasting impression. So go ahead, embrace the joy of baking, and create your pastry masterpiece today!

Lemon Cream Cheese Danish

Prep Time 15 minutes
Cook Time 20 minutes
Total Time 35 minutes
Servings 4 pieces
Calories 250
A delightful pastry combining flaky puff pastry with creamy lemon filling, perfect for breakfast or dessert.

Ingredients

Dough

  • 1 sheet frozen puff pastry (thawed)

Filling

  • 4 oz cream cheese (softened)
  • 0.25 cup powdered sugar
  • 1 tsp vanilla extract
  • 1 lemon zest lemon zest
  • 1 cup lemon curd
  • 1 large egg egg
  • 1 tbsp water

Instructions 

  • Preheat oven to 400°F (200°C). Roll out pastry and cut into four rectangles.
  • Mix cream cheese, powdered sugar, vanilla, and lemon zest until smooth.
  • Create borders on pastry, spread cream cheese mixture, and top with lemon curd.
  • Brush edges with egg wash and bake for 15-20 minutes until golden.
  • Cool briefly and serve warm or at room temperature.

Notes

For a richer flavor, chill the danish before serving.
Calories: 250kcal
Cost: $12
Course: Breakfast, Dessert
Cuisine: American
Keyword: lemon, puff pastry

Indulge in the Ultimate No-Bake Chocolate Parfait

Welcome to a world of decadence where dessert becomes an experience! In this article, we will delve into crafting the ultimate no-bake chocolate parfait—a rich, creamy delight that elevates any occasion. Whether you’re planning a dinner party, celebrating a special moment, or simply craving something sweet, this chocolate parfait is your go-to recipe. With layers of luxurious chocolate mousse, whipped cream, and crunchy Oreo cookie crumbs, you are sure to impress your family and friends. Plus, it’s simple enough for anyone to make, even if you’re new to cooking!

Let’s explore why you’ll love this recipe and how to create this indulgent dessert that’s as delightful to behold as it is to taste.

Why You’ll Love This Recipe

  • Unmatched Flavor: The combination of dark chocolate, heavy cream, and Oreo crumbs creates a symphony of rich flavors that will leave your taste buds dancing.
  • No Baking Required: Perfect for those who want a quick and easy dessert option without the hassle of baking. This recipe is entirely no-bake!
  • Customizable: You can easily adapt this recipe to suit your preferences—add fruits, nuts, or different types of cookies for a unique spin.
  • Perfect for Any Occasion: Whether it’s a casual family dinner or an elegant gathering, this dessert fits right in and is sure to impress guests.
  • Make-Ahead Friendly: Prepare it in advance! This dessert keeps well in the fridge, making it a stress-free option for entertaining.

Ingredient Breakdown

To create this creamy chocolate parfait, you’ll need the following ingredients:

  • 25 Oreo cookies (crushed): These will form the delightful crunch layer in your parfait.
  • 7 oz Dark chocolate: The star of the show! Use high-quality dark chocolate for the richest flavor.
  • 1/2 cup Heavy cream: This is for the chocolate mousse, adding a luscious texture.
  • 1 1/2 cups Heavy cream (cold): Essential for making the whipped cream topping.
  • 1/4 cup Cocoa powder: This intensifies the chocolate flavor in the mousse.
  • 2 tbsp Powdered sugar: Adds a touch of sweetness to the whipped cream.
  • 1 tsp Vanilla extract: Enhances the flavor of both the mousse and whipped cream.

Substitutions

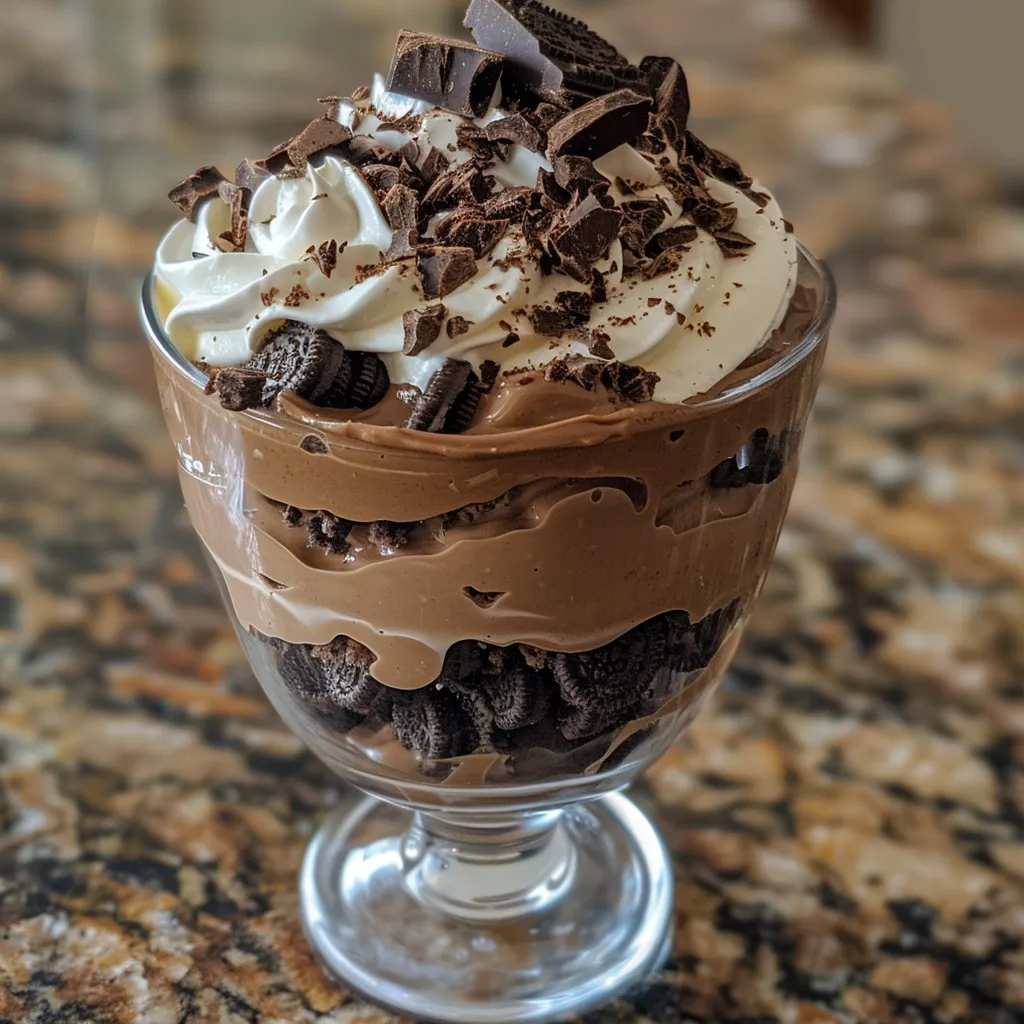
Close-up image of a chocolate dessert in a glass, showcasing creamy layers and garnishes.

If you need to make adjustments or substitutions, here are some options:

  • Chocolate: You can substitute dark chocolate with semi-sweet or milk chocolate if preferred.
  • Cream: For a lighter version, use whipped topping instead of heavy cream.
  • Oreos: Try using any chocolate sandwich cookies or even graham crackers for a different flavor.
  • Sweeteners: Use honey or agave syrup in place of powdered sugar for a natural sweetener.

How to Make This Chocolate Parfait

Now, let’s dive into the step-by-step instructions for crafting this delightful dessert:

  1. Prepare the Oreo Crust: Crush the Oreo cookies in a plastic bag or a food processor until they achieve fine crumbs. Set aside.
  2. Make the Chocolate Mousse: In a saucepan, melt the dark chocolate over low heat, stirring constantly until smooth. Remove from heat and let it cool slightly.
  3. Whip Heavy Cream: In a mixing bowl, add 1/2 cup of heavy cream and whisk until soft peaks form. Gradually fold the whipped cream into the melted chocolate until fully combined.
  4. Assemble the Parfait Layers: In serving glasses, create a layer of Oreo crumbs, followed by a layer of chocolate mousse. Repeat these layers until you reach the top of the glass.
  5. Make the Whipped Cream: In a separate bowl, combine the cold heavy cream, powdered sugar, and vanilla extract. Whip until stiff peaks form.
  6. Add the Final Touch: Top each parfait with a generous dollop of the whipped cream and sprinkle additional Oreo crumbs on top for garnish.

Pro Tips for Perfecting Your Parfait

  • Quality Ingredients: Always use high-quality chocolate and cream for the best flavor.
  • Chill Your Tools: For fluffy whipped cream, chill your mixing bowl and beaters before whipping.
  • Layering Technique: Use a piping bag for the whipped cream to achieve a beautiful finish.
  • Texture Matters: Ensure your chocolate has cooled sufficiently before mixing with cream to avoid melting it.
  • Serve Chilled: Allow the parfaits to set in the fridge for at least an hour before serving for enhanced flavors.
  • Experiment with Flavors: Feel free to add a splash of liqueur like Kahlua for an adult twist!
  • Storage: Cover and store leftover parfaits in the refrigerator for up to 3 days.
  • Presentation: Use clear glasses to showcase the beautiful layers of your parfait.

Common Mistakes and Troubleshooting

Even experienced cooks can run into issues. Here are common mistakes and how to avoid them:

  • Over-whipping Cream: Stop whipping as soon as you see stiff peaks. Over-whipped cream can become grainy.
  • Chocolate Seizing: Make sure to melt chocolate gently to prevent it from seizing. Avoid letting any water contact the chocolate.
  • Too Sweet: Adjust the sugar in the whipped cream to your taste preferences for balance.
  • Layering Issues: If layers aren’t holding, ensure your mousse is thick enough by allowing it to cool properly.

Variations to Try

Switch things up with these fun variations of the classic chocolate parfait:

  • Fruit Chocolate Parfait: Layer in fresh raspberries or strawberries between the chocolate layers for a fruity twist.
  • Nutty Delight: Add chopped nuts like almonds or hazelnuts for a crunchy texture.
  • Minty Fresh: Incorporate mint extract into the whipped cream for a refreshing flavor.
  • Peanut Butter Bliss: Swirl in some creamy peanut butter into the mousse for a decadent flavor combination.

Storage and Make-Ahead Instructions

This chocolate parfait can be made ahead of time, making it a perfect choice for entertaining. Here’s how to store it:

  • Refrigeration: Cover the parfaits with plastic wrap or a lid and store them in the refrigerator for up to 3 days.
  • Make-Ahead: Prepare the chocolate mousse and whipped cream a day in advance. Assemble right before serving to keep the layers intact.
  • Freezing: While it’s not ideal to freeze the parfaits, you can freeze the mousse separately. Thaw in the fridge before layering.

Frequently Asked Questions

Here are some common questions about making chocolate parfaits:

  • Can I use milk chocolate instead of dark chocolate? Yes, but the flavor will be sweeter and less intense.
  • What can I substitute for heavy cream? You can use coconut cream or a non-dairy whipping cream for a lighter version.
  • How long can I store the parfaits in the fridge? They can be stored for up to 3 days in an airtight container.
  • Can I make this dessert vegan? Yes! Use vegan chocolate and coconut cream for the mousse and whipped topping.
  • What’s the best way to crush Oreos? A food processor works best, but you can also place them in a ziplock bag and crush them with a rolling pin.
  • Can I add other flavors to the mousse? Absolutely! Experiment with coffee, orange zest, or even spices like cinnamon for a unique flavor.
  • How do I prevent the whipped cream from deflating? Make sure your cream is very cold and avoid over-whipping.
  • Is it necessary to chill the parfaits before serving? Yes, chilling allows the flavors to meld and enhances the overall experience.

Nutritional Tips and Dietary Adaptations

If you’re concerned about nutrition, here are some tips:

  • Lower Sugar: Reduce the amount of powdered sugar in the whipped cream or use a sugar substitute.
  • Gluten-Free: Use gluten-free cookies to ensure the parfait is suitable for those with gluten sensitivities.
  • Dairy-Free: Substitute heavy cream with coconut cream or other plant-based creams.

Equipment Recommendations

To make this chocolate parfait, here’s what you’ll need:

  • Mixing Bowls: Use a variety of sizes for mixing ingredients.
  • Whisk or Electric Mixer: For whipping cream to perfection.
  • Food Processor: Essential for crushing Oreos quickly and evenly.
  • Serving Glasses: Clear glasses work best to showcase the beautiful layers.

Serving Suggestions

For the perfect presentation:

  • Garnish: Top with chocolate shavings, fresh berries, or mint leaves for a pop of color.
  • Portion Sizes: Serve in small glasses for individual portions, making it easy for guests to enjoy.
  • Accompanying Drinks: Pair with coffee, dessert wine, or a milkshake for a delightful treat.

In conclusion, making a no-bake chocolate parfait is not just easy; it’s a delightful way to impress your loved ones. With layers of rich chocolate mousse, fluffy whipped cream, and crunchy Oreo crumbs, it’s a dessert that combines elegance with comfort. Whether you stick to the classic recipe or experiment with unique variations, this dessert is bound to be a hit. So gather your ingredients, unleash your creativity, and indulge in the decadence of the ultimate chocolate parfait!

Creamy Chocolate Parfait (No Bake)

Prep Time 15 minutes
Total Time 15 minutes
Servings 4 servings
Calories 450
A rich and creamy no-bake dessert layered with crushed Oreos and chocolate, perfect for a quick indulgence.

Ingredients

Crushed Oreos

  • 25 pieces Oreos (crushed)

Dark chocolate

  • 7 oz dark chocolate

Heavy cream

  • 1/2 cup heavy cream (for melting chocolate)
  • 1 1/2 cups heavy cream (cold) (for whipping)

Cocoa powder

  • 1/4 cup cocoa powder

Powdered sugar

  • 2 tbsp powdered sugar

Vanilla extract

  • 1 tsp vanilla extract

Instructions 

  • Crush the Oreos into fine crumbs and set aside.

Notes

Chill the parfait before serving for best results.
Calories: 450kcal
Cost: $12
Course: Dessert
Cuisine: American
Keyword: chocolate

Welcome to the world of mini strawberry tarts—a delightful dessert that combines a buttery crust, creamy filling, and fresh strawberries, perfect for any gathering. Whether you’re hosting a brunch, celebrating a birthday, or simply indulging your sweet tooth, these tarts are sure to impress. Join me, Mike, as we dive into this scrumptious recipe that balances tradition with a touch of modern flair.

Why You’ll Love This Recipe

Here are just a few reasons why these mini strawberry tarts should be on your dessert table:

  • Versatile Delight: These tarts can be dressed up or down, making them suitable for both elegant events and casual family gatherings.
  • Easy to Make: With straightforward instructions, even novice bakers can master this recipe without stress.
  • Beautiful Presentation: The vibrant colors of strawberries against a golden crust create an eye-catching dessert.
  • Customizable Flavors: You can easily adapt the filling or crust to suit your personal taste or dietary needs.
  • Make Ahead: Prepare the components in advance for a stress-free dessert assembly.

Ingredients

To create these delightful mini strawberry tarts, gather the following ingredients:

  • 13 tbsp. unsalted butter: Room temperature for easy mixing.
  • 1/2 cup powdered sugar: Sweetness for the crust.
  • 2 cups all-purpose flour: The base for your shortbread crust.
  • Pinch of salt: Enhances the flavors.
  • 8 oz cream cheese: Softened for a smooth filling.
  • 1/4 cup + 2 tbsp powdered sugar: For the filling and sweetness.
  • 1 cup heavy whipping cream: Creates a light and fluffy texture.
  • 1/2 tsp vanilla extract: Adds depth to the filling.
  • 10 oz strawberries: Freshly sliced, for that vibrant topping.
  • 2 tbsp sugar: To macerate the strawberries.
  • 1/2 tsp lemon juice: Brightens the flavor of the strawberries.

Step-by-Step Instructions

Follow these simple steps to create your mini strawberry tarts:

Part 1: Making the Shortbread Crust

  1. In a mixing bowl, combine the unsalted butter and powdered sugar, creaming them together until light and fluffy.
  2. Gradually add in the all-purpose flour and a pinch of salt, mixing just until the dough forms.
  3. Press the dough into mini tart pans, ensuring an even layer across the bottom and up the sides.
  4. Bake in a preheated oven at 350°F (175°C) for about 15-20 minutes, or until golden brown. Allow to cool completely.

Part 2: Preparing the Fresh Strawberry Filling

  1. In a medium bowl, beat the cream cheese and powdered sugar until smooth.
  2. In a separate bowl, whip the heavy cream with vanilla extract until stiff peaks form.
  3. Gently fold the whipped cream into the cream cheese mixture, creating a light and fluffy filling.

Part 3: Assembling the Mini Strawberry Tarts

  1. Slice the strawberries and mix them with sugar and lemon juice. Let them sit for about 10 minutes to release their juices.
  2. Fill each cooled tart shell with the cream cheese filling, smoothing it out with a spatula.
  3. Top each tart with the macerated strawberries, arranging them beautifully for presentation.

Pro Tips for Perfect Mini Strawberry Tarts

Miniature strawberry tarts with a buttery crust and fluffy cream filling, garnished with sliced strawberries.

Maximize your success with these expert insights:

  • Chill the Dough: If the dough becomes too soft while you’re working with it, chill it for 15-20 minutes before pressing into the tart pans.
  • Use Fresh Strawberries: For the best flavor and texture, opt for ripe, fresh strawberries.
  • Don’t Overmix: When folding in the whipped cream, be gentle to maintain the lightness of the filling.
  • Flavor Variations: Consider adding a splash of almond extract to the filling for a unique twist.
  • Try Different Fruits: Experiment with other fruits like raspberries, blueberries, or peaches for a different flavor profile.
  • Garnish Wisely: A sprinkle of mint leaves or a dusting of powdered sugar can elevate the presentation.
  • Storage Tips: Store any leftover tarts in the refrigerator for up to 3 days, but best enjoyed fresh.
  • Make Ahead: Prepare the crust and filling a day in advance, then assemble just before serving.

Common Mistakes and Troubleshooting

Even the best chefs can run into issues. Here are common pitfalls and how to avoid them:

  • Crust Too Crumbly: Ensure your butter is at room temperature and fully creamed with the sugar.
  • Filling Too Runny: Be sure to whip the cream to stiff peaks and fold carefully.
  • Strawberries Not Sweet Enough: Always taste your fruit before using. Adjust sugar as needed before macerating.

Variations on Mini Strawberry Tarts

Here are some delicious variations to consider:

  • Chocolate Hazelnut: Substitute the cream cheese filling with chocolate hazelnut spread for a rich twist.
  • Lemon Curd: Swap out some of the filling for lemon curd for a zesty flavor.
  • Berry Medley: Use a mix of strawberries, blueberries, and raspberries for a colorful tart.
  • Nutty Crust: Incorporate finely chopped nuts into the crust for added flavor and texture.

Storage and Make-Ahead Instructions

To ensure your tarts retain their deliciousness:

  • Refrigerate: Store in an airtight container in the fridge for up to 3 days.
  • Freezing Tips: Freeze the crusts before filling for up to 2 months; thaw before filling.
  • Prep Ahead: Make the crust and filling a day before serving; assemble on the day for the best taste.

Frequently Asked Questions

Here are some common questions about making mini strawberry tarts:

  • Can I use frozen strawberries? Yes, but ensure they are thawed and drained to avoid excess moisture.
  • How can I make these gluten-free? Substitute all-purpose flour with a gluten-free flour blend.
  • What can I use instead of cream cheese? Mascarpone cheese or whipped coconut cream can be good alternatives.
  • How do I prevent the crust from getting soggy? Bake the crust until golden and allow it to cool completely before adding the filling.
  • Can I add a glaze on top? Absolutely! A simple glaze made from powdered sugar and milk can add sweetness and shine.
  • How long do these tarts last? They are best enjoyed within 2-3 days, but can last up to a week in the fridge.
  • Are these tarts suitable for kids? Yes! They are a fun and tasty dessert that kids will love.
  • Can I use other fruits? Yes! Feel free to experiment with other fruits like peaches or kiwi.

Nutritional Tips and Dietary Adaptations

For those mindful of nutrition, here are some tips:

  • Lower Sugar: Reduce the amount of sugar in both the crust and filling for a healthier option.
  • Vegan Version: Use vegan butter and a plant-based cream cheese alternative.
  • Portion Control: Consider making smaller tarts for a guilt-free indulgence.

Equipment Recommendations

To make your experience smoother, here’s a list of essential tools:

  • Mini Tart Pans: Perfect for creating uniform-sized tarts.
  • Mixing Bowls: Have a few sizes handy for mixing the crust and filling.
  • Electric Mixer: A hand mixer or stand mixer will help achieve the perfect creaminess.
  • Spatula: For folding in whipped cream and smoothing out the filling.

Serving Suggestions

When it comes to serving your delicious mini strawberry tarts, consider:

  • Garnishing: Fresh mint leaves or a dusting of powdered sugar adds a pop of color.
  • Pairing: Serve with a scoop of vanilla ice cream or a dollop of whipped cream for extra indulgence.
  • Presentation: Arrange on a beautiful platter to elevate the dessert table.

In conclusion, these delightful mini strawberry tarts are not just a dessert; they are a celebration of flavors and creativity in the kitchen. With the right ingredients and a little love, you can create a treat that brings smiles to any occasion. I hope you enjoy making and sharing these tarts as much as I do. Happy baking!

Mini Strawberry Tarts

Prep Time 30 minutes
Cook Time 15 minutes
Total Time 45 minutes
Servings 8 pieces
Calories 250
Delightful mini tarts filled with creamy cheese and topped with fresh strawberries, perfect for a sweet treat.

Ingredients

Dough

  • 13 tbsp unsalted butter, room temp
  • 1/2 cup powdered sugar
  • 2 cups all purpose flour
  • pinch salt
  • 8 oz cream cheese, softened
  • 1/4 cup plus 2 tbsp powdered sugar
  • 1 cup heavy whipping cream
  • 1/2 tsp vanilla extract
  • 10 oz strawberries
  • 2 tbsp sugar *
  • 1/2 tsp lemon juice

Instructions 

  • Prepare the tart crust by mixing butter, powdered sugar, flour, and salt, then chill and bake in tart molds.
  • Whip the cream cheese with powdered sugar until smooth, then fold in whipped cream and vanilla to make the filling.
  • Fill the baked tart shells with the cream mixture and chill.
  • Slice strawberries and toss with sugar and lemon juice, then top the tarts with strawberries before serving.

Notes

Chill the assembled tarts for at least 30 minutes before serving for best flavor and texture.
Calories: 250kcal
Cost: $12
Course: Dessert
Cuisine: American
Keyword: strawberry

Discover the Joy of Creamy Pesto Chicken Pasta

Welcome to a culinary journey that will transform your weeknight dinners into delightful experiences! This Creamy Pesto Chicken Pasta recipe is not just a meal; it’s an invitation to savor comfort food that is both simple and sophisticated. Imagine tender chicken, a rich creamy sauce, and vibrant pesto all enveloping perfectly cooked pasta. Whether you’re a seasoned home cook or just starting, this recipe promises to be a crowd-pleaser. Let’s dive in!

Why You’ll Love This Recipe

  • Quick Preparation: In under 30 minutes, you can prepare a delicious meal that feels gourmet.
  • Versatile Ingredients: The recipe uses everyday ingredients, yet delivers a restaurant-quality dish.
  • Comforting & Satisfying: The rich flavors of creamy pesto and tender chicken create a comforting dish that’s perfect for any occasion.
  • Family-Friendly: Even the pickiest eaters will enjoy this dish, making it perfect for family dinners.
  • Make-Ahead Potential: This pasta dish can be prepared in advance and baked just before serving, saving time on busy nights.

Ingredients You’ll Need

To create this delectable Chicken Pesto Pasta, gather the following ingredients:

  • 10.5 ounces penne or rigatoni pasta
  • 2 medium chicken breasts, diced (approx. 10.5 oz)
  • 1 tablespoon olive oil
  • Salt and black pepper to taste
  • 1 tablespoon unsalted butter
  • 2 cloves garlic, minced
  • 3/4 cup plus 2 tablespoons heavy cream
  • 1/2 cup whole milk
  • 1/2 cup basil pesto
  • 3/4 cup grated Parmesan cheese
  • 3.5 ounces baby spinach (optional)
  • 1 cup shredded mozzarella cheese
  • 1/4 cup grated Parmesan cheese for topping

Step-by-Step Instructions

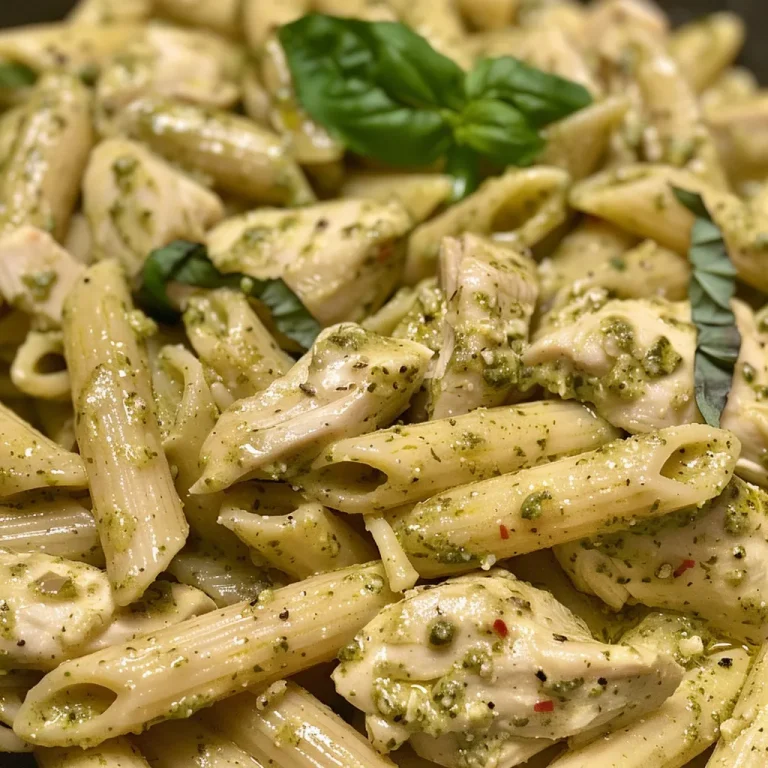
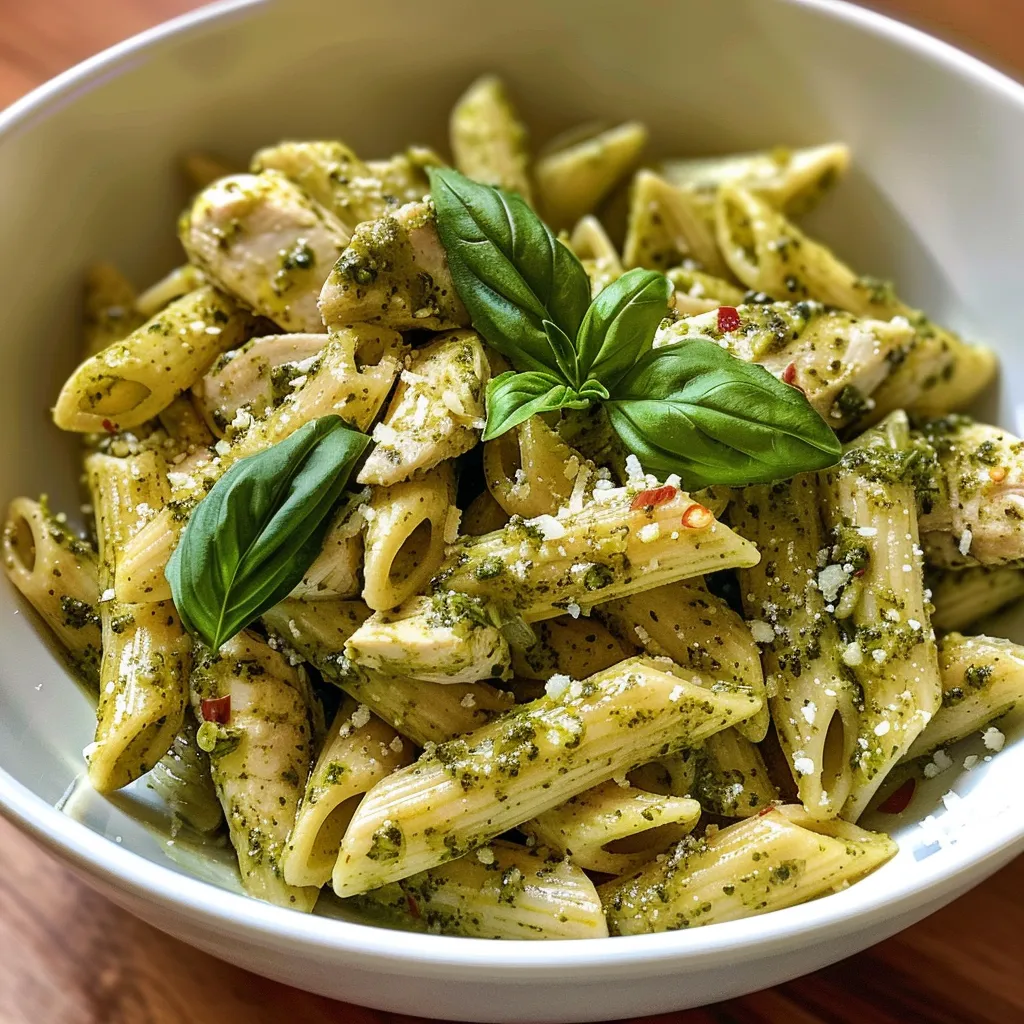
An appetizing plate of chicken pasta with a rich green pesto sauce and garnished with spinach.

Follow these easy steps to create your Creamy Pesto Chicken Pasta:

  • Preheat your oven to 400°F (200°C) and lightly grease a 9×13-inch baking dish.
  • Cook the penne or rigatoni in a large pot of boiling salted water for exactly 2 minutes less than the package directions. Drain the pasta and set aside.
  • Heat olive oil in a large skillet over medium-high heat. Season the diced chicken with salt and pepper, then sauté for 5–6 minutes until cooked through.
  • In the same skillet, melt the butter and sauté the minced garlic for 30 seconds. Whisk in the heavy cream and milk, simmering for 2–3 minutes until slightly thickened, then stir in the pesto and Parmesan until smooth.
  • Fold the cooked chicken, drained pasta, and optional spinach into the skillet. Toss thoroughly to ensure the sauce coats every ingredient.
  • Transfer the pasta mixture into the prepared baking dish, spreading it into an even layer. Evenly sprinkle the shredded mozzarella and remaining Parmesan over the top.
  • Place the dish in the oven uncovered and bake for 20–25 minutes until the sauce is bubbling and the cheese topping is golden brown.
  • Allow the dish to rest on the counter for 5 minutes before serving.

Pro Tips for Perfect Pasta

  • Use Quality Pesto: A good quality basil pesto elevates the dish. You can also make your own for a fresh flavor.
  • Don’t Overcook the Pasta: Aim for al dente, as the pasta will continue cooking in the oven.
  • Experiment with Cheeses: Mix different cheeses like Gouda or Fontina for a unique flavor profile.
  • Make it Creamier: For a richer sauce, add an extra splash of heavy cream or a dollop of cream cheese.
  • Mix in Veggies: Consider adding cherry tomatoes or zucchini for added nutrition and flavor.
  • Adjust Seasoning: Always taste your sauce and adjust salt and pepper accordingly.
  • Use Fresh Herbs: Garnish your dish with fresh basil or parsley for a burst of fresh flavor.
  • Top with Nuts: Toasted pine nuts or walnuts add a delightful crunch and nutty flavor.

Common Mistakes and Troubleshooting

Even the best chefs encounter challenges. Here are some common mistakes and how to avoid them:

  • Overcooked Chicken: Ensure you don’t overcook your chicken, as it can become dry. Sauté until just cooked through.
  • Thick Sauce: If your sauce is too thick, add a bit more milk or cream to reach your desired consistency.
  • Glued Pasta: If your pasta sticks together, toss it with a bit of olive oil right after draining.
  • Insufficient Flavor: Always taste your sauce and adjust seasoning as needed before serving.
  • Leftover Sauce: If you have leftover sauce, it can be refrigerated and used for other dishes like sandwiches or dips.

Creative Variations to Try

This recipe is versatile, allowing you to customize it to your taste. Here are some fun variations:

  • Vegetarian Version: Replace chicken with sautéed mushrooms and increase the amount of spinach for a hearty vegetarian option.
  • Spicy Kick: Add red pepper flakes or diced jalapeños to the sauce for a spicy twist.
  • Seafood Delight: Substitute chicken with shrimp or scallops for a seafood-inspired dish.
  • Cheesy Baked Version: Add more cheese on top and broil for a few minutes for a crispy, cheesy crust.

Storage and Make-Ahead Instructions

This Creamy Pesto Chicken Pasta is excellent for meal prep and storage:

  • Refrigeration: Store leftovers in an airtight container in the fridge for up to 3 days.
  • Freezing: This dish can be frozen for up to 2 months. Thaw in the refrigerator overnight before reheating.
  • Make-Ahead: Prepare the dish up to the baking step, cover, and refrigerate. Bake when ready to serve.

Comprehensive FAQ

Here are answers to some commonly asked questions about this recipe:

  • Can I use a different type of pasta? Yes! Feel free to use any pasta shape you prefer.
  • Is this recipe suitable for a gluten-free diet? Substitute regular pasta with gluten-free pasta.
  • How can I make this dish lighter? Substitute heavy cream with half-and-half or a lighter cream alternative.
  • Can I use rotisserie chicken? Absolutely! Just shred it and add it to the sauce for a quick meal.
  • What can I serve with this dish? A simple green salad or garlic bread pairs perfectly.
  • Can I add more vegetables? Yes! Feel free to add bell peppers, peas, or broccoli to the mix.
  • How do I ensure the sauce isn’t too thick? If the sauce thickens too much, add a splash of pasta water or additional cream.
  • What if I don’t like pesto? You can replace pesto with a creamy Alfredo sauce for a different flavor profile.

Nutritional Tips and Dietary Adaptations

To make this dish fit various dietary needs, consider the following tips:

  • Low-Carb Option: Substitute pasta with zucchini noodles or spaghetti squash for a low-carb alternative.
  • Dairy-Free Version: Use coconut milk and dairy-free cheese alternatives for a dairy-free meal.
  • High-Protein Variation: Add chickpeas or lentils for a protein boost while keeping it vegetarian.

Recommended Equipment

Ensure you have the following tools ready for cooking:

  • Large Pot: For boiling pasta and ensuring it cooks evenly.
  • Skillet: A large skillet for sautéing chicken and making the sauce.
  • Baking Dish: A 9×13-inch baking dish for oven cooking the assembled pasta.
  • Measuring Cups and Spoons: For accurate ingredient measurements.
  • Wooden Spoon: For stirring and mixing the pasta and sauce.

Serving Suggestions

Serve your Creamy Pesto Chicken Pasta with a few finishing touches:

  • Garnish: Fresh basil or parsley adds a beautiful touch and extra flavor.
  • Serve with a Salad: Pair it with a light arugula salad dressed in lemon vinaigrette for a refreshing contrast.
  • Accompany with Bread: Garlic bread or a crusty baguette is perfect for soaking up the delicious sauce.

In conclusion, this Creamy Pesto Chicken Pasta recipe is not just a meal; it’s a celebration of flavors that brings people together. Whether for a weeknight dinner, a special occasion, or simply to indulge yourself, this dish is sure to impress. Happy cooking!

Creamy Pesto Chicken Pasta

Prep Time 10 minutes
Cook Time 30 minutes
Total Time 40 minutes
Servings 4 servings
Calories 850
A rich and flavorful pasta dish featuring tender chicken, fresh basil pesto, and creamy cheese sauce, baked to perfection.

Ingredients

Pasta

  • 10.5 ounces penne or rigatoni pasta
  • 2 medium chicken breasts (diced (10.5 oz))
  • 1 tablespoon olive oil
  • Salt and black pepper Salt and black pepper (to taste)
  • 1 tablespoon unsalted butter
  • 2 cloves garlic (minced)
  • 3/4 cup heavy cream (plus 2 tablespoons)
  • 1/2 cup whole milk
  • 1/2 cup basil pesto
  • 3/4 cup grated Parmesan cheese
  • 3.5 ounces baby spinach (optional)
  • 1 cup shredded mozzarella cheese
  • 1/4 cup grated Parmesan cheese

Instructions 

  • Preheat oven to 400°F (200°C). Cook pasta 2 minutes less than package directions, then drain.
  • Sauté seasoned chicken in olive oil until cooked, then set aside.
  • Melt butter, sauté garlic, then whisk in cream and milk. Add pesto and Parmesan, simmer until thickened.
  • Mix chicken, pasta, and spinach into sauce. Transfer to baking dish, top with mozzarella and Parmesan.
  • Bake uncovered 20–25 minutes until bubbly and golden. Rest 5 minutes before serving.

Notes

For extra flavor, sprinkle fresh basil on top before serving.
Calories: 850kcal
Cost: $15
Course: Main Course
Cuisine: Italian
Keyword: Chicken, Creamy, Pasta

If you’re looking for a quick and delicious meal that doesn’t skimp on flavor, you’ve come to the right place! These Garlic Butter Chicken Bites are not just quick and easy to prepare, but they also pack a punch of rich flavors that everyone will love. In just 15 minutes, you can whip up a dish that’s perfect for busy weeknights, family gatherings, or even a cozy dinner for two. With tender chicken coated in a luscious garlic butter sauce, this recipe is sure to become a staple in your kitchen.

Why You’ll Love This Recipe

There are countless reasons to adore these garlic butter chicken bites, but here are just a few:

  • Quick Preparation: Ready in just 15 minutes, making it an ideal choice for busy evenings.
  • Versatile Dish: Perfect as an appetizer, main course, or even a meal prep option.
  • Flavor-Packed: The combination of garlic and butter creates a rich and satisfying flavor profile that complements the chicken perfectly.
  • Customizable: Easily adaptable with different herbs, spices, or side dishes to suit your taste.
  • Family-Friendly: A dish that even the pickiest eaters will love, making meal times enjoyable for everyone.

Ingredients Breakdown

Let’s dive into the ingredients that make these garlic butter chicken bites so irresistible. Here’s what you’ll need:

  • 1 pound Boneless Skinless Chicken Breasts: You can substitute with boneless skinless chicken thighs for a richer flavor.
  • 1/2 cup All-Purpose Flour: Can omit for a gluten-free option. For a healthier twist, consider using almond flour.
  • 1 teaspoon Italian Seasoning: A mix of oregano, basil, and thyme works well as a substitute.
  • Salt and Freshly Ground Black Pepper: Adjust amounts to your taste preference.
  • 2 tablespoons Olive Oil: Can be replaced with another cooking oil like avocado oil.
  • 4 tablespoons Unsalted Butter: Used in parts for cooking and finishing; feel free to use flavored or ghee if desired.
  • 4 cloves Minced Fresh Garlic: Use garlic powder as an alternative, but adjust the quantity for potency.
  • 1/4 cup Finely Chopped Fresh Parsley: Can double up for more herbaceous notes or substitute with basil for a different flavor.

How to Make Garlic Butter Chicken Bites

Ready to get cooking? Here’s a step-by-step guide to creating these delectable bites:

  1. **Prep the Chicken**: Cut the boneless skinless chicken breasts into bite-sized pieces, approximately 1-1.5 inches in size.
  2. **Season the Flour**: In a shallow dish, mix the all-purpose flour with Italian seasoning, salt, and pepper.
  3. **Coat the Chicken**: Dredge each chicken piece in the seasoned flour, shaking off the excess.
  4. **Heat the Oil**: In a large skillet, heat the olive oil over medium-high heat until shimmering.
  5. **Cook the Chicken**: Add the coated chicken bites to the skillet in a single layer. Cook for about 3-4 minutes on each side until golden brown and cooked through.
  6. **Add Butter and Garlic**: Reduce the heat to medium, then add the butter and minced garlic to the skillet. Stir to coat the chicken in the garlic butter sauce.
  7. **Garnish**: Sprinkle the finely chopped parsley over the chicken bites and mix well.
  8. **Serve**: Remove from heat and serve immediately. Enjoy your garlic butter chicken bites with your choice of sides!

Pro Tips for Perfect Garlic Butter Chicken Bites

Plate of garlic butter chicken bites with fresh parsley sprinkled on top.

Here are some expert insights to ensure your chicken bites turn out perfectly every time:

  • Use High-Quality Ingredients: Fresh garlic and high-quality chicken make a noticeable difference in flavor.
  • Don’t Overcrowd the Pan: Give chicken pieces enough space to cook evenly and achieve a nice golden brown.
  • Control the Heat: If the garlic starts to brown too quickly, lower the heat to avoid bitterness.
  • Rest the Chicken: Allow the chicken to rest for a few minutes after cooking to keep it juicy.
  • Experiment with Herbs: Try adding fresh herbs like thyme or rosemary for an extra flavor boost.
  • Make it Spicy: Add red pepper flakes to the garlic butter for a touch of heat.
  • Pair with Fresh Sides: Fresh salads or steamed vegetables complement the richness of the chicken.
  • Make-Ahead Option: Prep the chicken and coat it in flour earlier in the day to save time when cooking.

Common Mistakes and Troubleshooting

Even the best chefs can make mistakes! Here are some common pitfalls and how to avoid them:

  • Overcooking: Keep an eye on the chicken to prevent it from drying out. Use a meat thermometer to ensure it reaches an internal temperature of 165°F.
  • Underseasoning: Don’t be shy with the salt and pepper; they enhance the overall flavor of the dish.
  • Skipping Fresh Garlic: Garlic powder is convenient, but fresh garlic provides superior flavor. Use it whenever possible.

Delicious Variations

Want to mix things up? Here are a few variations to try:

  • Honey Garlic Chicken Bites: Add honey to the garlic butter for a sweet twist.
  • Buffalo Garlic Chicken Bites: Toss cooked chicken bites in buffalo sauce for a spicy kick.
  • Italian Herb Chicken Bites: Use Italian herbs and serve with marinara sauce for dipping.
  • Lemon Garlic Chicken Bites: Add lemon zest and juice for a bright and zesty flavor.

Storage and Make-Ahead Instructions

These garlic butter chicken bites are perfect for meal prep and can be stored for later:

  • Refrigerate: Store cooked chicken bites in an airtight container for up to 3 days.
  • Freeze: Freeze cooked chicken bites for up to 2 months. Reheat in the oven or microwave.
  • Make-Ahead: Prep the chicken and flour mixture a day in advance and store in the refrigerator until ready to cook.

Frequently Asked Questions

Here are some common questions about garlic butter chicken bites:

  • Can I use chicken thighs instead of breasts? Yes, boneless skinless chicken thighs will add more flavor and juiciness.
  • Is this recipe gluten-free? Yes, simply omit the flour or use a gluten-free flour substitute.
  • What can I serve with garlic butter chicken bites? These chicken bites pair well with rice, pasta, or a fresh salad.
  • Can I make this dish in advance? Yes, you can prep ingredients ahead of time and cook them just before serving.
  • How do I store leftovers? Keep in an airtight container in the fridge for up to 3 days.
  • Can I use frozen chicken? Yes, but be sure to thaw it completely before cooking.
  • What other seasonings can I use? Feel free to experiment with your favorite herbs and spices!
  • How can I make this dish spicier? Add red pepper flakes or a dash of hot sauce to the garlic butter.

Nutrition Tips and Dietary Adaptations

For a healthier version of this dish, consider these substitutions:

  • Lower Fat: Use less butter or substitute with olive oil for cooking.
  • More Veggies: Add broccoli or bell peppers to the skillet while cooking.
  • Plant-Based Option: Substitute chicken with chickpeas or tofu for a vegetarian version.

Essential Equipment Recommendations

To make this recipe easier, ensure you have the following equipment:

  • Large Skillet: A non-stick skillet is ideal for even cooking.
  • Meat Thermometer: To check the chicken’s internal temperature for perfect doneness.
  • Sharp Knife: For cutting the chicken into even pieces.
  • Cutting Board: A sturdy board for prepping ingredients.

Serving Suggestions

Serve your garlic butter chicken bites with a variety of sides:

  • Fresh Salad: A simple green salad with lemon vinaigrette pairs beautifully.
  • Rice Pilaf: Fluffy rice pilaf complements the richness of the chicken.
  • Garlic Bread: For a delightful addition, serve with warm garlic bread.
  • Steamed Vegetables: Broccoli or green beans add a nutritious touch.

In conclusion, these Garlic Butter Chicken Bites are a must-try for any home cook. They are quick, flavorful, and adaptable, making them perfect for any occasion. With just a few ingredients and minimal prep time, you can create a dish that delights your family and friends. So, roll up your sleeves, get cooking, and enjoy the deliciousness of these chicken bites!

Garlic Butter Chicken Bites in 15 Minutes for Busy Nights

Prep Time 5 minutes
Cook Time 10 minutes
Total Time 15 minutes
Servings 4 servings
Calories 350
Quick and flavorful garlic butter chicken bites perfect for busy weeknights, ready in just 15 minutes.

Ingredients

Protein

  • 1 pound Boneless Skinless Chicken Breasts (Can substitute with boneless skinless chicken thighs for a richer flavor.)
  • 1/2 cup All-Purpose Flour (Can omit for a gluten-free option.)
  • 1 teaspoon Italian Seasoning (Mix of oregano, basil, and thyme works well as a substitute.)
  • to taste Salt and Freshly Ground Black Pepper (Adjust amounts to taste preference.)
  • 2 tablespoons Olive Oil (Can be replaced with another cooking oil.)
  • 4 tablespoons Unsalted Butter (Used in parts for cooking and finishing; use flavored or ghee if desired.)
  • 4 cloves Minced Fresh Garlic (Use garlic powder as an alternative, but adjust quantity for potency.)
  • 1/4 cup Finely Chopped Fresh Parsley (Can double up for more herbaceous notes.)

Instructions 

  • Cut chicken into bite-sized pieces and season with salt, pepper, and Italian seasoning.
  • Dredge chicken pieces in flour, shaking off excess.
  • Heat olive oil in a large skillet over medium-high heat. Cook chicken until golden and cooked through, about 5-7 minutes.
  • Add minced garlic and cook for 1 minute. Stir in butter until melted and coat the chicken.
  • Sprinkle chopped parsley over the chicken and serve immediately.

Notes

For extra flavor, add a squeeze of lemon or a sprinkle of red pepper flakes.
Calories: 350kcal
Cost: $15
Course: Main Course
Cuisine: American
Keyword: Chicken

Welcome to the ultimate guide for crafting the perfect Garlic Herb Butter Roasted Chicken. With its juicy meat and aromatic flavors, this recipe is not just a meal; it’s a celebration of culinary skill and heart. Whether you’re preparing a Sunday dinner for the family or hosting friends for a special occasion, this dish will elevate your cooking game. In this comprehensive guide, we’ll delve into the intricacies of this beloved chicken recipe, ensuring you have all the tools and knowledge at your fingertips.

Why You’ll Love This Recipe

  • Unmatched Flavor: The combination of garlic herb butter and fresh herbs infuses the chicken with a rich, savory taste that is hard to resist.
  • Perfectly Juicy: Roasting the chicken at the right temperature ensures that it remains moist and tender, providing the ultimate comfort food experience.
  • Simple Techniques: Even if you’re a beginner, this recipe is straightforward and uses common kitchen techniques that anyone can master.
  • Impressive Presentation: A beautifully roasted chicken garnished with herbs not only tastes great but also looks stunning on the dining table.
  • Versatile Ingredients: Many of the ingredients can be easily substituted based on availability, allowing you to customize the recipe to suit your taste.

Ingredients Breakdown

Here are the ingredients you will need to create this mouthwatering dish, along with some substitution options:

  • 4-5 pound whole chicken: Ensure it’s at room temperature with giblets and neck removed for even cooking.
  • 1/4 cup unsalted butter: Melted, to ensure it’s easy to mix with herbs.
  • 4 tablespoons olive oil: Adds moisture and enhances flavor.
  • 1 lemon: Zested and juiced; provides brightness to the dish.
  • Salt and freshly ground pepper: To taste; essential for seasoning.
  • 4 tablespoons butter: Room temperature, mixed with herbs for a flavorful rub.
  • 2 tablespoons fresh parsley: Chopped; can be substituted with dried parsley (1 tablespoon).
  • 1 tablespoon fresh rosemary: Chopped; dried rosemary can be used if fresh isn’t available.
  • 1 teaspoon fresh thyme: Chopped; dried thyme is a suitable alternative.
  • 1 tablespoon paprika (optional): For a darker roasted color.
  • 6 cloves garlic: Minced; enhances the aromatic quality of the dish.
  • 1 head garlic: Roughly peeled and cut in half horizontally; adds additional flavor during roasting.
  • 6 sprigs fresh rosemary: Tied together for easy removal after cooking.
  • 3 sprigs fresh thyme: Used for flavoring.
  • 1 lemon: Quartered; for stuffing the cavity.

Step-by-Step Directions

Follow these simple steps to roast your chicken to perfection:

  1. Preheat Your Oven: Preheat your oven to 375°F (190°C) to ensure even cooking.
  2. Prepare the Chicken: Pat the chicken dry with paper towels to help it crisp up while roasting.
  3. Make the Herb Butter: In a bowl, combine melted butter, olive oil, lemon juice, zest, minced garlic, parsley, rosemary, thyme, salt, and pepper.
  4. Apply the Herb Butter: Carefully loosen the skin of the chicken and rub the herb butter mixture underneath it, ensuring even coverage.
  5. Stuff the Cavity: Place the quartered lemon and halved garlic head inside the chicken cavity, along with the tied rosemary and thyme.
  6. Place in the Roasting Pan: Transfer the chicken to a roasting pan, breast side up, and tuck the wing tips underneath the body.
  7. Roast the Chicken: Roast in the preheated oven for approximately 1 hour and 15 minutes or until the internal temperature reaches 165°F (74°C).
  8. Let it Rest: Remove from the oven and let the chicken rest for about 15-20 minutes before carving to allow the juices to redistribute.

Expert Tips for Perfect Roasting

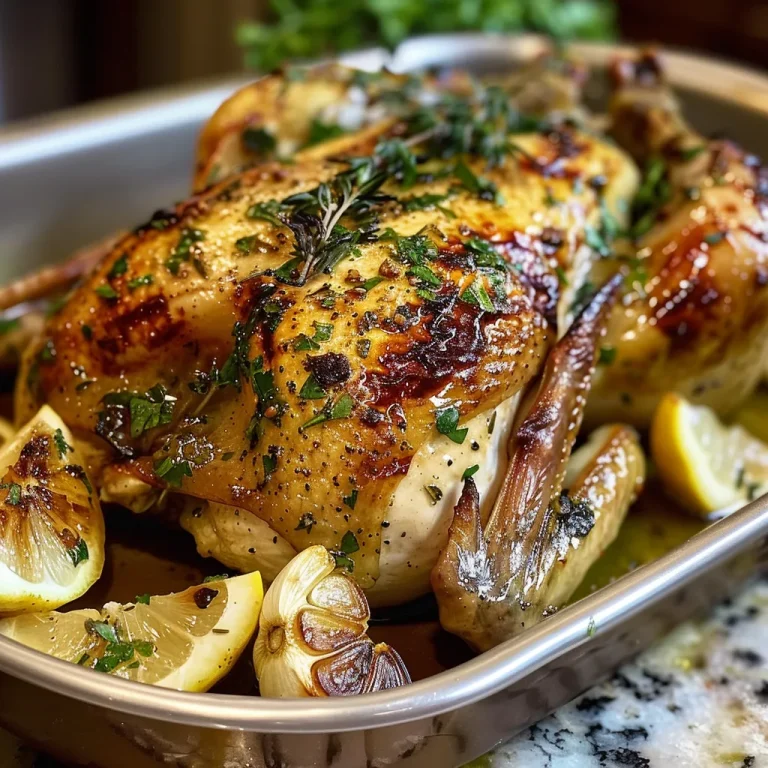
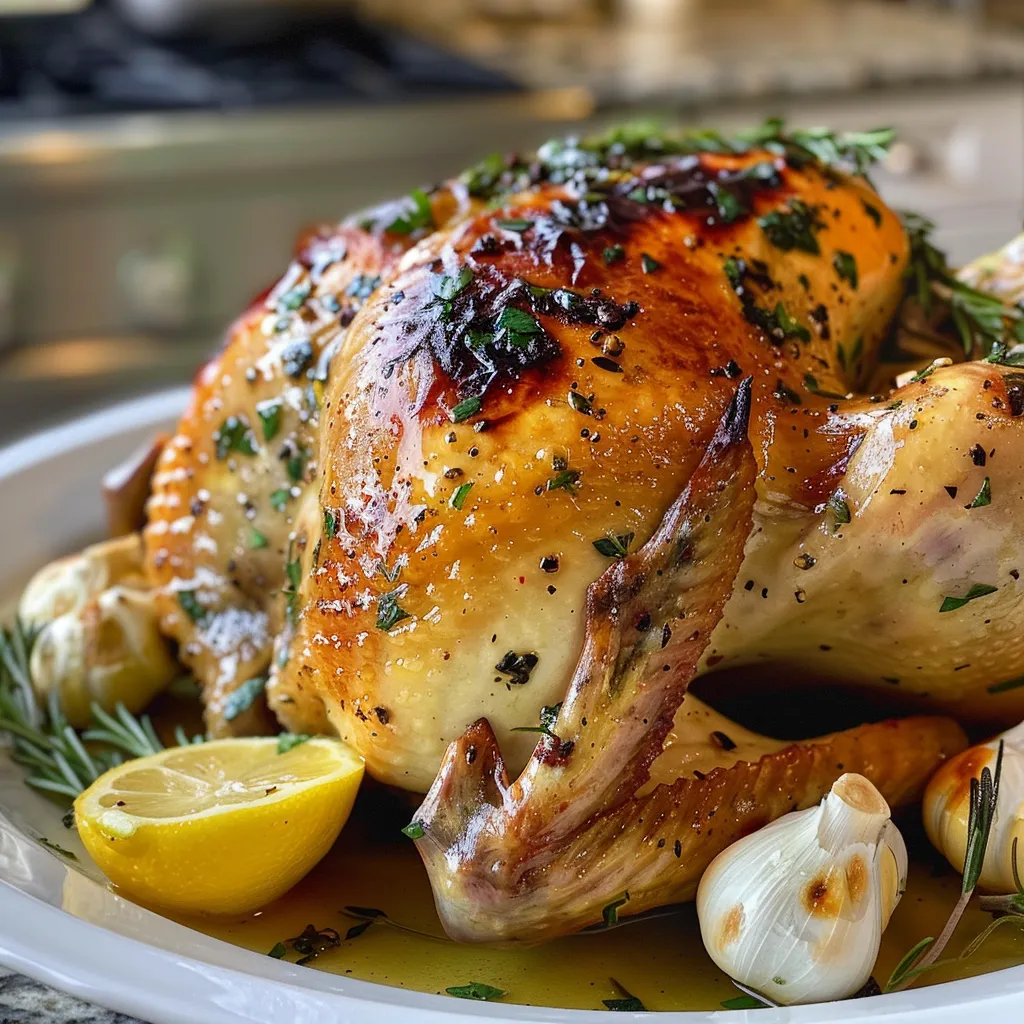
Side view of a golden-brown roasted chicken with herbs and garlic, ready to serve.
  • Room Temperature: Always let your chicken sit at room temperature for about 30 minutes before roasting. This helps it cook evenly.
  • Use a Meat Thermometer: Invest in a good quality meat thermometer to check the internal temperature for safety and perfect doneness.
  • Don’t Rush the Resting: Allowing the chicken to rest after cooking is crucial for retaining moisture.
  • Baste for Extra Flavor: If desired, baste the chicken with its own juices halfway through cooking to enhance flavor.
  • Experiment with Herbs: Feel free to mix and match herbs based on your preferences or what you have on hand.
  • Add Vegetables: Roasting vegetables alongside the chicken can create a complete meal with minimal effort.
  • Avoid Overcooking: Keep a close eye on the chicken as it roasts; overcooking can lead to dry meat.
  • Use Fresh Ingredients: Fresh herbs and spices can dramatically improve the flavor profile of your dish.

Common Mistakes and Troubleshooting

Even the best chefs can run into issues. Here’s how to avoid common pitfalls:

  • Dry Chicken: Ensure you’re not overcooking the chicken; use a thermometer for accuracy.
  • Watery Skin: Make sure to dry your chicken thoroughly before applying the herb butter.
  • Uneven Cooking: If using a smaller chicken, adjust the roasting time. A smaller chicken cooks faster!
  • Flavorless Meat: Don’t skimp on seasoning! Generously apply salt and pepper both inside and outside the chicken.

Variations of Garlic Herb Butter Roasted Chicken

Once you master the basic recipe, try these exciting variations:

  • Lemon Garlic Herb Chicken: Add more lemon zest and juice for a brighter flavor.
  • Spicy Herb Roasted Chicken: Incorporate cayenne pepper or chili flakes into the herb butter for a kick.
  • Honey Garlic Chicken: Mix honey into the herb butter for a sweet glaze.
  • Herbed Chicken with Vegetables: Surround the chicken with your favorite root vegetables for a one-pan meal.

Storage and Make-Ahead Instructions

This recipe can be enjoyed fresh or stored for later:

  • Storage: Store any leftovers in an airtight container in the refrigerator for up to 4 days.
  • Freezing: You can freeze cooked chicken for up to 3 months. Just ensure it’s well-wrapped.
  • Reheating: To reheat, place the chicken in a baking dish in the oven at 350°F (175°C) until warmed through.
  • Make-Ahead: You can prepare the herb butter a day in advance and keep it in the refrigerator until ready to use.

Frequently Asked Questions (FAQs)

  • Can I use a smaller chicken? Yes, adjust the cooking time accordingly; a smaller chicken will cook faster.
  • What can I use instead of fresh herbs? Dried herbs are a great substitute; just use about one-third of the amount.
  • How do I know when the chicken is done? Use a meat thermometer; the internal temperature should reach 165°F (74°C).
  • Can I marinate the chicken? Absolutely! Marinate for a few hours or overnight for enhanced flavor.
  • What sides pair well with roasted chicken? Roasted vegetables, mashed potatoes, or a fresh salad make excellent accompaniments.
  • Can I cook this chicken on a grill? Yes, but be sure to monitor the temperature closely to avoid drying it out.
  • Is it necessary to stuff the cavity? While not necessary, stuffing with aromatics enhances flavor.
  • How do I make the skin crispy? Make sure to dry the chicken thoroughly and roast at a high temperature.

Nutrition Tips and Dietary Adaptations

This Garlic Herb Butter Roasted Chicken is not just delicious but can also fit into various dietary needs:

  • Low-Carb: Perfect for keto diets; pair with low-carb vegetables.
  • Dairy-Free: Substitute the butter with a dairy-free alternative for lactose intolerance.
  • Gluten-Free: Naturally gluten-free; enjoy without any modifications.
  • Protein-Packed: An excellent source of protein, making it a great choice for muscle maintenance.

Equipment Recommendations

For the best results, here’s what you’ll need:

  • Roasting Pan: A sturdy roasting pan is essential for even cooking.
  • Meat Thermometer: A digital thermometer makes checking doneness simple.
  • Basting Brush: Use this for applying the herb butter mixture.
  • Cutting Board: A good quality board is important for carving your chicken.

Serving Suggestions

To make your dinner even more memorable, consider these serving options:

  • Garnish: Fresh herbs or lemon wedges can enhance the presentation.
  • Side Dishes: Pair with roasted potatoes, seasonal vegetables, or a light salad.
  • Wine Pairing: A crisp white wine, such as Chardonnay, complements the flavors beautifully.

In conclusion, mastering the art of Garlic Herb Butter Roasted Chicken is a rewarding endeavor that brings together flavors, textures, and the warmth of home cooking. With this guide, you’ll not only create a stunning dish but also forge connections around the table that nourish both body and spirit. Happy cooking!

Garlic Herb Butter Roasted Chicken

Prep Time 15 minutes
Cook Time 1 hour 30 minutes
Total Time 1 hour 45 minutes
Servings 4 servings
Calories 950
This flavorful roasted chicken is infused with garlic and fresh herbs, resulting in a juicy and aromatic main dish perfect for any occasion.

Ingredients

Whole Chicken

  • 1 piece whole 4-5 pound chicken (room temperature with giblets and neck removed)

Herb and Garlic Mixture

  • 1/4 cup unsalted butter (melted)
  • 4 tablespoons olive oil
  • 1 piece lemon (zested and juiced)
  • 4 tablespoons butter (room temperature)
  • 2 tablespoons fresh parsley (chopped)
  • 1 tablespoon fresh rosemary (chopped)
  • 1 teaspoon fresh thyme (chopped)
  • 1 tablespoon paprika (optional) (for darker color when roasting)
  • 6 cloves garlic (minced)
  • 1 head garlic (roughly peeled and cut in half horizontally)
  • 6 sprigs fresh rosemary (tied together)
  • 3 sprigs fresh thyme
  • 1 piece lemon (quartered)

Instructions 

  • Preheat oven to 375°F (190°C). Rub the chicken with olive oil, lemon zest, juice, garlic, herbs, and spices. Stuff lemon quarters and herb sprigs inside the cavity. Tie the rosemary sprigs around the chicken. Roast for about 1.5 hours until golden and cooked through.

Notes

Let the chicken rest for 10 minutes before carving for best results.
Calories: 950kcal
Cost: $15
Course: Main Course
Cuisine: American
Keyword: Chicken, garlic, herbs

Indulge in Comfort: A Comprehensive Guide to Creamy Tomato Basil Chicken Breasts

Welcome to a culinary adventure where you’ll discover the joy of cooking with my favorite Creamy Tomato Basil Chicken Breasts recipe. This dish combines tender chicken breasts with a rich and creamy tomato sauce, creating a meal that is perfect for any occasion. Whether you’re hosting a dinner party or simply enjoying a cozy night in, this recipe will warm your heart and delight your taste buds. In this guide, I’ll provide you with all the details you need to make this dish a success, including tips, variations, and storage recommendations.

Why You’ll Love This Recipe

  • Quick and Easy: With just a few simple steps, you can have a restaurant-quality meal on the table in under 30 minutes.
  • Comforting Flavors: The combination of creamy sauce and fresh basil creates a comforting and satisfying dish that everyone will love.
  • Versatile Ingredients: This recipe uses easy-to-find ingredients that you probably already have in your pantry.
  • Healthier Option: By using chicken breasts and fresh ingredients, this dish offers a healthier alternative to heavy pasta meals.
  • Impressive Presentation: The vibrant colors of the tomatoes and fresh basil make this dish visually stunning, perfect for impressing guests.

Ingredients Breakdown

Let’s dive into the ingredients you’ll need to create this delicious dish:

  • 1 tablespoon canola oil: For sautéing the chicken and enhancing flavor.
  • 2 boneless skinless chicken breasts: Roughly 1 lb or 454 grams, halved for even cooking.
  • Salt and pepper: Essential seasonings to enhance the chicken’s natural flavors.
  • 1 tablespoon minced garlic: Adds aromatic depth to the sauce.
  • ¾ teaspoon salt: For seasoning the sauce.
  • ½ teaspoon dried basil: Provides additional herbaceous flavor.
  • ¼ teaspoon black pepper: A touch of heat to complement the dish.
  • 1 pinch crushed red pepper flakes: Optional, but it adds a delightful kick!
  • 398 ml canned diced tomatoes with Italian herbs: The base of our sauce, offering rich flavor.
  • ¾ cup tomato pasta sauce: Marinara or other seasoned tomato sauce work well.
  • ¾ cup whipping cream: Makes the sauce creamy and indulgent (whole milk or half and half can be used as substitutes).
  • 1 tablespoon corn starch: Helps thicken the sauce for a perfect consistency.
  • 2 tablespoons freshly chopped basil: For a burst of fresh flavor (basil pesto is a great substitute if fresh basil is unavailable).
  • Freshly grated Parmesan: For garnish, adding a touch of elegance and flavor.

How to Make This Creamy Tomato Basil Chicken

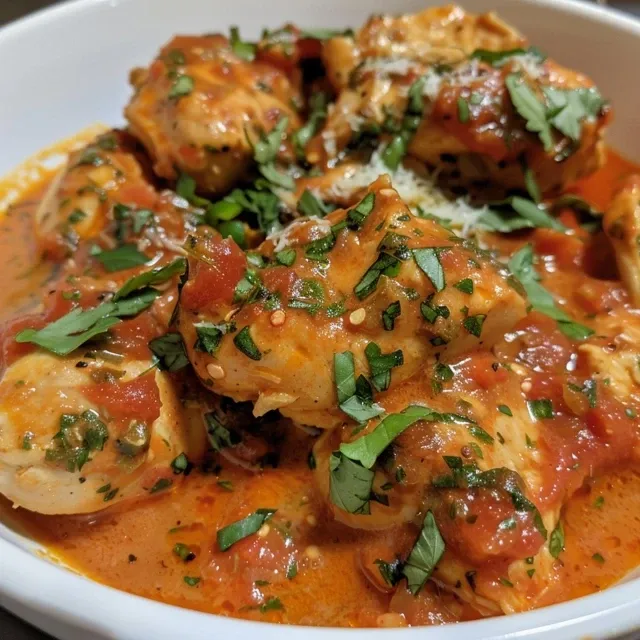
Deliciously plated creamy tomato basil chicken, highlighting its vibrant colors and creamy texture.

Follow these steps to create your delicious dish:

  1. Halve chicken breasts the long way to create two thin pieces (this helps them cook more evenly).
  2. Heat canola oil in a large skillet over medium-high heat. Season chicken breasts with salt and pepper.
  3. Brown chicken breasts on each side (2-4 minutes per side), then remove from the pan and keep covered.
  4. Add garlic, salt, basil, black pepper, and red pepper flakes if using. Cook for 1 minute, ensuring garlic doesn’t burn.
  5. Add diced tomatoes and tomato sauce, scraping the browned bits off the pan with a wooden spoon.
  6. Whisk together cream and corn starch, then add to the pan. Stir to combine.
  7. Return the chicken breasts to the pan. Bring to a low simmer, reduce heat to medium-low, and cover. Cook until chicken reaches an internal temperature of 165°F and sauce thickens slightly.
  8. Serve hot, garnished with freshly chopped basil and Parmesan cheese.

Pro Tips for Success

  • Even Cooking: Pound chicken breasts to an even thickness for uniform cooking.
  • Watch the Garlic: Be careful not to overcook the garlic to avoid bitterness.
  • Thickening the Sauce: If the sauce is too thin, let it simmer uncovered for a few minutes.
  • Flavor Boost: Experiment with adding other herbs like thyme or oregano for different flavor profiles.
  • Make Ahead: Prepare the sauce in advance and store it in the fridge for up to 3 days. Just add the chicken when you’re ready to cook.
  • Pairing: This dish pairs beautifully with rice, pasta, or a fresh salad.
  • Leftover Chicken: Use leftover chicken in salads, wraps, or sandwiches for a quick meal.
  • Cooking in Batches: If you’re cooking for a crowd, double the recipe and make it in batches.

Common Mistakes and Troubleshooting

  • Overcooking Chicken: Always use a meat thermometer to check for doneness—165°F is the target.
  • Sauce Too Thin: If your sauce isn’t thickening, add a bit more corn starch mixed with water and stir it in.
  • Burning Garlic: If the garlic burns, it will impart bitterness. Keep an eye on it and stir frequently.
  • Missing Flavor: Taste as you go! Adjust seasonings to your preference.

Delicious Variations

Feel free to customize this recipe to suit your taste with these variations:

  • Spicy Tomato Basil Chicken: Add more crushed red pepper flakes for a spicier kick.
  • Cheesy Tomato Basil Chicken: Stir in shredded mozzarella cheese for an extra cheesy sauce.
  • Pesto Chicken: Replace the chopped basil with pesto for a richer flavor.
  • Mushroom Tomato Basil Chicken: Add sautéed mushrooms for an earthy depth.

Storage and Make-Ahead Instructions

This dish is great for meal prep! Here’s how to store it:

  • Refrigeration: Store leftovers in an airtight container for up to 3 days.
  • Freezing: Freeze the cooked chicken in sauce for up to 3 months. Thaw overnight in the fridge before reheating.
  • Make-Ahead: The sauce can be made ahead of time and stored in the fridge for up to 3 days. Just add the chicken when you’re ready to cook.

Frequently Asked Questions

  • Can I use skin-on chicken breasts? Yes, skin-on chicken can add extra flavor. Just adjust the cooking time accordingly.
  • What can I serve with creamy tomato basil chicken? It pairs well with pasta, rice, or steamed vegetables.
  • Can I make this recipe dairy-free? Yes, substitute the whipping cream with coconut cream or a dairy-free alternative.
  • How do I know when the chicken is done? Use a meat thermometer to ensure the internal temperature reaches 165°F.
  • Can I use fresh tomatoes instead of canned? Absolutely! Just ensure they are ripe and flavorful.
  • What’s the best way to reheat leftovers? Reheat gently on the stovetop or in the microwave until heated through.
  • Can I add vegetables to this dish? Yes! Spinach, zucchini, or bell peppers can be great additions.
  • How do I store leftover sauce? Store in an airtight container in the fridge for up to 3 days.

Nutrition Tips and Dietary Adaptations

This recipe is not only delicious but can also be made to fit various dietary needs:

  • Low-Carb Option: Serve over cauliflower rice or zucchini noodles instead of pasta.
  • Dairy-Free: Use coconut cream or a plant-based cream alternative.
  • Gluten-Free: This recipe is naturally gluten-free; just ensure any sauces used are certified gluten-free.
  • Increased Protein: Add more chicken or even some chickpeas for added protein.

Essential Equipment Recommendations

Here’s what you’ll need to make this recipe:

  • Large Skillet: A non-stick skillet works best for even cooking.
  • Meat Thermometer: To ensure your chicken is perfectly cooked.
  • Wooden Spoon: Great for scraping the bottom of the pan and mixing.
  • Whisk: For combining the cream and corn starch smoothly.

Serving Suggestions

Enhance your meal by pairing this dish with:

  • Garlic Bread: A classic side that complements the creamy sauce.
  • Green Salad: A fresh salad with a light vinaigrette balances the richness of the dish.
  • Rice or Pasta: Serve over your favorite grain for a complete meal.
  • Steamed Vegetables: Brighten your plate with seasonal vegetables.

In conclusion, this Creamy Tomato Basil Chicken Breasts recipe is a delightful way to bring comfort and flavor into your home. With simple ingredients, easy steps, and plenty of variations, it’s a dish that you can enjoy time and again. So gather your ingredients, follow these tips, and let me know how you enjoyed the recipe! Happy cooking!

Creamy Tomato Basil Chicken Breasts

Prep Time 10 minutes
Cook Time 20 minutes
Total Time 30 minutes
Servings 4 servings
Calories 520
A flavorful and creamy chicken dish featuring tender chicken breasts simmered in a rich tomato basil sauce, perfect for a comforting meal.

Ingredients

Main

  • 1 tablespoon canola oil
  • 2 pieces boneless skinless chicken breasts (roughly 1 lb or 454 grams)
  • salt and pepper salt and pepper
  • 1 tablespoon minced garlic (2-3 cloves)
  • 0.75 teaspoon salt
  • 0.5 teaspoon dried basil
  • 0.25 teaspoon black pepper
  • 1 pinch crushed red pepper flakes (optional)
  • 398 ml canned diced tomatoes with Italian herbs
  • 0.75 cup tomato pasta sauce (marinara or seasoned tomato sauce)
  • 0.75 cup whipping cream (whole milk or half and half also work)
  • 1 tablespoon corn starch
  • 2 tablespoons freshly chopped basil (or 1 tablespoon basil pesto)
  • as needed Parmesan for garnish

Instructions 

  • Halve chicken breasts lengthwise to ensure even cooking.
  • Heat oil in a skillet, season chicken with salt and pepper, then brown on both sides (2-4 minutes each).
  • Remove chicken, cook garlic, salt, basil, pepper, and red pepper flakes for 1 minute.
  • Add diced tomatoes and tomato sauce, then whisk in cream and corn starch. Return chicken to pan and simmer until cooked through and sauce thickens.

Notes

Serve with freshly grated Parmesan and extra basil for garnish.
Calories: 520kcal
Cost: $15
Course: Main Course
Cuisine: American
Keyword: basil, Chicken, Tomato

Experience the Joy of Baking with This Lemon Cream Cheese Danish

If you’re looking for a delightful breakfast treat that combines the flaky goodness of puff pastry with a tangy lemon cream cheese filling, then this Lemon Cream Cheese Danish is just what you need. This easy recipe will elevate your morning routine and impress your family and friends alike. With every bite, you’ll enjoy a perfect balance of sweetness and citrus that brings comfort and joy to the table. Let’s dive into the world of baking and discover how to create this delicious pastry that’s not just a treat but an experience!

Why You’ll Love This Recipe

This Lemon Cream Cheese Danish isn’t just another breakfast option; it’s a culinary delight packed with flavor and texture. Here are some reasons why you’ll fall in love with it:

  • Quick and Easy: With just a few simple ingredients and minimal prep time, you can whip this up in no time!
  • Versatile Serving Options: Perfect for brunch, a cozy family breakfast, or even as a dessert, this pastry fits any occasion.
  • Impressive Presentation: The intricate folding technique of the pastry creates a stunning visual that will wow your guests.
  • Homemade Goodness: Nothing beats the taste of freshly baked pastries, made right in your own kitchen.
  • Customization: You can easily adjust the filling to include your favorite flavors or toppings, making it your own.

Ingredients Breakdown

Here’s what you’ll need to create this tantalizing Lemon Cream Cheese Danish:

  • 1 sheet Frozen puff pastry (thawed): The star of our danish; it provides that flaky, delicious crust.
  • 4 ounces Cream cheese (softened): This will be the base of our rich filling.
  • ¼ cup Confectioner’s sugar: Adds sweetness and helps to balance the tang of the lemon.
  • 1 teaspoon Vanilla extract: Enhances the flavor profile of the cream cheese.
  • 2 Lemons (Zest and set 1 teaspoon aside): The zest provides vibrant flavor while the juice can be used for the glaze.
  • 2.5 ounces Lemon Curd: Adds a burst of tangy sweetness to the filling.
  • 1 Egg: Used for the egg wash to give the pastry a beautiful golden finish.
  • 1 tablespoon Water: To mix with the egg for the egg wash.
  • ½ cup Confectioner’s sugar: For the glaze; sweetens and adds a nice finish.
  • 2 teaspoons Milk: To thin the glaze to the right consistency.
  • 1 teaspoon Lemon zest: For added flavor in the glaze.

How to Make Your Lemon Cream Cheese Danish

Tantalizing photo of a lemon danish pastry, highlighting its creamy inside and puffed layers.

Follow these simple steps to create your danish:

  1. Preheat your oven to 400 degrees F.
  2. In a mixing bowl, combine the cream cheese, confectioner’s sugar, vanilla extract, and lemon zest (set 1 teaspoon aside for later) until thoroughly blended.
  3. Prepare the egg wash by whisking the egg with water and set aside.
  4. Unfold the thawed puff pastry sheet and place it on a parchment-lined baking sheet. Lightly brush the outer edges of the pastry with the egg wash.
  5. Cut 1-inch strips down the left and right thirds of the puff pastry, leaving the middle section untouched.
  6. Spread the cream cheese mixture over the center of the puff pastry, followed by a layer of lemon curd.
  7. Fold the ends of the pastry over the filling.
  8. Starting from the top, fold the left strip in towards the middle, then alternate with the right strip. Continue this pattern down the length of the pastry.
  9. Brush the remaining egg wash over the pastry.
  10. Bake in the preheated oven for about 20 minutes, or until golden brown.
  11. Let the pastry cool completely for about 1 hour after removing it from the oven.
  12. Meanwhile, prepare the glaze by mixing the confectioner’s sugar, milk, and reserved lemon zest in a small bowl. Drizzle over the cooled danish.
  13. Serve immediately or store in the refrigerator until ready to serve.

Pro Tips for Perfecting Your Danish

To ensure your Lemon Cream Cheese Danish turns out perfectly every time, consider these expert tips:

  • Use Quality Ingredients: Opt for high-quality cream cheese and fresh lemons to enhance the flavor.
  • Don’t Overwork the Dough: Handle the puff pastry gently to keep it flaky and airy.
  • Chill the Pastry: If your kitchen is warm, chill the pastry in the refrigerator before baking to maintain its structure.
  • Watch the Bake Time: Keep an eye on the danish towards the end of the baking time to prevent over-browning.
  • Experiment with Fillings: Try different flavors of curd or even fruit preserves for a unique twist.
  • Brush the Edges: For a beautiful finish, ensure the egg wash is generously applied to the edges.
  • Let It Cool: Allow the pastry to cool completely before adding the glaze for a better presentation.
  • Make Ahead: Prepare the filling and pastry ahead of time for a quick assembly in the morning.

Common Mistakes and Troubleshooting

Even the best bakers can encounter issues. Here’s how to troubleshoot common mistakes:

  • Pastry Not Rising: Ensure your puff pastry is fresh and properly thawed. Cold dough doesn’t rise well.
  • Filling Leaking Out: Make sure your edges are sealed well and the filling isn’t overstuffed.
  • Glaze Too Thick: If your glaze is too thick, add a little more milk to reach the desired consistency.
  • Pastry Overbaking: If your danish is browning too quickly, consider covering it loosely with foil.

Variations to Try

Feeling adventurous? Here are some tasty variations to make your danish even more exciting:

  • Blueberry Lemon Danish: Add fresh blueberries to the cream cheese filling for a burst of flavor.
  • Coconut Cream Cheese Danish: Mix in shredded coconut with the cream cheese for a tropical twist.
  • Chocolate Lemon Danish: Drizzle melted chocolate over the top before serving for a decadent touch.
  • Apple Cinnamon Danish: Substitute lemon curd with apple pie filling and sprinkle with cinnamon.

Storage and Make-Ahead Instructions

This danish is best enjoyed fresh, but you can store leftovers or prepare in advance:

  • Storing: Keep any leftovers in an airtight container in the refrigerator for up to 3 days.
  • Freezing: You can freeze the unbaked pastry for up to a month. Just thaw overnight in the fridge before baking.
  • Make Ahead: Prepare the filling and pastry dough a day in advance. Assemble and bake the next morning!

Frequently Asked Questions

Here are some common queries about making Lemon Cream Cheese Danish:

  • Can I use homemade lemon curd? Absolutely! Homemade lemon curd adds a personal touch to your danish.
  • What if I can’t find puff pastry? You can substitute with crescent roll dough, but the texture will differ.
  • Can I make this danish gluten-free? Yes, use a gluten-free puff pastry alternative.
  • How do I know when the danish is done? It should be golden brown and flaky. A toothpick inserted should come out clean.
  • Can I use different fruit curds? Yes, feel free to experiment with other flavors like raspberry or orange!
  • How do I reheat leftovers? Warm in the oven at 350°F for about 10 minutes to regain crispness.
  • Is this recipe suitable for kids? Definitely! Kids can help with folding the pastry and drizzling the glaze.
  • Can I add nuts to the filling? Yes, chopped nuts like pecans or almonds make a great addition.

Nutritional Information and Dietary Adaptations

This Lemon Cream Cheese Danish is not only delightful but can be adjusted to fit various dietary needs:

  • Low Sugar Options: Substitute confectioner’s sugar with a sugar alternative for a lower-sugar version.
  • Vegan Adaptation: Use a plant-based cream cheese and egg replacement to make it vegan-friendly.
  • Low-Calorie Option: Use less cream cheese and substitute with Greek yogurt for a lighter variant.

Essential Equipment for Success

To make this Lemon Cream Cheese Danish, you’ll need:

  • Baking Sheet: A sturdy, flat surface for baking your pastry.
  • Parchment Paper: Prevents sticking and makes cleanup easier.
  • Mixing Bowl: For combining your filling ingredients.
  • Whisk: Essential for mixing your egg wash and glaze.
  • Pastry Brush: For applying the egg wash and glaze evenly.

Serving Suggestions

This Lemon Cream Cheese Danish pairs beautifully with a variety of beverages and sides:

  • Fresh Fruit: Serve with a side of mixed berries for a refreshing contrast.
  • Coffee or Tea: A warm cup of coffee or herbal tea complements the flavors perfectly.
  • Yogurt: Pair it with a dollop of yogurt for added creaminess and protein.

Wrap-Up: Your New Favorite Breakfast Treat Awaits!

Now that you have all the knowledge and steps needed to create your very own Lemon Cream Cheese Danish, it’s time to get baking! Remember, every great chef started right where you are. Embrace this opportunity to fill your kitchen with delicious aromas and create a treat that your loved ones will adore. Happy baking!

Lemon Cream Cheese Danish

Prep Time 20 minutes
Cook Time 20 minutes
Total Time 40 minutes
Servings 8 pieces
Calories 350
A delightful pastry combining creamy lemon filling and flaky puff pastry, topped with a sweet glaze.

Ingredients

Dough

  • 1 sheet Frozen puff pastry (thawed)

Filling

  • 4 ounces Cream cheese (softened)
  • 0.25 cup Confectioner’s sugar
  • 1 teaspoon Vanilla extract
  • 2 lemons Lemons (Zest and set aside 1 tsp) (Zest and juice)
  • 2.5 ounces Lemon Curd

Egg Wash

  • 1 egg Egg
  • 1 tablespoon Water

Glaze

  • 0.5 cup Confectioner’s sugar
  • 2 teaspoons Milk
  • 1 teaspoon Lemon zest

Instructions 

  • Preheat oven to 400°F (200°C).
  • Mix cream cheese, confectioner’s sugar, vanilla, and lemon zest until smooth. Prepare egg wash with egg and water.
  • Unfold pastry, cut strips, spread filling and lemon curd, then fold and braid as directed. Brush with egg wash.
  • Bake for 20 minutes until golden. Cool completely, then drizzle with glaze made from sugar, milk, and lemon zest.

Notes

Ensure puff pastry is fully thawed before use for best results.
Calories: 350kcal
Cost: $15
Course: Dessert
Cuisine: American
Keyword: lemon, pastry

Elevate Your Dinner with Creamy Lemon Chicken Pasta

Cooking is an art, and every artist needs a canvas. In the kitchen, we transform simple ingredients into delightful meals that bring joy and connection to our tables. This Creamy Lemon Chicken Pasta recipe is a perfect example, showcasing how a few key ingredients can create a symphony of flavors that will impress your family and friends. With perfectly seasoned chicken, al dente spaghetti, and a luscious cream sauce, this dish is not only comforting but also elegant enough for any occasion.

In this comprehensive guide, I’ll walk you through everything you need to know to make this dish successfully. From ingredient breakdowns to expert tips, you’ll find all the information you need to master this recipe and make it your own. Let’s dive in!

Why You’ll Love This Recipe

This Creamy Lemon Chicken Pasta is not just about taste; it’s about the experience of cooking and sharing. Here are some specific reasons to love it:

  • Quick and Easy: Ready in about 30 minutes, making it perfect for busy weeknights when time is tight.
  • Simple Ingredients: Uses pantry staples that you likely already have, such as flour, garlic, cream, and pasta.
  • Crowd-Pleasing Flavor: The combination of creamy sauce and zesty lemon creates a dish that everyone will love.
  • Versatile: You can easily adapt the recipe by adding vegetables or swapping pasta shapes to suit your preferences.
  • Impressive Presentation: The vibrant colors and rich textures make for a visually stunning meal.

Ingredients You’ll Need

To create this delicious Creamy Lemon Chicken Pasta, gather the following ingredients:

  • 1 lb boneless skinless chicken breast (sliced in half lengthwise to create thin cutlets)
  • 1/2 cup all-purpose flour
  • 2 teaspoons Italian seasoning (divided: 1 tsp for chicken, 1 tsp for sauce)
  • 2 teaspoons lemon pepper seasoning
  • Kosher salt (to taste)
  • Freshly cracked black pepper (to taste)
  • 2 tablespoons olive oil (divided)
  • 1 lb spaghetti
  • 6 cloves garlic (finely minced)
  • 1 whole lemon (zested and juiced, about 3 tbsp juice)
  • 1.5 cups heavy cream
  • 1/2 cup freshly shaved Parmesan cheese
  • 1/2 cup reserved pasta water
  • Fresh parsley (chopped, for garnish)
  • Lemon wedges (for serving)

These ingredients work together to create a beautiful balance of flavors, but don’t hesitate to make substitutions based on your taste or dietary needs. For example, you can use whole wheat pasta for a healthier option or replace heavy cream with a plant-based alternative for a lighter version.

How to Make Creamy Lemon Chicken Pasta

Delicious creamy pasta dish featuring chicken, garlic, and lemon zest in a rich sauce.

Follow these step-by-step instructions to create the perfect Creamy Lemon Chicken Pasta:

Step 1: Cook the Pasta

Bring a large pot of salted water to a boil and cook spaghetti until al dente, about 8-9 minutes. Before draining, reserve 1/2 cup pasta water. Drain the pasta, toss it with 1 tablespoon olive oil, and set aside.

Step 2: Prepare the Chicken

While the pasta cooks, slice each chicken breast in half lengthwise to create thinner cutlets about 1/2-inch thick. Let the chicken rest at room temperature for 15-20 minutes if time allows. In a shallow bowl, combine flour, 1 teaspoon Italian seasoning, lemon pepper seasoning, salt, and pepper. Dredge each chicken piece in the flour mixture, shaking off excess.

Step 3: Sear the Chicken

Heat 1 tablespoon olive oil in a large skillet over medium-high heat. Add the chicken and cook for 3-4 minutes per side until golden brown and cooked through to an internal temperature of 165°F. Remove to a plate and set aside.

Step 4: Make the Sauce

Reduce heat to medium and add the remaining tablespoon of olive oil to the same pan. Add finely minced garlic, the remaining teaspoon of Italian seasoning, salt, and pepper. Stir constantly for 30 seconds until fragrant but not browned. Add lemon zest, lemon juice, and heavy cream to the pan. Stir well and season with salt and pepper. Let the sauce warm through and thicken for 2-3 minutes until it coats the back of a spoon and holds a line when you draw your finger through it.

Step 5: Combine Pasta and Sauce

Stir in Parmesan cheese until melted and smooth. Add cooked spaghetti to the sauce and toss to coat, adding reserved pasta water 2 tablespoons at a time until the sauce clings smoothly to the pasta without pooling at the bottom of the pan.

Step 6: Finish With Chicken

Slice cooked chicken into strips and return to the pan, stirring until heated through. Adjust seasoning if needed.

Step 7: Serve and Garnish

Serve immediately, garnished with fresh chopped parsley and lemon wedges on the side. Enjoy your Creamy Lemon Chicken Pasta as a delightful dinner that’s sure to impress!

Pro Tips for Making Creamy Lemon Chicken Pasta

Here are some expert insights to help you elevate your dish:

  • Use Fresh Ingredients: Fresh garlic and lemon will enhance the flavors significantly compared to dried alternatives.
  • Don’t Overcook the Chicken: Aim for that perfect golden brown while keeping the chicken juicy; use a meat thermometer to ensure doneness.
  • Adjust Sauce Consistency: The reserved pasta water is your best friend for achieving the ideal creamy texture.
  • Experiment with Herbs: Fresh thyme or basil can add an aromatic touch to the dish.
  • Make it Ahead: Cook the chicken and sauce in advance, then combine with freshly cooked pasta when ready to serve.
  • Garnish Creatively: Consider adding a sprinkle of red pepper flakes for a kick or toasted pine nuts for crunch.

Common Mistakes and Troubleshooting

Even the best of us can make mistakes in the kitchen. Here are some common pitfalls to avoid:

  • Overcooked Pasta: Be sure to test your pasta a minute or two before the package instructions suggest to ensure it’s al dente.
  • Too Thick Sauce: If your sauce is too thick, gradually add more reserved pasta water to achieve the desired consistency.
  • Underseasoned Chicken: Don’t skip seasoning the chicken; it’s a key flavor component that should not be overlooked.

Variations of Creamy Lemon Chicken Pasta

Feel free to adapt this recipe to suit your tastes or dietary needs. Here are some delicious variations:

  • Vegetable Lovers: Add sautéed spinach, broccoli, or cherry tomatoes for a pop of color and nutrition.
  • Herb Infusion: Substitute Italian seasoning with fresh herbs like thyme or rosemary for a different flavor profile.
  • Spice it Up: Incorporate red pepper flakes or a dash of hot sauce for a spicy kick.
  • Cheesy Delight: Swap the Parmesan with goat cheese or feta for a tangy twist.

Storage and Make-Ahead Instructions

This Creamy Lemon Chicken Pasta can be prepared in advance and stored for later enjoyment:

  • Refrigeration: Store leftovers in an airtight container in the refrigerator for up to 3 days.
  • Freezing: The dish can be frozen, but be aware that the texture may change. Store in a freezer-safe container for up to 2 months.
  • Reheating: Reheat gently on the stovetop over low heat, adding a splash of milk or cream to revive the sauce.

FAQs about Creamy Lemon Chicken Pasta

Here are some frequently asked questions to help you navigate this recipe:

  • Can I use chicken thighs instead of breasts? Yes, chicken thighs will add more flavor and remain moist.
  • What pasta works best for this recipe? Spaghetti is traditional, but you can use fettuccine, penne, or any pasta you prefer.
  • Can I make this dish dairy-free? Absolutely! Substitute heavy cream with coconut cream or cashew cream.
  • How can I make it gluten-free? Use gluten-free pasta and flour to adapt this recipe.
  • What should I serve with this dish? A fresh green salad or garlic bread complements the meal beautifully.
  • How do I know when the chicken is done? Use a meat thermometer; the internal temperature should reach 165°F.
  • Can I add more lemon flavor? Yes! Increase the lemon zest or juice to enhance the citrus taste.
  • How long does it take to prepare? The dish takes about 30-40 minutes from start to finish.

Nutritional Tips and Dietary Adaptations

While indulging in this Creamy Lemon Chicken Pasta, consider these nutritional tips for a balanced meal:

  • Protein Boost: Add beans or chickpeas for added protein and fiber.
  • Fiber Up: Serve with a side of steamed vegetables or a salad to increase your fiber intake.
  • Portion Control: Be mindful of portion sizes, especially with creamy sauces.

Equipment Recommendations

To make your cooking experience smoother, here are some essential tools:

  • Large Pot: For boiling pasta.
  • Large Skillet: Use for searing chicken and making the sauce.
  • Meat Thermometer: To ensure chicken is cooked perfectly.
  • Colander: For draining pasta.
  • Wooden Spoon: For stirring and combining ingredients.

Serving Suggestions

To elevate your dining experience, consider these serving suggestions:

  • Garnish: Use fresh parsley and lemon wedges for a bright presentation.
  • Pairing: Serve with a crisp white wine like Chardonnay to complement the flavors.
  • Accompaniments: A side of garlic bread or a light salad makes for a complete meal.

In conclusion, this Creamy Lemon Chicken Pasta is not just a recipe; it’s a culinary journey that brings together the best of flavors and techniques. Whether you’re cooking for family, entertaining friends, or treating yourself, this dish is sure to impress. Embrace the joy of cooking and the connections it fosters around the table. Happy cooking!

Creamy Lemon Chicken Pasta

Prep Time 15 minutes
Cook Time 20 minutes
Total Time 35 minutes
Servings 4 servings
Calories 650
A flavorful and creamy pasta dish featuring tender chicken, zesty lemon, and Parmesan, perfect for a quick and satisfying meal.

Ingredients

Protein

  • 1 lb boneless skinless chicken breast (sliced in half lengthwise to create thin cutlets)
  • 1/2 cup all-purpose flour
  • 2 teaspoons Italian seasoning (divided (1 tsp for chicken, 1 tsp for sauce))
  • 2 teaspoons lemon pepper seasoning
  • Kosher salt Kosher salt (to taste)
  • Freshly cracked black pepper black pepper (to taste)
  • 2 tablespoons olive oil (divided)
  • 1 lb spaghetti
  • 6 cloves garlic (finely minced)
  • 1 whole lemon (zested and juiced (about 3 tbsp juice))
  • 1.5 cups heavy cream
  • 1/2 cup Parmesan cheese (shaved)
  • 1/2 cup reserved pasta water
  • Fresh parsley parsley (chopped, for garnish)
  • Lemon wedges lemon wedges (for serving)

Instructions 

  • Cook spaghetti in salted boiling water until al dente, reserve 1/2 cup pasta water, then drain and toss with 1 tbsp olive oil.
  • Slice chicken in half lengthwise, season with 1 tsp Italian seasoning, lemon pepper, salt, and pepper. Dredge in flour mixture.
  • Cook chicken in 1 tbsp olive oil until golden and cooked through, then set aside.
  • In the same pan, sauté garlic with remaining seasoning, then add lemon zest, juice, and cream. Simmer until thickened, then stir in Parmesan.
  • Add cooked pasta to sauce, then stir in reserved pasta water until sauce coats pasta. Return chicken, heat through, garnish with parsley, and serve with lemon wedges.

Notes

For extra flavor, add a pinch of red pepper flakes to the sauce.
Calories: 650kcal
Cost: $15
Course: Main Course
Cuisine: Italian
Keyword: Chicken, lemon, Pasta