Author

Mike

Browsing

Unveiling the Delight of Iced Mocha: Your New Favorite Drink

If you’re a coffee lover seeking a refreshing yet indulgent treat, look no further than the iced mocha. This delightful concoction perfectly blends the rich flavors of chocolate with the invigorating essence of coffee, creating a drink that’s both satisfying and energizing. In this guide, we’ll walk you through every step of making the perfect iced mocha at home, ensuring that you can enjoy this café-quality beverage without ever leaving your kitchen.

Why You’ll Love This Recipe

  • Quick and Easy: This recipe is designed for simplicity, taking just 10 minutes from start to finish.
  • Customizable: You can adjust the sweetness and chocolate intensity to suit your taste.
  • Perfect for Any Time: Enjoy it as a morning pick-me-up or a refreshing afternoon treat.
  • Budget-Friendly: Making iced mocha at home saves money compared to buying from coffee shops.
  • Impress Your Friends: Serve this drink at gatherings and wow your guests with your barista skills!

Ingredient Breakdown

To create the ultimate iced mocha, you’ll need the following ingredients:

  • Milk: 1/4 cup of warm milk to dissolve the coffee. You can use any milk of choice—dairy or non-dairy alternatives like almond or oat milk work beautifully.
  • Instant Coffee: 2 tablespoons for a quick and robust flavor, but feel free to substitute with brewed coffee or espresso if you prefer.
  • Sugar: 2 tablespoons to sweeten the drink. Adjust to taste, or substitute with honey or a sweetener of your choice.
  • Cocoa Powder: 2 teaspoons for that rich chocolate flavor. Use unsweetened cocoa powder for a decadent taste.
  • Chocolate Syrup: 2 tablespoons, plus extra for drizzling. This adds sweetness and a glossy finish.
  • Cold Milk: 2 cups to create the base of your iced mocha.
  • Whipped Cream: For topping, optional but adds a creamy touch!

How to Make an Iced Mocha at Home
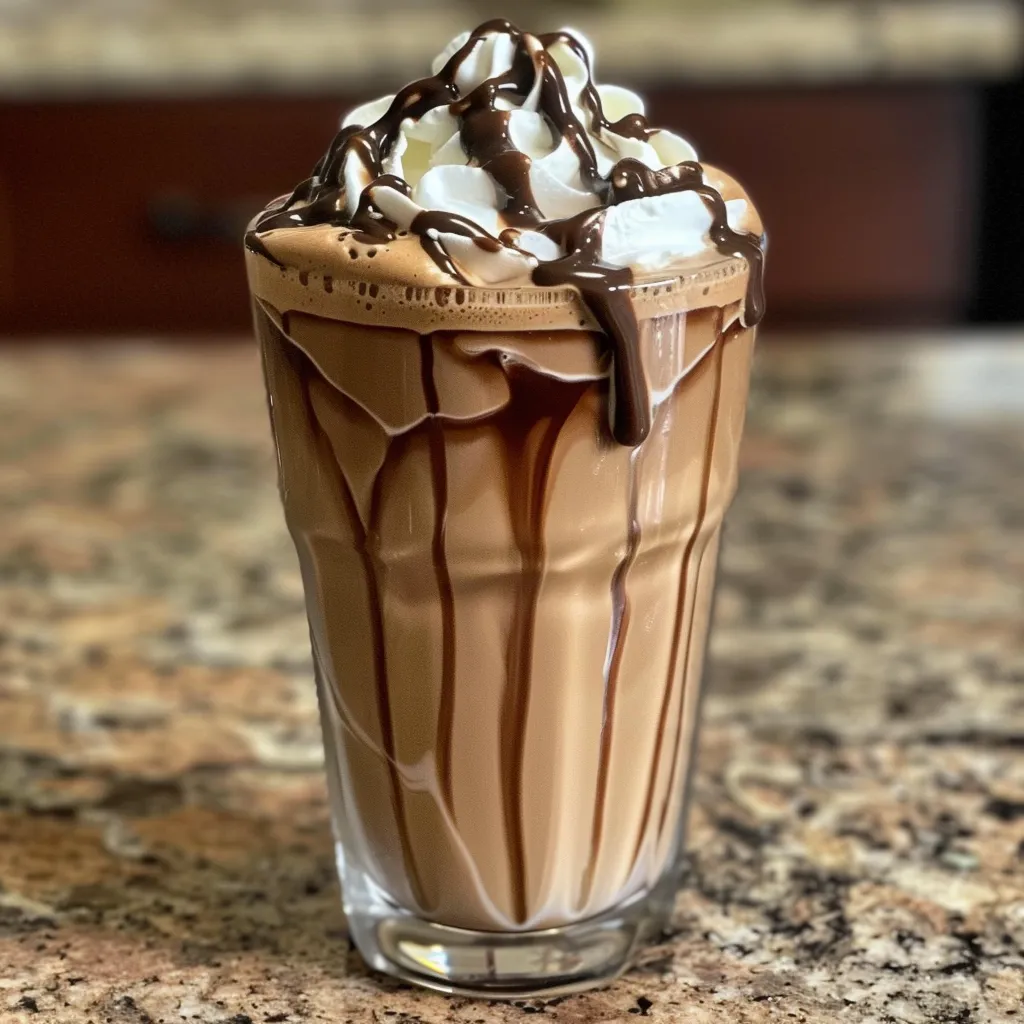
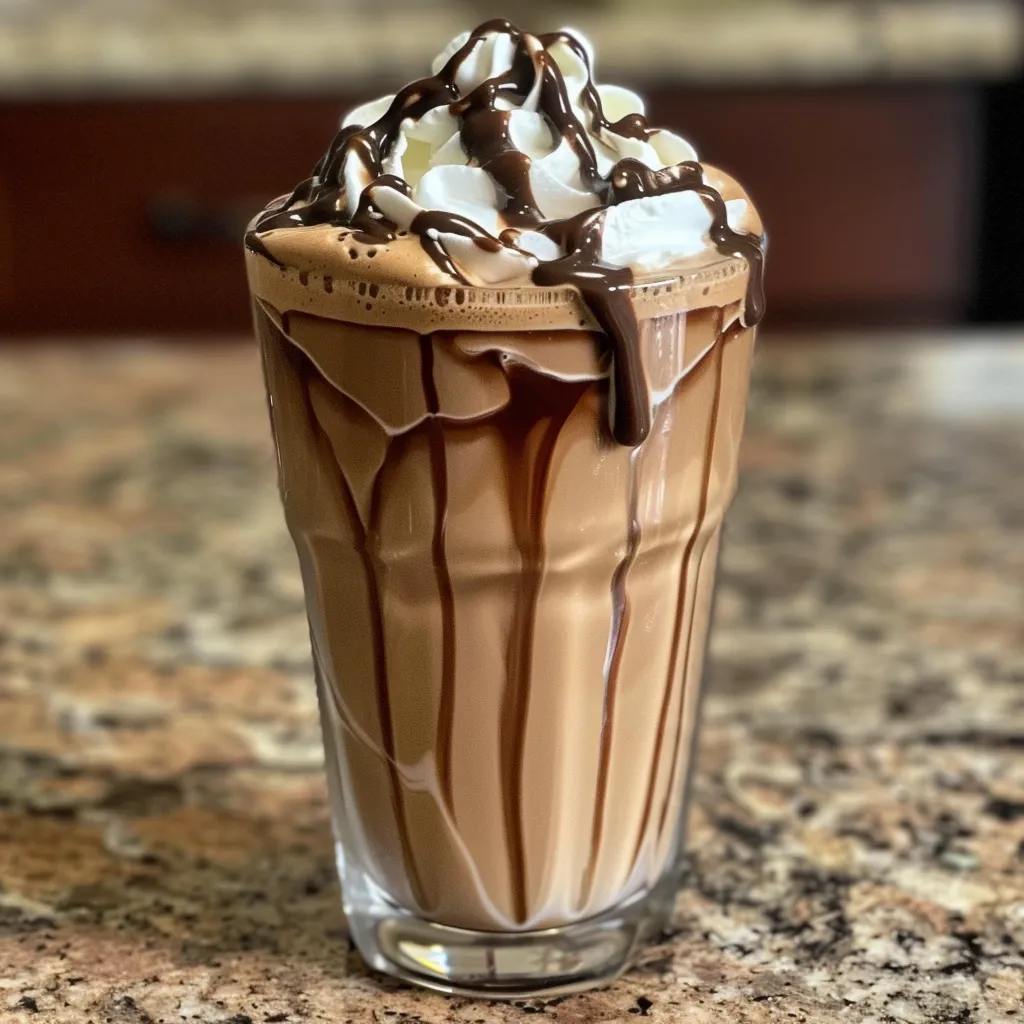
Iced mocha drink featuring a layer of whipped cream and chocolate drizzle.

Follow these simple steps to create your iced mocha:

  1. Warm the Milk: In a small saucepan or microwave, warm 1/4 cup of milk. Don’t boil it—just heat it until it’s warm to the touch.
  2. Dissolve the Coffee: Transfer the warm milk to a bowl and add 2 tablespoons of instant coffee. Stir until the coffee is fully dissolved.
  3. Add Sweetness and Flavor: Stir in 2 tablespoons of sugar and 2 teaspoons of cocoa powder. Mix well using a wire whisk.
  4. Incorporate Chocolate Syrup: Add 2 tablespoons of chocolate syrup and whisk until everything is well combined.
  5. Blend the Drink: In a blender, combine 2 cups of cold milk, along with the coffee and chocolate mixture. Add a few ice cubes if desired. Blend until smooth and frothy.
  6. Serve: Pour your iced mocha into glasses. Top with whipped cream and drizzle extra chocolate syrup on top before serving.

Pro Tips for the Perfect Iced Mocha

  • Use Quality Ingredients: The better the ingredients, the richer the flavor of your iced mocha. Opt for high-quality cocoa powder and chocolate syrup.
  • Experiment with Milk: Different types of milk can alter the texture and flavor. Try different options to find your favorite!
  • Chill Your Coffee: If you prefer a less diluted drink, chill your brewed coffee before adding it to the mixture.
  • Make it Dairy-Free: Substitute regular milk with almond, soy, or coconut milk for a delicious dairy-free version.
  • Layer Your Ingredients: For an aesthetically pleasing drink, layer the chocolate mixture and cold milk in your glass before adding ice.
  • Sweeten to Taste: Taste your mixture before serving. Adjust the sweetness according to your preference.
  • Add Ice Cream: For a decadent treat, add a scoop of vanilla or chocolate ice cream to your blender.
  • Store Leftovers: If you have extra iced mocha, store it in the refrigerator for up to 2 days. Shake or stir before serving.

Common Mistakes and Troubleshooting

Here are some common pitfalls and how to avoid them:

  • Overly Sweet: If your iced mocha turns out too sweet, add a splash of extra milk to balance the flavors.
  • Too Bitter: If you find the coffee taste too strong, consider reducing the instant coffee amount in your next batch.
  • Clumpy Mixture: Ensure you dissolve the coffee and cocoa powder well in the warm milk to avoid clumps.

Variations of the Classic Iced Mocha

Feel free to get creative with your iced mocha! Here are some delicious variations:

  • Mocha Frappuccino: Blend in ice until slushy for a refreshing frappuccino version.
  • Mint Iced Mocha: Add a few drops of mint extract for a cool twist.
  • Spicy Mocha: Incorporate a pinch of cayenne or cinnamon for a spicy kick.
  • Hazelnut Mocha: Use hazelnut syrup instead of chocolate syrup for a nutty flavor.

Storage and Make-Ahead Instructions

You can prepare certain components of your iced mocha in advance:

  • Chilled Coffee: Brew and chill coffee a day ahead for convenience.
  • Chocolate Sauce: Make a batch of homemade chocolate sauce and store it in the refrigerator for up to two weeks.

Comprehensive FAQ

  • Can I use brewed coffee instead of instant coffee? Yes, feel free to use brewed coffee or espresso for a richer flavor.
  • How can I make this iced mocha dairy-free? Substitute regular milk with your favorite non-dairy milk like almond or oat milk.
  • How can I sweeten my iced mocha without sugar? Use honey, maple syrup, or a sugar substitute to achieve the desired sweetness.
  • Can I make iced mocha in bulk? Absolutely! Just multiply the ingredients as needed and store in the fridge.
  • What is the best way to blend the iced mocha? Use a high-speed blender for a creamy and frothy texture.
  • How long can I store iced mocha? Store in an airtight container in the refrigerator for up to 2 days.
  • Is whipped cream necessary? It’s optional, but it adds a delightful creaminess to the drink.
  • Can I make my own chocolate syrup? Yes! Combine cocoa powder, sugar, and water over heat to create a homemade syrup.

Nutrition Tips and Dietary Adaptations

To make your iced mocha a bit healthier, consider these tips:

  • Reduce Sugar: Adjust the amount of sugar or use a natural sweetener to lower the calorie content.
  • Use Low-Fat Milk: Opt for low-fat or skim milk to reduce fat and calorie intake.
  • Control Portions: Serve in smaller glasses to enjoy the flavor without overindulging.

Equipment Recommendations

Here’s what you’ll need to make the perfect iced mocha:

  • Blender: A good-quality blender ensures a smooth, frothy drink.
  • Whisk: A wire whisk is essential for mixing the coffee and cocoa powder.
  • Measuring Cups: Accurate measurements help maintain the balance of flavors.

Serving Suggestions

Serve your iced mocha in tall glasses, garnished with:

  • Chocolate Drizzle: A swirl of chocolate syrup adds a gourmet touch.
  • Chocolate Shavings: For an elegant presentation, sprinkle some chocolate shavings on top.
  • Fresh Mint Leaves: A sprig of mint adds a refreshing aroma and enhances the visual appeal.

Whether you’re enjoying this drink on a hot summer day or as a comforting afternoon pick-me-up, this iced mocha recipe is sure to become a staple in your home. So gather your ingredients, follow the steps, and savor every sip of this chocolatey bliss. Remember, cooking is all about joy and connection—so share your creations with loved ones and enjoy the delightful moments that come with them!

Iced Mocha

Prep Time 5 minutes
Cook Time 5 minutes
Total Time 10 minutes
Servings 2 glasses
Calories 250
A refreshing and indulgent iced mocha combines rich coffee, chocolate, and creamy milk for a perfect cool treat.

Ingredients

Milk (warm)

  • 0.25 cup milk (warm)

Milk (cold)

  • 2 cups milk (cold)
  • 2 tablespoons instant coffee
  • 2 tablespoons sugar
  • 2 teaspoons cocoa powder (unsweetened)
  • 2 tablespoons chocolate syrup (more to drizzle)
  • a few ice cubes ice cubes

Whipped cream

Instructions 

  • Warm ¼ cup of milk until just heated, then transfer to a bowl and add instant coffee. Stir until dissolved.
  • Add sugar and cocoa powder to the mixture, then whisk until smooth.
  • Stir in chocolate syrup until well combined. Set aside.
  • In a blender, combine cold milk, the coffee mixture, and ice cubes. Blend until frothy.
  • Pour into glasses, top with whipped cream, and drizzle with chocolate syrup before serving.

Notes

You can adjust the sweetness and chocolate level to your taste.
Calories: 250kcal
Cost: $8
Course: Beverage
Keyword: chocolate, coffee, Cold Drink

Discover the Comfort of Chicken Pulao

Welcome to the world of Chicken Pulao, a dish that encapsulates the essence of comfort food. This fragrant meal combines tender chicken, aromatic spices, and perfectly cooked basmati rice, creating a symphony of flavors that warms the soul and brings people together. In this in-depth guide, we’ll explore everything you need to know about making Chicken Pulao, from the ingredients to cooking methods, tips for perfection, and even variations to suit your preferences. Let’s embark on this culinary journey and make your cooking experience delightful!

Why You’ll Love This Recipe

This Chicken Pulao recipe is not just about the taste; it’s about the experience it brings. Here are five compelling reasons to try it:

  • Easy to Prepare: With straightforward steps, you can whip up this dish even on a busy weeknight.
  • Flavors that Comfort: The combination of spices and herbs creates a dish that’s both aromatic and satisfying.
  • Nutritious and Wholesome: Packed with protein from the chicken and fiber from the rice, this meal is balanced and nourishing.
  • Customizable: You can easily modify the recipe to include your favorite vegetables or spices.
  • Perfect for Sharing: This dish is ideal for family dinners or gatherings, allowing everyone to enjoy together.

Understanding Your Ingredients

Let’s break down the ingredients for Chicken Pulao and explore potential substitutions to suit your taste:

  • Chicken: 1 lb of bone-in chicken, cut into pieces. You can also use boneless chicken for a quicker cooking time.
  • Basmati Rice: 1 cup, washed and soaked for 20 minutes. Jasmine rice can be a great substitute if you prefer.
  • Oil and Ghee: 2 tablespoons of oil and 1 tablespoon of ghee enhance flavor. If you want a lighter option, you can use all oil.
  • Onion: 1 onion, thinly sliced (about 170 grams). Shallots can be used for a sweeter flavor.
  • Ginger and Garlic: 1-2 tablespoons, freshly grated or minced. These provide a robust flavor base.
  • Green Chili: 1-2 for heat. Adjust according to your spice tolerance.
  • Tomato: 1 small, chopped for acidity. Substitute with a tablespoon of tomato paste if fresh tomatoes aren’t available.
  • Mint Leaves: 2 tablespoons, chopped (optional). For a twist, you can use cilantro or basil.
  • Salt: 1 teaspoon, adjust to taste.
  • Garam Masala: 1 teaspoon for depth of flavor.
  • Plain Yogurt: 2 tablespoons of full-fat yogurt adds creaminess. Substituting with coconut yogurt can make it dairy-free.
  • Whole Spices: Include 1 stick of cinnamon, 2 bay leaves, 5 green cardamom pods, 1/2 teaspoon cumin seeds, 1/2 teaspoon black peppercorns, and 4 cloves for authentic flavor.
  • Lime or Lemon Juice: 1 tablespoon for brightness.
  • Cilantro Leaves: Chopped for garnish.

How to Make Chicken Pulao

Follow these detailed steps to create a delicious Chicken Pulao:

  1. Heat oil and ghee in a heavy-bottom pan or Dutch oven over medium-high heat.
  2. Add the sliced onions and cook for about 10-12 minutes, stirring frequently, until caramelized.
  3. Introduce the whole spices, ginger, and garlic, sautéing for 1 minute until fragrant.
  4. Add the chicken pieces, mixing well and sautéing for about 3-4 minutes until the chicken changes color.
  5. Stir in the green chili, tomato, mint leaves, salt, garam masala, and yogurt, cooking until the oil separates, about 2-3 minutes.
  6. Pour in the water and bring to a boil.
  7. Drain the rice and add it to the pot, stirring gently.
  8. Once boiling, reduce the heat to low, cover, and let it simmer for 10-15 minutes until the water is absorbed and the rice is cooked.
  9. Turn off the heat, fluff the rice with a fork, add lime juice, and gently mix.
  10. Garnish with chopped cilantro leaves and serve hot.

Instant Pot Chicken Pulao

If you prefer making this pulao in an Instant Pot, follow these adapted steps:

  1. Use the “Sauté” function, and heat oil and ghee.
  2. Add the onions and cook until caramelized.
  3. Introduce the whole spices, ginger, and garlic.
  4. Add chicken and sauté until it changes color.
  5. Mix in the remaining ingredients, including water and rice.
  6. Seal the lid and cook on “Manual” for 6 minutes, followed by a natural release.
  7. Fluff and serve as above.

Pro Tips for Perfect Chicken Pulao

To ensure your Chicken Pulao turns out perfectly every time, consider these expert insights:

  • Soak the Rice: Soaking basmati rice for at least 20 minutes before cooking helps achieve fluffy grains.
  • Use Fresh Spices: Ensure your spices are fresh for maximum flavor impact.
  • Don’t Rush the Onions: Caramelizing onions adds a rich depth to the dish; patience is key.
  • Adjust Water Carefully: Use 1 1/4 cups of water for stovetop cooking, but reduce to 1 cup for the Instant Pot method.
  • Seal the Pot Well: Proper sealing ensures steam retention, leading to perfectly cooked rice.
  • Rest Before Serving: Allowing the pulao to rest for a few minutes after cooking lets flavors meld.
  • Garnish Generously: Fresh herbs enhance both flavor and presentation.
  • Pair with Raita: A cooling yogurt-based side balances the spices beautifully.

Common Mistakes and Troubleshooting

Here are some common pitfalls to avoid when making Chicken Pulao:

  • Overcooking the Rice: If the rice is mushy, reduce the cooking time or the amount of water.
  • Burnt Onions: Stir frequently to prevent sticking and burning.
  • Too Much Spice: Start with less chili and taste as you go; you can always add heat later.
  • Skipping the Soak: Don’t skip soaking the rice for best texture.

Delicious Variations

Feel free to experiment with these variations to put your spin on Chicken Pulao:

  • Vegetable Pulao: Substitute chicken with a mix of your favorite vegetables like peas, carrots, and bell peppers.
  • Chicken Biryani: For a richer taste, layer the cooked chicken and rice, and bake it in the oven.
  • Yakhni Pulao: Use chicken stock instead of water for a deeper flavor.
  • Spicy Chicken Pulao: Add more green chilies or a teaspoon of chili powder for an extra kick.

Storage and Make-Ahead Instructions

Chicken Pulao can be easily stored or prepared ahead of time:

  • Refrigeration: Store in an airtight container for up to 3 days.
  • Freezing: Freeze the cooked pulao for up to 1 month. Thaw in the refrigerator overnight before reheating.
  • Make-Ahead: You can prepare the chicken base a day in advance and simply cook the rice on the day you plan to serve it.

Comprehensive FAQ

Here are answers to common questions about Chicken Pulao:

  • Can I use brown rice instead of basmati? Yes, but adjust cooking times as brown rice requires longer cooking.
  • Is Chicken Pulao gluten-free? Yes, this recipe is naturally gluten-free.
  • Can I make this dish vegetarian? Absolutely! Just replace chicken with paneer or a mix of vegetables.
  • What should I serve with Chicken Pulao? Raita, salad, or a side of pickles complement it well.
  • Can I add nuts? Yes! Cashews and almonds can be added for extra texture and flavor.
  • How can I make it less spicy? Reduce the number of green chilies or omit them altogether.
  • What if my rice is too sticky? This usually means it was overcooked or too much water was used. Adjust next time.
  • Can I use leftover chicken? Yes, if using pre-cooked chicken, add it towards the end of the cooking process to warm it through.

Nutrition Tips and Dietary Adaptations

This Chicken Pulao can be tailored to fit various dietary needs:

  • For a Low-Carb Option: Replace rice with cauliflower rice for a lighter dish.
  • High-Protein Adaptation: Add chickpeas or lentils to increase protein content.
  • Dairy-Free Version: Use coconut yogurt instead of regular yogurt.

Equipment Recommendations

To make the cooking process easier, consider these essential tools:

  • Heavy-Bottomed Pot: Ideal for even heat distribution and preventing burning.
  • Instant Pot: For a quick and convenient cooking experience.
  • Rice Paddle: Perfect for fluffing the rice without breaking the grains.

Serving Suggestions

Chicken Pulao is versatile in pairing:

  • With Raita: A cooling yogurt sauce perfectly balances the spices.
  • Accompanied by Salad: Fresh salads enhance the meal with crunch and freshness.
  • With Pickles: Add a tangy twist with pickles or chutneys.

Conclusion

In summary, Chicken Pulao is not just a meal; it’s an experience filled with tradition and warmth. With the detailed steps and tips provided, I hope you feel empowered to create this comforting dish in your own kitchen. Remember, cooking is about connection and joy. Enjoy the process, share with your loved ones, and savor every bite of your delicious Chicken Pulao!

Chicken Pulao

Prep Time 15 minutes
Cook Time 30 minutes
Total Time 45 minutes
Servings 4 servings
Calories 450
A flavorful and aromatic Chicken Pulao combines tender chicken, fragrant spices, and fluffy rice for a satisfying meal.

Ingredients

Meat

  • 1 lb Chicken bone-in, cut into pieces
  • 1 cup Basmati Rice washed and soaked for 20 minutes

Spices and Aromatics

  • 2 tablespoons Oil
  • 1 tablespoon Ghee
  • 1 onion Thinly sliced onion (about 170 grams)
  • 2 tablespoons Freshly grated or chopped Ginger
  • 2 tablespoons Minced Garlic
  • 1-2 green chili pepper Green chili pepper
  • 1 small Tomato, chopped
  • 2 tablespoons Chopped Mint leaves (optional)
  • 1 teaspoon Salt, adjust to taste
  • 1 teaspoon Garam Masala
  • 2 tablespoons Plain Yogurt (full-fat)

Water and Spices

  • 1 1/4 cup Water (use 1 cup for Instant Pot method)
  • 1 stick Cinnamon (Dalchini)
  • 2 Bay leaf Tej Patta
  • 5 Green Cardamom Elaichi
  • 1/2 teaspoon Cumin seeds (Jeera)
  • 1/2 teaspoon Black Peppercorns
  • 4 Cloves Laung
  • 1 tablespoon Lime or Lemon juice
  • 2 tablespoons Chopped Cilantro leaves

Instructions 

  • Heat oil and ghee in a heavy-bottom pan. Add sliced onions and cook until caramelized, about 10-12 minutes.
  • Add whole spices, ginger, and garlic; sauté for 1 minute. Add chicken and cook 3-4 minutes until it changes color.
  • Add green chili, tomato, mint, salt, garam masala, and yogurt; sauté until oil separates, 2-3 minutes.
  • Pour in water, bring to a boil. Add drained rice, stir, and reduce heat. Cover and cook for 10-15 minutes until rice is done.
  • Turn off heat, fluff rice gently, add lime juice, and garnish with cilantro. Serve hot.

Notes

For best flavor, let the rice rest for 5 minutes before serving.
Calories: 450kcal
Cost: $15
Course: Main Course
Cuisine: Indian
Keyword: Chicken, Rice

Welcome to the ultimate guide for crafting the perfect beef nachos! If you’re looking to impress your friends and family at your next game night, you’ve come to the right place. This recipe is not just about layering chips and toppings; it’s about creating a culinary experience that everyone will love. In this article, we’ll explore everything you need to know about making mouthwatering beef nachos, including ingredient breakdowns, expert tips, variations, and more. Let’s dive in!

Why You’ll Love This Recipe

This beef nachos recipe stands out for several reasons:

  • Easy to Prepare: With simple ingredients and straightforward steps, you can whip these up in no time.
  • Customizable: Feel free to mix and match toppings to suit your taste or dietary needs.
  • Perfect for Sharing: This dish is designed for a crowd, making it ideal for parties or gatherings.
  • Flavor-Packed: The combination of seasoned ground beef and melted cheeses creates an irresistible flavor profile.
  • Fun Experience: Nachos are always a crowd-pleaser, and the interactive nature of building your own plate adds to the fun!

Ingredient Breakdown

Let’s take a closer look at the ingredients you’ll need to create these delicious nachos and some great substitutions if you’re looking for alternatives.

  • Olive Oil: 1 tablespoon for sautéing. You can substitute with vegetable oil if preferred.
  • Onion: 1/2 finely diced. Red onions work beautifully for a sweeter flavor.
  • Garlic: 1 clove minced. Fresh garlic enhances the overall taste.
  • Ground Beef: 1 pound, but you can swap this for ground chicken, turkey, or even plant-based meat for a lighter or vegan option.
  • Taco Seasoning: 1 packet. Homemade seasoning can be made using chili powder, cumin, and paprika.
  • Tortilla Chips: 2 (16-ounce) bags. Choose thick chips for sturdier nachos.
  • Cheddar and Monterey Jack Cheese: 2 cups each, shredded. Feel free to mix in other cheeses like pepper jack for a spicy kick!
  • Optional Toppings: Sliced jalapeños, diced tomatoes, beans, sliced green onions, salsa, sour cream, guacamole, and more.

Pro Tips for Perfect Nachos

To take your nacho game to the next level, consider these expert insights:

  • Layering is Key: Always layer chips, then beef, followed by cheese to ensure even melting and distribution of flavors.
  • Don’t Overcrowd: Avoid overcrowding your baking sheets to ensure all chips get crispy.
  • Watch the Oven: Keep a close eye on your nachos while baking to prevent burning.
  • Serve Immediately: Nachos are best served hot and fresh, so prepare them right before serving.
  • Garnish Last: Add delicate toppings like diced tomatoes and green onions after baking for freshness.
  • Experiment with Sauces: Try drizzling some cheese sauce or BBQ sauce on top for added flavor.
  • Make It Spicy: For heat lovers, consider using spicy taco seasoning or adding sliced jalapeños.
  • Keep it Balanced: Ensure a good ratio of meat to chips for a well-balanced bite.

Common Mistakes and Troubleshooting

Side view of a colorful plate of beef nachos with various toppings.

Even the best chefs make mistakes! Here are common pitfalls to avoid:

  • Burnt Chips: Baking too long can lead to burnt chips. Always check at the 10-minute mark.
  • Cold Cheese: If the cheese doesn’t melt well, try grating it finely or using a blend of cheeses.
  • Too Much Topping: Overloading can lead to soggy nachos. Stick to a moderate amount of toppings.
  • Dry Beef: Overcooking ground beef can dry it out. Cook only until no longer pink.

Delicious Variations

Feeling adventurous? Here are some variations to try:

  • BBQ Chicken Nachos: Swap ground beef for shredded BBQ chicken for a smoky twist.
  • Vegetarian Nachos: Replace meat with black beans, corn, and bell peppers for a hearty vegetarian option.
  • Loaded Carne Asada Nachos: Use carne asada for a more robust flavor profile.
  • Buffalo Chicken Nachos: Mix shredded chicken with buffalo sauce and top with blue cheese crumbles.

Storage and Make-Ahead Instructions

You can prepare components of your nachos ahead of time:

  • Storage: Keep cooked beef in an airtight container in the fridge for up to 3 days.
  • Reheating: Warm in the oven at 350°F until heated through, but avoid microwaving chips to keep them crispy.
  • Make-Ahead: Prepare the beef and cut your toppings in advance, then assemble and bake just before serving.

Comprehensive FAQ

Here are some frequently asked questions regarding beef nachos:

  • Can I use different types of cheese? Yes, feel free to mix your favorite cheeses for a unique flavor.
  • How can I make nachos healthier? Use turkey or chicken, low-fat cheese, and load up on veggies.
  • Can I freeze nachos? It’s best to freeze the beef mixture separately, but baked nachos don’t freeze well.
  • What’s the best way to keep nachos warm? Serve them on a warm plate or in a warming drawer if available.
  • Can I use homemade tortilla chips? Absolutely! Homemade chips can add a personal touch.
  • Do I have to bake nachos? You can also prepare them in a slow cooker for a gooey, cheesy dish!
  • What other toppings can I add? Try adding olives, guacamole, or even a drizzle of ranch dressing.
  • How do I prevent soggy nachos? Layer toppings strategically and avoid wet ingredients on the bottom.

Nutrition Tips and Dietary Adaptations

For those conscious about nutrition:

  • Lean Proteins: Opt for lean ground turkey or chicken to reduce fat content.
  • Lower Sodium: Make your own taco seasoning to control sodium intake.
  • Gluten-Free: Ensure your tortilla chips are labeled as gluten-free.
  • Vegan Option: Use plant-based meat substitutes and vegan cheese.

Equipment Recommendations

To successfully execute this recipe, consider using:

  • Large Skillet: For browning the beef and sautéing vegetables.
  • Baking Sheets: Two sheets to ensure even baking and distribution.
  • Parchment Paper: To line your baking sheets for easy cleanup.
  • Grater: For shredding cheese efficiently.

Serving Suggestions

Serve your nachos with a side of:

  • Salsa: Enhance flavor with fresh salsa or pico de gallo.
  • Sour Cream: A classic creamy accompaniment that balances the heat.
  • Guacamole: Add a rich, creamy texture and flavor to your nachos.

Now that you’re equipped with all the knowledge needed to create the ultimate beef nachos, gather your ingredients, invite some friends over, and enjoy a game night like no other. Remember, cooking should be fun and engaging, so don’t be afraid to experiment with flavors and toppings. Happy cooking!

Beef Nachos

Prep Time 10 minutes
Cook Time 15 minutes
Total Time 25 minutes
Servings 4 servings
Calories 850
Delicious crispy nachos topped with seasoned ground beef and melted cheeses, perfect for sharing.

Ingredients

Main

  • 1 tablespoon olive oil
  • 1 2 onion onion, finely diced
  • 1 clove garlic, minced
  • 1 pound ground beef
  • 1 ounce packet taco seasoning
  • 2 16 ounce bags tortilla chips
  • 2 cups shredded cheddar cheese
  • 2 cups shredded Monterey Jack cheese

Optional toppings

  • to taste sliced jalapeños, diced tomatoes, beans, sliced green onions, salsa, sour cream, guacamole, etc.

Instructions 

  • Preheat oven to 400°F (200°C). Line baking sheets with parchment paper.
  • Heat olive oil in a skillet, cook onion until softened (~3 min), add garlic and cook 1 min.
  • Add ground beef, cook until no longer pink (~5 min), drain excess fat, stir in taco seasoning and water, simmer 3 min.
  • Spread chips on baking sheets, top with beef, sprinkle with cheese, add optional toppings if desired.
  • Bake 10-15 min until cheese melts, then add fresh toppings and serve with sides.

Notes

For extra flavor, add fresh cilantro or a squeeze of lime before serving.
Calories: 850kcal
Cost: $15
Course: Appetizer
Cuisine: Mexican
Keyword: Nachos

Start Your Day Right with a Delicious Almond Smoothie

Are you looking for a nutritious and energizing start to your day? Look no further! This creamy almond smoothie is not just a treat for your taste buds but also a powerhouse of nutrients. Packed with healthy fats, protein, and fiber, it’s perfect for breakfast or a midday snack. In this guide, I’ll walk you through everything you need to know to make the perfect almond smoothie, enhancing your morning routine with a drink that satisfies your cravings and nourishes your body.

Why You’ll Love This Recipe

This almond smoothie isn’t just delicious; it brings a multitude of benefits to your morning routine. Here’s why you’ll fall in love with it:

  • Nutritious Boost: The combination of almond milk, protein powder, and oats provides essential nutrients to kickstart your metabolism.
  • Versatility: Customize this smoothie with various fruits, nut butters, or superfoods to match your taste and nutritional needs.
  • Quick and Easy: With just a few ingredients and a blender, you can whip this up in under 5 minutes!
  • Dairy-Free Delight: This smoothie is perfect for those seeking a dairy-free option, ensuring everyone can enjoy it.
  • Energy Sustainer: Thanks to the protein and healthy fats, this smoothie keeps you full and energized throughout the morning.

Ingredients Breakdown

To create this delightful almond smoothie, here’s what you’ll need:

  • Almond Milk: 1 1/4 cups of unsweetened almond milk forms the base of the smoothie. You can substitute it with any other plant-based milk if desired.
  • Protein Powder: 2 scoops of your favorite protein powder add a nutritious punch. Choose a flavor that complements the smoothie, like vanilla or chocolate.
  • Rolled Oats: 1/4 cup of rolled oats provides fiber and helps thicken the smoothie. Quick oats can be used as a substitute.
  • Raw Almonds: 1/4 cup of raw almonds gives a rich flavor and healthy fats. If you prefer, you can use almond butter instead.
  • Almond Extract: 1/2 teaspoon of almond extract enhances the almond flavor, making every sip more delightful.

How to Make Your Almond Smoothie

Follow these simple steps to blend your ingredients into a creamy almond smoothie:

  1. In a high-speed blender, combine all the ingredients: almond milk, protein powder, rolled oats, raw almonds, and almond extract.
  2. Blend for 3-4 minutes or until the mixture is smooth and creamy.
  3. Serve immediately or refrigerate for up to 1 day. If storing, give it a quick stir before enjoying.

Pro Tips for the Best Almond Smoothie

To elevate your smoothie-making game, consider these expert tips:

  • Blend in stages: If your blender struggles, start with the liquid and oats, then add the remaining ingredients.
  • Chill your ingredients: Use chilled almond milk and frozen bananas for a refreshing, icy texture.
  • Watch your consistency: Adjust the amount of almond milk based on your preferred thickness.
  • Experiment with flavors: Try adding cocoa powder, cinnamon, or vanilla for different flavor profiles.
  • Consider toppings: Top your smoothie with sliced fruits, nuts, or a sprinkle of granola for added texture.
  • Make it a meal: Add a tablespoon of peanut butter or Greek yogurt for extra protein and calories.
  • Pre-portion ingredients: Prepare smoothie packs in advance to save time on busy mornings.
  • Use fresh almonds: Soak raw almonds overnight for easier blending and enhanced creaminess.

Common Mistakes and Troubleshooting

Here are some common pitfalls to avoid when making your almond smoothie:

  • Too thick: If your smoothie is too thick, add more almond milk gradually until you reach the desired consistency.
  • Not blending enough: Ensure you blend for the full time to achieve a smooth texture; chunks can ruin the experience.
  • Flavor imbalance: Taste your smoothie before serving; adjust sweetness with honey or a banana if needed.
  • Skipping the oats: Don’t skip the oats! They not only add nutrition but also help achieve the right texture.

Delicious Variations of Your Almond Smoothie

Mix things up with these almond smoothie variations:

  • Berry Bliss: Add 1 cup of mixed berries (fresh or frozen) for a fruity twist.
  • Chocolate Almond Delight: Incorporate 1 tablespoon of cocoa powder for a chocolatey treat.
  • Green Power: Blend in a handful of spinach or kale for added vitamins without compromising taste.
  • Tropical Escape: Substitute almond milk with coconut milk and add pineapple for a tropical flavor.

Storage and Make-Ahead Instructions

Making smoothies in advance can save precious time. Here’s how to store your almond smoothie:

  • In the fridge: Store in an airtight container for up to 24 hours. Shake or stir before consuming.
  • Freezing: Pour into ice cube trays, freeze, and blend the cubes later for a quick smoothie fix.
  • Prep packs: Pre-portion the dry ingredients in bags and simply add almond milk and blend when ready.

FAQ: Everything You Need to Know

Got questions? I’ve got answers! Here are some frequently asked questions about almond smoothies:

  • Can I use sweetened almond milk? Yes, but be mindful of added sugars—unsweetened is usually healthier.
  • Is this smoothie vegan-friendly? Absolutely! All the ingredients are plant-based.
  • What protein powder should I use? Choose a plant-based protein or whey protein based on your dietary preferences.
  • Can I add vegetables? Yes! Spinach, kale, or even carrots can be blended in without altering the taste significantly.
  • How can I make this smoothie lower in calories? Reduce the amount of nuts or use less protein powder to lower calorie content.
  • Can children enjoy this smoothie? Definitely! It’s a nutritious treat for both kids and adults alike.
  • What can I use instead of protein powder? Greek yogurt or silken tofu are great alternatives for added protein.
  • Can I make this smoothie without oats? Yes, but oats provide fiber and texture. You can replace them with chia seeds if desired.

Nutritional Tips and Dietary Adaptations

For those with specific dietary needs, here are some adaptations:

  • Gluten-Free: Ensure your oats are certified gluten-free, or use gluten-free granola as a topping.
  • Lower Sugar: Opt for unsweetened almond milk and skip sweeteners for a low-sugar option.
  • High-Protein: Add extra protein powder or Greek yogurt to boost protein content.
  • Add Fiber: Incorporate chia seeds or flaxseeds to enhance fiber and omega-3 content.

Equipment Recommendations

To achieve the best results, here’s what you’ll need:

  • High-Speed Blender: A quality blender is essential to ensure a smooth consistency.
  • Measuring Cups: Accurate measurements will help replicate the recipe perfectly every time.
  • Storage Containers: Airtight containers for storing leftovers are a must for maintaining freshness.

Serving Suggestions

Enjoy your almond smoothie in style! Here are some serving ideas:

  • Garnish: Top with sliced almonds, chia seeds, or fresh fruit for added texture and visual appeal.
  • Pair with: Serve alongside whole-grain toast or a healthy breakfast bar for a complete meal.
  • Presentation: Use a clear glass to show off the beautiful color of your smoothie; it enhances the drinking experience.

Conclusion

Now that you have all the knowledge, tips, and variations at your fingertips, it’s time to get blending! This creamy almond smoothie is sure to become a staple in your kitchen, elevating your morning routine and fueling your day. Remember, cooking is all about experimentation and joy—don’t hesitate to make this recipe your own. Enjoy every sip, and here’s to a healthier, happier you!

Almond Smoothie

Prep Time 5 minutes
Total Time 5 minutes
Servings 2 cups
Calories 250
A creamy and nutritious almond smoothie perfect for a quick breakfast or snack.

Ingredients

Liquid

  • 1.25 cups almond milk unsweetened

Protein

  • 2 scoops protein powder

Oats

  • 0.25 cup rolled oats or quick oats

Nuts

  • 0.25 cup almonds raw

Flavoring

  • 0.5 tsp almond extract

Instructions 

  • Combine all ingredients in a high-speed blender.
  • Blend for 3-4 minutes until smooth.
  • Serve immediately or refrigerate for up to 1 day.

Notes

Feel free to add a banana for extra creaminess.
Calories: 250kcal
Cost: $8
Course: Breakfast
Cuisine: American
Keyword: almond, Smoothie

Welcome to a delightful journey of flavor with this Nutella banana milkshake recipe. If you’re looking for a quick and indulgent treat that combines the creamy richness of Nutella with the natural sweetness of ripe bananas, you’ve landed in the right place! This milkshake is not just a drink; it’s a moment of joy in a glass. Whether you’re treating yourself after a long day or impressing guests at a gathering, this recipe will satisfy your cravings and elevate your dessert game.

Why You’ll Love This Recipe

This Nutella banana milkshake is a true crowd-pleaser. Here are some reasons why:

  • Quick to Make: Ready in just under 5 minutes, this milkshake is the perfect solution for a last-minute dessert.
  • Decadent Flavor: The combination of rich Nutella and sweet bananas creates a harmonious flavor that everyone loves.
  • Customizable: Tailor the recipe to your taste by adjusting the sweetness or adding extras like vanilla ice cream or whipped cream.
  • Healthier Indulgence: With fresh bananas, this milkshake offers nutrients while still being a treat.
  • Perfect for Any Occasion: It’s not just a dessert; it’s a versatile drink that works for parties, picnics, or even a cozy night in.

Ingredient Breakdown

Let’s dive into the ingredients needed for this creamy delight:

  • 2 ripe bananas: The riper the bananas, the sweeter the milkshake. Look for bananas with brown spots for maximum flavor.
  • 3 tablespoons of Nutella: This will give your milkshake its signature chocolate-hazelnut flavor. Feel free to adjust based on your preference.
  • 300 ml of whole or semi-skimmed milk: Whole milk adds creaminess, but you can use any milk alternative based on dietary needs.
  • 2 scoops of vanilla ice cream (optional): For an extra creamy texture, adding ice cream is a game changer.
  • Ice cubes: Depending on how thick you like your shake, add more or less.
  • Whipped cream and chocolate shavings (optional): Elevate your presentation and flavor with these toppings.

Step-by-Step Instructions

Follow these simple steps to create your delicious milkshake:

  • Peel the bananas and slice them into rounds.
  • Place the banana slices, Nutella, and milk into a blender.
  • Add ice cubes and, if using, the ice cream.
  • Blend until the mixture is smooth and creamy, adjusting the consistency with more milk if needed.
  • Taste and adjust sweetness with more Nutella if desired.
  • Pour the milkshake into large glasses.
  • Top with whipped cream and chocolate shavings if desired.
  • Enjoy immediately with a straw!

Pro Tips for the Best Milkshake

Side view of a delicious milkshake topped with whipped cream and chocolate shavings.

Here are some expert insights to elevate your milkshake experience:

  • Use Cold Ingredients: Ensure your milk and ice cream are cold for a refreshing shake.
  • Blend in Stages: Start with bananas and liquids, then add ice to achieve the desired thickness.
  • Experiment with Add-Ins: Consider adding a tablespoon of peanut butter or a pinch of cinnamon for a twist.
  • Frost Your Glasses: Chill your serving glasses beforehand for an extra touch of elegance.
  • Adjust Sweetness: Taste as you blend—everyone’s sweetness preference varies!
  • Use a High-Powered Blender: This ensures a silky-smooth texture without any banana lumps.
  • Serve Immediately: Milkshakes are best enjoyed fresh to maintain their creamy consistency.
  • Show Off Your Creation: Don’t hesitate to garnish with a cherry or colorful sprinkles for a fun presentation!

Common Mistakes and Troubleshooting

Even the best chefs make mistakes! Here’s how to avoid common pitfalls:

  • Too Thick? Add a splash of milk and blend again until you reach your desired consistency.
  • Too Sweet? Balance with a bit more milk or add a pinch of salt to cut the sweetness.
  • Bananas Not Sweet Enough? Use slightly overripe bananas to ensure maximum sweetness.
  • Inconsistent Texture? Blend in short bursts and scrape down the sides of the blender for an even mixture.

Variations to Try

Want to switch things up? Here are some delicious variations:

  • Peanut Butter Banana Milkshake: Add 2 tablespoons of peanut butter for a nutty twist.
  • Chocolate Banana Delight: Use chocolate ice cream instead of vanilla for an intense chocolate flavor.
  • Mint Chocolate Chip: Add a few drops of peppermint extract and some chocolate chips for a refreshing minty shake.
  • Protein-Packed Version: Substitute regular milk with protein-rich almond milk and add a scoop of protein powder.

Storage and Make-Ahead Instructions

While this milkshake is best served fresh, you can prepare some components ahead of time:

  • Pre-Sliced Bananas: Freeze banana slices in a zip-top bag to use later.
  • Nutella Swirl: Prepare a Nutella swirl in the glass before pouring in the milkshake for a visual treat.

However, it’s best to consume the milkshake immediately for the freshest taste and texture.

Comprehensive FAQ

Here are some frequently asked questions about this Nutella banana milkshake:

  • Can I use frozen bananas? Yes! Frozen bananas can create an even creamier texture.
  • Is this milkshake suitable for vegans? Absolutely! Use plant-based milk and ice cream to make it vegan-friendly.
  • How can I make this milkshake healthier? You can reduce the amount of Nutella or use a natural sweetener instead.
  • What other toppings can I add? Try crushed nuts, caramel drizzle, or a sprinkle of cocoa powder for added flavor.
  • Can I make it in advance? It’s best made fresh, but you can prepare the ingredients ahead of time.
  • How long will it last in the fridge? Milkshakes are best enjoyed fresh, but if stored, consume within a few hours.
  • What’s the best way to blend? Start slowly to combine ingredients, then increase speed for a smooth finish.
  • Can I substitute Nutella? Yes, you can use any chocolate hazelnut spread or even chocolate syrup for a different flavor.

Nutritional Tips and Dietary Adaptations

This milkshake can easily fit into various dietary needs:

  • Gluten-Free: All ingredients are naturally gluten-free, making this recipe safe for gluten-sensitive individuals.
  • Dairy-Free: Use almond milk and a dairy-free ice cream for a completely dairy-free version.
  • Low-Calorie Option: Substitute ice cream with yogurt or reduce the Nutella amount for a lighter treat.

Equipment Recommendations

To achieve the best results, here’s the equipment you’ll need:

  • High-Speed Blender: A powerful blender ensures a smooth and creamy milkshake.
  • Measuring Cups and Spoons: For precise ingredient measurements.
  • Serving Glasses: Choose fun or elegant glasses to enhance your presentation.

Serving Suggestions

Make your milkshake experience even better with these serving ideas:

  • Pair with Cookies: Serve alongside chocolate chip or peanut butter cookies for a delightful combo.
  • Use Fun Straws: Add colorful straws for a festive touch at parties.
  • Host a Milkshake Bar: Allow guests to customize their milkshakes with various toppings and add-ins!

In conclusion, this Nutella banana milkshake is more than just a drink—it’s an experience packed with flavor and nostalgia. Whether you’re enjoying it alone or sharing it with loved ones, you’re guaranteed a moment of pure bliss. So grab your blender and indulge in this delightful treat today!

Milk Shake Nutella Banane

Prep Time 5 minutes
Total Time 5 minutes
Servings 2 glasses
Calories 350
A delicious and creamy banana Nutella milkshake perfect for a quick treat or dessert.

Ingredients

Fruits and Dairy

  • 2 pieces bananas bien mûres (ripe bananas)
  • 3 tablespoons Nutella (about 90g)
  • 300 ml lait entier ou demi écrémé
  • 2 scoops glace vanille (optional for creaminess)
  • as needed to taste Glaçons (according to desired consistency)
  • optional Chantilly et copeaux de chocolat (for decoration)

Instructions 

  • Peler les bananes et les couper en rondelles.
  • Mettre dans un blender les bananes, le Nutella et le lait, puis mixer.
  • Ajouter les glaçons et la glace si désiré, puis mixer jusqu'à lisse.
  • Ajuster la texture avec plus de Nutella ou lait si nécessaire.
  • Verser dans un verre, décorer avec chantilly et copeaux de chocolat, puis servir immédiatement.

Notes

Pour une texture plus onctueuse, ajoutez une boule de glace supplémentaire.
Calories: 350kcal
Cost: $8
Course: Beverage
Cuisine: French
Keyword: Banana, milkshake, Nutella

Discover the Delight of an Iced Mocha Oat Latte

If you’re looking for a refreshing coffee experience, look no further than the iced mocha oat latte. This delightful beverage combines the robust flavor of espresso with the creaminess of oat milk and a hint of cocoa, making it the perfect treat any time of day. Whether you’re a busy professional or a coffee aficionado, this easy-to-make recipe will elevate your coffee routine to a new level. In this guide, we’ll explore everything you need to know to craft the best iced mocha oat latte right at home.

Why You’ll Love This Iced Mocha Oat Latte

  • Quick and Easy: This recipe is perfect for busy women who want a delicious coffee fix without spending hours in the kitchen.
  • Customizable: You can easily adjust the sweetness or swap ingredients based on your dietary preferences.
  • Refreshing Flavor: The combination of espresso and oat milk creates a smooth and creamy drink that’s perfect for warm days.
  • Rich in Nutrients: Oat milk is a good source of fiber and vitamins, making this latte a healthier option compared to traditional milk-based drinks.
  • Perfect for Any Time: Enjoy it as a morning pick-me-up or an afternoon treat, and feel satisfied all day.

Ingredients You’ll Need

Here’s a detailed breakdown of the ingredients needed for your iced mocha oat latte, along with possible substitutions:

  • Oat Milk: Provides a creamy texture and a subtle sweetness. You can substitute with almond milk or soy milk if preferred.
  • Espresso: Adds a rich coffee flavor. If you don’t have an espresso machine, strong brewed coffee works just as well.
  • Cocoa Powder: Delivers a chocolatey taste. Use unsweetened cocoa powder for a healthier option or try chocolate syrup for added sweetness.
  • Sugar or Sweetener: Adjust based on your taste; honey or agave syrup are great natural alternatives.
  • Ice Cubes: Essential for that refreshing chilled effect.
  • Whipped Cream (Optional): Adds an indulgent touch on top of your latte.
  • Chocolate Shavings (Optional): For an extra dose of chocolatey goodness.

How to Make Iced Mocha Oat Latte

Follow these simple steps to create your iced mocha oat latte:

  • Step 1 – Brew Espresso: Brew a shot of espresso and let it cool slightly.
  • Step 2 – Prepare Cocoa Mixture: In a small bowl, mix cocoa powder and sugar with hot water to form a smooth paste.
  • Step 3 – Combine Ingredients: Add the cooled espresso to the cocoa mixture and stir well to combine.
  • Step 4 – Assemble the Drink: Fill a glass with ice cubes, then pour oat milk over the ice and espresso mixture.
  • Step 5 – Stir and Serve: Stir gently to combine all the ingredients. Optionally, top with whipped cream and chocolate shavings for an extra treat!

Tips for Perfect Results

  • Fresh Ingredients: Always use fresh espresso for the best flavor.
  • Chill Your Glass: For an extra frosty experience, chill your glass in the freezer for a few minutes before serving.
  • Adjust Sweetness: Taste your drink before serving; you can always add more sweetener to taste.
  • Experiment with Flavors: Try adding a splash of vanilla or caramel syrup for a unique twist.
  • Use Quality Cocoa: The type of cocoa powder you use can significantly affect the taste; opt for high-quality brands.
  • Blend for Smoothness: For a creamier texture, consider blending the ingredients instead of stirring.
  • Serve Immediately: Enjoy your iced mocha oat latte right away for the best flavor and texture.
  • Storage: If you have leftovers, store the mixture (without ice) in the fridge for up to 24 hours. Just add ice before serving.

Common Mistakes and Troubleshooting

Even with the best recipes, mistakes can happen. Here are some common pitfalls and how to avoid them:

  • Overly Bitter Flavor: If your drink tastes bitter, you may have over-extracted your espresso. Make sure not to brew it for too long.
  • Too Sweet: If your latte turns out too sweet, try adding more oat milk to balance the flavors.
  • Inconsistent Texture: Ensure that your cocoa powder is fully dissolved in the hot water to avoid lumps.
  • Weak Flavor: If your drink lacks flavor, consider using less milk or adding another shot of espresso.

Delicious Variations of Iced Mocha Oat Latte

Here are some delicious variations to try:

  • Mocha Almond Oat Latte: Add a splash of almond extract for a nutty flavor.
  • Mint Mocha Oat Latte: Incorporate peppermint syrup for a refreshing twist.
  • Spiced Mocha Oat Latte: Add a pinch of cinnamon or nutmeg for a warm, spiced flavor.
  • Matcha Mocha Oat Latte: Swap espresso for matcha powder for a green tea twist.

Storage and Make-Ahead Instructions

If you’re looking to prepare ahead of time, consider these storage tips:

  • Make-Ahead Base: Brew a batch of espresso and prepare the cocoa mixture; store them separately in the fridge for up to 24 hours.
  • Oat Milk Storage: Keep oat milk in the refrigerator and use it within a week after opening for best quality.
  • Ice Cubes: Make ice cubes from leftover coffee or oat milk to enhance the flavor as they melt.

FAQs About Iced Mocha Oat Latte

  • Can I use instant coffee instead of espresso? Yes, but the flavor may not be as rich. Use a strong brew for the best results.
  • Is oat milk healthier than regular milk? Oat milk is lower in calories and contains more fiber, making it a great alternative.
  • Can I make this latte vegan? Absolutely! All the ingredients can be vegan-friendly, especially when using plant-based sweeteners.
  • How can I make it less sweet? Simply reduce the amount of sugar or sweetener you add, or use unsweetened cocoa powder.
  • What if I don’t have cocoa powder? You can use chocolate syrup instead, but adjust the sweetness accordingly.
  • How long does this drink last? It’s best enjoyed fresh, but the base can be stored in the fridge for up to 24 hours.
  • Can I serve it hot? Yes, omit the ice for a warm mocha oat latte!
  • What is the best way to froth oat milk? Use a frother or blender to achieve a creamy texture before adding it to your drink.

Nutritional Tips and Dietary Adaptations

This iced mocha oat latte can fit into various dietary preferences:

  • Low-Calorie Option: Use unsweetened oat milk and reduce the amount of sugar.
  • Gluten-Free: Oat milk is generally gluten-free, but check labels for cross-contamination.
  • Protein Boost: Add a scoop of protein powder to your latte for an extra nutritional punch.

Essential Equipment Needed

To make your iced mocha oat latte, you’ll need the following:

  • Espresso Machine or Coffee Maker: For brewing your espresso or strong coffee.
  • Blender or Frother: Optional, for frothing oat milk or blending ingredients.
  • Measuring Cups and Spoons: For accurate ingredient measurements.
  • Glass or Mug: To serve your delicious creation.

Serving Suggestions

To enhance your iced mocha oat latte experience, consider these serving suggestions:

  • Pair with a Pastry: Enjoy it alongside a croissant or muffin for a delightful breakfast.
  • Garnish Creatively: Use a sprinkle of cinnamon or cocoa powder on top for added flair.
  • Perfect Afternoon Treat: Serve it with a light salad or sandwich for a refreshing lunch option.

Conclusion

There you have it! A comprehensive guide to crafting the perfect iced mocha oat latte. With its rich flavors and creamy texture, this drink is sure to become a staple in your coffee routine. Remember, the beauty of this recipe lies in its versatility—feel free to experiment with different ingredients to find your ideal blend. So grab your supplies, and let’s make some delicious moments together!

Iced Mocha Oat Latte

Prep Time 5 minutes
Cook Time 5 minutes
Total Time 10 minutes
Servings 1 cup
Calories 180
A refreshing and creamy iced latte with chocolate and oat milk, perfect for a quick treat.

Ingredients

Dairy & Non-Dairy Milk

  • 1 cup Oat milk
  • 1 shot Espresso (Brewed and cooled)
  • 1 tbsp Cocoa powder
  • 1 tbsp Sugar or sweetener
  • 1 cup Ice cubes
  • Optional Whipped cream (For topping)
  • Optional Chocolate shavings (For garnish)

Instructions 

  • Brew a shot of espresso and let it cool slightly.
  • Mix cocoa powder and sugar with hot water to form a smooth paste.
  • Add cooled espresso to the cocoa mixture and stir well.
  • Fill a glass with ice cubes, then pour oat milk and espresso mixture over.
  • Stir gently to combine. Optional: top with whipped cream and chocolate shavings.

Notes

Adjust sweetness to taste and enjoy immediately.
Calories: 180kcal
Cost: $12
Course: Beverage
Cuisine: fusion
Keyword: coffee

Experience the Ultimate Refreshment with Peach Tea

As the hot summer days roll in, there’s nothing quite like a glass of refreshing peach tea to cool you down. This Refreshing Easy Peach Tea Recipe combines the rich flavor of black tea with the sweetness of ripe peaches, creating a delightful drink that is perfect for gatherings or a quiet afternoon at home. In this guide, I’ll walk you through the entire process, sharing tips, variations, and everything you need to know to master this summer favorite.

Why You’ll Love This Recipe

This peach tea recipe isn’t just easy to make; it offers numerous benefits:

  • Perfect for hot summer days: Enjoy a refreshing drink that helps you beat the heat.
  • Customizable sweetness: Adjust the sugar or honey to suit your taste preferences.
  • Fresh ingredients: Using ripe peaches gives the tea a natural sweetness that’s hard to resist.
  • Easy to prepare: With just a few simple steps, you can have a pitcher of delicious tea ready in no time.
  • Impressive for gatherings: Serve this beautiful drink at parties or family gatherings to wow your guests.

Key Ingredients & Substitutions

Here’s what you’ll need to create your perfect peach tea:

  • Black tea bags: You can use 4 black tea bags or your preferred tea for a different flavor. Green tea or herbal tea works well too!
  • Fresh peaches: 2 ripe peaches, sliced. For a quicker version, consider using frozen peaches—just let them thaw before adding.
  • Sweetener: 2-3 tablespoons of honey or sugar. Adjust to taste based on your preference.
  • Ice cubes: 1 cup, to serve the tea cold.
  • Optional garnishes: Fresh mint leaves and lemon slices for an added touch of flavor and presentation.

Step-by-Step Instructions

Side view of refreshing peach tea in a transparent glass, with ice cubes and lemon slices around it.

Follow these steps to craft your own refreshing peach tea:

  • Boil water: Start by bringing 4 cups of water to a rolling boil in a pot or kettle. This is the base for your tea!
  • Steep the tea: Once boiling, remove the pot from heat and add the tea bags. Let them steep for about 5 minutes for a robust flavor.
  • Add sweetness: After steeping, remove the tea bags and stir in your honey or sugar until fully dissolved. Taste as you go to ensure it’s just right!
  • Cool it down: Allow the sweetened tea to cool to room temperature, then refrigerate it to chill completely.
  • Combine with peaches: In a large pitcher, mix the chilled tea with the sliced peaches. Let it sit for a few minutes for the flavors to meld together.
  • Serve chilled: Fill glasses with ice cubes and pour the peach tea over the ice. Garnish with extra peach slices and fresh mint leaves for a beautiful presentation.

Pro Tips for the Perfect Peach Tea

To ensure your peach tea is the absolute best, consider these expert insights:

  • Steeping time: Don’t over-steep the tea bags to avoid bitterness. Five minutes is ideal for a bold flavor.
  • Cooling method: If you’re in a hurry, you can cool the tea quickly by placing it in an ice bath instead of waiting for it to cool down at room temperature.
  • Flavor infusion: For a deeper peach flavor, allow the tea to sit longer with the peach slices before serving.
  • Sweetness adjustments: If you’re using ripe, juicy peaches, you may need less sweetener since they add natural sweetness.
  • Minty freshness: Adding fresh mint leaves not only enhances flavor but also adds a beautiful aroma.
  • Batch preparation: Double or triple the recipe for larger gatherings. Store extra tea in the refrigerator for up to a week.
  • Experiment with other fruits: Feel free to mix in other fruits like berries or citrus for a unique twist.
  • Presentation matters: Serve in clear glasses to showcase the beautiful color of the tea and peach slices.

Common Mistakes & Troubleshooting

Here are some common pitfalls to avoid when making peach tea:

  • Over-steeping the tea: This can lead to bitterness. Remember to set a timer!
  • Not cooling the tea: Serving warm tea defeats the purpose of a refreshing drink. Chill it properly before serving.
  • Forgetting to taste: Always taste your tea before serving to ensure the sweetness and flavor are just right.
  • Using unripe peaches: Make sure your peaches are ripe for the best flavor. If they’re hard, let them ripen a bit before using.

Variations on Peach Tea

Feel free to get creative with your peach tea! Here are some fun variations to try:

  • Peach Lemonade Iced Tea: Combine peach tea with lemonade for an extra zing.
  • Peach Mint Iced Tea: Add muddled mint leaves to the tea for a refreshing herbal twist.
  • Spiced Peach Tea: Incorporate spices like cinnamon or ginger during the steeping process for a warm, cozy flavor.
  • Peach Green Tea: Swap black tea for green tea for a lighter, healthier option.

Storage and Make-Ahead Instructions

If you want to prepare your peach tea in advance, here’s how to store it:

  • Refrigeration: Store your peach tea in an airtight container in the refrigerator for up to a week.
  • Freezing: Pour leftover tea into ice cube trays and freeze for later use. These cubes can be added to future drinks without diluting flavor.

Nutrition Tips and Dietary Adaptations

This peach tea can fit various dietary needs:

  • Low-calorie option: Use a sugar substitute like stevia or monk fruit to reduce calories.
  • Fruit infusion: Enhance the nutritional profile by adding other fruits to your tea.
  • Herbal alternatives: For a caffeine-free version, use herbal tea instead of black tea.

Equipment Recommendations

Here’s some recommended equipment to make your peach tea-making experience smoother:

  • Teapot or kettle: A good quality kettle will help you heat water quickly.
  • Measuring cups: For accurate ingredient measurements.
  • Pitcher: A glass pitcher is perfect for mixing and serving your peach tea.
  • Strainer: If you prefer a smoother tea without peach pulp, a fine-mesh strainer can help.

Serving Suggestions

To elevate your peach tea experience, consider these serving suggestions:

  • Garnish beautifully: Use fresh peach slices, mint leaves, or lemon wedges to add color.
  • Pair with snacks: Serve alongside light snacks like finger sandwiches, fruit platters, or cookies for a delightful afternoon tea.
  • Create a tea bar: Set up a DIY tea bar with various fruits, sweeteners, and herbs for guests to customize their drinks.

Frequently Asked Questions

Here are some common questions about making peach tea:

  • Can I use other types of tea? Absolutely! Feel free to experiment with green tea, herbal teas, or even flavored teas.
  • How sweet should my tea be? It’s all about personal preference! Start with a small amount of sweetener and adjust as needed.
  • Can I make peach tea ahead of time? Yes, peach tea can be made in advance and stored in the refrigerator for several days.
  • What if I don’t have fresh peaches? You can use frozen peaches; just let them thaw and add them to the tea.
  • Can I make this tea hot instead of iced? Yes! Simply skip the ice and serve it warm for a cozy drink.
  • How do I adjust the recipe for more servings? Simply multiply the ingredients by the number of servings you need.
  • What’s the best way to serve peach tea? Serve it chilled over ice with garnishes for a refreshing treat.
  • Can I add alcohol to my peach tea? Yes, for a fun twist, consider adding a splash of vodka or rum for a summer cocktail.

In conclusion, making your own refreshing peach tea is not only simple but also a wonderful way to enjoy summer flavors. With fresh peaches and the right steps, you can create a delightful drink that brings joy and refreshment to your table. So gather your ingredients, invite some friends, and sip into summer with this vibrant peach tea recipe!

Refreshing Easy Peach Tea

Prep Time 10 minutes
Cook Time 10 minutes
Total Time 20 minutes
Servings 4 cups
Calories 150
A simple and delicious summer beverage combining fresh peaches and black tea for a refreshing treat.

Ingredients

Tea

  • 4 bags black tea bags (or preferred tea)
  • 4 cups water
  • 2 pieces ripe peaches (sliced plus extra for garnish)
  • 2-3 tablespoons honey or sugar (adjust to taste)
  • 1 cup ice cubes
  • optional Fresh mint leaves (for garnish)
  • optional Lemon slices (for serving)

Instructions 

  • Bring 4 cups of water to a boil, then remove from heat and steep tea bags for 5 minutes.
  • Remove tea bags, stir in honey or sugar until dissolved, then cool to room temperature and chill.
  • In a pitcher, combine chilled tea with sliced peaches and let sit for a few minutes.
  • Fill glasses with ice, pour the peach tea over, and garnish with extra peach slices, mint leaves, and lemon slices if desired.

Notes

Adjust sweetness and garnishes to your preference for the perfect summer refreshment.
Calories: 150kcal
Cost: $10
Course: Beverage
Cuisine: American
Keyword: Peach, tea

Welcome to the delicious world of Sticky Garlic Chicken Noodles, where savory flavors and comforting textures come together in a dish that’s perfect for any weeknight. This recipe is not just a meal; it’s an experience that will transform your kitchen into a bustling restaurant. In this guide, I’ll walk you through the steps to create this mouthwatering dish, while providing tips and insights to elevate your cooking game.

Whether you’re a seasoned chef or someone just looking to impress at dinner time, this recipe is designed to be approachable, fun, and incredibly satisfying. Let’s dive into why you’ll love this dish and how you can make it your own!

Why You’ll Love This Recipe

  • Quick and easy: Made in just 30 minutes, this recipe is ideal for busy weeknights when you want something delicious without the lengthy prep.
  • Flavor explosion: The sticky garlic sauce is a perfect blend of sweet, savory, and spicy. It’s a flavor bomb that you’ll want to savor in every bite.
  • Customizable: This recipe is incredibly flexible. Feel free to swap chicken with tofu, beef, or shrimp based on your dietary preferences or what you have on hand.
  • Kid-friendly: Even the pickiest of eaters will enjoy these noodles! The sweet and savory sauce makes it appealing to children while still being satisfying for adults.
  • Make it a meal: Add vegetables like bell peppers, broccoli, or snap peas for a complete, nutritious dish that looks as good as it tastes.

Ingredients for Sticky Garlic Chicken Noodles

Here’s what you’ll need to create this delightful dish:

  • For the Chicken and Noodles:
    • 1 lb boneless, skinless chicken thighs or breasts, cut into bite-sized pieces
    • 8 oz egg noodles, rice noodles, or spaghetti
    • 2 tablespoons cornstarch
    • 2 tablespoons neutral oil (like canola or avocado)
    • 2-3 green onions, sliced (optional garnish)
    • Sesame seeds (optional garnish)
  • For the Sticky Garlic Sauce:
    • 1/4 cup low-sodium soy sauce
    • 3 tablespoons brown sugar
    • 1 tablespoon oyster sauce
    • 1 tablespoon hoisin sauce
    • 1 tablespoon rice vinegar or apple cider vinegar
    • 1 tablespoon sesame oil
    • 4 cloves garlic, minced
    • 1 teaspoon fresh ginger, grated (optional)
    • 1/2 teaspoon chili flakes or sriracha (optional, for heat)
    • 1/4 cup water
    • 1 teaspoon cornstarch (to thicken sauce)

Step-by-Step Instructions

Now that you have all your ingredients, let’s get cooking!

  • Step 1: Cook the Noodles: Boil the noodles according to the package instructions until just tender. Drain and set aside. Drizzle with sesame oil to prevent sticking.
  • Step 2: Prep the Sauce: In a small bowl, whisk together soy sauce, brown sugar, oyster sauce, hoisin, vinegar, sesame oil, garlic, ginger (if using), chili flakes, water, and cornstarch. Set aside.
  • Step 3: Coat and Cook the Chicken: Toss the chicken pieces with cornstarch for a light crisp on the outside. Heat oil in a large skillet or wok over medium-high heat. Add the chicken in a single layer and cook until golden and cooked through, about 5-7 minutes. Work in batches if needed to avoid overcrowding.
  • Step 4: Add the Sauce: Pour the sticky garlic sauce into the pan with the chicken. Bring to a simmer and cook for 2-3 minutes until thick and glossy.
  • Step 5: Toss in the Noodles: Add the cooked noodles to the skillet and toss well to coat in the sauce. Stir until everything is evenly combined and heated through.
  • Step 6: Garnish and Serve: Serve hot, topped with sliced green onions and a sprinkle of sesame seeds if desired.

Pro Tips for Perfect Sticky Garlic Chicken Noodles

  • Marinate the Chicken: For deeper flavor, marinate the chicken in the sauce for 30 minutes before cooking.
  • Adjust the Heat: Control the spiciness by adjusting the amount of chili flakes or sriracha to suit your palate.
  • Use Fresh Ingredients: Fresh garlic and ginger will enhance the flavor of the sauce significantly. Don’t skip these!
  • Thicken the Sauce: If you prefer a thicker sauce, let it simmer longer or increase the cornstarch to achieve your desired consistency.
  • Veggie Boost: Add sliced bell peppers, carrots, or snap peas for added nutrition and color.
  • Don’t Overcook the Noodles: Keep an eye on them while boiling. You want them al dente, as they will continue to cook in the sauce.
  • Experiment with Noodles: While egg noodles are traditional, feel free to try rice noodles or even whole wheat spaghetti for a health twist!
  • Use a Wok: If you have one, a wok is ideal for this recipe as it allows for better heat distribution and cooking.

Common Mistakes and Troubleshooting

Here are some common pitfalls to avoid when preparing Sticky Garlic Chicken Noodles:

  • Overcrowding the Pan: Cooking the chicken in batches ensures it gets crispy and doesn’t steam.
  • Not Prepping Ingredients First: Have all your ingredients measured and ready to go. This recipe cooks quickly!
  • Ignoring the Sauce: Make sure the sauce simmers long enough to thicken properly. A watery sauce won’t cling to the noodles.
  • Using Cold Ingredients: Ensure your chicken is at room temperature before cooking for even cooking.

Variations for Sticky Garlic Chicken Noodles

Feel free to mix things up with these tasty variations:

  • Vegetarian Option: Substitute chicken with tofu or tempeh for a vegetarian-friendly version.
  • Seafood Twist: Use shrimp or scallops instead of chicken for a delightful seafood variation.
  • Spicy Garlic Chicken Noodles: Add more chili flakes or a splash of hot sauce for an extra kick.
  • Peanut Sauce Version: Swap the sticky garlic sauce with a peanut sauce for a different flavor profile.

Storage and Make-Ahead Instructions

If you want to prepare ahead, here’s how to store and reheat your Sticky Garlic Chicken Noodles:

  • Make-Ahead: You can prep the sauce and chop your chicken and vegetables a day in advance. Store them separately in the fridge.
  • Storing: Leftovers can be stored in an airtight container in the fridge for up to 3 days.
  • Reheating: Reheat in a skillet over medium heat, adding a splash of water or a bit of extra sauce to keep it moist.

Frequently Asked Questions

Here are some common questions regarding Sticky Garlic Chicken Noodles:

  • Can I use different types of noodles? Absolutely! Rice, egg noodles, or even whole wheat spaghetti work beautifully.
  • How do I make the sauce thicker? Simmer it longer or add an extra teaspoon of cornstarch mixed with water.
  • Can I make this dish less sweet? Reduce the amount of brown sugar or use a sugar substitute.
  • Is this recipe spicy? The level of spiciness can be adjusted by varying the chili flakes or sriracha.
  • Can I prepare this ahead of time? Yes, you can prep the ingredients the day before and cook when ready.
  • What can I serve with Sticky Garlic Chicken Noodles? This dish pairs well with steamed vegetables or a side salad.
  • Can I freeze the leftovers? It’s not recommended as the texture of the noodles may change upon freezing.
  • How do I store leftovers? Store in an airtight container in the fridge for up to 3 days.

Nutritional Tips and Dietary Adaptations

For those conscious about their diets, here are some tips:

  • Gluten-Free: Use gluten-free soy sauce and rice noodles to make this dish gluten-free.
  • Low-Carb: Substitute traditional noodles with zucchini noodles or cauliflower rice.
  • Low-Sodium: Opt for low-sodium soy sauce to control your salt intake.
  • Protein Boost: Add extra protein by incorporating edamame or chickpeas.

Equipment Recommendations

Here’s what you’ll need:

  • Large Skillet or Wok: Essential for cooking the chicken and sauce evenly.
  • Whisk: For mixing the sauce ingredients smoothly.
  • Measuring Cups and Spoons: Accurate measurements ensure the best flavors.
  • Colander: Perfect for draining the cooked noodles.

Serving Suggestions

To elevate your meal, consider these serving suggestions:

  • Garnish: Top with sesame seeds and sliced green onions for extra flavor and visual appeal.
  • Side Dishes: Serve with a light cucumber salad or steamed broccoli.
  • Pairing: A light white wine or iced green tea complements the flavors beautifully.

In conclusion, Sticky Garlic Chicken Noodles are not just a recipe but a culinary adventure waiting to be explored. With this comprehensive guide, you have all the tools and knowledge to create a dish that will impress your family and friends. Remember, cooking is all about experimenting and having fun, so don’t hesitate to make this recipe your own. Happy cooking!

Sticky Garlic Chicken Noodles

Prep Time 10 minutes
Cook Time 15 minutes
Total Time 25 minutes
Servings 4 servings
Calories 550
A flavorful and easy-to-make dish featuring tender chicken, noodles, and a savory garlic sauce, perfect for a quick dinner.

Ingredients

For the Chicken and Noodles

  • 1 lb boneless, skinless chicken thighs or breasts, cut into bite-sized pieces
  • 8 oz egg noodles, rice noodles, or spaghetti
  • 2 tablespoons cornstarch
  • 2 tablespoons neutral oil like canola or avocado
  • 3 green onions sliced, optional garnish
  • Sesame seeds for garnish, optional

For the Sticky Garlic Sauce

  • 0.25 cup low-sodium soy sauce
  • 3 tablespoons brown sugar
  • 1 tablespoon oyster sauce
  • 1 tablespoon hoisin sauce
  • 1 tablespoon rice vinegar or apple cider vinegar
  • 1 tablespoon sesame oil
  • 4 cloves garlic, minced
  • 1 teaspoon fresh ginger, grated, optional
  • 0.5 teaspoon chili flakes or sriracha, optional for heat
  • 0.25 cup water
  • 1 teaspoon cornstarch to thicken sauce

Instructions 

  • Cook the noodles until just tender, drain, toss with sesame oil, and set aside.
  • Whisk together soy sauce, sugar, oyster, hoisin, vinegar, sesame oil, garlic, ginger, chili flakes, water, and cornstarch to make the sauce.
  • Toss chicken with cornstarch, then cook in hot oil until golden and cooked through, about 5-7 minutes.
  • Pour sauce into the pan with chicken, simmer until thick and glossy, about 2-3 minutes.
  • Add noodles to the pan, toss to coat, and heat through. Garnish with green onions and sesame seeds if desired.

Notes

For extra flavor, add a splash of lime juice or sprinkle with chopped cilantro before serving.
Calories: 550kcal
Cost: $15
Course: Main Course
Cuisine: Asian
Keyword: Chicken, garlic, Noodles

Discover the Irresistible Chocolate Banana Shake

Welcome to a delightful culinary journey where we blend the rich flavors of chocolate and the creamy goodness of banana to create the ultimate Chocolate Banana Shake. This indulgent treat is not just a delicious drink; it’s a nutritious option perfect for breakfast, a midday snack, or a dessert. In just a few simple steps, you can whip up a shake that your entire family will love. So, let’s dive into why this recipe is a must-try!

Why You’ll Love This Recipe

This Chocolate Banana Shake is a winner for many reasons:

  • Quick and Easy: It takes less than 10 minutes to prepare, making it an ideal choice for busy mornings.
  • Nutritionally Balanced: Packed with fiber and essential nutrients from bananas and oats, it’s a healthy way to satisfy your sweet tooth.
  • Customizable: With various ingredient options and add-ins, you can easily tailor this shake to fit your taste preferences.
  • Kid-Friendly: Children will love the sweet, creamy flavor, helping you sneak in essential nutrients without any fuss.
  • Indulgent Yet Healthy: Enjoy the taste of chocolate without the guilt, thanks to simple, wholesome ingredients.

Ingredients for Your Chocolate Banana Shake

Let’s gather what you need to create this delicious shake. Here’s a detailed breakdown:

  • Banana: 1 ripe banana adds natural sweetness and creaminess.
  • Milk: 500 ml of milk (1.5% fat) serves as the base. You can substitute with almond milk, oat milk, or any milk of your choice for a dairy-free option.
  • Cocoa Powder: 2 teaspoons of unsweetened cocoa powder deliver the rich chocolate flavor without added sugar.
  • Honey: 1 teaspoon of honey for a touch of sweetness. Maple syrup or agave can be used as alternatives.
  • Oats: 50 g of rolled oats not only thicken the shake but also provide fiber.

How to Make Your Chocolate Banana Shake

A freshly blended banana chocolate shake with a smooth texture in a glass.

Creating this shake is a breeze! Follow these simple steps:

  1. Peel the banana and cut it into pieces.
  2. Add the banana, milk, oats, cocoa powder, and honey to a blender.
  3. Blend until smooth and creamy.
  4. Serve immediately, and enjoy your delicious creation!

Pro Tips for the Perfect Shake

To ensure your shake turns out perfectly every time, consider these expert insights:

  • Use Ripe Bananas: Ripe bananas are sweeter and creamier, enhancing the flavor of your shake.
  • Chill Your Ingredients: For a cold, refreshing shake, chill your milk and bananas beforehand.
  • Adjust Sweetness: Taste your shake before serving and adjust the sweetness to your liking with honey or syrup.
  • Experiment with Add-Ins: Try adding peanut butter, vanilla extract, or even a scoop of protein powder for a nutritional boost.
  • Blend Thoroughly: Ensure all ingredients are well-blended for a smooth texture without any lumps.
  • Use a High-Powered Blender: This will help achieve that creamy consistency without any graininess from the oats.
  • Garnish Creatively: Top your shake with whipped cream, chocolate chips, or a sprinkle of cocoa powder for an appealing presentation.

Common Mistakes and Troubleshooting

Even the best of us can run into a few bumps along the way. Here’s how to avoid common pitfalls:

  • Too Thick: If your shake is thicker than desired, simply add more milk a little at a time until you reach your preferred consistency.
  • Not Sweet Enough: If the shake lacks sweetness, incorporate a bit more honey or a sweetener of choice.
  • Grainy Texture: Ensure to blend thoroughly, especially if using rolled oats. A high-powered blender can help.

Delicious Variations to Try

Want to switch things up? Here are some fun variations of the classic Chocolate Banana Shake:

  • Peanut Butter Banana Shake: Add 1-2 tablespoons of creamy peanut butter for a nutty twist.
  • Chocolate Mint Shake: Incorporate a few drops of peppermint extract for a refreshing chocolate mint flavor.
  • Berry Chocolate Shake: Blend in a handful of mixed berries for added sweetness and a fruity twist.
  • Protein-Packed Shake: Include a scoop of your favorite protein powder for a post-workout boost.

Storage and Make-Ahead Instructions

This shake is best enjoyed fresh, but if you need to prepare in advance, here are some tips:

  • Refrigeration: Store in an airtight container in the refrigerator for up to 24 hours. Shake well before consuming.
  • Freezing: You can freeze the shake in an ice cube tray and blend the cubes with a bit of milk later for a quick treat.

Frequently Asked Questions

Here are some common questions about the Chocolate Banana Shake:

  • Can I use frozen bananas? Yes, frozen bananas can add a thicker texture and make your shake extra cold.
  • Is this shake vegan? Yes, if you use plant-based milk and a vegan sweetener.
  • How can I make it healthier? Reduce or omit the honey and use dark cocoa powder to keep it nutritious.
  • Can I add greens? Absolutely! Spinach or kale can be blended in for added nutrients without affecting the taste.
  • Is it suitable for kids? Yes, this shake is a kid-friendly option that offers a healthy alternative to sugary drinks.
  • Can I prepare it the night before? You can, but for the best taste and texture, make it fresh.
  • How do I make it creamier? Use Greek yogurt or a scoop of ice cream for added creaminess.
  • What’s the best way to serve it? Serve it chilled in a tall glass with a straw for a delightful experience.

Nutritional Tips and Dietary Adaptations

This Chocolate Banana Shake can fit various dietary needs:

  • For a Low-Carb Version: Use unsweetened almond milk and omit the oats.
  • For a Protein Boost: Add a scoop of your favorite protein powder.
  • For Gluten-Free: Ensure that your oats are certified gluten-free.
  • For Dairy-Free: Substitute with coconut or almond milk.

Equipment Recommendations

To make your shake effortlessly, here’s what you’ll need:

  • High-Powered Blender: For a smooth and creamy consistency.
  • Measuring Cups and Spoons: To ensure you get the proportions just right.
  • Spatula: For scraping down the sides of the blender to ensure everything is well mixed.

Serving Suggestions

Enjoy your Chocolate Banana Shake with these tasty side options:

  • Granola: A sprinkle of granola on top adds crunch and texture.
  • Fruit Skewers: Pair with fresh fruit skewers for a refreshing side.
  • Healthy Muffins: Serve alongside healthy muffins for a balanced breakfast.

In conclusion, this Chocolate Banana Shake is more than just a drink; it’s a delightful fusion of flavors and nutrition that the whole family can enjoy. Whether you’re starting your day or treating yourself in the afternoon, this shake is sure to please. I encourage you to try it today and experience the joy of blending flavors in your kitchen!

Bananen-Schoko-Shake

Prep Time 5 minutes
Total Time 5 minutes
Servings 1 portion
Calories 350
Ein cremiger und schokoladiger Bananen-Shake, perfekt für einen energiereichen Start in den Tag.

Ingredients

Fruits

  • 1 stück Banane
  • 500 ml Milch 1,5 Fett
  • 2 Teelöffel Kakaopulver
  • 1 Teelöffel Honig
  • 50 g Haferflocken

Instructions 

  • Banane schälen und in Stücke schneiden.
  • Alle Zutaten in den Mixer geben und mixen.
  • Shake direkt servieren.

Notes

Für eine cremigere Konsistenz kannst du Eiswürfel hinzufügen.
Calories: 350kcal
Cost: $5
Course: Getränk
Keyword: Banane

Unlock the Flavors of Chipotle Chicken Bowls

If you’re in search of a vibrant and satisfying meal that encapsulates the smoky, spicy flavors of your favorite chipotle dishes, look no further! These Chipotle Chicken Bowls are not only a feast for the senses but also an incredibly versatile option for meal prep. Bursting with flavor, they combine marinated chicken, zesty cilantro lime rice, and hearty black beans, making them a perfect choice for any occasion—whether it’s a cozy family dinner or a quick lunch at work.

This recipe is designed to guide you through making delightful Chipotle Chicken Bowls at home, ensuring you can enjoy the vibrant flavors without having to step into a restaurant. With my two decades of culinary experience, I’ll share my top tips, variations, and common pitfalls to help you master this dish.

Why You’ll Love This Recipe

  • Quick and Easy: Perfect for busy weeknights, these bowls can be prepared in under 30 minutes once everything is prepped.
  • Customizable: Adapt the recipe to suit everyone’s tastes by swapping ingredients or adding your favorite toppings.
  • Meal Prep Friendly: Make a large batch to enjoy throughout the week, saving time and ensuring you have a healthy meal on hand.
  • Flavor Packed: The marinade infuses the chicken with smoky chipotle flavors, complemented by fresh and zesty accents from the cilantro lime rice.
  • Healthy Ingredients: Packed with protein and fiber, this bowl is a nutritious option that doesn’t compromise on taste.

Ingredient Breakdown

Let’s take a closer look at what makes up these delicious Chipotle Chicken Bowls and explore some substitutions to customize your dish.

For the Chicken Marinade

  • 2 pounds chicken breasts, cubed
  • 1/4 cup chipotle peppers in adobo
  • 1/2 cup plain Greek yogurt (or sour cream for a creamier texture)
  • 1 tablespoon honey (or maple syrup for a vegan option)
  • 2 teaspoons lime juice
  • 1 teaspoon salt
  • 1 teaspoon cumin
  • 2 tablespoons water

For the Black Beans

  • 2 (15-ounce) cans black beans, rinsed and drained
  • 1 teaspoon minced garlic
  • 1 teaspoon cumin
  • 1 teaspoon oregano

For the Cilantro Lime Rice

  • 2 cups cooked rice (white, brown, or cauliflower rice as a low-carb option)
  • 1 teaspoon salt
  • 2 tablespoons lime juice
  • 1/2 cup chopped fresh cilantro (or parsley for a different flavor)

Pro Tips for Perfect Chipotle Chicken Bowls

To elevate your cooking experience and ensure your Chipotle Chicken Bowls are a hit, consider these expert insights:

  • Marinate Longer: For better flavor penetration, marinate the chicken for at least 2 hours or overnight.
  • Use High Heat: Searing the chicken on high heat helps lock in moisture and create a nice crust.
  • Cook Rice Ahead: Preparing the rice in advance saves time and allows flavors to meld together.
  • Experiment with Spices: Feel free to add chili powder or smoked paprika for an extra kick.
  • Fresh Ingredients Matter: Use fresh cilantro and lime juice for the best flavor in your rice.
  • Keep it Warm: Serve the bowls hot, and keep the components warm until serving for a delightful experience.
  • Layer Your Bowls: Start with rice, then add chicken, beans, and toppings for a visually appealing dish.
  • Use Quality Chicken: Opt for organic or free-range chicken for better flavor and quality.

Common Mistakes and Troubleshooting

Even the best chefs can face hiccups in the kitchen. Here are some common mistakes to avoid when making Chipotle Chicken Bowls:

  • Overcooking the Chicken: Keep an eye on the chicken to prevent it from drying out. Cook until just done.
  • Skipping the Marinade: Don’t rush this step; it’s crucial for flavor. Marinate as recommended.
  • Undercooking the Rice: Ensure your rice is fully cooked and fluffy for the best texture in your bowls.
  • Ignoring Seasoning: Taste as you go! Adjust seasoning to your preference for a well-balanced dish.

Delicious Variations

Want to switch things up? Here are some creative variations to keep your Chipotle Chicken Bowls exciting:

  • Vegetarian Option: Substitute chicken with grilled tofu or sautéed vegetables for a plant-based version.
  • Mexican Street Corn: Add elote (Mexican street corn) for a sweet and creamy element.
  • Spicy Salsa: Top with your favorite salsa or pico de gallo for added freshness and heat.
  • Cheesy Delight: Sprinkle shredded cheese or crumbled feta on top for a creamy twist.

Storage and Make-Ahead Instructions

Planning ahead? Here’s how to store and prepare your Chipotle Chicken Bowls for future meals:

  • Refrigeration: Store each component separately in airtight containers for up to 4 days.
  • Freezing: The marinated chicken can be frozen for up to 3 months; just thaw in the fridge overnight before cooking.
  • Make-Ahead Rice: Cooked rice can be refrigerated for up to a week, making meal prep a breeze.
  • Reheat Properly: Reheat chicken and beans on the stovetop or in the microwave until heated through, adding a splash of water if necessary.

Frequently Asked Questions

Here are some common questions regarding Chipotle Chicken Bowls:

  • Can I use frozen chicken? Yes, just ensure it’s fully thawed before marinating and cooking.
  • How spicy is this recipe? The spice level can be adjusted by reducing the amount of chipotle peppers.
  • Can I make this vegan? Absolutely! Substitute chicken with marinated tofu and use a plant-based yogurt.
  • What toppings do you recommend? Try avocado, sour cream, fresh lime, or your favorite hot sauce.
  • How do I store leftovers? Keep leftovers in airtight containers in the fridge for up to 4 days.
  • Can I use brown rice? Yes, brown rice adds more fiber and has a nutty flavor.
  • Is this recipe gluten-free? It is naturally gluten-free, just ensure your toppings are as well.
  • What can I substitute for black beans? Pinto beans or kidney beans work well as alternatives.

Nutritional Tips and Dietary Adaptations

This recipe can adapt to various dietary preferences and needs. Here are some tips:

  • Low-Carb: Substitute rice with cauliflower rice to significantly lower the carb count.
  • High-Protein: Add more chicken or include quinoa for an additional protein boost.
  • Low-Calorie: Use skinless chicken breasts and reduce the amount of yogurt in the marinade.
  • Dairy-Free: Replace Greek yogurt with coconut yogurt for a creamy, dairy-free option.

Essential Equipment Recommendations

To make the most of your cooking experience, here’s what you’ll need:

  • Cutting Board: A sturdy cutting board for prepping ingredients.
  • Sharp Knife: A sharp knife for easy chopping and dicing.
  • Skillet or Grill Pan: For cooking the chicken to perfection.
  • Rice Cooker: If you prefer hassle-free rice cooking, a rice cooker is a great investment.

Serving Suggestions

To round out your meal, consider serving your Chipotle Chicken Bowls with:

  • Fresh Guacamole: A creamy avocado dip that adds richness.
  • Chips and Salsa: For a crunchy side that complements the flavors.
  • Light Salad: A fresh green salad with a citrus vinaigrette to balance the meal.

In conclusion, these Chipotle Chicken Bowls are a fantastic option to enjoy at home, bringing the vibrant flavors of Chipotle right to your kitchen. With their customizable nature and meal prep convenience, they’re sure to become a staple in your culinary repertoire. So gather your ingredients, unleash your inner chef, and enjoy this delightful dish with family and friends!

Chipotle Chicken Bowls

Prep Time 15 minutes
Cook Time 20 minutes
Total Time 35 minutes
Servings 4 servings
Calories 550
Enjoy flavorful and easy-to-make chipotle chicken bowls with rice, black beans, and fresh cilantro.

Ingredients

For the Chicken Marinade

  • 2 pounds chicken breasts cubed
  • 1/4 cup chipotle peppers in adobo
  • 1/2 cup plain Greek yogurt
  • 1 tablespoon honey
  • 2 teaspoons lime juice
  • 1 teaspoon salt
  • 1 teaspoon cumin
  • 2 tablespoons water

For the Black Beans

  • 2 15-ounce cans black beans
  • 1 teaspoon minced garlic
  • 1 teaspoon cumin
  • 1 teaspoon oregano

For the Cilantro Lime Rice

  • 2 cups cooked rice
  • 1 teaspoon salt
  • 2 tablespoons lime juice
  • 1/2 cup chopped fresh cilantro

Instructions 

  • Marinate chicken with chipotle peppers, yogurt, honey, lime juice, salt, cumin, and water for at least 30 minutes.
  • Cook marinated chicken in a skillet over medium heat until fully cooked.
  • Heat black beans with garlic, cumin, and oregano in a separate pot.
  • Mix cooked rice with salt, lime juice, and cilantro.
  • Assemble bowls with rice, chicken, black beans, and toppings.

Notes

For best flavor, marinate chicken at least 30 minutes before cooking.
Calories: 550kcal
Cost: $15
Course: Main Course
Cuisine: Mexican
Keyword: Black Beans, Chicken, Rice