
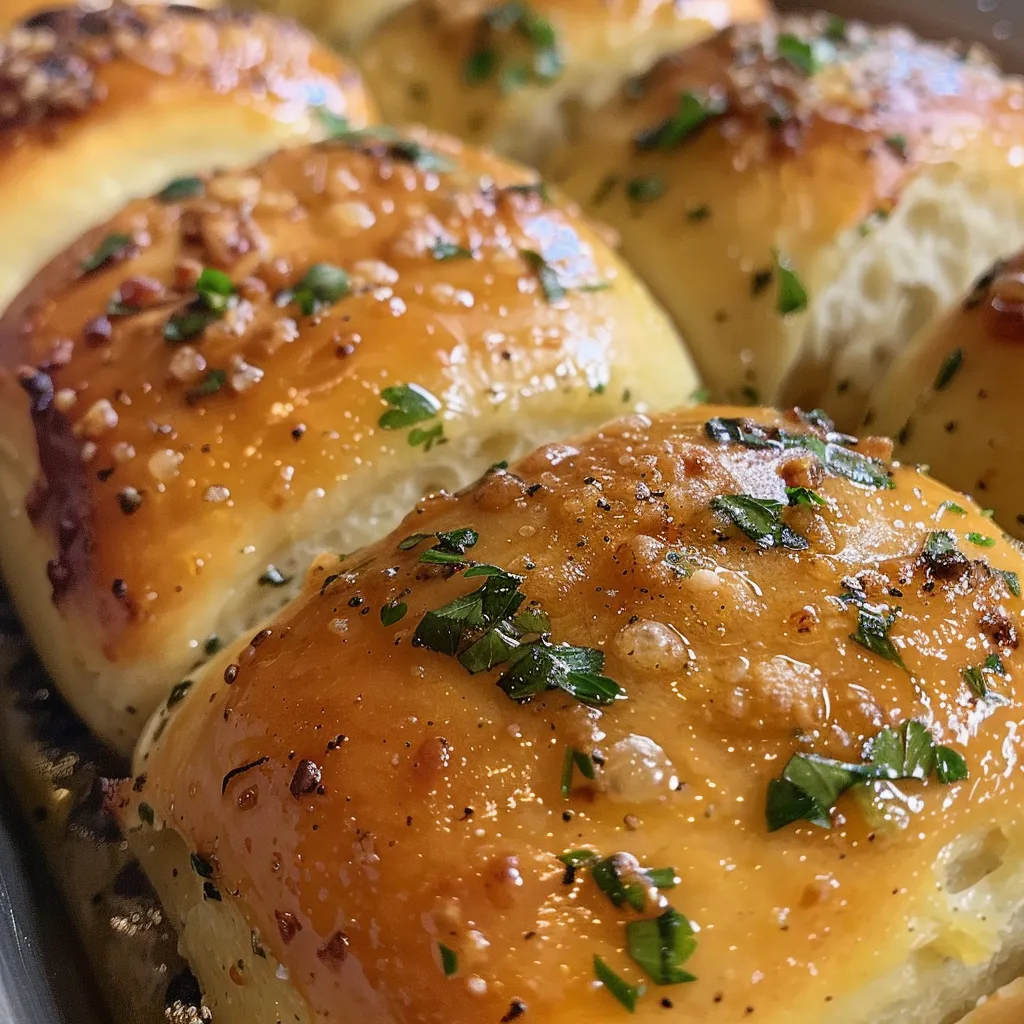
Mastering the Art of Garlic Bread Rolls
Welcome to the ultimate guide on making irresistible garlic bread rolls! If you’ve ever dreamed of fluffy, buttery rolls infused with the aromatic goodness of garlic, you’re in the right place. These rolls are perfect for any occasion, from family dinners to festive gatherings. In this comprehensive guide, we’ll explore everything you need to know, from ingredients and techniques to troubleshooting and serving suggestions. Let’s dive in!
Why You’ll Love This Recipe
These garlic bread rolls are more than just a side dish; they’re a culinary experience! Here are some reasons why you’ll adore this recipe:
- Buttery richness: The combination of warm, melted garlic butter and soft rolls creates a decadent flavor profile that’s hard to resist.
- Easy to make: With straightforward ingredients and simple steps, you can whip up these rolls even if you’re a beginner in the kitchen.
- Versatile pairing: These rolls complement a variety of dishes, from pasta and soups to grilled meats and salads.
- Make-ahead option: You can prepare the dough in advance, making it a stress-free addition to your meal prep.
- Perfect for gatherings: Impress your guests with homemade rolls that are sure to elevate any meal!
Ingredients You’ll Need
Here’s a complete list of ingredients for making fabulous garlic bread rolls, along with suggested substitutions:
- Unsalted butter: 4 1/2 tablespoons (for dough) and an additional 2 tablespoons (for garlic butter). If you prefer, you can use olive oil for a lighter option.
- Minced garlic: 2 tablespoons, which infuses the rolls with a rich garlic flavor. You can use garlic powder as an alternative, but fresh garlic is recommended for the best taste.
- All-purpose flour: 3 1/2 cups + 1 tablespoon. For a healthier twist, consider using whole wheat flour or a gluten-free blend.
- Fresh parsley: 3 tablespoons, chopped. Dried parsley can be used in a pinch, but fresh herbs deliver superior flavor.
- Granulated sugar: 1 tablespoon, which helps activate the yeast and creates a slightly sweet flavor. Brown sugar can be used for a deeper taste.
- Instant yeast: 2 1/4 teaspoons, ensuring a quick rise. Active dry yeast can be substituted but requires proofing.
- Fine sea salt: 1 teaspoon. Always opt for fine salt for an even distribution in the dough.
- Warm milk: 1 cup (110°F), providing moisture and enriching the dough. You can use dairy-free milk such as almond or oat milk if desired.
- Large egg: 1, at room temperature, which helps bind the ingredients. For a vegan option, try using a flax egg instead.
- Flaky sea salt: For finishing, adding a beautiful touch of flavor and texture.
Step-by-Step Instructions to Make Garlic Bread Rolls
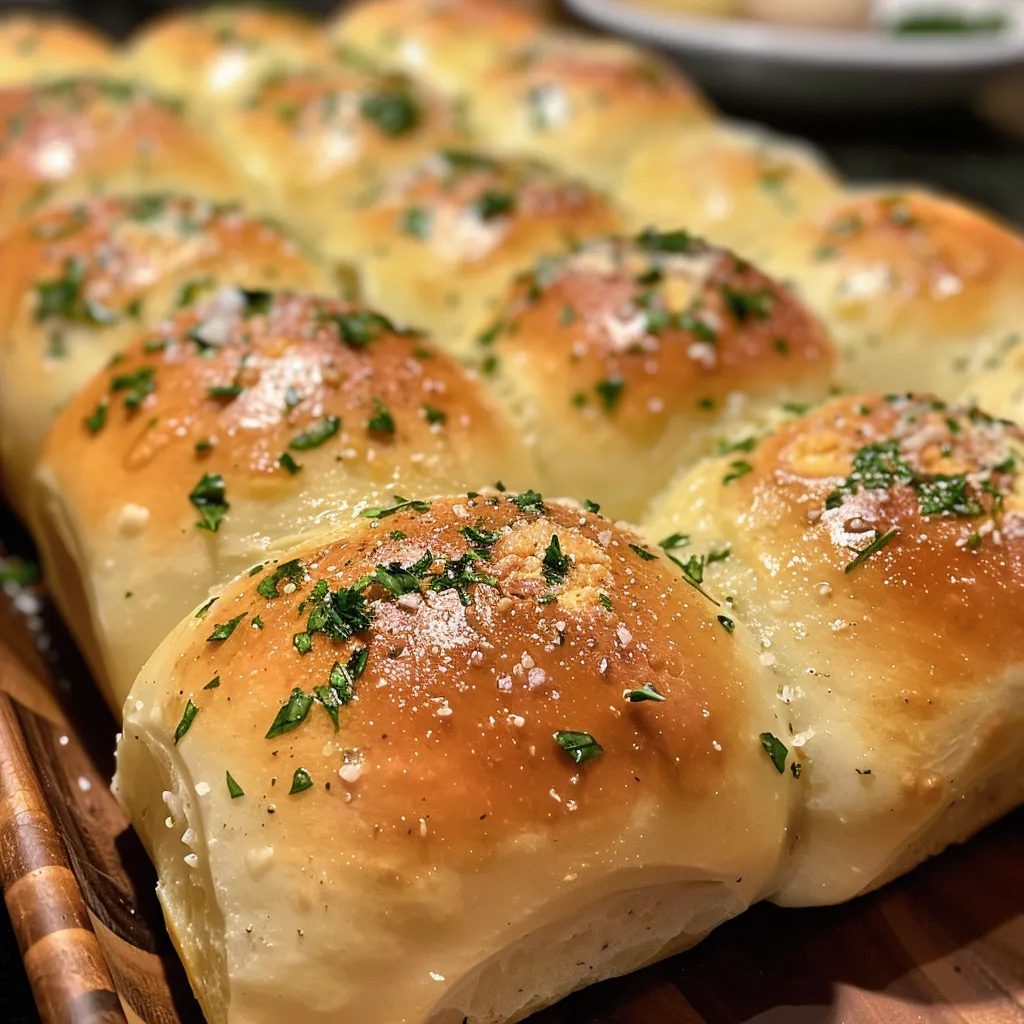
Follow these detailed instructions for perfectly fluffy garlic bread rolls:
- Lightly butter the bottom and sides of a 9×13 pan and set it aside.
- In a small pot, melt the butter and add the minced garlic. Cook for 1-2 minutes or until the garlic is fragrant. Remove from heat and allow to cool.
- In a stand mixing bowl, combine flour, parsley, sugar, yeast, and salt. Add the warmed milk, egg, and cooled garlic butter. Knead on low speed with a dough hook until the dough is smooth and slightly tacky (about 10-12 minutes). If the dough is too sticky, add one tablespoon of flour at a time until workable.
- Divide the kneaded dough into 12 equal portions (about 67 grams each). Shape each piece into a smooth ball by pinching the seam tightly underneath. Place the rolls in the prepared pan. Cover and let rise in a warm place until doubled in size (1-2 hours).
- Preheat the oven to 350°F (180°C).
- Brush the tops of the rolls with the beaten egg wash. Bake for 20-30 minutes, or until golden brown.
- While the rolls bake, prepare the garlic butter by melting the remaining butter and stirring in minced garlic and parsley. Once the rolls are out of the oven, brush them with garlic butter and sprinkle with flaky sea salt.
- Serve warm and enjoy!
Pro Tips for Making Garlic Bread Rolls
Here are some expert insights to ensure your garlic bread rolls turn out perfectly every time:
- Temperature is key: Ensure the milk is warmed to 110°F for optimal yeast activation.
- Don’t rush the rise: Allow the dough to fully double in size; this is crucial for achieving fluffy rolls.
- Watch your baking time: Keep an eye on the rolls; they should be golden brown on top but not overbaked.
- Experiment with flavors: Try adding herbs like rosemary or thyme to the dough for a unique twist.
- Keep rolls covered: During rising, cover the rolls with plastic wrap or a kitchen towel to prevent them from drying out.
- Use a scale: For consistent results, weigh your ingredients, particularly the flour and dough portions.
- Brush with garlic butter generously: Don’t skimp on the garlic butter after baking; it enhances flavor and makes the rolls irresistible.
- Store properly: Keep leftover rolls in an airtight container to maintain freshness.
Common Mistakes and Troubleshooting
Even seasoned bakers can run into issues! Here’s how to troubleshoot common mistakes:
- Dough too sticky? Add flour gradually until you achieve a workable consistency.
- Dough not rising? Check your yeast’s expiration date or ensure the milk wasn’t too hot.
- Rolls too dense? Ensure you knead the dough well to develop gluten, which gives structure.
- Uneven baking? Rotate the pan halfway through baking to ensure even heat distribution.
Variations to Try
Feel free to customize your garlic bread rolls with these delicious variations:
- Cheesy Garlic Rolls: Add shredded mozzarella or parmesan cheese to the dough for a cheesy twist.
- Herb-Infused Rolls: Incorporate dried herbs like oregano or Italian seasoning into the dough for added flavor.
- Spicy Garlic Rolls: Mix in red pepper flakes for a bit of heat.
- Sweet Garlic Rolls: Add a touch of honey to the dough for a subtly sweet flavor that pairs wonderfully with garlic.
Make-Ahead and Storage Instructions
These rolls are perfect for meal prep! Here’s how to store and make them ahead:
- Make-Ahead: After shaping the rolls, cover and refrigerate them overnight. Let them rise at room temperature for about an hour before baking.
- Freezing: You can freeze unbaked rolls. Shape them, place on a baking sheet, freeze until solid, then transfer to a zip-top bag. Bake from frozen, adding a few extra minutes to the bake time.
- Storing Leftovers: Keep leftover rolls in an airtight container at room temperature for up to 3 days. Reheat in the oven for a few minutes before serving.
Frequently Asked Questions
Here are some common questions about making garlic bread rolls:
- Can I use whole wheat flour? Yes, using whole wheat flour will give the rolls a nuttier flavor, but they may be denser.
- How can I make these rolls vegan? Substitute the egg with a flax egg and use plant-based milk and butter.
- What can I serve these rolls with? They pair beautifully with pasta dishes, soups, salads, or as a side to grilled meats.
- How do I know when the rolls are done? They should be golden brown on top and sound hollow when tapped.
- Can I add cheese to the rolls? Absolutely! Adding cheese will enhance the flavor and make them extra delicious.
- What’s the best way to reheat leftovers? Warm them in the oven at 350°F for a few minutes until heated through.
- How long do these rolls last? They are best enjoyed fresh but can last up to 3 days at room temperature.
- Can I make the dough in a bread machine? Yes, simply follow the same ingredient measurements and use the dough setting on your machine.
Nutrition Tips and Dietary Adaptations
Here are a few tips to make your garlic bread rolls a bit healthier:
- Whole grains: Use whole wheat flour instead of all-purpose flour for added fiber.
- Reduce fat: You can cut down on butter by using half the amount or replacing it with yogurt for moisture.
- Lower sugar: You can reduce the sugar slightly without compromising the dough’s texture.
- Gluten-free option: Substitute with a gluten-free flour blend and adjust the liquid as needed.
Essential Equipment for Success
To make these garlic bread rolls, you’ll need a few key pieces of equipment:
- Stand mixer: Makes kneading the dough a breeze.
- Baking pan: A 9×13 pan works perfectly for these rolls.
- Measuring cups and spoons: Accurate measurements are crucial for baking success.
- Kitchen scale: For precise dough portions, a scale is invaluable.
- Plastic wrap or kitchen towel: For covering the dough while it rises.
Serving Suggestions
These garlic bread rolls are incredibly versatile. Here are some delightful serving suggestions:
- As an appetizer: Serve warm with marinara sauce for dipping.
- With soups: Pair them with creamy tomato soup or minestrone for a comforting meal.
- With pasta: They complement any pasta dish beautifully, especially those with garlic or herb sauces.
- At gatherings: Present them in a basket lined with a cloth for a rustic touch at your next dinner party.
There you have it—the definitive guide to making mouth-watering garlic bread rolls! With these tips, variations, and detailed instructions, you’re all set to create rolls that will delight family and friends alike. Happy baking!
Garlic Bread Rolls
Ingredients
Dough
- 4.5 tablespoons unsalted butter
- 2 tablespoons minced garlic
- 3.5 cups all-purpose flour (*See notes below for measuring*)
- 1 tablespoon chopped fresh parsley
- 1 tablespoon granulated sugar
- 2.25 teaspoons instant yeast
- 1 teaspoon fine sea salt
- 1 cup whole or 2% milk (warmed to 110°F)
- 1 large egg (room temperature)
- 1 beaten egg for brushing the tops
Garlic Butter
- 2 tablespoons unsalted butter
- 1 tablespoon minced garlic
- 1 tablespoon chopped fresh parsley
Finishing
- flaky sea salt for finishing flaky sea salt
Instructions
- Butter a 9x13 pan and set aside.
- Melt butter, add minced garlic, cook 1-2 minutes, then cool.
- Mix flour, parsley, sugar, yeast, and salt. Add milk, egg, and garlic butter. Knead until smooth, about 10-12 minutes.
- Divide dough into 12 balls, shape, place in pan, cover, and let rise 1-2 hours.
- Preheat oven to 350°F (180°C). Brush rolls with beaten egg and bake 20-30 minutes until golden.
- Make garlic butter, brush on hot rolls, sprinkle with flaky sea salt, and serve warm.
