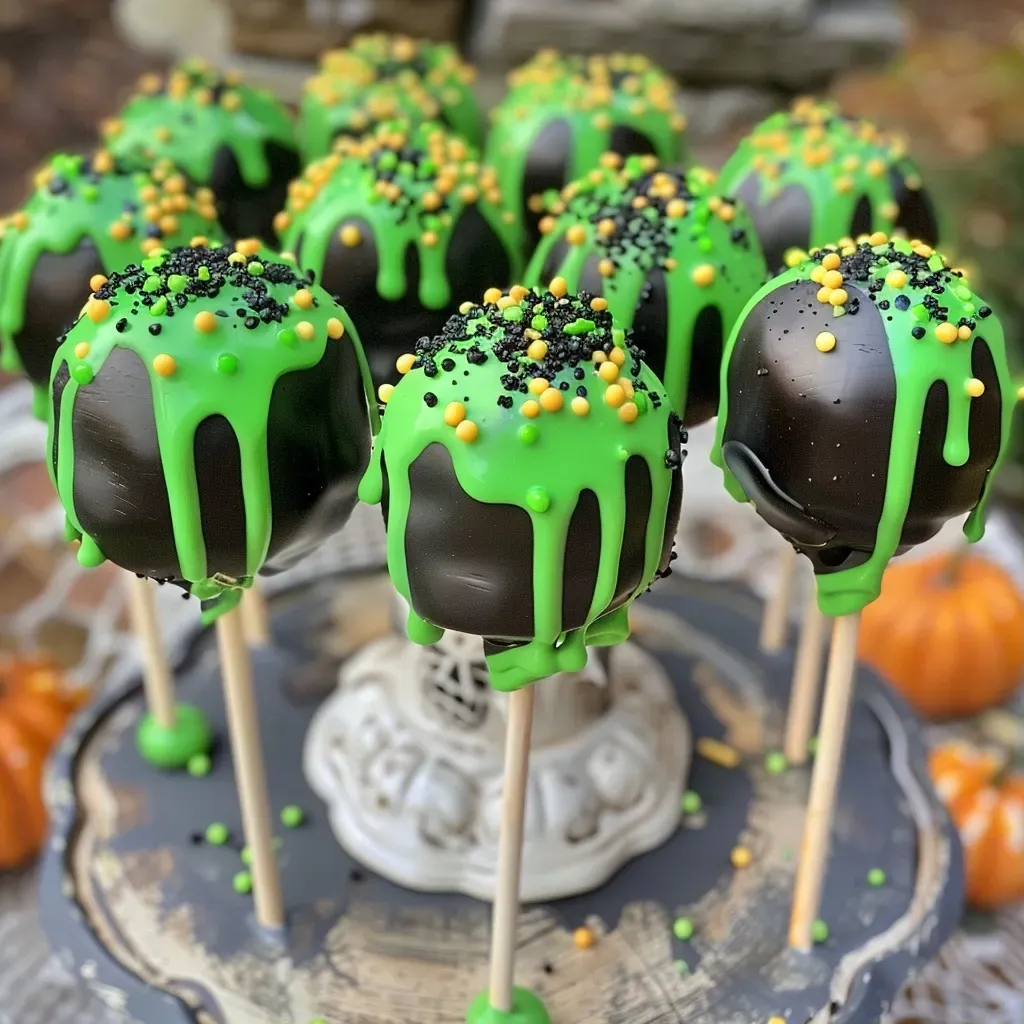
Unleash the Magic of Witches Cauldron Cake Pops
As the leaves turn and the air gets crisp, it’s time to welcome the enchanting season of Halloween! What better way to celebrate than with delightful Witches Cauldron Cake Pops? These treats are not just visually stunning but also bursting with flavor, making them perfect for parties, gatherings, or even a cozy night in. In this guide, we’ll walk you through every step of creating these magical cake pops, ensuring that your kitchen becomes a cauldron of creativity and fun.
Throughout this article, you’ll discover detailed instructions, expert tips, and variations that will help you craft the perfect cauldron cake pops that everyone will adore. Let’s embark on this culinary adventure!
Why You’ll Love This Recipe
These cake pops are not just a feast for the eyes; they come with a host of benefits:

★ Recommended Kitchen Tool
5-Speed Electric Hand Mixer
Make this recipe even easier with a quality 5-Speed Electric Hand Mixer — a must-have kitchen staple!
- Easy to Make: The recipe uses simple ingredients that are often found in your pantry, making it accessible for everyone.
- Fun for All Ages: Both kids and adults can participate in the decorating process, creating a memorable family activity.
- Customizable: You can easily adapt the flavors, colors, and decorations to suit any occasion, not just Halloween!
- Perfect for Parties: These treats are bite-sized and easy to serve, making them ideal for gatherings.
- Storage-Friendly: They can be made in advance and stored, giving you flexibility in party planning.
Ingredients Breakdown
Before we dive into the magical process of making witches cauldron cake pops, let’s look at what you’ll need:
- 1 (15.25 ounce) white cake mix: A classic base for the cake balls.
- 1 1/4 cups water: Essential for mixing the cake batter.
- 1/2 cup vegetable oil: Adds moisture and richness to the cake.
- 1 (3 ounce) box lime jello powder: This gives a fun flavor and color to the cake.
- Optional: Electric green gel food coloring: For enhancing the vibrant color of the cake.
- 1 (16 ounce) can of vanilla frosting: Acts as a binder for the cake balls.
- 2 (12 ounce) bags black candy melts: The main coating for the cake pops.
- 23 (8-inch) treat sticks: To transform cake balls into pops.
- 1 cup orange candy melts: For the fiery effect on the cauldron.
- 1 cup yellow candy melts: To add depth to the flame effect.
- 1 cup lime green candy melts: For the cauldron’s bubbling top.
- Green pearl sprinkles (in assorted sizes): For a magical finishing touch.
Step-by-Step Instructions
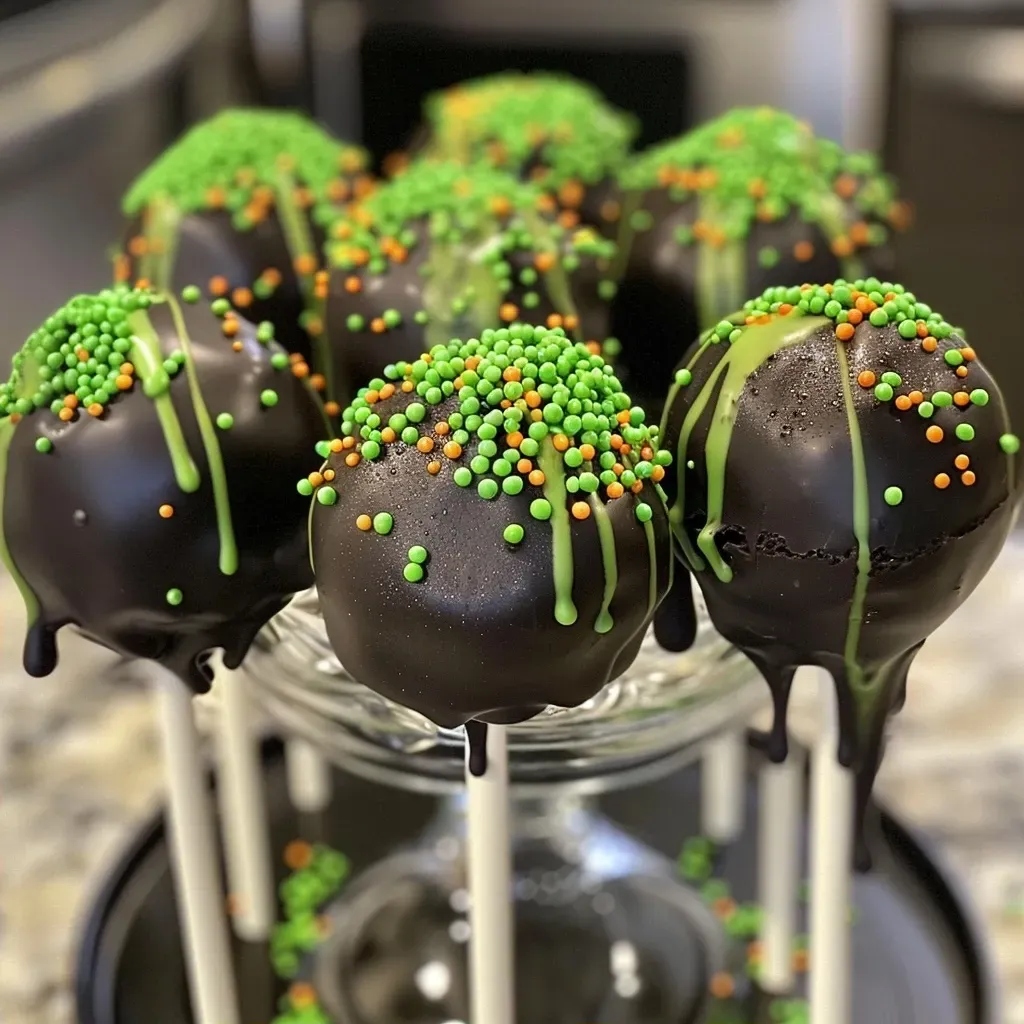
Now that we have our ingredients ready, let’s follow these steps to create your cauldron cake pops:
For the Cake Balls:
- Preheat your oven to 350°F (175°C). Spray a 9×13-inch baking pan with non-stick cooking spray.
- In a medium mixing bowl, combine the cake mix, water, oil, lime jello, and any additional food coloring. Beat until the mixture is smooth.
- Pour the batter into the prepared pan and bake for 34-38 minutes, or until a toothpick comes out clean.
- Allow the cake to cool in the pan for 15 minutes, then turn it out onto a cutting board to cool completely.
- Once cooled, crumble the cake into a large bowl and mix in half of the frosting. Form 1½-inch balls and place them on a cookie sheet lined with parchment paper.
- If the mixture is too gooey, freeze the balls for about 15 minutes to firm them up, then reshape them.
For the Cake Pops:
- Line a cookie sheet with parchment paper. Melt the black candy melts in a microwave-safe bowl, heating in increments of 30 seconds until smooth.
- Dip one end of each treat stick into the melted candy, then insert it into the center of each cake ball. Place the filled cookie sheet in the refrigerator for about 15 minutes to harden.
- Once the cake balls are set, dip them into the melted black candy melts, tapping off any excess. Place them top-side down on the prepared cookie sheet.
- Allow the cake pops to harden in the refrigerator for another 15 minutes.
- Melt the orange candy melts and transfer them to a squeeze bottle. Drizzle the orange candy from the base of the cake pop upwards to create a flame effect.
- Repeat this step with the yellow candy melts, layering them over the orange for added depth.
- Finish with the green candy melts, filling the top of each cake pop and letting it drip down the sides. Sprinkle the green pearls while the candy is still wet.
Expert Tips for Success
Here are some professional insights to ensure your witches cauldron cake pops turn out perfectly:
- Use Quality Ingredients: Always choose high-quality cake mix and candy melts for the best flavor and appearance.
- Work in Batches: Keep the cake balls that you are not currently working with in the freezer to maintain their firmness.
- Temperature Matters: Ensure that your melted candy is not too hot to avoid melting the cake pop when dipping.
- Experiment with Flavors: Consider using different flavored cake mixes or jello for a unique twist.
- Consistent Sizing: Use a cookie scoop to ensure all cake balls are uniform in size for even coating.
- Decorate Creatively: Get creative with toppings; consider using edible glitter or other themed sprinkles.
- Proper Cooling: Always allow the cake pops to cool completely before decorating to avoid melting.
- Make Ahead: You can prepare the cake balls a day in advance and store them in the refrigerator until ready to coat.
Common Mistakes & Troubleshooting
Even the best chefs encounter hiccups. Here’s how to avoid or fix common mistakes:
- Too Soft Cake Balls: If your cake balls are too soft, add more frosting and refreeze briefly before shaping.
- Cracks in Coating: If the candy melts crack, ensure they’re at the right temperature and not overcooked.
- Sticks Falling Out: If the sticks don’t stay in, dip them deeper into the melted candy before inserting them into the cake balls.
- Uneven Coating: To achieve a smooth finish, ensure each cake pop is dipped fully and gently tapped to remove excess coating.
Flavor Variations
Your witches cauldron cake pops can easily be customized! Here are some delicious variations:
- Chocolate Cauldron: Use chocolate cake mix and chocolate frosting instead of vanilla for a rich flavor.
- Vanilla Bean: Incorporate vanilla bean paste for a gourmet touch in your cake mix.
- Spiced Pumpkin: Substitute pumpkin cake mix and add pumpkin spice for a seasonal twist.
- Rainbow Cauldron: Use multiple colors of candy melts and sprinkles for a fun and vibrant look.
Storage & Make-Ahead Instructions
Plan ahead and store your cake pops properly:
- Storage: Keep your cake pops in an airtight container in the refrigerator for up to one week.
- Freezing: You can freeze undecorated cake balls for up to one month. Thaw before dipping.
- Make-Ahead: Prepare the cake balls a day in advance and store them in the refrigerator until you’re ready to coat them.
Frequently Asked Questions
Here are some common queries regarding witches cauldron cake pops:
- Can I use other flavors of jello? Absolutely! Feel free to experiment with different flavors to suit your taste.
- What if I don’t have candy melts? You can use tempered chocolate instead, but candy melts are easier to work with.
- Can these be made gluten-free? Yes! Simply use gluten-free cake mix and ensure all other ingredients are also gluten-free.
- How can I avoid a messy process? Use a squeeze bottle for decorating and keep your workspace clean by using parchment paper.
- What’s the best way to serve them? Display them in a foam block or a decorative container to keep them upright and showcase their beauty.
- Can I make these without a microwave? Yes! You can melt candy melts over a double boiler if you prefer.
- Are they safe for young children? Yes, as long as there are no choking hazards from decorations.
- Can I ship these? Yes, but ensure they are well-packaged to prevent any damage during transit.
Nutritional Tips and Dietary Adaptations
For those watching their dietary intake, here are some tips:
- Use Low-Fat Options: Opt for low-fat cake mix and frosting to reduce calories.
- Substitute Sweeteners: You can use sugar alternatives in the cake mix for a lower-sugar option.
- Dairy-Free Variation: Use a dairy-free cake mix and frosting to accommodate lactose intolerance.
Equipment Recommendations
To achieve the best results, here’s what you’ll need:
- Mixing Bowls: A set of medium and large mixing bowls for easy mixing.
- Cookie Scoop: For uniform cake ball sizes, making the process quicker and easier.
- Microwave-Safe Bowls: For melting your candy melts efficiently.
- Parchment Paper: Essential for lining your baking sheets for easy cleanup.
- Squeeze Bottles: Perfect for precise decorating without mess.
Serving Suggestions
Make your cake pops even more festive with these serving ideas:
- Halloween Party Platter: Arrange them on a spooky-themed platter with Halloween decorations.
- Gift Bags: Package them in clear bags tied with ribbons as personalized party favors.
- Themed Dessert Table: Incorporate them into a larger dessert table filled with other Halloween treats for a stunning display.
Creating witches cauldron cake pops is not just about baking; it’s about bringing joy and creativity into your kitchen. With the right ingredients, a sprinkle of magic, and a dash of love, you can craft these delightful treats that will surely impress your guests. Whether you’re hosting a Halloween celebration or simply looking to indulge in a fun baking project, these cake pops are your gateway to a delightful experience. Happy baking!
Witches Cauldron Cake Pops
Ingredients
Cake Base
- 1 package white cake mix
- 1 1/4 cups water
- 1/2 cup vegetable oil
- 1 box lime jello powder
- optional electric green gel food coloring (Optional for color)
- 1 can vanilla frosting
- 2 bags black candy melts
- 23 treat sticks 8-inch treat sticks
- 1 cup orange candy melts
- 1 cup yellow candy melts
- 1 cup lime green candy melts
- green pearl sprinkles (in assorted sizes) green pearl sprinkles (For decoration)
Instructions
- Bake the cake: Mix cake ingredients, bake at 350°F (175°C) for 34-38 minutes, then cool and crumble.
- Form cake balls: Combine crumbled cake with frosting, shape into 1.5-inch balls, freeze for 15 minutes, then reshape and freeze for 30 more minutes.
- Melt black candy melts and dip treat sticks, insert into cake balls, then chill until firm.
- Dip cake pops in black candy melts, place on parchment, then chill for 15 minutes.
- Melt orange, yellow, and green candy melts separately, pour into squeeze bottles, and create flames and drips on the cake pops. Decorate with sprinkles and chill until set.