Unlock the Secrets of Classic Garlic and Lemon Hummus
Welcome to the ultimate guide on making Classic Garlic and Lemon Hummus! This creamy, zesty dip is not just a staple in Mediterranean cuisine but also a delightful addition to your snack repertoire. Whether you’re hosting a gathering or simply craving something delicious, this recipe is here to elevate your culinary experience. In this comprehensive guide, you’ll discover everything from the health benefits of hummus to expert tips that ensure your dip turns out perfectly every time.
Why You’ll Love This Recipe
Hummus is more than just a tasty dip—it’s a powerhouse of nutrition and versatility. Here are five reasons why you’ll adore this classic hummus recipe:
- Nutritious and Healthy: Packed with protein, fiber, and healthy fats, hummus is an excellent option for a light snack or a healthy appetizer.
- Quick and Easy: With just a handful of ingredients and a food processor, you can whip up this hummus in under 10 minutes!
- Customizable: This recipe serves as a base for countless variations—add your favorite spices or toppings to make it uniquely yours.
- Perfect for Sharing: Hummus is a crowd-pleaser, perfect for parties, picnics, or family gatherings. Serve it alongside pita, veggies, or crackers for a delightful spread.
- Store-Bought vs. Homemade: Homemade hummus is fresher and more flavorful than store-bought versions, and you can control the ingredients!
Ingredients Breakdown
Here’s what you’ll need to make your Classic Garlic and Lemon Hummus, along with some substitution options:
- 1 1/2 cups cooked chickpeas (garbanzo beans): You can use canned chickpeas for convenience, or soak and cook dried chickpeas.
- 1/4 cup cold water: Adjust based on desired consistency; add more for a thinner hummus.
- 3 tbsp lemon juice: Freshly squeezed lemon juice adds brightness; bottled juice can be used in a pinch.
- 2 tbsp tahini: This sesame paste enriches the flavor. If you’re allergic, you can substitute with sunflower seed butter.
- 1 tbsp extra-virgin olive oil: For a smooth texture and rich taste; feel free to drizzle more on top before serving.
- 2 cloves garlic: Fresh garlic adds a punch of flavor; roasted garlic can be used for a milder taste.
- 1/2 tsp sea salt: Adjust to taste; try adding flavored salts for a unique twist.
- 1/4 tsp roasted cumin powder: This spice adds warmth; you can also experiment with smoked paprika for depth.
Step-by-Step Instructions
Follow these easy steps to create your homemade hummus:
- Step 1: Blend the Base: In a food processor, puree the tahini, cold water, olive oil, cumin, salt, garlic, and lemon juice until smooth.
- Step 2: Add Chickpeas: Toss in the cooked chickpeas and blend again for 3-4 minutes. Scrape down the sides as needed.
- Step 3: Adjust Consistency: If the hummus is too thick, gradually add an extra tablespoon or two of cold water until you reach your desired texture.
- Step 4: Taste and Adjust: Sample your hummus and add more salt, cumin, or lemon juice if necessary.
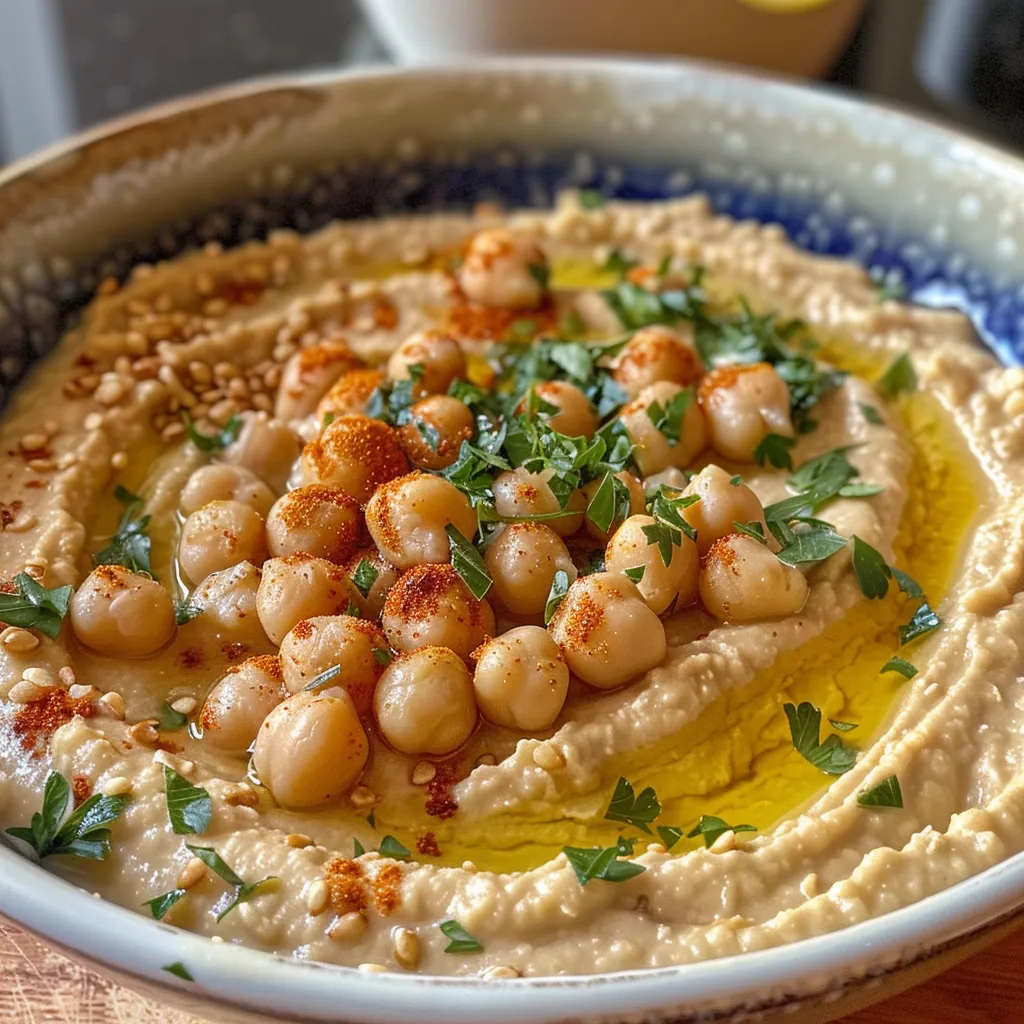
- Step 5: Serve with Style: Transfer the hummus to a serving bowl. Drizzle with olive oil and sprinkle with your favorite toppings.
Expert Tips for Perfect Hummus
Here are some professional insights to take your hummus to the next level:
- Use Ice Water: Adding ice water instead of regular water can help aerate the hummus, making it fluffier.
- Blending Time: Don’t rush the blending process; longer blending times yield a creamier consistency.
- Chill Before Serving: Allow your hummus to chill in the fridge for at least 30 minutes to let the flavors meld.
- Experiment with Spices: Don’t be afraid to try different spices like coriander, paprika, or even chili powder for a kick!
- Presentation Matters: Use a shallow bowl for serving, creating a well in the center for olive oil or other toppings.
- Always Taste: Adjust flavors as you go—what works for one batch may not work for another!
- Use Quality Ingredients: The better the ingredients, the better the hummus. Opt for fresh lemons and high-quality olive oil.
- Store Properly: Keep hummus in an airtight container in the fridge for up to a week.
Common Mistakes & Troubleshooting
Even experienced cooks can run into hiccups. Here’s how to avoid common pitfalls:
- Hummus is too thick: Add more cold water, a tablespoon at a time, until you reach your desired consistency.
- Too salty: Balance with a bit of lemon juice or a touch of water to dilute the saltiness.
- Not enough flavor: Boost with additional lemon juice, garlic, or spices according to your taste preference.
- Grainy texture: Ensure you blend long enough; try using a high-speed blender for a smoother finish.
Delicious Variations
Get creative! Here are some fun ways to vary your hummus:
- Spicy Hummus: Add a teaspoon of cayenne pepper or harissa for heat.
- Roasted Red Pepper Hummus: Blend in 1/2 cup of roasted red peppers for a sweet, smoky flavor.
- Herbed Hummus: Incorporate fresh herbs like basil, cilantro, or parsley for a refreshing twist.
- Beet Hummus: Add cooked beets to your basic hummus for a vibrant color and earthy taste.
Storage & Make-Ahead Instructions
Planning ahead? Here’s how to store and prepare your hummus:
- Refrigeration: Store hummus in an airtight container in the fridge for up to 5-7 days.
- Freezing: You can freeze hummus for up to three months. Thaw in the fridge and stir before serving.
- Make Ahead: Prepare hummus up to two days in advance for optimal flavor.
Nutritional Information & Dietary Adaptations
This hummus recipe is not only delicious but also nutritious. Here are some key points to consider:
- High in Protein: Chickpeas offer a great source of plant-based protein, making this hummus a filling snack.
- Rich in Fiber: Helps promote digestive health and keeps you feeling full.
- Dairy-Free & Vegan: Perfect for those following plant-based diets.
- Gluten-Free: Naturally gluten-free, making it suitable for a variety of dietary needs.
Essential Equipment Recommendations
To make your hummus-making experience smoother, consider using the following tools:
- High-Quality Food Processor: A good processor ensures a creamy texture and smooth blend.
- Measuring Cups and Spoons: For accurate ingredient measurements.
- Rubber Spatula: Ideal for scraping down the sides of the food processor.
Serving Suggestions
Enjoy your hummus in various delightful ways:
- With Pita Bread: Serve with warm, toasted pita for a classic combination.
- Veggie Platter: Pair with fresh vegetables like carrots, cucumbers, and bell peppers for a healthy snack.
- On a Sandwich: Use hummus as a spread on sandwiches or wraps for added flavor.
- As a Dip: Use it as a dip for tortilla chips or crackers for a fun twist.
Frequently Asked Questions
Got questions? Here are some FAQs about making and enjoying hummus:
- Can I make this hummus without tahini?: Yes, you can use sunflower seed butter or simply omit it for a different flavor.
- How do I fix bitter hummus?: Add a pinch of sugar or more lemon juice to balance the flavors.
- What can I use instead of chickpeas?: You can experiment with white beans or lentils for a unique twist.
- Is hummus safe to freeze?: Yes, hummus freezes well; just stir well after thawing.
- Can I add other ingredients to the hummus?: Absolutely! Feel free to experiment with flavors like roasted garlic, herbs, or spices.
- How do I store leftover hummus?: Keep it in an airtight container in the fridge for up to a week.
- What’s the best way to serve hummus?: Serve it with a drizzle of olive oil and your choice of toppings.
- Is homemade hummus healthier than store-bought?: Yes, homemade hummus allows you to control the ingredients and avoid preservatives.
Conclusion
Now that you have everything you need to make the perfect Classic Garlic and Lemon Hummus, it’s time to get cooking! This versatile dip is sure to impress your family and friends, making every gathering special. Remember, cooking is about experimenting and enjoying the process. So, roll up your sleeves, gather your ingredients, and have fun creating this delicious hummus that’s sure to become a staple in your kitchen. Enjoy!
Classic Garlic and Lemon Hummus
Ingredients
Main ingredients
- 1 1/2 cups cooked chickpeas (garbanzo beans)
- 1/4 cup cold water
- 3 tbsp lemon juice
- 2 tbsp tahini
- 1 tbsp extra-virgin olive oil
- 2 cloves garlic
- 1/2 tsp sea salt
- 1/4 tsp roasted cumin powder
Instructions
- Puree tahini, cold water, olive oil, cumin, salt, garlic, and lemon juice until smooth.
- Add cooked chickpeas and blend until creamy and smooth, scraping sides as needed.
- If too thick, add extra water and blend again.
- Adjust seasoning with more salt, lemon, or cumin if desired.
- Transfer to a bowl, add toppings if desired, and serve.